The BEST Lemon Meringue Pie

Lemon Meringue Pie is literally a slice of sunshine! Tart and tangy, bright lemon filling is topped with clouds of fluffy meringue that is going to blow your taste buds.

There is something truly amazing about pie, it is just so good! Just try these blog favorites and see what I mean, Easy Chocolate, Fresh Strawberry and Perfect Banoffee Pie!

Slice of Lemon Meringue pie on a plate.

Homemade Lemon Meringue Pie

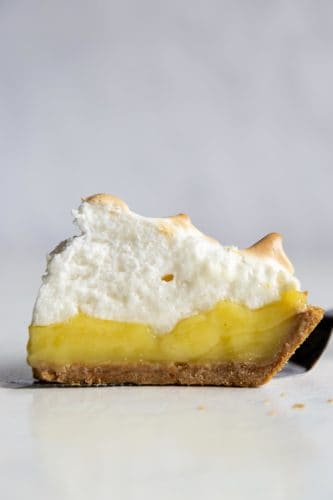
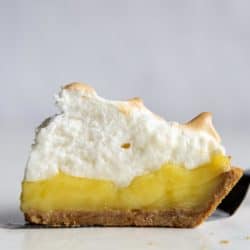
Lemon meringue pie has to be one of my all time favorites. It is bright, zingy and fresh. The meringue is like eating a pillowy toasted marshmallow. Together it is like a little slice of heaven, or sunshine! To me this pie just screams springtime! The lemon curd is silky smooth and just the perfect combination of tart and tangy. Then comes the beautiful mountain of meringue that sits on top of the pie like a cloud. When you bake it in the oven it turns the outside into a golden brown with just the right amount of bite. It is sweet and light, the ideal combination for the lemon filling.

This Lemon meringue pie, is one to impress. Everyone loves the clouds of meringue. Do not let the meringue part intimidate you. I am going to give you all the tips and tricks to get a perfect meringue. the Lemon filling is just as easy. You are going to be an expert in this pie in no time. So let’s make this amazing meringue pie!

What You Will Need For Meringue Pie

I love that this recipes doesn’t allow the egg yolks or the egg whites to go to waste. You will use the yolks in the lemon curd and the whites for the meringue.

  • Graham crackers: Crush your graham crackers with a food processor or in a freezer bag with a rolling pin. 
  • Unsalted Butter: Be sure to use unsalted butter, you do not want a salty crust. 
  • Granulated Sugar: The bit of sweet to balance the tart.
  • Lemon Zest: If you do not have a zester, use the smallest holes of a cheese grater. Stop once you get to the white part of the lemon as it can be bitter.
  • Kosher Salt:  Salt makes the sweet and tart, sweeter and more tart.
  • Cornstarch:  The thickener for the lemon filling.
  • Unsalted Butter:  Helps create a rich filling.
  • Lemon Juice: Use fresh lemon juice over concentrate
  • Water:  To mix with the filling
  • Egg Yolks:  save the egg whites for the meringue
  • Egg Whites: Use the whites from the yolk of the filling.
  • Sugar: This the meringue fluff and taste sweet.
  • Cream of Tartar: Stabilizes the egg whites and creates the peaks.
  • Kosher Salt: For flavor
  • Vanilla Extract: Gives the meringue that sweet marshmallow like flavor.

How To Make The Best Lemon Meringue

There are a few steps to this dessert, but it is so worth the effort. Trust me, this is going to be one of the best pies you will ever make.

  1. Crush: Ground Graham crackers in a food processor, mix in melted butter until the crumbs hold in a clump when pressed together.
  2. Pie tin: Press the crust into the bottom and up the side of a pie pan using the flat bottom of a small glass or measuring cup. Place in the refrigerator to set for about 15 minutes while the oven is preheating.
  3. Bake: Preheat the oven to 375°F and bake the crust for 10 minutes.
  4. Cool: Turn the oven off and remove the pie crust. Set it on a wire rack to cool.

Make the Lemon Filling

  1. Mix: Whisk together the sugar and lemon zest. Add the salt and cornstarch, whisk to distribute evenly. Set aside.
  2. Heat: Melt butter in a saucepan over medium heat. Add water, lemon juice, and the sugar/cornstarch mixture, stir to make sure the cornstarch dissolves. Add the egg yolks and cook the mixture, whisking constantly, until it thickens and some bubbles burst at the surface, about 5 mins. 
  3. Make it Smooth: Strain the filling through a fine mesh sieve into a clean bowl.
  4. Fill: Transfer cool lemon filling into the cool pie crust, cover with plastic wrap and refrigerate until the filling sets completely, about 4 hours.

Make the Meringue

  1. Double Boiler: Whisk together egg whites and sugar in a heatproof bowl over a pot of simmering water. Continue whisking until the egg white mixture reaches 160°F. 
  2. Beat: Transfer egg white mixture into a stand mixer bowl and add cream of tartar. Beat with the wire whisk attachment on medium speed until it is fluffy and reaches soft peaks.
  3. Flavoring: Sprinkle in the salt and stream in the vanilla extract. Then continue beating until the meringue is shiny and stiff peaks form.

Assemble the Pie

  1. Combine:Add the meringue on top of the lemon filling.With a spatula push the meringue out to the edges leaving a dome in the middle. Then use the back of a spoon to make little peaks all around.
  2. Brown: Use a kitchen torch to brown the meringue in places.
  3. Serve: Serve immediately

Pouring the lemon filling in the pie crust.

Making Perfect Lemon Filling

When eat your lemon meringue pie, you want the lemon filling to be silky smooth and that perfect combination of tartness and a bit of sweet. Here is how we do that.

  • Heat Slowly: After you seperate the egg yolks from the whites you want to add them to the pot before they get hot. The mixture should be warm, but not hot. If the mixture is to hot you’ll curdle the eggs or basically scramble them.
  • Stir: The secret to luscious lemon filling is to stir constantly and stir well. Do not walk away from your pot.
  • Strain: Pushing the filling through a fine mesh strainer will guarantee you will have silky smooth lemon filling. Do not skip this step.

Making designs with a spoon in the meringue.

Tips For The Fluffiest Meringue

Don’t let the meringue part of this lemon meringue pie intimidate you. This dessert is going to become the best you ever made with these tips, perfection is just a few minutes away.

  • Egg Whites: Separating the egg yolks from the egg whites is super important. If you get even a smidge of egg yolk in your egg whites, your meringue will be ruined. To help you avoid that separate the eggs while they are are still cold. Cold eggs separate better than room temperature.
  • Room Temperature: However, room temperature egg whites will whip up easier and better so after you separate them, let your egg whites come to room temperature.
  • Create The Peaks: It might take some patience but you will want to make sure your peaks are good and stiff. Don’t worry it will come
  • Design: This is the most fun part. With the back of a spoon gently create swirls and whirls for your meringue, they will look awesome when you’ve browned them.
  • To Brown the Meringue:  I used a kitchen torch to get that golden brown look you want. But you can get the same look by moving the oven rack close to the top and turning on your broiler. place the lemon meringue pie in the oven and watch it carefully turning as needed to brown it evenly.

Baked Lemon Meringue pie with a golden top.

How to Store French Lemon Meringue Pie

Lemon Meringue pie is best eaten the same day it is made and as soon as the meringue is put on. To store leftovers cover in such a way that the plastic or foil does not touch the meringue if possible. I use toothpicks in the pie, to prop up the plastic wrap away from the pie.

Keep in the fridge for up to 3 days. There may be some “weeping” of the meringue and it will separate as it is stored. This is normal of meringue that is stored for a few days. It will not change the taste, but it might the texture. It will still be amazing!

A side view of the layers of lemon and meringue in the slice of pie.

More Lemony Recipes You Have to Try

Lemon is one of my all time favorite ingredients to cook and bake with. It adds so much zip and zing to recipes. The tartness balances out the sweet in the best desserts. Lemon’s zing brings out the best in chicken and fish especially. You can make a simple dish absolutely delicious just by adding a fresh squeeze of lemon. When you go searching for lemon recipes on here, you will find quite a few, and they are all amazing, but here are a few to get your started.

Print

Lemon Meringue Pie

Lemon Meringue Pie is literally a slice of sunshine! Tart and tangy, bright lemon filling is topped with clouds of fluffy meringue that is going to blow your taste buds.
Course Dessert
Cuisine American
Keyword lemon meringue pie
Prep Time 25 minutes
Cook Time 35 minutes
Total Time 1 hour
Servings 10 Slices
Calories 374kcal
Author Alyssa Rivers

Ingredients

Crust

  • 14 (full sheets) of Graham crackers
  • 3 ounces unsalted butter melted

Lemon filling

  • 1 1/4 cups granulated sugar
  • 1 Tablespoons lemon zest
  • 1/4 teaspoons kosher salt
  • 1/4 cup corn starch
  • 2 ounces unsalted butter
  • 3/4 cup lemon juice
  • 1 1/4 cup water
  • 5 egg yolks save the egg whites for the meringue

Meringue topping

  • 5 large egg whites
  • ½ cup granulated sugar
  • ½ teaspoon cream of tartar
  • A pinch of kosher salt
  • ½ teaspoon of vanilla extract

Instructions

Make the pie crust:

  • Ground Graham crackers in a food processor, mix in melted butter until the crumbs hold in a clump when pressed together.
  • Press the crust into the bottom and up the side of a pie pan using the flat bottom of a small glass or measuring cup. Place in the refrigerator to set for about 15 minutes while the oven is preheating.
  • Preheat the oven to 375°F and bake the crust for 10 minutes.
  • Turn off the oven and remove the pie crust. Set it on a wire rack to cool.

Make the lemon filling:

  • Whisk together the sugar and lemon zest. Add the salt and cornstarch, whisk to distribute evenly. Set aside.
  • Melt butter in a saucepan over medium heat. Add water, lemon juice, and the sugar/cornstarch mixture, stir to make sure the cornstarch dissolves. Add the egg yolks and cook the mixture, whisking constantly, until it thickens and some bubbles burst at the surface, about 5 mins.
  • Strain the filling through a fine mesh sieve into a clean bowl. Set aside to cool.
  • Transfer cool lemon filling into the cool pie crust, cover with plastic wrap and refrigerate until the filling sets completely, about 4 hours.

Make the meringue:

  • Whisk together egg whites and sugar in a heatproof bowl over a pot of simmering water. Continue whisking until the egg white mixture reaches 160°F.
  • Transfer egg white mixture into a stand mixer bowl and add cream of tartar. Beat with the wire whisk attachment on medium speed until it is fluffy and reaches soft peaks.
  • Sprinkle in the salt and stream in the vanilla extract. Then continue beating until the meringue is shiny and stiff peaks form.

Assemble the pie:

  • Add the meringue on top of the lemon filling. Use a spatula to push the meringue out to the edges leaving a dome in the middle. Use the back of a spoon to make little peaks all around.
  • Use a kitchen torch to brown the meringue in places.
  • Serve immediately.

Nutrition

Calories: 374kcal | Carbohydrates: 55g | Protein: 5g | Fat: 16g | Saturated Fat: 8g | Trans Fat: 1g | Cholesterol: 128mg | Sodium: 220mg | Potassium: 118mg | Fiber: 1g | Sugar: 40g | Vitamin A: 485IU | Vitamin C: 8mg | Calcium: 35mg | Iron: 1mg


source https://therecipecritic.com/lemon-meringue-pie/
Share:

Mission: ImPASTAble | Quick Update

It's been a week and a half since Dan's new pasta shape went on sale. The response has been way beyond what we expected. Listen in for a quick update from Dan.

And for those of you who haven't seen it yet: The shape is on sale right now! Get it at Sfoglini. Due to overwhelming demand, orders placed now will ship in 10-12 weeks. We really appreciate your patience and we promise the pasta will be worth the wait!

Want to see photos and videos from Dan’s journey? Follow @thesporkful on Instagram! And do you have questions about Mission: ImPASTAble? Send a voice memo to hello@sporkful.com, include your first name and location, and we may answer your question on a future episode.

Get 500+ more great Sporkful episodes from our catalog and lots of other Stitcher goodness when you sign up for Stitcher Premium: www.StitcherPremium.com/Sporkful (promo code: SPORKFUL).

Transcript available at www.sporkful.com.


Share:

Crockpot Apricot Chicken

Apricot Chicken is a super easy and incredibly delicious dinner your whole family is going to love! Sweet and savory and full of flavor the chicken is tender and juicy.

I love meals that are easy but taste amazing! Make this a complete dinner and serve with Broccoli, Rice or Potatoes.

Chicken thighs in an apricot sauce in the crockpot.

Apricot Chicken Recipe

A friend made this for all of us last summer. I was a little unsure about it because of the apricot jam in it. But I loved it! It gives the perfect balance of flavor between the apricot jam and Russian salad dressing. Trust me on this flavor combination, it is the best. The sauce has a sweetness but a spicy savoriness to it from the dressing. They combine in the most magical way.

Apricot chicken makes my busy day become stress free. It is one less thing I have to worry about and my family is happy that they get dinner! I love slow cooker set it and forget it dinners. And a miracle happened, my extremely picky eater even ate it. This child does not like anything it seems and he had seconds. If he likes it, you are going to love it!

What You Need For Easy Apricot Chicken

With ingredients that are easy to have on hand, you can throw this together on a busy day and have a delicious dinner ready when you are.

  • Apricot Preserves: You can use a low sugar apricot jam too, this creates that bit of sweet.
  • Russian Dressing: Use your favorite brand, I used Wishbone brand.
  • Dry Onion Soup Mix: This adds spices and the savory flavor. Make your own mix for incredible results.
  • Chicken Thighs: Use bone in chicken thighs, boneless or even chicken breasts.
  • Oil: Good quality high smoke vegetable oil such as canola.

How To Make Apricot Chicken in the Crockpot

The only extra step you have is to quickly brown the chicken. Remember this isn’t to cook it, just to give the skin some texture and flavor.

  1. Combine: In a medium bowl mix together the preserves, dressing and soup mix.
  2. Brown: This is optional but I highly recommend it. Generously salt and pepper the chicken. Place in a skillet that has been heated to medium high that has a good Tablespoon of oil in the bottom. Cook each side for 1-2 minutes or till good and golden.
  3. Crockpot:  Place the chicken in the bottom of the slow cooker and pour the mixture over the chicken.
  4. Cook: Cook on low for 3-4 hours or till internal temperature reaches 165 degrees.
Browning the chicken thighs, placing them in the crockpot, and pouring the sauce on top.

Tips and Variations For the Best Apricot Chicken

The wonderful thing about this chicken recipe is that it is forgiving and can be adjusted to your liking or needs. Slow cooking is just that way.

  • Chicken:  Using bone in and skin on chicken thighs will give you the juiciest chicken. You can use chicken breasts or skinless boneless chicken thighs it may not be as moist. Thighs contain the darker part of the chicken and darker meat is naturally juicer. Keeping the bone in and skin on will add even more moisture. Chicken breasts are known for being more dry and over cooking, even in sauce, can cause it to be dry.
  • Browning: Similar to searing beef, searing chicken can lock in juice and add immense flavor. It is an extra step that you do not have to do, but I highly recommend it. The chicken is just that much more divine.
  • Preserves: If you do not have apricot jam or cannot find it, there are options. You can use pineapple, mango, orange  or peach instead. Also try a mixture of apricot and peach or pineapple for a nice twist in flavor.
  • Dressing: There are times when I cannot find Russian dressing. It isn’t very often but it happens. Substituting Catalina or French Dressing will give you the same results.
  • Onion Soup Mix: Do not leave this out. It adds the flavor and savory you need in this dish. I also recommend making your own. It is super easy and simple and tastes way better than store bought!
  • Extras: To add oomph to your dish try sautéing onions and adding them to the apricot chicken. For more zip throw in fresh grated ginger, a Tablespoon of soy sauce or Dijon mustard.
  • Potatoes: For an all in one crock pot meal add baby Yukon or red potatoes with the chicken.
  • Different Protein: This slow cooker apricot chicken recipe works really well with pork chops too!

Freezing and Storing Apricot Glazed Chicken

I love dishes that make great leftovers and this chicken recipe make amazing leftovers

  • Store: If you do have leftovers place in a tightly sealed container and place in the fridge for 4-5 days. Warm up leftovers in the microwave or the stove top.
  • Freeze: Let the chicken cool and place leftovers in a freezer safe bag. Tightly seal. Freeze for up to 3 months. Let it thaw overnight in the fridge. Reheat in the microwave or on the stove top.
Apricot Chicken on top of rice with a side of broccoli on a plate.

More Slow Cooker Recipes to Try

Slow cooker or crockpot recipes are favorites that will never go out of style. Slow cooking infuses flavor into your meal and cooks it to tender juicy perfection. Sauces are rich and luscious, spices, herbs and ingredients create remarkable dishes, the whole family will love.

Print

Crockpot Apricot Chicken

Apricot Chicken is a super easy and incredibly delicious dinner your whole family is going to love! Sweet and savory and full of flavor the chicken is tender and juicy.
Course Dinner, Main Course
Cuisine American, Asian American
Keyword apricot chicken, chicken
Prep Time 20 minutes
Cook Time 3 hours
Total Time 3 hours 20 minutes
Servings 6 Servings
Calories 420kcal
Author Alyssa Rivers

Ingredients

  • 1 1/2 cups apricot preserves
  • 1 cup Russian dressing I used Wishbone brand
  • 1 envelope dry onion soup mix
  • 6 bone in chicken thighs can use breasts, and boneless thighs

Instructions

  • Mix together the preserves, dressing and soup mix.
  • Place chicken in bottom of slow cooker; pour mixture over chicken.
  • Cook on Low and continue cooking for 3-4 hours.

Notes

Updated on March 30, 2021
Originally Posted on July 10, 2012

Nutrition

Calories: 420kcal | Carbohydrates: 42g | Protein: 49g | Fat: 6g | Saturated Fat: 1g | Cholesterol: 145mg | Sodium: 821mg | Potassium: 930mg | Fiber: 1g | Sugar: 26g | Vitamin A: 189IU | Vitamin C: 8mg | Calcium: 33mg | Iron: 1mg


source https://therecipecritic.com/crockpot-apricot-chicken/
Share:

Mongolian Chicken

Mongolian Chicken is coated chicken tossed in a sweet savory sauce that is better than take out!  This simple recipe is the beginning to tasty dinner in minutes.

Just like my Mongolian Beef, this tastes amazing and is easy. Serve it over a bowl of rice with Egg Rolls and Wontons for a dinner out, from home!

Chicken and green onions sauteed in a wok.

Easy Mongolian Chicken

Inspired by my Mongolian Beef, this Mongolian chicken has all the flavor and richness, but with chicken! I like to use chicken because it can be a lot cheaper than beef, it is better for the heart and taste and texture just work. My family loves this dish. It is a favorite since it has just enough sweet and savory that makes it so good! We usually do not have leftovers, which is bummer because they are just as good if not better than when we have it fresh.

The “Mongolian” flavor comes from Taiwan and does not have anything to do with Mongolia. But that does not stop this dish and others like it from being one of America’s favorite. You have to try Mongolian chicken noodles, Mongolian Beef and Broccoli and these that are cooked in the slow cooker with beef or chicken.

Ingredients for Chinese Chicken

Basic ingredients combine quickly to make a fabulous dinner that is divine.

  • Chicken Breasts: Cut your chicken into bite sized pieces of equal proportions.
  • Cornstarch: This coating adds texture to the chicken and helps thicken the sauce.
  • Olive Oil: For cooking the chicken.
  • Chicken Broth: The base of the sauce.
  • Brown Sugar: You can either use light or dark brown sugar.
  • Soy Sauce: Use low sodium soy sauce if you would like.
  • Hoisin Sauce: Classic Asian sauce that adds a bit of sweet and salty.
  • Sesame Oil: This is a great finishing oil that adds flavor.
  • Cornstarch: Thickening agent that works without adding flavor.
  • Sesame seeds and Green Onions: These are optional but add color and flavor.

How to Make Mongolian Chicken

Quick and easy you will love this better than take out dinner. You will love how fast it is and your family will love the flavor.

  1. Chicken: In a ziplock bag add the chicken and cornstarch and shake to coat.
  2. Sauté: Using a large skillet or wok over medium high heat, add the olive oil. Working in batches add the chicken and fry each side until golden
  3. Sauce: In a small bowl whisk together the chicken broth, brown sugar, soy sauce, hoisin sauce, sesame oil and cornstarch. Pour over the Chicken and cook for 2-3 minutes until sauce starts to thicken.
  4. Serve: Serve with sesame seeds and green onions.

Coating the chicken, adding sauce and sauteing it in a pan.

Tips and Variations for the Best Mongolian Chicken

This is super simple to make and super delicious. Sure to be a family favorite.

  • Chicken: Coating the chicken in cornstarch and then stir frying it crisps it up perfectly. You can use chicken breasts or chicken thighs.
  • Vegetables: This is one of the best ways to vary the recipe. Although this is usually served by itself it is awesome with vegetables. Try broccoli, mushrooms, peppers, zucchini, carrots, water chestnuts or sugar snap peas.
  • Spicy:  Add a bit more heat by adding siracha, red pepper flakes or fresh ginger.
  • Serve: Serve over rice, brown rice, stir fry noodles, or even zoodles.

Storing Leftovers

Leftovers are a beautiful thing when it comes to Mongolian chicken. I like to make a double batch so I have enough for at least two meals.

  • Leftovers: This is almost better the second day. Leftover will keep for up to 4 days and can be reheated in the microwave or on the stove top.
  • Freezing: Once the Mongolian chicken has completely cooled, place it in an airtight container or freezer bag and store in the freezer for up to 2 months. Thaw overnight in the refrigerator. Microwave or reheat in a skillet or wok.

Mongolian chicken in bowl with rice.

More Asian Recipes to Love

There is nothing better than making your own take out. It is awesome. You can make it to your liking adding or substituting ingredients. Make it spicier or more milder. And cooking your own is much healthier and cheaper. I have all the best recipes that are tried and true right here.

Print

Mongolian Chicken

Mongolian Chicken is coated chicken tossed in a sweet savory sauce that is better than take out!  This simple recipe is the beginning to tasty dinner in minutes.
Course Dinner, Main Course
Cuisine Asian American
Keyword mongolian chicken
Prep Time 10 minutes
Cook Time 15 minutes
Total Time 25 minutes
Servings 4 People
Calories 262kcal
Author Alyssa Rivers

Ingredients

  • 1 pound chicken breasts cut into 1 inch pieces
  • 1/4 cup cornstarch
  • 2 Tablespoons olive oil
  • 1/2 cup chicken broth
  • 1 Tablespoon brown sugar
  • 3 Tablespoons soy sauce
  • 1 Tablespoon hoisen sauce
  • 1 teaspoon sesame oil
  • 1 teaspoon cornstarch
  • sesame seeds and sliced green onions for garnish

Instructions

  • In a ziplock bag add the chicken and cornstarch and shake to coat. In a large skillet or wok over medium high heat, add the olive oil. Working in batches add the chicken and fry each side until golden.
  • In a small bowl whisk together the chicken broth, brown sugar, soy sauce, hoisin sauce, sesame oil, and cornstarch. Pour over the chicken and cook for 2-3 minutes until sauce starts to thicken. Serve with sesame seeds and green onions.

Nutrition

Calories: 262kcal | Carbohydrates: 13g | Protein: 26g | Fat: 11g | Saturated Fat: 2g | Trans Fat: 1g | Cholesterol: 73mg | Sodium: 1060mg | Potassium: 481mg | Fiber: 1g | Sugar: 4g | Vitamin A: 35IU | Vitamin C: 3mg | Calcium: 14mg | Iron: 1mg


source https://therecipecritic.com/mongolian-chicken/
Share:

Creamy Tuscan Garlic Shrimp

Tuscan Garlic Shrimp is the most amazing creamy shrimp dish. A creamy garlic parmesan sauce with spinach and sun-dried tomatoes creates an unforgettable restaurant quality meal right at home!

This delish dish comes together in about 30 minutes. Make a full meal and serve it with a Salad, Green Beans and Bread.

Tuscan Garlic Shrimp in a pan ready to eat.

Creamy Garlic Shrimp

If you love shrimp and a creamy garlic parmesan sauce then this recipe is going to become your new favorite! It comes from one of my top recipes,  the original Creamy Tuscan Garlic Chicken. The sauce is absolute perfection. Every single time I make it I am reminded of how good it is. This is a tried and true recipe that I use again and again!

The best part about this meal is that it is made in under 30 minutes and tastes like it came out of a five-star restaurant. The shrimp cook in just a matter of minutes and the creamy sauce on top is to die for. The addition of sun-dried tomatoes and spinach makes this sauce more unique and is perfect served over a heaping pile of pasta! This dish is absolutely fantastic. The creamy sauce in this recipe is going to blow your family away. You are going to love this meal just as much as we did!

What is Tuscan Style Food?

Tuscan food is based on the idea of poor cooking. This means simple meals that are inexpensive and could easily be made in large amounts. It is not elaborate or complicated and uses high quality ingredients and natural flavors. Lots of garlic and herbs and spinach and sun-dried tomatoes. This Creamy Tuscan Garlic Shrimp is just that.  Simple, fresh, full of flavor and can feed a lot. It is easy to double and feed any more as well. This sauce and type of cooking are so incredible, if you love this you are going to love these others. Creamy Tuscan Italian Sausage, Tuscan Garlic Scallops, Tuscan Pasta Salad, Stuffed Tuscan Garlic Chicken, and Insanely Good Creamy Tuscan Garlic Salmon. This is only the beginning, check my blog for more Tuscan inspired dishes.

What You Will Need For Tuscan Shrimp

You can use frozen or fresh shrimp and have an impeccable results. I like to buy them already peeled and deveined for faster prep.

  • Shrimp: Use large shrimp that are peeled and deveined.
  • Garlic: Minced garlic cloves.
  • Olive Oil: Adds flavor and cooks the shrimp beautifully
  • Heavy Cream: Totally worth the few extra calories. It provides a smooth rich sauce.
  • Chicken Broth: Gives flavor and breaks up the heaviness of the cream.
  • Garlic Powder: Helps provide that extra punch of garlic flavor.
  • Italian Seasoning: The Best combination of seasonings. Make your own here, and keep it handy, it goes with everything.
  • Parmesan Cheese: Freshly grated for flavor and a bit salty tang.
  • Spinach: Adds color, texture and flavor.
  • Sun-Dried Tomatoes: Use jarred sun-dried tomatoes that have been drained.

How To Make Creamy Tuscan Garlic Shrimp

This comes together in 30 minutes and then dinner is ready! Perfect for busy nights and lazy weekends.

  1. Shrimp: In a large skillet add olive oil and cook the shrimp and garlic on medium high heat for 2-3 minutes or until pink. Remove shrimp and set aside on a plate.
  2. Sauce: Add the heavy cream, chicken broth, garlic powder, Italian seasoning, and parmesan cheese. Whisk over medium high heat until it starts to thicken.
  3. Add: Add the spinach and sun-dried tomatoes and let it simmer until the spinach starts to wilt.
  4. Combine: Add the shrimp back to the pan and serve over pasta if desired.

Sauteing the shrimp, making the cream sauce and adding the ingredients all together.

Pro Tips for The Best Creamy Tuscan Garlic Shrimp

Shrimp is easy to cook with and this sauce is to die for, so what are you waiting for, make this tonight!

  • Shrimp: I like to use fresh shrimp as much as I can, it brings the best flavor. You can take the tails off before you cook them so that the tuscan shrimp is easier to eat. Remember to cook the shrimp just till it’s pink all over. You do not want to overcook it, it can become rubbery. Another reason I don’t like to use precooked shrimp. It can be easily overcooked. If you do use frozen, let it thaw in the fridge or use the quick thaw method that is printed on the back of the package.
  • Heavy Cream: You really do not want to trade out the heavy cream for half and half in this dish. Half and half has added sugar for one. And it will create a thinner sauce that you will have to add a thickener too. Your creamy tuscan sauce will not be as creamy. Truly the heavy cream is the best way to go.
  • Saute: If you want a richer flavor to your shrimp sauté the shrimp in butter instead of olive oil. Oh my!
  • Spinach: I like to cut or break off the stems from the spinach so I don’t have any of the hard stem parts in my sauce. This is an extra step that you do not have to do. Just a personal preference.
  • Sun Dried Tomatoes: Use the jarred sun dried tomatoes , drain them but do not rinse them.
  • Serve: This incredible on its own but we love it served over a bowl of freshly cooked noodles.

Upclose picture to see the creamy tuscan garlic shrimp and the incredible texture.

Storing Leftover Tuscan Shrimp

This Garlic shrimp dish is best fresh, but leftovers are just as good. They will keep in the fridge for up to 4 days in a tightly covered container. Warm up slowly on the stove. Microwaving can make the shrimp rubbery if it is overheated. I do not recommend freezing this as the cream sauce will not reheat well.

Tuscan shrimp tossed with noodles in a bowl.

More Delicious Shrimp Pasta Recipes

Shrimp is super easy to cook and cooks up fast, making it a great option when you need dinner quick. It pairs super nicely with all sorts of different spices and flavors making it very versatile. Shrimp has a mild flavor that does not over power or taste fishy. It can be a bit tricky to cook in the fact you do not want to over cook it and make it rubbery. But try these tried and true recipes and you will have success every single time!

Print

Creamy Tuscan Garlic Shrimp

Tuscan Garlic Shrimp is the most amazing creamy shrimp dish. A creamy garlic parmesan sauce with spinach and sun-dried tomatoes creates an unforgettable restaurant quality meal right at home!
Course Dinner, Main Course
Cuisine American, Italian, Italian American
Keyword creamy garlic tuscan shrimp, tuscan garlic shrimp
Prep Time 5 minutes
Cook Time 15 minutes
Total Time 20 minutes
Servings 4 People
Calories 532kcal
Author Alyssa Rivers

Ingredients

  • pounds large shrimp peeled and deveined
  • 3 garlic cloves minced
  • 2 Tablespoons olive oil
  • 1 cup heavy cream
  • ½ cup chicken broth
  • 1 teaspoon garlic powder
  • 1 teaspoon Italian seasoning
  • ½ cup parmesan cheese
  • 1 cup spinach chopped
  • ½ cup sun-dried tomatoes

Instructions

  • In a large skillet add olive oil and cook the shrimp and garlic on medium high heat for 2-3 minutes or until pink. Remove shrimp and set aside on a plate.
  • Add the heavy cream, chicken broth, garlic powder, italian seasoning, and parmesan cheese. Whisk over medium high heat until it starts to thicken.
  • Add the spinach and sundried tomatoes and let it simmer until the spinach starts to wilt.
  • Add the shrimp back to the pan and serve over pasta if desired.

Video

Notes

Updated on March 28, 2021
Originally Posted on March 18, 2018

Nutrition

Calories: 532kcal | Carbohydrates: 12g | Protein: 43g | Fat: 35g | Saturated Fat: 17g | Cholesterol: 519mg | Sodium: 1693mg | Potassium: 747mg | Fiber: 2g | Sugar: 5g | Vitamin A: 1795IU | Vitamin C: 17.6mg | Calcium: 468mg | Iron: 5.4mg


source https://therecipecritic.com/creamy-tuscan-garlic-shrimp/
Share:

Popular

Archive

Slider Tag

Facebook

Header Ads

Recent in Food

Blog Archive

Recent Posts

Unordered List

  • Lorem ipsum dolor sit amet, consectetuer adipiscing elit.
  • Aliquam tincidunt mauris eu risus.
  • Vestibulum auctor dapibus neque.

Pages

Theme Support

Need our help to upload or customize this blogger template? Contact me with details about the theme customization you need.