Melon Salad with a Citrus Honey Mint Dressing

I don’t know about you but nothing hits the spot more on a hot summer day than fresh fruit and salads! Combine the two together and our melon salad will leave you feeling refreshed and satisfied!

This simple melon salad is easy to make but completely delightful to your tastebuds! It cools you down with the watery melon taste but adds a splash of flavor with the citrus honey mint dressing! Pair this with our burgers, corn, and some lemonade. These 4 recipes will create a summer meal for the books!

A bowl filled with different types of melons topped with a dressing.

Melon Salad with Citrus Honey Mint Dressing

Summer brings with it the desire to be outside, enjoying the refreshing sun on my face. There is always excitement in the air for all of the vacations and holidays and outdoor activities! I catch the summer bug and will do just about anything to hold on to that feeling! Making delicious and refreshing salads is one of those things and this one is a salad to remember. I love any excuse to use juicy melons including making a delicious watermelon agua fresca which is always a huge hit!

There is just something so simple about mixing different melons together and creating so much flavor. This recipe is not only delicious but most importantly, it’s a super easy recipe to make! After all, who doesn’t like a recipe that only requires 1 tool and a few ingredients?? Once you’ve finished balling up the melons, take it to the next level by drizzling the citrus honey mint dressing all over, and voila! You have a salad to impress!

What’s in Melon Salad with Citrus Honey Mint Dressing?

There isn’t much I love more than a simple recipe that packs a punch! This melon salad has only a few ingredients and delivers on taste, ease AND it looks impressive! For ingredient measurements, see the recipe card below.

  • Watermelon, honeydew, and cantaloupe: Use a melon baller scoop to create perfectly round balls. If you don’t have one of these, you can slice your melon up into cubes!
  • Lemon and lime: These juices will give this salad a fresh taste and a great citrus flavor!
  • Mint: Chop the mint up finely so that the flavor can be spread evenly throughout the salad.
  • Honey: The honey will balance out the citrus with a dash of sweetness!
A bowl filled with fruit, all scooped as small pieces.

How to make Melon Salad with Citrus Honey Mint Dressing

It only takes as long as scooping out the melon to make this recipe!! It looks impressive and colorful all while being simple and insanely delicious!

  1. Scooping the melon: Take each melon and using your melon scoop (or if you don’t have one, just cut the melon into cubes). Scoop out the melon and place it into the bowl. Do this for all 3 melons then combining them together.
  2. Whisk the Dressing: Next thing to do is make the dressing! Combine the lemon and lime juice into a separate small bowl, stir in the honey until it is dissolved. Then, chop up the mint into fine pieces and stir it in with the honey and juices.
  3. Mix together: Last step is to pour it over the salad until the melons are covered. Serve and enjoy!!
A bowl filled with watermelon, honeydew and cantaloupe scooped in small sizes with dressing being poured on them.

Tips and Variations For the Best Fruit Salad

We all know that the best part about salads is that you just put them in the refrigerator and keep coming back for more. The trick is how to make them last the longest! Follow these easy tips and you’ll be able to munch on these leftovers for days!

  • Smoothie and Juices: Once the melons get soft and extra juicy, then they are probably about on their last leg. However, this is a great time to use them in a smoothie or juice! Toss them in a blender with some ice and any additional fruit and you have yourself a delicious summer drink!
  • Cutting Melons: If you don’t have a round scoop to cut the melons into circles, cutting them into ½ inch to inch squares will also work. If you still want it to look fancy, try cutting them into trianagles for a fun shape and look.
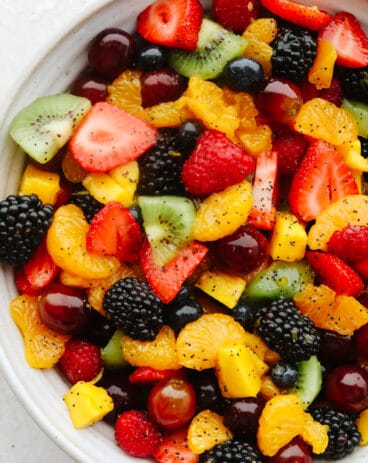
  • Add Ins: Berries, mango and peaches are a sweet addition to this melon salad.
  • Serving: Garnish the melon salad with fresh mint and place in a clear bowl or platter for all to see the beatiful melon colors.
3 different melons on a spoon topped with mint dressing.

Leftovers Callout Title

  • Making Ahead: Store your round melon balls in an air tight container with lemon juice over top for 3 to 5 days. Whisk together the dressing right before you are ready to serve.
  • Refrigerating: Wrap your container with tightly sealed plastic wrap. This will preserve the melons in your fridge for 3-5 days. Don’t forget to seal it after each time it gets opened!
  • Freezeing Fruit: If you find yourself not able to finish the salad in time, you can freeze it! Place it in an airtight container and you can freeze it for up to 12 months!
A bowl of fruit salad with melons and dressing.
Print

Melon Salad with Citrus Honey Mint Dressing

I don't know about you but nothing hits the spot more on a hot summer day than fresh fruit and salads! Combine the two together and our melon salad will leave you feeling refreshed and satisfied!
Course Salad, Side Dish
Cuisine American
Keyword melon salad
Prep Time 15 minutes
Total Time 15 minutes
Servings 4 people
Calories 548kcal
Author Alyssa Rivers

Ingredients

  • 1 small watermelon
  • 1 cantaloupe
  • 1 honeydew

Honey Citrus mint glaze:

  • Juice of half lemon
  • Juice of half of a lime
  • 3 Tablespoons honey
  • 1 Tablespoon mint chopped

Instructions

  • Using a melon baller scoop round spheres out of each of the melons and place them into a medium-sized bowl.

To make the honey citrus dressing:

  • In a small bowl add the lemon juice, lime juice, honey and mint and whisk. Pour over the salad and mix until incorporated.

Nutrition

Calories: 548kcal | Carbohydrates: 138g | Protein: 10g | Fat: 2g | Saturated Fat: 1g | Polyunsaturated Fat: 1g | Monounsaturated Fat: 1g | Sodium: 92mg | Potassium: 2373mg | Fiber: 8g | Sugar: 120g | Vitamin A: 11282IU | Vitamin C: 200mg | Calcium: 114mg | Iron: 4mg


source https://therecipecritic.com/melon-salad/
Share:

Dill Pickle Dip

Calling all pickle lovers! Loaded with chopped pickles and herbs, this dill pickle dip is bursting with flavor and absolutely irresistible!

Dips are the perfect summer treat. They are the best crowd-pleasers with how easy-to-make and delicious they are! Jalapeno popper, million-dollar, and hot corn are some of my other favorites!

Dill pickle dip with potato chips, celery, and carrots.

Easy and Delicious Dill Pickle Dip Recipe

As someone who loves easy and delicious dips, I am SO excited to share this recipe with you. This dip only has 6 ingredients and comes together in minutes to create the most amazing zesty, creamy flavor! Because of this, it is always requested at family parties and is gobbled up in no time. The tangy flavor pairs so well with chips, crackers, fresh veggies, you name it! Even my family members who don’t like pickles have become a believer after trying this pickle dip.

Dill pickle dip is the perfect, easy dish for potlucks and game days. Additionally, it is so easy to make and just as easy to store and take on the go! That being said, my personal favorite way to enjoy this insanely good dip is for a Netflix binge night. Like binging your new favorite show, resisting another bite of this flavorful, addictive dill pickle dip is impossible. It is the perfect addition to your easy-to-make snack arsenal!

What You Need For Pickle Dip

With only a handful of simple ingredients, this pickle dip is an easy and inexpensive treat to throw together! It is also easy to customize flavors and substitute ingredients to your liking. I have all individual measurements listed in the recipe card below.

  • Cream Cheese: This is the creamy base of the dill pickle dip. Having your cream cheese at room temperature helps everything to mix together well! Also, a dairy-free variation of this dip can be made with cream cheese like Miyoko’s or Daiya.
  • Sour Cream: Sour cream adds a smooth texture and tangy flavor to your dill pickle dip. Greek yogurt works as a great substitute, too!
  • Chopped Dill Pickles: Small whole dill pickles, finely chopped, are what I like to use in this recipe! You can adjust the size of your dill pieces to your liking.
  • Garlic Powder: Adds a boost of flavor to your dip. Using fresh garlic is another way to achieve this.
  • Dill Weed: Used to add fresh, zesty flavor to your dip and also a hint of texture.
  • Dill Pickle Juice: Dill pickle juice will add additional flavor to your dip. It can also be used to make your dill pickle dip thinner until you reach your desired consistency!

How to Make the Best Dill Pickle Dip

This dip is rich and tasty with minimal effort. As a result, no one will suspect you made it minutes before the party with how much scrumptious flavor is loaded in each bite! You can even use your extra time to make homemade chips to really impress your guests.

  1. Combine Ingredients: In a medium size combine the cream cheese, sour cream, chopped dill pickles, garlic powder, dill weed, and pickle juice until incorporated.
  2. Serve or Chill: Serve immediately or chill for an hour to let the flavors blend and cheese to thicken.
Dill pickle dip ingredients in a glass bowl.

Making the Best Dill Pickle Dip

Dill pickle dip can easily be customized to suit your tastes. So, whether you want to add more flavors or change up texture, you can use these easy tips to craft the best dip possible!

  • Different Pickles: Any kind of pickle will work here, use your favorite! You could try using hot pickles to add a little heat to your dill pickle dip!
  • Flavor Enhancers: Adding diced onion or onion powder to your dip gives it a pop of savory flavor. Jalapeños, a dash of Chili powder or paprika can add great flavor, as well. A little heat plays perfectly with the zesty flavor of dill.
  • Convert to Cheese Ball: Want dill pickle dip but in cheese ball form? No problem! Easily convert your dip into a cheese ball by placing mixture onto plastic wrap and gently shaping it into a ball. Next, refrigerate for at least an hour or until it is set in place. It is then ready to be transferred to a serving dish.
  • Dip Too Thick: If your dill pickle dip becomes too thick, add a spoonful of pickle juice at a time until you get the consistency you are looking for. Also, keep in mind that this dip will become thicker while resting in the refrigerator. If you’re making it in advance, you may need to add a splash of pickle juice to your dip before serving.
  • Serve With: Serve your dill pickle dip up with crackers, chips, veggies or pita. Zucchini chips are a tasty, healthy snack that also pairs wonderfully with dill pickle dip! Also, you can use this as a spread for sliders and sandwiches for a zesty pop of flavor!
Dill pickle dip on serving dish with chips and veggies.

Storing Leftover Dill Pickle Dip

My favorite part about dips is that they are so incredibly easy to store! You can eat them straight from the Tupperware container which makes them the ultimate anytime snack.

  • In the Refrigerator: Store your dill pickle dip in an airtight container for 3-4 days.
  • In the Freezer: This dip will keep in the freezer for up to 2 months in an airtight container. Thaw in the fridge before serving.
Putting dill pickle dip on a potato chip.
Print

Dill Pickle Dip

Calling all pickle lovers! Loaded with chopped pickles and herbs, this dill pickle dip is bursting with flavor and absolutely irresistible!
Course Appetizer, Snack
Cuisine American
Keyword dill pickle dip, dill pickle dip recipe
Prep Time 10 minutes
Total Time 10 minutes
Servings 6 people
Calories 169kcal
Author Alyssa Rivers

Ingredients

  • 8 ounce cream cheese softened
  • 1/2 cup sour cream
  • 1 cup finely chopped dill pickles
  • 1 teaspoon garlic powder
  • 1 Tablespoon dill weed chopped
  • 2 Tablespoons dill pickle juice

Instructions

  • In a medium-size bowl combine the cream cheese, sour cream, chopped dill pickles, garlic powder, dill weed, and pickle juice until incorporated.
  • Serve immediately or chill for an hour to let the flavors blend together and the cheese to thicken.

Nutrition

Calories: 169kcal | Carbohydrates: 3g | Protein: 3g | Fat: 17g | Saturated Fat: 9g | Polyunsaturated Fat: 1g | Monounsaturated Fat: 4g | Cholesterol: 52mg | Sodium: 211mg | Potassium: 86mg | Fiber: 1g | Sugar: 2g | Vitamin A: 632IU | Vitamin C: 1mg | Calcium: 59mg | Iron: 1mg


source https://therecipecritic.com/dill-pickle-dip/
Share:

Banana Cream Pudding Cookies

Banana Pudding Cookies are soft, chewy, and absolutely scrumptious. With all the banana flavor of a banana cream pie wrapped in a cookie.

Pudding creates the moistest, most tender desserts ever! Just try these other pudding-infused delights, Funfetti Cheesecake, Chocolate Chip, and even Chocolate Pudding Pie.

Banana pudding cookies on a wire rack.

Banana Pudding Cookies Recipe

I am a lover of all things banana cream. I simply love bananas! Just try these fan favorites like Banana Bread, Banoffee Pie, and Magnolia Bakery Banana Pudding! So, I had to give these banana pudding cookies a try! The result was fantastic! These cookies have just the right amount of banana ratio and I loved the white chocolate chip chunks throughout. The white chocolate is like having real cream in the cookies. It is so scrumptious. Honestly, I couldn’t stop eating them.

Pudding is the secret ingredient here. It creates a cookie that is moist, tender, and absolutely heavenly. The banana cream pudding creates a rich banana flavor that doesn’t overpower the cookies. The banana pudding cookies are so easy and fun to make, my kids always love to jump in and help. It is a perfect activity for the whole family. Banana pudding cookies allow you to have that iconic flavor without all the work of making a pie. So go ahead make a couple of batches of these, you won’t regret it!

Pudding Cookies Ingredients

Simple and delicious banana pudding cookies! Make sure you buy the instant banana cream pudding not cook and serve pudding. Cooked pudding will not give the same impeccable results. You are going to love how moist and tender these banana pudding cookies are! For all ingredient measurements see the recipe card below.

  • Unsalted butter softened: Butter soft and but not melted will create the perfect texture. Make sure your butter is not melted.
  • Brown sugar: Brown sugar adds moisture and flavor.
  • Granulated sugar: White sugar creates the sweetness that makes these pudding cookies great.
  • Banana cream instant pudding mix: Rmember to make sure you purchase instant pudding and not cooked.
  • Eggs: Room tempertature eggs will mix in better than if they are cold.
  • Vanilla extract: Compliments the banana flavor by mellowing it just a bit.
  • Flour: All purpose flour give the cookies structure.
  • Baking soda: This will help the cookies rise.
  • Salt: Salt balances the sweetness.
  • White chocolate chips: There is something magical that happens with the creamy sweet white chocolate and bananas.

How To Make Banana Cookies with Pudding

These banana pudding cookies cook up just like regular cookies. They are fast and easy! You are going to love how fun these are to make. Make these banana pudding cookies with your family!

  1. Prep: Preheat oven to 350 degrees Fahrenheit. Line a baking sheet with parchment paper or a Silpat baking mat and set aside.
  2. Mixing Up the Batter: Using a mixer, beat together butter and sugars until creamy. Add in pudding mix, eggs, and vanilla extract. In a medium bowl, whisk together the flour, baking soda, and salt. Add the dry ingredients to the wet ingredients and mix until just combined. Stir in the white chocolate chips.
  3. Baking: Drop cookie dough by rounded tablespoons onto prepared baking sheet. Bake for 10 minutes, or until slightly golden around the edges and set. Remove cookies from oven and let cool on baking sheet for two minutes. Transfer to a cooling rack and cool completely.
Banana cookies on a wire rack.

Tips For the Best Banana Cream Cookies

It is so easy to make these banana pudding cookies that you will want to make them all the time. The texture of the cookies will keep you coming back for more. Make a double batch so you have enough.

  • Pudding: Do not mix up the pudding before adding it to the mix. the pudding will go in dry. Make sure you use instant pudding, not cook and serve. It has more cornstarch in it and will change the consistency and texture of the cookies.
  • Mix: These cookies will mix perfectly in a kitchen aid, with a hand mixer or even by hand. Just make sure that you do not overmix the cookies.
  • Line: To make the banana pudding cookies cook evenly and come off your pan, line the cookie sheet with parchment paper or a silicone liner.
  • Scoop: Use a cookie scoop to ensure cookies that are uniform and bake evenly.

Variations of Easy Pudding Cookies

Once you start making cookies with pudding you may not go back to regular cookies. These banana pudding cookies can be customized to your liking and changed up to lots of different flavors. Let the experimenting begin!

  • Add-ins: White chocolate chips are a perfect combination with the banana flavor. But you can subsititue out the wite for semi-sweet chocolate or even peanut butter chips.
  • Crunch: For a bit more texture to your cookies, add in chopped walnuts, pecans or peanuts. Crushed Nilla Wafers or graham crackers would also make a delicious addition.
  • Pudding: You do not have to use banana pudding, but these will not be banana cream cookies anymore. But try vanilla, chocolate, and butterscotch for a new variation of cookie.

How to Store Pudding Cookies

Make an extra batch of these cookies and freeze them for later. Once the banana cookies have completely cooled, place them in a freezer-safe bag in the freezer for up to 3 months. Extra cookies can be stored in an airtight container for up to two weeks at room temperature.

Banana pudding cookies stacked on top of each other.
Print

Banana cream pudding cookies

Banana Pudding Cookies are soft, chewy, and absolutely scrumptious. With all the banana flavor of a banana cream pie wrapped in a cookie.
Course Dessert, Snack
Cuisine American
Keyword banana pudding cookies, pudding cookies
Prep Time 10 minutes
Cook Time 10 minutes
Total Time 20 minutes
Servings 24 Cookies
Calories 246kcal
Author Alyssa Rivers

Ingredients

  • 1 cup unsalted butter softened
  • 3/4 cup brown sugar
  • 1/4 cup granulated sugar
  • 3.4 ounce package banana cream instant pudding mix
  • 2 large eggs
  • 1 teaspoon vanilla extract
  • 2 1/4 cups flour
  • 1 teaspoon baking soda
  • 1/2 teaspoon salt
  • 2 cups white chocolate chips

Instructions

  • Preheat oven to 350 degrees Fahrenheit. Line a baking sheet with parchment paper or a Silpat baking mat and set it to the side.
  • Using a mixer, beat together butter and sugars until creamy. Add in pudding mix, eggs, and vanilla extract. In a medium bowl, whisk together the flour, baking soda, and salt. Add the dry ingredients to the wet ingredients and mix until just combined. Stir in the white chocolate chips.
  • Drop cookie dough by rounded tablespoons onto a prepared baking sheet. Bake for 10 minutes, or until slightly golden around the edges and set. Remove cookies from the oven and let cool on the baking sheet for two minutes. Transfer to a cooling rack and cool completely.

Notes

Updated on July 30, 2021
Originally Posted on April 17, 2013

Nutrition

Calories: 246kcal | Carbohydrates: 30g | Protein: 3g | Fat: 13g | Saturated Fat: 8g | Cholesterol: 37mg | Sodium: 141mg | Potassium: 72mg | Fiber: 1g | Sugar: 21g | Vitamin A: 261IU | Vitamin C: 1mg | Calcium: 42mg | Iron: 1mg


source https://therecipecritic.com/banana-cream-pudding-cookies/
Share:

Sourdough Pancakes That are Fluffy and Delicious!

These tried and true sourdough pancakes are fluffy and delicious! They pair well with just about any toppings that you have on hand and they have just a touch of sweetness making adding maple syrup the final touch of heaven!

If you are looking for a super easy and delicious sourdough pancake recipe then you have come to the right place! These are quick and easy to make (once you have your sourdough starter ready!) Pair this with our scrambled eggs and our heavenly bacon and you are set for a breakfast that is sure to impress!

A stack of sourdough pancakes with berries on top.

Simple Sourdough Pancakes

If you are looking for a recipe to help ease your fear of baking sourdough, then you have come to the right place! Sourdough is less intimidating than you think and can create some of THE most delicious recipes that you will make. Sourdough breathes life into a dish and helps it develop its flavor. These pancakes are light and fluffy with a hint of sweetness that will make you keep coming back for more.

Because you will need a sourdough starter (or discard), these pancakes take a bit of prep work beforehand but once you are in the kitchen baking them, it’s a fast and easy recipe that we know you will love!! We loved these pancakes so much. Try topping them with our maple syrup and these will easily become a family favorite!!

What You Need For Sourdough Pancakes

Once you make this recipe, you will want to thank us later! It uses all of your pantry staples and is one of those delicious meals that just stays constantly on your meal rotations. Trust us when we say you won’t be able to cook these fast enough on the griddle to keep up with the demand! See the recipe card below for full measurements.

  • Flour: The flour binds all of the ingredients together
  • Baking powder, Baking soda, Salt: Combined, these three help to create fluffiness in pancakes.
  • Sugar: Adding sugar in this recipe keeps things sweet.
  • Sourdough starter or discard: This is a key ingredient to this recipe. Acting as a natural yeast, it greatly adds to the flavor and texture.
  • Milk: Milk is necessary to dissolve the flour and start creating the whole mixture.
  • Egg: Eggs in the recipe allow for bubbles and helps the pancakes to rise. It is best to leave your eggs out at room temperature and beaten.
  • Butter: It’s best to use unsalted, melted butter.

How to Make Easy Sourdough Pancakes

Don’t let the use of sourdough intimidate you! This recipe is quick and easy to make! You’ll wonder why you were ever nervous to bake with sourdough in the first place!

  1. Start with the dry ingredients: Grab a large mixing bowl and whisk together the flour, baking powder, baking soda, salt, and sugar. These are all of your dry ingredients and will create the base for the recipe!
  2. Wet Ingredients are next: After you have whisked all of the dry ingredients together, in a separate medium bowl or liquid measuring cup, combine the sourdough starter, milk, eggs, and butter and whisk until combined.
  3. Combine the wet and dry ingredients: Pour the wet ingredients over the dry and mix until combined. Don’t overmix! It should still be a little lumpy.
  4. SOURDOUGH TIP: If you would like to gain a little bit more of a sourdough flavor, stop here and store this mix on your counter overnight and it will ferment and have more of a distinct sourdough flavor. If you don’t want this, skip this step and continue mixing!
  5. Let’s flip those pancakes: Spray a preheated griddle (325°-350°) with some nonstick cooking spray. Pour ⅓ cup pancake batter on and cook until bubbling on top, about 2 minutes. Once the bubbles begin to pop and the pancake turns a golden brown, flip and cook for an additional 1-2 minutes. They are done once they are golden brown on the bottom.
  6. Serve and Enjoy! Its time to top with your favorite pancake toppings and enjoy the fruits of your labors!
The process of making sourdough pancakes in three photos.

The Best Sourdough Pancake Tips

There are a few things that can take this recipe to the next level and we have some tips that will help you with that! These pancakes are so delectable that you will want to make sure to follow these extra tips and you will be baking like a true chef in no time!

  • How to mix: Make sure that once all of the ingredients are together that you don’t over mix the batter. This will result in gooey or sticky pancakes.
  • Melting the Butter: After you have melted the butter, let it sit until it is cooled (but still liquid). This will make it so that your batter doesn’t have large clumps!
  • Sourdough starter (or discard!): Make sure to prepare this beforehand. The sourdough starter is a necessary base for the batter that you will need ready as you begin to mix all of the ingredients together!
  • Cooking Surface: It’s best to cook the pancakes on a nonstick griddle or flat surface.
  • Cooking Temperature: Try to cook these pancakes on low heat. This will keep you from burning the outside of the pancake while the inside remains uncooked.
  • Toppings: Adding different toppings will make this dish taste new every time! Try adding maple syrup, strawberry sauce, buttermilk, fresh fruit, and chopped nuts. Add whatever you want to make this recipe your own!

How to Easily Store Homemade Sourdough Pancakes

The best part about these sourdough pancakes is that you can make some extra to store in either your fridge or freezer to enjoy later! They taste just like the day you made them and are an easy way to prepare 2 meals in 1!

  • Refrigerate: Once cooked, place them in an airtight container and they can last in the refrigerator for 2-3 days.
  • Freezer: Lay each pancake flat on parchment paper on a tray and place in the freezer for 2 hours (don’t stack them). Take them out and place them all together in a airtight ziplock bag. Or, you can individually wrap each pancake with plastic wrap and place them together in a bag and then freeze. You can freeze them for up to 3 months.
  • Reheat: To reheat your pancakes, you can simply microwave them for 30 seconds to 1 minute until heated through, add your toppings and enjoy!
Cutting a slice of sourdough pancakes with a fork.
Print

Sourdough Pancakes

These tried and true Sourdough Pancakes are fluffy and delicious! They pair well with just about any toppings that you have on hand and they have just a touch of sweetness making adding maple syrup the final touch of heaven!
Course Breakfast
Cuisine American
Keyword sourdough pancakes, sourdough pancakes recipe
Prep Time 15 minutes
Cook Time 20 minutes
Rest 12 hours
Total Time 12 hours 35 minutes
Servings 4 People
Calories 422kcal
Author Alyssa Rivers

Ingredients

  • 2 cups all purpose flour
  • 2 teaspoons baking powder
  • 1 teaspoon baking soda
  • ½ teaspoon salt
  • 3 Tablespoons granulated sugar
  • 1 cup sourdough starter or discard
  • 1 1/4 cup milk
  • 2 large eggs beaten
  • 3 Tablespoons unsalted butter melted

Instructions

  • In a large bowl whisk together the flour, baking powder, baking soda, salt, and sugar.
  • In a medium bowl or liquid measuring cup, combine the sourdough starter, milk, eggs, and butter and whisk until combined. Pour the wet ingredients over the dry and mix until just combined. It should still be a little lumpy.
  • From here you have the option to cook the pancakes right away, or you can cover the dough and leave it on the counter overnight to ferment and have more of a distinct sourdough flavor.
  • On a griddle preheated to 325°-350° and sprayed with cooking spray, pour ⅓ cup pancake batter on and cook until bubbling on top, about 2 minutes. Flip and cook for an additional 1-2 minutes, or until golden brown on the bottom.
  • Serve with your favorite pancake toppings and enjoy.

Nutrition

Calories: 422kcal | Carbohydrates: 61g | Protein: 12g | Fat: 14g | Saturated Fat: 8g | Polyunsaturated Fat: 1g | Monounsaturated Fat: 4g | Trans Fat: 1g | Cholesterol: 123mg | Sodium: 637mg | Potassium: 407mg | Fiber: 2g | Sugar: 13g | Vitamin A: 521IU | Calcium: 199mg | Iron: 4mg


source https://therecipecritic.com/sourdough-pancakes/
Share:

Popular

Archive

Slider Tag

Facebook

Header Ads

Recent in Food

Blog Archive

Recent Posts

Unordered List

  • Lorem ipsum dolor sit amet, consectetuer adipiscing elit.
  • Aliquam tincidunt mauris eu risus.
  • Vestibulum auctor dapibus neque.

Pages

Theme Support

Need our help to upload or customize this blogger template? Contact me with details about the theme customization you need.