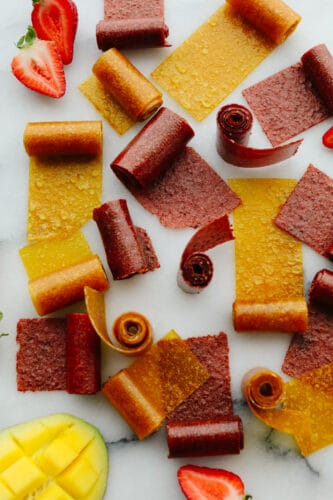
Fruit leather is an amazing snack that combines a delicious fruity taste with a texture that is to die for! Simple and SOO good, it will for sure be something that your family will go crazy for!
Making fruit leather at home is so easy plus it will save you a lot of money! You can make it your own with whatever fruit that you love! Some other homemade snacks to try are this trail mix, ranch pretzels, and this yummy banana bread!

Why Should I Make My Own Fruit Leather?
Fruit leather is one of those delicious snacks that I always get sucked into buying at the store. It isn’t messy and my kids love it. Once I made this recipe, I kept asking myself why I hadn’t tried this before! It is so simple and let’s be honest, buying fruit leather isn’t cheap! This not only tastes amazing but it’s saving me money so that is a win-win in my book! You don’t need a lot of stuff for this recipe! You just need to make sure that you are home while it cooks. And the best part about this is that YOU DON’T NEED A DEHYDRATOR!
I think this was always my biggest hangup with homemade fruit leather. I didn’t want to have to go out and buy something for my kitchen that I would probably only use with a couple of recipes. But now that you have this recipe, put your mind at ease (and your wallet away!) because you don’t need any extra tools or fancy accessories that you don’t already have on hand. Like I said, simple and delicious is the name of this game! What you will need is some fruit. And luckily, there is always a season during the year that we have an abundance of certain fruits! So this recipe can be made all year long. It will keep your pantry well-stocked and your kids will absolutely love it!!
What is in Fruit Leather
This is the part where you breathe a sigh of relief when you realize that there are only THREE ingredients that you need to make this! Delightfully simple, this recipe can be made by anyone! You’ve got this! See the recipe card below for exact ingredient measurements.
- Strawberries: Use fresh strawberries (or the fruit of your choice). You can use frozen fruit but make sure that it’s fully thawed first!
- Lemon juice: This will help to brighten the flavor if your fruit!
- Granulated sugar (or honey): Using sugar will keep your fruit leather sweet and not too tart.
How to Make Baked Fruit Leather
Here is where you realize that all you need to make this recipe is sometimes! And it’s all pretty hands-off time because it’s basically just in your oven cooking! So pick a day that you have things to do at home and at the end of your day, you can enjoy this delicious fruit leather!
- Prep: Preheat the oven to 150° or the lowest your oven will go, making sure it’s below 200°. Line your baking sheet with a silpat and set aside.
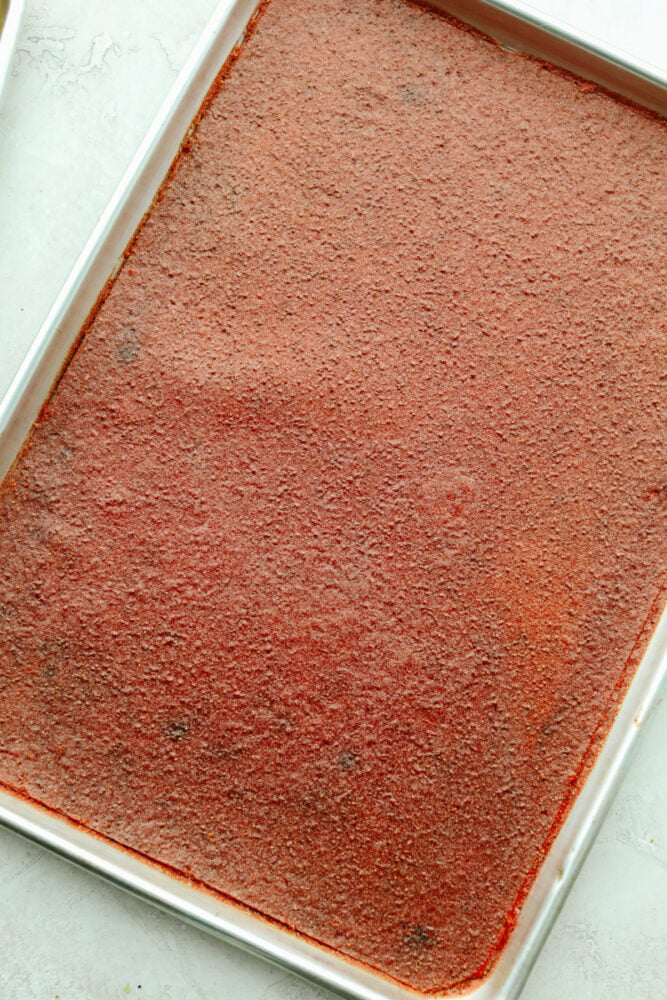
- Blend ingredients: In the blender add the strawberries, lemon juice and sugar. Blend until you have a smooth puree. Pour the puree onto the baking sheet and smooth using a knife or an offset spatula. Tapping the pan on the counter a few times can help get it nice and even.
- Bake and cut: Bake for 6-8 hours, or until the leather is no longer tacky. Remove from the oven and allow to cool completely before using a pizza cutter to cut into strips for fruit roll ups or into rectangles for pieces of fruit leather. If you would like to roll it, cut a strip of parchment paper to roll up with it so it does not stick to itself.
Homemade Fruit Leather Tips
Making homemade fruit leather is a great way to enjoy fruit at the peak of ripeness throughout the entire year!
- Go low: Put your oven at the lowest temp it can go! My oven only goes to 170°, but if yours goes lower than that go ahead and set at the LOWEST temp! Anywhere between 130°-190° will work, but lower is definitely better.
- Frozen Fruit? Want to use frozen fruit? Go for it! Be sure to thaw the fruit before measuring it and then proceed through the recipe as written.
- Done but not overdone: The fruit leather will be done when it’s not tacky and doesn’t get gummy when cut. It is overdone if the leather starts cracking or getting so dry that it can break. It typically takes 6-8 hours to fully dry, but it could take up to 12 hours to fully dry.
- Use a dehydrator: This recipe is mainly for using an oven, but if you have a dehydrator that can speed up the process immensely. Set the dehydrator to 135°, line the dehydrator tray with parchment paper or use a fruit leather tray, spread the puree in a thin even layer on the trays and put in the dehydrator for 4-8 hours. It will be ready when the fruit is no longer tacky.

Fruit Variations
Make the most of this recipe! If fruit leather is something that you want to have on hand as a regular snack at your house, here are a few ideas to switch things up and keep it interesting! There are so many yummy fruit leathers out there, it would be a shame to stop at just one!
- Change the flavor: The easiest thing that you can do to change this up is to use different fruits. I usually buy fruit leather in variety packs so this is no different! Buy a few fruits and make some different options. These keep for a long time (see the storing tips below) so it’s definitely worth it!
- Combine fruit: Take it up a notch and combine a few fruits to make some extra delicious flavors. Just make sure that your total fruit equals the 3 cups needed for a batch.

Storing Homemade Fruit Leather
Homemade Fruit Leather is simple to store and there are a couple options to consider.
Room Temperature: You can store your fruit leather at room temp, but it has to be in a cool, dry, dark place like a pantry or a cool cupboard. Wrap the pieces in plastic wrap and then put in an airtight container. It will keep for up to 2 weeks, but be sure it is dry otherwise it could mold.
Freezer: If you want to keep your fruit leather long-term, the best way is to wrap the pieces in plastic wrap and then store them in a large freezer ziplock bag in the freezer. Fruit leather will keep for up to a year in the freezer.

More Homemade Snacks to Love
Desserts
Cookies and Cream Muddy Buddies
Dressings, Sauces, and Dips
Amazing Homemade Applesauce

Dressings, Sauces, and Dips
5 Minute Million Dollar Dip
Dressings, Sauces, and Dips
Fresh Fruit Salsa
Homemade Fruit Leather
Ingredients
- 3 Cups fresh strawberries or fruit of your choice
- 1 tablespoon lemon juice
- 3 tablespoons granulated sugar or honey
Instructions
-
Preheat the oven to 150° or the lowest your oven will go, making sure it’s below 200°. Line your baking sheet with a silpat and set aside.
-
In the blender add the strawberries, lemon juice and sugar. Blend until you have a smooth puree. Pour the puree onto the baking sheet and smooth using a knife or an offset spatula. Tapping the pan on the counter a few times can help get it nice and even.
-
Bake for 6-8 hours, or until the leather is no longer tacky. Remove from the oven and allow to cool completely before using a pizza cutter to cut into strips for fruit roll ups or into rectangles for pieces of fruit leather. If you would like to roll it, cut a strip of parchment paper to roll up with it so it does not stick to itself.
source https://therecipecritic.com/fruit-leather/