In the 1980s, six women on an island off the coast of Massachusetts began selling lobster rolls as a church fundraiser. Today people travel by car, boat, and plane just to taste these hallowed summer treats. This week, one of those people is Dan. He travels to Martha’s Vineyard to uncover Grace Church's secret recipe. Plus, Daniel Gritzer from Serious Eats breaks down the science of why frozen lobster might be better than fresh.
On Saturday, June 3, Dan will be moderating a panel at a food festival on Martha’s Vineyard called Martha’s Vineyard Flavors. It’s a weekend of talks, demonstrations, and delicious meals. You can buy tickets to part of the event or the whole thing here.
This episode originally aired on June 17, 2019, and was produced by Dan Pashman, Anne Saini, and Ngofeen Mputubwele, with editing by Peter Clowney. The Sporkful production team now includes Dan Pashman, Emma Morgenstern, Andres O'Hara, Jared O'Connell, and Nora Ritchie.
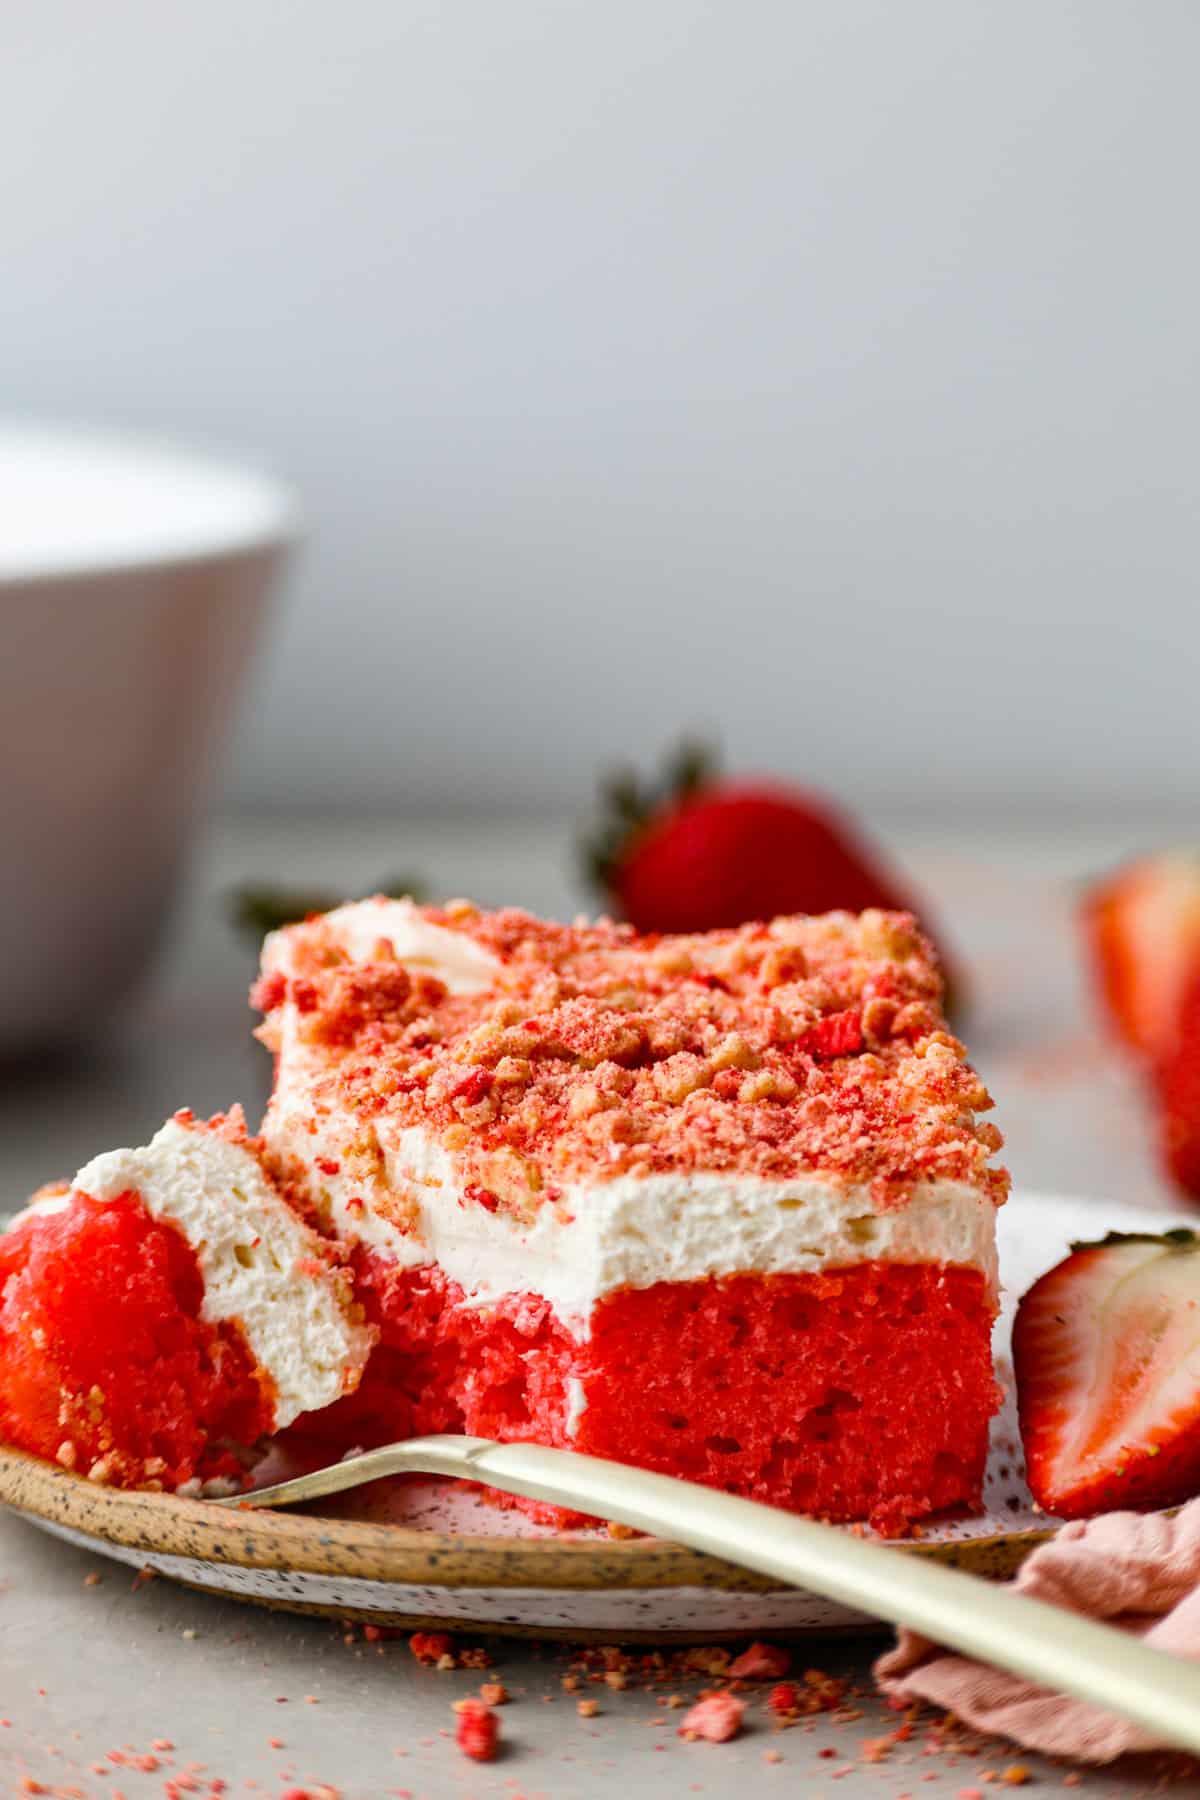
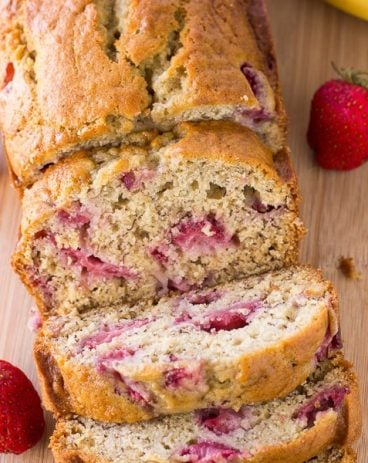
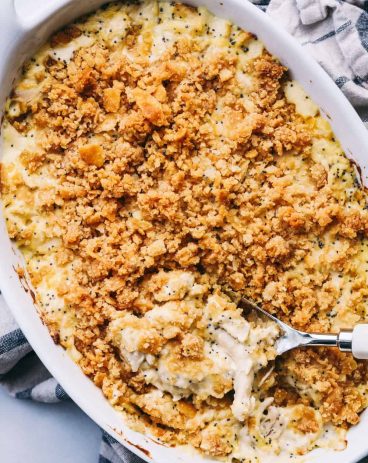
This moist Strawberry Crunch Cake is topped with a creamy whipped topping made with cream cheese and powdered sugar. The finishing touch is a delightful crunch topping made from crushed golden Oreos and freeze-dried strawberries.
I love a good strawberry dessert, especially in the summer months! It feels so festive and makes every BBQ have a deliciously sweet ending. Check out this Strawberry Tart, this delicious (and easy!) Fresh Strawberry Pie and this yummy Strawberry Icebox Cake.
Strawberry Crunch Cake Recipe
If you have never had strawberry crunch cake and are wondering what it is, you are in for a treat, especially if you love strawberries. The base cake is strawberry flavored ( you can make this from scratch with this recipe or from a box). It’s topped with a whipped topping, but the very best part is where you get the crunch. Sprinkled on top is a mixture of crushed vanilla Oreos and dehydrated strawberries.
We love this cake not only because it’s filled with strawberry flavor but the texture. It’s a match made in heaven. The cake is moist and delicious, but every bite has a delicious crunch. I love a recipe with a twist, and this one takes a classic cake to a whole other level!
What Ingredients are in Strawberry Crunch Cake?
The ingredients list is very simple. And once you try this recipe, you are going to want to make sure that you always have them on hand! All of the exact ingredient measurements can be found below in the recipe card at the bottom of the post.
Cake
Strawberry Cake Mix: You can make this easy by just grabbing boxed cake mix from the store!
Strawberry Jello: I love strawberry gelatin, and this adds an extra punch of flavor to the mix.
Eggs: I always use large eggs when I am baking.
Vegetable Oil: This adds moisture to the cake, making it the perfect soft and fluffy texture.
Milk: You can use 1 percent or 2 percent milk in this recipe.
Strawberry Crunch Topping
Golden Oreos: Remove the filling from your Oreos before you make the topping.
Freeze-Dried Strawberries: I find these in the aisle at the grocery store with nuts, chocolate chips, and baking additions.
Butter: I used salted butter in this strawberry crunch cake recipe.
Whipped Topping
Cream Cheese: Let this sit out and come to room temperature to mix in better.
Powdered Sugar: This blends seamlessly, making the topping smooth and sweet.
Whipped Topping: Let the Cool Whip thaw before mixing it with other ingredients. I like to keep it in my fridge rather than my freezer so that it’s ready to go.
Is Strawberry Crunch Cake Easy to Make?
Yes! This recipe is so simple and comes together in less than an hour. That’s baking and frosting time included! It’s a great recipe to be served with any meal for dessert. Everyone loves it!
Prep: Preheat the oven to 350 degrees Fahrenheit and spray a 9×13 baking dish with pan spray. Set aside.
Mix the Cake Batter: Add the cake mix, jello powder, eggs, oil, and milk to a large mixing bowl. Use a hand or stand mixer fitted with the paddle attachment and beat on medium speed for 2 minutes.
Bake and Cool: Add the batter to the prepared baking dish and bake for 25-30 minutes until a toothpick comes out clean from the center and the center springs back when lightly pressed on. Let the cake cool completely.
Make the Topping: To prepare the topping beat the cream cheese and powdered sugar in a bowl until smooth. Add ⅓ of the whipped topping and stir until smooth.
Spread the Topping: Fold in the remaining whipped topping and spread evenly over the top of the cooled cake.
Add the Strawberry Crunch: Add the golden Oreos (without the filling) and the freeze-dried strawberries to a large ziplock bag and crush with a rolling pin. You can crush them as much or as little as you’d like. I like a combination of chunky bits and crumbs. Sprinkle as much or as little as you’d like over the strawberry cake. I used about half of the mixture.
Variations and Substitutions
There are a few different ways to substitute ingredients for this strawberry crunch cake recipe in case you don’t have some of them on hand. Here are a few tips that you can try!
Use oil instead of butter: Substitute the oil for melted butter if you would like a lighter crumb, though be aware that oil tends to make cakes a bit more moist.
How to make homemade Cool Whip: If you can’t find whipped topping (Cool Whip) at your store, you can make some at home from scratch! Instead of using 8 ounces of whipped topping, mix 1 ½ cups of heavy whipping cream with 3 tablespoons of powdered sugar and mix until it forms stiff peaks.
Half the topping: If you don’t like a lot of crumb topping, feel free to half the topping to ½ ounce of freeze-dried strawberries and 6 Golden Oreos.
Can I Make These Cupcakes Instead?
Yes! This strawberry crunch cake makes delicious cupcakes and is the perfect little hand-held treat to make this an easy grab-and-go dessert option.
Add Batter to Liner: Fill 24 cupcake liners ⅔ of the way full with the batter.
Bake and Cool: Bake at 350 degrees Fahrenheit for 18-20 minutes or until a toothpick comes out clean. Let the cupcakes cool.
Add Cream Frosting and Crunch: Top with the cream and sprinkle each cupcake with the strawberry crunch mixture.
How to Store Strawberry Crunch Cake
I love a good make ahead option and this cake can be made up to 24 hours ahead of time, making it the perfect dessert!
In the Refrigerator: Because this cake has a cream topping, you will need to store it in an airtight container in your refrigerator. It will last up to 5 days.
Store leftover cake covered in the fridge for up to 5 days.
More Delicious Strawberry Recipes
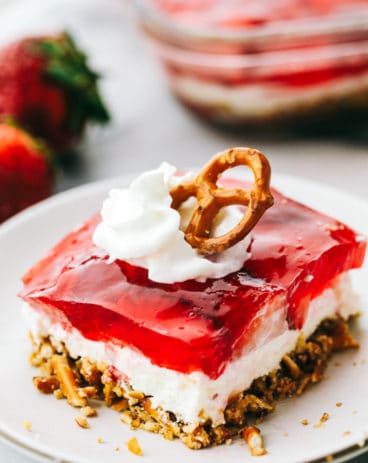
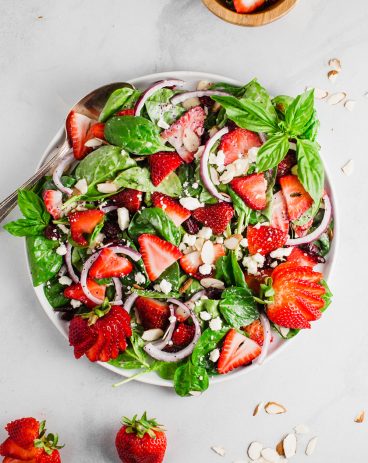
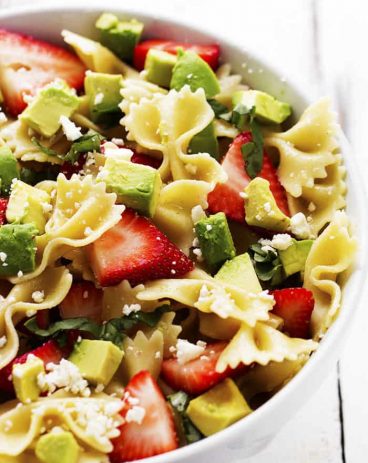
Strawberries are the best ingredient because they can be made into sweet or savory dishes. Here are some delicious strawberry recipes that you must try after you bake up this crunch cake!
This moist Strawberry Crunch Cake is topped with a creamy whipped topping made with cream cheese and powdered sugar. The finishing touch is a delightful crunch topping made from crushed golden Oreos and freeze-dried strawberries.
Preheat the oven to 350 degrees Fahrenheit and spray a 9×13 baking dish with pan spray. Set aside.
Add the cake mix, jello powder, eggs, oil, and milk to a large bowl. Use a hand or stand mixer fitted with the paddle attachment and beat on medium speed for 2 minutes.
Add the batter to the prepared baking dish and bake for 25-30 minutes until a toothpick comes out clean from the center and the center springs back when lightly pressed on. Let the cake cool completely.
To prepare the topping, beat the cream cheese and powdered sugar in a bowl until smooth. Add ⅓ of the whipped topping and stir until smooth.
Fold in the remaining whipped topping and spread evenly over the top of the cooled cake.
Add the golden Oreos (without the filling) and the freeze-dried strawberries to a large ziplock bag and crush them with a rolling pin. You can crush them as much or as little as you’d like. I like a combination of chunky bits and crumbs. Sprinkle as much or as little as you’d like over the cake. I used about half of the mixture.
Pizza for breakfast? Yes please! A thin, crispy crust topped with salty bacon, a pile of soft scrambled eggs and melted cheddar cheese.. now that’s how I like to start my mornings!
I’m one of those people that likes to enjoy breakfast all day long. Eggs and bacon are my love language! If you’re looking for other recipes to make for breakfast (or any meal, really) try breakfast quesadillas, breakfast enchiladas, or this easy-to-make breakfast casserole!
Bacon Breakfast Pizza Recipe
Breakfast pizza? Pizza for breakfast? Now we’re talking! Even though this recipe is simply bacon and eggs piled onto a pizza crust, trust me when I say that this breakfast pizza will earn you major brownie points with anyone you serve it to. Total cool Mom status, right?
First, scramble up some eggs until they are just cooked through but still nice and soft. They’ll cook a little more in the oven later, so keep them just a tad on the undercooked side. Add them to some refrigerated pizza dough for easy prep along with “pizza sauce” made with Dijon mustard and mayo, then cover with bacon and shredded cheese. Pop it in the oven, and voila! Easy, cheesy, breakfast pizza magic.
Ingredients for Bacon and Cheddar Breakfast Pizza
This is everything I used to make this bacon and cheddar breakfast pizza. It uses a lot of simple ingredients but is so incredibly delicious! I know your family will love it as much as mine does.
Refrigerated Pizza Crust Dough: Premade to make your life a little easier. I used Pillsbury thin crust! (If you want the freshest flavor possible, though, another great option is this quick and easy homemade pizza dough!)
Chopped Bacon: Using precooked bacon is another great way to cut down on time.
Eggs: Beaten together to create the scramble.
Milk: So your scrambled eggs turn out fluffy and tender!
Salt and Pepper: Used to season the eggs. You can also add a dash of seasoning salt or any other spices you prefer!
Shredded Cheddar Cheese: Because every good pizza needs tons of gooey, melted cheese, right? I love the melty, savory flavor that cheddar adds, but you can also swap this out for other cheeses like monterey, colby, or pepper jack.
Mayonnaise and Dijon Mustard: Mixed together to create a creamy and tangy “pizza sauce.”
Chopped Green Onions: For a garnish on top! These add a hint of delicious onion flavor that brings the dish together.
Let’s Make Pizza for Breakfast!
Bacon breakfast pizza is SO easy to make and only takes 20 minutes from start to finish. So, even if you’re short on time you can still fuel up your kids with this hearty, delicious breakfast!
Preheat Oven, Bake Crust: Preheat oven to 400ºF. Spread the pizza crust on a baking sheet and bake for 5 minutes.
Cook Bacon: In a large skillet, cook the chopped bacon until crisp and remove to a plate. Drain all but 1 tablespoon of the bacon drippings from the skillet.
Scramble Eggs: Add the eggs, milk, salt and pepper to a bowl and whisk until well combined. Pour the eggs into the skillet with bacon drippings and scramble until just set, about 2-3 minutes.
Add Sauce: Mix the mayonnaise and Dijon mustard in a small bowl and spread a thin layer over the pizza crust as a “sauce.”
Layer With Toppings, Bake: Add the scrambled eggs over the sauce, then top with the cheddar cheese and bacon. Bake the pizza for another 5-7 minutes until the crust is golden and the cheese is melted.
Add Garnish and Serve: Sprinkle with chopped green onions. Cut yourself a nice, big slice, and enjoy!
Customize Your Pizza
Just like a traditional pizza, you can switch up the sauces and toppings for your breakfast pizza to make it your own. It’s a great recipe for using up leftovers in your fridge!
Make Your Own Crust: Even though it seems like it would take a lot of effort, making a homemade crust is super easy. Check out my simple recipe here!
More Toppings: If it works in an omelet, you can use it for your breakfast pizza. Try crumbled sausage, ham, chopped avocados, tomatoes, bell peppers, onions, mushrooms, or spinach.
Finishing Touches: Want a little heat? Add a a drizzle of your favorite hot sauce! Cholula is my family’s go-to.
Storing Leftovers
This bacon breakfast pizza makes great leftovers. Here are a couple of options to keep it fresh:
In the Refrigerator: Wrap pan tightly with plastic wrap or transfer to an airtight container. It will stay good for up to 3 days.
In the Freezer: In an airtight container or freezer bag, your bacon and cheddar breakfast pizza will last for a month or two. Thaw overnight in the fridge before you reheat it.
To Reheat: Pop a slice in the microwave for a minute or two, or warm in the oven for 10-15 minutes at 350 degrees Fahrenheit. This is the best method if you want to keep the crust crispy.
More Breakfast Favorites
They say it’s the most important meal of the day, so start yours out right! These are a few of my favorite breakfast recipes that are not only easy to make, but super delicious and will keep you satisfied until lunchtime.
Pizza for breakfast? Yes please! A thin, crispy crust topped with salty bacon, a pile of soft scrambled eggs and melted cheddar cheese.. now that's how I like to start my mornings!
CourseBreakfast
CuisineAmerican
Keywordbacon and cheddar breakfast pizza, breakfast pizza, breakfast pizza recipe
Prep Time15 minutesminutes
Cook Time5 minutesminutes
Total Time20 minutesminutes
Servings8Slices
Calories437kcal
AuthorAlyssa Rivers
Ingredients
1packagerefrigerated pizza crust doughI used Pillsbury thin crust
Preheat oven to 400ºF. Spread the pizza crust on a baking sheet and bake for 5 minutes.
In a large skillet, cook the chopped bacon until crisp and remove to a plate. Drain all but 1 tablespoon of the bacon drippings from the skillet.
Add the eggs, milk, salt and pepper to a bowl and whisk until well combined. Pour the eggs into the skillet with bacon drippings and scramble until just set, about 2-3 minutes.
Mix the mayonnaise and Dijon mustard in a small bowl and spread a thin layer over the pizza crust as a "sauce"
Add the scrambled eggs over the sauce, then top with the cheddar cheese and bacon. Bake the pizza for another 5-7 minutes until the crust is golden and the cheese is melted. Sprinkle with chopped green onions and cut into slices to serve.
Notes
Originally posted on May 14, 2014Updated on May 23, 2023
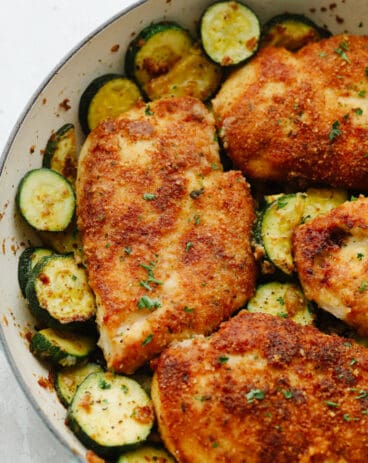
Deliciously seasoned chicken cutlets are breaded and pan-fried until golden brown and crispy. Chicken Milanese is a classic Italian recipe that is fast, easy, and sure to be a weeknight favorite!
We love chicken at our house, and I always look for easy chicken recipes for my family. Chicken Milanese cooks up quickly because the cutlets are thin. I love it when dinner doesn’t require a lot of cooking time! Try some of my fast and easy chicken recipes that are made in the air fryer like this delicious recipe or these popular drumsticks. I also love slow-cooker chicken recipes like this one!
What Is Chicken Milanese?
Originating in the city of Milan, Italy, chicken Milanese is known as a breaded and pan-fried thin cut of meat. It can be made with veal or pork, but chicken is our favorite! The breading gets crispy and golden on the outside, but the chicken remains tender and moist on the inside. I also like to use seasonings and Parmesan cheese for added flavor! You are going to love my recipe!
I love how versatile chicken Milanese is because the flavors are delicious yet simple. It’s a perfect meal for a busy weeknight or to impress dinner guests. This chicken recipe would pair well with any side dish you desire! It is commonly served with a simple side salad. But I love to serve it with roasted potatoes, grilled asparagus, and these easy homemade rolls.
Ingredients For Chicken Milanese
I love that this recipe uses so many basic ingredients. With just a few pantry seasonings, flour, and bread crumbs, you can create a tasty breading for your cutlets! Set up your breading station and you are good to go! The measurements can all be found in the recipe card below.
Chicken Breasts: I use boneless skinless chicken breasts and cut them lengthwise to be thinner. Then I pound the cutlets to be 1/4-inch thick.
Eggs: Used for dipping to help the breading stick to the chicken.
Salt: Salt enhances the overall flavor.
Pepper: For seasoning and to balance out the flavors.
Italian Seasoning: I love to use Italian seasoning to flavor my chicken! You can get this from the store or make your own blend at home.
All-Purpose Flour: I use all-purpose flour in this recipe to give structure to the breading. You can also use whole wheat flour as an alternative.
Bread Crumbs: I use plain breadcrumbs in this recipe, but you can use Italian breadcrumbs. It’s a great shortcut! Panko breadcrumbs work as well.
Parmesan Cheese: I like to use freshly grated parmesan for the best possible flavor!
Olive Oil: I like to use olive oil for frying, but vegetable oil works too.
Lemon Wedges: For serving and to garnish.
Chicken Milanese Recipe
This chicken Milanese recipe will be a new family favorite! Once the chicken is breaded then it cooks up in minutes because the cutlets are so thin. You’ll have golden brown and tender chicken in no time! Follow my super easy instructions below.
Prepare the Chicken: Cut the chicken breasts in half lengthwise. Use the flat end of a meat mallet to pound the chicken to about 1/4-inch thick. Use a rolling pin if you don’t have a mallet. Cover the chicken with plastic wrap and pound it thinner using a rolling pin.
Mix the Egg Mixture: In a large shallow dish, whisk your eggs, salt, pepper, and Italian seasoning together.
Prepare the Breading Station: In a second shallow dish add the flour, and in a third shallow dish add the breadcrumbs and parmesan cheese. Mix the breadcrumbs and cheese together in their dish.
Bread the Chicken Cutlets: Place a cutlet in the flour dish, covering both sides. Shake off any excess flour then dip the floured cutlet into the egg mixture. Evenly coat the chicken and allow any excess egg to drain off. Then coat the cutlet in the breadcrumbs and cheese mixture. Set the breaded chicken onto another dish while you bread the remaining cutlets.
Cook the Chicken: Heat the oil in a large skillet over medium heat. Fry the chicken for about 4 minutes per side. The internal temperature of fully cooked chicken is 165 degrees Fahrenheit.
Serve and Enjoy: Place the cooked chicken on a paper towel-lined plate to soak up any excess frying oil. Serve with fresh lemon wedges and your favorite sides because lemon makes everything better!
Tips and Tricks
Feel free to make this chicken Milanese your own by adding different seasonings. This recipe is easy to make and you can have your kids help you! My kids love to help with the breading station. Just follow my tips and tricks below for success in making this delicious chicken recipe! You’re going to love how easy it is.
Breadcrumbs: I like to add seasonings and herbs to plain breadcrumbs because I can control the flavors. But you can omit the Italian seasoning and just buy premade Italian breadcrumbs. Panko breadcrumbs also work!
Spices: You can definitely mix this up and add different spices and seasonings to your breadcrumb mixture.
Press: Press the crumbs onto the chicken cutlets because helps the coating to stick.
Crowding: You don’t want to overcrowd the pan.
Don’t Overcook: Use a meat thermometer to test for doneness and make sure you don’t overcook the cutlets. You are looking for a temperature of 165 degrees Fahrenheit.
Storing Leftovers
With a dinner as good as chicken Milanese, there’s a slim chance you’ll even have leftovers! Here’s how to keep it for a quick and tasty lunch the next day. You can even make extra chicken to eat all week! Just switch up the sides and your family won’t mind.
In the Refrigerator: In an airtight container, your chicken Milanese will keep in the fridge for 3-4 days.
In the Freezer: In an airtight container, store your chicken in the freezer for up to 2 months. Thaw overnight in the refrigerator before reheating.
Reheating: You can reheat your chicken in the air fryer for 8-10 minutes at 350 degrees F. This helps to keep the outside nice and crispy! The internal temperature should be 165 degrees Fahrenheit before consumption.
More Delicious Chicken Dinners
If you love chicken Milanese, I have more delicious chicken recipes for you to try! Chicken has a mild flavor on its own, so it’s easy to marinate and flavor it any way you like it. Whether your air frying it, put it on the grill, in the slow cooker or instant pot, it’s just wonderful. Try these other incredible chicken recipes.
Deliciously seasoned chicken cutlets are breaded and pan-fried until golden brown and crispy. Chicken Milanese is a classic Italian recipe that is fast, easy, and sure to be a weeknight favorite!
Cut the chicken breasts in half lengthwise. Use the flat end of a meat mallet to pound the chicken to about 1/4-inch thick. You can also cover the chicken in plastic wrap and use a rolling pin to pound it thinner if you don't have a meat mallet.
In a large shallow dish, whisk your eggs, salt, pepper, and Italian seasoning together.
In a second shallow dish place your flour, and in a third shallow dish place your breadcrumbs and parmesan cheese. Mix the breadcrumbs and cheese together in their dish.
Place a cutlet in the flour dish, covering both sides. Shake off any excess flour then dip the floured cutlet into the egg mixture. Evenly coat the chicken and allow any excess egg to drain off.
Coat the cutlet in the breadcrumbs and cheese mixture. Set the breaded chicken onto a plate while you bread the remaining cutlets.
Heat the oil in a large skillet over medium heat. Fry the chicken for about 4 minutes per side. The internal temperature of fully cooked chicken should reach 165 degrees Fahrenheit.
When all the chicken is cooked, you can place them on a paper towel lined plate to soak up any excess frying oil.
Serve with fresh lemon wedges and your favorite sides!
Notes
You can place the chicken on a baking sheet and into the oven at 200 degrees Fahrenheit until ready to serve if you desire. This will also keep the chicken warm in the oven while you cook the remaining cutlets.