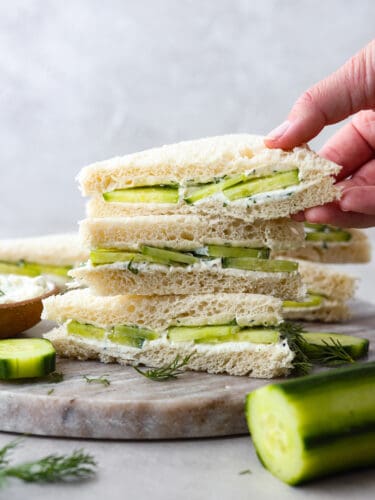
Cool and crisp, cucumber sandwiches are the perfect summer appetizer! Each sandwich is lined with a creamy lemon herb spread for a pop of zesty flavor. You’ll love them!
Cucumber sandwiches are so easy to make and the perfect finger food for parties, picnics, and more! For more great crowd-pleasing appetizers, try these avocado deviled eggs, bruschetta, or a simple charcuterie board!

Cucumber Sandwich With Creamy Lemon Dill Spread
Cucumber sandwiches are a traditional English dish usually reserved for tea parties. They consist of thin slices of cucumber on crustless, buttered bread. Today’s recipe features an AMAZING cream cheese spread flavored with zesty dill and lemon. Cucumber sandwiches may seem simple, but trust me, they taste out of this world! They’re cool, crisp, and beyond flavorful!
Cucumber sandwiches are a great appetizer for baby and bridal showers because not only do they taste amazing, but they’re super easy to whip up for a crowd! Soft white bread, crisp cucumber, and a creamy spread loaded with fresh herbs are the fixings of a perfect summer dish! They’re great for school lunches too! My kids are obsessed with dill pickles so this is one of their favorite treats.
Cucumber Sandwich Ingredients
The great thing about this cucumber sandwich recipe is that it uses super simple ingredients! However, I do recommend using fresh herbs to give your creamy spread the best flavor possible. Measurements for each of these ingredients can be found in the recipe card at the end of the post.
- Cream Cheese: This acts as the foundation of your spread. It makes it thick and creamy!
- Mayonnaise: You can use storebought mayo or make your own at home! Find my full recipe here.
- Lemon Juice: Lemon and dill are a match made in heaven! Use fresh lemon juice if possible for the best flavor.
- Chives: I love adding chopped chives to dips and spreads because they add delicious savory flavor to each bite. You can also use chopped green onions as a substitute!
- Herbs: I used a combination of fresh dill and parsley for bright, zesty flavor!
- Salt and Pepper: Add both to taste!
- Cucumbers: I used English cucumbers because they have a sweeter, more delicate flavor and don’t require peeling!
- White Bread: The traditional version of this recipe has crusts removed, but you can keep the crust on if you’d like! Also, feel free to experiment with different types of bread. Whole-grain breads work, too!
How to Make Cucumber Sandwiches
This is the perfect appetizer to make in a pinch! Cucumber sandwiches come together in minutes! They’ve been a life-saver for when I need to bring something to a potluck and I’m short on time.
- Prepare Cream Cheese Mixture: In a bowl add your cream cheese, mayonnaise, lemon juice, chives, dill, parsley, salt and pepper, and mix it all together.
- Add to Bread Slices: Take two slices of bread and spread the mixture on each one.
- Layer With Cucumber Slices: Layer your cucumber slices on top of one slice, and then put the pieces of bread together.
- Cut and Serve: Cut it in half diagonally to make a triangle. Serve immediately.

Tips for Making Successful Cucumber Sandwiches
While this recipe is super easy to make, there are a few things to keep in mind to take it to the next level! These are a few ways to perfect and customize this classic English dish.
- Salt Cucumbers: Salting your cucumber slices can keep your sandwiches from becoming soggy. Cucumbers have a very high water content, and salt helps to remove excess moisture. This tip is especially important if you plan on making these sandwiches ahead of time! Transfer your sliced cucumbers to a large bowl and add a sprinkle of salt. After about 20 minutes, your cucumbers will be ready to use.
- Flavor Cucumbers: A great way to add more pickle flavor is to toss your cucumber slices in white vinegar before adding them to your sliced bread.
- Use a Sharp Knife: The key to uniform sandwich pieces with crisp edges is to use a sharp, serrated knife.

Storing Leftovers
Store your leftover cucumber sandwiches for the perfect grab-and-go snack! They’re great for putting into school lunches as well.
- In the Refrigerator: Leftover sandwiches will last for up to 4 days either covered in plastic wrap or in an airtight container.

More Tasty Sandwich Recipes

Copycat Recipes
Monte Cristo Sandwich (Disneyland Copycat)

Dinner
Copycat Chick-fil-A Sandwich

Dinner
Sloppy Joe Grilled Cheese
Dinner
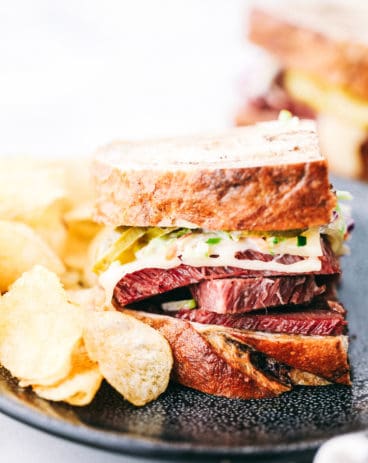
Corned Beef Sandwich

Cucumber Sandwich
Ingredients
- 8 oz cream cheese softened
- 2 tablespoons mayonnaise
- 1 tablespoon lemon juice
- 1 tablespoon chives or green onions chopped
- 1 tablespoon dill chopped
- 1 teaspoon parsley chopped
- salt and pepper to taste
- 2 cucumbers peeled and sliced
- 8 slices of white bread crusts removed
Instructions
-
In a bowl add your cream cheese, mayonnaise, lemon juice, chives, dill, parsley, and salt and pepper and mix it all together.
-
Take two pieces of bread and spread the mixture on each one.
-
Layer your cucumber slices on top of one slice, and then put the pieces of bread together.
-
Cut it in half diagonally to make a triangle. Serve immediately.
Nutrition
source https://therecipecritic.com/cucumber-sandwich/