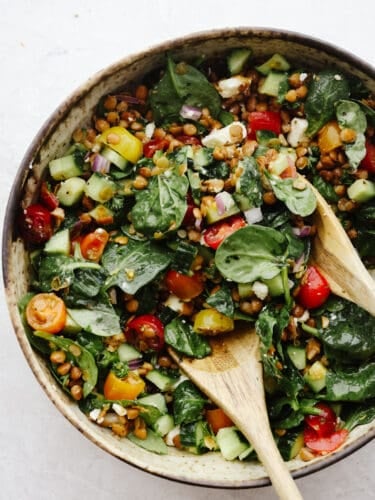
This hearty salad is a keeper! Filled with green lentils, spinach, cucumber, and crumbled feta cheese, drizzled with smooth Italian dressing, lentil salad is the best way to put a boost of flavor and nutrition into your day.
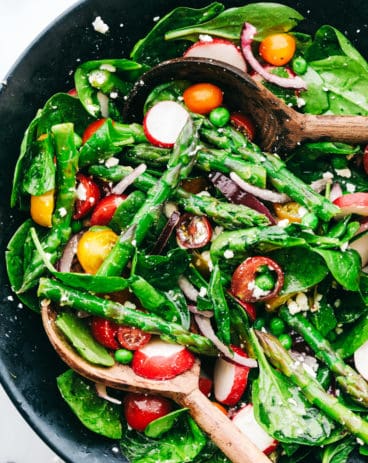
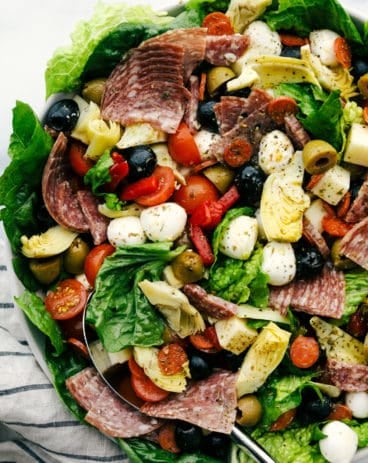
Salads don’t have to be boring! Wedge salad, Italian chopped salad, and blackberry blue cheese salad are just a few of my many favorites. They’re soooo good and bursting with flavor! Honestly, just as satisfying and delicious as a hearty meal!
Easy Green Lentil Salad Recipe
I’ve been a little obsessed with all of the Easter treats going up on the blog lately, so I decided I needed a little healthy balance. To me, there’s no better way to reset than with a tasty salad filled with flavor! This lentil salad is easily one of my new favorites. It’s fresh, flavorful, and loaded with the best texture! Lentils really are a great addition, and they’re super healthy to boot!
Each little lentil is filled with fiber and potassium. They’re also great for keeping cholesterol levels low! They taste absolutely amazing in soup, so I knew they’d be just as delicious sprinkled in a green salad! Next item of business- the dressing. Because what would salads be without them? This lentil salad is tossed in a homemade Italian dressing, made with tasty ingredients like olive oil, garlic, honey, and herbs. It’s the perfect way to complement fresh vegetables! This simple salad is the whole package and the kind of thing that makes you look forward to lunchtime. Let’s get started!
All Ingredients Needed
These are the ingredients I used to make this salad, but you can always mix and match with things you have in your fridge! That’s the beauty of salads- they taste good with so many different additions! Check out the recipe card at the bottom of the post for exact measurements.
Baby Spinach: Baby spinach is one of my favorite greens to use as a salad base. It’s so soft and tender!
Green Lentils: You can use either cooked or canned, whatever you prefer!
Fresh Parsley: Adds an earthy, aromatic flavor.
English Cucumber: Sliced cucumber is the best. It’s the perfect refreshing, crunchy addition to any salad!
Grape Tomatoes: I used heirloom grape tomatoes!
Feta Cheese: Feta adds a tangy pop of flavor! Not to mention, its crumbly texture is absolutely delicious in this lentil salad. You can swap this out for ricotta or parmesan, as well.
Dressing
Olive Oil: The foundation of the dressing! It adds an earthy, delicate flavor and helps the dressing ingredients stick together.
Fresh Lemon Juice: Nothing complements greens like a pop of citrus!
Garlic: Minced garlic adds the best savory flavor.
Honey: Gives the dressing a smooth texture and sweetness.
Kosher Salt: I like adding kosher salt because it has a chunkier grain and a more pure flavor.
Pepper: Added to enhance the overall flavor of the lentil salad.
Red Onion: Adds a bit of crunch and sharp flavor.
How to Make Lentil Salad
Lentil salad is so easy to make. It’s great for an anytime meal! It’s also the perfect side dish to accompany dinner. Your friends and family will love its fresh, delicious flavor! And if you’re looking for more easy, tasty salads, find my complete list of spring salads here.
Prepare Lentils: If using canned lentils, drain and set aside. If using raw lentils, cook according to directions. Drain and set aside lentils to cool.
Whisk Dressing Ingredients: To prepare the dressing, whisk together the olive oil, lemon juice, garlic, honey, seasonings, salt, and pepper. Then set it aside.
Add Salad Ingredients to Large Bowl: To assemble the salad, add all the salad ingredients to a large bowl.
Toss and Serve: Toss with the dressing and then enjoy!
Tips, Tricks, and Variations
Here are a few simple ways to perfect this hearty lentil salad. It’s also great for making ahead! There’s nothing better than a tasty meal that’s ready to be eaten right out of the fridge!
Keep Lentils Firm: I always prefer to cook my own lentils as opposed to buying them canned. This way, I have more control over their texture. I like to cook them just until tender, still slightly firm. They will absorb dressing as the salad sits, making them soften. You don’t want them to be soggy.
Flavor Additions: Because this salad is nice and fresh and has a light dressing, you can add just about anything to it. Fresh or dried fruit and chopped nuts are both great additions! Also, if you’re looking to add more protein, tofu and shredded chicken are great in it, too.
Making Ahead: If you’re wanting to make lentil salad in advance, it’s best if you store the salad and dressing separately. It can be kept in the fridge for 3 days before it needs to be consumed.
Storing Leftover Salad
Like most green salads, this one is best served fresh so you can enjoy all the flavor the veggies have to offer! If, however, you have leftovers, lentil salad will keep in the fridge for a few days before it needs to be thrown out.
In the Refrigerator: Store for up to 4 days in an airtight container or bowl covered with plastic wrap.
Note: If you want to keep your salad from becoming soggy, store salad and dressing separately.
More Healthy and Delicious Salads
If you’re wanting more salad recipes that are fresh, delicious, and packed with bold flavor, look no further! These recipes are so delicious and in my lunch lineup all the time! Whether you’re wanting a quick lunch, a side for dinner, or something to take to a potluck, these flavorful salads won’t disappoint! Enjoy!
This hearty salad is a keeper! Filled with green lentils, spinach, cucumber, and crumbled feta cheese, drizzled with smooth Italian dressing, lentil salad is the best way to put a boost of flavor and nutrition into your day.
CourseDinner, Salad
Keywordvegetarian
Prep Time10minutes
Cook Time15minutes
Total Time25minutes
Servings4
Calories412kcal
AuthorAlyssa Rivers
Ingredients
For the Salad
2cupsbaby spinach
1 1/2cupsgreen lentils(cooked or canned)
1/4cupfresh parsley,chopped
1cupEnglish cucumber,diced
1cupgrape tomatoes,halved (I used heirloom grape tomatoes)
30-minute meals are my go-to meals at least a few times a week! Quick, easy, and incredibly delicious, there are so many to choose from!
There are just some days that a quick meal is a must! I have rounded up some of my very favorite meals that you can make in under 30 minutes! It doesn’t get much better than that! Start out with these shrimp fajitas, this honey garlic stir fry, or this amazing chicken parmesan!
Quick and Easy Meals in Under 30 Minutes
During the school year, I am constantly on the go! Between all of my work, family events, and my kid’s school and activities, I am busy! And I know that I’m not the only one! My goal is to make sure that we have at least our meals together during the week. Even if it only means sitting down for 10 minutes together! But in order to do this, I can’t be spending the entire day in the kitchen! This is why I love all of these 30 minute easy meals!
I have rounded up all of my very favorite meals that are easy and take less than 30 minutes to make! That way, I can spend my time eating amazingly delicious food AND still have some time to sit down and ask my family how their day went. Plus, a meal that doesn’t take that long AND tastes like you’ve been cooking all day is a win in my book! Take a look at these recipes and try some of them out! You will be surprised at how good something can taste, even when it’s quick and easy! Enjoy!
Tips for Quick Meals
If you truly want to make these meals in 30 minutes, some of them require a little prep work! Here are a few tips to making that happen!
Meal plan: If you plan your easy 30 minute meals ahead of time and do the grocery shopping at the beginning of the week then this will all work out! There is nothing more frustrating than going to cook a meal and realizing that you need to go to the store for ONE thing. And that definitely takes away from cooking it up in 30 minutes! So prepare your meal plan and groceries ahead of time and you will be so glad that you did!
Room temperature ingredients: Some recipes (especially ones that you bake) call for room temperature ingredients. So pull those out a little bit ahead of time so that they are ready to go when you are!
Thaw meat: If you have frozen meat, you will want to take that out and thaw it in the fridge overnight. These recipes will need thawed or fresh meat. If you forget, you can cook some recipes with frozen chicken in the pressure cooker. Find pressure cooker recipes here in case that happens to you!
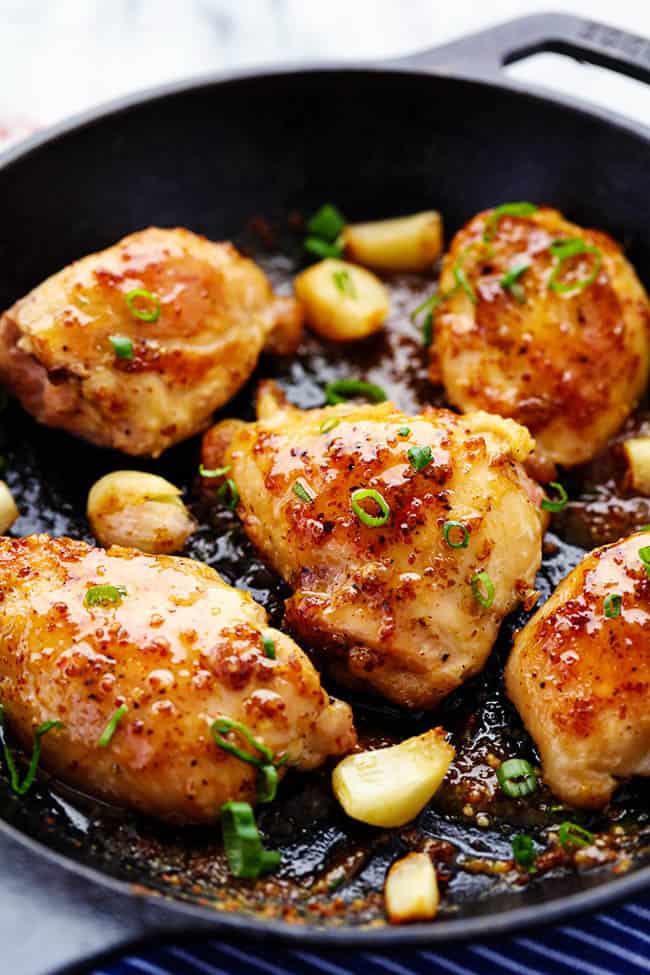
A quick and easy 30 minute meal that is packed with amazing honey dijon garlic flavor! The chicken is so juicy and tender and the sauce is sweet and tangy… you are going to love it!
Ingredients: boneless, olive oil, garlic cloves, honey, stone ground dijon mustard, salt and pepper to taste, green onions or fresh parsley for garnish
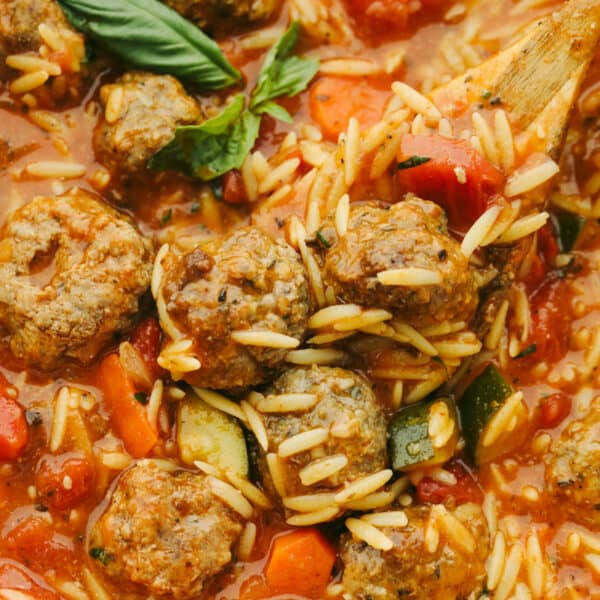
This meatball soup is hearty and full of amazing flavor. It only takes about 30 minutes to cook up and can be made with homemade or frozen meatballs! It's a MUST TRY recipe for sure!
Ingredients: olive oil, onion, minced, carrots, sliced, zucchini, chopped, garlic, minced, diced Italian tomatoes, beef broth, dried Italian seasoning, onion powder, salt, meatballs, frozen or homemade, dry orzo, or dry small pasta of choice, marinara sauce , fresh parsley, chopped, fresh parmesan cheese, grated
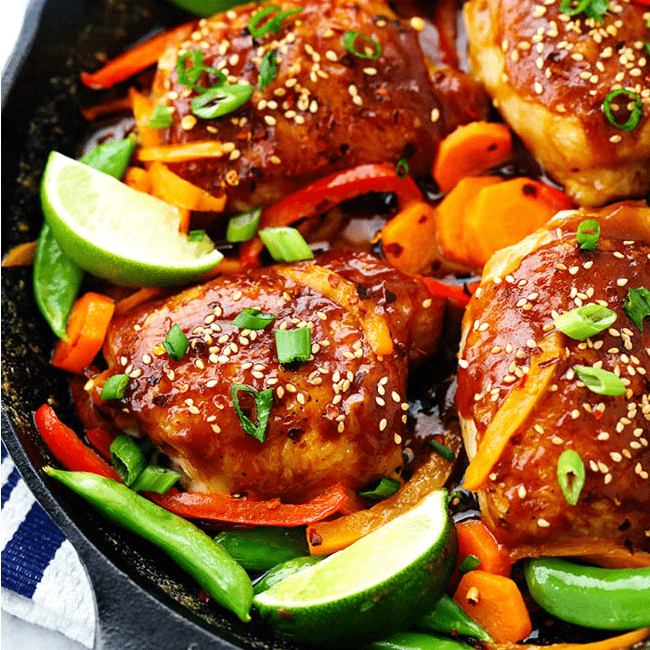
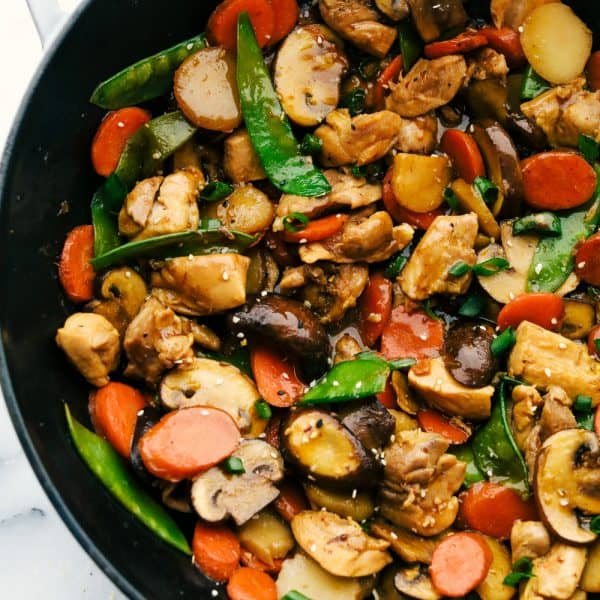
A 30 minute one skillet meal that is full of amazing flavor and veggies! The Thai peanut sauce glazes the chicken perfectly and this will be a hit for dinner!
Ingredients: chicken, Oil, Large Carrot, Red Bell Pepper, Orange Bell Pepper, soy sauce, water, peanut butter, white vinegar, brown sugar, garlic cloves, Juice of one lime, steamed snow peas, Red pepper flakes, green onions
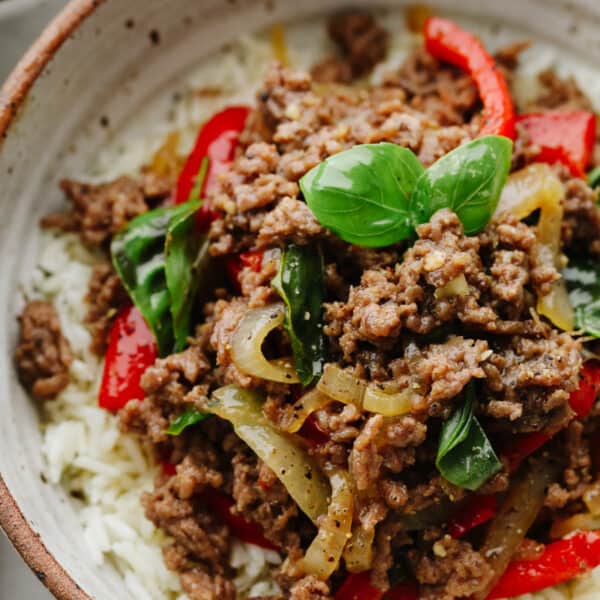
Thai basil beef is simple and delicious! It's made with a homemade Thai sauce that has a bold and brilliant flavor and can be thrown together in less than 30 minutes. It is SOO GOOD!
Ingredients: vegetable oil, shallots, garlic, fresh ginger, red bell pepper, lean ground beef, brown sugar, fish sauce, low sodium soy sauce, oyster sauce, Asian garlic chili paste, low sodium beef broth, water, cornstarch, basil leaves*, Cooked Jasmine rice
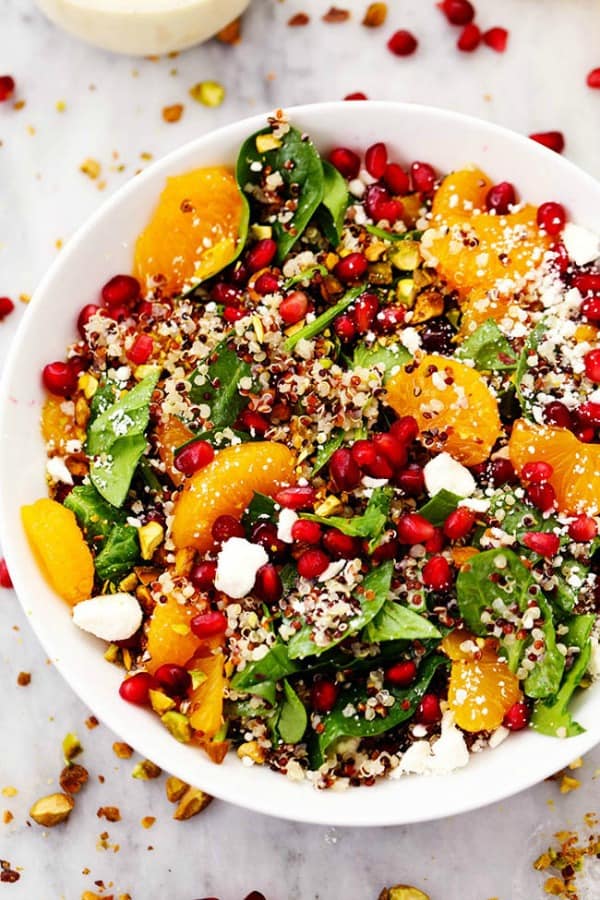
A mouthwatering winter salad with quinoa, spinach, mandarine oranges, and crunchy pistachios. Topped with a creamy lemon greek yogurt dressing and feta cheese this makes one unforgettable salad!
Ingredients: quinoa, spinach, mandarine oranges, pomegranate seeds, pistachios, crumbled feta cheese, juice from one fresh lemon, apple cider vinegar, sugar, minced garlic, plain Greek yogurt, extra virgin olive oil, salt, freshly ground black pepper
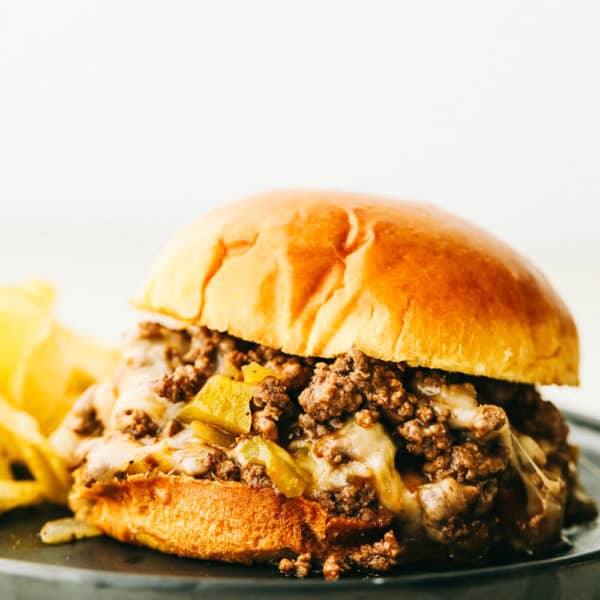
This easy and comforting philly cheese steak sloppy Joe is made in less than 30 minutes and instantly became a family favorite. The flavor combination and melted cheese makes these sloppy joes irresistible!
Ingredients: Extra Virgin Olive Oil, Ground Beef, Onion , Green Pepper , Steak Sauce, Beef Broth, Cornstarch, Water, Hamburger Buns, Provoline Cheese, Salt and Pepper to Taste
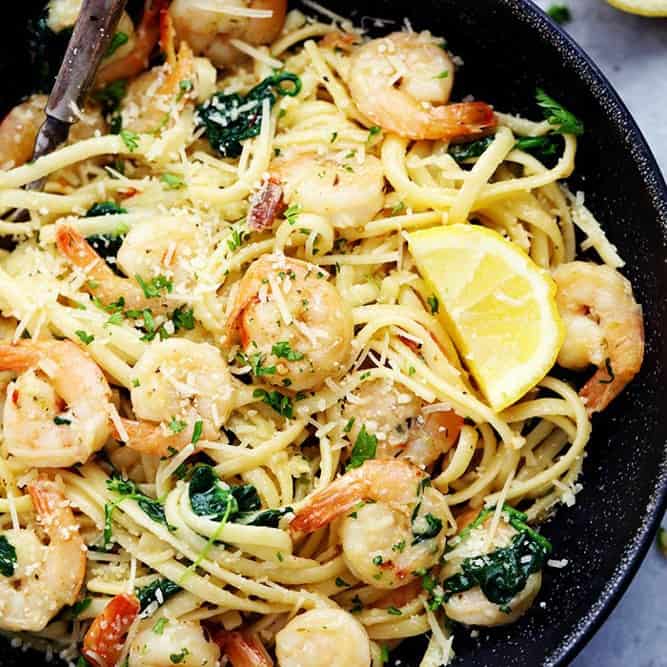
Lemon Garlic Parmesan Shrimp Pasta is made in just one pot and ready in 30 minutes! Fresh shrimp gets cooked in a buttery lemon garlic sauce and gets tossed in fresh parmesan cheese and pasta. It will become a new favorite!
Ingredients: Linguine Pasta, olive oil, butter, garlic, red pepper flakes, large shrimp, salt and pepper to taste, italian seasoning, baby spinach, parmesan cheese, parsley, lemon juice
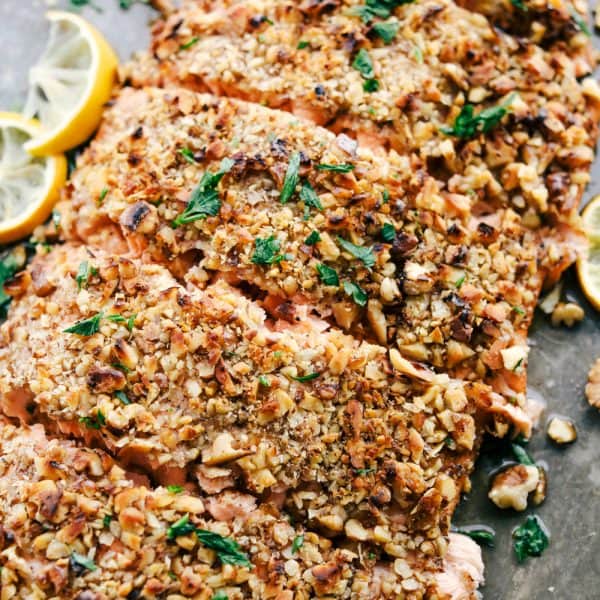
Walnut Crusted Maple Salmonis a savory salmon dish that is coated in a sweet maple syrup, delicious Dijon mustard coated with a thick walnut crust all baked to perfection. Baked in under 30 minutes!
Ingredients: salmon, salt and pepper, Maple Syrup, Dijon Mustard, Fisher Nuts Walnuts
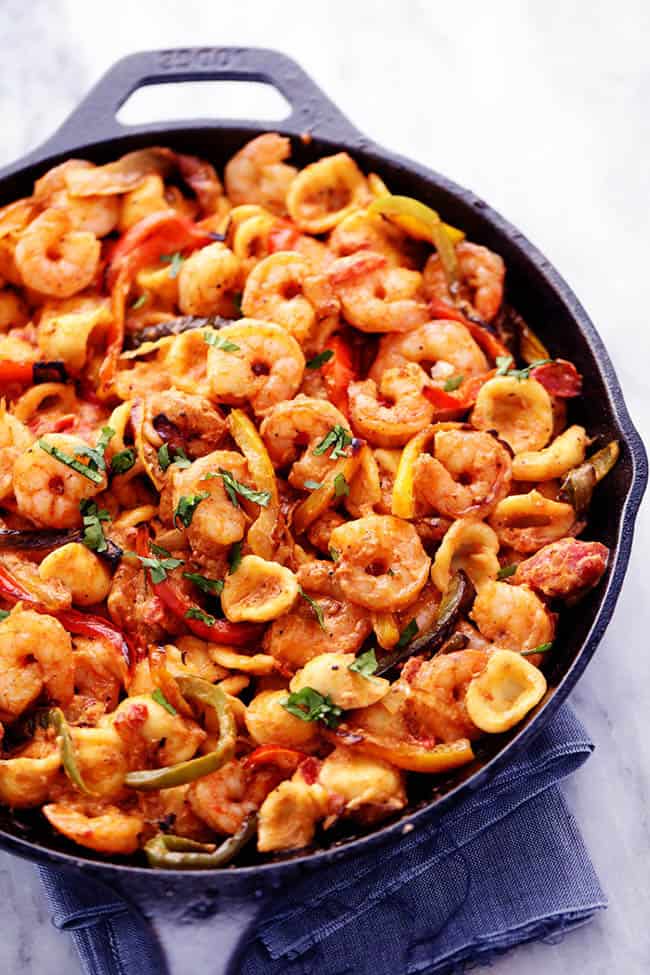
A quick and easy 30 minute meal that has all of the things that you love about a fajita. Bell Peppers, onions, pasta, and shrimp are in the most flavorful and creamy sauce that you are going to love!
Ingredients: pasta, olive oil, bell peppers, small onion, small shrimp, McCormick Fajita Recipe Mix, 14 ounce diced fire roasted tomatoes, chicken broth, heavy cream, cream cheese, shredded cheddar cheese, chopped cilantro for garnish
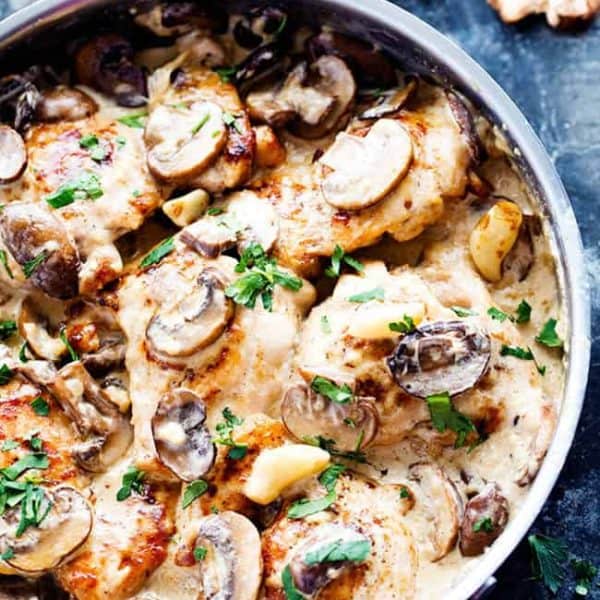
Moo Goo Gai Pan is a classic Chinese dish with tender chicken pieces and mushrooms then add in crisp vegetables such as carrots, water chestnuts, snow peas all stir fried together with a special white sauce poured over top and simmered all together. Way better than take out and only 20 minutes!
Ingredients: olive oil, chicken thighs, salt and pepper, large carrots, mushrooms, water chestnuts, snow peas, chicken broth, soy sauce, brown sugar, garlic, hoisin sauce, sesame oil, cornstarch, water, chopped green onions and sesame seeds for garnish
Denver Omelet Breakfast Muffins are such a great breakfast and perfect for making ahead or on the go! Loaded with Peppers, onions, ham and ooey gooey cheese, these will become a favorite!
Ingredients: onion, green pepper, chopped fully cooked ham, shredded cheddar cheese, eggs, half and half cream, salt, pepper, Sliced green onion for garnish
Easiest Homemade Pizza Ever! Foolproof, dough is ready in 20 minutes, best pizza ever and taken from my quick and easy dough recipe. Crispy crust with all your favorite toppings to make your pizza night a bonus!
Ingredients: warm water, sugar, yeast, flour, Salt
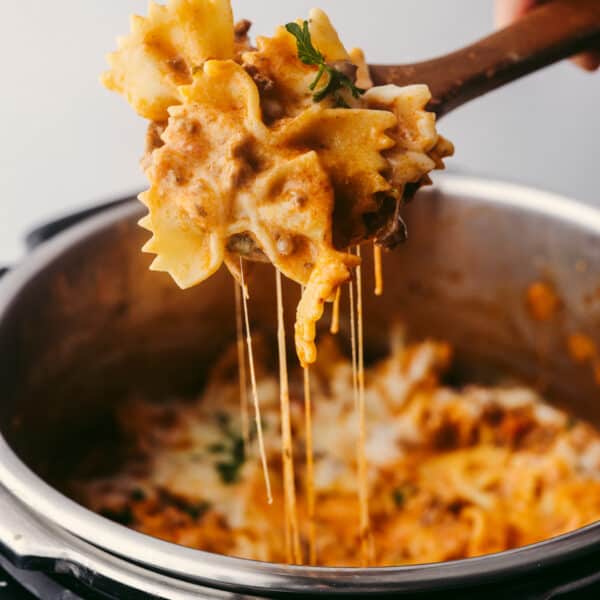
This Instant Pot recipe is filled with all the lasagna flavors you love! Layers of creamy ricotta, melty mozzarella, and ground beef seasoned with Italian herbs come together in this super easy dish!
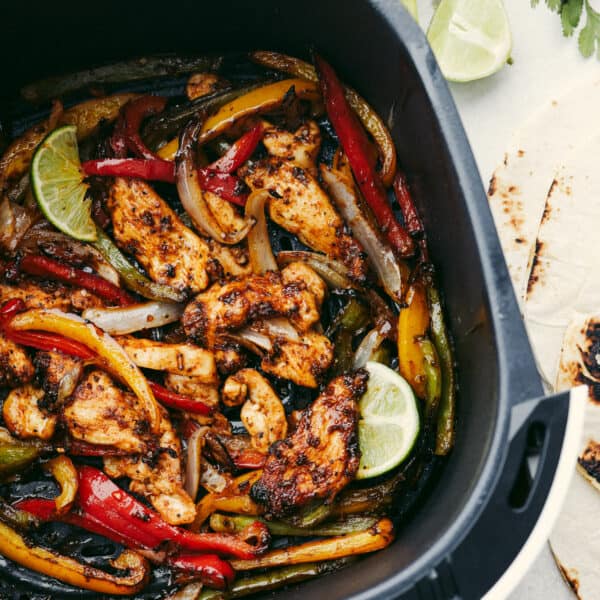
These air fryer fajitas are packed to the brim with flavor but only take a few minutes to make! They are perfect for those on-the-go, busy nights, and everyone will go crazy over them!
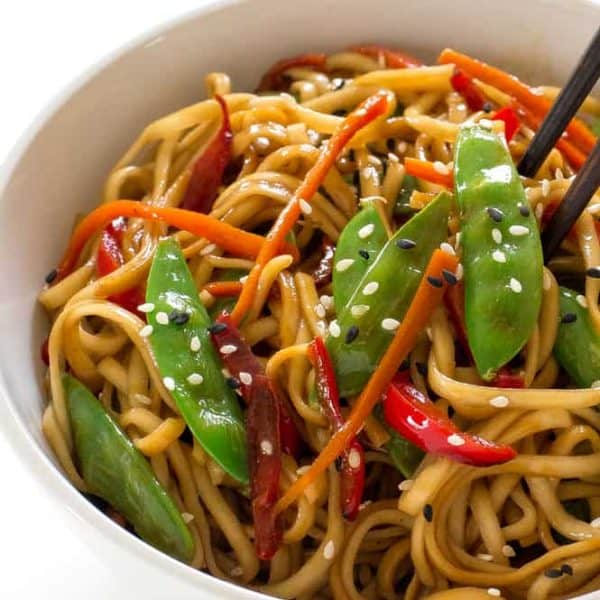
20 Minute Vegetable Lo Mein is a super easy weeknight dinner that is loaded with veggies! Crisp vegetables and long noodles all combined in a flavorful sauce the entire family will love it!
Ingredients: uncooked lo mein noodles or spaghetti, oil, red bell pepper, carrot, snow peas, garlic, sesame seeds for garnish, low sodium soy sauce, sesame oil, brown sugar, mirin
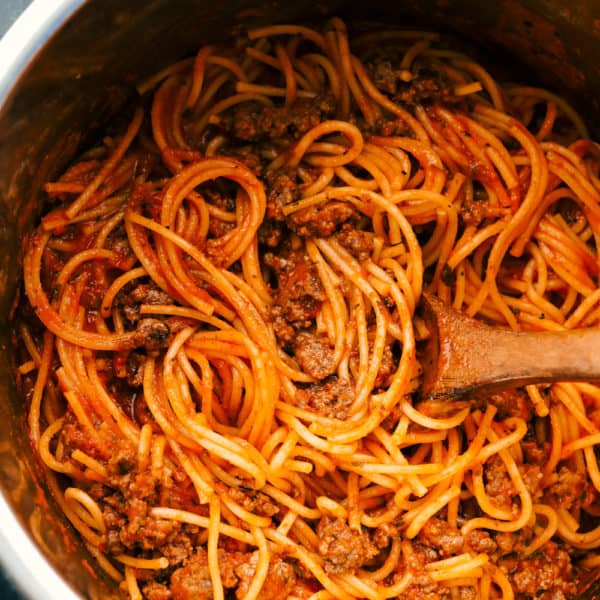
For those nights when you need something fast and easy turn to 10 minute Instant Pot Spaghetti. Superbly seasoned beef and tender noodles all cook together in a delectable sauce and is ready in no time.
Ingredients: olive oil, ground beef, Italian seasoning, garlic powder, salt, pepper, spaghetti noodles, marinara sauce, water
Hearty and delicious chicken and rice soup! Perfect with a loaf of crusty bread!
Ingredients: and ½ tablespoons unsalted butter, olive oil, medium red bell pepper, of 1 yellow onion, large carrot, large stalks celery, dried thyme leaves, 14.5 ounces EACH reduced-sodium chicken stock (or chicken broth) (stock has a richer flavor), and ½ cups water, package Knorr Rice Sides – Chicken Flavor Broccoli, prepared rotisserie chicken, Salt and freshly cracked pepper, Optional: fresh parsley
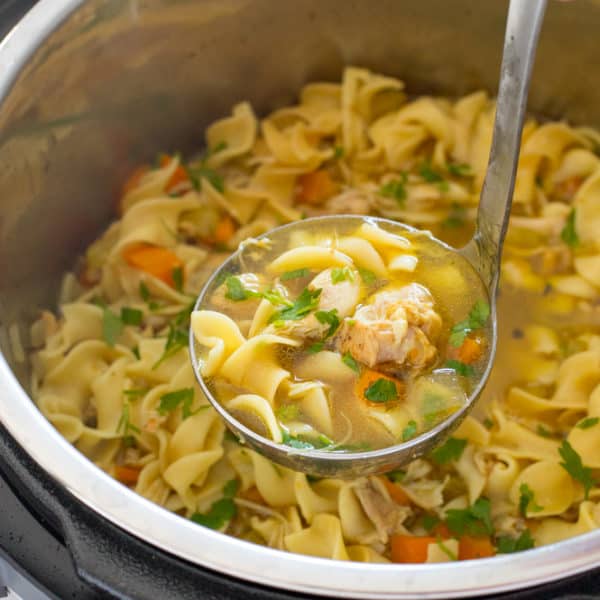
Instant Pot Chicken Noodle Soup made with chicken thighs, veggies and egg noodles.This soup is comfort food at it's finest! Ready in less than 30 minutes!
Ingredients: boneless skinless chicken thighs, onion, large dice, carrots, large dice, celery, large dice, salt, pepper, paprika, onion powder, garlic powder, low sodium chicken broth, fresh thyme (can substitute 1 tsp dried), bay leaves, sage leaves, chopped (substitute 1 tsp dried), uncooked egg noodles, fresh chopped parsley for serving
These fun and festive Easter egg cookies are the best dessert for Spring! The cookie base is sweet, soft, and buttery, topped with beautiful pastel royal icing as a colorful finishing touch!
Easter is just around the corner! Get your dessert lineup ready with these other tasty recipes! Easter cake, lavender cupcakes, and carrot cake cookies are just a few of my many favorites! Find my full list here.
Easter Egg Sugar Cookies With Royal Icing
You can’t go wrong with sugar cookies! They’re so buttery and soft, and you can frost them with whatever design you want! To get in the Easter spirit, today’s cookies are cute pastel Easter eggs to brighten up any party. I used royal icing to get the most precise design, but you can use your favorite frosting here instead! Buttercream and cream cheese frosting are both tasty choices!
These Easter egg sugar cookies are a great activity for the kids. I’ve included 3 designs to help get you started, but I think the fun part is coming up with your own! In no time, you’ll have sugar cookies that not only taste amazing but look amazing too! If you’re looking for more festive, delicious treats, you’ll have to try these awesome no-bake bird’s nest cookies, too! Making fun, themed treats is one of my favorite parts about holidays.
Sugar Cookie Ingredients
These Easter egg sugar cookies use a lot of basic baking ingredients which makes preparation a breeze! The only item I needed to get from the store was meringue powder for the royal icing. (This acts as a replacement for egg whites. Super useful if you’re wanting bakery-worthy icing without the hassle!) If you’re looking for measurements, they can all be found in the recipe card at the end of the post.
All-Purpose Flour: Gives the cookies a light structure.
Salt: A pinch is added to enhance the overall flavor!
Baking Powder: Baking powder is a must for light, soft cookies! Your cookies will turn out hard and dense if you don’t add it in.
Unsalted Butter: For richness and moisture.
Granulated Sugar: Gives your Easter egg sugar cookies the perfect amount of sweetness.
Egg Yolks: Egg yolks tenderize your dough, leaving you with a tender, more chewy cookie!
Sour Cream: The secret ingredient for ultra-soft cookies!
Vanilla Extract: A must for deep, complex flavor.
Lemon Extract: (Optional) I like to add a little lemon extract for a pop of zesty flavor! Lemon desserts are perfect for spring!
Powdered Sugar: Powdered sugar adds sweetness to your icing but also makes it nice and smooth.
Meringue Powder: This is a substitute for egg whites! Wanting to use egg whites instead? See my tips section below!
Water: For adjusting consistency.
Gel Food Coloring: I like using gel food coloring instead of liquid because it gives your icing more clarity and vibrance.
How to Make Easter Egg Sugar Cookies
This is a quick and easy recipe to make for all of your Spring get-togethers! Did I mention it only takes 8 minutes for the cookies to bake? Then all you’ve got to do is frost them! That’s my favorite part. Adding cute designs and seeing the Easter eggs take shape is so exciting!
Preheat Oven, Prep Cookie Sheets: First, preheat the oven to 350°F and line 2-3 cookie sheets with parchment paper.
Dry Ingredients: In a medium bowl, whisk together the flour, salt, and baking powder. Set aside.
Wet Ingredients: In another medium bowl, beat together the butter and sugar for 2-3 minutes until light and fluffy. Add the egg yolks, sour cream, and extracts and mix until combined.
Mix Wet and Dry Ingredients Together: Add the dry ingredients to the wet and mix until combined.
Shape: Split the dough into 2-3 pieces and roll them one at a time on a lightly floured surface until they are ¼ inch thick. Use your favorite cookie cutters to cut out your cookies. Press the scraps together and set aside to rest for about 5 minutes. Reroll the scraps and cut more cookies until all the dough has been used.
Bake: Place the cookies on the parchment-lined cookie sheets leaving 1 ½ inches between them. Bake for 6-8 minutes, rotating the pan at 4 minutes. I find this gives the cookies a nice, even bake. The edges will be just set and the cookies will be very light in color and should have very minimal coloring underneath them.
Cool and Frost: Let the cookies cool on the pan for 2 minutes for the shape to set before transferring to a cooling rack. Frost once they are cooled or store in an airtight container until you are ready to frost them.
Preparing the Royal Icing
Mix Dry Ingredients: Using an electric mixer with the whisk attachment, mix the powdered sugar and meringue powder together on low.
Stiff Frosting: Next, add 8 tablespoons of water and mix together on high speed for about 2 minutes. The icing should be pretty stiff. Add additional water 1 tablespoon at a time until the icing is about the consistency of soft-serve ice cream and forms soft peaks. Reserve 1 cup of frosting and cover tightly with plastic wrap.
Filler Frosting: With the remaining icing, add additional water 1-2 teaspoons at a time until when the whisk is raised the icing drips back into the bowl and the lines of icing take about 10 seconds to melt back into the icing. This is the thin icing that will be used to fill, or flood, your cookies. Separate into small bowls and tint the icing with your chosen colors. Cover each bowl tightly with plastic wrap when not being used. This icing will dry very quickly.
Tips for Sugar Cookies and Royal Icing
These Easter egg sugar cookies are super easy to make, but a few simple steps will help you achieve a bakery-worthy result! I hope you love these adorable cookies as much as I do!
Don’t Overmix: In order for your sugar cookies to turn out as soft and chewy as possible, only mix your batter until combined. If you overmix, gluten may develop and leave your cookies hard and rubbery.
Using Egg Whites: If you prefer, you can swap out meringue powder for raw egg whites. For every 2 tablespoons of meringue powder used, you can substitute 1 egg white.
Is My Royal Icing the Right Consistency? To make sure your royal icing is ready to use, use a spoon to scoop icing out of the bowl. Slowly pour it back in. When it drips back in, if it melts back into the icing in 10 seconds, you have the right consistency. If the mixture is too thick, add more water 1 teaspoon at a time. Similarly, if the icing is too thin, add more powdered sugar 1 tablespoon at a time. Note: For the Easter egg designs, you will need both thick icing and thin icing for filling/flooding. If you feel confident, you can try piping with just the thinner icing, but be careful to leave space on the edge of the cookie so the icing doesn’t run over the edge.
Piping Cookie Designs
Blue Cookie: Flood the egg with blue icing. While the icing is still wet, work quickly and pipe 4 pairs of green lines. Pipe yellow dots between the top two pairs of green lines and the bottom green lines. Pipe five yellow dots in the center of the cookie to be the centers of your flowers. Use the pink icing to pipe five dots around each flower center.
Pink Cookie: Flood the egg with pink icing. While the icing is still wet, use the blue to pipe three lines at the bottom of the egg and three loops at the top to look like a flower. Use green to pipe a zigzag in the center of the cookie and to outline the blue loops at the top. Use the yellow to make dots above and below the zigzag. If you want to make them look like tear drops, use a toothpick or a scribe tool to drag the top of the dot upwards. Wipe the toothpick or scribe off between making each teardrop.
Yellow cookie: Flood the egg with yellow icing. Use green to make 4 lines across the cookie. Use blue to make 5 swirly likes across the egg.
Frosting Tips
Royal icing can be tricky to work with, but if you keep these simple tips in mind you’ll be decorating your cookies like a pro!
Wet-On-Wet Technique: These Easter egg designs use a wet-on-wet decorating technique. This means the icing for the base of the cookie should still be very wet when the details are piped on. This allows the details to sink into the base icing and it creates a nice smooth surface. You have to work very quickly and decorate each cookie from start to finish before moving to the next, otherwise the icing will form a crust and the details won’t sink in.
Piping Tip Or Piping Bag? For these cookies you can either use a very small piping tip, a #1, #1.5, or #2, or you can use a piping bag with the very end snipped off. If you use just a piping bag, snip the very tiniest amount off and test by squeezing a little icing out. If it’s not big enough, cut another tiny bit off the bag until you get the right size. It should be small enough to make a clean line and not curl around the tip of the bag, but not wide enough to pool out of the bag on it’s own. It’s always best to start very small and work up instead of cutting big and having to get another bag.
Keep Icing From Drying Out: Royal icing likes to start drying and forms a crust very quickly. When you are not using a bowl or piping bag, use damp paper towels and plastic wrap to cover them. Wrap bowls in plastic wrap between use and cover the tips of piping bags with a damp paper towel to prevent them from crusting over between using different colors.
Let Icing Fully dry: Let the iced cookies sit out overnight to allow the icing to fully set before serving them. Don’t cover them with plastic wrap or place them in a covered container, otherwise the icing will take much longer to set. The icing prevents the cookie from drying out.
Storing Leftover Easter Egg Sugar Cookies
The great thing about using royal icing as frosting is that you can store your cookies at room temperature! These Easter egg sugar cookies have a longer shelf life than most other cookies, making them a tasty treat to snack on during the week!
At Room Temperature: First, make sure your royal icing has set completely. Store cookies in an airtight container or cover with plastic wrap. Your cookies will stay good for one week.
More Spring Desserts
Spring is here, and that means it’s time to break out all of the tasty desserts! Bright colors and fruity flavors are here to stay. I’ve rounded up a few of my favorite spring dessert recipes to accompany the warmer temperatures and good vibes. I hope you love them as much as I do!
These fun and festive Easter egg cookies are the best dessert for Spring! The cookie base is sweet, soft, and buttery, topped with beautiful pastel royal icing as a colorful finishing touch!
CourseDessert
CuisineAmerican
KeywordEaster Egg Sugar Cookies
Prep Time1hour
Cook Time8minutes
Total Time1hour8minutes
Servings18Cookies
Calories243kcal
AuthorAlyssa Rivers
Ingredients
2CupsAll Purpose Flour
½TeaspoonSalt
½TeaspoonBaking Powder
½CupUnsalted ButterSoftened
2/3CupGranulated Sugar
2Egg Yolks
2TablespoonsSour Cream
1 ½TablespoonVanilla Extract
1TeaspoonLemon Extractoptional
Royal Icing
4CupsPowdered Sugarsifted
3TablespoonsMeringue Powder
9-12TablespoonsWaterRoom Temperature
Gel Food Coloring
Instructions
Preheat the oven to 350° and line 2-3 cookie sheets with parchment paper.
In a medium bowl whisk together the flour, salt, and baking powder. Set aside.
In another medium bowl, beat together the butter and sugar for 2-3 minutes until light and fluffy. Add the egg yolks, sour cream, and extracts and mix until just combined.
Add the dry ingredients to the wet and mix until just barely combined.
This recipe does not require any chilling time, so you’re ready to roll out your cookies! Split the dough into 2-3 pieces and roll them one at a time on a lightly floured surface until they are ¼ inch thick. Use your favorite Christmas tree cookie cutters (or alternative shapes!) to cut out your cookies. Press the scraps together and set them aside to rest for about 5 minutes. Reroll the scraps and cut more cookies until all the dough has been used.
Place the cookies on the parchment-lined cookie sheets leaving 1 ½ inches between them. Bake for 6-8 minutes, rotating the pan at 4 minutes. I find this gives the cookies a nice, even bake. The edges will be just set and the cookies will be very light in color and should have very minimal coloring underneath them.
Let the cookies cool on the pan for 2 minutes for the shape to set before transferring them to a cooling rack. Frost, once they are cooled then store in an airtight container until you are ready to frost them.
Royal Icing
Using an electric mixer with the whisk attachment, mix the powdered sugar and meringue powder together on low.
Add 8 tablespoons of water and mix together on high speed for about 2 minutes. The icing should be pretty stiff. Add additional water 1 tablespoon at a time until the icing is about the consistency of soft-serve ice cream and forms soft peaks. Reserve 1 cup of frosting and cover tightly with plastic wrap.
With the remaining icing, add additional water 1-2 teaspoons at a time until when the whisk is raised the icing drips back into the bowl and the lines of icing take about 10 seconds to melt back into the icing. This is the thin icing that will be used to fill, or flood, your cookies. Separate into small bowls and tint the icing with your chosen colors. Cover each bowl tightly with plastic wrap when not being used. This icing will dry very quickly.