Brioche French Toast

Move over regular French toast, there’s a new brunch boss in town and it’s made with brioche bread! With its buttery richness and pillowy texture, it’s like biting into a cloud of happiness. Trust me, once you’ve had brioche French toast, there’s no going back to the basic stuff. It’s breakfast, elevated!

There’s nothing better than starting your day off with a hearty breakfast. This brioche French toast is a must-make, but you’ll have to pair it with some delicious oven-baked bacon, scrambled eggs, and homemade buttermilk syrup!

2 slices of brioche French toast stacked on top of each other.

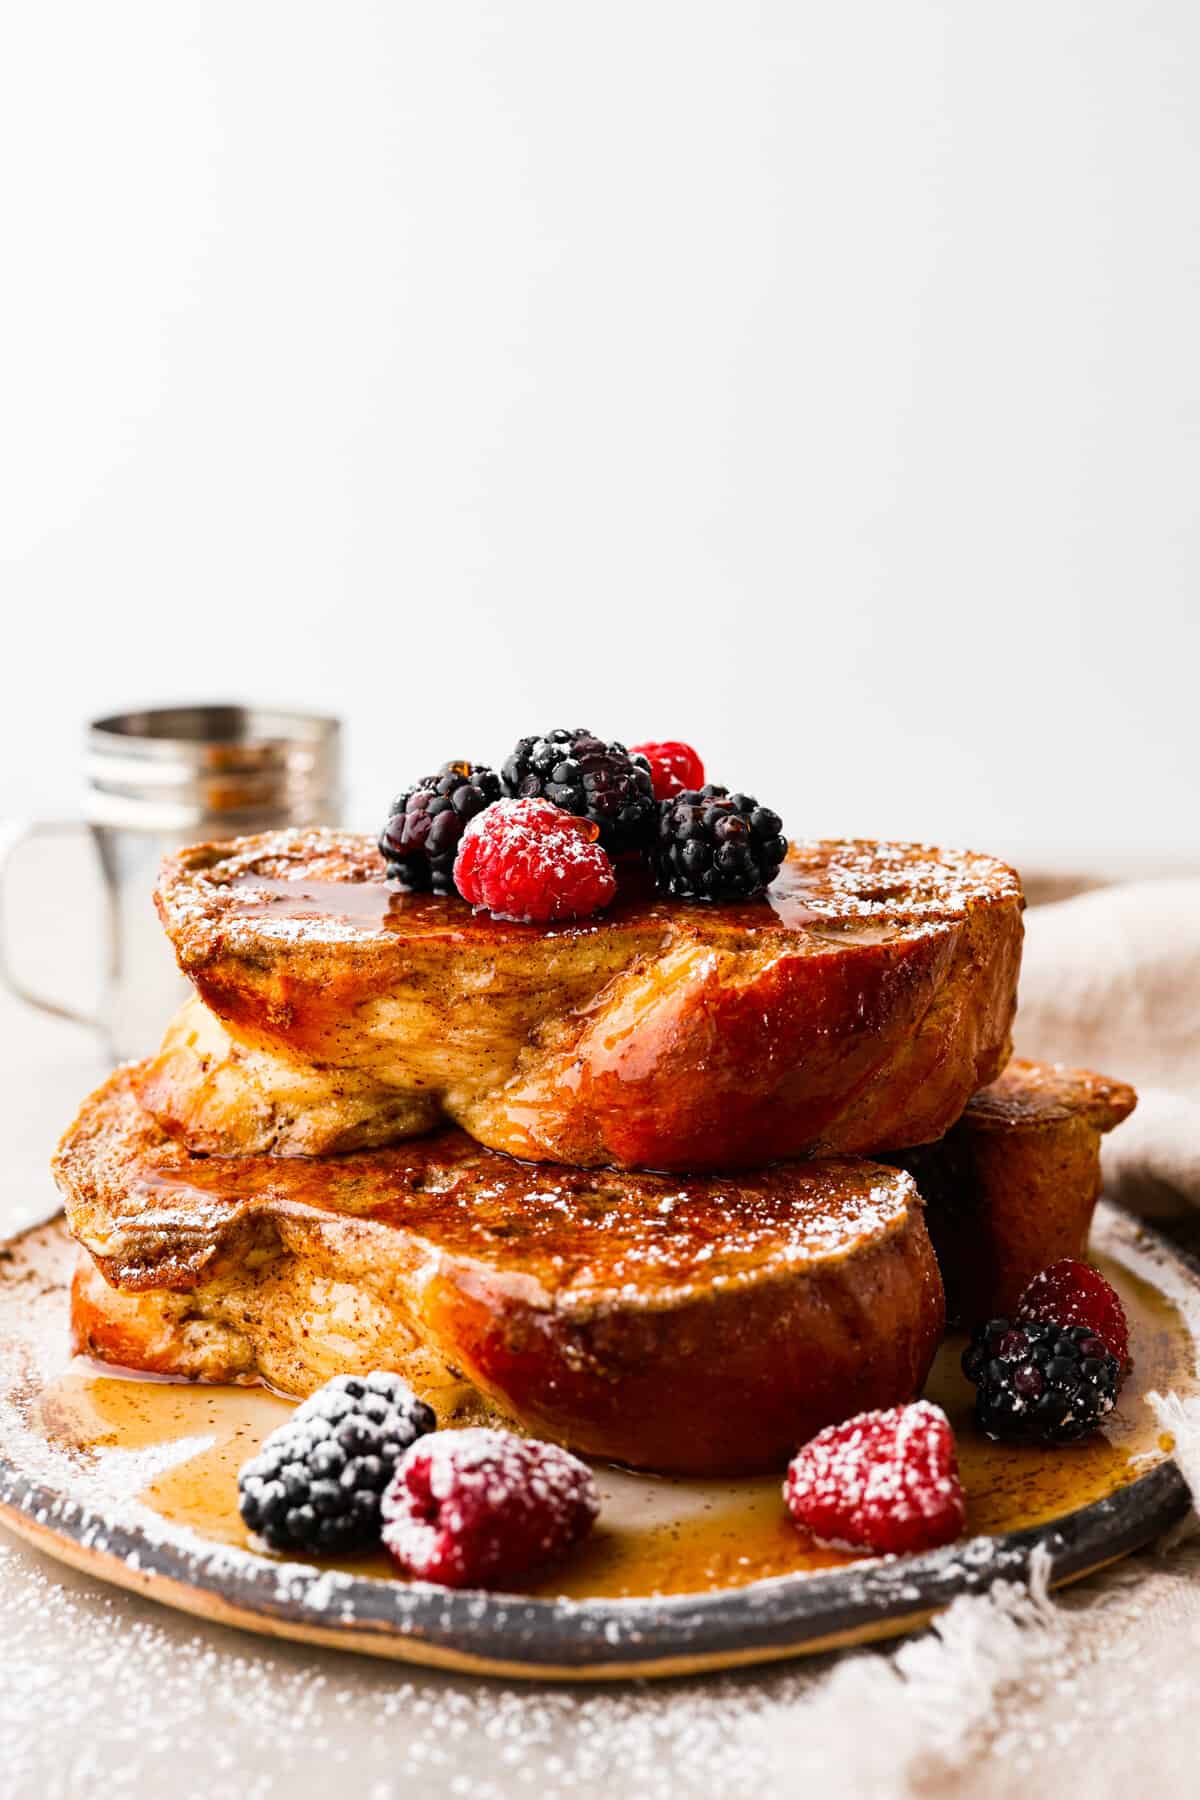
Brioche French Toast Recipe

French toast made with homemade brioche bread is a breakfast that’s worth waking up for! It’s like biting into a fluffy cloud of sweetness that just melts in your mouth. The texture is perfect – it’s soft on the inside, with a slightly crispy crust on the outside, making each bite a joy to eat.

If you’re looking to impress your friends or family with your breakfast skills, then brioche French toast is the way to go! It’s a dish that’s sure to please even the pickiest eaters. Plus, it’s versatile – you can add your favorite toppings, whether it’s fresh berries, whipped cream, Nutella, or caramel sauce! With a breakfast that’s so delicious, you’ll be looking for excuses to make it all week long. So go ahead, grab a fork, and dig in to soft, fluffy goodness!

Ingredients Needed

Who says you need a complicated recipe for a delicious breakfast? With just a few simple ingredients like brioche bread, eggs, and cinnamon, you can make the ultimate French toast! And the best part? You can customize it with all of your favorite toppings, from fresh berries to buttermilk syrup and everything in between!

  • Brioche Bread, Thickly Sliced: Brioche bread is the star of the show when it comes to making French toast. Its buttery and fluffy texture gives a perfect base for the egg mixture. You can use store-bought brioche, but I recommend making your own for the best flavor! Find my full recipe here.
  • Large Eggs: Eggs are a must-have when making French toast. They are the binding agent that holds everything together. Be sure to use large eggs for the perfect custard texture.
  • Cinnamon: Cinnamon adds warmth and depth to the French toast. It’s a classic spice that goes perfectly with the sweetness of the bread. If you’re not a fan of cinnamon, you can also substitute it with nutmeg or cardamom.
  • Heavy Whipping Cream: Heavy whipping cream adds richness and creaminess to the custard mixture. If you don’t have heavy whipping cream on hand, you can also use whole milk or half-and-half.
  • Brown Sugar: Brown sugar gives a caramel-like sweetness to the French toast. It’s the perfect complement to the buttery brioche bread.
  • Vanilla Extract: Vanilla adds a subtle sweetness to the French toast. It’s a must-have ingredient that enhances the overall flavor of the dish. Try making your own blend using my recipe here!
  • Butter: Butter is the perfect fat to use when cooking French toast. It adds a rich, buttery flavor to the dish and helps prevent sticking.

How to Make the Best Brioche French Toast

Looking for a breakfast that’s easy to make and guaranteed to make your morning better? Brioche French toast is the answer! With just a few simple ingredients and a hot skillet, you can whip up a breakfast that’s sweet, buttery, and super delicious. So start your day off right and treat yourself to a slice (or two) of this delicious dish! Let’s get started.

  1. Slice Bread: Slice your brioche loaf into about 1 ½ inch slices, they should be fairly thick.
  2. Prepare Egg Mixture: In a large bowl, add your eggs, cinnamon, whipping cream, and sugar. Whisk to combine well.
  3. Coat: Take each piece of brioche and fully submerge it in your egg mixture, then place each soaked piece flat in a pan, pour any remaining liquid evenly over the bread and allow the bread to sit and soak the liquid up a bit.
  4. Heat Skillet: Heat up a large skillet on your stove over medium high heat and then melt some butter into the pan, about 2 tablespoons.
  5. Cook: Place a few slices of the soaked bread into the heated and buttered skillet and cook for 2-3 minutes on each side.
  6. Serve: Once the french toast is all cooked, serve fresh with your favorite toppings!
Collage of egg mixture being prepared and bread being dipped in it.

Ways to Perfect Your Brioche French Toast

Follow these simple tips and your brioche French toast will be nothing short of perfection! Thick slices of bread, a flavorful custard mixture, and a perfectly golden brown exterior are just a few steps away!

  • Use Thick Slices: Cut your brioche bread into thick slices to ensure that it absorbs the custard mixture without falling apart.
  • Let Flavors Meld: Let your custard mixture rest for a few minutes before dipping the bread to allow the ingredients to meld together for a more flavorful French toast.
  • Cook Over Medium Heat: Use a non-stick skillet and heat it up on medium heat. Add butter to the skillet and let it melt before adding the soaked bread. One of the most common mistakes I see is that people cook their French toast on too hot of a pan, and the outsides end up burning.
  • Cook in Batches: Don’t overcrowd the skillet – cook your brioche French toast in batches for the best results.
  • Keep Warm: Keep the cooked French toast warm in a 200°F oven while you cook the rest of the batches.
  • Add Your Favorite Toppings: Don’t forget the toppings! Maple syrup, whipped cream, fresh berries, and powdered sugar are all delicious options to customize your brioche French toast with.
Syrup being poured over French toast.

Storing Leftovers / Making Ahead

I suggest making this dish to eat fresh, but you can also store the leftovers in the fridge in an airtight container for about 5 days.

Brioche French toast is also great for making ahead! You can prepare the french toast the night before, leaving the bread and eggs to soak in the fridge covered and cook it fresh in the morning. Not only does it make mornings less chaotic, but makes the French toast more flavorful!

Two slices of brioche French toast, one has a bite taken out of it.
Print

Brioche French Toast

Move over regular French toast, there's a new brunch boss in town and it's made with brioche bread! With its buttery richness and pillowy texture, it's like biting into a cloud of happiness. Trust me, once you've had brioche French toast, there's no going back to the basic stuff. It’s breakfast, elevated!
Course Breakfast
Cuisine American
Keyword brioche french toast, brioche french toast recipe
Prep Time 45 minutes
Cook Time 15 minutes
Total Time 1 hour
Servings 6 people
Calories 251kcal
Author Alyssa Rivers

Ingredients

  • 1 loaf brioche bread thickly sliced
  • 5 large eggs
  • 2 teaspoons cinnamon
  • ¼ cup heavy whipping cream
  • 1 tablespoon brown sugar
  • 1 teaspoon vanilla
  • Butter for cooking

Instructions

  • Slice your brioche loaf into about 1 ½ inch slices, they should be fairly thick.
  • In a large bowl, add your eggs, cinnamon, whipping cream, and sugar. Whisk to combine well.
  • Take each piece of brioche and fully submerge it in your egg mixture, then place each soaked piece flat in a pan, pour any remaining liquid evenly over the bread and allow the bread to sit and soak the liquid up a bit.
  • Heat up a large skillet on our stove over medium high heat and melt some butter into the pan, about 2 tablespoons.
  • Place a few slices of the soaked bread into the heated and buttered skillet and cook for 2-3 minutes on each side.
  • Once the french toast is all cooked, serve fresh with your favorite toppings!

Nutrition

Calories: 251kcal | Carbohydrates: 30g | Protein: 11g | Fat: 10g | Saturated Fat: 4g | Polyunsaturated Fat: 2g | Monounsaturated Fat: 3g | Trans Fat: 0.03g | Cholesterol: 148mg | Sodium: 320mg | Potassium: 146mg | Fiber: 3g | Sugar: 6g | Vitamin A: 347IU | Vitamin C: 0.2mg | Calcium: 105mg | Iron: 3mg


source https://therecipecritic.com/brioche-french-toast/
Share:

Flatbread Pizza

Flatbread pizza is a simple and delicious recipe that is easier to make than regular pizza. With a thin and chewy flatbread crust that is topped with your favorite pizza toppings, it’s even better than takeout and always a hit!

I am a HUGE pizza fan. I definitely don’t feel guilty about it either. Some things in life were meant to be enjoyed, and pizza is at the top of that list. If you love pizza too, you’ve got to try this Bubble Pizza, this amazing and simple White Pizza, and this yummy Taco Pizza.

Flatbread pizza on a piece of parchment with fresh basil on top.

Flatbread Pizza Recipe

I love this flatbread pizza recipe for so many reasons! For starters, it’s made on flatbread instead of a traditional pizza dough. That makes it easier to make without compromising on flavor. Flatbread is a delicious thin bread kind of like naan or pita bread, and it can be flavored or plain. You can pick it up from the store in the bread section, or you can make your own at home with the recipe I’ve linked below. Either way you make it, flatbread pizza might be your new favorite.

The amazing thing about pizza when you make it at home is that you can literally make it exactly the way you want it! When I’m making one just for me, I love a drizzle of olive oil and some mushrooms and parmesan cheese. Sometimes I’ll add some spinach for a pop of color. You can add things like pesto, sausage, garlic, and really any pizza sauce you like. I share more of my favorite pizza sauce recipes below in the recipe box.

Ingredients

The key to a good flatbread pizza is, of course, the flatbread! I love making my own simple flatbread at home because it tastes better than store bought and you can pop them in the freezer. Then they are ready to pull out anytime you need them. You can also buy a lot of great options from the store. The measurements are listed below in the recipe card.

  • Flatbread: Flatbread is a simple, very flat dough. It’s similar to pita bread and makes the perfect simple crust for pizza. I love making my own, but there are a lot of great options at the grocery store too.
  • Marinara Sauce: Homemade pizza sauce is just what this pizza needs! The sauce is so easy to make, but if you are in a rush you can definitely pick up your favorite brand at the store.
  • Mozzarella Cheese: This is the key to a perfectly melty pizza. You can add other cheeses as well, but I think every pizza needs mozzarella.
  • Pepperoni: You can buy whatever type of meat you like, but my family definitely prefers pepperoni.
  • Basil Leaves: Fresh basil leaves add a pop of flavor and color. It really makes a difference!
Process photos showing how to add all the ingredients together.

How To Make Flatbread Pizza

Because you are using flatbread that is already baked, you just have to cook this flatbread pizza in the oven until the cheese is melted. It’s a no fuss recipe that anyone can perfect. You won’t have to worry about whether it’s done or not, and it also makes the perfect freezer pizza. More about that below!

  1. Prep: Preheat oven to 400 degrees Fahrenheit.
  2. Line Pans: Line a baking sheet with parchment paper and place the flatbreads on the prepared pan.
  3. Add Sauce: Spread ¼ cup marinara sauce over each flatbread.
  4. Add Toppings: Top each flatbread with ½ cup mozzarella cheese, and 10 slices of pepperoni.
  5. Bake: Bake for 8-10 minutes until the flatbread is golden and crisp around the edges. If desired, broil for 1-2 minutes to brown the cheese.
  6. Garnish: Garnish with fresh basil leaves and red pepper flakes if desired.
  7. Enjoy: Slice and enjoy!
Flatbread pizza cut into three pieces.

Tips for Making Flatbread Pizza

Homemade flatbread pizza has a simple crust, so the toppings are really what make this pizza shine. You can follow my exact recipe, or use these tips below to make an entirely new pizza that your whole family will love.

  • Add Veggies: Adding things like mushrooms, cherry tomatoes, spinach, bell peppers, and red onion can really take your pizza to the next level! I really like a simple Margherita flatbread pizza, but adding more toppings can always be fun. Other ideas are black olives, sliced tomatoes, and fresh arugula. The key to a great pizza is flavor combinations that you know you will love, so keep that in mind when adding your toppings.
  • Use A Different Sauce: Flatbread toppings can be anything you want! I like a simple tomato sauce, but my kids especially love white pizza sauce. You can also make Alfredo sauce and add chicken and bacon on top for a really simple and creamy pizza. If you are making a white pizza, add some balsamic vinegar and fresh herbs to really make those flavors stand out!
  • Add Meat: My family is all about pepperoni pizza, but there is no reason to just stick to that. I love adding chicken, sausage, bacon, and prosciutto on my pizza. Maybe not all at the same time! But pretty close. The more the merrier I say!
A hand picking up a piece of pizza.

Storing Leftovers

Flatbread pizza makes great leftovers because you can reheat it again and again, and it will still taste amazing. You can pop your pizza in the freezer for an easy freezer meal when you are in a rush. Here are my tips for storing leftovers and meal prep.

  • In the Refrigerator: You can store your leftover pizza in the fridge for up to 5 days. Make sure it’s in an airtight container so that the bread doesn’t get dry and stale.
  • In the Freezer: You can put your assembled pizza in the freezer. Follow this recipe for the assembly of the pizza, and then before you bake it, wrap it in plastic wrap and pop it in the freezer. You can store it for up to 3 months, and pop it in the oven whenever you need it. When you do bake it, put it on a parchment lined pan and bake at 400 degrees until the cheese has melted. That should be for about 10-15 minutes depending on how frozen it is and your oven. Just keep your eye on it and wait until that cheese starts to move around.
Print

Flatbread Pizza

Flatbread pizza is a simple and delicious recipe that is easier to make than regular pizza. With a thin and chewy flatbread crust that is topped with your favorite pizza toppings, it's even better than takeout and always a hit!
Course Dinner, lunch
Cuisine American, Italian American
Keyword flatbread pizza
Prep Time 5 minutes
Cook Time 10 minutes
Total Time 15 minutes
Servings 4 people
Calories 284kcal
Author Alyssa Rivers

Ingredients

  • 1 recipe flatbread
  • 1 cup marinara sauce, store-bought or homemade
  • 2 cups mozzarella cheese, shredded
  • 40 slices pepperoni
  • fresh basil leaves, for garnish

Instructions

  • Preheat oven to 400 degrees Fahrenheit.
  • Line a baking sheet with parchment paper and place the flatbreads on the prepared pan.
  • Spread ¼ cup marinara sauce over each flatbread.
  • Top each flatbread with ½ cup mozzarella cheese, and 10 slices of pepperoni.
  • Bake for 8-10 minutes until the flatbread is golden and crisp around the edges. If desired, broil for 1-2 minutes to brown the cheese.
  • Garnish with fresh basil leaves and red pepper flakes if desired.
  • Slice and enjoy!

Nutrition

Serving: 1flatbread | Calories: 284kcal | Carbohydrates: 5g | Protein: 17g | Fat: 22g | Saturated Fat: 11g | Polyunsaturated Fat: 1g | Monounsaturated Fat: 8g | Trans Fat: 0.3g | Cholesterol: 64mg | Sodium: 959mg | Potassium: 280mg | Fiber: 1g | Sugar: 3g | Vitamin A: 644IU | Vitamin C: 4mg | Calcium: 295mg | Iron: 1mg


source https://therecipecritic.com/flatbread-pizza/
Share:

Easy Moo Goo Gai Pan

Moo Goo Gai Pan is a classic Chinese dish! Tender chicken pieces and mushrooms with crisp vegetables such as carrots, water chestnuts, and snow peas all stir-fried together with a savory sauce. Way better than take out and it only 20 minutes!

I am all about skipping the take out and making Chinese food at home. If you love Chinese food as much as I do try this Skinny Slow Cooker Kung Pao Chicken, Awesome Kung Pao Shrimp or Instant Pot Beef and Broccoli.

Moo Goo Gai pan on a dish.

Moo Goo Gai Pan Recipe

Seriously! Skip takeout and make this at home. It’s one of my all-time favorite Chinese dishes. Don’t get me wrong, I love me some takeout, but I also love to make moo goo gai pan at home and enjoy it in the comfort of my sweatpants. It is so much better than I thought it could ever be! The combo of tender chicken pieces and crisp veggies all in a savory sauce is amazing. You are going to love how easy and delicious this moo goo gai pan recipe is! It truly is better than takeout.

There is little to no seasoning on moo goo gai pan. Just the perfect sweet and savory sauce that enhances all the flavors in this dish! You will have dinner on the table in less than 20 minutes. If you are craving Chinese food, skip those expensive food delivery apps and make this Moo Goo Gai Pan recipe instead! You won’t regret it and your family will love every bite!

Where Does Moo Goo Gai Pan Come From?

Moo Goo Gai Pan is best known for being a popular Chinese takeout dish. It’s part of Cantonese cuisine and usually includes chicken and mushrooms that are served with other vegetables depending on your preference and where it is prepared. It’s a quick and easy Chinese dish that is now modernized into an American-Chinese stir fry.

Ingredients for Moo Goo Gai Pan

This is everything you need to make a delicious moo goo gai pan stir fry! All the flavors from the ingredients blend so well together to make this a fresh and hearty meal. Check out the recipe card for exact measurements!

  • Olive Oil: Used to cook the chicken in.
  • Chicken Thighs: I cut my chicken thighs into 1 inch chunks but if you like the classic Chinese thin sliced cuts of meat that will work too. Just be sure not to overcook your sliced chicken since it is thinner. If you don’t want to use thigh meat, you can also use boneless skinless chicken breasts.
  • Salt and Pepper: Help to enhance all of the tasty flavors of moo goo gai pan. Season to taste!
  • Vegetables: The great thing about stir fries is that you can throw in leftover veggies that you have in the fridge. I used carrots, mushrooms, water chestnuts, and snow peas! Bok choy, bamboo shoots, celery, or cabbage are great options as well.
  • Chopped Green Onions and Sesame Seeds: For garnish! These add a little extra flavor and also give the moo goo gai pan great presentation.

For the Sauce:

  • Chicken Broth: This is the liquid gold that makes the moo goo gai pan sauce come to life! It adds depth of flavor and richness to the dish.
  • Soy Sauce: This umami bomb ties everything together in the sauce. It gives the dish that classic savory taste we all know and love.
  • Brown Sugar: Sweet, sweet brown sugar! This guy brings balance to the moo goo gai pan sauce by adding a touch of sweetness that complements the salty and savory flavors.
  • Garlic: This tiny but mighty ingredient packs a flavorful punch in the sauce. It adds a subtle yet powerful garlicky aroma and taste that will make your mouth water.
  • Hoisin Sauce: This sweet and savory sauce is a staple in Chinese cuisine, and it adds a unique flavor to the moo goo gai pan sauce.
  • Sesame Oil: Just a small amount of sesame oil goes a long way in adding nuttiness and depth to the sauce.
  • Cornstarch: Cornstarch is the key to achieving the perfect consistency in the moo goo gai pan sauce. It thickens the sauce just enough to coat the chicken and veggies without being too heavy.
  • Water: Last but not least, water! It’s what helps to bring all the ingredients together and create a delicious, cohesive sauce. It’s like the glue that holds everything together, and also helps to adjust the sauce’s consistency.

Recipe for Moo Goo Gai Pan

You can’t go wrong with this Chinese dinner staple. It’s quick, simple to make and served up hot and ready in less than 20 minutes. Time to gather up your ingredients and a saucepan! This saucy, savory dish is the perfect solution for a hungry family on busy weeknights.

  1. Cook Chicken: In a large skillet or wok add the olive oil and turn to medium high heat. Then salt and pepper the chicken and cook in the wok until cooked throughout and no longer pink. Remove and set aside on a plate.
  2. Sauté Vegetables: Add a tablespoon of olive oil and carrots and sauté until almost tender 1-2 minutes. Then add the mushrooms and sauté for 1-2 minutes. Add in the water chestnuts and snow peas and sauté for a minute more.
  3. Whisk Sauce Ingredients: To make the sauce, whisk in a small bowl the chicken broth, soy sauce, brown sugar, garlic, hoisin, and sesame oil. Combine the cornstarch and water in another small bowl and whisk into the sauce.
  4. Combine: Add the chicken back to the wok and pour the sauce on top and let simmer until it starts to thicken.
Process of making moo goo Gai pan.

Tips and Tricks

This moo goo gai pan recipe is foolproof and really hard to get wrong. But here are a few extra tips to make sure your meal turns out as delicious as your favorite Chinese restaurant!

  • Vegetable Size: It’s best to cut the vegetables all the same size and width. This will help ensure that they cook evenly and at the same rate.
  • Don’t Overcook the Veggies: Moo goo gai pan is all about fresh, crisp veggies. To ensure they retain their texture and flavor, don’t overcook them. They should be tender but still have a bit of crunch.
  • Don’t Overcrowd the Pan: When cooking the chicken and veggies, make sure not to overcrowd the pan. This can cause the ingredients to steam instead of sear, resulting in a mushy texture.
  • Cutting Chicken: When cutting the chicken a simple trick is to place the chicken in the freezer for about 20 to 30 minutes. Letting the chicken become hard but not frozen helps cut the chicken easier. Be sure to cut against the grain for best results. At this time, it is best to slice the chicken into thin slices or one inch chunks depending on what you prefer.
  • Keep Your Wok Hot: Make sure your wok or skillet is always hot when cooking the chicken and vegetables. This will help them become seared to perfection!
  • Serve With Rice: Moo goo gai pan is traditionally served with steamed rice, which helps to soak up the delicious sauce and balance out the flavors. Yum!
Moo goo gai pan in a staub pan.

Make it a Complete Meal!

These other easy Chinese dishes are great for serving alongside your moo goo gai pan! Adding a side salad like my Chinese Chicken Pasta Salad with Sesame Dressing, 20-Minute Vegetable Lo Mein or a simple white rice can make this into a complete meal that rivals your favorite takeout spot.

Storing Leftovers

If you have leftover moo goo gai pan, keep it! It’s so easy to heat up for a quick and delicious lunch. Chinese food is one of those things that tastes just as good the next day.

  • In the Refrigerator: Store in an airtight container for 3-4 days.
  • Reheating: Reheat over the stove at medium heat until warmed through. Make sure the internal temperature of your chicken reaches 165 degrees Fahrenheit. Enjoy with white rice.
Moo goo gai pan on a white plate.
Print

Easy Moo Goo Gai Pan Recipe

Moo Goo Gai Pan is a classic Chinese dish! Tender chicken pieces and mushrooms with crisp vegetables such as carrots, water chestnuts, and snow peas all stir-fried together with a savory sauce. Way better than take out and it only 20 minutes!
Course Dinner, Main Course
Cuisine Asian American, Chinese
Keyword Moo Goo Gai Pan, Moo Goo Gai Pan Recipe
Prep Time 10 minutes
Cook Time 10 minutes
Total Time 20 minutes
Servings 4 people
Calories 419kcal
Author Alyssa Rivers

Equipment

  • Want to make this even easier? Here are a few products that I LOVE:
  • Wok or Skillet

Ingredients

  • 2 tablespoons olive oil divided
  • 1 pound chicken thighs or breasts cubed
  • salt and pepper
  • 3 large carrots sliced
  • 8 ounces mushrooms sliced
  • 8 ounces water chestnuts
  • 1 cup snow peas
  • 1/4 cup chicken broth
  • 2 tablespoons soy sauce
  • 1 tablespoon brown sugar
  • 2 cloves garlic minced
  • 1 tablespoon hoisin sauce
  • 1 teaspoon sesame oil
  • 1 teaspoon cornstarch
  • 1 tablespoon water
  • chopped green onions and sesame seeds for garnish

Instructions

  • In a large skillet add the olive oil and turn to medium high heat. Salt and pepper the chicken and cook in the wok until cooked throughout and no longer pink. Remove and set aside on a plate.
  • Add a tablespoon of olive oil and carrots and sauté until almost tender 1-2 minutes. Then add the mushrooms and sauté for 1-2 minutes. Add in the water chestnuts and snowpeas and sauté for a minute more.
  • To make the sauce, whisk in a small bowl the chicken broth, soy sauce, brown sugar, garlic, hoisin, and sesame oil. Combine the cornstarch and water in another small bowl and whisk into the sauce.
  • Add the chicken back to the wok and pour the sauce on top and let simmer until it starts to thicken.

Video

Notes

Originally posted January 26, 2020
Updated on March 30, 2023

Nutrition

Calories: 419kcal | Carbohydrates: 22g | Protein: 23g | Fat: 27g | Saturated Fat: 6g | Cholesterol: 111mg | Sodium: 750mg | Potassium: 706mg | Fiber: 4g | Sugar: 10g | Vitamin A: 7998IU | Vitamin C: 21mg | Calcium: 37mg | Iron: 2mg


source https://therecipecritic.com/moo-goo-gai-pan/
Share:

Popular

Archive

Slider Tag

Facebook

Header Ads

Recent in Food

Blog Archive

Recent Posts

Unordered List

  • Lorem ipsum dolor sit amet, consectetuer adipiscing elit.
  • Aliquam tincidunt mauris eu risus.
  • Vestibulum auctor dapibus neque.

Pages

Theme Support

Need our help to upload or customize this blogger template? Contact me with details about the theme customization you need.