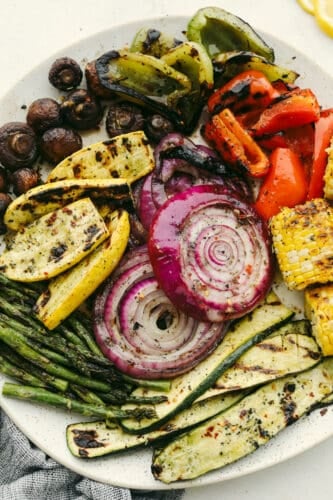
These delicious grilled vegetables are the perfect side to enhance any meal. They are drizzled with a savory garlic marinade that amplifies each vegetable’s amazing flavor and texture!
I love healthy ways to add a burst of flavor to vegetables. I know you will love my asparagus, broccoli, and brussels sprouts for other veggie side dishes that will taste just as good as your entrée!

Easy Grilled Vegetables Recipe
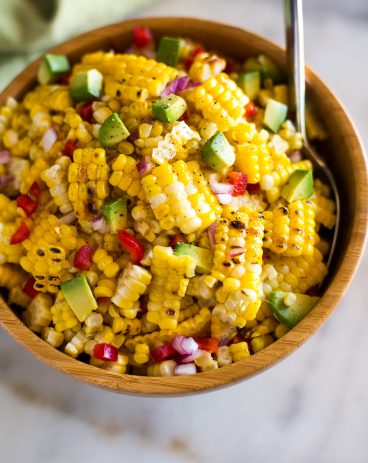
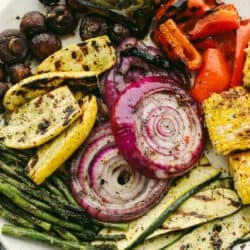
You can never go wrong with a juicy cut of meat served with a side of grilled vegetables at a barbecue. And why pick just one veggie when you can have a variety of all the best summer vegetables? With zucchini, mushrooms, asparagus, yellow squash, corn, and red onion, you have a decadent selection of veggies that not only look good, are good for you, but taste good too!! The juicy, savory marinade truly brings out the best in each of these vegetables. Once they are grilled to a perfect char, you are left with a tender, smoky result with just a hint of sweetness.
The best part about this recipe, though, is that it is SUPER simple to put together but tastes INCREDIBLE! With just a touch of olive oil, fresh garlic, and herbs, you are left with a delicious side that not even the fanciest of steakhouses can rival. Don’t take my word for it! I know this will be a winning side dish that will keep your guests coming back for more.
Best Grilled Vegetables Ingredients
With just a few ingredients, these grilled vegetables come together easily for the perfect summer side. For all the ingredients and measurements see the recipe card below.
- Zucchini: Sliced into thin strips.
- Mushrooms: I like using small, brown mushrooms for adding different size and texture to the vegetable variety.
- Asparagus: One stalk.
- Squash: Yellow, sliced into thin strips.
- Corn: On the cob, cut into thirds.
- Red Onion: Sliced ½ inch thick.
Vegetable Marinade
- Olive Oil: Pulls flavors together and helps the vegetables cook perfectly.
- Garlic Clove: Fresh, sliced.
- Salt and Pepper: To taste.
- Crushed Red Pepper: Adds a hint of spice to your marinade.
- Lemon: I like to use the juice of half of a lemon.
How to Make Grilled Vegetables
This recipe is ideal for having a complete meal in just a few minutes. Have a tasty dinner bursting with flavor even on busy weeknights!
- Add Vegetables: Add bell pepper, zucchini, mushrooms, asparagus, squash, corn and red onion to a large bowl.
- Mix Marinade Ingredients: In a small bowl add the olive oil, garlic, pepper, salt, crushed red pepper and lemon juice.
- Pour Over Vegetables: Pour on top of the veggies and toss.
- Prep Grill: Preheat the grill to medium high heat. Add the veggies to the grill. You can also use a basket for the grill.
- Grill Vegetables: Cook the mushrooms, asparagus, for about 3-4 minutes and the rest of the veggies for 5-7 minutes until they start to soften and have a nice char.

Grilled Vegetables Quick Tips
Elevate your grilled vegetables with just a few easy tips and tricks.
- Thickness of Slices: It is best to keep your vegetables in slices that are relatively the same thickness. This will make sure that they all cook evenly and some do not cook faster than others.
- Vegetables Too Dry: Let your vegetables marinate for at least an hour to prevent them from becoming dry when grilled. This gives oil-based marinades time to really sink into the vegetables.
- Sweetness: Grilling vegetables brings out their natural sugars, so if you don’t want them to be too sweet, you can use extra marinade or seasoning to counteract this.
- Grill or Stovetop: These grilled vegetables can be cooked on a gas or charcoal grill as well as in a skillet on the stove for a delicious year-round meal.
- Other Vegetables: Add more variety to your veggie mix by grilling up others like potatoes, sweet potatoes, carrots, and eggplant. I would avoid leafy greens as they tend to shrink when grilled.
- Flavor Enhancers: Customize and add flavor to your vegetables by topping them with lemon pepper and Italian seasonings. You can even add a sprinkle of parmesan or feta as a cheesy touch.
- Save Marinade: Save extra marinade to toss vegetables in after grilling. This gives them added flavor.

What to Serve With Grilled Vegetables
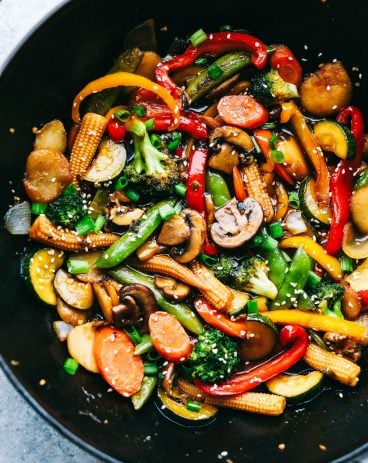
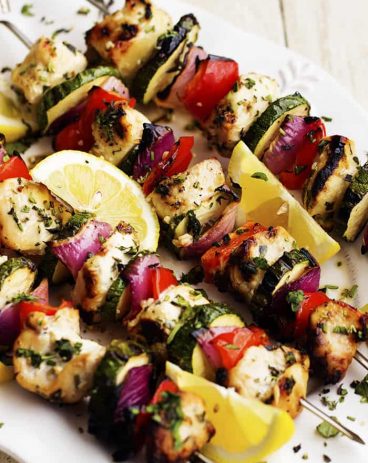
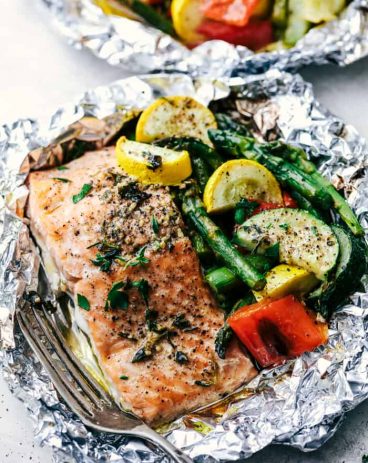
Grilled vegetables work wonderfully as a classic barbecue side, but the best part about them is that they are so versatile, the choices of what to serve them alongside are endless. I have been liking to throw these into stir-fries for a pop of marinated veggie deliciousness, add them on a bed of pasta for texture, and in tin foil packets for a juicy, ready-to-go meal. They are also great on skewers because they not only have a gorgeous variety of colors but taste good too. I am excited to hear how you work these delicious veggies into your favorite recipes!

Storing Grilled Vegetables
Allow grilled vegetables to cool completely before storing or they may get soggy. Also, try to keep your vegetables stored in thin layers as they will not keep as well when stacked on top of each other.
- In the Refrigerator: Keep vegetables either tightly wrapped in plastic wrap or in an airtight container. They will keep for up to 3 days.
- In the Freezer: Store in an airtight container. Grilled vegetables will keep in the freezer for 8-12 months. There is no need to thaw when reheating.
- Reheating: To preserve their perfectly charred outside and tender inside, I like to reheat grilled vegetables in the oven for 10 minutes at 425 degrees Fahrenheit. You can also reheat them in a skillet or in an air fryer for a few minutes at 370 degrees Fahrenheit. This is a super easy thing to have on hand for snacks or to add to other dishes in a snap.

Other Super Easy Veggie Recipes
Side Dishes
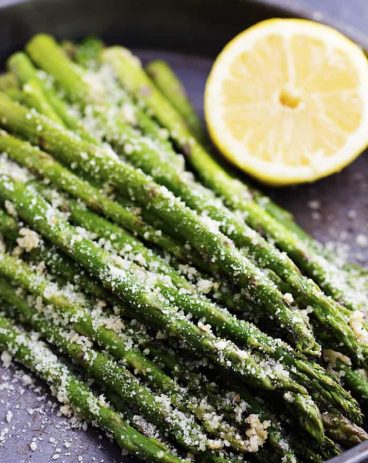
Roasted Lemon Parmesan Garlic Asparagus
Side Dishes
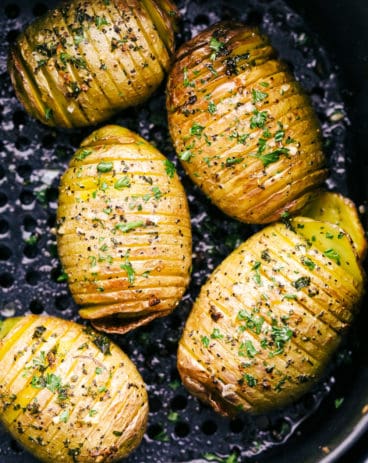
Air Fryer Garlic Butter Hasselback Potatoes
Side Dishes
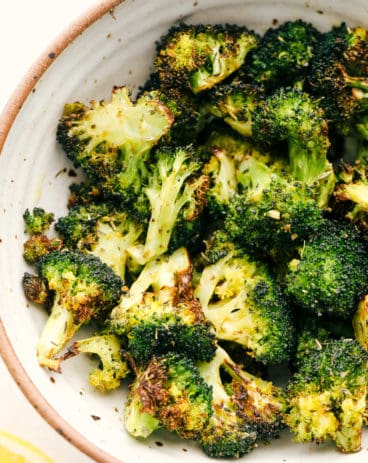
Air Fryer Roasted Garlic Broccoli
Side Dishes
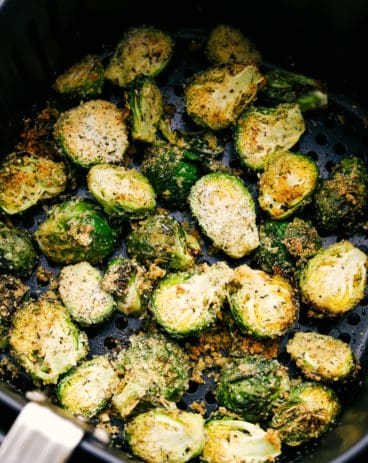
Crispy Parmesan Air Fryer Brussels Sprouts
Grilled Vegetables
Ingredients
- 2 zucchini sliced
- 8 ounce mushrooms
- 1 stalk asparagus
- 2 yellow squash sliced
- 2 corn on the cob cut into thirds
- 1 red onion sliced ½ inch thick
Marinade:
- 1/4 cup olive oil
- 3 garlic cloves sliced
- 1/2 teaspoon pepper
- 1/4 teaspoon salt
- 1/2 teaspoon crushed red pepper
- 1/2 lemon juiced
Instructions
-
Add bell pepper, zucchini, mushrooms, asparagus, squash, corn and red onion to a large bowl.
To make the marinade:
-
In a small bowl add the olive oil, garlic, pepper, salt, crushed red pepper and lemon juice.
-
Pour on top of the veggies and toss.
-
Preheat the grill to medium high heat. Add the veggies to the grill. You can also use a basket for the grill.
-
Cook the mushrooms, asparagus, for about 3-4 minutes and the rest of the veggies for 5-7 minutes until they start to soften and have a nice char.
Nutrition
source https://therecipecritic.com/grilled-vegetables/