Overnight Eggs Benedict Casserole

This overnight eggs benedict casserole is super easy to make and loaded with flavor! With layers of English muffins and Canadian bacon, all topped with a zesty hollandaise sauce, breakfast doesn’t get better than this!

Making breakfast casserole-style is a great way to save time! You’ll have to try some of my other favorites! Tater tot, apple french toast, and chorizo egg casseroles are absolutely delicious!
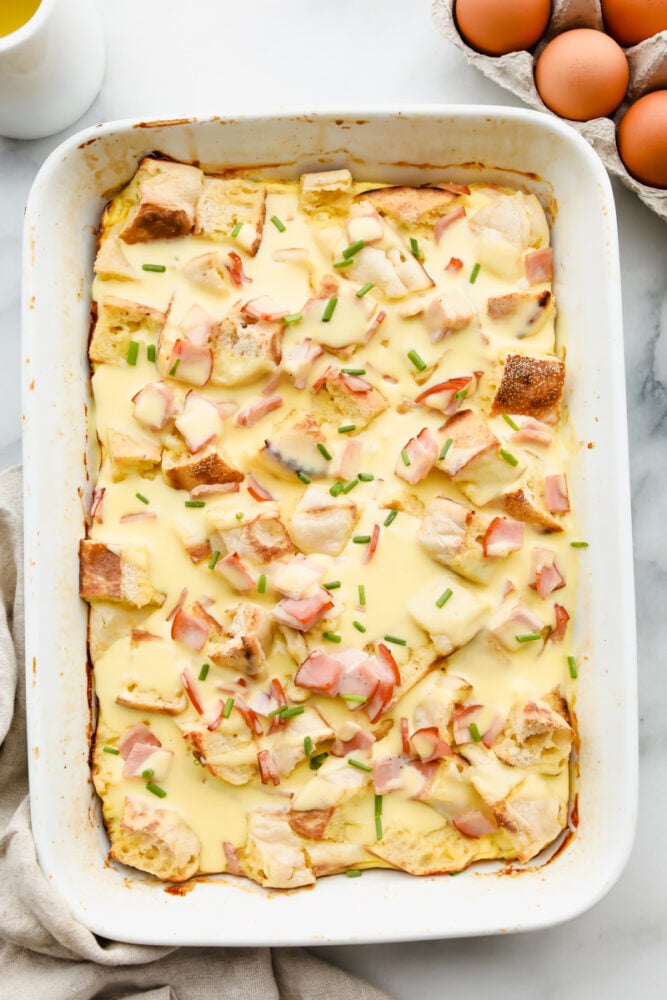
Eggs benedict casserole in a white serving dish.

Eggs Benedict Casserole With Hollandaise Sauce Recipe

I really, really love overnight breakfast recipes. You do all of the work the night before and cut right to the chase the next morning. Because let’s be honest, I am not a morning person. I want to eat breakfast while still in my pajamas. Straight from bed to the kitchen table. This recipe is perfect for any occasion when you want a great breakfast or brunch recipe but want to do most of the prep ahead of time.

Not only is this super easy to make, but trust me, it’s one of the absolute best breakfasts you can make! The foundation of the casserole is made with English muffins and Canadian bacon, but a few extra simple ingredients turn it into the ultimate crowd-pleaser. The eggs make it nice and creamy, almost like a quiche, and to top it all off we smother the whole thing in mouthwatering hollandaise sauce! Each bite is a blend of creamy, savory, and zesty! You’re not going to want to miss out on this one!

Eggs Benedict Ingredients

The way these simple ingredients come together to make a tasty breakfast is amazing! You’re going to be hooked! Measurements for each ingredient can be found below.

  • Canadian Bacon: Tender and savory, Canadian bacon is the perfect addition to your casserole! You can also use thick deli cut ham or bacon.
  • English Muffins: These are the foundation of your eggs benedict casserole! Tasty alone, but even better baked with eggs, bacon, and cream!
  • Eggs: Used to bind and give structure to the casserole.
  • Heavy Cream: Makes each bite smooth and tasty! You can also use half & half.
  • Salt and Pepper: Add to taste!

Hollandaise Sauce

  • Egg Yolks: Egg yolks bind with the butter to make your sauce rich and creamy.
  • Heavy Cream: This will thicken up your sauce and make it smooth!
  • Lemon Juice: You can use either fresh or bottled here, but I prefer fresh lemon juice for a brighter flavor!
  • Dijon Mustard: A must for that classic zesty Hollandaise flavor!
  • Butter: You can’t go wrong with a little melted butter! It adds tasty flavor and richness to the sauce.
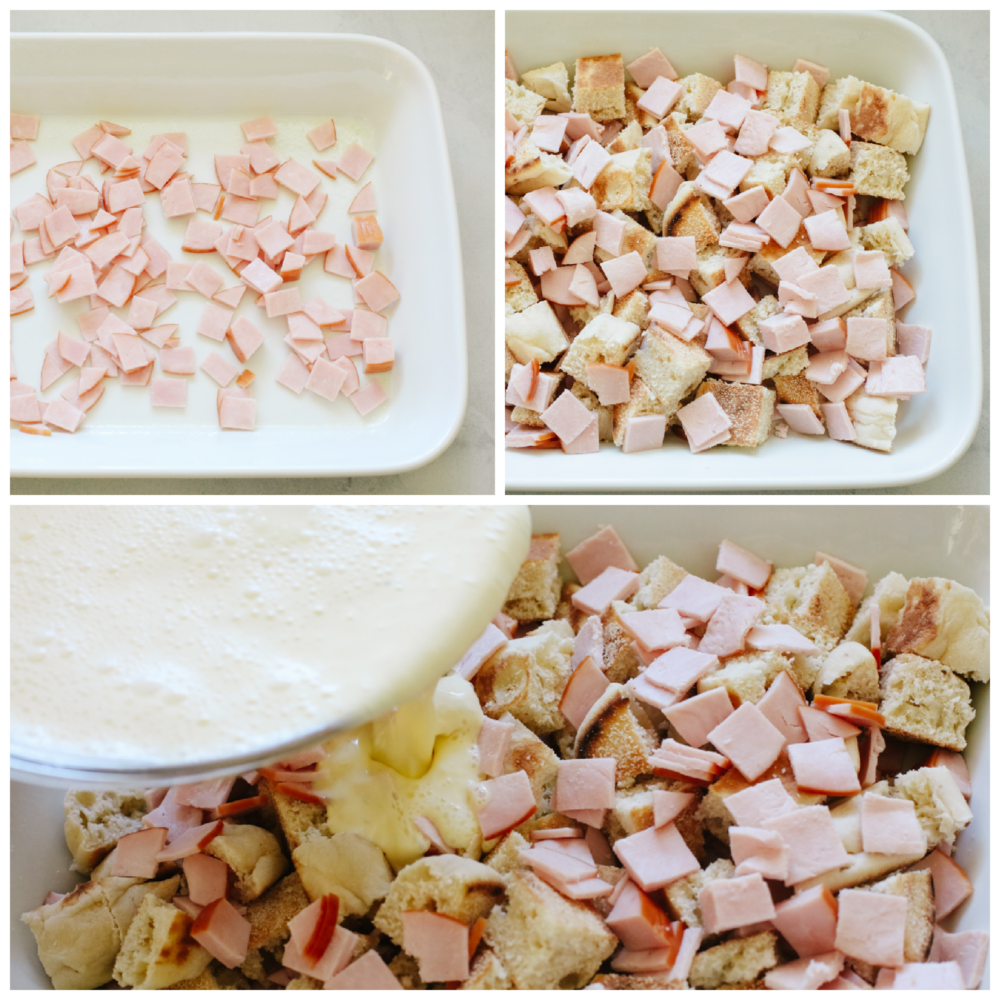
Process shots of layering eggs benedict casserole.

Making Your Breakfast Casserole

You’re going to love how easy this eggs benedict casserole is to make. All it takes is a little bit of layering! It’s perfect for throwing together for the holidays!

  1. Prep Pan, Layer: Let’s start! First, lightly grease a 9×13 inch baking dish. Sprinkle half of the Canadian bacon (or ham) in the dish, then add the chopped english muffins, then top with remaining Canadian bacon.
  2. Whisk Wet Ingredients: In a large bowl, whisk together the eggs, milk, salt, and pepper. Pour over the top of the english muffins and Canadian bacon. Cover and refrigerate overnight.
  3. Bake: Next, preheat your oven to 375 degrees. Bake (covered with foil) for 35 minutes. Uncover and bake another 10-15 minutes longer or until a knife inserted near the center comes out clean (a few crumbs are okay but there shouldn’t be any wet/soggy crumbs on the knife).
  4. Prep Sauce: While casserole is baking, prepare the sauce. In top of a double boiler (or you can use a metal bowl over a pot of simmering water) whisk together the egg yolks, heavy cream, lemon juice, and mustard until blended. Continue to cook (whisking constantly) until mixture has thickened enough that it can coat the back of a spoon when dipped in. Reduce heat to low and slowly whisk in the melted butter. Drizzle over casserole, garnish with chopped parsley (if desired) and serve immediately.
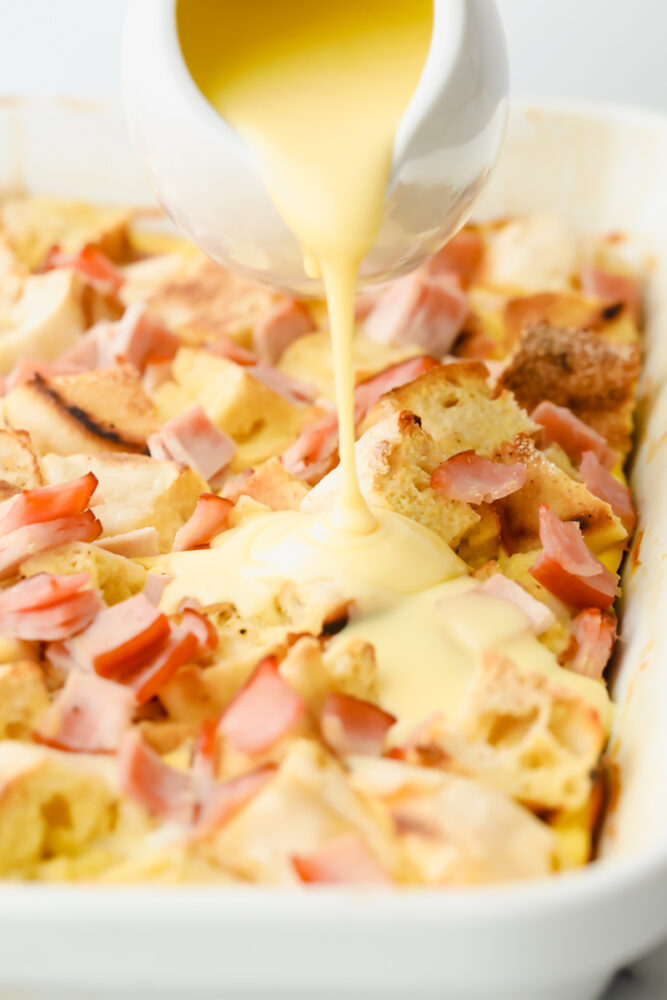
Pouring hollandaise sauce over casserole.

Tips for Making Your Casserole

This eggs benedict casserole is so easy and delicious! Here are a few ways you can customize and upgrade this dish! You’re going to love it. It’s been a regular in the breakfast lineup at my house!

  • Meat: Instead of Canadian bacon, feel free to use chopped ham, bacon, or even turkey or sausage! This is a perfect recipe for using up your Thanksgiving leftovers!
  • Add Heat: You can make your hollandaise sauce a little spicy by adding ½ teaspoon of cayenne pepper! The heat is amazing with the zesty flavor of the sauce!
  • Make it Dairy-Free: You can easily make this casserole dairy-free by swapping heavy cream for coconut cream or your favorite nut milk!
  • Add More Flavor: You can customize your eggs benedict casserole by adding extra herbs and spices! Some of my favorites are nutmeg, Italian seasoning, and paprika!
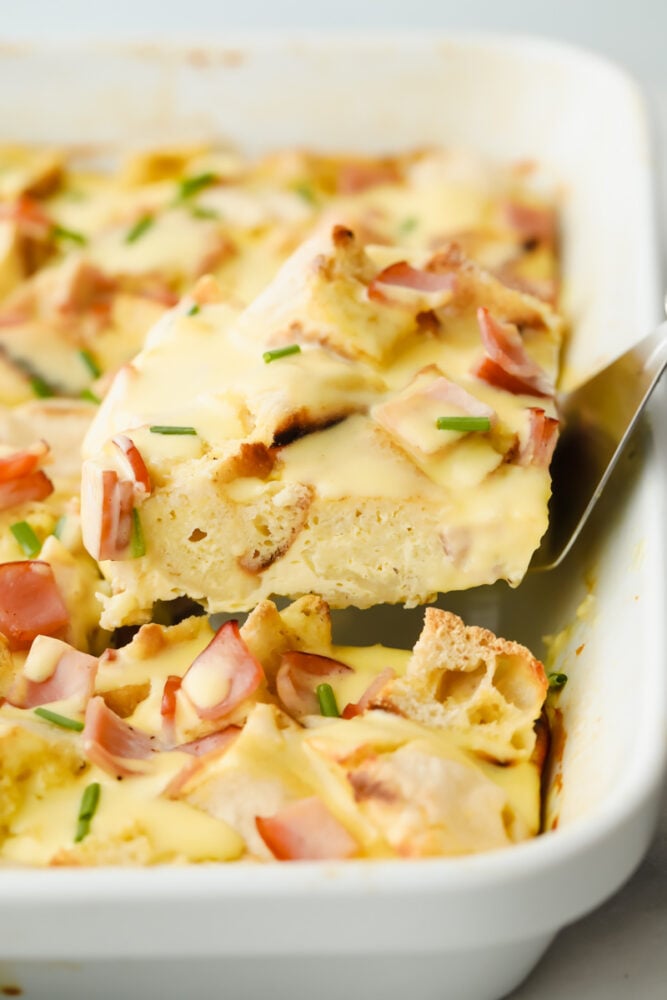
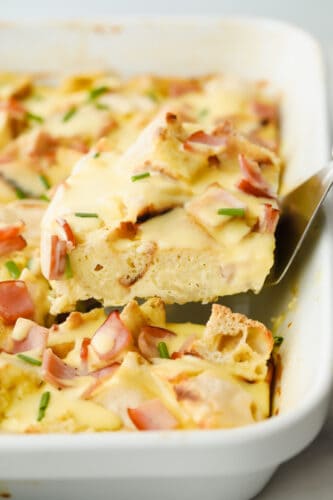
Taking a slice of casserole out of the pan.

Storing Leftover Casserole

I love having a slice of this eggs benedict casserole warmed up days after I’ve made it! It tastes just as good as when it’s made fresh!

  • In the Refrigerator: Wrap your casserole with plastic wrap or store in an airtight container. It will last for 2-3 days.
  • Reheating: Reheat your casserole in the oven at 350 degrees Fahrenheit until warmed through!

Taking a bite of egg benedict casserole topped with hollandaise sauce.
Print

Overnight Eggs Benedict Casserole

This overnight eggs benedict casserole is super easy to make and loaded with flavor! With layers of English muffins and Canadian bacon, all topped with a zesty hollandaise sauce, breakfast doesn’t get better than this!
Course Breakfast
Cuisine American
Keyword eggs benedict casserole
Prep Time 15 minutes
Cook Time 45 minutes
Total Time 1 hour
Servings 6 Servings
Calories 602kcal
Author Alyssa Rivers

Ingredients

  • 12 ounces Canadian bacon or thick deli cut ham- diced
  • 6 homemade English muffins cut into one inch cubes or store bought
  • 8 large eggs
  • 2 cups milk heavy cream or half & half
  • 1 teaspoon salt
  • ½ teaspoon pepper

Sauce

  • 4 large egg yolks
  • ½ cup heavy cream
  • 2 tablespoons fresh lemon juice
  • 2 teaspoons dijon mustard
  • ½ cup butter melted

Instructions

  • Lightly grease a 9×13 inch baking dish. Sprinkle half of the Canadian bacon (or ham) in the dish, then add the chopped English muffins, then top with remaining Canadian bacon.
  • In a large bowl, whisk together the eggs, milk, salt, and pepper. Pour over the top of the English muffins and Canadian bacon. Cover and refrigerate overnight.
  • Preheat oven to 375 degrees. Bake (covered with foil) for 35 minutes. Uncover and bake another 10-15 minutes longer or until a knife inserted near the center comes out clean (a few crumbs are okay but there shouldn't be any wet/soggy crumbs on the knife).
  • While casserole is baking, prepare the sauce. On top of a double boiler (or you can use a metal bowl over a pot of simmering water) whisk together the egg yolks, heavy cream, lemon juice, and mustard until blended. Continue to cook (whisking constantly) until the mixture has thickened enough that it can coat the back of a spoon when dipped in. Reduce heat to low and slowly whisk in the melted butter. Drizzle over casserole, garnish with chopped parsley (if desired), and serve immediately.

Notes

*Prep time does not include overnight chilling time.
Updated on November 30, 2021
Originally Posted on February 27, 2016

Nutrition

Calories: 602kcal | Carbohydrates: 33g | Protein: 29g | Fat: 39g | Saturated Fat: 20g | Cholesterol: 453mg | Sodium: 1450mg | Potassium: 486mg | Fiber: 2g | Sugar: 5g | Vitamin A: 1386IU | Vitamin C: 2mg | Calcium: 192mg | Iron: 2mg


source https://therecipecritic.com/overnight-eggs-benedict-casserole/
Share:

Christmas Wreath Charcuterie

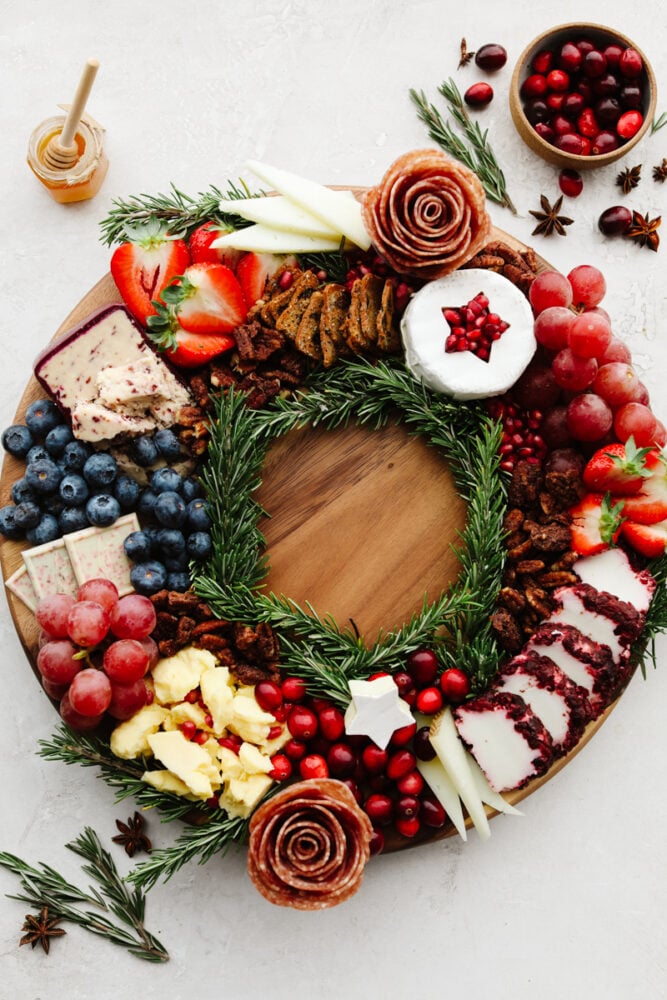
This Christmas wreath charcuterie board is the perfect festive touch to any holiday party! It’s stunning and delicious! Plus, it’s super easy to make and all of your guests will be so impressed!

If you are looking for more holiday appetizers to make this Christmas season then try out these Christmas Cornflake Wreaths, this AMAZING Cranberry Salsa, and these delicious homemade Madeleines!

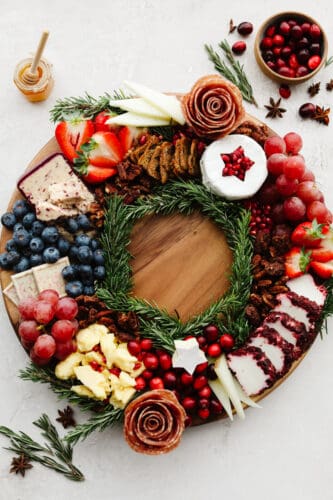
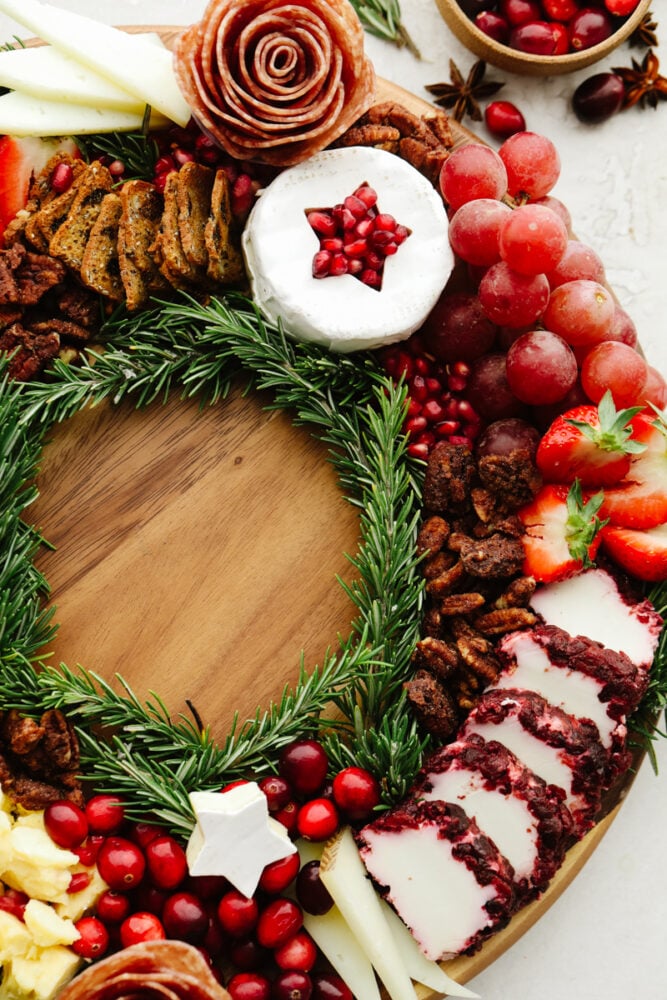
A Christmas wreath charcuterie board.

Christmas Wreath Charcuterie

This wreath isn’t meant to be hung on your door… it’s meant to be eaten! Which is the best kind of wreath in my opinion! I LOVE a good charcuterie (shar-koo-tuh-ree) board! They are SO delicious and you can literally make them for any occasion. I love how fancy they look and how you can put whatever you want on them to make them just what your party needs! This board is no exception! Filled with Christmas colors and delicious cheeses, fruits, and meat… It’s going to catch the attention of each and every one of your guests!

The best part about this is that it’s SO simple to make but it looks like a million bucks! I have included the step-by-step instructions to take you through exactly what you need to do to make this on your own at home. Once you are done, you will want to make a charcuterie board for everything! And you can! I love to make them with kid-friendly snacks for my kids to eat after school. They think it’s so fancy and they love it! There is no right way to make this so get creative and go crazy!

Cheese to Use for a Christmas Wreath Charcuterie

I like to start out building up a charcuterie board with my cheeses. As I said, feel free to use whatever items that you want on your board! Here are the cheeses that I used on this board:

  • Garlic Herb Brie
  • English Cheddar Cheese
  • Cranberry Cheese
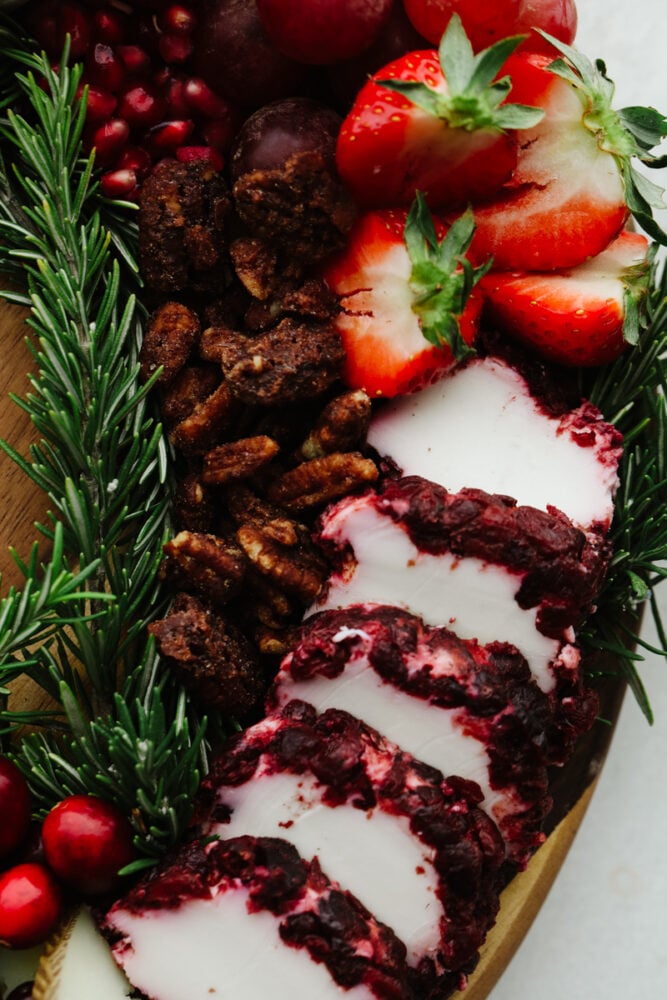
  • Cranberry Cinnamon Goat’s Milk Cheese

If you love cheese and want to add in some more or these cheeses aren’t available then you could also try manchego, provolone, and pepper jack! You can’t go wrong with using more cheese!

A close up of the side of the charcuterie board with nuts, cheeses and cranberries.

Meats To Use on a Christmas Wreath Charcuterie

I didn’t load up this board with too many meats! But the beauty of these boards is that you can do that and use only exactly what you want! I used one specifically because I knew that I could form it into a gorgeous flower! For this board I used:

  • Italian Dry Salami

If you want to add in more meats and less cheese and fruits then I suggest using some pepperoni, prosciutto, Spanish chorizo, or capocollo!

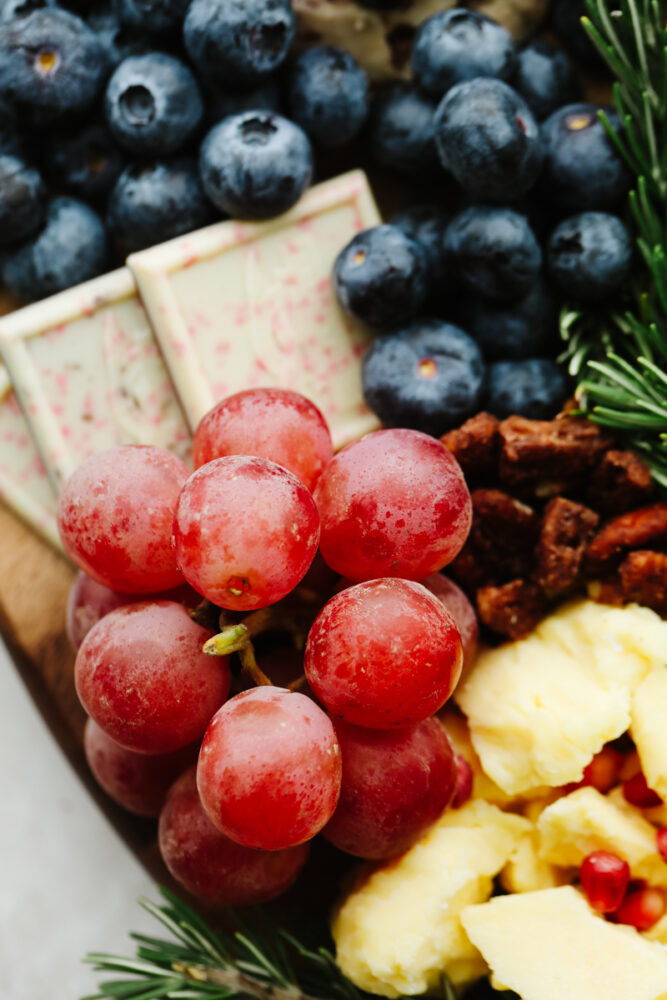
A close up of the side of the Christmas wreath charcuterie board. Grapes, cheese, pecans, cranberries and blueberries.

Next Comes the Fruit!

The key to making a Christmas charcuterie wreath turn out so festive are the colors that you put on it! And the most color that you will get will be from the fruits that you pick! I picked some bold colors so that they would really pop on my board. Here are the fruits that I used:

  • Strawberries
  • Grapes
  • Pomegranate
  • Cranberries
  • Blueberries

I especially like to add fruit to a charcuterie board not only because it’s a classic ingredient but because of the great taste and texture. It’s nice to have some juicy, fresh taste to complement all of the savory meats and cheeses!

A close up of some grapes and fruit on the charcuterie board.

Don’t Forget the Nuts, Crackers and Sweets!

The final ingredients that you add to this board really take it to the next level in taste and texture! Adding in the nuts, crackers, and chocolates will be what set your board apart, and finish it off before you are ready to garnish! Here are the nuts, crackers, and sweets that I used:

  • Pistachios
  • Candied pecans
  • Baked crackers
  • Ghiradelli peppermint bark squares

This part of the board is a big mixture of salty and sweet which is so important! Using both makes it so that they will go with everything else on the board! If you would like to add more of these things then you can try using some chocolate whoppers, wheat thins, walnuts, almonds, and macadamia nuts!

A close up of some cheese, candied pecans, strawberries and a rosemary sprig.

Let’s Put it All Together!

Now that you’ve gathered all of the ingredients for this board, it’s time for the fun part! To put it together and make this Christmas wreath charcuterie board! It’s so pretty and delicious! It will definitely be the star of the party!

  1. Add cheese: In a circular shape, start assembling your board by adding the cheeses.
  2. Arrange the meat: Then, you want to add the meats. I used a small cup and arranged the salami like a flower.
  3. Place the fruit: Add in your fruits
  4. Add in the rest of the ingredients: Fill the board in with chocolate, nuts and crackers.
  5. Garnish: Add the rosemary in the center and outline the wreath. Then, add some sprigs in the outside edges.

Make it Your Own!

Like I said before, the best part about a Christmas wreath charcuterie is that you can do whatever you want to make it your own! Here are some more ideas that you could use to make it festive and just perfect for your get-together!

  • Use shapes: I love using cookie cutters to make different shakes out of the cheeses! For this board, I cut out the cheese in the shape of a star and then filled it with pomegranate seeds. It really made them stand out! You can do this or even cut up smaller pieces in the shapes of stars of Christmas trees! Then you can really make it your own!
  • Change up your crackers: A good way to bring in some more flavor and texture is to add in more crackers. I like to use Trader Joe’s Savory Thin crackers, Wheat Thins, or Triscits.
  • Make it seasonal: Depending on what season you are making this for you can totally change it up! In fact, try this Halloween one or this fall one for next year! You can even make these for smaller occasions like mix together some goldfish, fruit snacks, fruit and veggies for your kids for an after school snack. These are SO fun to make!
Print

Christmas Wreath Charcuterie

This Christmas wreath charcuterie board is the perfect festive touch to any holiday party! It's stunning and delicious!
Course Appetizer
Cuisine American
Keyword Christmas charcuterie
Prep Time 20 minutes
Total Time 20 minutes
Servings 6 people
Author Alyssa Rivers

Ingredients

Meat

  • Italian Dry Salami

Cheese

  • Garlic Herb Brie
  • English Cheddar Cheese
  • Cranberry Cheese
  • Cranberry Cinnamon Goat’s Milk Cheese

Fruit

  • Strawberries
  • Grapes
  • Pomegranate
  • Cranberries
  • Blueberries

Nuts

  • Pistachios
  • Candied pecans

Chocolate

  • Ghiradelli Peppermint Bark Squares

Crackers:

  • Baked crackers (any kind)

Garnish

  • Rosemary sprigs

Instructions

  • In a circular shape charcuterie board, start assembling your board by adding the cheeses.
  • Next, add the meats. I used a small cup and arranged the salami like a flower.
  • Add in your fruits.
  • Fill the board in with nuts, chocolate, and crackers.
  • Add the rosemary in the center and outline the wreath. Add some sprigs to the outside edges.


source https://therecipecritic.com/christmas-charcuterie/

Share:

Cranberry Salsa (The Best Holiday Appetizer!)

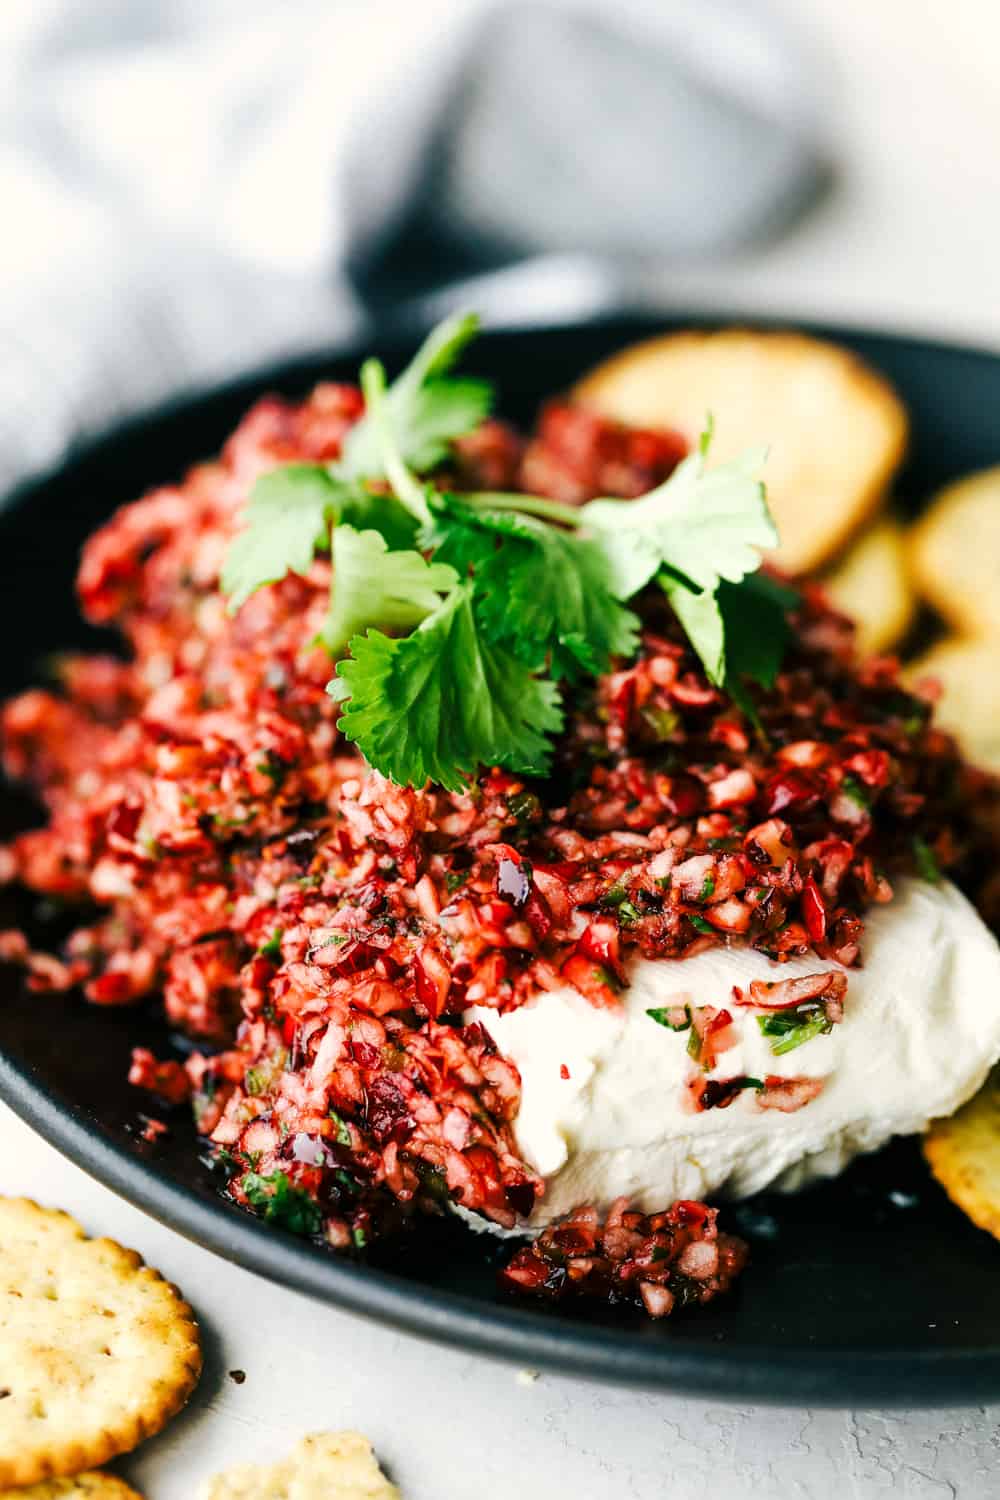
Cranberry salsa is a fresh cranberry mixture of sweet and savory that is laid over the top of cream cheese. This makes for the BEST holiday appetizer!

If you love holiday appetizers as much as I do then for your next holiday party you must try these Bacon Wrapped Brussels Sprouts, these Cranberry Pecan Brie Bites, or this Jalapeno Bacon Cheese Ball!

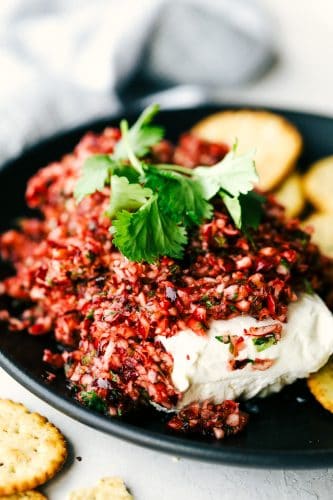
Cranberry salsa with cream cheese and crackers

Cranberry Salsa

Ok, I know that there are a million and one holiday appetizers out there for you to try. But believe me when I tell you that this one is seriously the best! I have never had so many people ask me for a recipe more! It’s the perfect combo of sweet and savory and on top of that… It’s SO simple to make! I bring it to every holiday party that I can and if I’m being honest… I make this long after Christmastime is over. It’s THAT good!

It’s so easy to make and is blended together in minutes.. Simply blend all the ingredients together leaving out the cream cheese. Once it is blended then lay your cream cheese flat on a plate and add your cranberry salsa over top for dipping. Your friends and family will be so impressed by the flavor this cranberry salsa recipe has to offer. It is filled with fresh and flavorful ingredients in every bite. Add some chips, sliced bread or crackers for dipping and make this one AMAZING holiday appetizer!

Ingredients in Cranberry Salsa

Bring this cranberry salsa to your next holiday party. Try it out and then you will see how simple this cranberry salsa is to make this holiday season! See the recipe card at the bottom of the post for exact measurements.

  • Fresh cranberries: Using fresh cranberries is perfect for this season. Fresh and tart really add to this dish!
  • Granny Smith apple: This adds a great crunch to the texture.
  • Green onions, cilantro and jalepeno: This is where the savory flavor comes in! They add a beautiful color as well as a little kick with the jalepeno.
  • Sugar: This adds some sweetness to counter the tanginess of the cream cheese.
  • Apple cider vinegar: I like that this adds a different taste to mix it all with.
  • Juice of one lime: A little citrus is used to cool down the jalapeño.
  • Cream cheese: This will be in it’s brick form with the salsa added over top of the cream cheese.

Let’s Make Some Salsa!

This cranberry salsa is going to blow you away with how good it is! It’s going to be a hit at any holiday party! Go ahead and try it, everyone is going to love it!

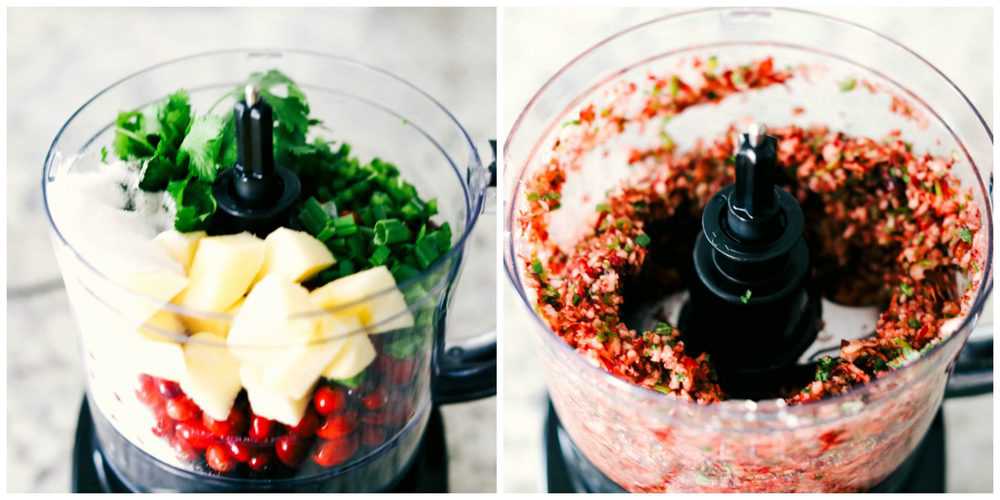
  1. Blend ingredients together: In a food processor add the cranberries, apple, green onions, cilantro, jalapeño, sugar, apple cider vinegar, and juice of one lime. Then, pulse until coarsely chopped.
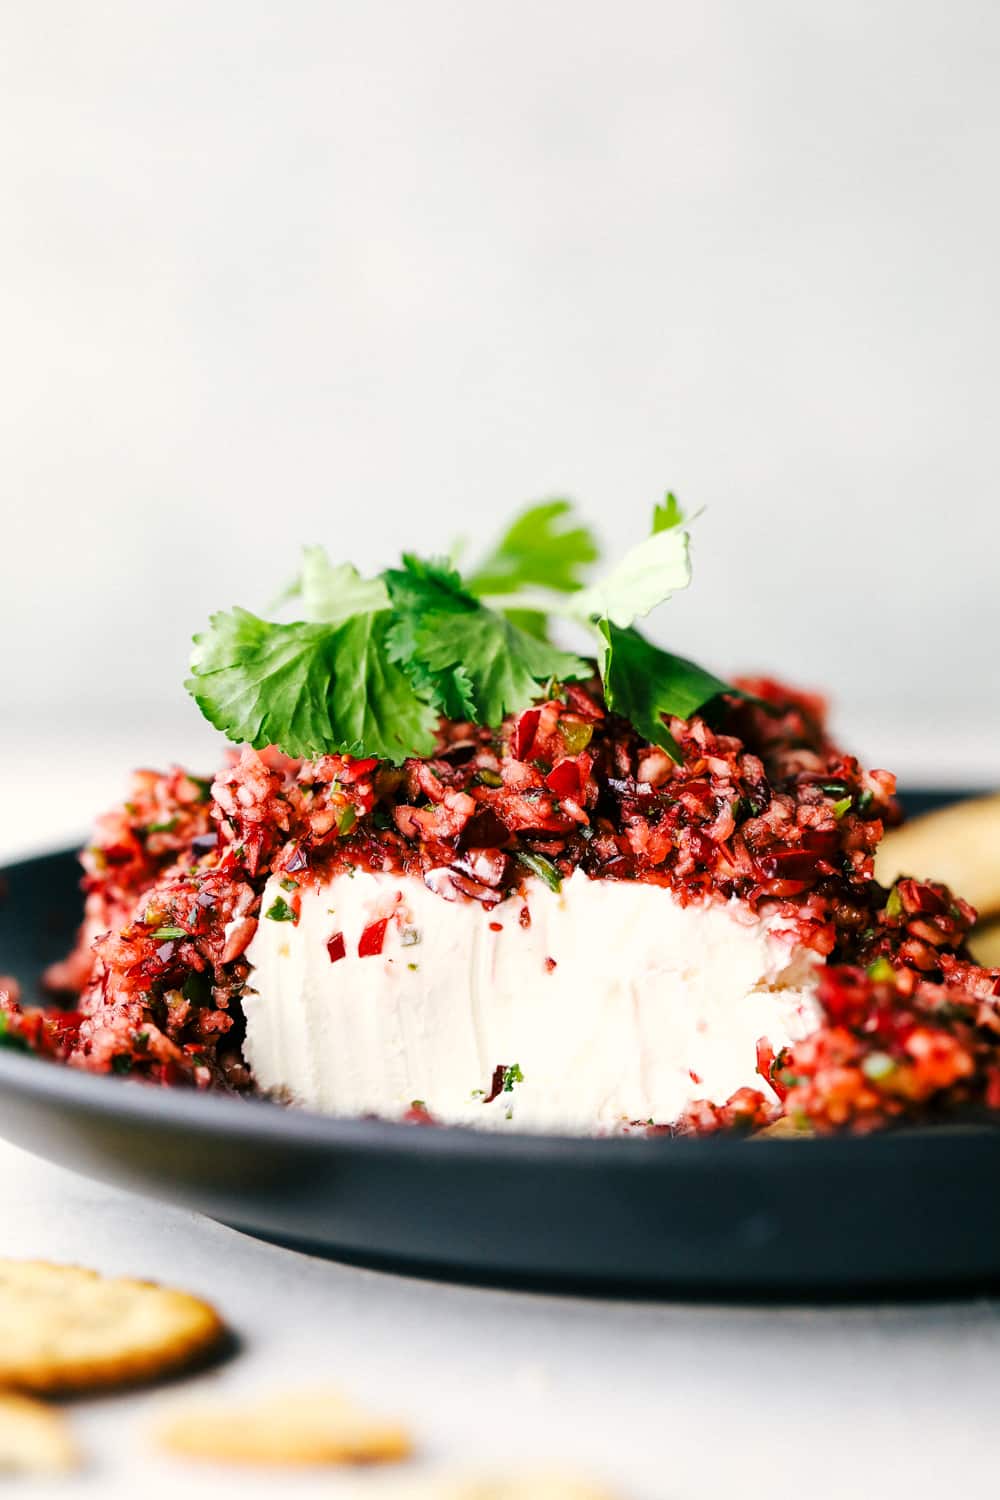
  2. Top and serve: Serve over softened cream cheese.
Cranberry salsa ingredients blended together.

Tips and Tricks to Making Cranberry Salsa

This holiday season be sure to make this cranberry salsa with fresh ingredients and know that it will be gone in minutes with everyone raving about it. Here are a few tips that will help make this cranberry salsa even better!

  • Food processor: If you do not have a food processor then a blender will work just as well to chop and blend all the ingredients together. Watch over your blender making sure you do not completely blend it all together. You will still want the cranberry salsa to be coarse, almost a chunky cranberry salsa.
  • Cranberries: Fresh is best and not canned for this cranberry salsa recipe. Cranberries are a little tart but with the sugar and juices it all blends together nicely.
  • Preparing cranberries: be sure to wash the cranberries and remove any cranberry that is squishy or too soft.
  • Jalapeños: Cut the ends off the jalapeños then slice in half and remove the seeds from them. The seeds hold in most of the heat. Add as little to no seeds to the food processor or blender depending on how hot you like your cranberry salsa. Then, finish chopping your jalapeño.
  • Honey: If you would like another sweetener then add honey or substitute it for the sugar. This will give you a glaze look on your cranberry salsa and still have the sweet taste.
  • Limes: Fresh limes are great or using lime juice from a bottle will work well too.
Cranberry salsa over top of a cream cheese block.

What to Serve it With

This cranberry salsa makes for the best holiday appetizer and is sure to please a crowd. Enjoy it with these fun ways of spreading and dipping it into the salsa this holiday season!

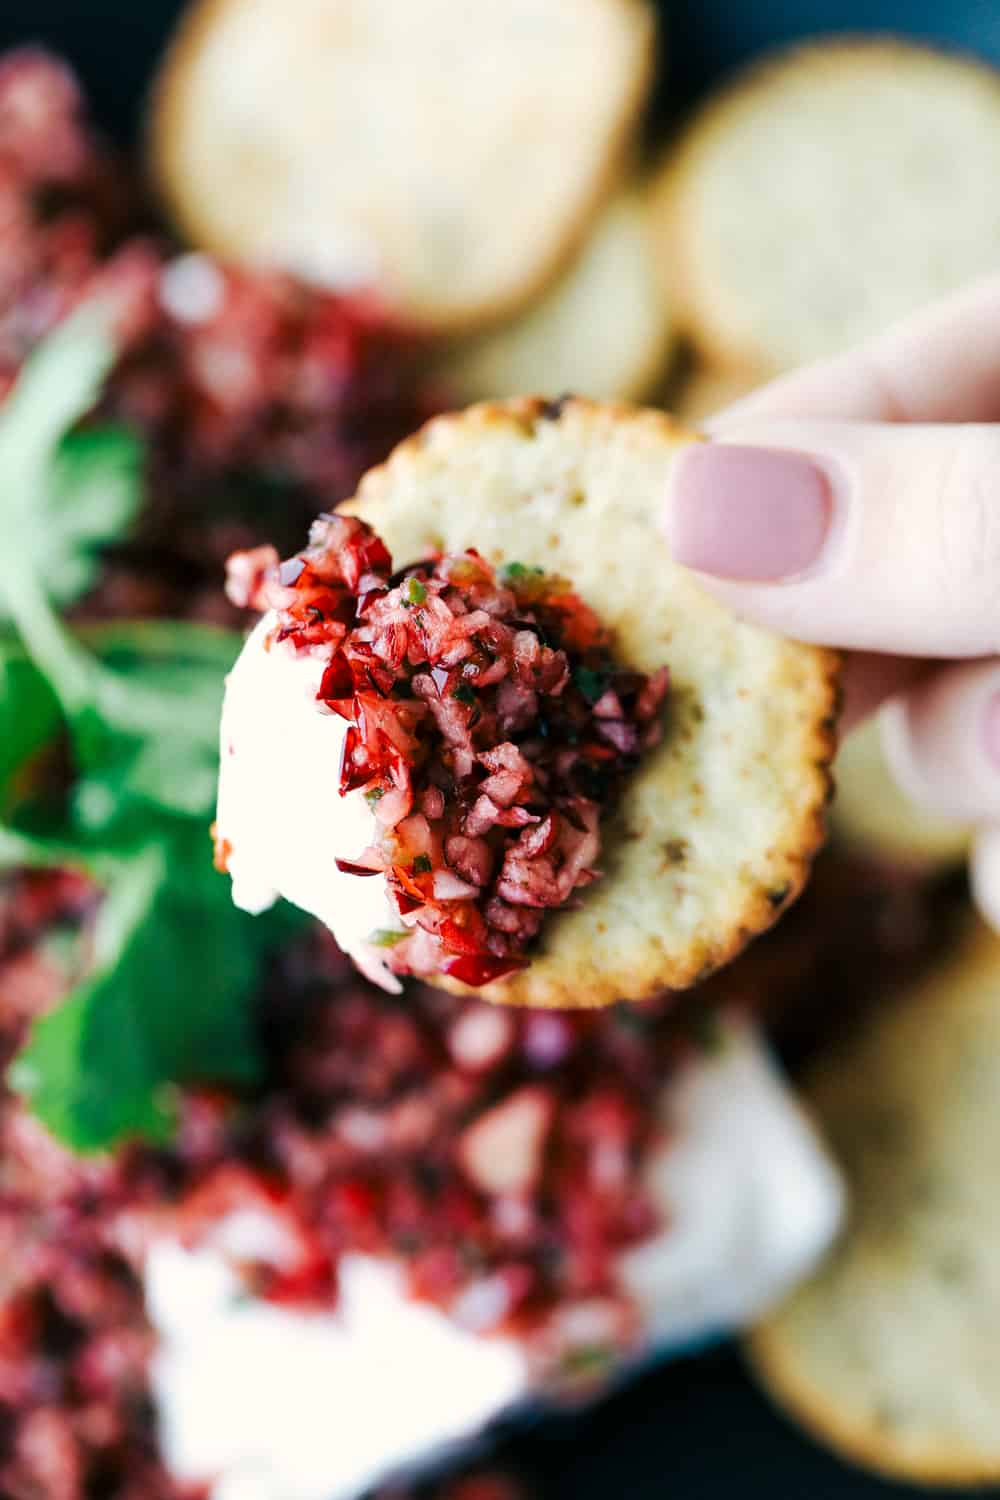
  • Crackers: Ritz crackers are soft but they still have the salty texture and great for spreading. Wheat thins, Triscuits or a whole wheat cracker are great for a sweet and salty blend.
  • Pretzels: The thick, flatter pretzels that are a little bigger in size are the best for dipping in this cranberry salsa.
  • Chips: Colored chips or a plain corn chip is delicious to dip in this!
  • Bread: Slice up some Sourdough Bread, a Crostini or this French Baguette. Then, either spread this on or dip it in!
Cranberry salsa with cream cheese spread over a cracker.

How to Store Leftovers (Or Make it Ahead of Time!)

With simple ingredients and with quick and easy instructions, this cranberry salsa comes together beautifully for your next holiday appetizer! Here are some great ways to store it.

  • Can you make cranberry salsa recipe ahead of time? Yes! This cranberry salsa will last in the refrigerator for up to 7 days when sealed in an airtight container. When ready to serve it then simply take it out and add it over cream cheese and crackers.
  • Can you freeze cranberry salsa? It is best fresh but if needed you can freeze this up to 1 month. When ready to serve it then let thaw in the refrigerator. Before serving, drain all of the extra juices from the cranberry salsa leaving it with only the chunks rather than with the juice.
Print

Cranberry Salsa (The Best Holiday Appetizer!)

Cranberry salsa is a fresh cranberry mixture of sweet and savory that is laid over the top of cream cheese. This makes for the BEST holiday appetizer!
Course Appetizer, Snack
Cuisine American
Keyword cranberry
Prep Time 10 minutes
Total Time 10 minutes
Servings 12 people
Calories 127kcal
Author Alyssa Rivers

Ingredients

  • 12 ounces fresh cranberries
  • 1 small Granny Smith apple cubed
  • 1/4 green onions chopped
  • 1/4 cup cilantro
  • 1 jalapeño seeded and diced
  • 1/2 cup sugar
  • 1 Tablespoon apple cider vinegar
  • juice of one lime
  • 1 8 ounce cream cheese softened

Instructions

  • In a food processor add the cranberries, apple, green onions, cilantro, jalapeño, sugar, apple cider vinegar, and juice of one lime. Pulse until coarsely chopped.
  • Serve over softened cream cheese.

Notes

Updated on November 29, 2021
Originally Posted on December 11, 2019

Nutrition

Calories: 127kcal | Carbohydrates: 15g | Protein: 1g | Fat: 7g | Saturated Fat: 4g | Cholesterol: 23mg | Sodium: 69mg | Potassium: 70mg | Fiber: 2g | Sugar: 12g | Vitamin A: 346IU | Vitamin C: 6mg | Calcium: 24mg | Iron: 1mg


source https://therecipecritic.com/cranberry-salsa/
Share:

One-Pot Chicken Stew

Chicken Stew is hearty, filling, and comforting! It is the perfect dish for Sunday dinner or a cold rainy day! This chicken stew is made with potatoes, carrots, onions, celery, and chicken cooked until fall-apart tender.

Stews are a fall favorite! Try this Tortellini Soup, Beef Stew, or Vegetable Beef Soup for more stew ideas this fall.

A pot of chicken stew with a wooden spoon.

Homemade Chicken Stew

Nothing says comfort food like a warm stew. I took one of my favorite Beef Stew Recipes and replaced the beef with chicken thighs. It is just as rich and comforting as beef stew and is perfect for those cold winter days! This tastes amazing when you serve it with some crusty bread and a delicious side salad! Then you will have an entire delicious meal that the whole family will love!

This chicken stew cooks in the oven for 1 ½ hours or until the chicken is super tender and falls apart easily. It is best to cut the celery, carrots, potatoes, and onions on the larger side. This will help them since they will be cooking for a long period of time in the oven without breaking down! Not only is this stew delicious but it’s super simple to make. Plus, when I can cook my entire meal, veggies included, in one pot… Well, I call that a win!

Ingredients for Chicken Stew

This stew is perfect for your family! This is comfort food at its finest! See the recipe card below for exact ingredient measurements.

  • Chicken: I like to use boneless skinless chicken thighs. They have the most flavor and hold up better when cooking for longer periods of time.
  • Salt: This will enhance all of the other flavors in the stew!
  • Pepper: I use just the right amount to add some flavor but I’m not adding any heat.
  • Butter: I used unsalted butter that’s at room temperature (for easier mixing)
  • Vegetables: Onions, carrots, baby potatoes and celery are added.
  • Spices: Bay leaves, fresh thyme and sage are added. Feel free to substitute dried in place of the fresh.
  • Dry sherry: You can also substitute white wine in place of the dry sherry or leave it out if you prefer.
  • Chicken stock: This gives the base of the dish a lot of flavor.
  • Cornstarch: This is used to thicken up the stew at the end!
  • Parsley: This will be a garnish on top!

How to Make Stew

Enjoy this homemade chicken stew this fall. Impress your family with how simple it is to make a hearty and delicious family dinner!

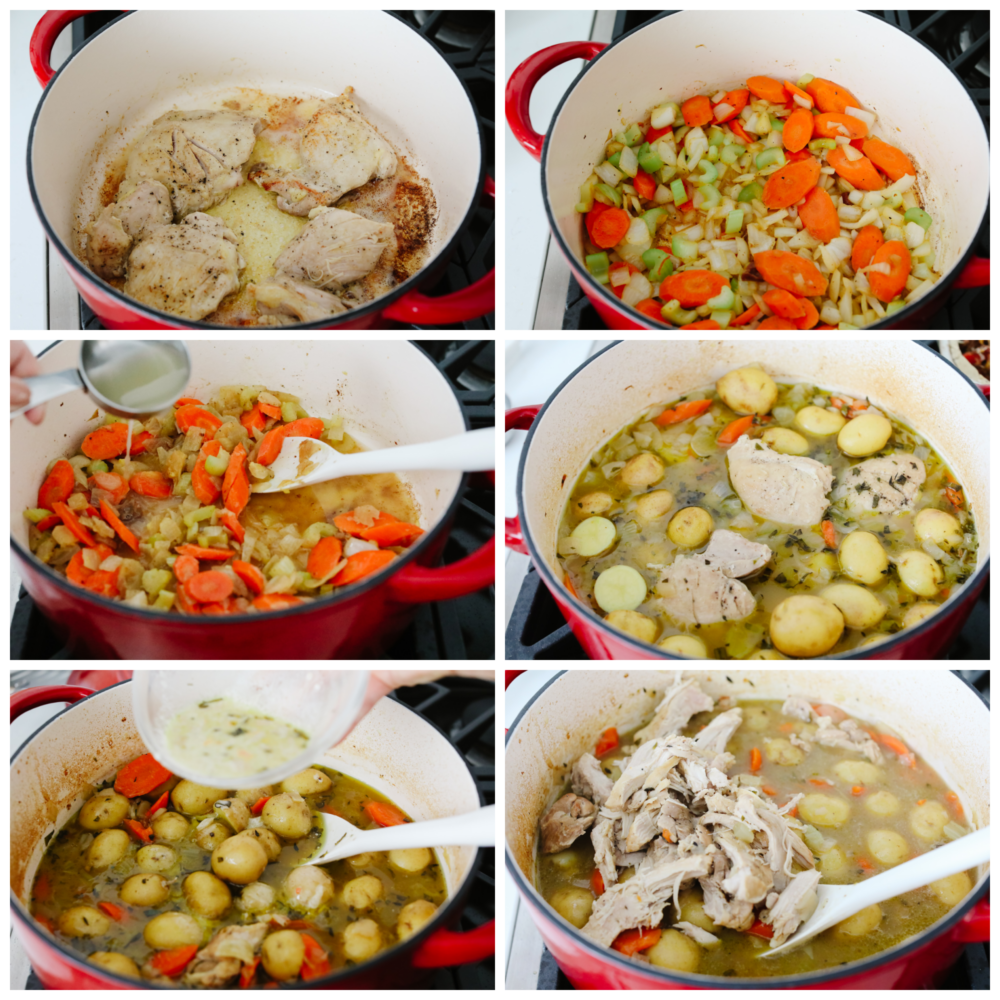
  1. Preheat and prep: Preheat oven to 350 degrees. Season chicken on both sides with salt and pepper.
  2. Brown the chicken:Heat butter in a large dutch oven over medium high heat. Add in chicken and sear on both sides until golden brown, 2-3 minutes a side. (You just want to get color on the chicken it won’t be fully cooked). Remove the chicken from the pan and set aside.
  3. Saute the veggies: Add in the carrots, onion and celery to the pan and saute for 5 minutes.
  4. Deglaze the pan: Add in the sherry to deglaze the pan. Scrap the brown bites off the bottom of the pan.
  5. Cook: Return the chicken to the pan along with the chicken broth, thyme, sage and bay leaves. Cover and place in the oven for 1 hour. 
  6. Add in potatoes and cook for additional 30 minutes: Carefully remove the pot from the oven and add in the potatoes. Return back to the oven and cook for 30 more minutes or until the potatoes are tender.
  7. Thicken the stew: To thicken the stew remove ¼ cup of the chicken broth liquid to a small bowl and whisk in 2 tablespoons of cornstarch. Add the mixture to the pot and bring to a rolling simmer on the stove. Cook for 1-2 minutes or until the sauce is thickened. 
  8. Serve: Remove bay leaves and top with fresh parsley and serve immediately with crusty bread for serving!
6 pictures showing how to cook veggies and chicken for stew.

Understanding How to Make the BEST Stew

If you aren’t familiar with how to make stew, then there may be a few things that you need to know! Here are a couple of common questions that people have before cooking up this chicken stew. Once you know these then you will be a pro!

  • What does it mean to deglaze? So when it comes to making a stew, this is a super important step! When you are told to deglaze a pan it means that you are adding a liquid to your hot pan to release all of the carmelized bits at the bottom (the bits of dark brown from searing your meat and veggies). It’s what adds so much more flavor to the base of your stew! You’ve probably done this in recipes before and just didn’t know that there was a name for it!
  • Why thicken your stew? At the end of this recipe, it tells you how to add cornstarch to thicken your stew. The reason for this is because stew is not as thin as a soup. Stew is typically thicken and heartier. So, if you want that classic consistency then add in that cornstarch!
  • Why can’t I add the potatoes in at the same time as the other vegetables? You don’t add in the potatoes until about halfway through because they cook so fast. You don’t want your potatoes to turn out all mushy! So putting them in later helps them to keep their shape and cooks them so that they are just right!
Chicken stew in a pot with a wooden spoon.

How to Store Leftovers

Some people will argue that stew is actually better to eat the next day! And with this chicken stew… they may just be right! In fact, double the recipe and you can have this again for lunch or dinner during the week! If you have leftovers, here is how you can store them!

  • Refrigerate: Once your stew has cooled then place it in an airttight container in your fridge. It will last 3-4 days!
  • Reheat: When you are ready to eat your stew then take it out of the fridge and place it in a pot. You can reheat it on your stove on medium heat until heated through.
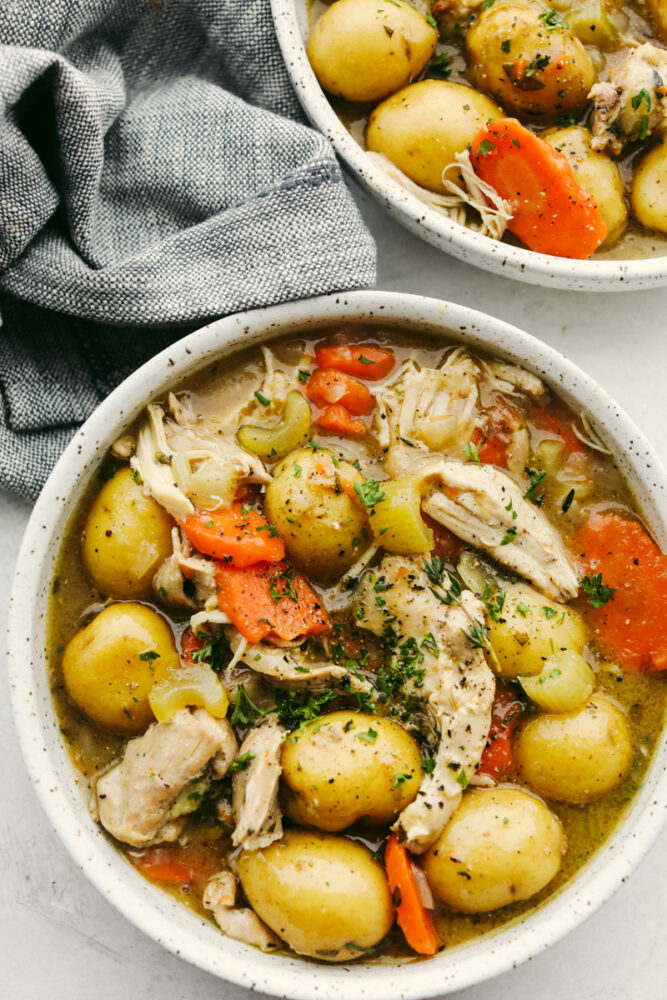
Chicken stew in a bowl, ready to serve.
Print

One-Pot Chicken Stew

Chicken stew is hearty, filling, and comforting! It is the perfect dish for Sunday dinner or a cold rainy day! This chicken stew is made with potatoes, carrots, onions, celery, and chicken cooked until fall-apart tender.
Course Dinner, Main Course
Cuisine American
Keyword Chicken Stew, stew
Prep Time 10 minutes
Cook Time 40 minutes
Total Time 50 minutes
Servings 8 People
Calories 192kcal
Author Alyssa Rivers

Ingredients

  • 1 1/2 pounds boneless skinless chicken thighs
  • 1 tesapoon salt
  • 1/2 teaspoon pepper
  • 2 Tablespoon unsalted butter
  • 1 large onion, large dice
  • 3 medium carrots, sliced into ½ inch slices
  • 3 ribs celery, large dice
  • 1/2 cup dry sherry
  • 1 teaspoon fresh thyme
  • 2 teaspoon fresh sage
  • 3 whole bay leaves
  • 1 1/2 pounds mini tri-color potatoes, cut in half
  • 4 cups chicken stock
  • 2 Tablespoon cornstarch
  • parsley for serving, if desired

Instructions

  • Preheat oven to 350 degrees. Season chicken on both sides with salt and pepper.
  • Heat butter in a large dutch oven over medium high heat. Add in chicken and sear on both sides until golden brown, 2-3 minutes a side. (You just want to get color on the chicken it won't be fully cooked). Remove the chicken from the pan and set aside.
  • Add in the carrots, onion and celery to the pan and saute for 5 minutes.
  • Add in the sherry to deglaze the pan. Scrap the brown bites off the bottom of the pan.
  • Return the chicken to the pan along with the chicken broth, thyme, sage, and bay leaves. Cover and place in the oven for 1 hour.
  • Carefully remove the pot from the oven and add in the potatoes. Return back to the oven and cook for 30 more minutes or until the potatoes are tender.
  • To thicken the stew remove ¼ cup of the chicken broth liquid to a small bowl and whisk in 2 tablespoons of cornstarch. Add the mixture to the pot and bring to a rolling simmer on the stove. Cook for 1-2 minutes or until the sauce is thickened.
  • Remove bay leaves and top with fresh parsley and serve immediately with crusty bread for serving!

Notes

Updated on November 27, 2021
Originally Posted on September 4, 2020

Nutrition

Calories: 192kcal | Carbohydrates: 7g | Protein: 20g | Fat: 8g | Saturated Fat: 3g | Cholesterol: 92mg | Sodium: 539mg | Potassium: 345mg | Fiber: 1g | Sugar: 2g | Vitamin A: 144IU | Vitamin C: 1mg | Calcium: 19mg | Iron: 1mg


source https://therecipecritic.com/chicken-stew/
Share:

Popular

Archive

Slider Tag

Facebook

Header Ads

Recent in Food

Blog Archive

Recent Posts

Unordered List

  • Lorem ipsum dolor sit amet, consectetuer adipiscing elit.
  • Aliquam tincidunt mauris eu risus.
  • Vestibulum auctor dapibus neque.

Pages

Theme Support

Need our help to upload or customize this blogger template? Contact me with details about the theme customization you need.