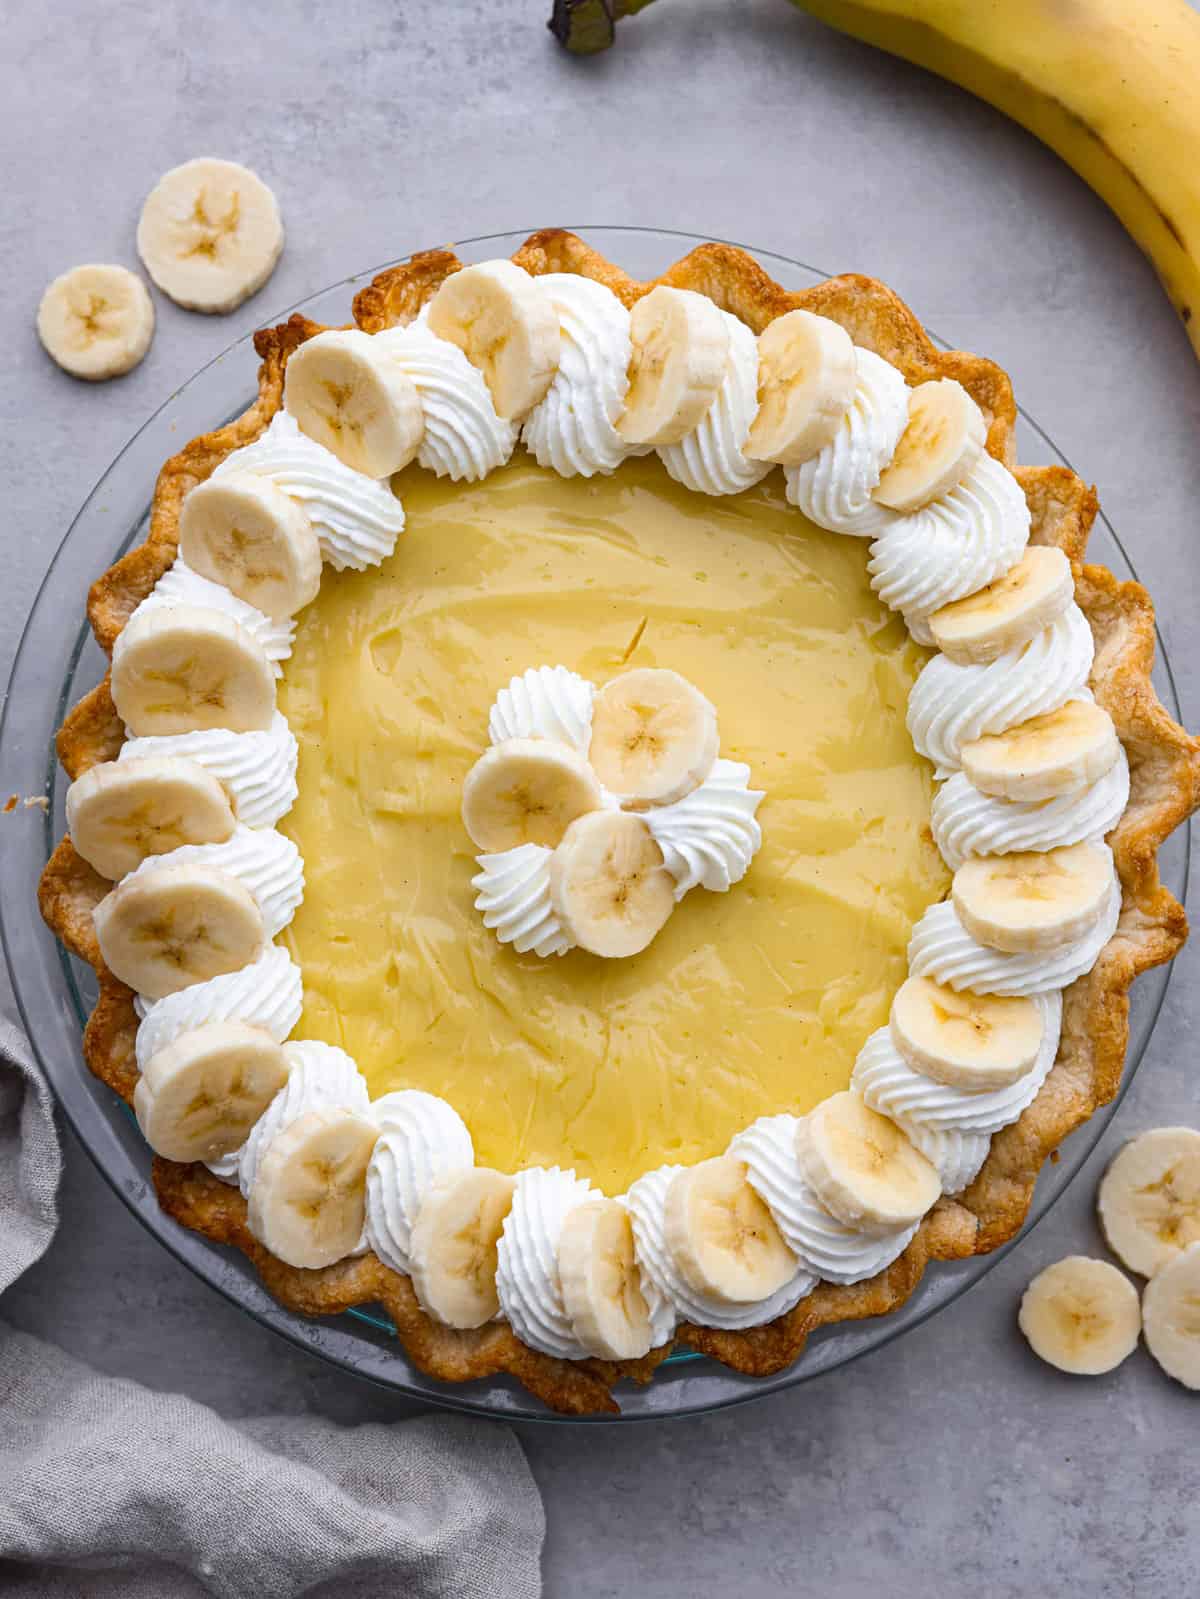
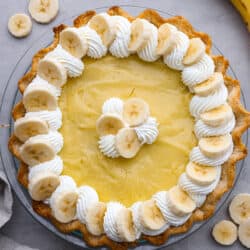
A classic dessert, made with a creamy vanilla bean and banana custard filling! This banana cream pie recipe is foolproof and ready to please a crowd!
There’s nothing quite as luscious or indulgent as homemade pie! For more creamy deliciousness, try this perfect coconut cream pie, key lime pie, or sweet potato pie!

Homemade Banana Cream Pie Recipe
You guys know I love a good pie. It’s the perfect way to end a meal, whether it’s a holiday or not! Having pies for dessert was a pretty common occurrence at our house growing up. (My grandma taught us well! I use her homemade pie crust recipe for everything!) Aside from cherry pie, banana cream was one of our absolute favorites! I still love it to this day and have to snag a piece whenever I see it at a potluck.
There’s just something about the natural sweetness of banana combined with a silky, custard filling that makes it so addictive. If you’ve been looking for a foolproof banana cream pie recipe, this is it! A golden, flaky crust filled with banana and vanilla bean custard, then topped with dollops of whipped cream and sliced bananas! It doesn’t get any better than this. If you’re as much of a fan of homemade pies as I am, I’m sure you’ll love my other pie recipes as well! Find my full list here!
Ingredients for Banana Cream Pie
This banana cream pie recipe uses a lot of standard baking ingredients, so you’ll likely have most (if not all) of them ready to go! You can find measurements for each ingredient below in the recipe card.
- Unbaked Pie Crust: Feel free to use a store-bought crust for easy prep! If you’re feeling ambitious, try making your own pie crust from scratch! It’s really not as difficult as it seems. My grandma’s recipe is tried and true and turns out golden and flaky every time. You can find the full recipe here!
- Granulated Sugar: Helps to sweeten the pie filling.
- Cornstarch: Cornstarch helps give your filling structure so it doesn’t spill out when cut into slices.
- Salt: Enhances the overall flavor of your pie!
- Whole Milk: The high-fat content of whole milk is what’s going to make your filling extra creamy and decadent.
- Egg Yolks: Needed for the custard-like banana cream filling. It makes it silky smooth!
- Unsalted Butter: Adds rich flavor and a creamy texture!
- Vanilla Extract and Vanilla Bean Paste: I like to add both for sweet, complex flavor.
- Sliced Bananas: You’ll add these both on top for a garnish and in between layers of the custard filling.
- Whipped Cream: The perfect finishing touch!
How to Make the Best Banana Cream Pie
This pie needs plenty of time to chill and set, so be sure you don’t make it last minute! Banana cream pie is perfect for making ahead to take some stress off of preparing dinner!
- Preheat Oven: Preheat the oven to 425 degrees Fahrenheit.
- Prepare Pie Dough: Place the pie dough into a 9-inch pie pan. Prick the bottom of the dough with a fork and chill in the freezer for 10-15 minutes.
- Blind Bake Crust: Once chilled, line the center of the pie crust with parchment paper and fill with ceramic pie weights or uncooked beans. Bake for 15 minutes so the shape of the crust sets before removing the parchment paper and pie weights. Bake the empty crust for about 15 additional minutes, or until the whole crust is nicely golden brown. Set aside to cool completely.
- Mix Custard Ingredients Together: Mix the sugar, cornstarch, and salt together in a heavy-bottomed medium saucepan. Whisk in the milk and egg yolks.
- Whisk: Heat over medium, whisking constantly until the mixture thickens and bubbles, which can take 5-8 minutes. Once thickened, continue to cook for an additional 1-2 minutes, still whisking constantly.
- Mix in Remaining Ingredients: Remove from the heat and whisk in the butter one piece at a time. Whisk in the vanilla and vanilla bean paste. Immediately pour half the mixture into the bottom of the cooled pie crust and smooth.
- Layer: Place enough sliced banana over the bottom layer of filling until it’s fully covered. Pour the remaining filling over the top of the bananas and smooth. Cover the hot filling with plastic wrap, making sure the plastic wrap makes contact with all of the filling so it doesn’t form a film over the top as it cools.
- Chill: Chill the pie in the fridge for 4 hours, or overnight.
- Add Toppings: Before serving, top with whipped cream and additional sliced bananas as desired.

Tips and Variations
These are a few extra ways you can customize your banana cream pie to your liking. I’ve added some extra topping ideas as well!
- Graham Cracker Crust: If you don’t want to use a pie crust, a graham cracker crust is a great choice, too! It adds a mouthwatering nutty flavor to banana cream pie. Simply blend the crackers in a food processor until a fine powder is formed, mix with a little melted butter, and then press into your pan! Just like a normal pie crust, you’ll want to prebake your graham cracker crust for about 10 minutes before adding your banana cream filling. Note: You can also use Nilla Wafers or Biscoff cookies!
- Use Ripe Bananas: This recipe works best with tender bananas, so avoid any that are too green!
- More Toppings: Want to take your banana cream pie to the next level? Try adding a drizzle of caramel sauce for the ultimate indulgent treat. Almond slivers or macadamia nuts are a great addition too and add the best texture!

Storing Leftover Pie
When I get a late-night craving for something sweet, finding homemade pie in the fridge is the BEST. Especially when it’s this luscious banana cream! Here’s how to keep your pie tasting fresh and delicious after you’ve made it!
- In the Refrigerator: Store leftover banana cream pie in an airtight container or loosely covered in plastic wrap for up to 4 days.

More Creamy and Delicious Pie Recipes
Desserts
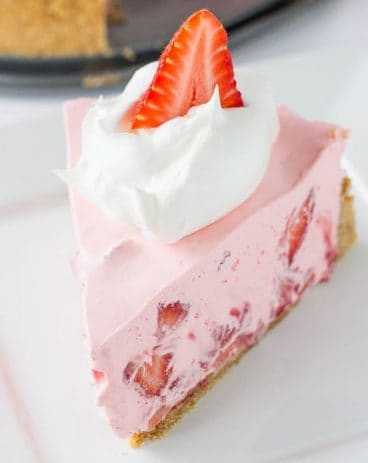
No-Bake Strawberry and Cream Pie
Desserts
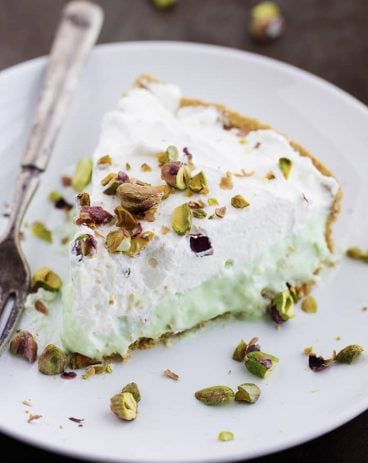
No Bake Pistachio Cream Pie
Desserts
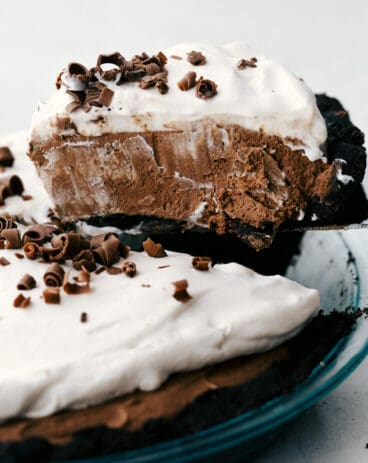
No-Bake Chocolate Pie
Desserts
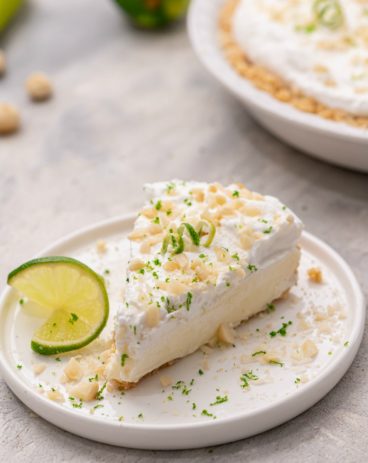
Macadamia Key Lime Pie
Banana Cream Pie
Ingredients
- 1 9- inch unbaked pie crust homemade or store bought
- 1 cup granulated sugar
- ¼ cup cornstarch
- ½ teaspoon salt
- 2 ¼ cup whole milk
- 4 large egg yolks
- 3 tablespoons unsalted butter cut into 6 pieces
- 1 ½ teaspoon vanilla extract
- ¼ teaspoon vanilla bean paste
- 1-2 bananas sliced
- Whipped cream for topping
Instructions
-
Preheat the oven to 425℉.
-
Place the pie dough into a 9-inch pie pan. Prick the bottom of the dough with a fork and chill in the freezer for 10-15 minutes.
-
Once chilled, line the center of the pie crust with parchment paper and fill with ceramic pie weights or uncooked beans. Bake for 15 minutes so the shape of the crust sets before removing the parchment paper and pie weights. Bake the empty crust for about 15 additional minutes, or until the whole crust is nicely golden brown. Set aside to cool completely.
-
Filling
-
Mix the sugar, cornstarch, and salt together in a heavy-bottomed medium saucepan. Whisk in the milk and egg yolks.
-
Heat over medium, whisking constantly until the mixture thickens and bubbles, which can take 5-8 minutes. Once thickened, continue to cook for an additional 1-2 minutes, still whisking constantly.
-
Remove from the heat and whisk in the butter one piece at a time. Whisk in the vanilla and vanilla bean paste. Immediately pour half the mixture into the bottom of the cooled pie crust and smooth.
-
Place enough sliced banana over the bottom layer of filling until it’s fully covered. Pour the remaining filling over the top of the bananas and smooth. Cover the hot filling with plastic wrap, making sure the plastic wrap makes contact with all of the filling so it doesn’t form a film over the top as it cools.
-
Chill the pie in the fridge for 4 hours, or overnight.
-
Before serving, top with whipped cream and additional sliced bananas as desired.
Nutrition
source https://therecipecritic.com/banana-cream-pie/