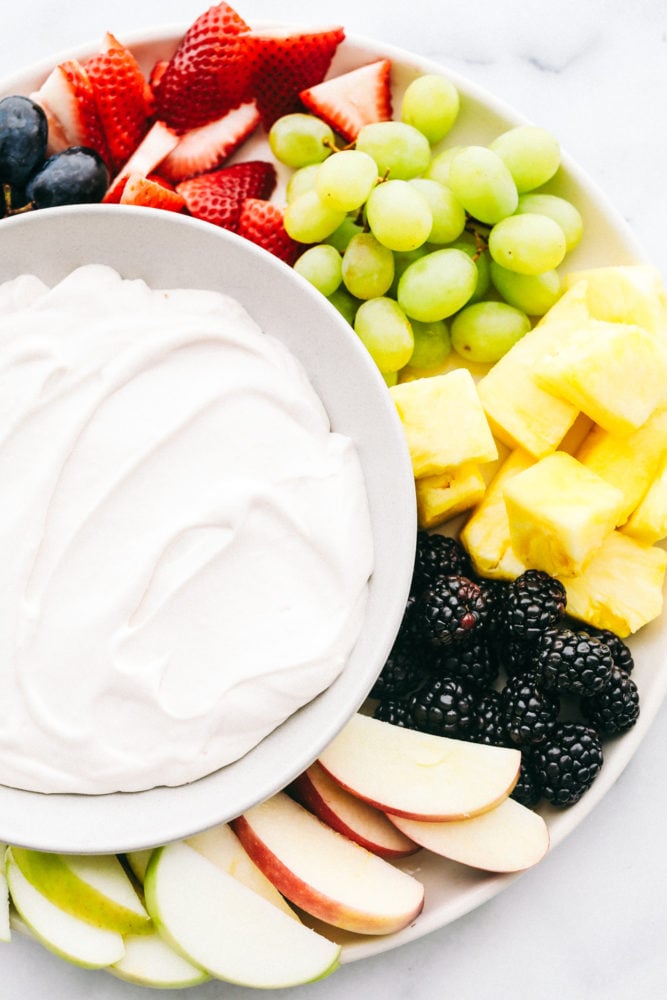
Baked Cream Cheese Chicken Taquitos

Cream cheese chicken taquitos are filled with a tender chicken mixture with cheese sprinkled over top then rolled in a flour tortilla and baked to perfection. These taquitos are a family favorite!

Similar to baked chicken tacos these taquitos are simple to make and won’t last long! It is a Mexican dish that everyone will love.
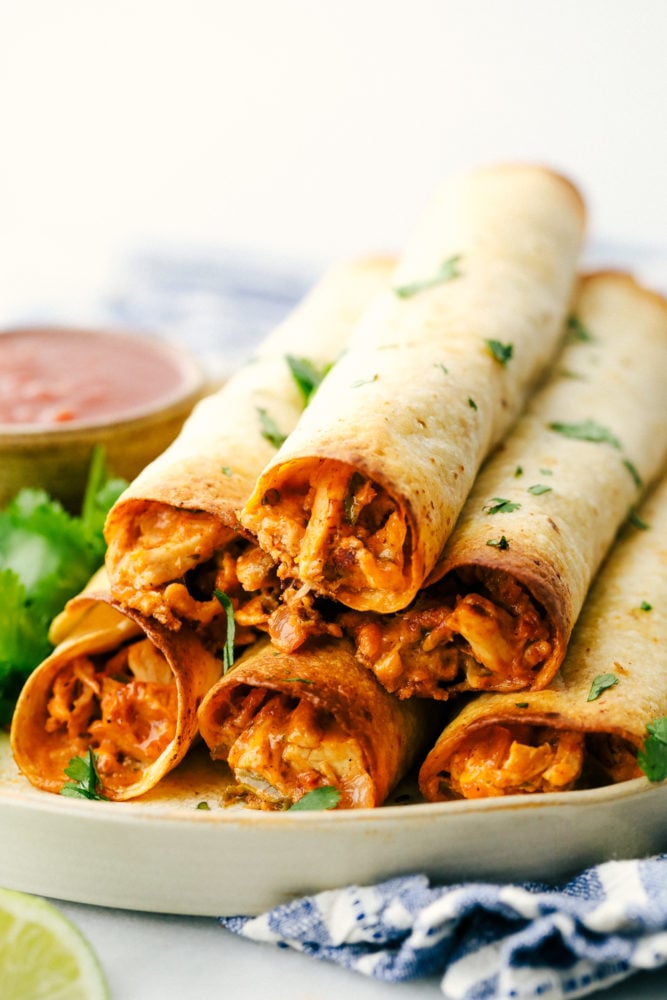
Chicken taquitos stacked on top of each other on a plate.

Baked Cream Cheese Chicken Taquitos

I have had to get pretty creative with lunches for my boys since they have been home during the summer. It is so easy to just send them to school and not have to worry about what we are going to eat for lunch. And I know that we all are so excited to get back to Utah and get back to school, friends and family. I saw an idea for baked taquitos on pinterest and I knew that my boys would love them!

Sure enough! They gobbled these bad boys up. The cream cheese chicken was awesome inside of these and gave them amazing flavor. They were creamy and absolutely delish! I love recipes that become an instant favorite. I will take baking over frying any day and it gave the outside a yummy crunch. We absolutely loved these things. They are going to be made a lot at our house and make a perfect lunch or dinner!

What are Taquitos?

Taquitos are a favorite Mexican dish that can be an appetizer, snack or main meal for dinner. Fill a small tortilla with meat and cheese then tightly rolled it up. Once it is rolled up, it is traditionally deep fried but they can be baked too.

Baked Chicken Taquitos Ingredients:

This is a recipe that I love! It is quick and easy to make plus it has pantry staple ingredients that are already in the kitchen. Mix them all together and the chicken filling is complete.

  • Chicken: Cooked and shredded chicken that can be already pre-cooked or cooked the same day.
  • Cream Cheese: This will be softened to add to the chicken mixture.
  • Salsa: Any salsa that is preferred will taste delicious. My restaurant style salsa is a favorite.
  • Cumin: A dry and earthy seasoning adds to this chicken mixture.
  • Chili Powder: Hint of spice from the chili powder can be omitted or left in.
  • Garlic Powder: I love the flavoring of garlic in my dishes.
  • Salt: Just a pinch!
  • Green Onion: Always a flavorful texture and color. 
  • Cilantro: This brings out an authentic Mexican flavor.
  • Lime Juice: Squeeze the lime juice over top the chicken mixture.
  • Colby Jack Cheese: The cheese is melted down in the filling when being baked.
  • Flour Tortillas: Small ones are best. Homemade tortillas are my favorite to make!

How to Make Homemade Chicken Taquitos:

Let’s make some taquitos! These homemade baked chicken taquitos are just simple to prepare and baked within minutes. They are filled with chicken mixture and then tightly rolled up making these taquitos a family favorite for sure.

  1. Prepare baking sheet: Preheat oven to 425 and prepare a baking sheet by lining it with foil and spraying it with cooking spray. Set aside.
  2. Combine filling ingredients: Soften the cream cheese in the microwave for about 15-20 seconds. In a mixing bowl, combine cream cheese, salsa, cumin, chili powder, garlic powder, lime juice, and salt. Add in the shredded chicken, colby jack cheese, green onions, and cilantro. Stir until combined well.
  3. Fill tortillas: Add about 3 Tablespoons of the chicken mixture about 1 inch from the edge of the flour tortilla. Roll it up and place it seam side down on the baking sheet. Repeat with each one and place about 1 inch apart not touching each other on baking sheet.
  4. Bake until brown and serve: Bake for 15-20 minutes or until the tortilla is lightly browning around the edges. Serve with sour cream, ranch, or your favorite sauce!
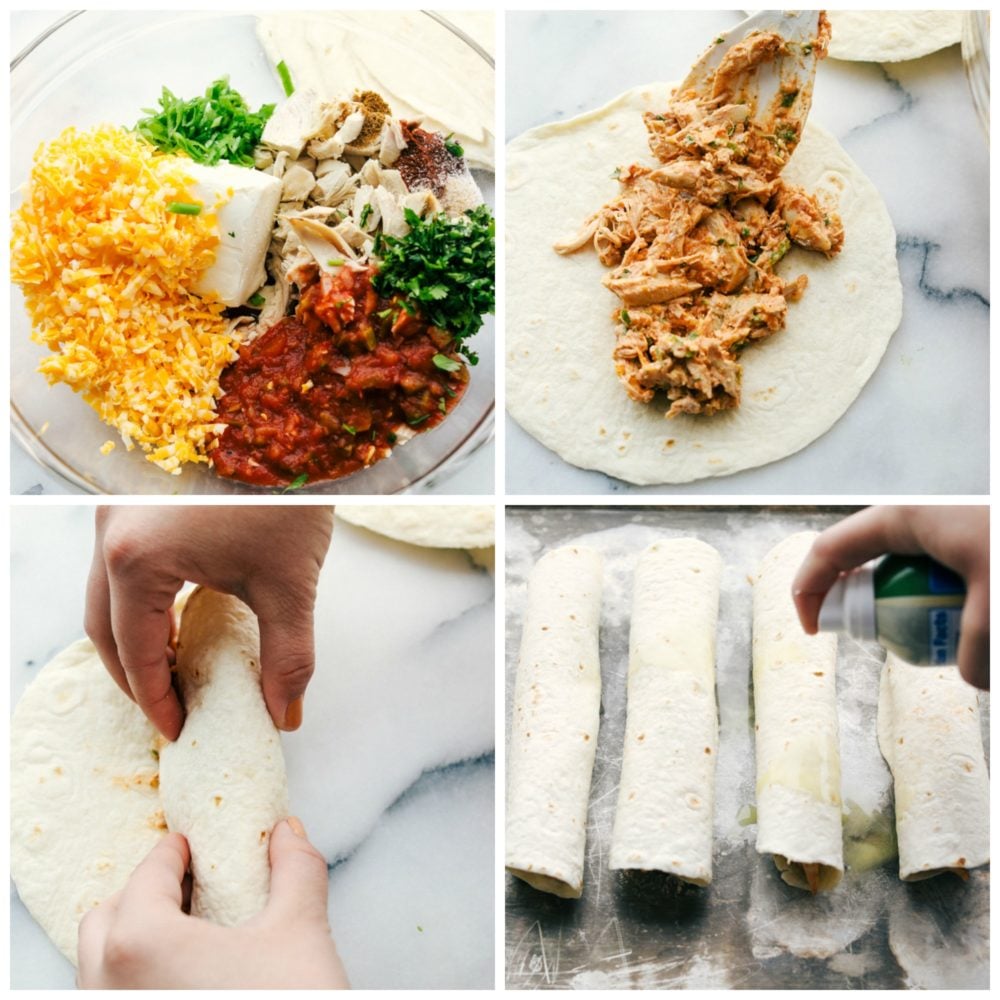
The process of making chicken taquitos. First photo on the left hand corner is all the filling ingredients in one glass bowl, The upper righthand corner is the chicken filling mixed together then laid in the flour tortilla in the middle. The bottom left hand corner the tortilla is being rolled up. The bottom right hand corner the rolled up tortillas are being sprayed on top.

Make a Complete Meal with Chicken Taquitos:

Another great thing about this taquitos recipe is it can be an appetizer, dinner time or even as a snack for after school. There are so many possibilities that are endless with these homemade chicken taquitos.
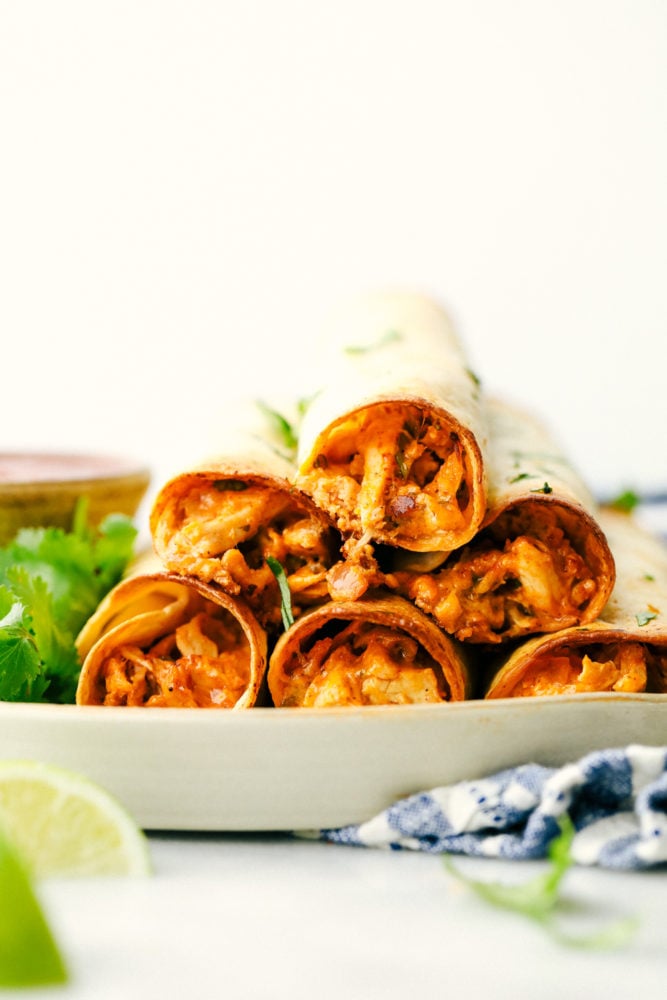
Cream cheese chicken taquitos are stacked on top of each other with lime wedges as a garnish.

Can you make these baked taquitos ahead of time?

Yes! Make this recipe as easy as you would like or more on the homemade side. These baked chicken taquitos are simple and one you will want to make over and over again.

  • Chicken: Make this a day ahead of time or use a pre-shredded chicken for the chicken ingredient.
  • Salsa: Pick your favorite salsa to make or have from the store.
  • Chicken mixture: Mix all the ingredients together and store in an airtight container for 24 hours long in the refrigerator.
  • Tortillas: Any flour tortilla will work for this. Homemade or store bought.

Storing Taquitos:

Being a busy mom and family having these already made up and letting the kids warm them up on their own when they are ready to enjoy makes this even easier. These are a great freezer meal as well as make ahead meal.

  • Refrigerator: Once cooked place in the refrigerator for in an airtight container or ziplock bag for 3 to 5 days. Reheating when desired.
  • Can you freeze taquitos? Yes, luckily the cream cheese and chicken mix freezes well. Place the already cooked chicken taquitos in a ziplock bag. These will stay frozen for up to 3 months long.
  • Reheating: When ready to reheat, place on a sprayed baking sheet frozen and bake at 400 degrees Fahrenheit for 15 to 20 minutes or until baked. Microwave is also another option that is much quicker.
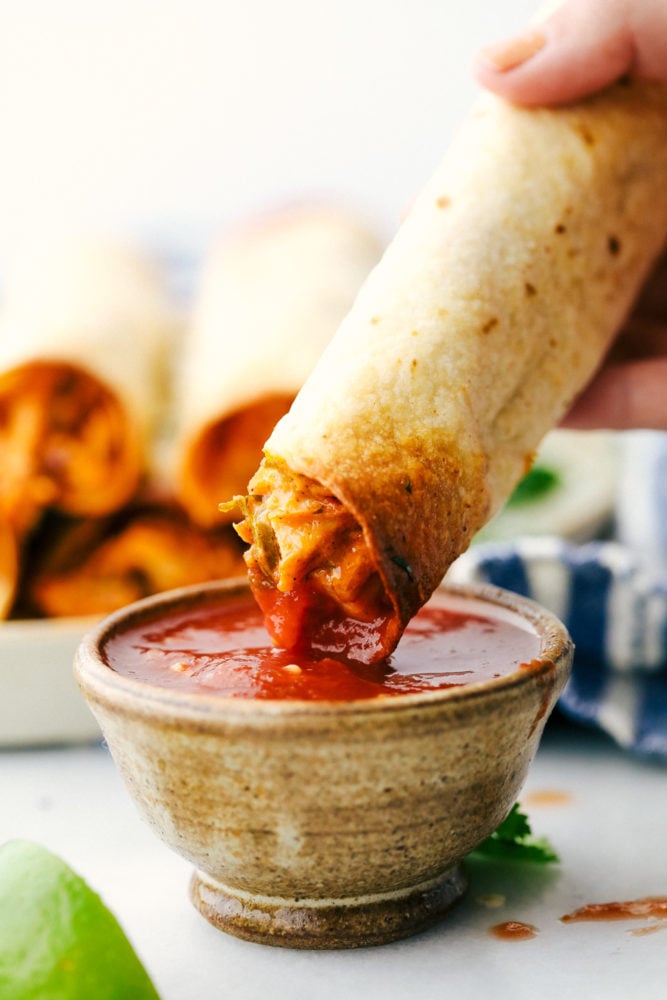
Cream cheese chicken taquito is being dipped in a red salsa.

Enjoy More Taquito Recipes:

Print

Baked Cream Cheese Chicken Taquitos

A delicious baked taquito with a cream cheese chicken inside that the entire family will love!
Course Dinner, Main Course
Cuisine Mexican
Keyword baked cream cheese chicken taquitos, chicken taquitos, Taquitos Recipe
Prep Time 15 minutes
Cook Time 15 minutes
Total Time 30 minutes
Servings 8 Servings
Calories 239kcal
Author Alyssa Rivers

Ingredients

  • 2 cups chicken cooked and shredded
  • 4 oz cream cheese
  • 1/3 cup salsa
  • 1/2 teaspoon cumin
  • 1 teaspoon chili powder
  • 1 teaspoon garlic powder
  • 1/4 teaspoon salt
  • 1 Tablespoon green onion finely chopped
  • 2 Tablespoons Cilantro finely chopped
  • 1 Tablespoon Lime Juice
  • 1 Cup Colby Jack Cheese
  • 8-10 small flour tortillas

Instructions

  • Preheat oven to 425 and prepare a baking sheet by lining it with foil and spraying it with cooking spray. Set aside.
  • Soften the cream cheese in the microwave for about 15-20 seconds. In a mixing bowl, combine cream cheese, salsa, cumin, chili powder, garlic powder, lime juice, and salt. Add in the shredded chicken, colby jack cheese, green onions, and cilantro. Stir until combined well.
  • Add about 3 Tablespoons of the chicken mixture about 1 inch from the edge of the flour tortilla. Roll it up and place it seam side down on the baking sheet. Repeat with each one and place about 1 inch apart not touching each other on baking sheet.
  • Bake for 15-20 minutes or until the tortilla is lightly browning around the edges. Serve with sour cream, ranch, or your favorite sauce!

Notes

Updated on April 7, 2020
Originally Posted on: July 31, 2014

Nutrition

Calories: 239kcal | Carbohydrates: 18g | Protein: 10g | Fat: 14g | Saturated Fat: 7g | Cholesterol: 41mg | Sodium: 514mg | Potassium: 152mg | Fiber: 1g | Sugar: 2g | Vitamin A: 514IU | Vitamin C: 1mg | Calcium: 163mg | Iron: 1mg


source https://therecipecritic.com/baked-cream-cheese-chicken-taquitos/
Share:

Avocado Egg Salad

Avocado egg salad is a twist on egg salad adding in the avocado for the color and delicious flavor! Add this to any sandwich or eat it straight from the bowl, it will be a new favorite!

You loved this Egg Salad recipe so much it is even better when you add an avocado! This combination is a perfect mix together!

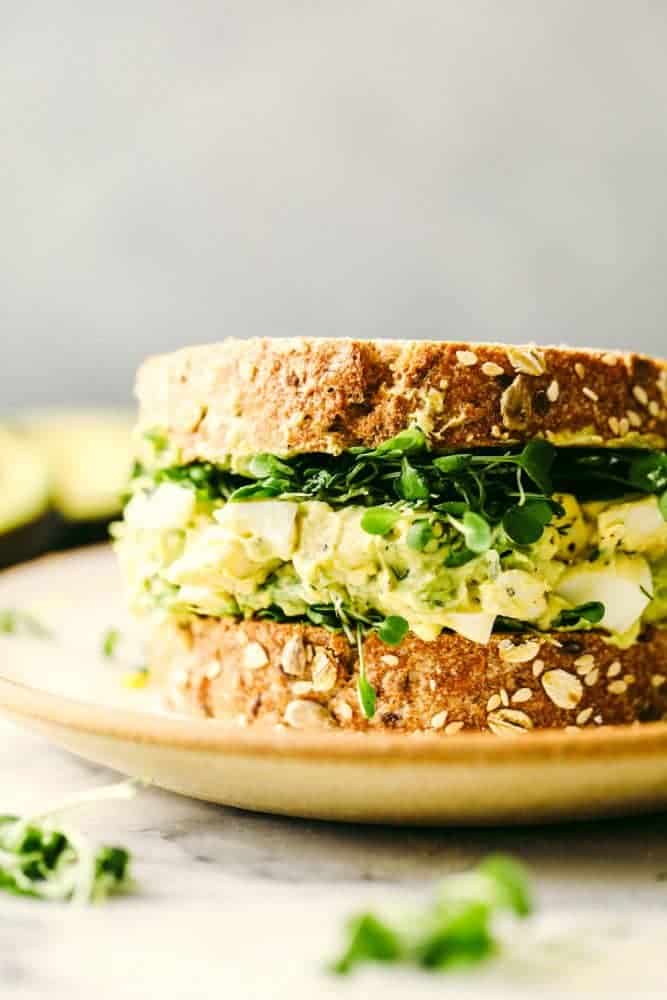
Avocado egg salad on a sandwich on a plate.

Avocado Egg Salad

This is a light and tasty egg salad that has one extra special ingredient! An avocado! It may sound different but it is so tasty and good. Still having that rich, thick texture and intense flavor adds to this salad or sandwich combo. So easy to mix together and add it to any kind of bread or toast. Simple ingredients for a simple recipe!

You will be making this recipe over and over again. The ingredients are simple to mix together and makes a creamy deliciousness! When making this salad you may think of celebrations and this is perfect for those special occasions or when needing to feed a crowd. The colors are soft and subtle ready for spring time. Light and tasty to bring on the warmer weather and fun days ahead with this simple to make avocado egg salad recipe.

Easy Avocado Egg Salad Ingredients:

  • Eggs: Boil eggs ahead of time and peel to add into the bowl.
  • Avocado: Slice and mash into the egg mixture.
  • Mayonnaise: Adds the creamy texture and flavor.
  • Dill: Minced
  • Chives: Have an onion flavoring with a hint of garlic flavoring in the chives.
  • Dijon Mustard: An intense flavoring of mustard with a sweet twist.
  • Salt and Pepper: Just a pinch for taste!

How to Make Avocado Egg Salad:

  1. Boil Eggs: Add the eggs to a saucepan and fill with cold water.   Bring water to a boil and immediately remove from heat.  Cover and let the eggs stand for 10-12 minutes.  Take the eggs out of the water and let cool.
  2. Mix together salad: Peel and chop the eggs and add them to a medium sized bowl.  Add avocado, mayonnaise, dill, chives, Dijon mustard, salt and pepper.  Mix well and mash avocado as you mix.  Spread on bread or use with your favorite crackers.

The ingredients to make avocado egg salad in a glass mixing bowl.

How to Hard Boil Eggs?

Place eggs in a large saucepan. Cover them with cool water by 1 inch. Cover with a lid and bring water to a boil over high heat; when the water has reached a boil, set the timer for the desired time. Boil for 6 – 7 minutes over medium-high heat for perfect hard-boiled eggs.

Avocado egg salad mixed together.

Tips for Making the Best Avocado Egg Salad:

  • Hard boil eggs: It is best to hard boil your eggs ahead of time. Try not to overcook the boiled eggs in the process.
  • Mashing avocados: Chunky avocados are better than a creamy avocado in this salad. Avocados are naturally creamy. The softer they are mashed and mixed together the better the salad will be.
  • Fresh Herbs: I personally prefer fresh herbs for this recipe. It seems to blend better and have that strong flavor that adds more to the salad.
  • Mayonnaise: If you need to substitute it for greek yogurt for an even lighter texture, that will alter the taste but will have the consistency needed.

Avocado egg salad mixed together in a gray bowl with a spoon inside of it.

How To Store It?

Store in an airtight container in the for 3 to 5 days long in the refrigerator. If you are enjoying a gathering and have the salad at room temperature it is best to store it after 1 to 2 hours or it is recommended to discard.

Avocado egg salad on a sandwich with Brussel sprouts.

Here are More Salad Sandwiches!

Print

Avocado Egg Salad

Avocado egg salad is a twist on egg salad adding in the avocado for the color and delicious flavor! Add this to any sandwich or eat it straight from the bowl, it will be a new favorite!
Course Main Course, Salad
Cuisine American
Keyword avocado egg salad, avocado egg salad recipe, egg salad recipe
Prep Time 10 minutes
Cook Time 12 minutes
Total Time 22 minutes
Servings 6 Sandwiches
Calories 205kcal
Author Alyssa Rivers

Ingredients

  • 8 large eggs
  • 1 large avocado
  • 1/4 cup mayonnaise
  • 1/4 cup dill minced
  • 2 tbsp chives minced
  • 2 tbsp dijon mustard
  • 1/2 tsp salt
  • 1/4 tsp pepper

Instructions

  • Add the eggs to a saucepan and fill with cold water. Bring water to a boil and immediately remove from heat. Cover and let the eggs stand for 10-12 minutes. Take the eggs out of the water and let cool.
  • Peel and chop the eggs and add them to a medium sized bowl. Add avocado, mayonnaise, dill, chives, Dijon mustard, salt and pepper. Mix well and mash avocado as you mix. Spread on bread or use with your favorite crackers.

Nutrition

Calories: 205kcal | Carbohydrates: 4g | Protein: 8g | Fat: 18g | Saturated Fat: 4g | Cholesterol: 222mg | Sodium: 395mg | Potassium: 250mg | Fiber: 2g | Sugar: 1g | Vitamin A: 366IU | Vitamin C: 3mg | Calcium: 40mg | Iron: 1mg


source https://therecipecritic.com/avocado-egg-salad/
Share:

This Southern Baptist Is A Matzah Expert

The science of crackers... Ahead of the Jewish holiday of Passover, we nerd out on matzah with help from the man who runs one of the biggest matzah factories in the world. Turns out those little holes in the matzah cracker (and other crackers like Ritz and Saltines) serve a very important purpose. Then Dan debates kosher law with a rabbi and shares his favorite ways to eat matzah, whether you're Jewish or not!

Get 500+ more great Sporkful episodes from our catalog and lots of other Stitcher goodness when you sign up for Stitcher Premium: www.StitcherPremium.com/Sporkful (promo code: SPORKFUL).

Transcript available at www.sporkful.com.


Share:

Tuna Noodle Casserole

This tuna noodle casserole is a family favorite that is filled with thick noodles, vegetables and tender chunks of tuna fish. All baked together in one pan in 30 minutes!

Tuna is a simple ingredient that can make a variety of meals like this easy tuna pasta salad, tuna avocado macaroni salad or tuna melt sandwich recipe. A can of tuna can go a long way!

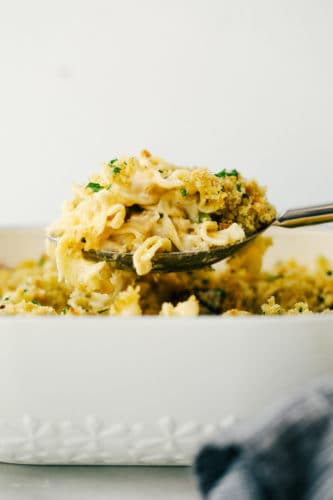
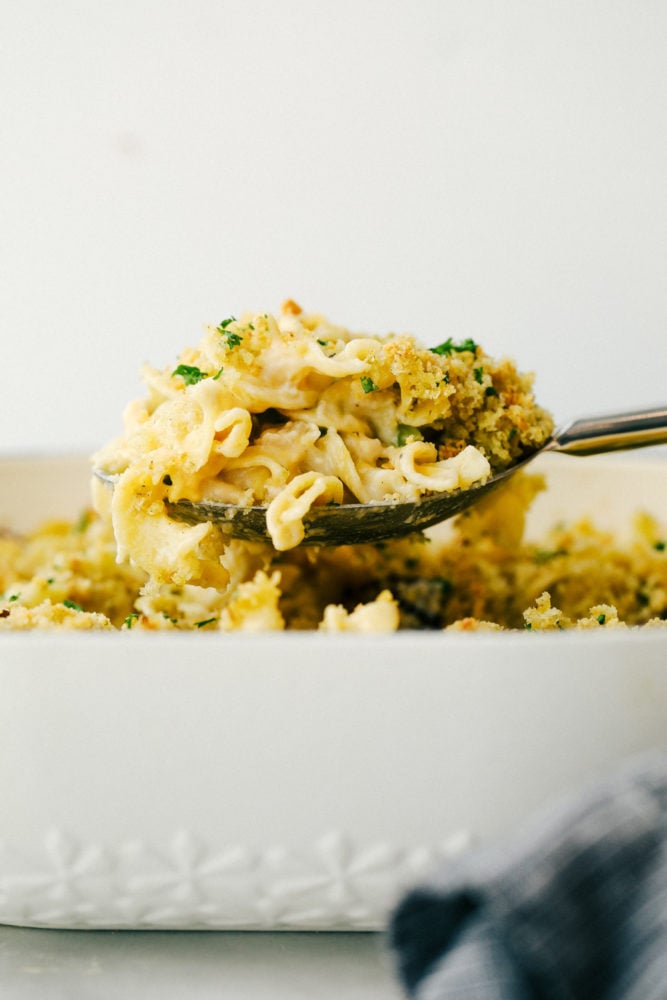
Tuna noodle casserole lifted up from the pan with a metal spoon.

Tuna Noodle Casserole

Be ready to sit down with your family enjoying a comforting meal all together with this tuna noodle casserole. It is filled with vegetables, chunks of tuna fish with a cheese mixture and Italian breadcrumbs sprinkled over top. This family dish is one that will be made over and over again! You can’t go wrong with this delicious casserole on your dinner table during a busy week.

Gather the family around to taste this tuna casserole. It is a one pan dish with less than 30 minutes to have it baked all together. It is a tried and true favorite in our family. All kids loved the tender noodles mixed with vegetables and tuna fish. Always a favorite combination that makes for a great dinner time meal. Be sure to cook the noodles first then add to the casserole dish. This is even perfect for making ahead of time or even freezing it for a freezer meal. This casserole is so versatile you will wonder why you haven’t had it yet! Enjoy this homemade tuna noodle casserole!

What is a Casserole?

I get asked this a lot! I am always shocked but also so happy to always explain. It is a mom’s best friend and a simple way to make a delicious homemade dinner in one pan. A casserole is a baked dinner dish that is filled with all the ingredients you need in order to make a complete meal. Usually a casserole is baked in a deep pan that is filled with a mixture or layers of ingredients then baked all together. Hopefully this the first of many casseroles that you make!

Tuna Noodle Casserole Ingredients:

Don’t let this ingredient list scare you away! It is a lot and looks intimidating. It is a simple casserole dish that is quick and easy to prepare, mix and bake all together. Each ingredient makes this casserole a perfect combination all mixed together.

  • Noodles: Wide Egg noodles soak up more and hold a thickness after being
  • Olive Oil: Helps sauté the vegetables together as well as adds a little flavoring at the same time. 
  • Onion: small is best. Not everyone loves onions and I understand that. You are welcome to omit the onion.
  • Celery: Pre-dice the celery the best you can at the thickness you prefer.
  • Mushrooms: Sliced up is best and in thin slices.
  • Butter: This butter and flour mixture is going to create a thickener for the sauce when baking.
  • Flour: Thicken a roux to make a sauce within the casserole.
  • Chicken Broth: Adds flavor as well as a thickener.
  • Milk: Whole milk is best for the thick sauce over the noodles.
  • Salt and Pepper: Just a pinch of each for taste and flavoring.
  • Tuna Fish: Cans of white albacore is my preferred choice but any tuna is delicious.
  • Frozen Peas: Thaw the peas before adding them into the noodle mix. 
  • Cheddar Cheese: Shredded is best and easier to sprinkle.
  • Parmesan: Grated in a bottle works well for the topping.
  • Breadcrumbs: Italian adds flavoring and gives it a thin crust layer.
  • Butter: Melt the butter and drizzle over top creating a harder crust when baking.

How to Make Tuna Noodle:

  1. Boil Pasta: Preheat oven to 375 degrees.  In a large pot boil the pasta according to package directions and drain and rinse. 
  2. Sauté vegetables: In a medium skillet over medium high heat add the olive oil, onion, and celery.  Sauté for 2-3 minutes until almost tender.  Add in the mushrooms and continue to sauté until tender.  Add to a large bowl.
  3. Create a roux: Add the butter to the skillet and whisk the flour until golden.  Slowly whisk in the chicken broth and milk.  Let simmer until thickened.
  4. Add to casserole dish: In the large bowl add the pasta, tuna, peas, and cheese.  Mix together.  Spread evenly in a 9×13 inch casserole dish.  In a small bowl combine parmesan, breadcrumbs, and butter.  Sprinkle on top of casserole.
  5. Bake at 375 degrees: Bake for 25-30 minutes or until bubble and golden brown on top.

The Recipe Critic Pro Tip:

Undercook the pasta when making it. It will finish cooking in the casserole while being baked. 

The process of sautéing mushrooms celery then making a roux with flour, chicken broth and milk.

Variations for Homemade Tuna Casserole:

Tuna casserole can be made a few different ways. Making it your own and how your family prefers is the best way to enjoy this dinner.

Here are a few ideas of omitting or substituting ingredients:

  • Tuna Fish: If the tuna fish is not your favorite try shredded chicken in replace of it.
  • Noodles: Whole wheat, bowtie, macaroni or any other noodles that you prefer to cook.
  • Vegetables: Add in or omit any vegetable that you are not sure of. Just know that each ingredient really blends in this casserole.
  • Cheese: Try different cheeses to make a variety of casserole options. Jalapeño or cheddar jack are also fun ways to add a little heat.

The process photos of mixing the ingredients mixed together in a glass bowl.

Let’s Freeze it!

Yes, you can freeze this casserole. Fortunately, there are two ways to freeze it. Make ahead method or freeze the leftovers that you were not able to finish.

  • Make Ahead: It is best to prepare everything and follow the instructions on how to bake it. Once you get to baking, skip and place in a air tight container or wrap tight with foil or wrap. Then place in the refrigerator for 1 to 2 months. When ready to warm up, let thaw in the refrigerator overnight. Top with parmesan and Italian bread crumbs then bake at 375 degrees Fahrenheit for 30 minutes.
  • Freeze Left Overs: This is simple to do and a great practice for left overs. Place the left overs in an airtight container and lay flat in the freezer. Thaw over night in the refrigerator and reheat in the microwave or oven.

Tuna casserole in a casserole dish with a spoon in them.

More Comforting Casserole Dishes to Make:

Tuna noodle casserole in a bowl with a fork r

Print

Tuna Noodle Casserole

This tuna noodle casserole is a family favorite that is filled with thick noodles, vegetables and tender chunks of tuna fish. All baked together in one pan in 30 minutes!
Course Dinner
Cuisine American
Keyword tuna noodle casserole, tuna noodle casserole recipe
Prep Time 15 minutes
Cook Time 30 minutes
Total Time 45 minutes
Servings 8 People
Calories 460kcal
Author Alyssa Rivers

Ingredients

  • 12 ounce wide egg noodles
  • 1 Tablespoon Olive Oil
  • 1 small onion diced
  • 1 cup celery diced
  • 1 cup mushrooms sliced
  • 2 Tablespoons butter
  • 1/4 cup flour
  • 1 cup chicken broth
  • 1 1/2 cup whole milk
  • salt and pepper
  • 2 6 ounce cans tuna fish I used white albacore
  • 1 cup frozen peas thawed
  • 1 cup shredded cheddar cheese
  • 1/2 cup grated parmesan
  • 1/2 cup Italian breadcrumbs
  • 1/4 cup butter melted

Instructions

  • Preheat oven to 375 degrees. In a large pot boil the pasta according to package directions and drain and rinse. In a medium skillet over medium high heat add the olive oil, onion, and celery. Sauté for 2-3 minutes until almost tender. Add in the mushrooms and continue to sauté until tender. Add to a large bowl.
  • Add the butter to the skillet and whisk the flour until golden. Slowly whisk in the chicken broth and milk. Let simmer until thickened.
  • In the large bowl add the pasta, tuna, peas, and cheese. Mix together. Spread evenly in a 9x13 inch casserole dish. In a small bowl combine parmesan, breadcrumbs, and butter. Sprinkle on top of casserole.
  • Bake for 25-30 minutes or until bubble and golden brown on top.

Nutrition

Calories: 460kcal | Carbohydrates: 46g | Protein: 22g | Fat: 21g | Saturated Fat: 11g | Cholesterol: 94mg | Sodium: 578mg | Potassium: 413mg | Fiber: 3g | Sugar: 6g | Vitamin A: 787IU | Vitamin C: 11mg | Calcium: 272mg | Iron: 2mg


source https://therecipecritic.com/tuna-noodle-casserole/
Share:

Fluffy Marshmallow Cream Cheese Fruit Dip (3 ingredients!)

Marshmallow cream cheese fruit dip is one of the best dips to enjoy year round. Fluffy fruit dip is sweet and creamy that is served with all your favorite fresh fruits!

Sunshine and fruit make me happy and one of my favorite snacks to have. We love dipping our fruit in this peanut butter cup fruit dip or strawberry cream cheese fruit dip as a little snack to get us through each day.
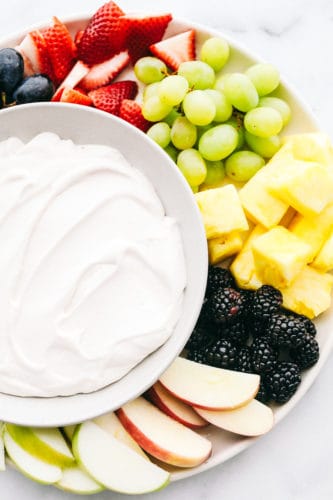
Fresh fruit prepared with a bowl of marshmallow cream cheese fruit dip.

Fluffy Marshmallow Cream Cheese Fruit Dip

This fluffy marshmallow cream cheese fruit dip is everything you will want! Fresh fruit dipped in this light and creamy dip is a refreshing taste full of flavor. Fruit is one of my weaknesses! It is bright, colorful and extremely tasty. Juicy and sweet fruit is the best! With all the bright and sunny days shining through I can see this fruit dip being made over and over again. It is the perfect snack to have or a great dip to take to your next party.

It is simple to make and only uses 3 ingredients to make. Whip this fruit dip up within minutes and have a delicious treat that everyone will love. The marshmallow flavoring brings a rich and thick texture then mixed with a cream cheese gives it that creamy, smooth taste. Once you start dipping you won’t be able to stop! This marshmallow cream cheese fruit dip is fluffy and irresistible!

Serving Delicious Fruit Dip:

With this easy to make fluffy fruit dip, anytime is a good time to serve it! Sharing this marshmallow cream cheese fruit dip is perfect for parties and any gatherings that you may have.

Here are some fun ideas to serve your fruit dip:

  • Special Occasions: Holidays are especially fun because it is an easy dip to make plus everyone can take a little at a time and eventually it is gone before the night is over. Have a special bowl or platter that is decorative and holiday themed is another great way to add to the holiday with this dip and fresh fruit.
  • Gatherings: Potlucks are always a great time to share. It is simple to share and a quick fix for a gathering of all ages.
  • At Home: Snack time at home is perfect for little fingers and a light and tasty snack for kiddos, especially after school. Fruit is a kids favorite plus a good dip = heavenly for kiddos. Sometimes little fingers are dipped in just as much as the fruit.

Only 3 Ingredients!

Yep! That is right! AND, it is the BEST dip ever! With these 3 ingredients you can’t go wrong with mixing them together. The cream cheese balances out the marshmallow cream for a creamy, sweet and savory treat! It makes the perfect combination that is a light and fluffy mixture!

  • Marshmallow Cream: Adds thickness and sweetness to the dip.
  • Cream Cheese: Gives the dip a little bit of tang to balance out the marshmallow cream.
  • Strawberry Yogurt: Flavoring to create a strawberry cream flavor.
  • Fruit: Washed and sliced for serving

How to Make Fluffy Fruit Dip:

It is simple! Seriously, just add all of your ingredients into one bowl and mix by hand or in a mixer until it is a fluffy texture. Just know it doesn’t last long! It is that good!

  1. Mix ingredients together: In a medium sized bowl beat together the marshmallow cream, cream cheese and strawberry yogurt until fluffy.
  2. Start dipping: Serve with your favorite sliced fruit!

The Recipe Critic Pro Tip:

Work smarter by using a hand mixer or kitchen aid to help you get the mix to the right consistency. 

Mixing the marshmallow cream cheese fruit dip together in a kitchen aid mixer.

Let’s Start Dipping!

Now that the mix is finished let’s start by dipping some yummy foods. Fresh fruit is my go-to but graham crackers or animal crackers are also a favorite in our house too. This mixture of marshmallow cream and cream cheese fruit dip is sweet and creamy that sticks perfectly to the fruit! Any kind of fruit or cracker is best with this dip. You can’t go wrong with these 3 ingredients blended together.

Start with some of these favorite fruits that are delicious year round:

  • Strawberries
  • Blueberries
  • Blackberries
  • Pineapple
  • Pears
  • Watermelon
  • Apple slices: It is best to use pineapple juice or lemon juice to keep from browning.
  • Red or Green Grapes
  • Honeydew
  • Cantaloupe

How long does Marshmallow Fruit Dip Last?

Marshmallow fruit dip will last about 5 to 7 days in the refrigerator stored in an air tight container. When you are ready to serve, simply stir it together and being dipping. It is that simple and still the best! It is a great snack to have throughout the day.

A red strawberry being dipped in marshmallow cream cheese fruit dip.

We Love Dips! Try These Ones too:

Print

Fluffy Marshmallow Cream Cheese Fruit Dip (3 ingredients!)

Marshmallow cream cheese fruit dip is one of the best dips to enjoy year round. Fluffy fruit dip is sweet and creamy that is served with all your favorite fresh fruits! 
Course Appetizer, Dessert, Side Dish, Snack
Cuisine American
Keyword 3 ingredient fruit dip, fruit dip, fruit dip recipe, Marshmallow cream cheese dip, marshmallow cream cheese fruit dip
Prep Time 5 minutes
Total Time 5 minutes
Servings 8 People
Calories 205kcal
Author Alyssa Rivers

Ingredients

  • 7 ounces marshmallow cream
  • 8 ounce cream cheese softened
  • 1 cup strawberry yogurt
  • sliced fruit for serving

Instructions

  • In a medium sized bowl beat together the marshmallow cream, cream cheese and strawberry yogurt until fluffy.
  • Serve with your favorite sliced fruit!

Nutrition

Calories: 205kcal | Carbohydrates: 28g | Protein: 3g | Fat: 10g | Saturated Fat: 6g | Cholesterol: 34mg | Sodium: 108mg | Potassium: 93mg | Fiber: 1g | Sugar: 21g | Vitamin A: 390IU | Calcium: 61mg | Iron: 1mg


source https://therecipecritic.com/marshmallow-fruit-dip/
Share:

Popular

Archive

Slider Tag

Facebook

Header Ads

Recent in Food

Blog Archive

Recent Posts

Unordered List

  • Lorem ipsum dolor sit amet, consectetuer adipiscing elit.
  • Aliquam tincidunt mauris eu risus.
  • Vestibulum auctor dapibus neque.

Pages

Theme Support

Need our help to upload or customize this blogger template? Contact me with details about the theme customization you need.