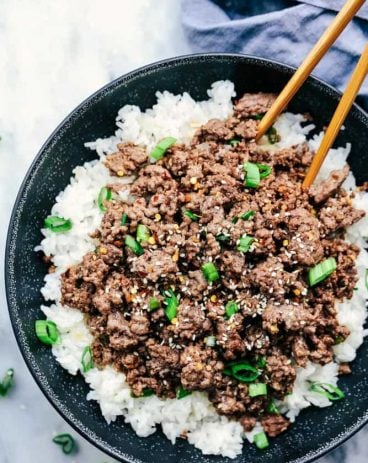
Garlic Butter Herb Prime Rib

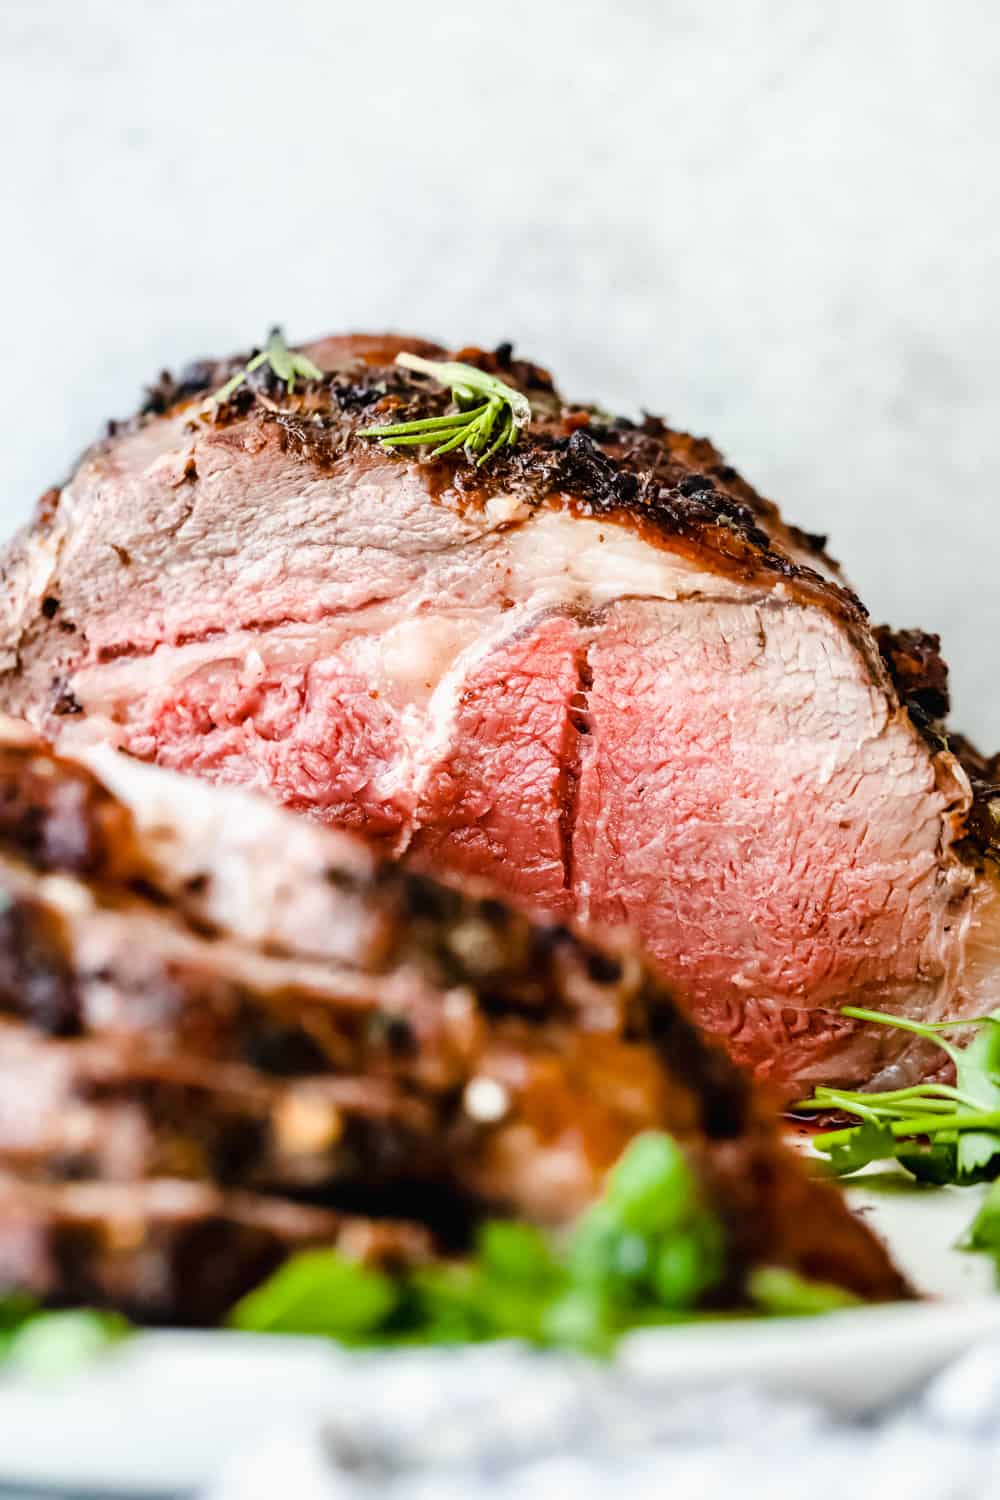
Garlic butter herb prime rib is melt in your mouth tender, cooked to medium-rare perfection, and marbled with fat. The seared garlic butter herb crust is incredible!

Impress your family with this beautiful cut of meat! When making this prime rib add Green Beans, Mashed Potatoes, and Rolls for a complete meal.
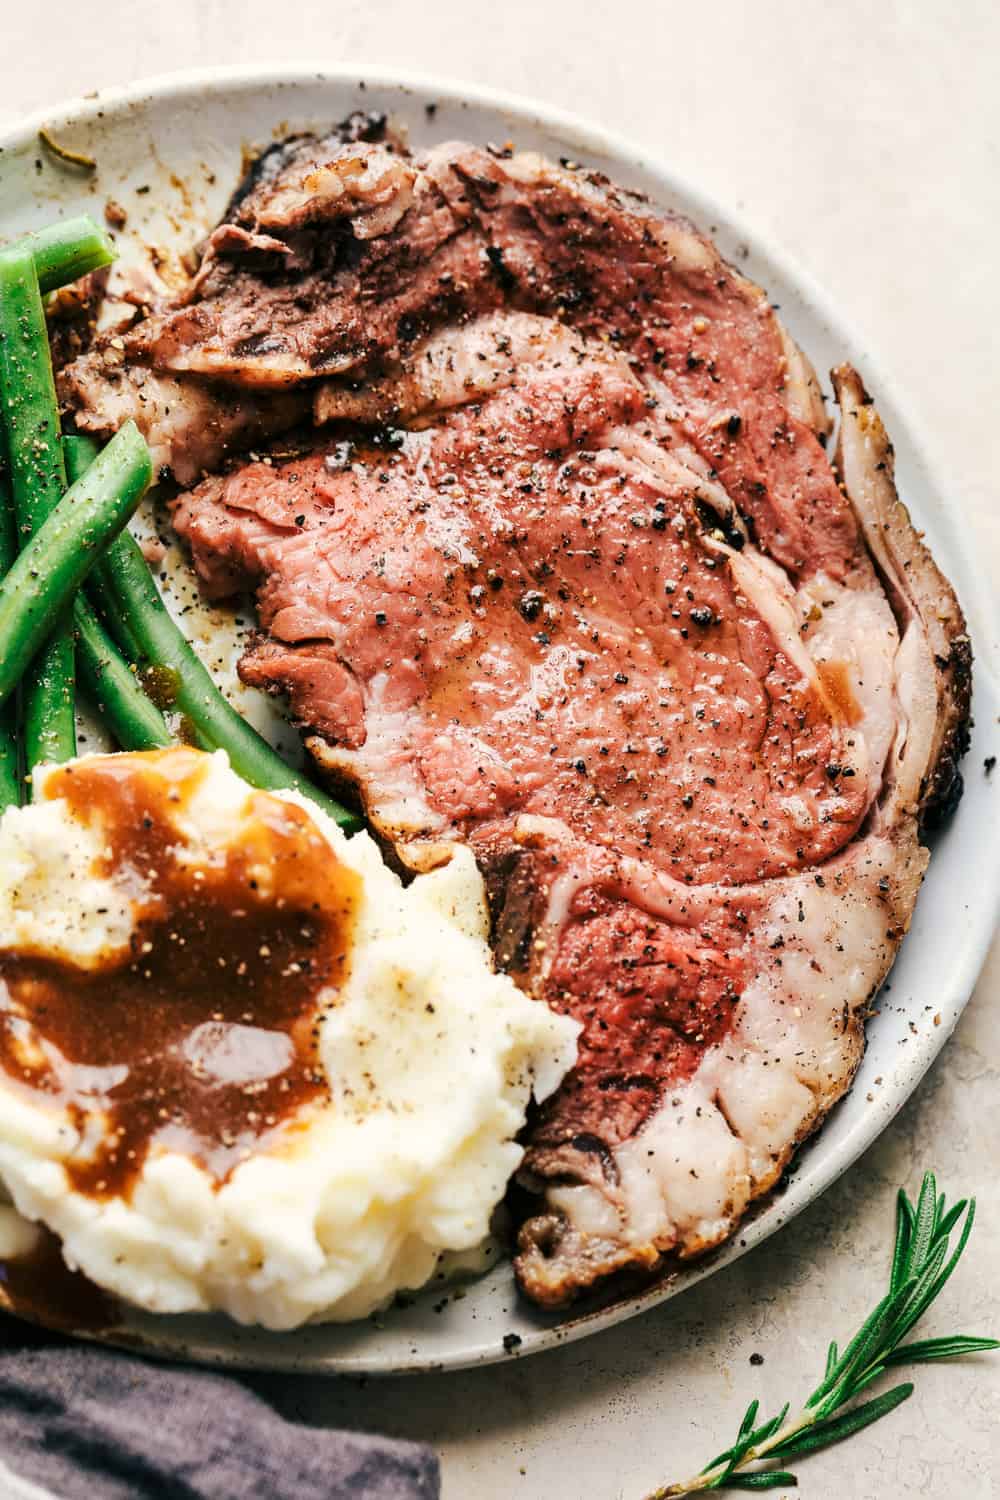
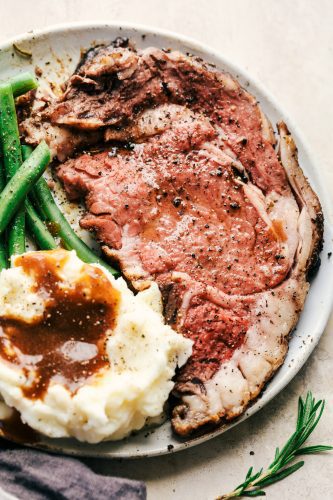
Prime rib with beans and potatoes on a plate.

The Best Prime Rib

The holidays wouldn’t be complete without a prime rib roast. Well, I am here to bring you the best prime rib recipe with a few tips and tricks for cooking the perfect tender and juicy meat every single time. You are going to bring your A-game to Christmas dinner with a flavorful and bold beef rib roast that is actually really simple to make! Cook up some grilled asparagus or some Brussel sprouts. They will go so well with this!

With these easy-to-follow steps, you will have a perfect Christmas dinner that will be loved by all. Prime rib is top-of-the-line meat that tastes just as AMAZING as it looks. The marbled cut and beautiful bone structure are just what you need to have this slice of heaven on your plate. Cooking this beef does not have to take long. It is best to have a crispy outside and a tender, juicy inside. With this garlic butter herb prime rib recipe you will have the PERFECT decadent dinner this holiday season!

Herb Garlic Butter Prime Rib Ingredients

I always buy my roast with the bone. The butcher at our local grocery store cuts the bone but leaves it partially attached and ties it onto the roast. This makes it easier to carve the meat and the bone creates a rack for the meat to cook on. See the recipe card at the bottom of the post for exact measurements.

  • Prime rib: I like to get a cut that is bone in and tied.
  • Butter: Make sure that the butter is softened so that it will blend well with the herbs and seasonings.
  • Garlic cloves: If you don’t have any fresh garlic cloves on hand then you can use minced garlic! ½ tsp equals about 1 clove.
  • Thyme, Oregano and Rosemary: I like to use freshly chopped herbs to make the flavor taste top notch!
  • Salt and pepper: Use these to taste!

How to Cook Prime Rib

Preparing your meat is a great way to ensure your cooking time is perfected by having an evenly cooked prime rib. Taking out your roast before cooking will help with this process! Enjoy this decadent recipe this holiday season with friends and family!

  1. Prepare your meat: Remove the prime rib from the refrigerator at least 30 minutes before to bring it to room temperature. Preheat the oven to 450 degrees.
  2. Mix together garlic butter herb sauce : In a small bowl mix butter, garlic, thyme, oregano, rosemary, salt and pepper. Then, rub all of the butter on the outside of your prime rib and plave in a roasting pan or large skillet with the fat side up.
  3. Cook prime rib: Cook for 15 minutes and reduce the temperature to 325 degrees. It is about 15 minutes per pound of meat. Bake until it reaches an internal temperature of 110 degrees.
  4. Let your meat rest: Remove from oven and let it rest with foil for at least 20 minutes. The temperature will rise to 130 degrees for a medium rare prime rib.
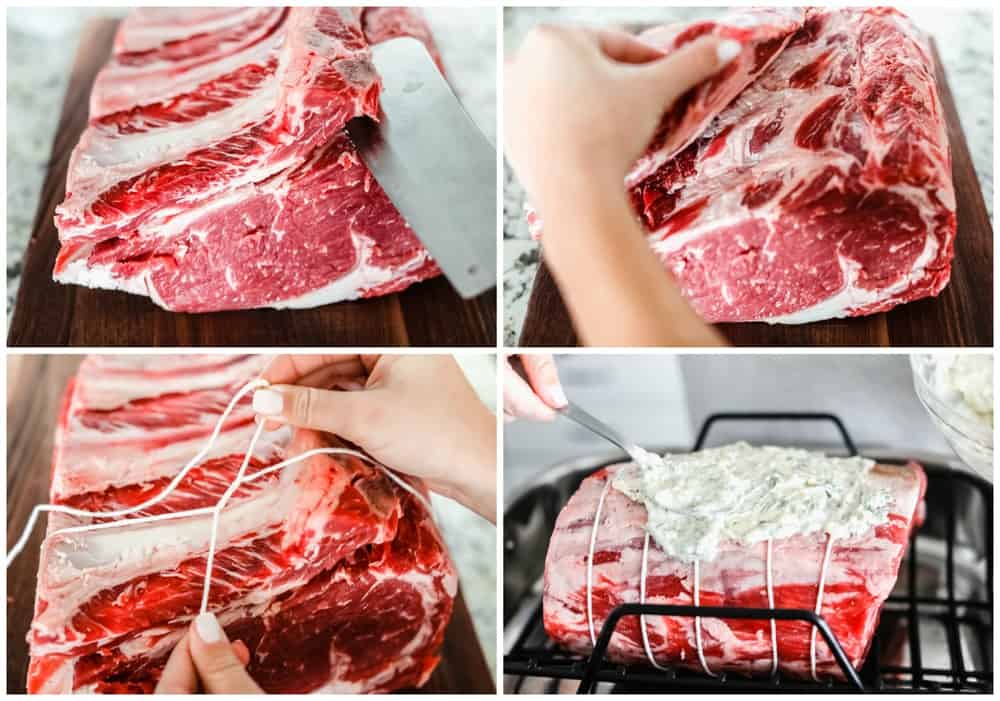
4 pictures showing how to prepare raw meat.

What Cut Of Meat Is Best?

A prime rib roast (or a standing roast) is cut from the back of the upper rib section of the steer. It usually is a total of 7 ribs. To make this slow-roasted prime rib then you will need a 3 bone rib roast. This is cut from either the chuck or the loin end of the rib sections. Here are some tips on how to choose the best meat!

  • Bone IN: You will want a bone in prime rib. On average a 2 to 6 pound prime rib has 2 to 3 bones.
  • Tied: When ordering from a butcher, ask to keep the strings on it if possible. This will ensure cooking it evenly and keeps its form while cooking.
  • Deckle: If possible, ask to have the largest deckle. The deckle is tender and the most flavorful piece of meat.
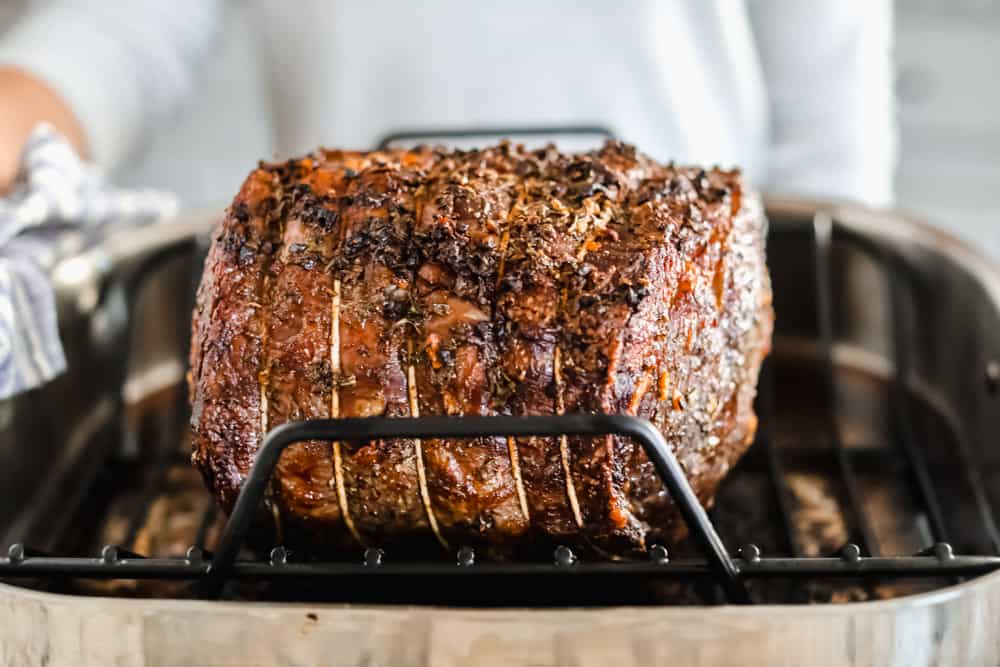
Prime rib on a rack, cooked.

Cooking Information Per Pound

The bones create a natural roasting rack for the meat. Cook the prime rib at a higher temperature of 450 degrees for 15 minutes. Then reduce the temperature to 325 degrees and continue to cook until the thermometer reads 110 degrees. About 15 minutes of cooking time per pound.
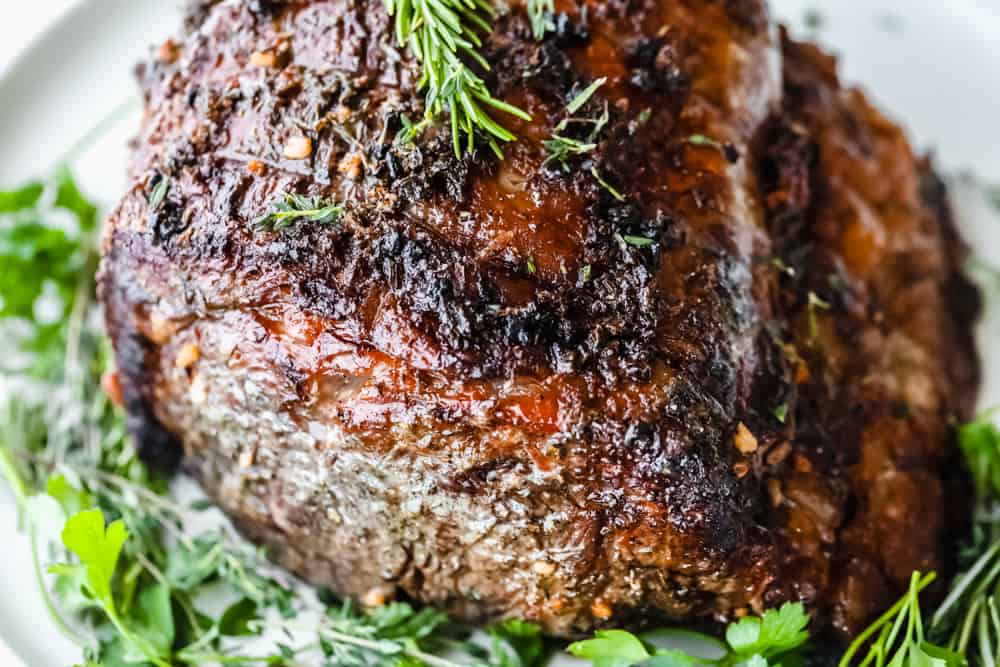
A prime rib garnished and ready to eat.

Cooking Tips

Melt in your mouth prime rib is just what you need to celebrate the holidays this year! These quick and simple tips will help cook it to perfection!

  • Use a thermometer: Using a meat thermometer is the best way to ensure a perfect prime rib every time.
  • Take it out of the fridge: Take your prime rib out of the refrigerator for about 30 minutes to let it rest before cooking. This will ensure an even cook time.
  • Keep the bone in: You can remove the bones before cooking but it is not necessary. The bone in adds to the flavor and helps keep the prime rib tender and juicy.
  • Let it rest! Remove your prime rib out of the oven when it is about 5 degrees lower than your temperature you are wanting. Cover your meat and let it rest. It will slowly cook as it is resting.
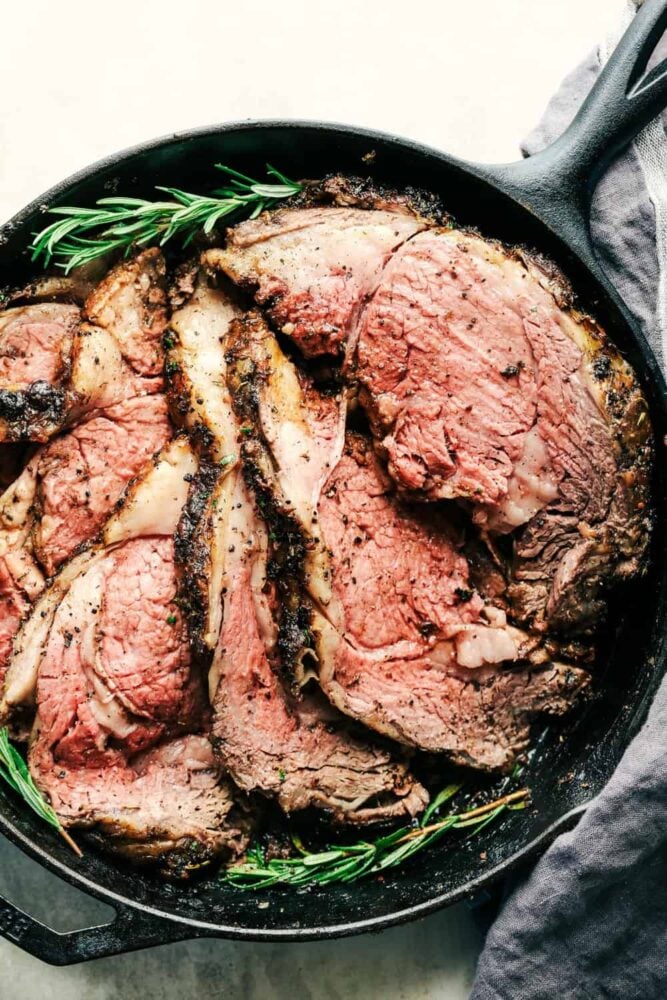
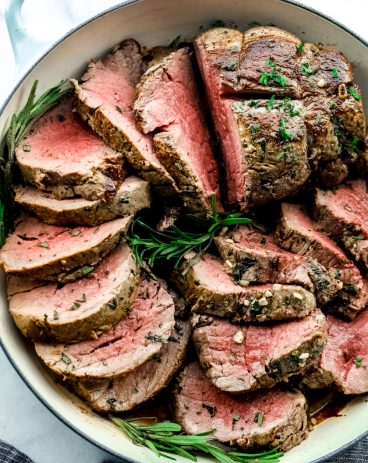
Prime rib that is in a pan, sliced and ready to serve.

Cooking Temperatures

Prime rib can be a little intimidating to make because you are trying to achieve the perfect medium-rare temperature The closed oven method is where you roast the meat at 500 degrees for 5 minutes per pound. Then, you leave the oven closed for 2 hours and it slowly cooks. If using this method then I highly recommend putting a thermometer inside of the meat so that you can check on it without opening the oven while it cooks.

  • Rare: 120 to130 degrees Fahrenheit
  • Medium Rare: 130 to 135 degrees Fahrenheit
  • Medium: 135 to 140 degrees Fahrenheit
  • Medium Well: 145 to 155 degrees Fahrenheit
  • Well Done: 155 degrees Fahrenheit
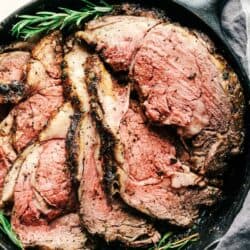
Prime rib sliced with the pink meat showing.

Storing Your Meat

Having leftover meat is just another way to enjoy it a little longer! You still have all the tender, juicy flavors are infused into the prime rib. Enjoy another slice of heaven a second time around with these storing ideas.

  • How long does it last in the refrigerator? It can be stored in an airtight container in the refrigerator for 5 to 7 days.
  • Can you freeze prime rib? Yes! Let it rest until completely cooled. Once it’s cooled then place in an ziplock freezer bag, letting all the air out. Lay flat in the freezer for 1 month. When ready to warm it up to eat it then place in the refrigerator over night until thawed.
  • How to reheat it: If it’s been frozen, let it thaw completely. Place in the oven for 12 to 15 minutes or until it has reached the desire internal temperature. Enjoy!

A Reader’s Review

This was absolutely amazing! The flavor was phenomenal. I like my meat well done and it was still super tender.
Patricia
Print

Garlic Butter Herb Prime Rib Recipe

Garlic butter herb prime rib is melt in your mouth tender and juicy prime rib that is cooked to medium rare perfection and marbled with fat.  The seared garlic butter herb crust is incredible!
Course Dinner, Main Course
Cuisine American
Keyword prime rib, prime rib recipe
Prep Time 5 minutes
Cook Time 1 hour
Total Time 1 hour 5 minutes
Servings 8 people
Calories 548kcal
Author Alyssa Rivers

Ingredients

  • 2-6 pounds bone prime rib boned and tied
  • 1 cup butter softened
  • 5 cloves garlic minced
  • 1 Tablespoon thyme finely chopped
  • 1 Tablespoon oregano finely chopped
  • 1 Tablespoon rosemary finely chopped
  • 1 Tablespoon salt
  • 1 teaspoon pepper

Instructions

  • Remove the prime rib from the refrigerator at least 30 minutes before to bring it to room temperature. Preheat the oven to 450 degrees.
  • In a small bowl mix butter, garlic, thyme, oregano, rosemary, salt and pepper. Rub all of the butter on the outside of your prime rib and place in a roasting pan or large skillet with the fat side up.
  • Cook for 15 minutes and reduce the temperature to 325 degrees. It is about 15 minutes per pound of meat. Bake until it reaches an internal temperature of 110 degrees.
  • Remove from oven and let it rest with foil for at least 20 minutes. The temperature will rise to 130 degrees for a medium rare prime rib.

Video

Notes

Updated on December 2, 2021
Originally Posted on November 17, 2017

Nutrition

Calories: 548kcal | Carbohydrates: 2g | Protein: 16g | Fat: 53g | Saturated Fat: 27g | Cholesterol: 130mg | Sodium: 1126mg | Potassium: 278mg | Fiber: 1g | Sugar: 1g | Vitamin A: 769IU | Vitamin C: 2mg | Calcium: 36mg | Iron: 2mg


source https://therecipecritic.com/prime_rib_recipe/
Share:

The Perfect Christmas Star Bread

Star Bread is a visually stunning, decadent tasting sweet bread, that will be the talk of the table. Whether it’s for the holidays or a special occasion this eye-pleasing, mouth-watering bread is the way to go.

Bread is the ultimate comfort food for me, it’s so luscious and satisfying, especially when it’s homemade with love.  Whether it’s this recipe or Grandma’s Perfect Homemade Bread Recipe, Easy Homemade Naan Bread, or Easy Cheesy Garlic Bread, they will all hit the spot!

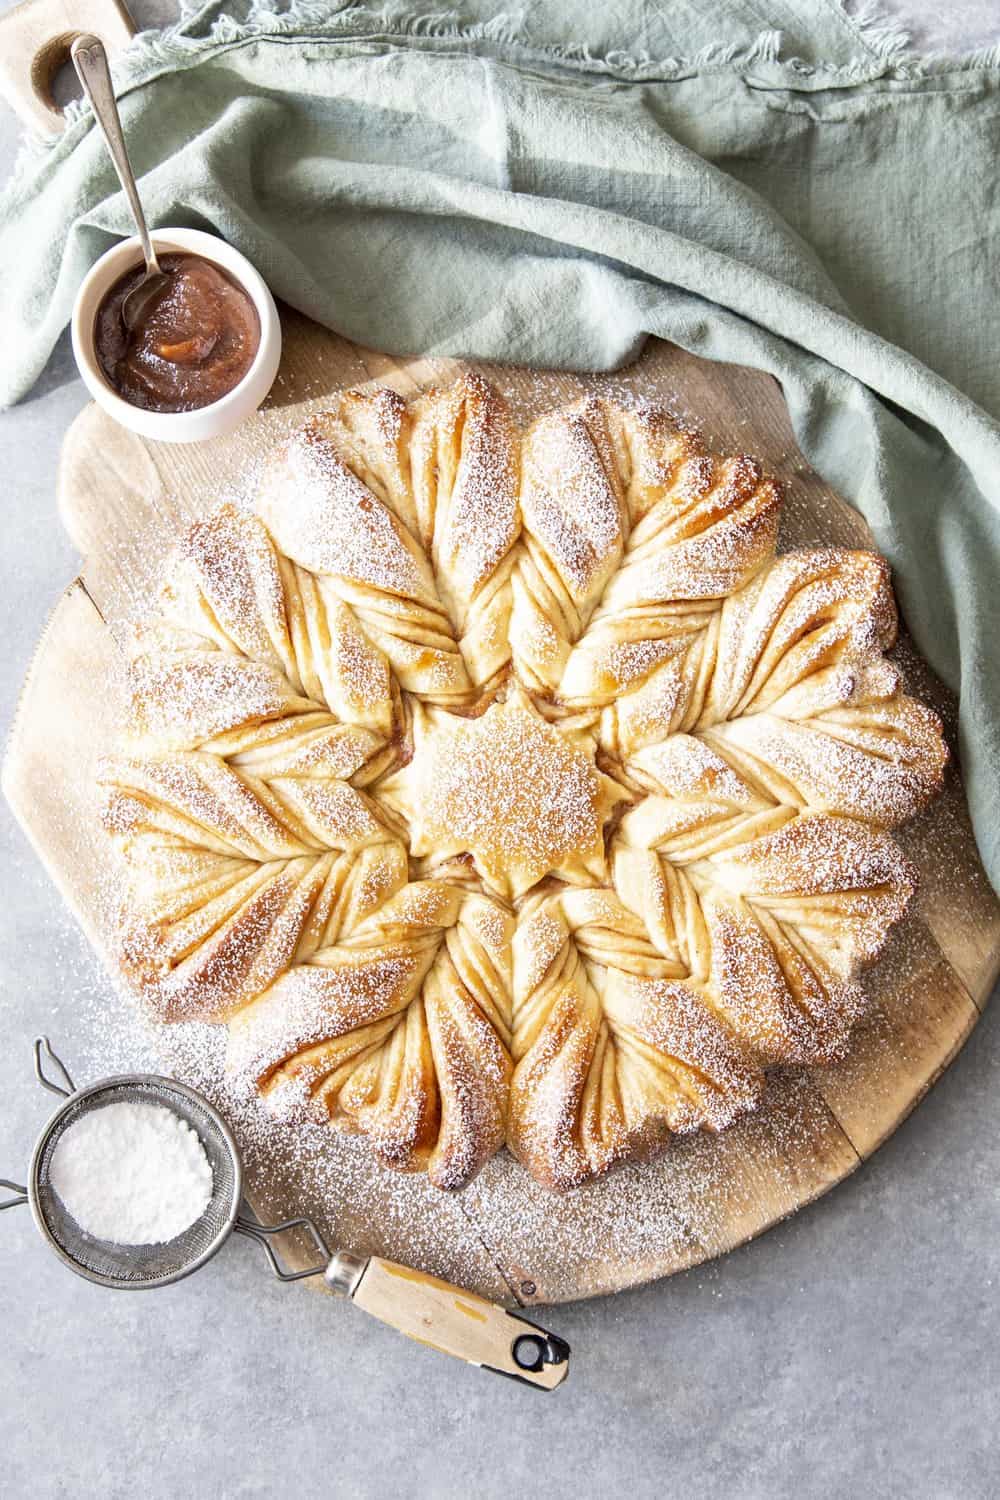
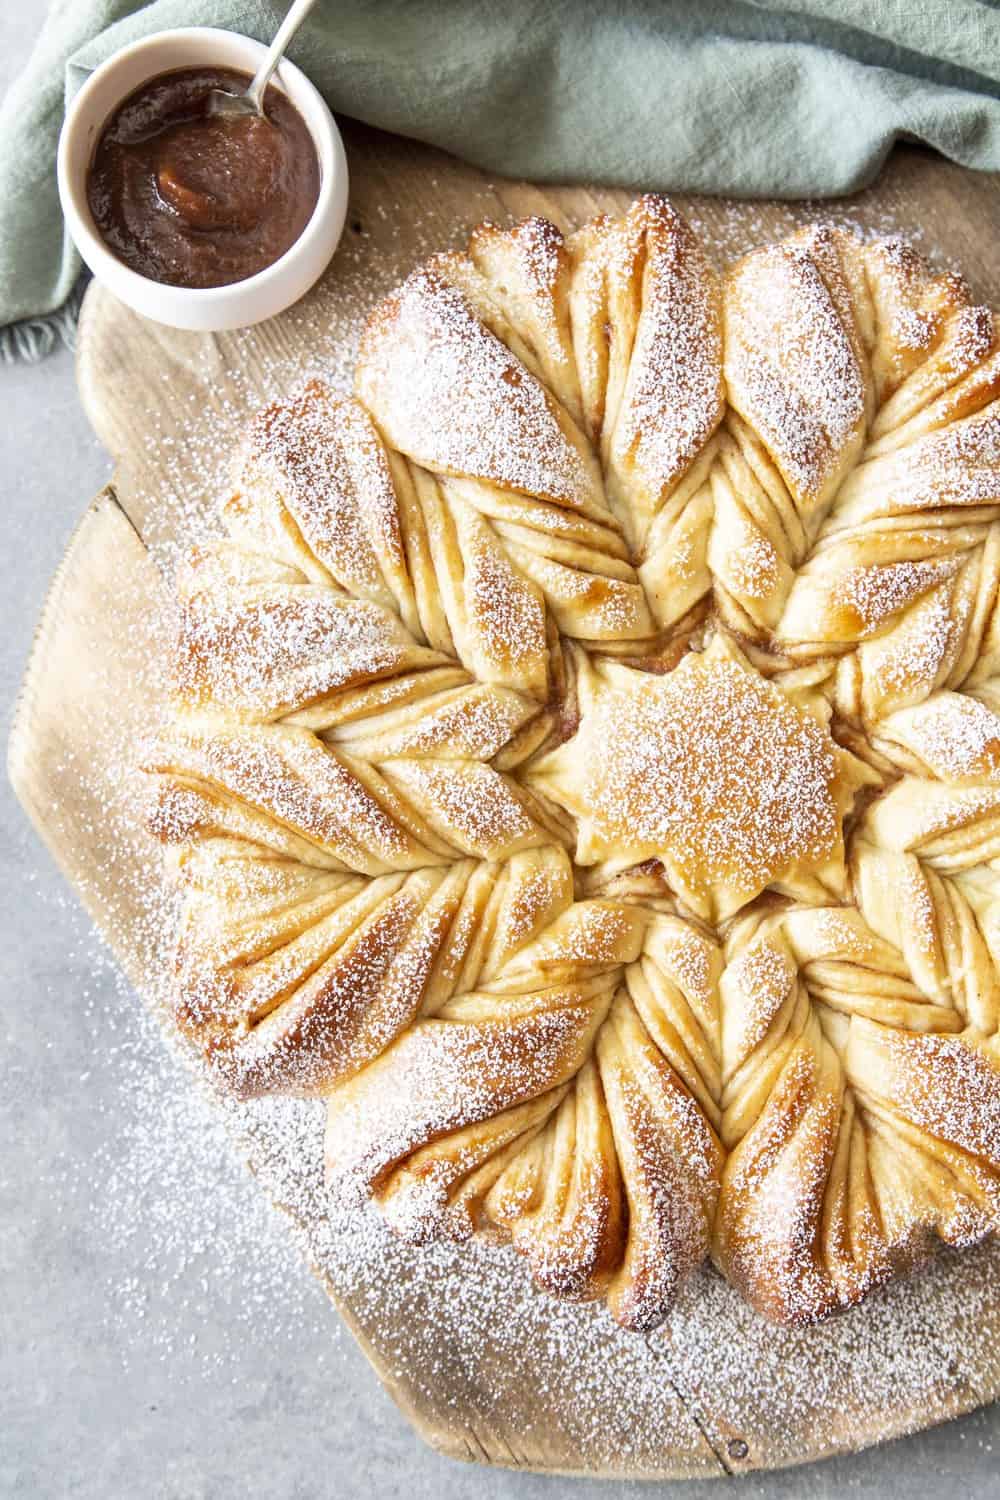
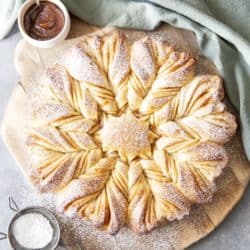
Decorative and tasty Star Bread

Christmas Star Bread

I’m not entirely sure why this is called Star Bread, but I’m guessing it has to do with not only the shape but the fact that it will quite literally be the star of the meal. This isn’t just bread, it’s art. And it’s art you can eat! Everyone will not only rave about how beautiful and intricate your star bread looks but the fact that it is simply delicious. Make it for breakfast or brunch. In fact, make it an entire meal with this Homemade Breakfast Sausage, this Eggs Benedict with Hollandaise Sauce or these amazing Orange Cranberry Muffins!

Now before you say to yourself, that looks too hard. Let me tell you it’s super easy. Truly! Anyone who can use a pizza cutter or even a knife can make this bread. If you are worried about your cutting skills you can even use a template, or a big bowl turned upside down to cut around to get it perfect. The mesmerizing swirls and beautiful shape of this star bread all add to its elegance. The sweet filling isn’t just for show, it is just as rich and tasty as it is beautiful.

Ingredients You Need to Make Star Bread 

This is your basic enriched dough with milk and butter added for increased structure and flavor. Most of these ingredients you might already have on hand. See the recipe card below for all of the ingredient measurements.

  • Milk: Use whole or 2% milk if you can, it helps the dough become extra soft when baked.
  • Butter: This adds incredible flavor.
  • Instant Yeast: This can be made with active yeast too.
  • Sugar: The sugar is what feeds the yeast.
  • Salt: This actually retards the yeast from getting too active and adds important flavor to the bread.
  • Flour: I used all purpose flour. Unbleached flour also works!

Apple Filling

  • Apple butter: Make your own for incredible flavor, or you can purchase at your store.
  • Egg wash: Helps create that deep golden color and stick it all together.
  • Egg: I like to use large eggs at room temperature.
  • Milk: This helps to mix everything all together!
  • Powdered sugar: This is optional and used to dust the top if the baked bread. It looks stunning!

Creating This Amazing Pull Apart Bread

Because of the extra richness, the star bread will rise slightly slower than usual.  So don’t worry if it isn’t rising as fast as you think it should. Follow these step-by-step instructions and then you will see just how simple this is!

  1. Scald: In a small saucepan add the milk and over medium heat bring to a simmer, stirring occasionally. Turn the heat off and add the cubed unsalted butter. Stir until the butter melts completely. Pour the hot milk mixture into a stand mixer bowl and set aside to cool to below 110 degrees F.
  2. Bloom: When the milk the mixture is cool enough then add the yeast and stir. Let it sit for 5 min to bloom.
  3. Mix: In a medium bowl, add the flour, sugar, salt and mix to blend. Then, transfer the flour mixture to the stand mixer bowl with the warm yeast and mix gently.
  4. Knead: Using a dough hook on speed 2 knead for about 7-10 min. The dough should start pulling away from the side of the bowl.
  5. Rise: Oil a glass bowl and your hands. Scrape the dough out of the mixing bowl and then shape it into a ball in your hands and place it in the oiled bowl. Over, and let rise in a warm place for 1-2 hours until at least doubled in size

Forming the Star

  1. Cut: Turn the dough out onto a lightly floured surface and cut into 4 equal portions. Shape into balls.
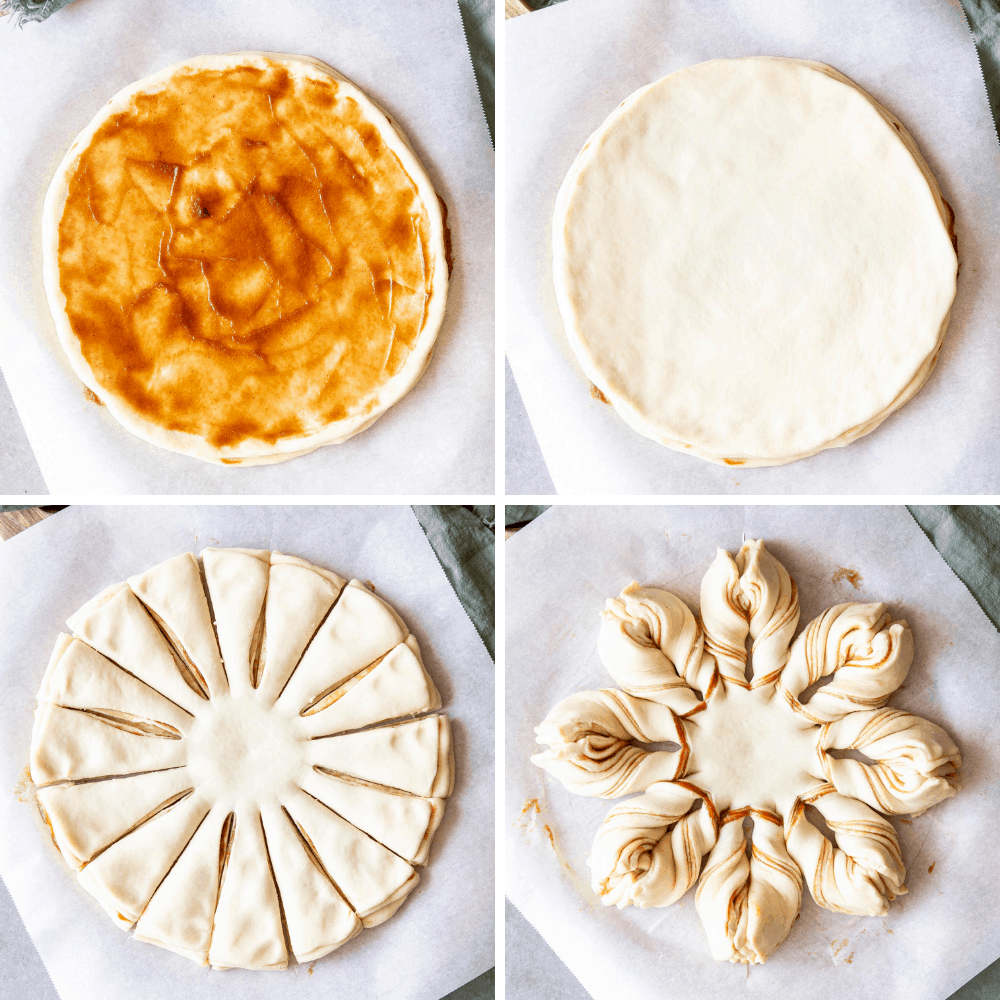
  2. Roll: Roll on dough ball  out into a circle about 9″-10″ in diameter. Place it on a piece of parchment paper and spread 2 tablespoons of apple butter over it.
  3. Layer: Roll another dough ball out to the same size as the first one and place it on top, spread another 2 Tablespoons of apple butter over the top. Repeat for the 3rd and 4th dough ball. You should end up with 4 layers of dough and 3 layers of apple butter.
  4. Mark: With the back of a round cookie cutter or a cup, mark a 3″ circle in the middle. Cut the dough into 16 sections leaving the 3″ circle in the middle untouched.
  5. Twist: Take two sections away from each other and press the end together to form the star point. You should end up with 8 star points. Then, cover it and let rise for 20 minutes.
  6. Bake: Beat the egg with a tablespoon of milk and brush it lightly over the star bread. Bake for 30 min until golden brown. Dust with powdered sugar before serving.
Making, layering and cutting Star Bread

Tips and Info for the Best Star Bread Ever

Working with yeasted bread can be intimidating but don’t stress! It’s really simple. If you feel like you need to practice try these favorites, Copycat Texas Roadhouse Rolls, Quick 45 Minute Cinnamon Rolls and Homemade Parker House Rolls. You’ll be an expert in no time, and adding star bread to your rotations will be excellent. It’s such gorgeous bread!

  • Yeast: For this recipe I used instant yeast, which means you don’t have to mix it with the warm milk first if you don’t want to. Active yeast means you need to activate it. Which means you will definitely want to mix it with the warm milk first to feed it and to get it going.
  • Warm Milk:  Make sure your milk is below 110 degrees F before you add the yeast or you’ll kill it. But also make sure it’s above 80 degrees F or it won’t activate it, it will be too cool. If you have a thermometer then use that for best results.
  • Shortcut: If you don’t trust your bread making skills you can use frozen bread dough. Use two loaves of frozen bread dough. Once it’s thawed then cut each loaf in half to create your 4 circles.
  • Don’t sweat it: Even if your circles aren’t perfect, most of the time mine are not, don’t worry about it. It always seems to come out just as beautiful and tastes just as amazing.
  • Twist: I found that you only need to twist the sections twice.
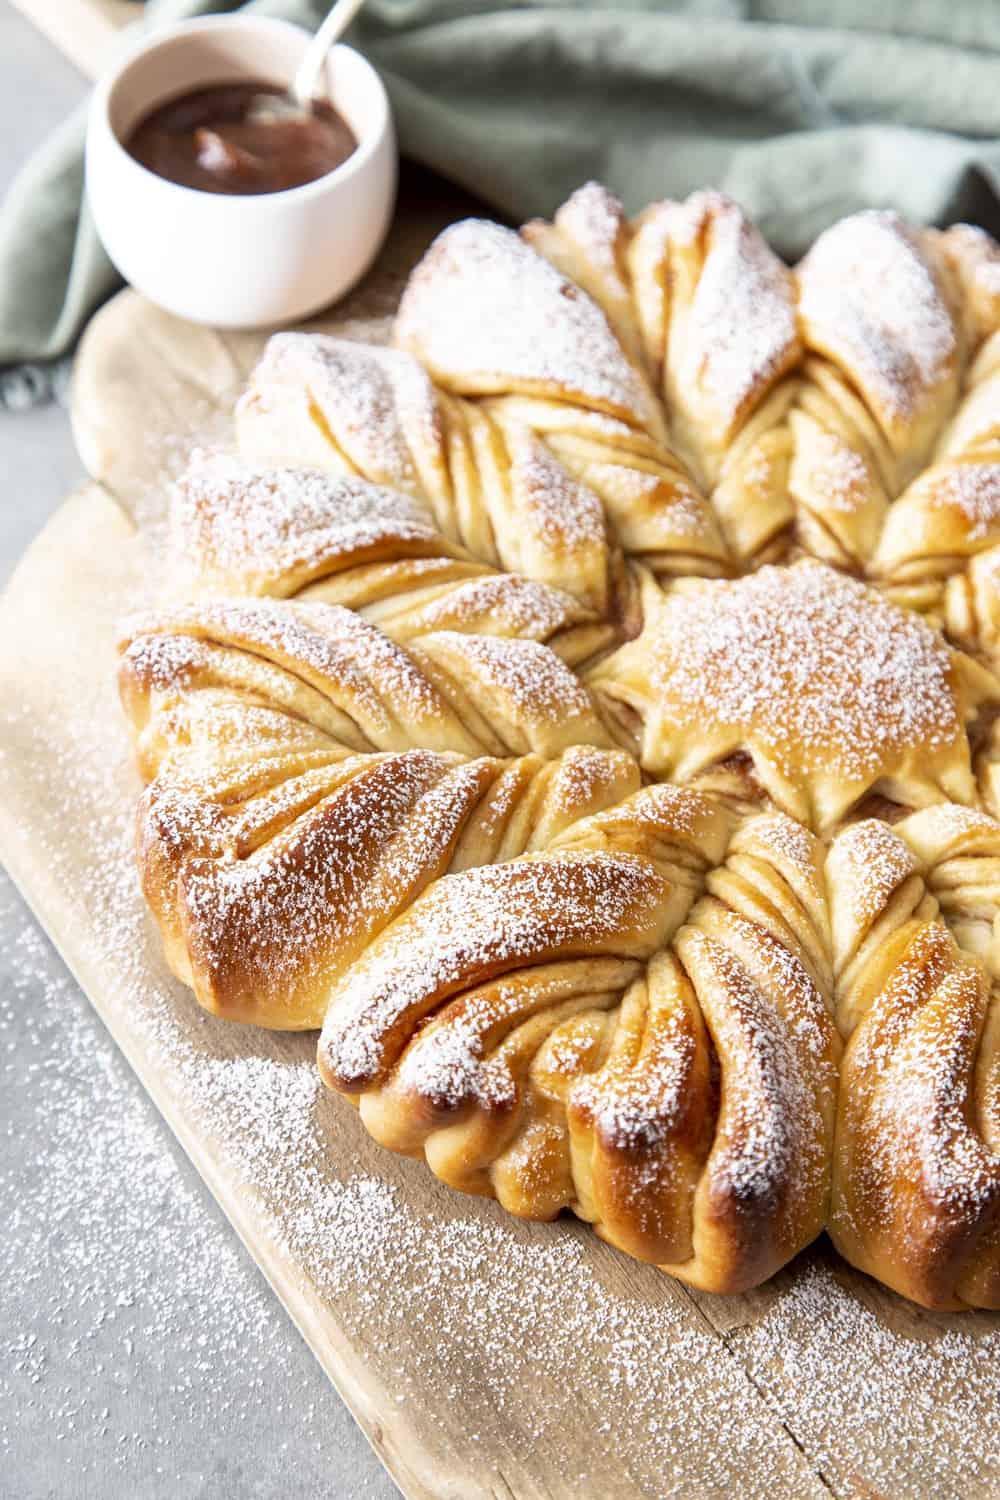
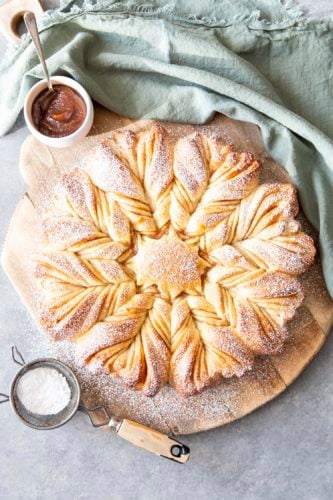
Dusted with powder sugar, star bread.

Christmas Bread Variations

There are multiple ways to fill this bread. The apple butter is one of my favorites though. Its silky smooth sweetness is the perfect balance of tart, sweet, and spice. The variations for this are endless.

  • Cinnamon and Sugar
  • Your favorite Jam (raspberry, strawberry, apricot…)
  • Nutella
  • Orange using butter, orange juice, orange zest and sugar
  • Cinnamon, nuts and raisins
  • Make a glaze with powdered sugar, milk and vanilla to drizzle over the top instead of the powdered sugar.
  • Make it savory with pesto, tomato sauce, herbs, pepperoni, sausage, or cheese , etc.
Star bread on serving bread and dusted with powdered sugar.

Storing Baked Star Bread

This bread is so delicious, especially as leftovers! Here is how you can store it for later!

  • Room temperature: Once your bread has cooled then go ahead an place it in an airtight container. Keep at room temperature for up to 4 days. Freeze for up to 3 months.
  • Freeze: If you want to freeze this bread then you totally can! Once it’s cooled then wrape it in plastic wrap and then tinoil. Then, label it with the date. It can stay in your freezer for up to 3 months! Once you are ready to eat, let it come to room temperature and then enjoy!
Print

Star Bread

Star Bread is a visually stunning, decadent tasting sweet bread, that will be the talk of the table. Whether it's for the holidays or a special occasion this eye-pleasing, mouth-watering bread is the way to go.
Course Breakfast, Dessert
Cuisine American
Keyword star bread, star bread recipe
Prep Time 45 minutes
Cook Time 30 minutes
Total Time 1 hour 15 minutes
Servings 12 People
Calories 170kcal
Author Alyssa Rivers

Ingredients

Dough

  • 1 cup whole milk
  • 2 ounces unsalted butter
  • 2 teaspoon instant yeast
  • ¼ cup granulated sugar
  • 1 teaspoon kosher salt
  • 2 ½ cups all-purpose flour
  • Extra flour for rolling

Filling

  • 6 tablespoon of apple butter
  • Egg wash
  • 1 large egg
  • 1 tablespoon milk
  • Powdered sugar for dusting

Instructions

  • Add milk to a small saucepan and bring to a simmer over medium heat stirring occasionally. Turn off the heat and add cubed unsalted butter to the hot milk, stirring until the butter melts completely. Pour the hot milk mixture into a stand mixer bowl and set it aside to cool to below 110°F.
  • When the milk mixture is cool enough, stir in the instant yeast and let it sit for 5 minutes to rehydrate.
  • In a medium mixing bowl, add flour, sugar, and salt, stir to distribute evenly. Transfer the flour mixture to the stand mixer bowl with the warm liquid mixture, and knead with the dough hook on speed 2 for about 7 – 10 minutes. The dough should start pulling away from the side of the bowl.
  • Oil a glass bowl and your hands. Scrape the dough out of the mixing bowl and shape it into a ball in your hands and place it in the oiled bowl. Cover, and let rise in a warm place for 1 – 2 hours until at least double in size.
  • Turn the dough out onto a lightly floured surface and cut into 4 equal portions. Shape into balls.
  • Roll one dough ball out into a circle about 9”-10” in diameter. Place it on a piece of parchment paper and spread 2 tablespoons of apple butter over it. Roll another dough ball out to the same size as the first one and place it on top, spread another 2 tablespoons of apple butter over it. Repeat for the 3rd and 4th dough ball. You should end up with 4 layers of dough and 3 layers of apple butter.
  • Mark a 3” circle in the middle with the back of a round cookie cutter or a cup. Cut the dough into 16 sections leaving the 3” circle in the middle untouched.
  • Twist two sections away from each other and press the end together to form the star point. You should end up with 8-star points. Cover and let rise for about 20 minutes.
  • Preheat the oven to 350°F.
  • Beat 1 large egg with a tablespoon of milk to make the egg wash. Lightly brush egg wash over the top of the bread and bake for 30 minutes until golden brown.
  • Remove the bread from the oven and let cool on a wire rack.
  • Dust with powdered sugar before serving.

Notes

Updated on December 1, 2021
Originally Posted on December 15, 2020

Nutrition

Calories: 170kcal | Carbohydrates: 26g | Protein: 5g | Fat: 5g | Saturated Fat: 3g | Cholesterol: 28mg | Sodium: 211mg | Potassium: 80mg | Fiber: 1g | Sugar: 5g | Vitamin A: 174IU | Calcium: 32mg | Iron: 1mg


source https://therecipecritic.com/star-bread/
Share:

Can We Go Viral On TikTok?

TikTok is the wild west of the food media world. It’s less professionalized than Instagram and YouTube, and it holds the promise of virality from the very first time you post. So we wondered: What actually makes a food TikTok go viral? To find out, we consult Bettina Makalintal, a food journalist and culture critic, and Professor Emily Contois, who studies food on Instagram. Then we get advice from a TikTok star: Joanne Lee Molinaro, aka The Korean Vegan. Armed with tips and tricks from the experts — and a pecan pie — can Dan reverse engineer his own viral TikTok?

If you’re the type who likes to flip to the end of the book first, you can watch Dan’s TikTok right here. //

Get 500+ more great Sporkful episodes from our catalog and lots of other Stitcher goodness when you sign up for Stitcher Premium: www.StitcherPremium.com/Sporkful (promo code: SPORKFUL).

Transcript available at www.sporkful.com.


Share:

Easy Cornish Pasties

These traditional English cornish pasties are SOO GOOD! The outside is a flaky crust that’s filled with delicious steak, potatoes, and veggies! If you haven’t tried this before then you are in for a real treat!

This makes the perfect entree for any meal. Pair it with this delicious asparagus, these simple rolls, and this salad. It will be a meal that everyone in the whole family will love!

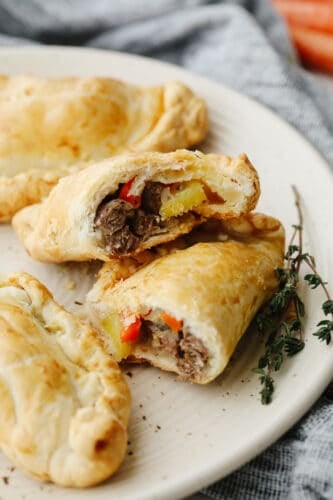
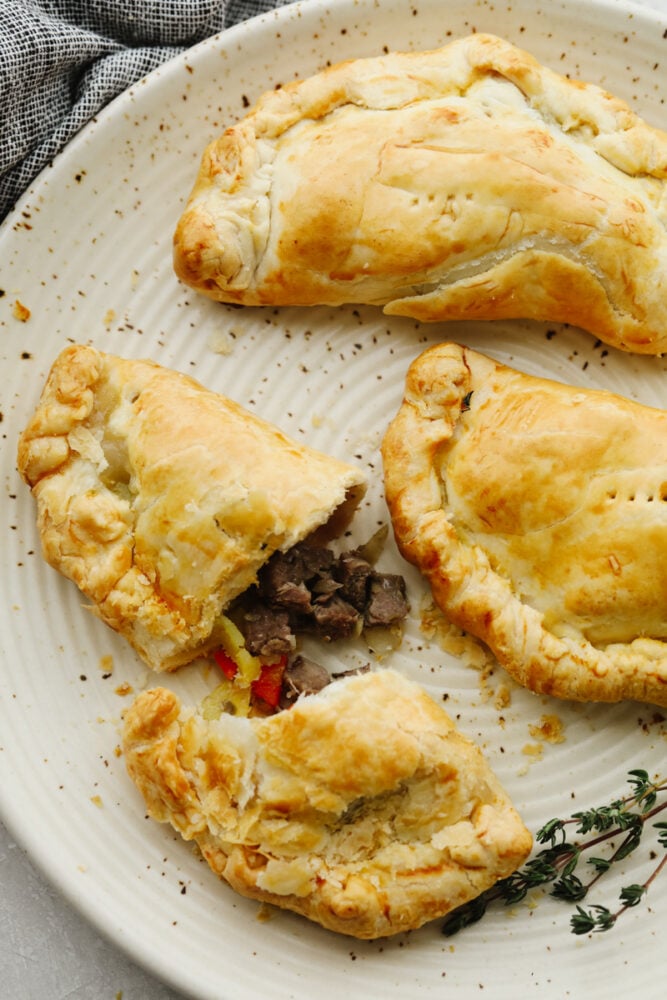
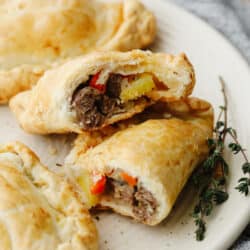
A few cornish pasties on a plate. One has been cut open.

What ARE Cornish Pasties

I get it, you want to know what you’re making and where it comes from before you commit to cooking it! A Cornish pasty comes from Cornwall, England. If you are looking for traditional English comfort food at its finest then this is it! This was originally made for miners who couldn’t come up for lunch. They needed something that they could still enjoy that was hearty and filling! So the pasty was made and the “handle” (the thick crust around the edge) was used for them to hold. This way, they could still eat without getting the main part of the pasty dirty with their hands.

The cornish pasty is made with a pie crust that is then filled with the most amazing steak, potatoes, and vegetables. They’ve all been seasoned and cooked to perfection. The outside is flaky and it perfectly holds everything inside. It’s a super simple recipe that anyone can make! In fact, have your kids help you… They will love filling up the pie crust and pinching all of the edges closed!

Ingredients for Cornish Pasties

The ingredients are simple and you probably have most of them on hand already! See the recipe card below for exact ingredient measurements.

  • Pie crust: You can use your favorite homemade pie crust or get one that’s premade.
  • Beef: You can use beef skirt, flank or sirloin steak for the meat!
  • Yukon gold potatoes: I love the flavor of Yukon gold potatoes but you could use any potatoes that you love!
  • Carrots: When you cut these up, keep them the same size so that they cook evenly!
  • Seasonings: These are super simple! I just used salt, pepper, and dried thyme.
  • Yellow onion: Dice this up into smaller pieces!
  • Butter: I always like to use unsalted butter in these recipes so that I don’t have to change the amount of salt!
  • Egg: A large egg will work great!

How to Make a Cornish Pasty

Now that you have all of your ingredients ready, it’s time to make it! It only takes about 25 minutes of prep and then you just have to wait! And let me tell you… It’s worth it!

  1. Preheat oven and prep pan: Preheat oven to 350°F. Line a baking sheet with parchment paper and set aside.
  2. Cut up meat and veggies then toss in seasonings: Cut the steak into bite sized cubes. Peel and dice potatoes, onion, and carrots. Combine the filling ingredients into a bowl and toss together. Season with salt, pepper, and dried thyme. Set aside.
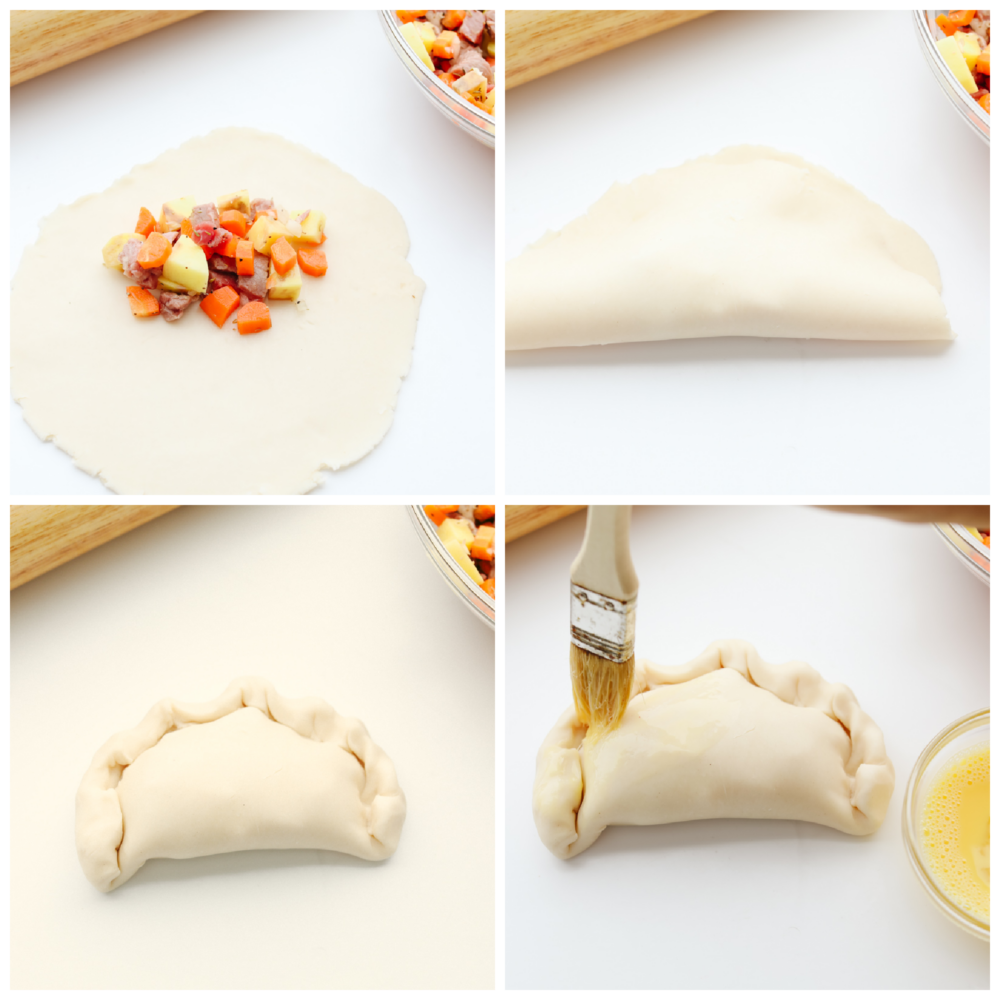
  3. Roll dough: Using chilled pie dough, roll dough into 4, 8-inch rounds. Rolling between wax paper makes it easier.
  4. Fill with meat: Fill the top half of each 8-inch round with the meat mixture.
  5. Pat on butter: Place 1 tbsp pat of butter on top of the meat mixture before folding. Don’t skip this part! This will help add moisture to the inside filling.
  6. Fold and crimp: Fold dough over to form a half circle and seal by crimping the edges.
  7. Make egg wash: Whisk the egg and 1 tbsp water together to make the egg wash. Brush each of the pasties with the egg wash. Prick the top of each pastie with a fork to help release steam while it bakes.
  8. Bake: Bake for 35-45 minutes or until the crust is golden brown, and the meat is cooked through.
4 pictures showing how to roll the dough, fill it and then pinch it back up and put an egg wash on it.

Baking Tips

Here are a few tips that you can try to make these Cornish pasties turn out just right! Feel free to change up the meat and vegetables to make this your own!

  • Rutabaga: Rutabaga is traditionally used in Cornish pasties.  Feel free to add ¼ cup peeled and diced if you desire!
  • Store bought pie crust: If using a refrigerated store bought pie crust, you will need to use both pie crusts in the box.  Let the crusts sit at room temperature for about 10 minutes.  Cut each crust in half so you have 4 total.  Roll the halves into a ball before rolling them out into a circle.
  • Don’t open the oven door: I know that it’s tempting to open the oven door while you are baking your pasties. After all, you just want to see how they are doing! But when you open the door while you are baking, you let a lot of the heat out. This makes it so that it can bake unevenly.
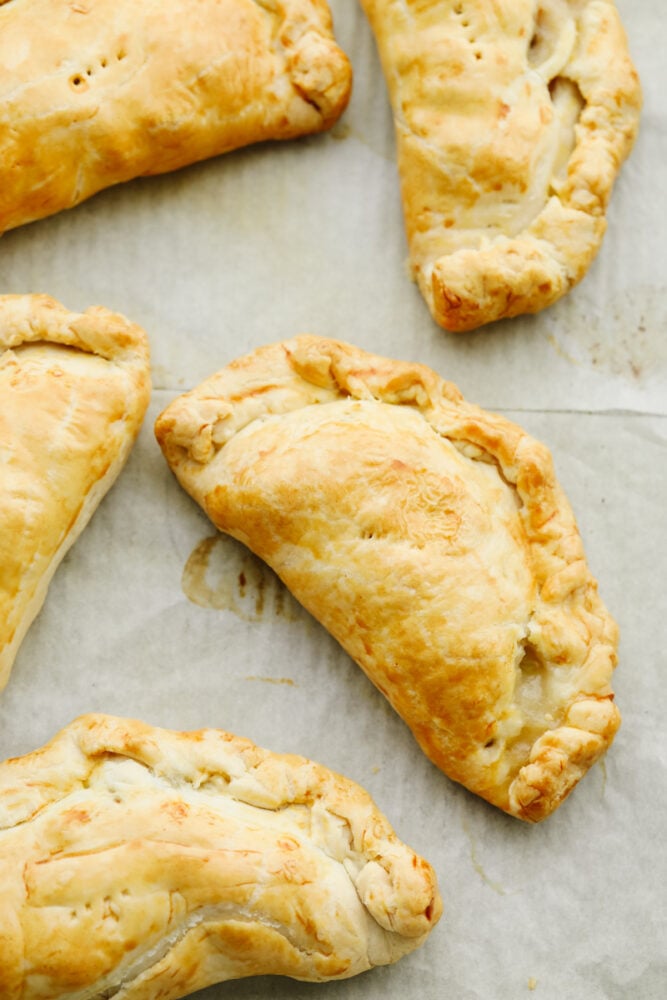
Cornish pasties cooked and on a pan with parchment paper.

How to Store Leftovers

These cornish pasties make a fantastic lunch the next day! If you have leftovers, here is how you can store them!

  • Refrigerate: Once they have cooled, place them in an airtight container. Then, put them in your fridge! They will last 2-3 days.
  • Reheat: You can easily reheat these in the microwave! Set them on a plate and cook them on high for one minute. Flip it over and cook for another minute or until heated through!
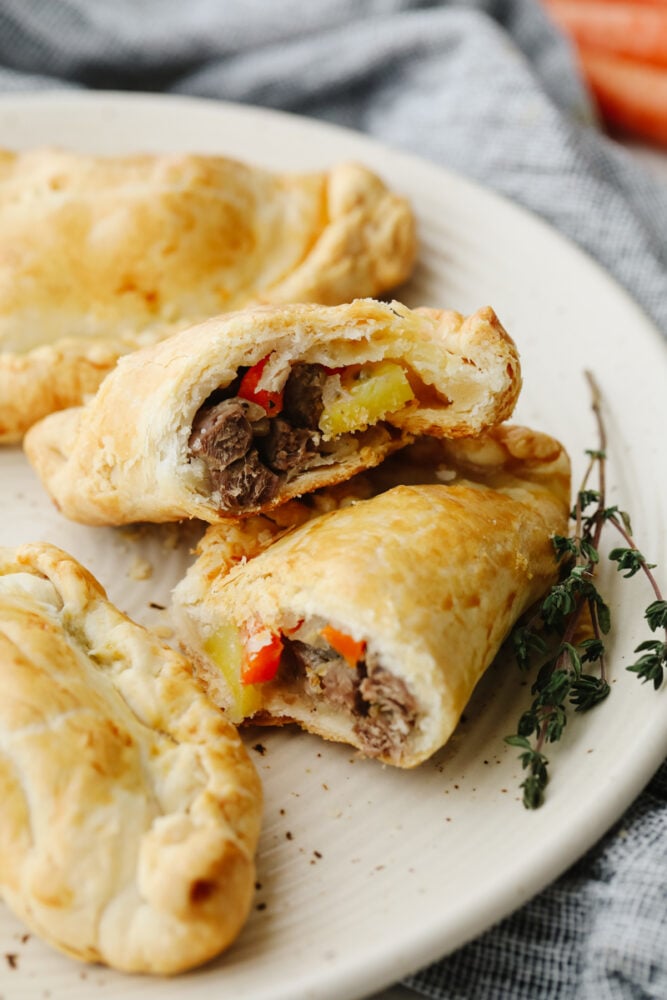
Cornish pasties on a plate cut open so that you can see the meat and veggies inside.
Print

Easy Cornish Pasties

These traditional English cornish pasties are SOO GOOD! The outside is a flaky crust that's filled with delicious steak, potatoes and veggies! If you haven't tried this before then you are in for a real treat!
Course Dinner
Cuisine English
Keyword cornish pasties, cornish pasty, pasty
Prep Time 25 minutes
Cook Time 45 minutes
Total Time 1 hour 10 minutes
Servings 4 pasties
Calories 439kcal
Author Alyssa Rivers

Ingredients

  • 1 Pie crust (your favorite homemade pie crust or premade) chilled
  • 1/2 pound beef skirt, flank or sirloin steak
  • 3/4 cup Yukon gold potatoes (about 1 medium potato) peeled and cubed
  • 1/4 cup carrots peeled and cubed
  • 1/4 teaspoon salt
  • ¼ teaspoon pepper
  • ¼ teaspoon dried thyme
  • 1/4 cup yellow onion diced
  • 4 Tablespoon butter divided
  • 1 large egg

Instructions

  • Preheat oven to 350°F. Line a baking sheet with parchment paper and set it aside.
  • Cut the steak into bite-sized cubes. Peel and dice potatoes, onion, and carrots. Combine the filling ingredients into a bowl and toss them together. Season with salt, pepper, and dried thyme. Set aside.
  • Using chilled pie dough, roll dough into 4, 8-inch rounds. Rolling between wax paper makes it easier.
  • Fill the top half of each 8-inch round with the meat mixture.
  • Place 1 tbsp pat of butter on top of the meat mixture before folding. Don't skip this part! This will help add moisture to the inside filling.
  • Fold dough over to form a half circle and seal by crimping the edges.
  • Whisk the egg and 1 tbsp water together to make the egg wash. Brush each of the pasties with the egg wash. Prick the top of each pastie with a fork to help release steam while it bakes.
  • Bake for 35-45 minutes or until the crust is golden brown, and the meat is cooked through.

Notes

Rutabaga is traditionally used in Cornish pasties. Feel free to add ¼ cup peeled and diced if you desire!
If using a refrigerated store-bought pie crust, you will need to use both pie crusts in the box.  Let the crusts sit at room temperature for about 10 minutes. Cut each crust in half so you have 4 total. Roll the halves into a ball before rolling them out into a circle.

Nutrition

Calories: 439kcal | Carbohydrates: 30g | Protein: 17g | Fat: 28g | Saturated Fat: 13g | Polyunsaturated Fat: 2g | Monounsaturated Fat: 10g | Trans Fat: 1g | Cholesterol: 107mg | Sodium: 481mg | Potassium: 454mg | Fiber: 2g | Sugar: 1g | Vitamin A: 1755IU | Vitamin C: 10mg | Calcium: 33mg | Iron: 3mg


source https://therecipecritic.com/cornish-pasty/
Share:

Farro Chickpea Skillet with Tomatoes, Kale, Cardamom & Lime

This vegan farro chickpea skillet with tomatoes, cardamom and lime is so flavourful, hearty, pantry-friendly, and it cooks up in 30 minutes.

The post Farro Chickpea Skillet with Tomatoes, Kale, Cardamom & Lime appeared first on The First Mess.


from The First Mess https://ift.tt/3DfjffA
via IFTTT
Share:

Popular

Archive

Slider Tag

Facebook

Header Ads

Recent in Food

Blog Archive

Recent Posts

Unordered List

  • Lorem ipsum dolor sit amet, consectetuer adipiscing elit.
  • Aliquam tincidunt mauris eu risus.
  • Vestibulum auctor dapibus neque.

Pages

Theme Support

Need our help to upload or customize this blogger template? Contact me with details about the theme customization you need.