Bunny Cupcakes

Hop into spring with these darling bunny cupcakes! Not only do they look like the cutest little cupcakes that you’ve ever seen, but they taste incredible!

Cupcakes are the best way to jazz up any party, get-together, or holiday celebration. Try out these cute rainbow cupcakes, these cannoli cupcakes, or these unique lavender cupcakes that will be delicious for every occasion!
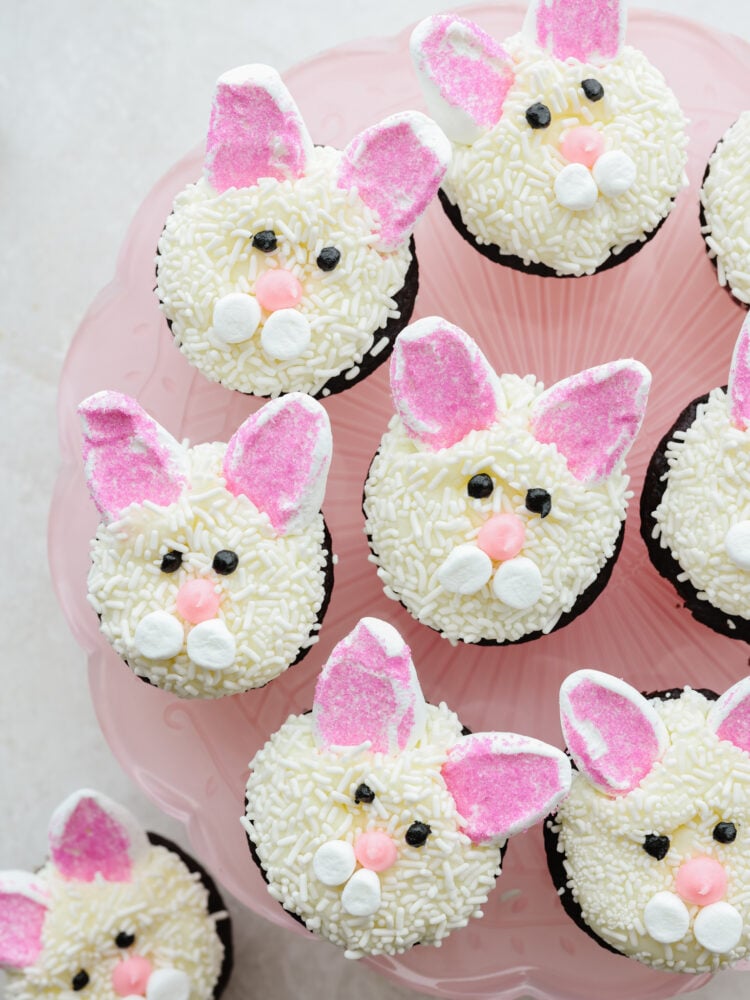
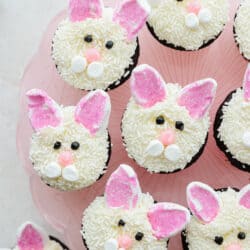
Bunny cupcakes on a pink cake platter.
00

Bunny Cupcakes

I love spring and Easter and all of the fun and fresh treats that come with it! These bunny cupcakes quickly became a favorite with my kids, and they had so much fun helping me decorate them! I mean, they may have eaten too many marshmallows in the process, but hey, that’s part of the fun in baking, right?? These bunny cupcakes were so easy to make that I’m going to find every excuse to make them all year long!

The best part about these cupcakes is that you can easily change out the flavor of cupcakes! I used chocolate cupcakes, but you could use white cupcakes or even lemon or strawberry! The possibilities are endless. In fact, try making a bunch of different flavors, and you can also change up the color of frosting and sprinkles so that they all look different. Baking is the best this way. Making it your own is half the fun!

Ingredients You Need to Make Bunny Cupcakes

Start making these early this spring so that you can make them as many times as possible! And trust me, your kids will LOVE these! So save yourself some time and double the batch! Check out the recipe card at the bottom of the post for exact measurements.

  • Vegetable Oil: If you want cupcakes that are moist and soft then you need to use vegetable oil!
  • Warm Coffee: Don’t worry! Your cake won’t taste like coffee. This helps bring out the chocolate flavor in the cupcakes.
  • Buttermilk: You can use storebought buttermilk or if you don’t have any then make some on your own! Check out that recipe here.
  • Egg: Set your egg out so that it can come down to room temperature… It will mix in so much better into your batter.
  • Vanilla: Add some more sweet flavor with a splash of vanilla!
  • Flour: I used all purpose flour in this recipe.
  • Granulated Sugar: Cupcakes need sugar to taste sweet and delicious.
  • Unsweetened Cocoa Powder: Make sure that you don’t use Dutch Process cocoa powder.
  • Baking Soda: This helps the cupcakes rise.
  • Salt: The salt will enhance all of the other ingredients.

Buttercream Frosting

  • Butter: Use unsalted butter that has been brought down to room temperature.
  • Powdered Sugar: This creates a sweet and smooth base for the frosting.
  • Vanilla Extract: A little extra sweet flavor to make this buttercream taste perfect!
  • Salt: This will enhance all of the flavors.
  • Milk: This is what will bind all of the ingredients together.
  • Marshmallows: You need large marshmallows and mini marshmallows for this recipe.
  • Toppings: White Jimmy Sprinkles are used on the top of the cupcake and pink sanding sugar is used on the marshmallow bunny ears.
  • Food Coloring: Black and pink for the nose and eyes.

How to Make Bunny Cupcakes

The bunny cupcakes are so fun to make, and they turn out so cute! They give you a great excuse to plan a party this spring. All of your guests will love them!

Cupcakes

  1. Prep: Preheat the oven to 350°. Line a muffin pan with cupcake liners and set aside.
  2. Whisk: In a large bowl whisk together the vegetable oil, warm coffee, egg, and vanilla until combined.
  3. Sift and Combine: In a medium bowl sift together the flour, sugar, unsweetened cocoa powder, baking soda, and salt. Add the dry ingredients to the wet ingredients and gently whisk together until fully combined.
  4. Bake: Scoop the batter into the prepared cupcake pan and only fill the cupcake liners 2/3 of the way full. Bake for 18-22 minutes, or until the cupcakes spring bake when lightly pressed. Cool completely before frosting.

Buttercream

  1. Mix Butter: In the bowl of a mixer add the butter. Use the paddle attachment to beat the butter for 1-2 minutes until it is smooth and creamy.
  2. Scrape Sides and Beat: Add the powdered sugar and mix on low until most of the sugar has been absorbed by the butter. You may need to scrape down the sides and bottom of the bowl a few times. Add the vanilla and salt and beat on medium-high for 2-3 minutes.
  3. Add Milk: Add the milk 1 tablespoon at a time on medium-low. Scrape down the sides of the bowl and then beat on medium-high for 2 minutes, or until the frosting is looking quite white and fluffy.
  4. Add Food Coloring: Separate a small amount of frosting into two small bowls and color one light pink and the other black.

Assembly

  1. Pipe and Roll: Using a large round piping tip, or the end of a piping bag snipped with a wide opening, pipe white frosting in one large, round dollop of frosting onto the top of each cupcake. Roll the cupcakes in a bowl of white sprinkles to evenly cover.
  2. Make the Face: For each cupcake, cut a mini marshmallow in half and then press it onto the bottom half of the top of the bunny cupcake. Right above the mini marshmallow use a #10 round piping tip to pipe a small pink nose. Above the nose use a #8 round piping tip to pipe two eyes with black frosting.
  3. Add Ears: To make the ears, cut one large marshmallow on a diagonal. Press the two sticky cut sides of the marshmallow into the pink sanding sugar and then place on the top half of the top of the cupcake as ears.
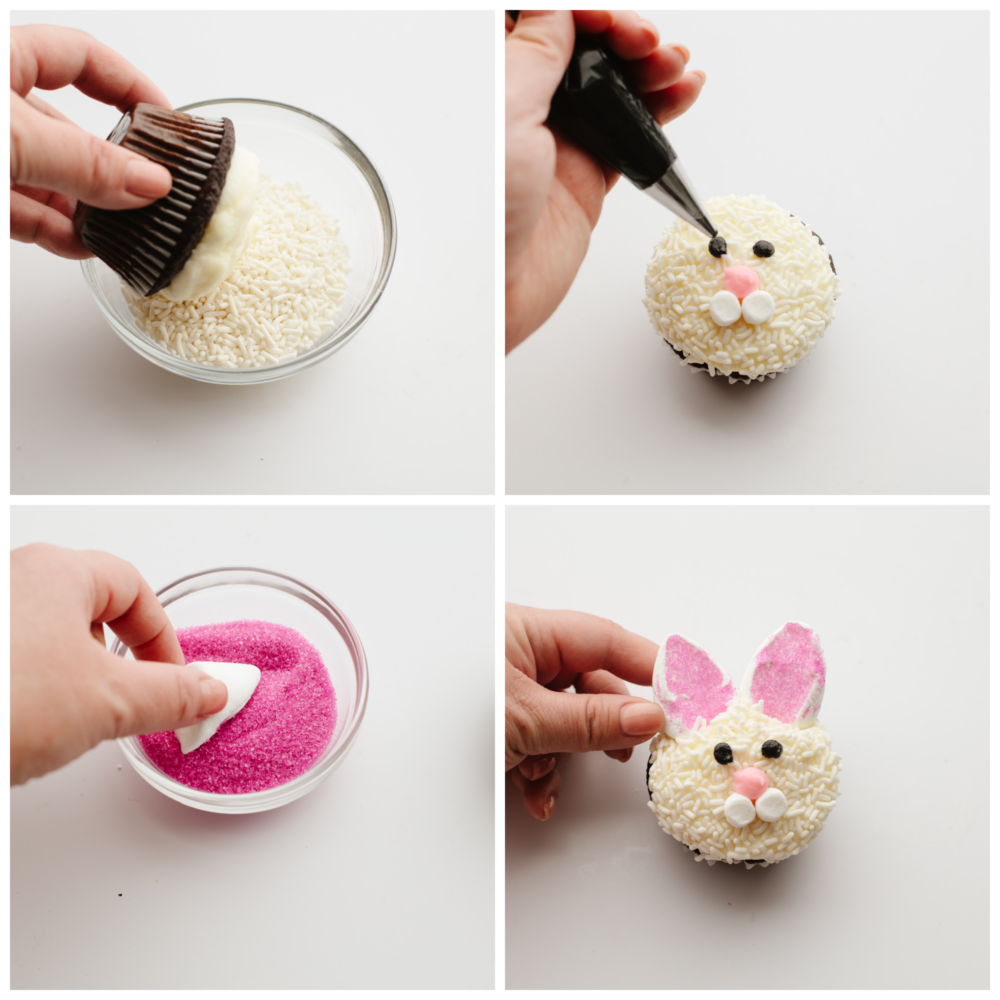
4 pictures showing how to make the face on the bunny cupcakes.

Variations

You can change up so many things to make these cupcakes different every single time. I’ve come up with a few ideas for you to try!

  • Cupcake: You can switch the flavor of the cupcake! My next choice would be white cake but you could try any flavor that you want!
  • Frosting: Match your frosting to your cupcake to have a more seamless look! Try these cupcakes with chocolate buttercream frosting and sprinkles instead.
  • The Face: Want another variety of animal to add in or to make for a different time of year? Take off the two tiny marshmallows, put whiskers on with some gel frosting and voila, you have a kitty cupcake!
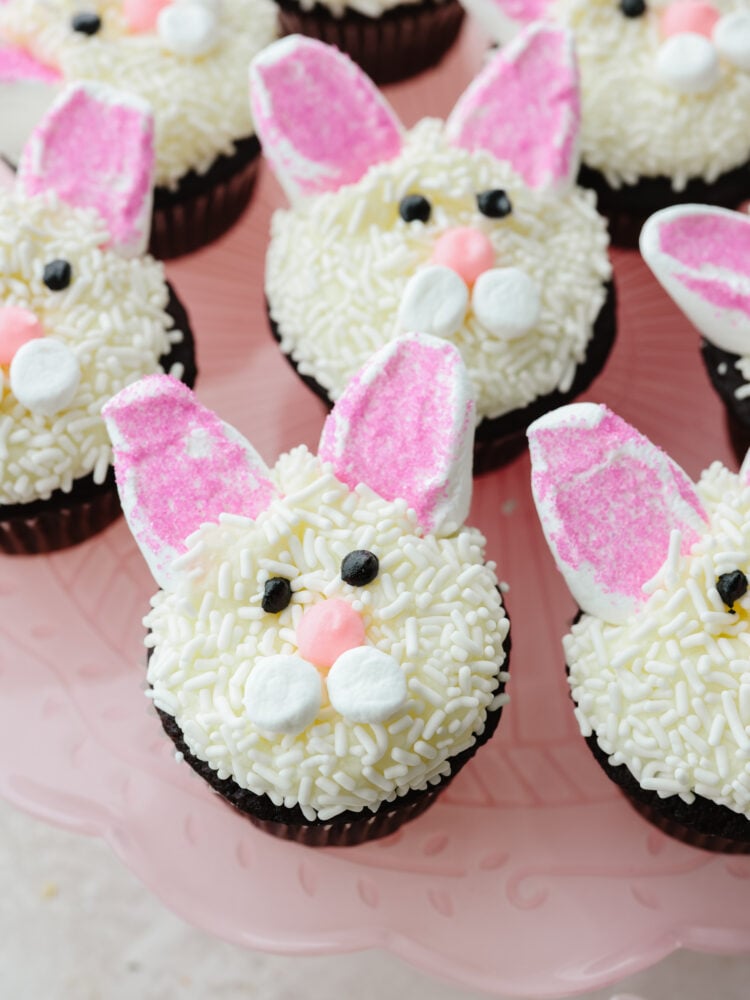
A zoomed in shot of bunny cupcakes.
Print

Bunny Cupcakes

Hop into spring with these bunny cupcakes! Not only do they look like the cutest little cupcakes that you've ever seen, but they taste incredible! 
Course Dessert
Cuisine American
Keyword bunny cupcakes, easter cupcakes, spring cupcakes
Prep Time 45 minutes
Cook Time 22 minutes
Total Time 1 hour 7 minutes
Servings 12 Cupcakes
Calories 427kcal
Author Alyssa Rivers

Ingredients

Cupcakes

  • ½ Cup Vegetable Oil
  • 1/2 Cup Warm Coffee
  • ½ Cup Buttermilk
  • 1 Large Egg Room Temperature
  • 1 ½ Teaspoon Vanilla
  • 1 1/4 Cup All-purpose Flour
  • 1 Cup Granulated Sugar
  • 6 Tablespoons Unsweetened Cocoa Powder Not Dutch Process
  • 1 Teaspoon Baking Soda
  • ½ Teaspoon Salt

Buttercream

  • 1 Cup Unsalted butter Room Temperature
  • 4 Cups Powdered Sugar
  • 1 Tablespoon Vanilla Extract
  • ½ Teaspoon Salt
  • 3 Tablespoons Milk
  • Large Marshmallows
  • Mini Marshmallows
  • White Jimmy Sprinkles
  • Pink Sanding Sugar
  • Black Food Coloring
  • Pink Food Coloring

Instructions

Cupcakes

  • Preheat the oven to 350°. Line a muffin pan with cupcake liners and set aside.
  • In a large bowl whisk together the vegetable oil, warm coffee, egg, and vanilla until combined.
  • In a medium bowl sift together the flour, sugar, unsweetened cocoa powder, baking soda, and salt. Add the dry ingredients to the wet ingredients and gently whisk together until fully combined.
  • Scoop the batter into the prepared cupcake pan and only fill the cupcake liners 2/3 of the way full. Bake for 18-22 minutes, or until the cupcakes spring bake when lightly pressed. Cool completely before frosting.

Buttercream

  • In the bowl of a mixer add the butter. Use the paddle attachment to beat the butter for 1-2 minutes until it is smooth and creamy.
  • Add the powdered sugar and mix on low until most of the sugar has been absorbed by the butter. You may need to scrape down the sides and bottom of the bowl a few times. Add the vanilla and salt and beat on medium-high for 2-3 minutes.
  • Add the milk 1 tablespoon at a time on medium-low. Scrape down the sides of the bowl and then beat on medium-high for 2 minutes, or until the frosting is looking quite white and fluffy.
  • Separate a small amount of frosting into two small bowls and color one light pink and the other black.

Assembly

  • Using a large round piping tip, or the end of a piping bag snipped with a wide opening, pipe white frosting in one large, round dollop of frosting onto the top of each cupcake. Roll the cupcakes in a bowl of white sprinkles to evenly cover.
  • For each cupcake, cut a mini marshmallow in half and press it onto the bottom half of the top of the cupcake. Right above the mini marshmallow use a #10 round piping tip to pipe a small pink nose. Above the nose use a #8 round piping tip to pipe two eyes with black frosting.
  • To make the ears, cut one large marshmallow on a diagonal. Press the two sticky cut sides of the marshmallow into the pink sanding sugar and then place on the top half of the top of the cupcake as ears.

Nutrition

Calories: 427kcal | Carbohydrates: 69g | Protein: 3g | Fat: 17g | Saturated Fat: 10g | Polyunsaturated Fat: 1g | Monounsaturated Fat: 4g | Trans Fat: 1g | Cholesterol: 56mg | Sodium: 306mg | Potassium: 90mg | Fiber: 1g | Sugar: 57g | Vitamin A: 515IU | Calcium: 29mg | Iron: 1mg


source https://therecipecritic.com/bunny-cupcakes/
Share:

Caramel Chicken

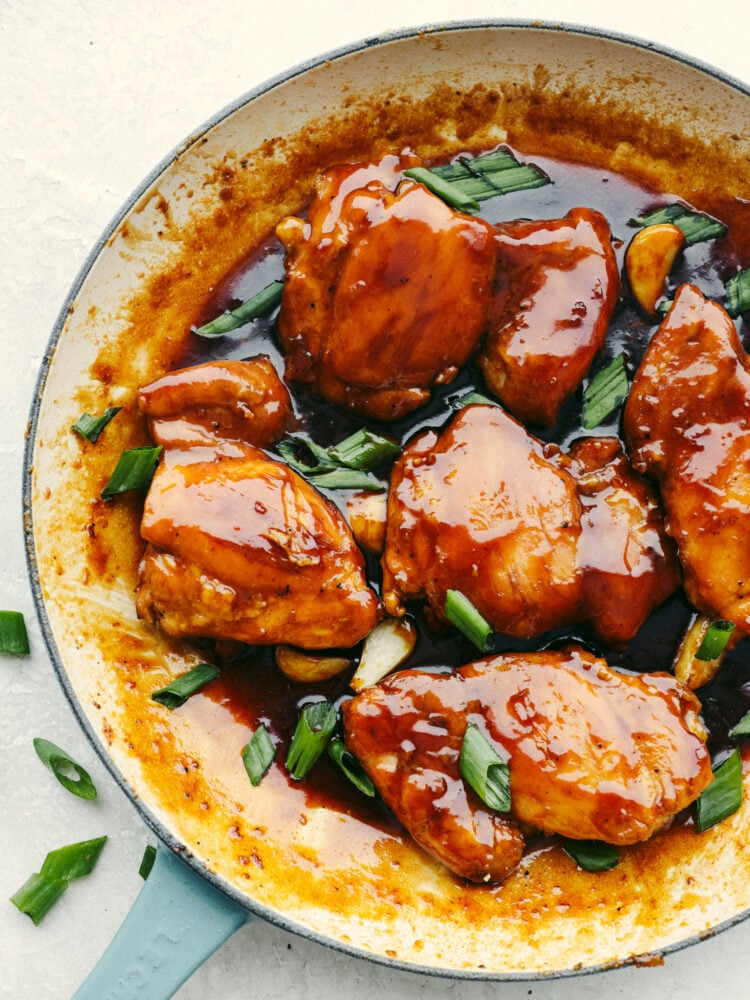
Caramel chicken is an amazing 30-minute meal that you won’t be able to get enough of! The chicken is glazed in the best sweet and tangy Asian sauce and is even picky eater-approved!

Looking for more easy, saucy Asian-inspired meals? Saucy Asian meatballs, garlic steak skewers, and sticky Asian glazed chicken are all must-try recipes that your family will go crazy over!

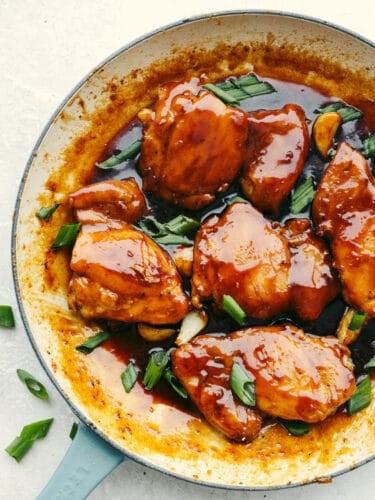
Caramel chicken garnished with scallions in a white and blue bowl.

Saucy Asian Caramel Chicken Recipe

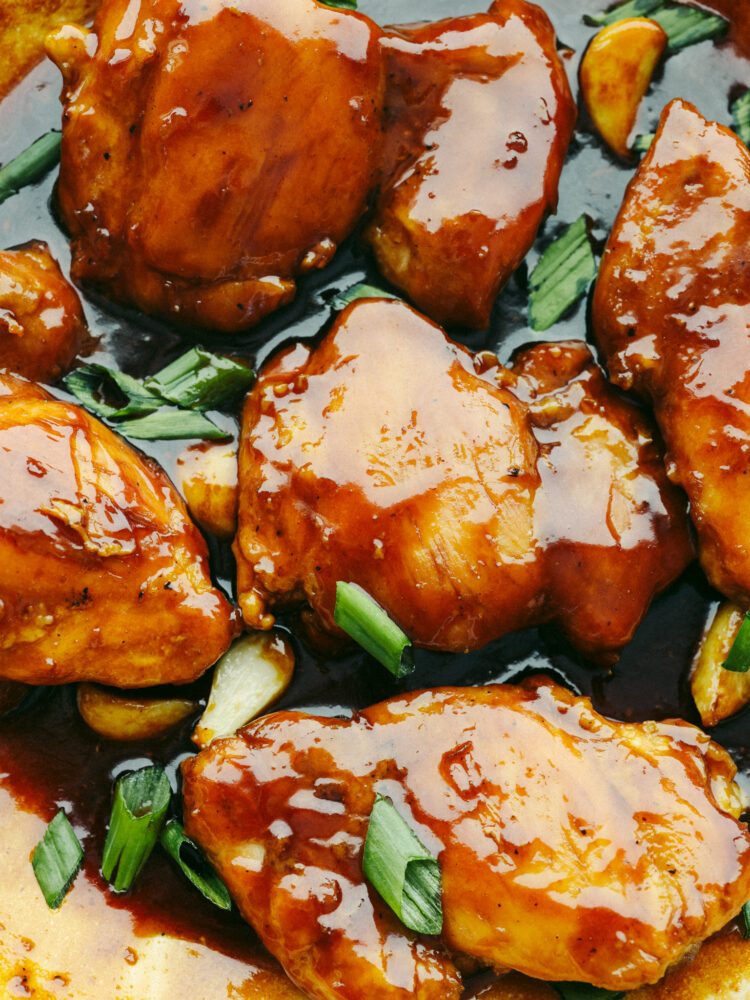
How do I even begin to describe the amazingness of this meal? The sauce. Oh my goodness. It is a sweet caramelized teriyaki glaze. Not to mention, the chicken is cooked in the skillet to juicy, tenderized perfection. The skillet gave it the perfect golden-brown crust along the outside. This is a one-pot recipe you’ll want to make again and again! My kids are always asking for it, and for good reason! It’s hard to resist something so saucy and bursting with flavor.

But the sauce. OMG the sauce. It thickened up just like you’d get in a restaurant and coated the chicken perfectly. Like caramel! No need for cornstarch in this one, it’s perfectly thick and delicious on its own! It is one of the best sauces that I have made. You guys have to try this recipe. Like right now. The whole family is going to love it! And if you’re needing inspiration for more delicious Asian meals that whip up in minutes, find my full list here!

Everything You Need to Make It

This is my go-to for busy weeknights. (Or when I’m feeling lazy!) It uses so many simple ingredients and is beyond easy to throw together! Trust me, though, with how insanely good this caramel chicken is, no one will ever suspect it took less than 30 minutes to make! You can find more 30-minute meals here. Note: measurements for all of the ingredients below can be found in the recipe card at the end of the post.

  • Chicken Thighs: I used boneless chicken thighs!
  • Vegetable Oil: Used for cooking the chicken in.
  • Garlic Cloves: Because what would a saucy dish be without a punch of tasty garlic??
  • Water: Adjusts the consistency of the sauce.
  • Light Brown Sugar: Don’t be scared about the sugar in the recipe. It isn’t too sweet. The vinegar and soy sauce gives it the perfect balance!
  • Rice Vinegar: Rice vinegar adds a tasty hint of tangy flavor.
  • Chicken Broth: I used low-sodium chicken broth here.
  • Soy Sauce: I used reduced-sodium soy sauce here as well to keep things on the healthier side.
  • Scallions: Add a pop of flavor and are great for using as garnish!

Let’s Make Caramel Chicken!

Only 5 simple steps are needed to make this saucy caramel chicken! You’re going to love how it turns out. It has so much flavor and tastes better than takeout!

  1. Sear Chicken: In a large skillet, heat oil over medium-high heat, season chicken with salt and cook until golden brown on each side. It should be crisp and cooked through. Transfer to a plate and set aside.
  2. Saute Garlic: Add garlic cloves to skillet until golden brown about 2 minutes. Transfer to the plate of chicken.
  3. Prepare Sauce: Return pot to medium-high heat and carefully pour ½ cup of water scraping down the browned bits. Whisk in the brown sugar until dissolved. Then cook until mixture turns a deep amber color. (About 4 minutes.) Carefully add vinegar and stir to dissolve.
  4. Add in Remaining Ingredients: Add garlic, broth, and soy sauce. Bring cooking liquid to a boil and whisk occasionally. This takes about 10 minutes. Be patient. The sauce will thicken and glaze the chicken beautifully.
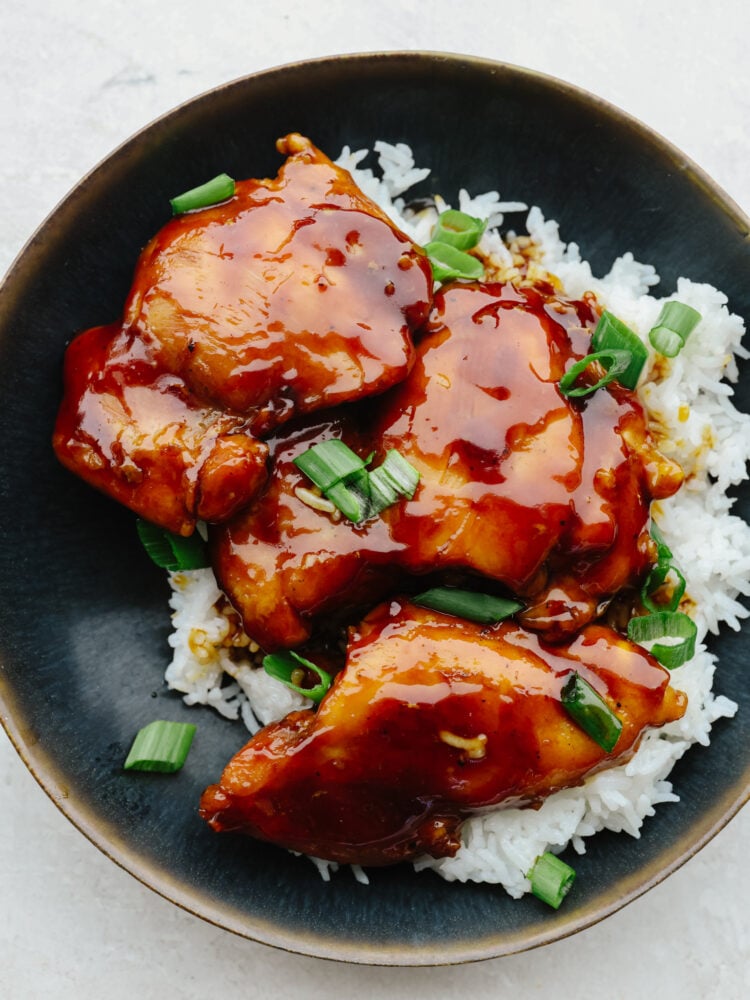
  5. Serve: Once glaze is ready, turn heat to medium-low and return chicken to the pan until heated through. Serve over rice and garnish with scallions or green onions if desired.
Closeup of chicken covered in caramelized Asian sauce.

Tips and Variations

This caramel Asian chicken is honestly one of the best saucy dishes I’ve had. It’s so easy and delicious! My family is always over the moon when it’s on the lineup for dinner. Here are a few tips and variations on making it as tasty as possible!

  • Check Internal Temperatures: Always make sure that your chicken has an internal temperature of 165 degrees F before serving. This is a good indication of when to stop. If you keep cooking past this point, your chicken may become dry.
  • Add Spice: Looking for more heat? Feel free to add a tablespoon of chili flakes or sriracha at a time until you reach your desired flavor.

Storing Leftovers

The great thing about dishes like this is that they make amazing leftovers. You can reheat it the next day over a bowl of rice and it will taste just as good!

  • In the Refrigerator: Store your caramel chicken in an airtight container for up to 3 days.
  • Reheating: For a quick and easy meal, you can reheat your chicken in the microwave in 30-second intervals until warmed through. I also like to reheat over the stove to keep my chicken from getting soggy. Make sure your chicken has an internal temperature of 165 degrees F before serving. Enjoy!
Caramel chicken served over white rice in a black bowl.
Print

Caramel Chicken

Caramel chicken is an amazing 30-minute meal that you won't be able to get enough of! The chicken is glazed in the best sweet and tangy Asian sauce and is even picky eater-approved!
Course Dinner, Main Course
Cuisine Asian, Asian American
Keyword caramel chicken, chicken, chicken recipes
Prep Time 5 minutes
Cook Time 25 minutes
Total Time 30 minutes
Servings 4 Servings
Calories 422kcal
Author Alyssa Rivers

Ingredients

  • 5 boneless chicken thighs
  • 2 Tablespoons vegetable oil
  • 8 garlic cloves peeled
  • 1/2 cup water
  • 1/3 cup light brown sugar packed
  • 1/4 cup rice vinegar
  • 1/2 cup low sodium chicken broth
  • 1/2 cup reduced sodium soy sauce
  • 2 scallions thinly sliced for garnish

Instructions

  • In a large skillet heat oil over medium high heat. Season chicken with salt and cook until golden brown on each side until crisp and cooked through. Transfer to a plate and set aside.
  • Add garlic cloves to skillet until golden brown about 2 minutes. Transfer to the plate of chicken.
  • Return pot to medium high heat and carefully pour ½ cup of water scraping down the browned bits. Whisk in the brown sugar until dissolved. Then cook until mixture turns a deep amber color. About 4 minutes. Carefully add vinegar and stir to dissolve.
  • Add garlic, broth and soy sauce. Bring cooking liquid to a boil and whisk occasionally. This takes about 10 minutes. Be patient. The sauce will thicken and glaze the chicken beautifully.
  • Once glaze is ready, turn heat to medium low and return chicken to pan until heated through. Serve over rice and garnish with scallions or green onions if desired.

Notes

Originally posted September 27, 2013
Recipe updated April 1, 2022

Nutrition

Calories: 422kcal | Carbohydrates: 23g | Protein: 51g | Fat: 13g | Saturated Fat: 7g | Cholesterol: 145mg | Sodium: 821mg | Potassium: 995mg | Fiber: 1g | Sugar: 18g | Vitamin A: 128IU | Vitamin C: 6mg | Calcium: 44mg | Iron: 2mg


source https://therecipecritic.com/caramel-chicken/
Share:

Asparagus Quiche

This asparagus quiche is as delicious as it is gorgeous! It has a perfectly flaky texture combined with an insanely delicious flavor. This will be the star of the show at any breakfast or brunch!

Savory breakfast recipes are so delicious! They fill you up, and everyone goes crazy over them. Try out some more of my favorites like this breakfast casserole, these amazing breakfast enchiladas, or this sausage and mushroom frittata.

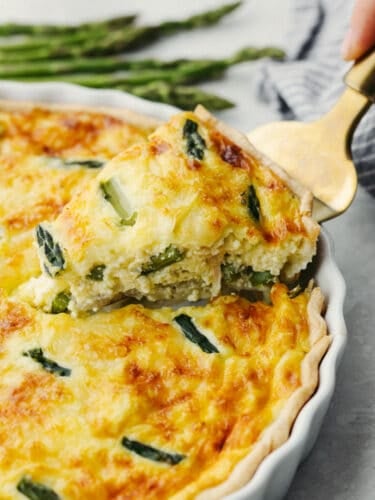
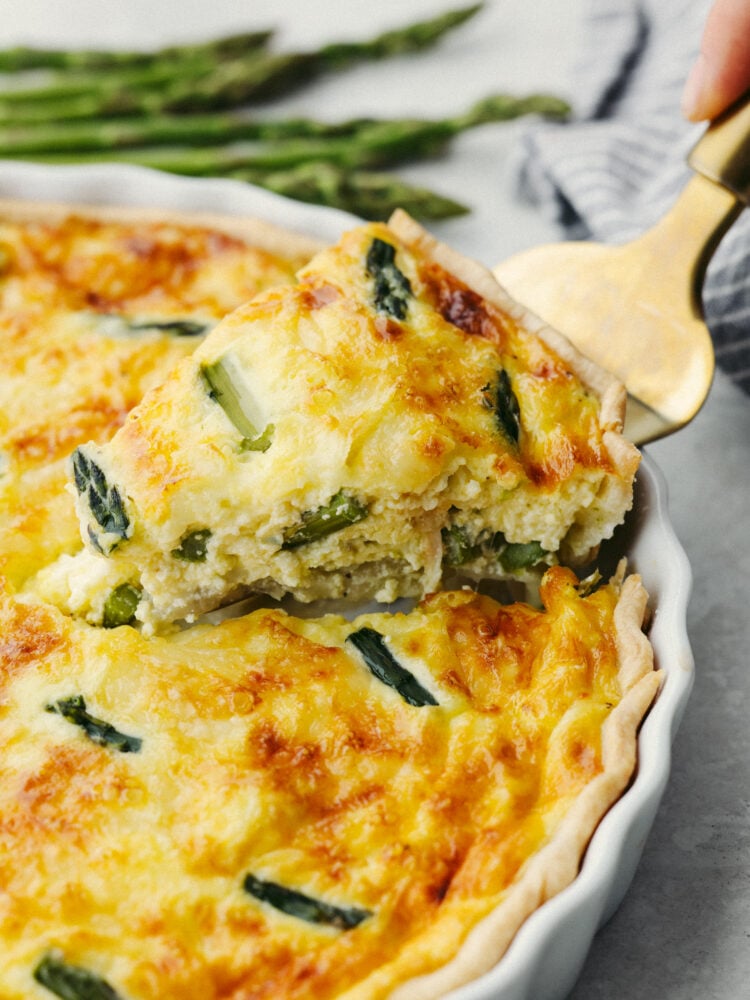
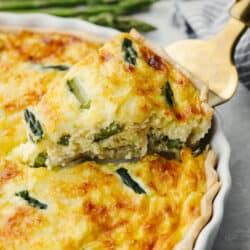
A slice of asparagus quiche being dished out with a gold pie server.

Asparagus Quiche

Quiche is like having a pie for breakfast. The crust is delightfully flaky, the filling is savory and delicious, and the vegetables inside bring beautiful color and a delicious taste. This asparagus quiche is no exception! The eggs in the quiche bind it all together and make this a breakfast to remember. I especially love the cheese…. everything is better with cheese!

One of the best things about quiche is that the leftovers taste just as good, if not better, the next day. I will sometimes make this on a Saturday morning and double the recipe so that breakfast is taken care of for Sunday too! Plus, this is easy to put together, so it’s become a go-to for just about any meal in our house. I mean, breakfast for dinner is something that everyone does… right? Try this out. It will become a staple recipe in your family too!

What Ingredients Are in Asparagus Quiche?

Lucky for you, this asparagus quiche is not only delicious, but it’s simple to make! Grab yourself a pre-made pie crust (or make one at home!), and you probably have everything else all ready to go. Isn’t it nice when you don’t have to make extra trips to the store?! Check out the recipe card at the bottom of the post for exact measurements.

  • Pie Crust: You can use a homemade or store-bought crust.
  • Eggs: If you use eggs that are room temperature, they will blend with the other ingredients nicely.
  • Heavy Cream: Any percent works, but you will get the best results with higher fat content.
  • Asparagus: Trim these and cut them into ½ inch pieces.
  • Gruyere Cheese: Shred this up! If you don’t have this cheese on hadn then any cheese will work.
  • Seasonings: Onion powder, salt and pepper will givea great flavor to this quiche.

How to Make Asparagus Quiche

This quiche only takes one hour from start to finish. And that included baking time! So make a plan and get all of the ingredients so that you can enjoy this for breakfast sometime soon!

  1. Preheat: Preheat the oven to 375℉.
  2. Make Your Pie Crust: Prepare your pie crust according to your recipe directions or line a pie dish with a store-bought pie crust.
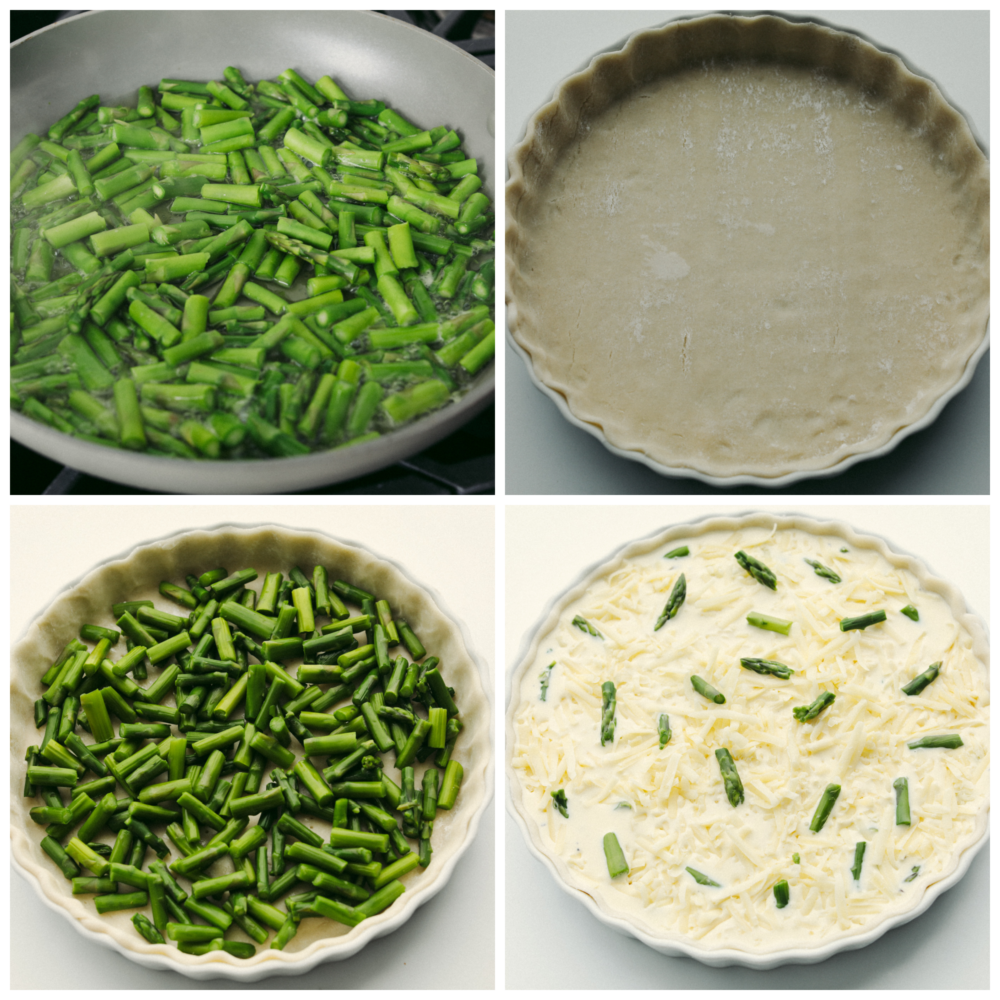
  3. Cut Asparagus: In a large skillet add 3 tablespoons of water, and the cut asparagus. Cover and cook over medium heat for 5-7 minutes, until the asparagus is bright green and crisp tender. Drain the water and allow to cool for a few minutes before placing in the bottom of the prepared pie crust.
  4. Combine: Once asparagus is slightly cooled, place in the bottom of the prepared pie crust, followed by 1 cup of the shredded cheese.
  5. Whisk: In a large bowl, whisk together the eggs, heavy cream, asparagus, cheese, onion powder, salt, and pepper.
  6. Pour: Pour the egg mixture into the pie crust and top with the remaining ¼ cup shredded cheese. 
  7. Bake: Bake for 45 minutes, or until the center is set. If the crust edges begin to brown, use a pie shield or foil wrapped around the edge. Let the quiche sit for 15 minutes before slicing.
4 picturs showing how to cooke asparagus, form a pie crust into the pan and add in the filling.

Quiche Making Tips

Here are a few tips that I’ve learned over the years when making asparagus quiche. Hopefully, they help you out too!

  • Don’t Overbake: If your quiche is turning brown on the edges but the middle still isn’t cooked all the way, then keep cooking it! You can put some foil around the outer edge of the crust. Then your middle part can cook longer without burning the rest!
  • Don’t Overfill: Your eggs will rise while the quiche cooks. So you don’t want to overfill the pie tin or else it will go over the edges.
  • Bottom Rack: Bakce your quiche on the bottom rack in the oven so that it turns out nicely browned and perfectly crisp.
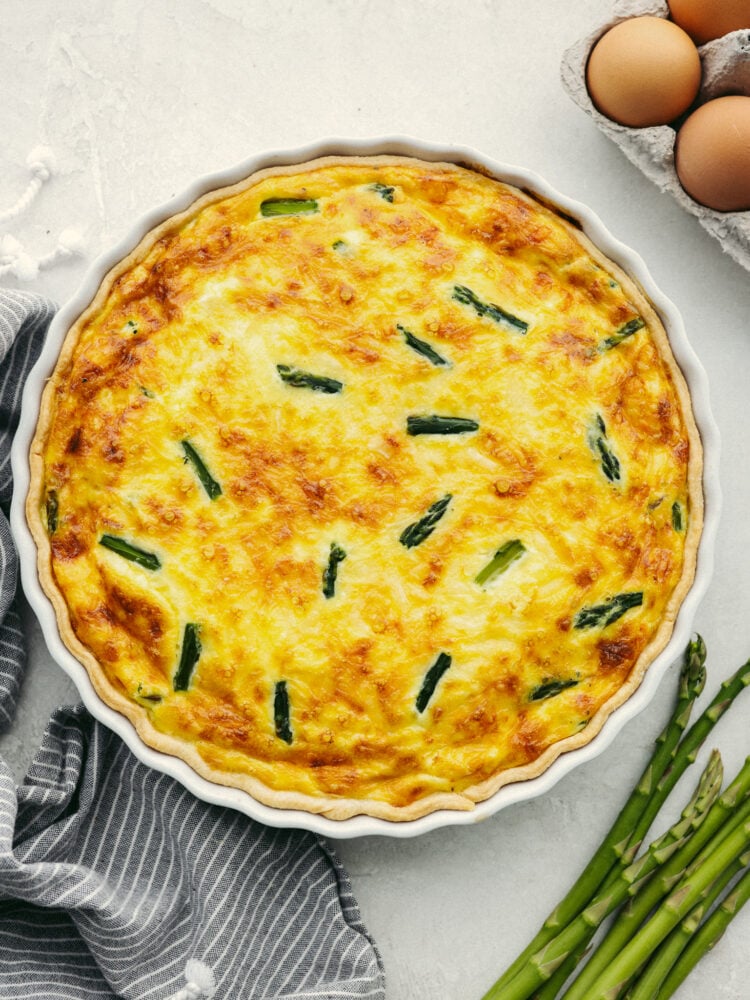
The top view of a fully cooked asparagus quiche, ready to cut and serve.

How to Store Leftovers

Like I said earlier, this asparagus quiche tastes just as good, if not better the next day! You can even make it ahead of time and freeze it for later!

  • In the Refrigerator: Once your quiche has cooled then cover it with foil and put it in your fridge. It will last 2-3 days.
  • In the Freezer: Wrap your cooled quiche in plastic wrap and foil. Label it with the date and it will stay good in your freezer for 3-4 months.
  • To Reheat: Let your frozen quich thaw in the fridge overnight. When you are ready to eat it, cook it at 350 degrees for 15-20 minutes.
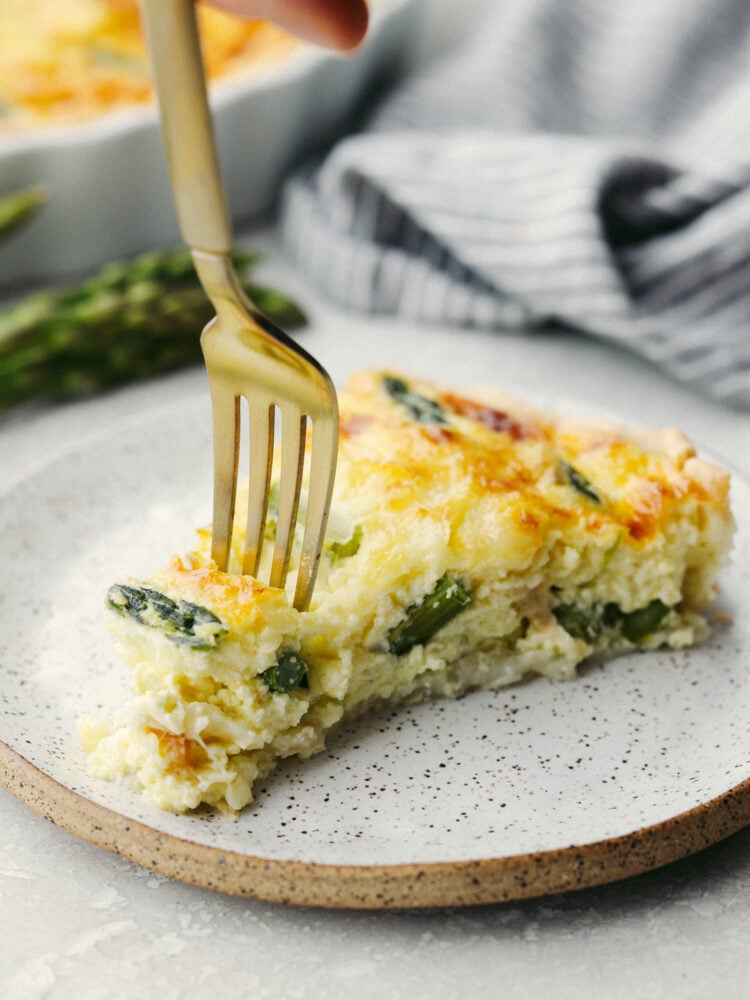
A slice of asparagus quiche on a plate with a gold fork cutting into it.
Print

Asparagus Quiche

This asparagus quiche is as delicious as it is gorgeous! It has a perfectly flaky texture combined with an insanely delicious flavor. This will be the star of the show at any breakfast or brunch! 
Course Breakfast, brunch
Cuisine American
Keyword asparagus quiche, vegetarian
Prep Time 15 minutes
Cook Time 45 minutes
Total Time 1 hour
Servings 6 People
Calories 577kcal
Author Alyssa Rivers

Ingredients

  • 1 Pre-Made Pie Crust (homemade or store-bought)
  • 4 large Eggs
  • 2 cups Heavy Cream (best results with higher fat)
  • 1 lb Asparagus (trimmed and cut into 1/2-inch pieces)
  • 1 1/4 cups Gruyere cheese, shredded, divided (any cheese works)
  • 1 tsp Onion Powder
  • 1/2 tsp Salt
  • 1/2 tsp Pepper

Instructions

  • Preheat the oven to 375℉.
  • Prepare your pie crust according to recipe directions or line a pie dish with a store-bought pie crust.
  • In a large skillet add 3 tablespoons of water, and the cut asparagus. Cover and cook over medium heat for 5-7 minutes, until the asparagus is bright green and crisp-tender. Drain the water and allow it to cool for a few minutes before placing it in the bottom of the prepared pie crust.
  • Once asparagus is slightly cooled, place it in the bottom of the prepared pie crust, followed by 1 cup of shredded cheese.
  • In a large bowl, whisk together the eggs, heavy cream, asparagus, cheese, onion powder, salt, and pepper.
  • Pour the egg mixture into the pie crust and top with the remaining ¼ cup shredded cheese.
  • Bake for 45 minutes, or until the center is set. If the crust edges begin to brown, use a pie shield or foil wrapped around the edge. Let the quiche sit for 15 minutes before slicing.

Nutrition

Serving: 1slice | Calories: 577kcal | Carbohydrates: 20g | Protein: 18g | Fat: 48g | Saturated Fat: 27g | Polyunsaturated Fat: 3g | Monounsaturated Fat: 15g | Trans Fat: 1g | Cholesterol: 244mg | Sodium: 577mg | Potassium: 329mg | Fiber: 2g | Sugar: 4g | Vitamin A: 2180IU | Vitamin C: 5mg | Calcium: 374mg | Iron: 3mg


source https://therecipecritic.com/asparagus-quiche/
Share:

Popular

Archive

Slider Tag

Facebook

Header Ads

Recent in Food

Blog Archive

Recent Posts

Unordered List

  • Lorem ipsum dolor sit amet, consectetuer adipiscing elit.
  • Aliquam tincidunt mauris eu risus.
  • Vestibulum auctor dapibus neque.

Pages

Theme Support

Need our help to upload or customize this blogger template? Contact me with details about the theme customization you need.