Strawberry Chicken Salad with Strawberry Balsamic Dressing

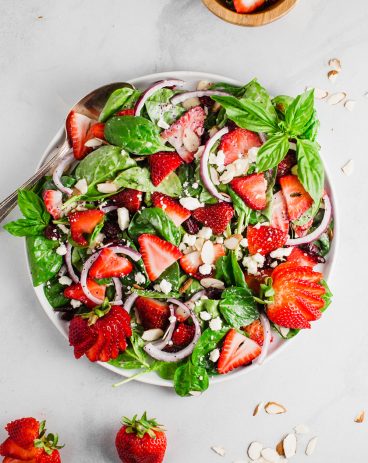
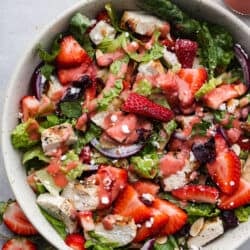
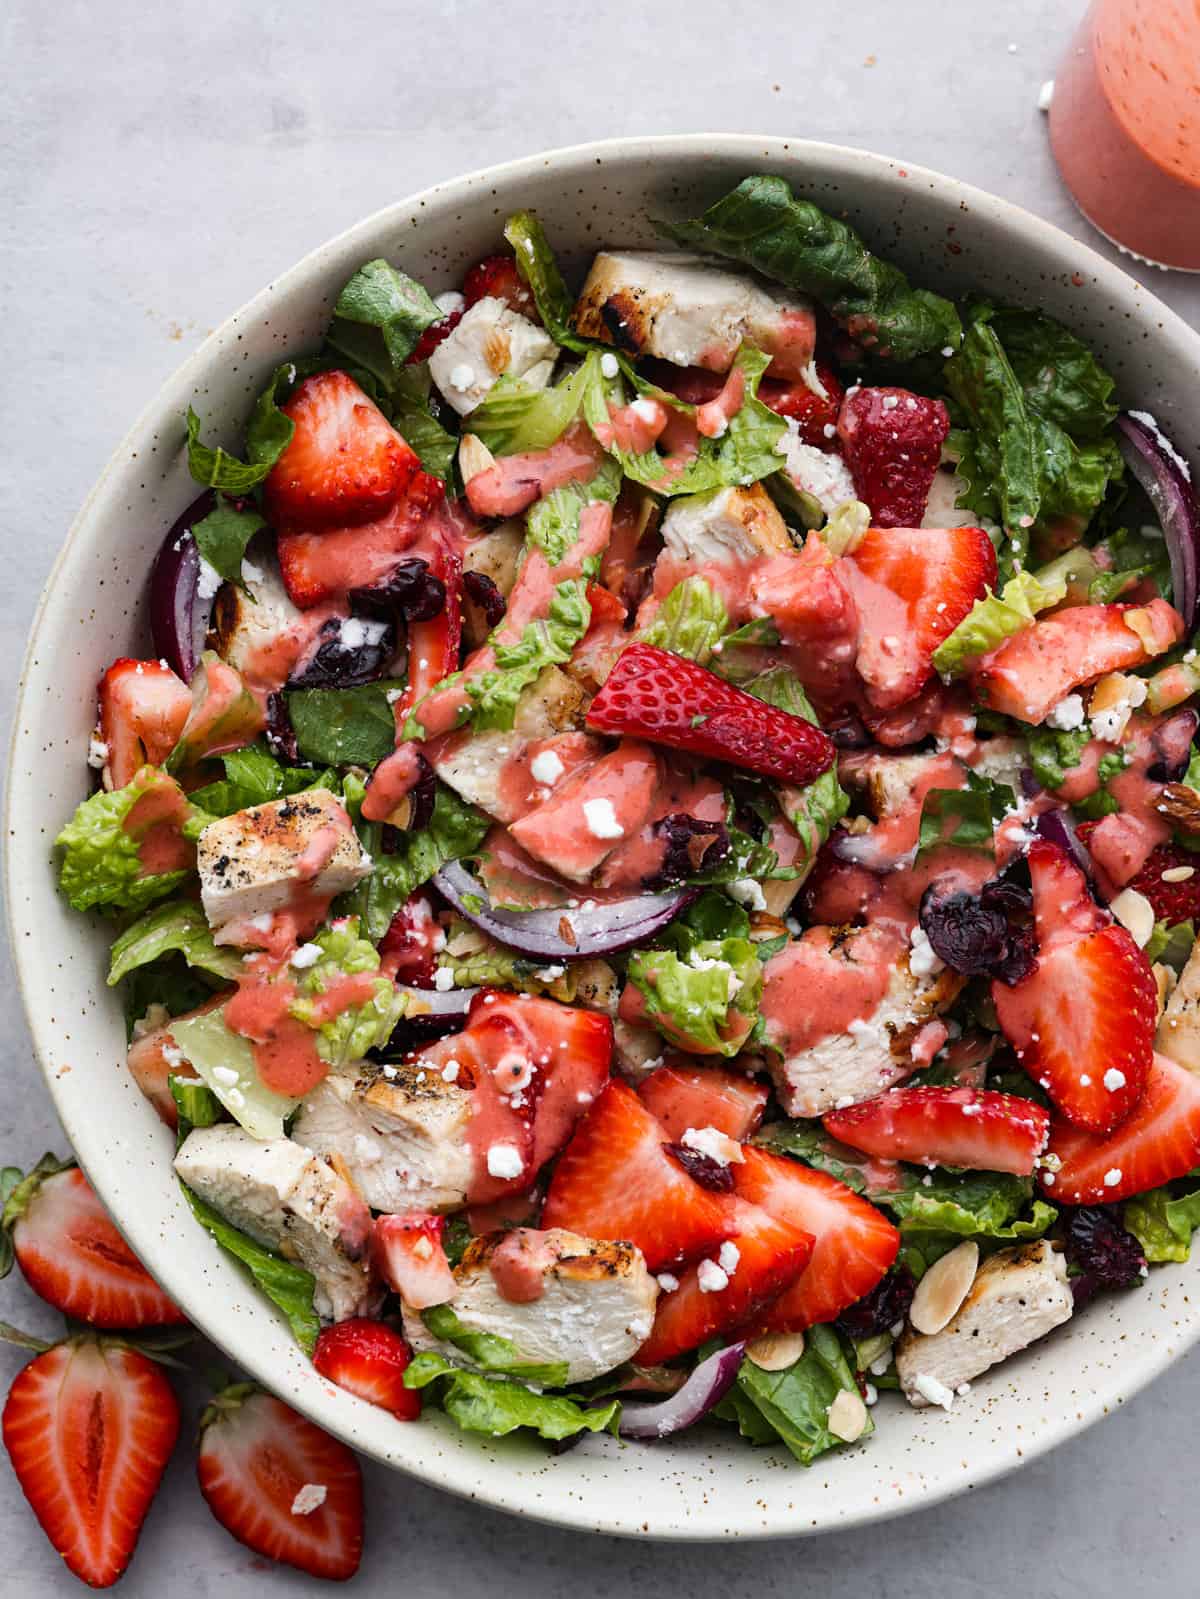
This strawberry chicken salad is filled with fresh fruit, goat cheese, almonds, and chicken and makes my mouth water just thinking about it! The strawberry balsamic dressing gives it the perfect flavor and takes this salad over the top!

If you love a good salad, then I have a few others that you MUST try! Check out this Broccoli Apple Salad, this delicious Asparagus Salad with Lemon Vinaigrette, or even this delicious Strawberry Cheesecake Dessert Salad. There is a recipe for any occasion!
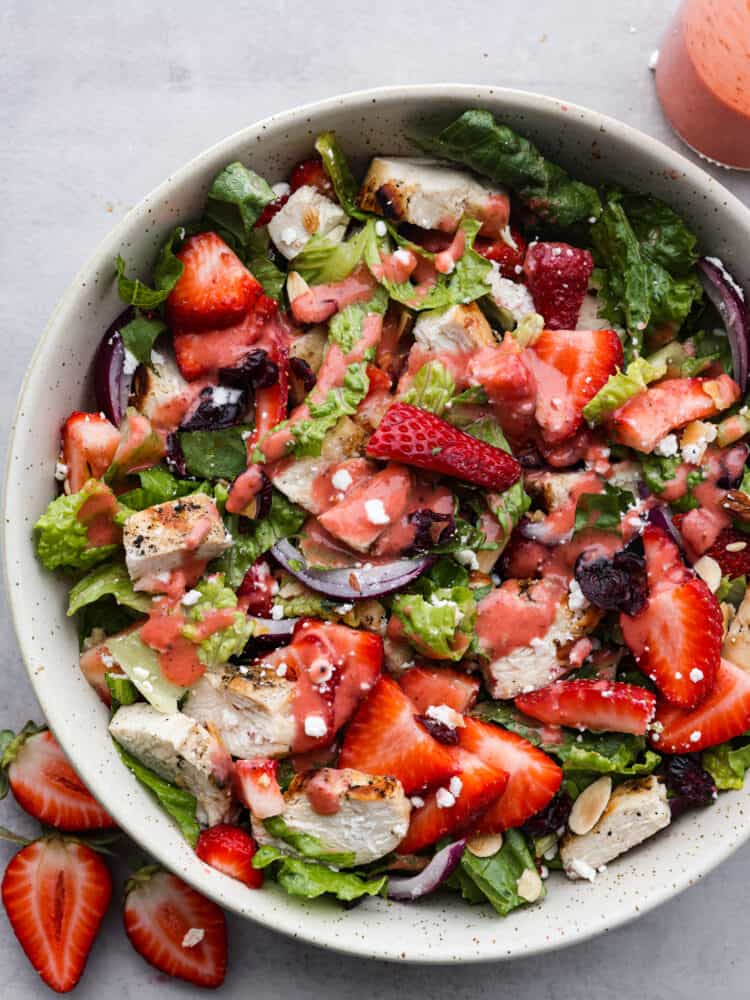
The top view of a bowl of strawberry chicken salad with strawberry balsamic dressing.

Strawberry Chicken Salad Recipe

It really is no secret at all that I love a good salad. It has helped me to keep a healthy diet and maintain the goals that I made at the beginning of the year. This salad checks all of the boxes. It’s healthy, delicious, and filled with fruits, veggies, and protein! I decided to top it off with a sweet strawberry balsamic dressing. It was the perfect finishing touch to this salad.

Not only does this salad knock it out of the park with its deliciousness, but it also is so easy to make!! I like to prepare my chicken ahead of time (try making it in your instant pot with this recipe) and then I can keep that in my fridge for a few recipes throughout the week!

Ingredients in Strawberry Chicken Salad

These ingredients are simple and easy! The best part about a salad is that you can change up the ingredients every time and make it different. My kids don’t like everything that I put into it so this is a great way to help them pick and choose what they like. Check out the recipe card at the bottom of the post for exact measurements.

Salad

  • Cooked Chicken: I like to use grilled chicken or buy a rotisserie chicken from Costco to make this part super easy!
  • Romaine: I like using this as the base of the salad but spinach nor arugula work great too.
  • Strawberries: Always use fresh strawberries in a salad!
  • Dried Cranberries: These add in such a delightful taste and texture.
  • Red Onion: I like to use red onion because it’s the onion that tastes the best when it’s raw.
  • Goat Cheese: If you don’t like goat cheese then you can use feta cheese for this strawberry chicken salad instead.
  • Almonds: I used sliced or slivered almonds for this salad.

Strawberry Balsamic Dressing

  • Strawberries: You can use fresh or frozen strawberries for this recipe.
  • Balsamic Vinegar: This brings in a fantastic savory flavor to the dressing.
  • Extra-Virgin Olive Oil: This is a must!
  • Dijon Mustard: I know, this sounds interesting but trust me, you don’t want to leave it out!
  • Garlic: You can mince up fresh garlic cloves or use the minced garlic from your fridge!
  • Salt and Pepper: These will enhance all of the flavors in the dressing for this strawberry chicken salad.

Let’s Make a Strawberry Chicken Salad!

This strawberry chicken salad is so delicious that you will want to serve it for every meal! It’s a great one to prepare all of your ingredients ahead of time and then toss them together when you are ready to eat!

  1. Blend: In a food processor or blender, pulse the strawberries, balsamic vinegar, olive oil, dijon mustard, garlic, salt and pepper until smooth. Set aside.
  2. Toss and Drizzle: In a large bowl toss the chicken, romaine, strawberries, dried cranberries, red onion, goat cheese, and sliced almonds. Then, toss with dressing or drizzle on top of served portions.
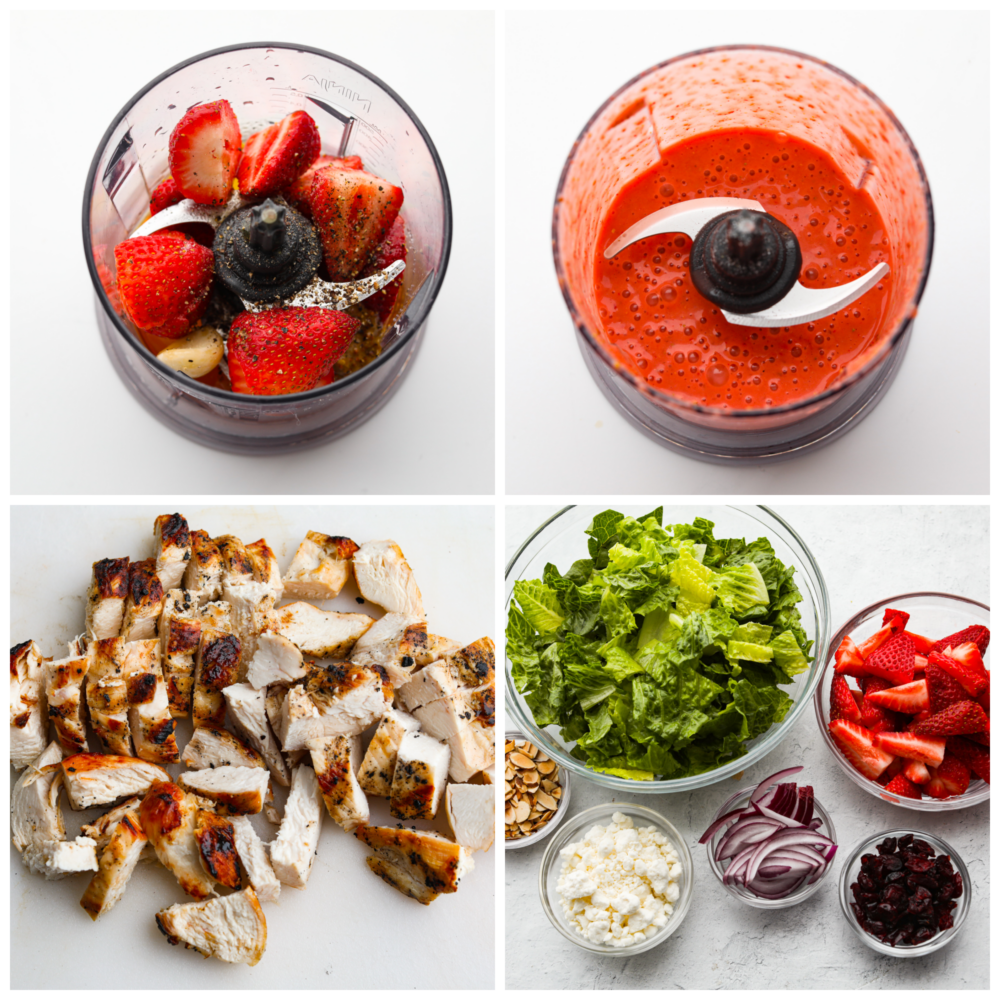
2 pictures showing how to make the dressing and 2 pictures showing all of the ingredients for the salad in glass bowls.

Variations

Change up this strawberry chicken salad and make it perfect just for you! Here are some tips on what you can substitute and how you can change things up.

  • Nuts: You don’t have to use almonds for this recipe! Try using pecans or walnuts instead. They will give off that same great crunch with a slightly different taste.
  • Dressing: You can easily change this up by using a lemon vinaigrette or a delicious poppyseed dressing.
  • Mix-Ins: Try adding some raisins, and some mandarin oranges. Different berries are delicious too! Try adding some raspberries, blackberries or blueberries to the mix!
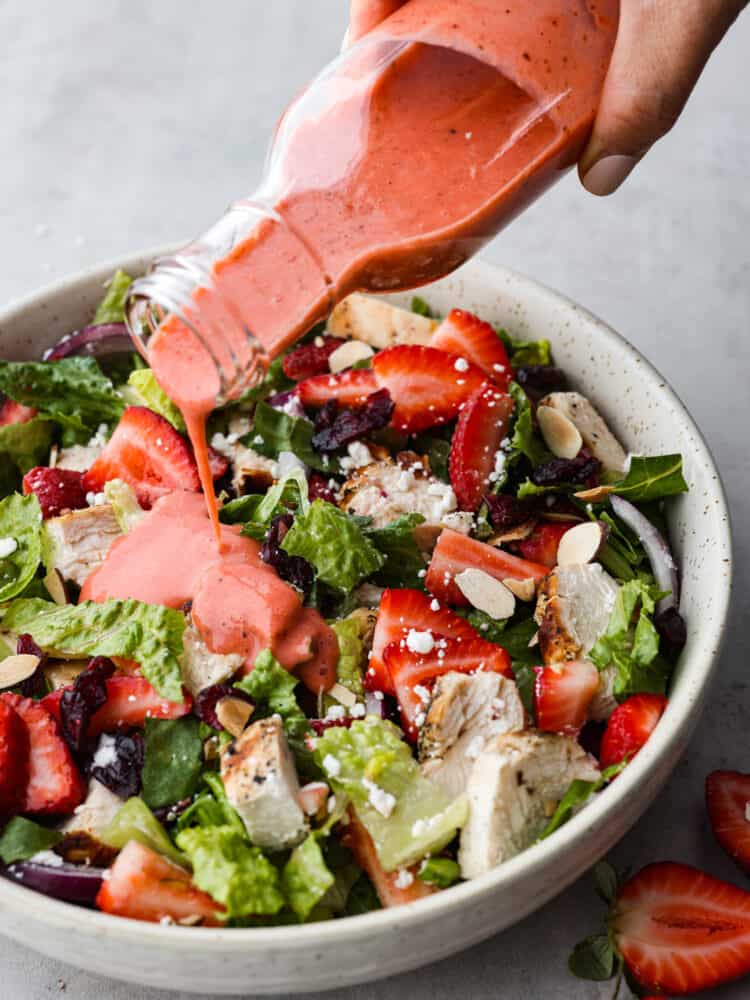
Strawberry vinaigrette being drizzled over the top of a salad.

Make it Ahead of Time

This strawberry chicken salad tastes best when you add the dressing to it right before you serve it (so the ingredients don’t get soggy). However, I like to chop everything up beforehand and store them in my fridge in separate containers. Then, I can toss everything together and drizzle the dressing on whenever I am ready to eat!
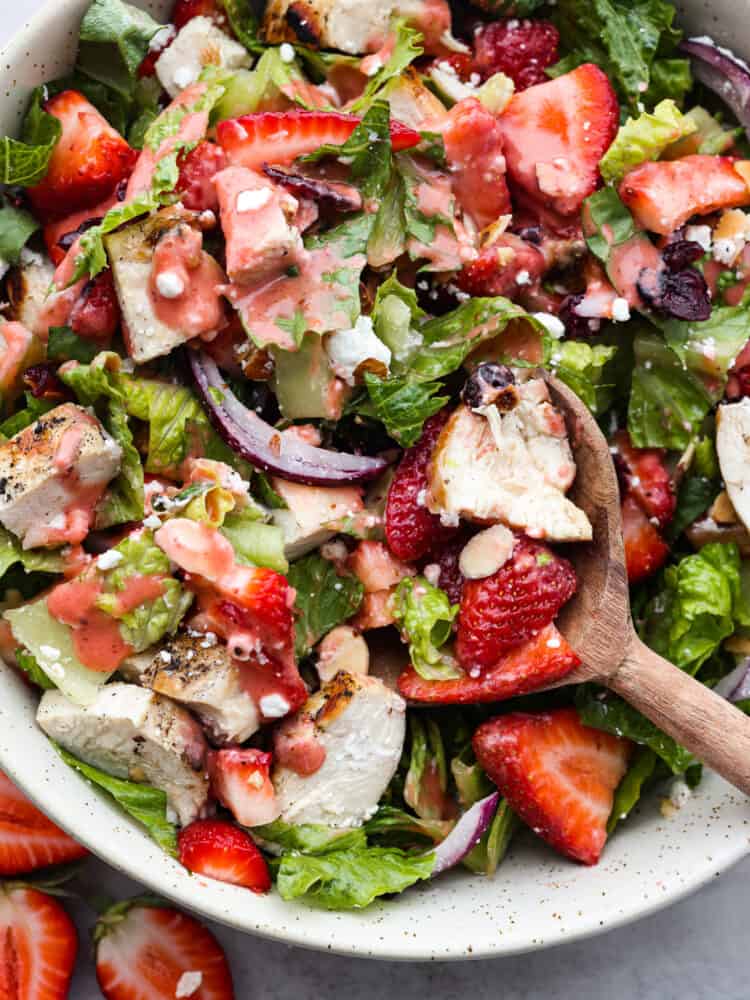
A close up of strawberry chicken salad with a wooden spoon in the bowl.
Print

Strawberry Chicken Salad with Strawberry Balsamic Dressing

This strawberry chicken salad is filled with fresh fruit, goat cheese, almonds, and chicken and makes my mouth water just thinking about it! The strawberry balsamic dressing gives it the perfect flavor and takes this salad over the top! 
Course Salad
Cuisine American
Keyword chicken salad, salad recipe, strawberry chicken salad
Prep Time 15 minutes
Total Time 15 minutes
Servings 6 Servings
Calories 291kcal
Author Alyssa Rivers

Ingredients

Salad

  • 2 cups cooked chicken chopped
  • 4 cups romaine chopped
  • 2 cups strawberries chopped
  • 1/2 cup dried cranberries
  • 1/4 cup red onion sliced
  • 1/4 cup goat cheese crumbled
  • 1/4 cup almonds sliced

Strawberry Balsamic Dressing

  • 1 cup strawberries
  • 1/4 cup balsamic vinegar
  • 1/4 cup extra-virgin olive oil
  • 1 tbsp Dijon mustard
  • 1 clove garlic minced
  • 1/4 tsp salt
  • 1/4 tsp pepper

Instructions

  • In a food processor or blender, pulse the strawberries, balsamic vinegar, olive oil, dijon mustard, garlic, salt and pepper until smooth. Set aside.
  • In a large bowl toss the chicken, romaine, strawberries, dried cranberries, red onion, goat cheese, and sliced almonds. Toss with dressing or drizzle on top of served portions.

Notes

Originally Posted on May 25, 2015
Updated on September 2, 2022

Nutrition

Calories: 291kcal | Carbohydrates: 19g | Protein: 16g | Fat: 18g | Saturated Fat: 4g | Polyunsaturated Fat: 3g | Monounsaturated Fat: 10g | Trans Fat: 0.002g | Cholesterol: 39mg | Sodium: 201mg | Potassium: 374mg | Fiber: 4g | Sugar: 13g | Vitamin A: 2857IU | Vitamin C: 44mg | Calcium: 65mg | Iron: 2mg


source https://therecipecritic.com/strawberry-chicken-salad-with-strawberry-balsamic-dressing/
Share:

How To Blind Bake a Pie Crust

Blind baking a pie crust is key to the perfect pie. I’m going to show you how to do it and why it’s so important!

Whether you’re using a premade or homemade pie crust, blind baking is going to ensure it doesn’t end up soggy. It’s a simple step that will take your homemade pies to the next level.

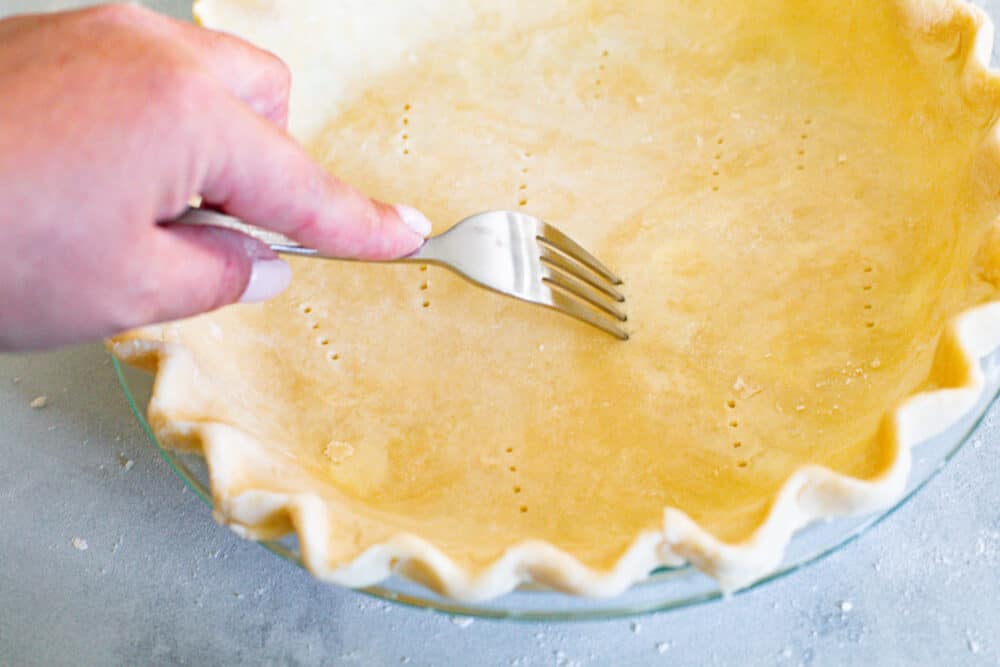
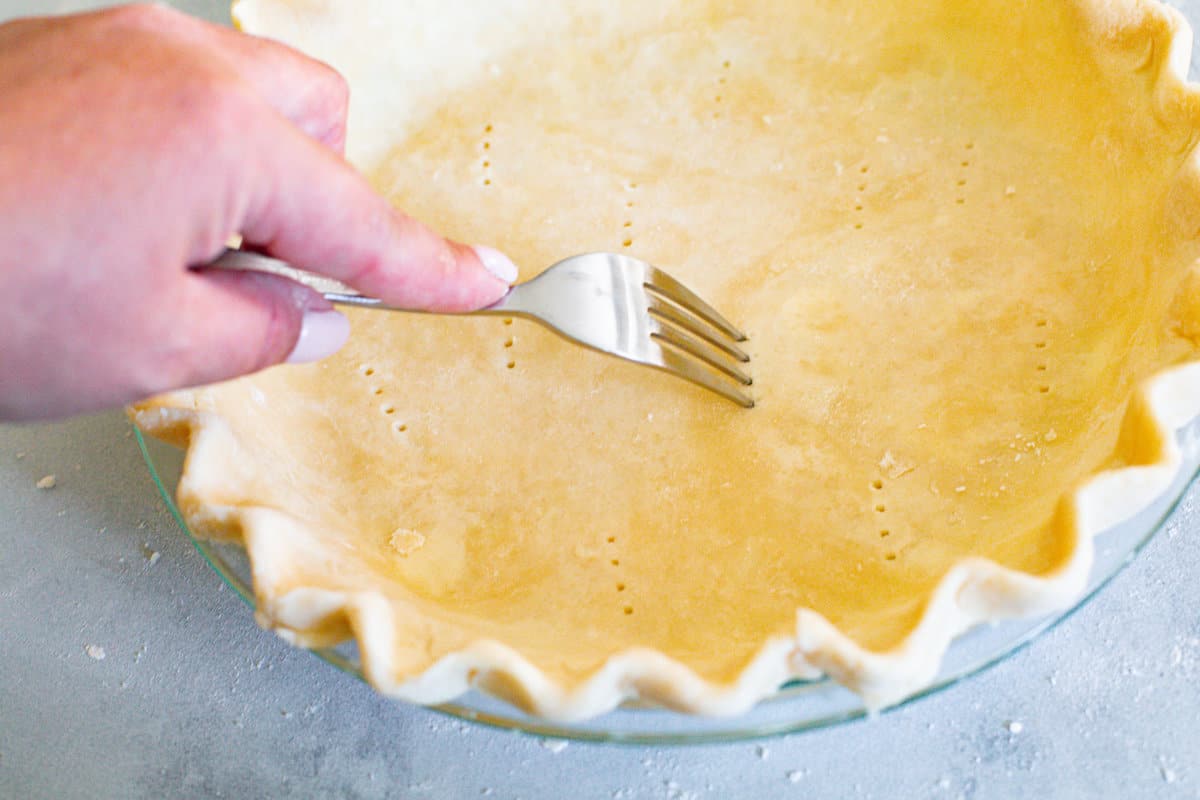
Pricking holes in the bottom of a pie crust using a fork.

What is Par-Baking?

By now, you’ve probably seen the term blind baking (also known as par-baking) scattered throughout pie recipes. This technique is used to bake a pie crust either partially or completely before any filling is added. As simple as it may seem, it’s a crucial step in making sure your pie crust is everything it should be; golden, flaky, and delicious as opposed to soggy and/or undercooked.

Don’t let blind baking intimidate you. It’s actually really easy! First, determine whether the kind of pie you’re making requires a partial or full blind bake. (I’ll tell you the difference below!) From there, all you need is some parchment paper, a pie dish, and either beans or pie weights to start the process!

Do I Need a Full or Partial Bake?

  • Full Blind Bake: You’ll want to completely bake your pie crust if you’re using a filling that isn’t cooked, or needs time to chill and set. This includes most cream-based pies such as coconut cream, banana cream, key lime, etc. A full blind bake requires a longer cooking time.
  • Partial Bake: A partial bake is suitable for pies with a filling that is cooked in the crust. This includes things like fruit pies (apple, berry, cherry, peach, etc.) and quiches. A partial blind bake requires a shorter cooking time.

Using Pie Weights

If you want your pie crust to retain its shape, I highly recommend using some sort of pie weight. I used traditional pie weights but you can use other substitutes such as uncooked beans, uncooked rice, or a pie plate in the center. You just want it to be heavy enough that it will keep the sides of your pie from shrinking down, and the bottom from puffing up. Regardless of what you use, just make sure the weight is evenly distributed.

What is Docking?

Docking is a simple technique where you prick the bottom of your pie crust with a fork before you bake it. The little holes allow steam to escape so that the bottom of the crust doesn’t puff up. Some people swear by this alone to help their pie crusts retain their shape during the baking process, but I like to use it in tandem with pie weights to keep any puffing or shrinking from happening. A combination of docking and pie weights is the best way to get that picture-perfect pie crust.

How to Blind Bake a Pie Crust

Now that you’re familiar with the process, here are step-by-step instructions on how to get that perfectly golden, flaky pie crust!

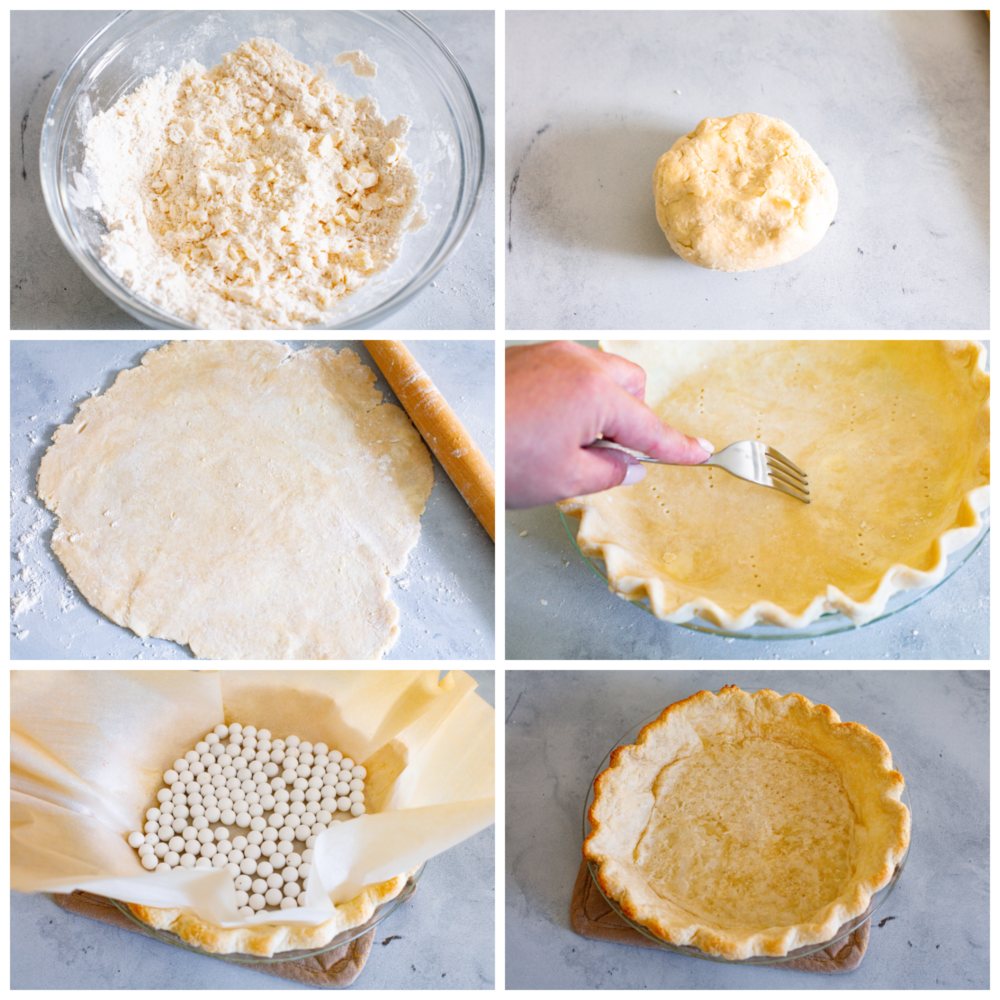
  1. Preheat: Preheat the oven to 425 degrees Fahrenheit and place the rack in the lower third of the oven.
  2. Prep Crust: Using either a premade or homemade pie crust, roll it out and transfer to a pie dish, crimping the edge as desired. Prick (dock) the bottom of the crust a handful of times with a fork. Chill the crust in the freezer for 15-20 minutes.
  3. Remove from Freezer: Once the crust is chilled, remove from the freezer and line the center with parchment paper making sure the parchment goes up the sides.
  4. Add Pie Weights: Fill the parchment with ceramic pie weights. You may also use uncooked beans if you don’t have pie weights.
  5. Bake: Bake for 15 minutes, until the edges of the crust begin to brown. Carefully remove the crust from the oven and lift the parchment and pie weights out of the crust. Transfer the hot weights to a plate to cool. *Note: Stop here if you are only partially baking your crust.
  6. Cook Until Golden Brown: Place the crust back in the oven and bake for 5-8 minutes, until the bottom is golden brown and cooked through.
  7. Cool and Add Filling: Remove the pie crust from the oven and let cool completely before adding the filling of your choice.

Extra Tips and Tricks

Here are a few extra tips to keep in mind as you par-bake your favorite pie crust recipe!

  • Chill Your Dough: Chill the crust before baking to allow the fat in the dough to harden. This will help the crust maintain its shape as it bakes.
  • Use Parchment Paper: I recommend using parchment paper instead of aluminum foil. Foil tends to stick to the dough of the crust, which means you can risk pulling it up and creating a hole in the bottom when it’s time to remove the weights. Using parchment paper will help keep this from happening. 
  • Using Beans as Pie Weights: Uncooked beans are inexpensive and readily available in most grocery stores and they make perfect pie weights! Use enough beans to fill the crust about halfway. Let them cool completely before placing them in an airtight container. The same beans can be used over and over.
  • Let Your Crust Cool Completely: Let the crust cool completely before adding your filling. This will allow it to release any steam or heat that might be trapped by a filling, which can end up resulting in a soggy crust.

How Long Will My Par-Baked Pie Crust Last?

Baked and unfilled pie crusts can be stored at room temperature for 5-7 days, though they are best filled and used within the first 2-3 days. They may start to get a little soft if they sit for too long. 

  • At Room Temperature: Let the crust cool completely before placing in an airtight container. Use within 3 days.
6-photo collage of pie crust ingredients being mixed together and then par-baked using pie weights.
Print

How to Blind Bake a Pie Crust

Blind baking a pie crust is key to the perfect pie. I'm going to show you how to do it and why it's so important!
Course Dessert
Keyword how to blind bake a pie crust
Prep Time 5 minutes
Cook Time 20 minutes
Total Time 25 minutes
Servings 1 pie crust
Author Alyssa Rivers

Ingredients

  • 1 Pie Crust
  • Parchment Paper
  • Pie Weights or uncooked beans

Instructions

  • Preheat the oven to 425℉ and place the rack in the lower third of the oven.
  • Roll out the pie crust and transfer to a pie dish, crimping the edge as desired. Prick the bottom of the crust a handful of times with a fork. Chill the crust in the freezer for 15-20 minutes.
  • Once the crust is chilled, remove from the freezer and line the center with parchment paper making sure the parchment goes up the sides.
  • Fill the parchment with ceramic pie weights. You may also use uncooked beans if you don’t have pie weights.
  • Bake for 15 minutes, until the edges of the crust begin to brown. Carefully remove the crust from the oven and lift the parchment and pie weights out of the crust. Transfer the hot weights to a plate to cool.
  • Place the crust back in the oven and bake for 5-8 minutes, until the bottom is golden brown and cooked through.
  • Remove the pie crust from the oven and let cool completely before adding the filling of your choice.


source https://therecipecritic.com/how-to-blind-bake-a-pie-crust/
Share:

Strawberry Cobbler

This easy-to-make strawberry cobbler is loaded up with fresh strawberries and topped with a sweet vanilla cake. It’s a crisp crust on the outside and is soft and buttery on the inside. Top with some vanilla ice cream for the ultimate treat!

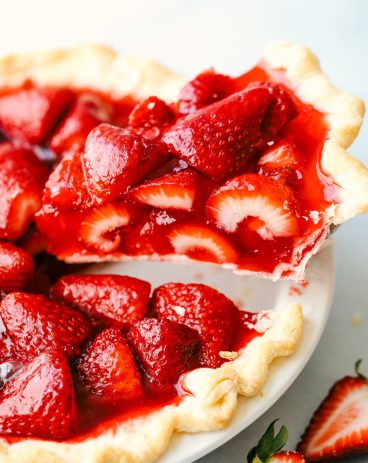
If you like this strawberry cobbler recipe, then make sure you check out some more delicious strawberry recipes like this strawberry tart, this yummy strawberry galette, and also this strawberry rhubarb pie.

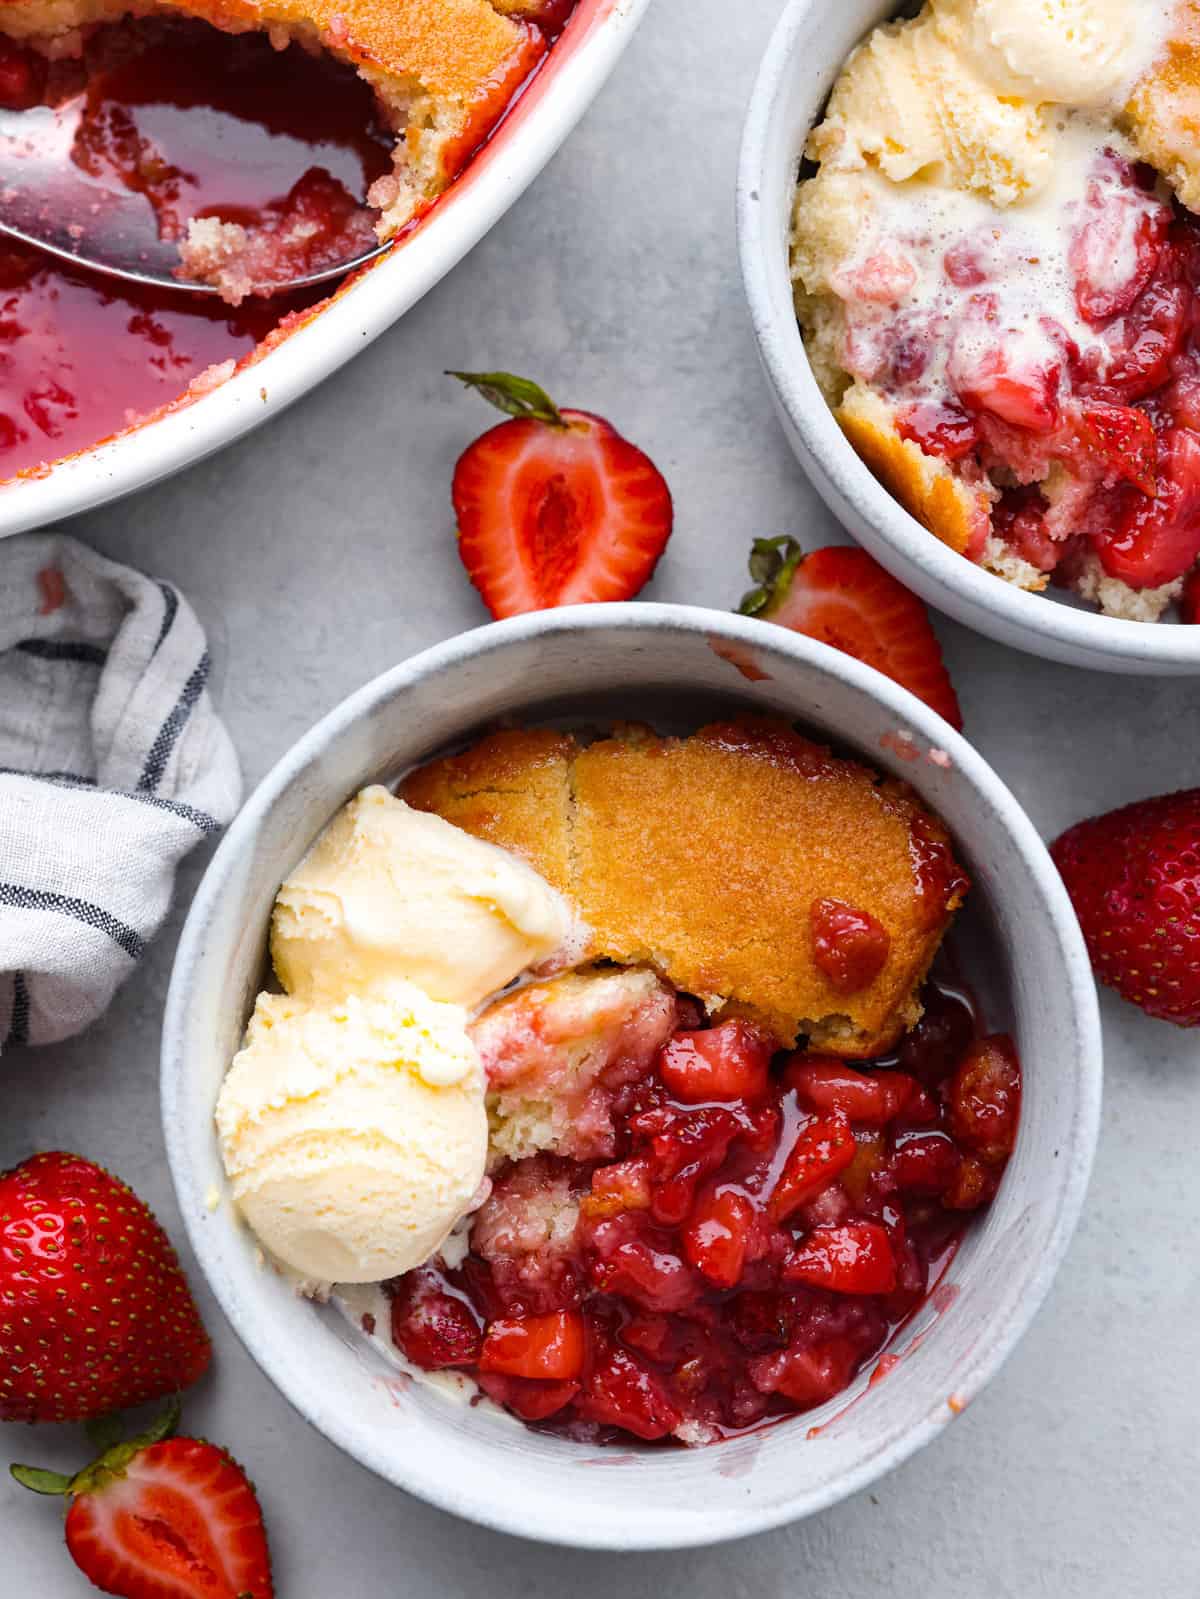
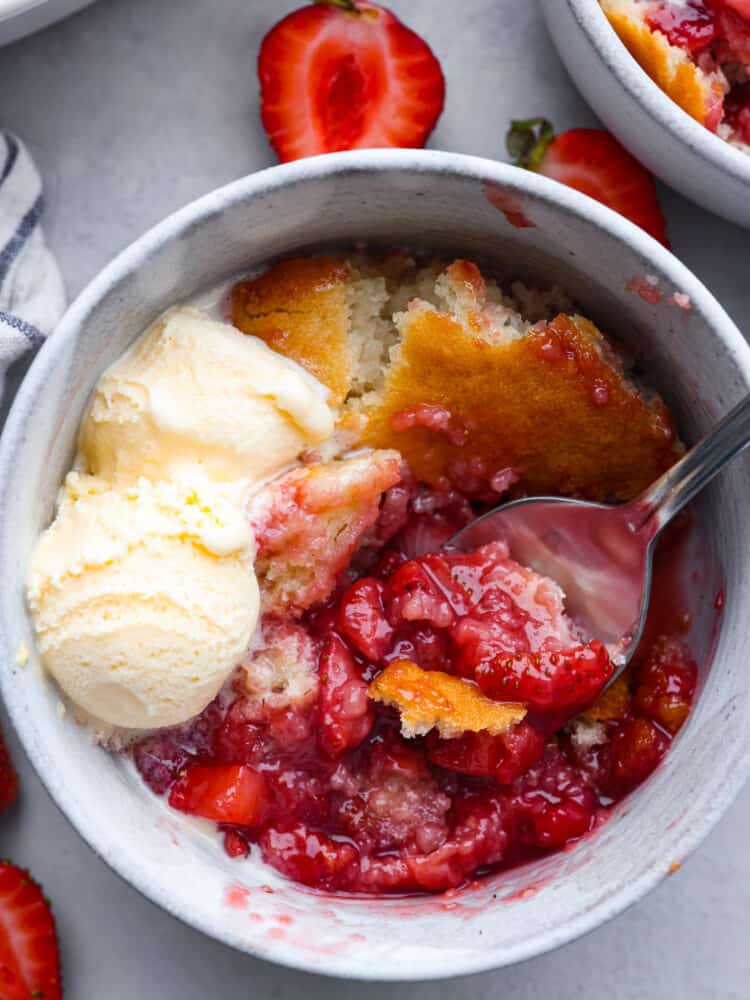
The top view of strawberry cobbler in a bowl with a scoop of vanilla ice cream.

What is a Cobbler?

A cobbler is a dessert that has fresh fruit and a biscuit-like topping. Since you drop the biscuit dough on top of the fruit, it gives a cobbled appearance when it’s done baking. I like to use a ¼ measuring cup and just spoon the batter on top of the fruit. Strawberries are my all-time favorite fruit. So this strawberry cobbler is one of my favorite things to make every year!

This strawberry cobbler comes together quickly and easily too. The strawberries are mixed with some lemon juice, cornstarch, and a bit of sugar which creates that wonderful strawberry sauce on the bottom of the dish. And the biscuit topping is my all-time favorite. It’s more of a cake than a biscuit. It’s so soft and buttery inside, but it still gets that crisp crust on the outside like a biscuit.

Ingredients in Fresh Strawberry Cobbler

If you have strawberries on hand, then this is a MUST-MAKE recipe! It’s so delicious and the perfect dessert for any occasion! Check out the recipe card at the bottom of the post for exact measurements.

Strawberry Filling

  • Strawberries: I use fresh strawberries so that I can get a brighter taste.
  • Sugar: This sweetens up the strawberries.
  • Cornstarch: This will thicken up the filling.
  • Lemon Juice: You can use fresh lemon juice or lemon juice from a bottle. Whichever you prefer.

Topping

  • Sugar: I love the sweet flavor that the sugar adds to the topping.
  • Flour: I used all-purpose flour for this recipe.
  • Salt: This enhances all of the flavors in the topping.
  • Baking Powder: This makes the cobbler light and soft.
  • Vanilla Extract: A splash of vanilla adds in some great flavor.
  • Milk: I used one percent milk, but you can use whatever you have on hand.
  • Butter: I used unsalted butter in this recipe.

How to Make Strawberry Cobbler

Cobblers can be made with so many different fruits, but this strawberry cobbler is definitely a favorite of mine. It’s a great recipe for the end of summer going into fall. Then you can start making peach and apple cobblers!

  1. Prep: Preheat the oven to 375 degrees Fahrenheit.
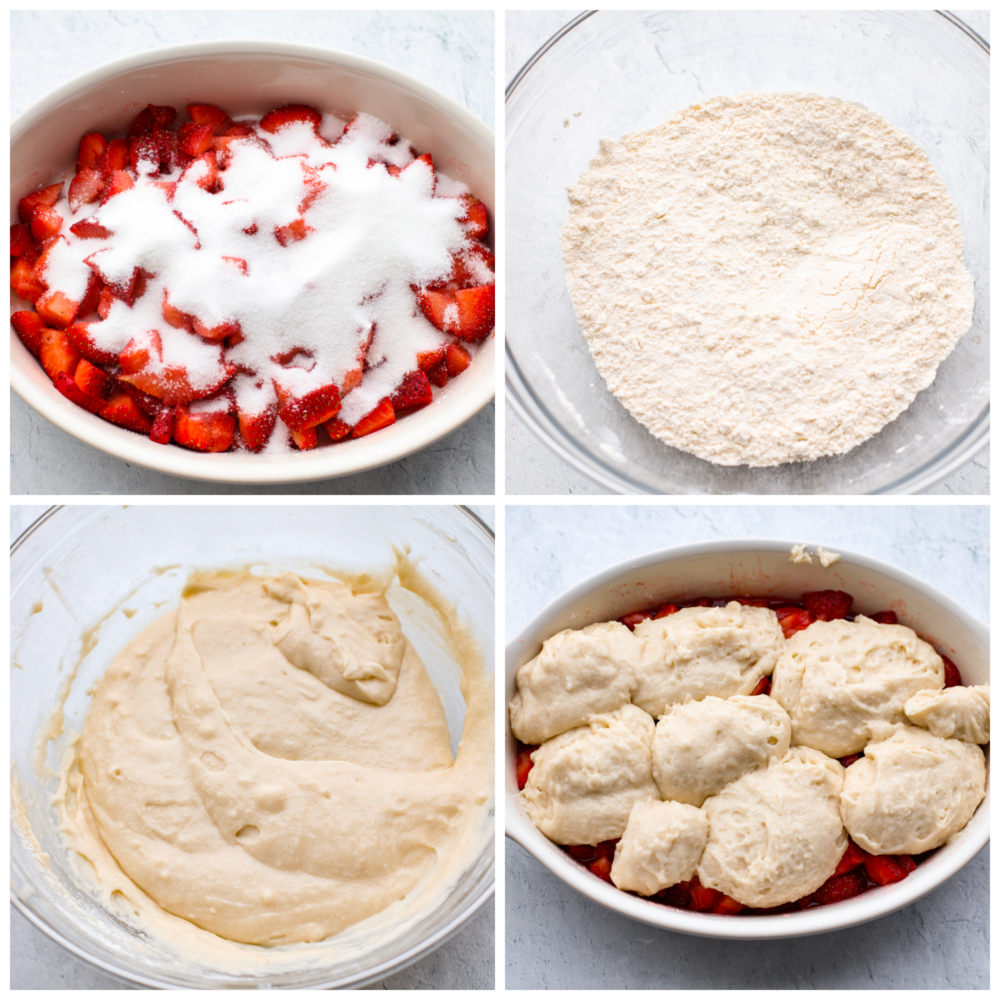
  2. Make Strawberry Mixture: Add the diced strawberries to a two-quart ceramic baking dish or a deep pie dish. Then, add the sugar, cornstarch, and lemon juice. Stir to coat the strawberries in the mixture. Let sit while preparing the cake topping.
  3. Combine: In a large bowl, add the sugar, flour, salt, and baking powder. Stir to combine.
  4. Pour: Pour in the milk, vanilla extract, and melted butter.
  5. Spoon Batter: Spoon the batter over the top of the strawberries.
  6. Bake: Bake at 375 degrees Fahrenheit for 35 minutes until the top is crispy and golden brown.
  7. Top and Serve: Serve cobbler warm or room temperature. Top with a scoop of vanilla ice cream or whip cream for a special treat!
4 pictures showing how to make the strawberry mixture and then add the dough on top.

Can I Use Frozen Strawberries?

Absolutely! Just set the strawberries in the fridge overnight to let them thaw before using them for this strawberry cobbler. If you have a ton of fresh berries on hand now, you can always freeze them and use them later to make this yummy recipe! Then you can bake this all year long.

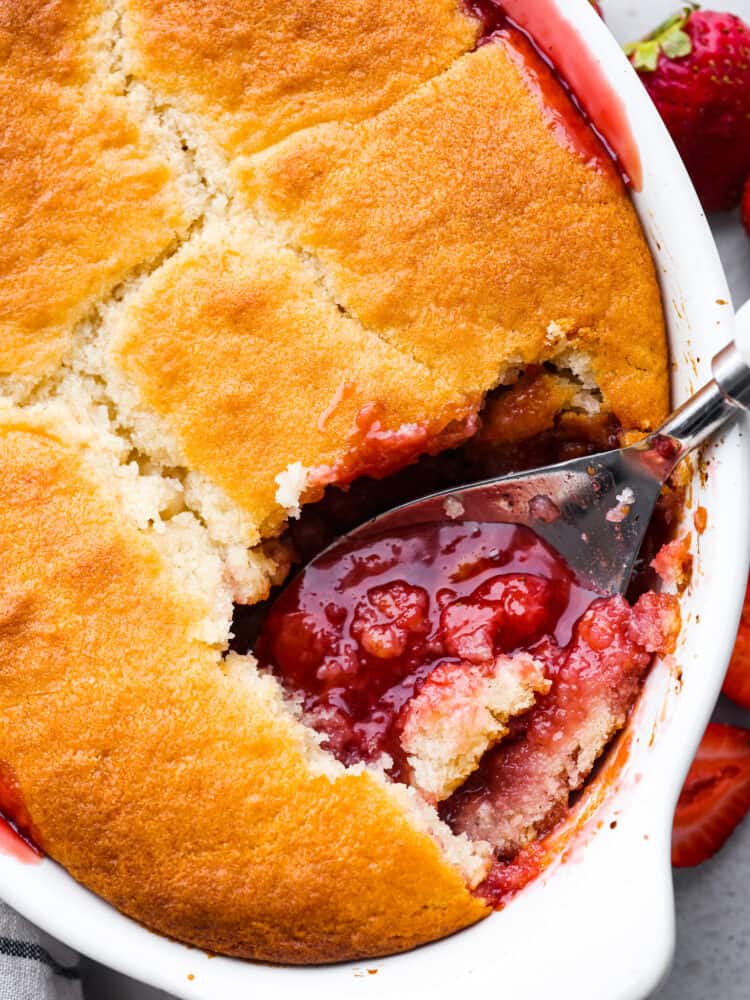
Strawberry cobbler in a baking dish with a large spoon scooping some out.

How to Store Strawberry Cobbler

This dessert makes delicious leftovers! You can eat it warm or cold and enjoy it for a few days afterward. That is if you can make it last that long!

  • In the Refrigerator: Let the cobbler cool, and then place it in an airtight container. Store it in your fridge, and it will last for about 4-5 days.
  • To Reheat: When you are ready to eat it, you can eat it cold, or you can cover it will foil and then reheat it in the oven at 325 degrees for about 10-20 minutes, or until heated through!
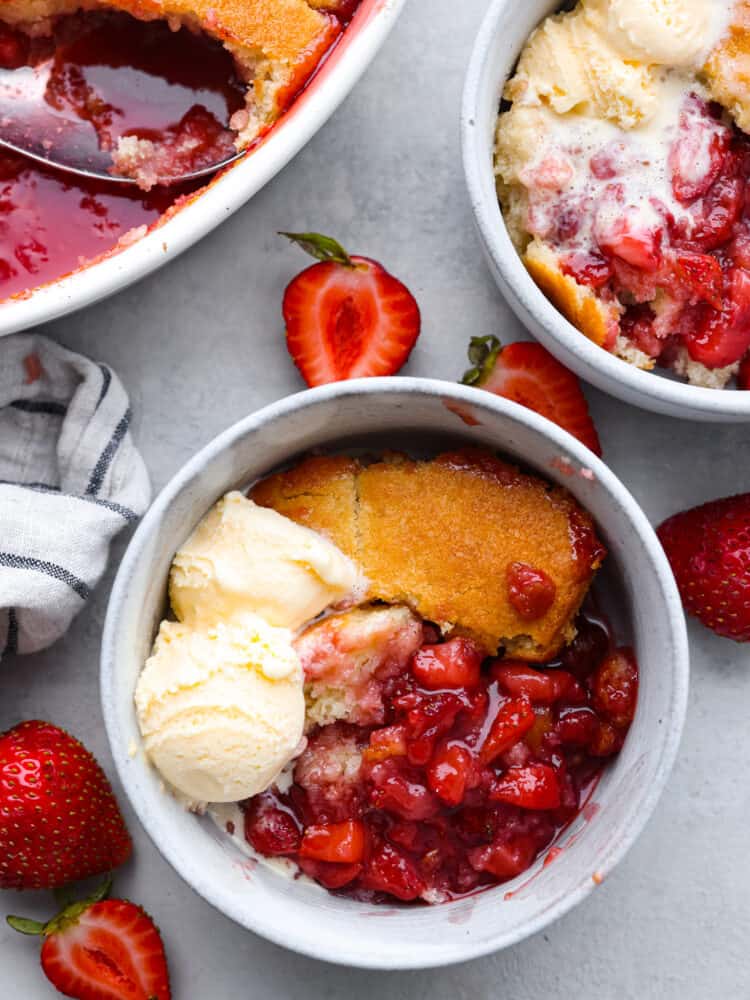
The top view of strawberry cobbler in a bowl with a spoon and some vanilla ice cream.
Print

Strawberry Cobbler

This easy-to-make strawberry cobbler is loaded up with fresh strawberries and topped with a sweet vanilla cake. It's a crisp crust on the outside and is soft and buttery on the inside. Top with some vanilla ice cream for the ultimate treat!
Course Dessert
Cuisine American
Keyword strawberry cobbler
Prep Time 10 minutes
Cook Time 35 minutes
Servings 6
Calories 323kcal
Author Alyssa Rivers

Ingredients

Strawberry Filling

  • 1 lb strawberries diced
  • 1/2 cup sugar
  • 1 teaspoon cornstarch
  • 1 teaspoon lemon juice

Topping

  • 1/2 cup sugar
  • 1 cup all purpose flour
  • 1/2 teaspoon salt
  • 1 tablespoon baking powder
  • 1 tablespoon vanilla extract
  • 3/4 cup milk
  • 4 tablespoons butter melted

Instructions

  • Preheat the oven to 375 degrees Fahrenheit.
  • Add the diced strawberries to a two-quart ceramic baking dish or a deep pie dish. Then, add the sugar, cornstarch, and lemon juice. Stir to coat the strawberries in the mixture. Let sit while preparing the cake topping.
  • In a medium size mixing bowl, add the sugar, flour, salt, and baking powder. Stir to combine.
  • Pour in the milk, vanilla extract, and melted butter.
  • Spoon the batter over the top of the strawberries.
  • Bake at 375 degrees Fahrenheit for 35 minutes until the top is crispy and golden brown.
  • Serve cobbler warm or room temperature. Top with ice cream for a special treat!

Notes

Originally Posted on July 20, 2018
Updated on September 1, 2022

Nutrition

Calories: 323kcal | Carbohydrates: 58g | Protein: 4g | Fat: 9g | Saturated Fat: 5g | Polyunsaturated Fat: 1g | Monounsaturated Fat: 2g | Trans Fat: 0.3g | Cholesterol: 24mg | Sodium: 269mg | Potassium: 393mg | Fiber: 2g | Sugar: 39g | Vitamin A: 292IU | Vitamin C: 45mg | Calcium: 142mg | Iron: 1mg


source https://therecipecritic.com/strawberry-cobbler/
Share:

Popular

Archive

Slider Tag

Facebook

Header Ads

Recent in Food

Blog Archive

Recent Posts

Unordered List

  • Lorem ipsum dolor sit amet, consectetuer adipiscing elit.
  • Aliquam tincidunt mauris eu risus.
  • Vestibulum auctor dapibus neque.

Pages

Theme Support

Need our help to upload or customize this blogger template? Contact me with details about the theme customization you need.