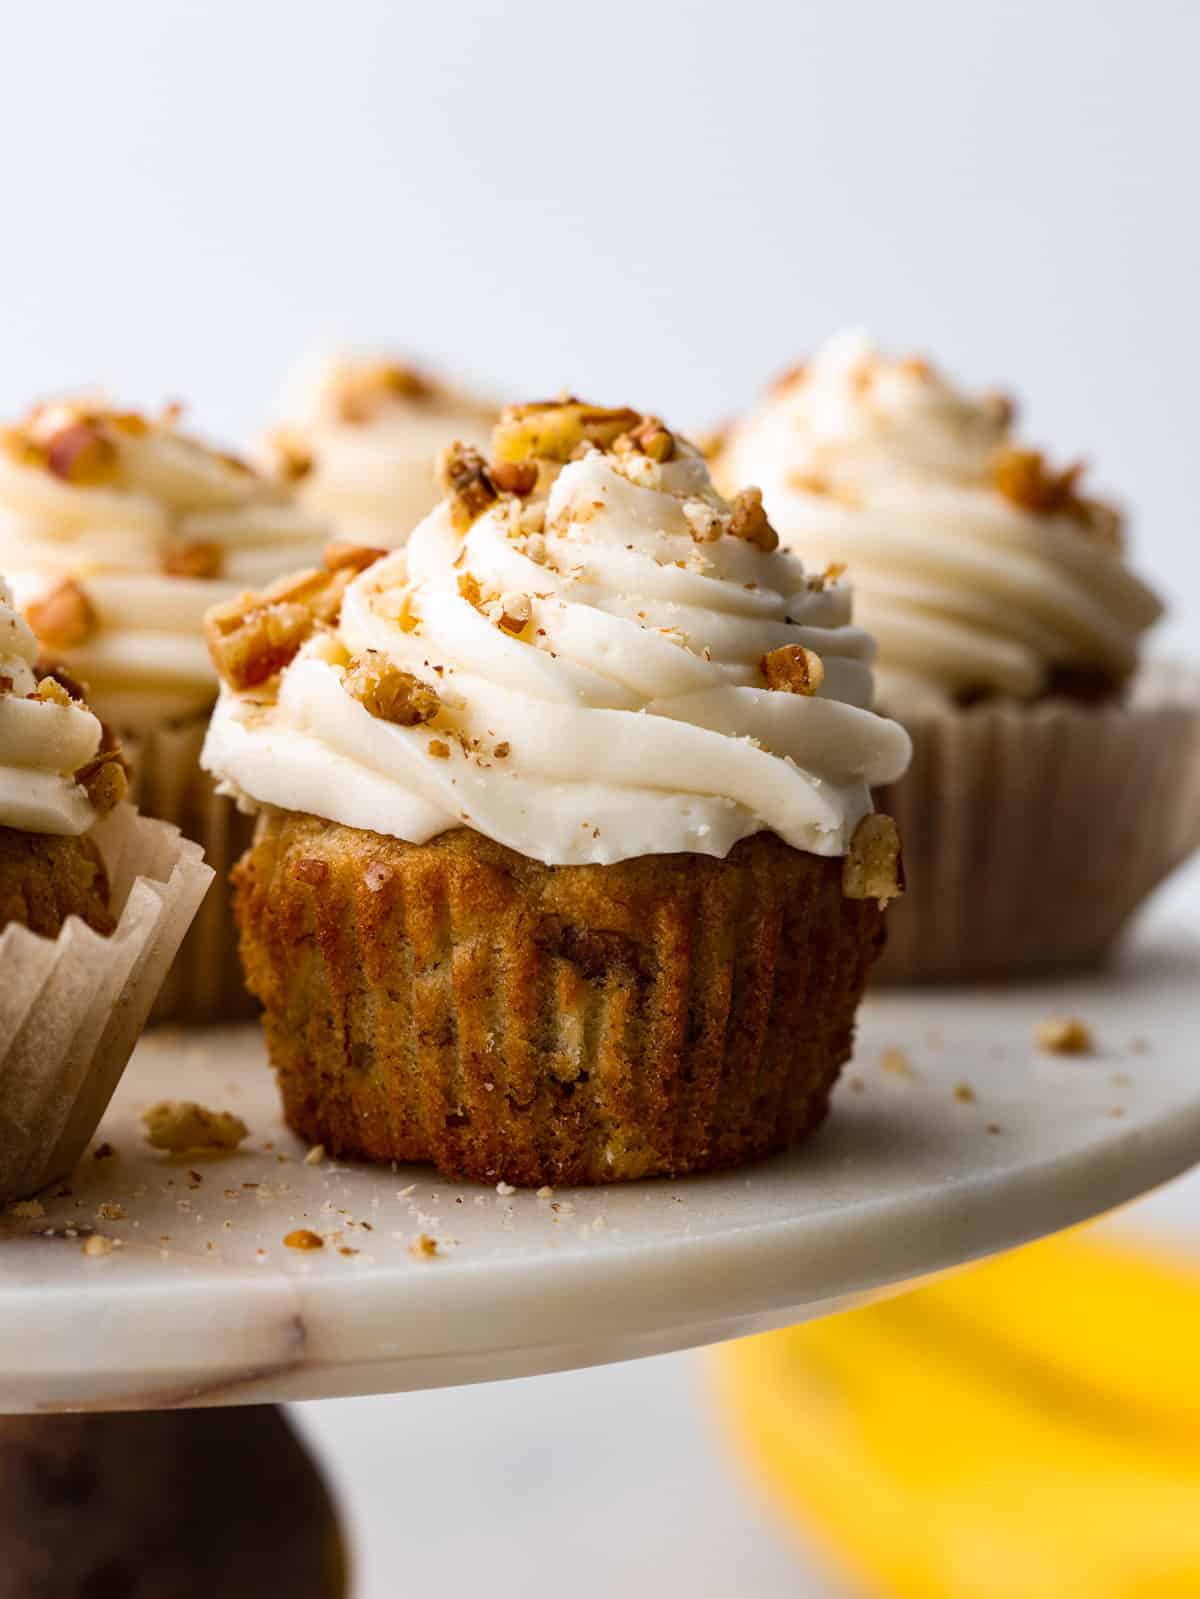
Hummingbird Cupcakes

A bite-sized take on a classic Southern dessert, these hummingbird cupcakes are sure to win your heart! Filled with pecans, chopped fruit, and topped with smooth cream cheese frosting, you won’t be able to stop at one!

One of the unique things about hummingbird cake is that it’s filled with coconut and pineapple! If you love tropical fruits, this is the dessert for you! A few more recipes I think you’ll love are this pineapple upside down cake, coconut cream cake, and key lime poke cake!
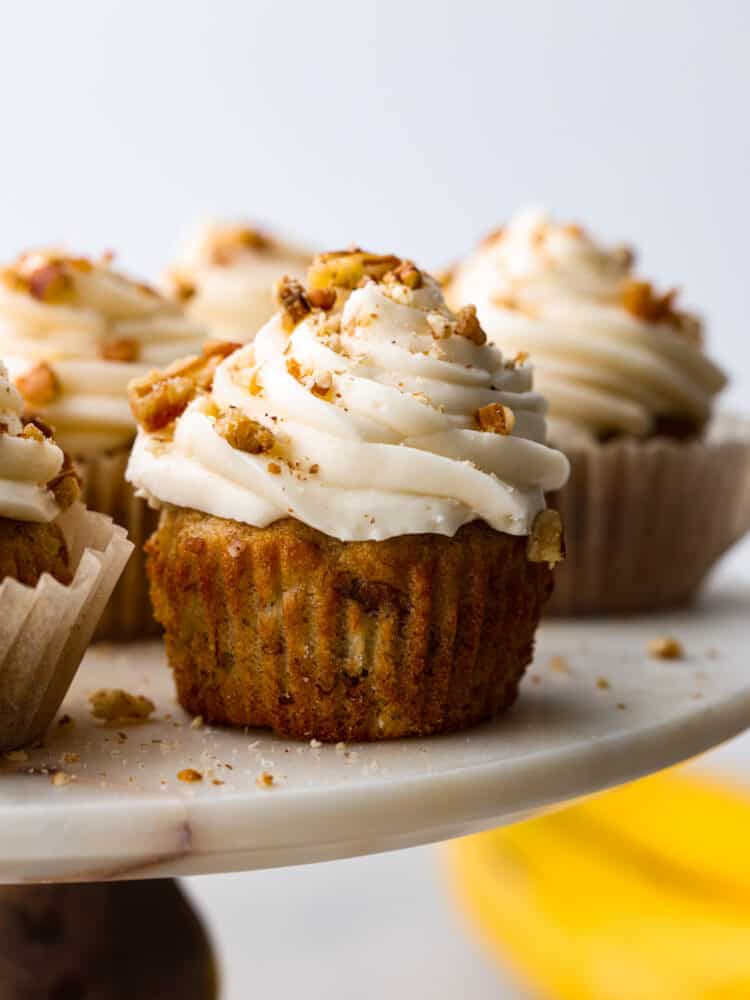
Frosted hummingbird cupcakes on a stone serving platter.

Hummingbird Cupcakes With Cream Cheese Frosting

If you’ve never had hummingbird cake before, you’re in for a treat! There’s a reason it’s been popular since the 70s! It’s similar to carrot cake in terms of spice and texture, but filled with coconut and pineapple for a pop of tropical flavor. In cupcake form, it’s even better! These delicious spiced cupcakes are so good, you won’t be able to stop at one. All of the tasty mix-ins these cupcakes have make them so amazing! Plus, they’re supremely moist and tender!

Topped with homemade cream cheese frosting, they become completely irresistible. Hummingbird cupcakes are such a unique dessert. If you’ve been looking for delicious new recipes to add to the dessert lineup, hummingbird cupcakes are the answer! You’re going to want to make them again and again! They have the perfect fall flavor with a twist.

Why is it Called a Hummingbird Cupcake?

These are called hummingbird cupcakes because some say they’re sweet enough to attract even hummingbirds! Others say that it’s called hummingbird cake because you’ll be humming in delight while you eat it! The most likely reason is that hummingbirds are Jamaica’s national bird and that’s where this tasty dessert first originated.

Ingredients Needed

In addition to standard baking ingredients, you’ll need a lot of fruit for this hummingbird cupcake recipe! It’s a great way to use up canned pineapple if you have it! Check out the recipe card below for exact measurements.

  • Butter: Makes your cupcakes nice and tender and also adds rich flavor!
  • Sugar: I used both granulated and brown sugar here.
  • Large Eggs: The trick to a smooth batter is to have your eggs at room temperature before you mix them in.
  • Vanilla: I always go for pure vanilla extract in my baking, but imitation vanilla works too if that’s what you’ve got on hand!
  • Mashed Bananas: As a lover of banana bread, this is one of my favorite ingredients here! Mashed bananas add flavor and make the cupcakes extra soft.
  • Shredded Coconut: Adds texture and also tropical flavor.
  • Crushed Pineapple: The star of the show here! Drain it before you throw it in your batter.
  • Flour: All-purpose works just fine!
  • Baking Soda: Baking soda is a must-add because it makes your cupcakes light and airy.
  • Spices: I used cinnamon and cardamom!
  • Salt: A pinch is all you need to enhance the flavor of your hummingbird cupcakes.
  • Chopped Pecans: I use these for the batter and reserve some extras for topping the hummingbird cupcakes with!

Cream Cheese Frosting

  • Unsalted Butter: Makes the frosting rich and luscious.
  • Cream Cheese: Use full-fat cream cheese for the tastiest frosting! Soften before using.
  • Vanilla: Adds an extra pop of flavor!
  • Salt: Helps boost the flavor.
  • Powdered Sugar: Makes the frosting smooth and sweet!

How to Make Hummingbird Cupcakes

You’re going to love how easy it is! Anyone can make hummingbird cupcakes. With the holidays coming up, they’re the perfect dessert to whip up!

  1. Preheat Oven, Prep Pan: Preheat your oven to 350℉ and prepare a 24 space cupcake pan (or 2 with 12) by lining it with cupcake liners.
  2. Mix Wet Ingredients and Sugars: In a stand mixer fitted with the paddle, or with a hand mixer, cream together the butter and sugars until light and fluffy 6-7 minutes. Add in your eggs one at a time and incorporate completely, then mix in your vanilla.
  3. Combine Fruit: In a separate bowl mix your bananas, coconut, and pineapple.
  4. Mix Dry Ingredients: In another bowl, whisk together your flour, baking soda, cinnamon, cardamom, and salt. Add it to your butter and egg mixture. Mix until just combined.
  5. Fold in Pecans: Add in your banana mixture and mix in gently, once everything is incorporated, fold in your chopped pecans.
  6. Bake: Fill each cupcake liner ¾ of the way and bake about 20-25 minutes, or until a toothpick inserted comes out clean.
  7. Cool: Allow cupcakes to cool in the pan about 10-15 minutes before removing and cooling completely.

How to Make the Cream Cheese Frosting

  1. Butter and Cream Cheese Mixture: In a stand mixer fitted with the whisk or using a hand mixer, whip your butter and cream cheese together until fluffy, and free of lumps. Add your vanilla and salt and mix to combine.
  2. Mix In Powdered Sugar: With the mixer set to low, add in your powdered sugar in ¼ cup at a time until it is all completely mixed in.
  3. Cool Cupcakes: Allow the cupcakes to cool completely before frosting.
  4. Pecans for Garnish: Take about ½ cup of your chopped pecans and crush them in a plastic bag until you have fine pieces you can sprinkle on the top of your frosted cupcakes.
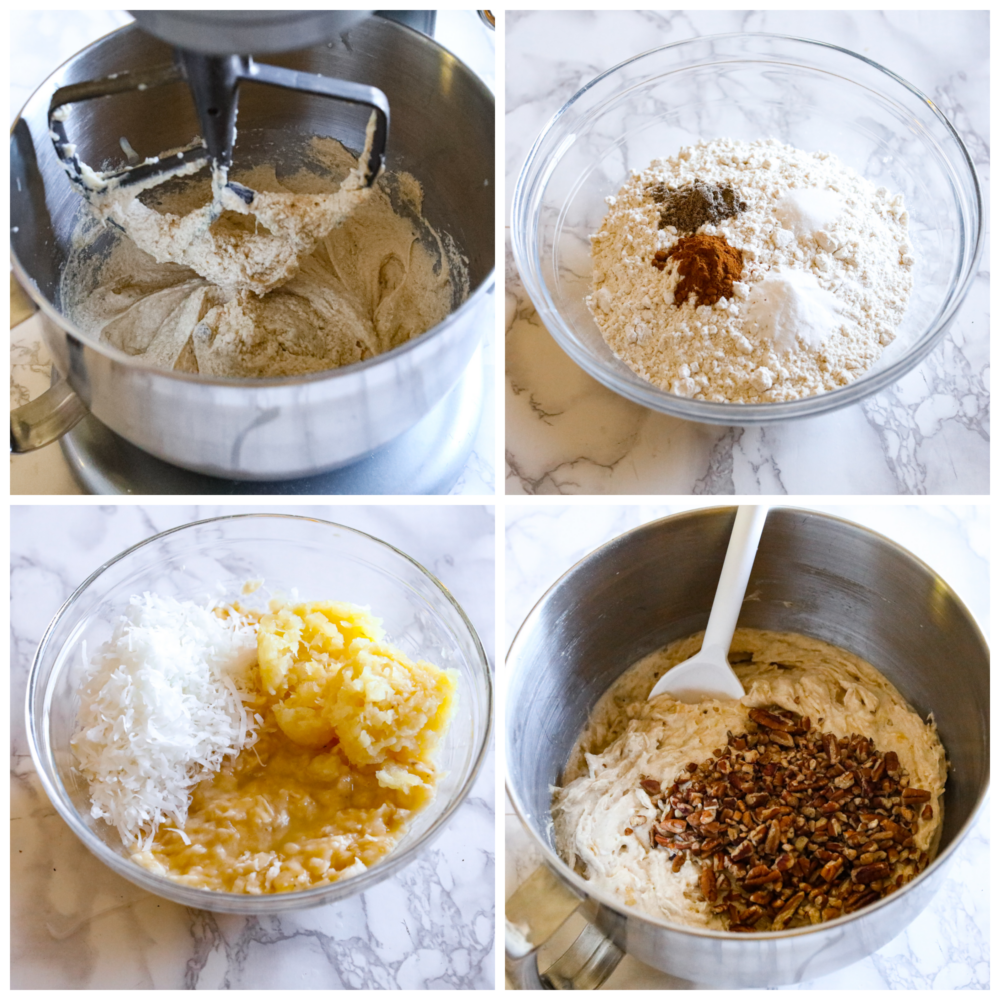
4-photo collage of cupcake batter being prepared.

Baking Tips

These are a couple easy ways you can customize your hummingbird cupcakes! This is such a great dessert to have in your back pocket. Everyone is going to love it!

  • Frosting: There are many ways to frost a cupcake, I used a piping bag fitted with a star tip to do a simple swirl on top, but there is no one right way to do it. Be creative!
  • Topping: I crushed my extra pecans into finer pieces to sprinkle on the top of the cupcakes to give them a nice little touch but this is optional. Sprinkling with cinnamon or adding a drizzle of caramel sauce would look great as well.
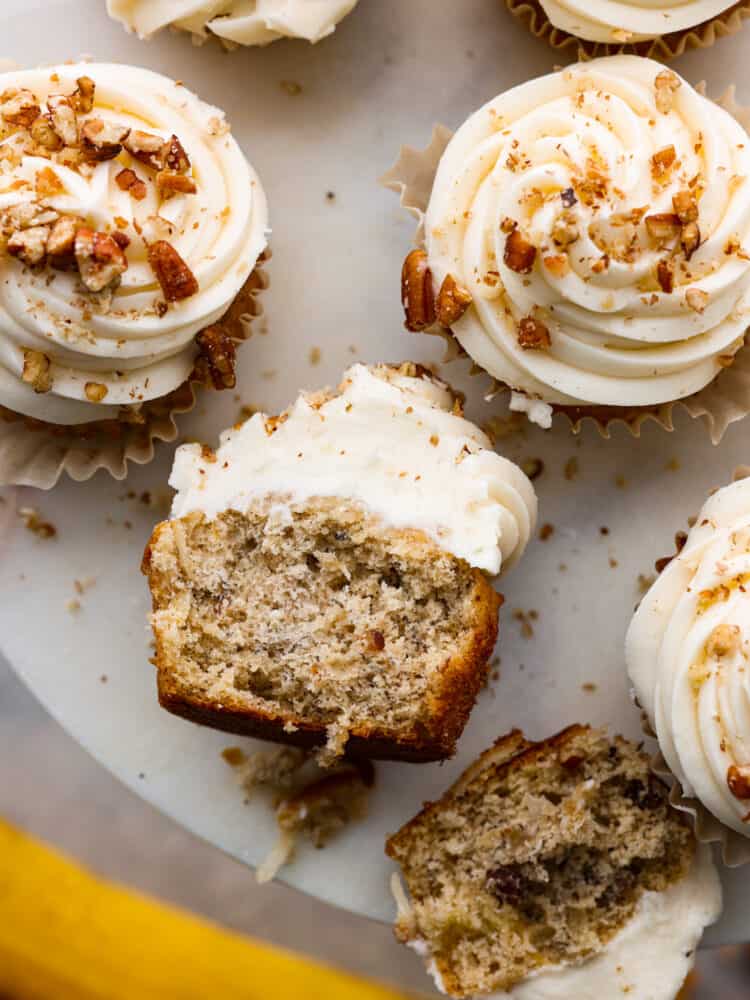
Top-down view of hummingbird cupcakes on a gray serving tray. One is cut in half.

Storing Leftover Hummingbird Cupcakes

Since these cupcakes have a cream cheese based frosting, you’ll want to keep them in the fridge for best results!

In the Refrigerator: Store hummingbird cupcakes in a covered container for 2-3 days.
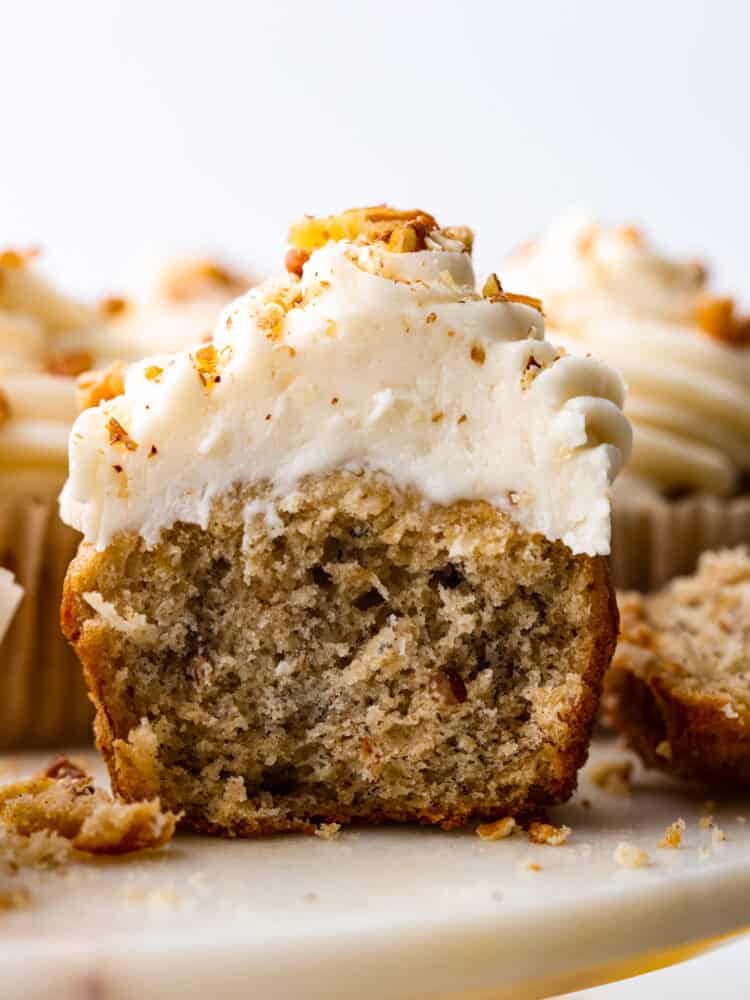
Closeup of a cupcake cut in half.
Print

Hummingbird Cupcakes

A bite-sized take on a classic Southern dessert, these hummingbird cupcakes are sure to win your heart! Filled with pecans, chopped fruit, and topped with smooth cream cheese frosting, you won't be able to stop at one!
Course Dessert, Snack
Cuisine American
Keyword hummingbird cake, hummingbird cupcake, hummingbird cupcake recipe, hummingbird cupcakes, hummingbird cupcakes recipe
Prep Time 30 minutes
Cook Time 15 minutes
Frosting Time 20 minutes
Total Time 1 hour 5 minutes
Servings 24 people
Calories 429kcal
Author Alyssa Rivers

Ingredients

  • 1 cup butter softened
  • ¾ cup granulated sugar
  • ¾ cups packed brown sugar
  • 3 large eggs room temperature
  • 2 teaspoons vanilla
  • 2 ripe bananas mashed
  • ½ cup shredded coconut
  • ½ cup crushed pineapple strained
  • 2 ½ cups all purpose flour
  • 1 teaspoon baking soda
  • 1 teaspoon cinnamon
  • ½ teaspoon cardamom
  • ½ teaspoon salt
  • ½ cup chopped pecans plus more for garnish

Cream cheese frosting:

  • 3/4 cup unsalted butter softened
  • 12 oz cream cheese softened
  • 1 1/2 teaspoon vanilla
  • 1/2 teaspoon salt
  • 6 cups powdered sugar

Instructions

  • Preheat your oven to 350℉ and prepare a 24 space cupcake pan (or 2 with 12) by lining it with cupcake liners.
  • In a stand mixer fitted with the paddle, or with a hand mixer, cream together the butter and sugars until light and fluffy 6-7 minutes. Add in your eggs one at a time and incorporate completely, then mix in your vanilla.
  • In a separate bowl mix your bananas, coconut, and pineapple.
  • In another bowl, whisk together your flour, baking soda, cinnamon, cardamom, and salt. Add it to your butter and egg mixture. Mix until just combined.
  • Add in your banana mixture and mix in gently, once everything is incorporated, fold in your chopped pecans.
  • Fill each cupcake liner ¾ of the way and bake about 20-25 minutes, or until a toothpick inserted comes out clean.
  • Allow cupcakes to cool in the pan about 10-15 minutes before removing and cooling completely.

Cream cheese frosting:

  • In a stand mixer fitted with the whisk or using a hand mixer, whip your butter and cream cheese together until fluffy, and free of lumps. Add your vanilla and salt and mix to combine.
  • With the mixer set to low, add in your powdered sugar in ¼ cup at a time until it is all completely mixed in.
  • Allow the cupcakes to cool completely before frosting.
  • Take about ½ cup of your chopped pecans and crush them in a plastic bag until you have fine pieces you can sprinkle on the top of your frosted cupcakes.

Nutrition

Calories: 429kcal | Carbohydrates: 58g | Protein: 3g | Fat: 21g | Saturated Fat: 12g | Polyunsaturated Fat: 1g | Monounsaturated Fat: 6g | Trans Fat: 1g | Cholesterol: 70mg | Sodium: 264mg | Potassium: 113mg | Fiber: 1g | Sugar: 46g | Vitamin A: 644IU | Vitamin C: 1mg | Calcium: 33mg | Iron: 1mg


source https://therecipecritic.com/hummingbird-cupcakes/
Share:

Easiest Bruschetta Recipe

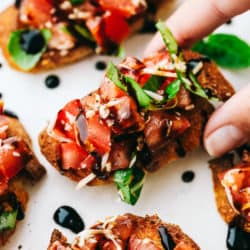
This bruschetta is easy to make with fresh, ripe Roma tomatoes, shredded mozzarella cheese and drizzled with balsamic vinaigrette over top of a French baguette. Bruschetta comes together quickly and easily!

Bruschetta is always fun to make and tastes delicious! Try a couple more variations of bruschetta recipes like this easy strawberry bruschetta or creamy feta and bacon bruschetta.

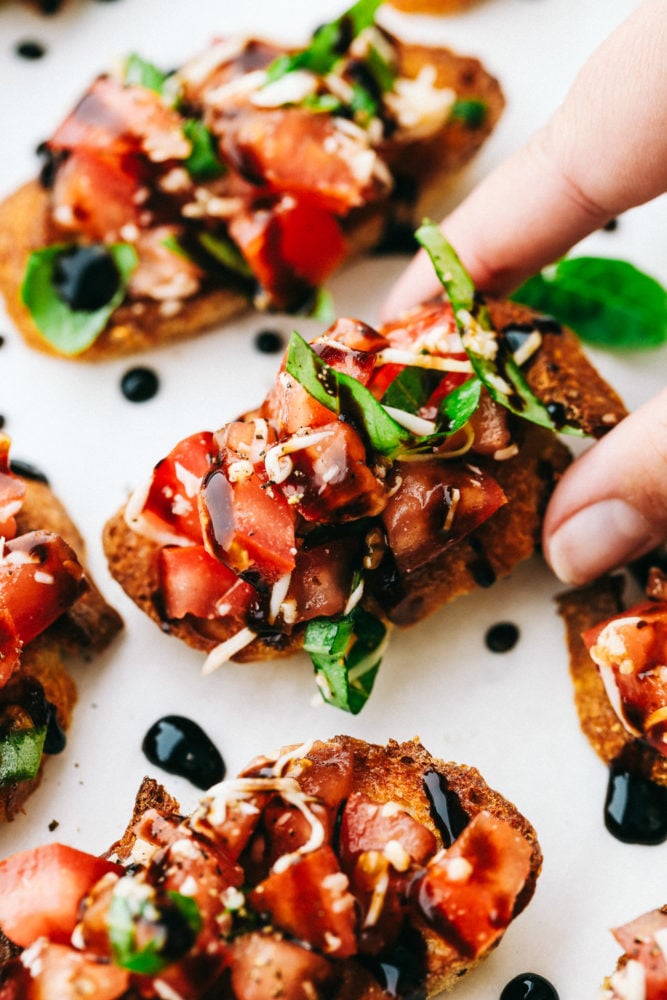
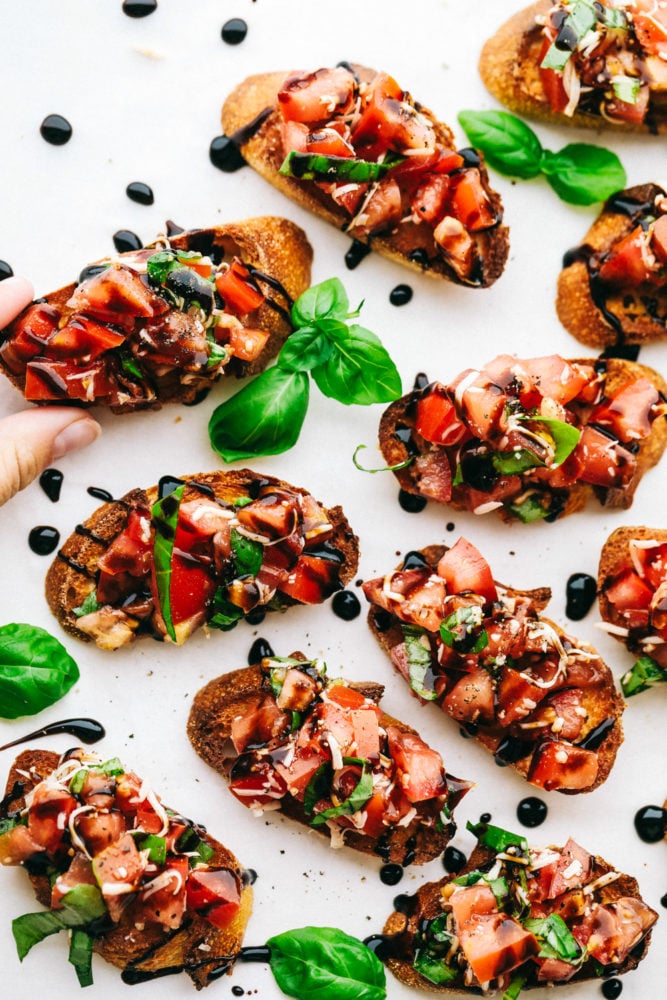
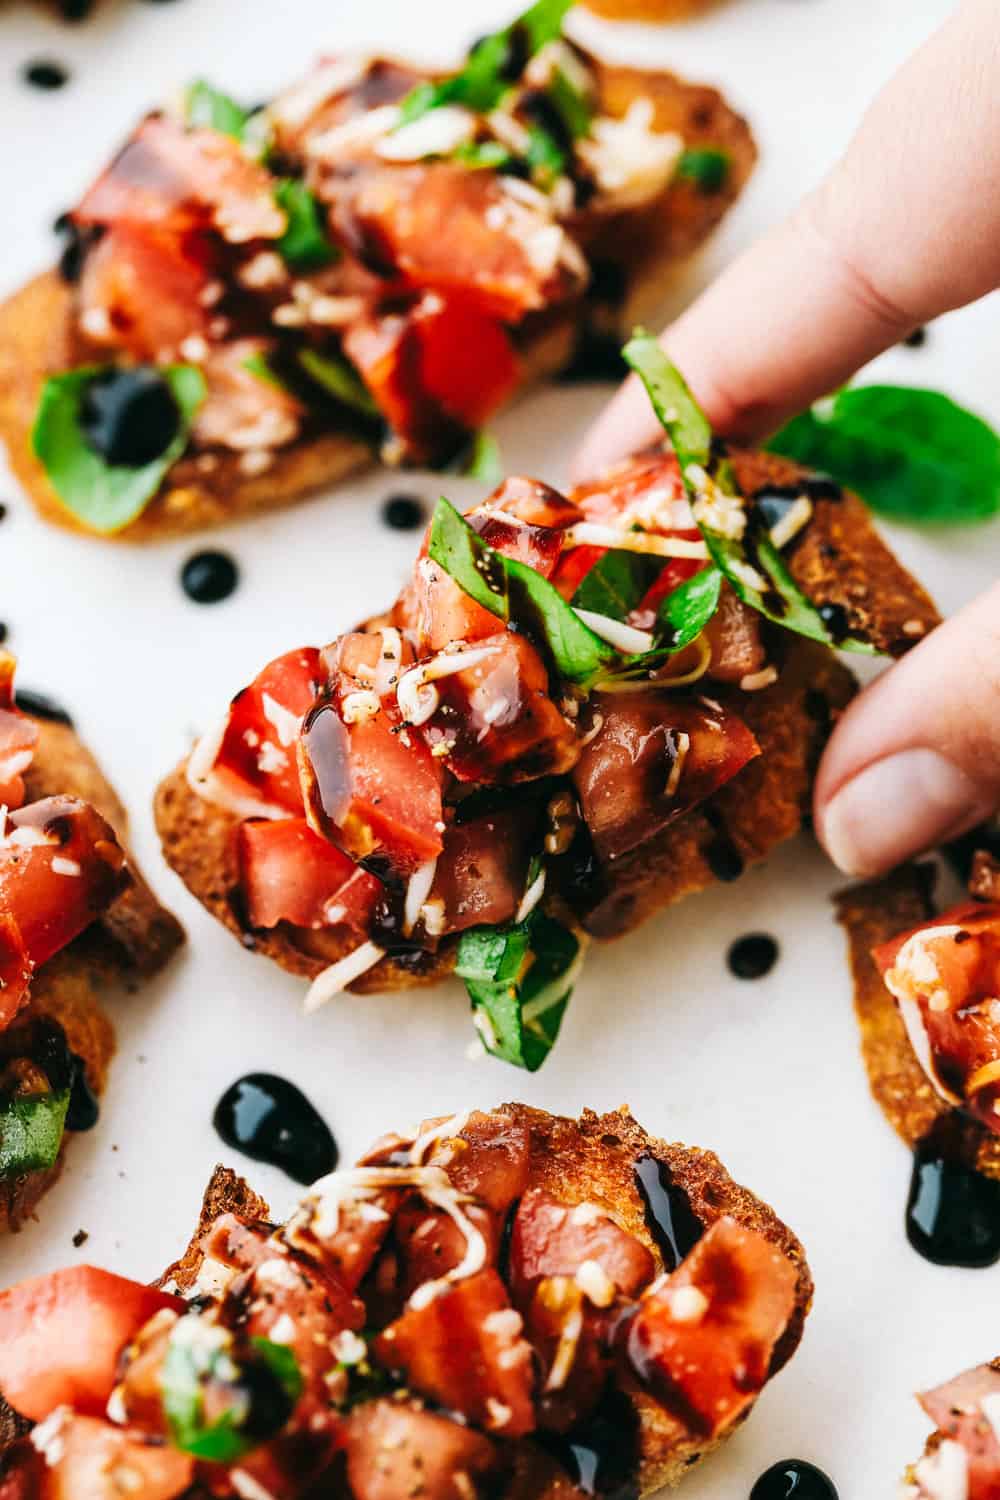
Bruschetta presented on a white plate.

Easiest Bruschetta Recipe

Bruschetta is originally from Italy and is a variation of tomatoes, vegetables, beans, cured meat, and cheese. It is mixed together, then rubbed the bread with garlic and brushed over the top of the bread. This bruschetta is one of my favorites during the year. It is light and filling at the same time. Every bite is zesty and flavorful! Add a drizzle of balsamic glaze over the top and you have one amazing appetizer!

The warm crispy, crunchy bread melts in the shredded mozzarella overtop the tomato mixture. Together this makes the perfect combination! Use up all your fresh tomatoes with this tried and true favorite. This appetizer is perfect for any occasion and great to use as an appetizer, party snack or light lunch. Because it is so light and tasty, everyone will want more!

Bruschetta Ingredients

This recipe uses simple ingredients to make a sweet and savory appetizer. Try it out over some delicious bread and then you won’t be able to stop! Check out the bottom of the post for all of the exact ingredient measurements.

  • Baguette: Slice the bread into thin, even slices.
  • Olive Oil: Brush the oil over the top of each slice of bread.
  • Roma Tomatoes: Freshly diced ripe tomatoes.
  • Mozzarella Cheese: Shredded cheese lays smoothly over the top of the tomato mixture and softens with the warm bread.
  • Balsamic Vinaigrette: This is a very dark concentrate that is rich in flavor.
  • Olive Oil: The olive oil adds a rich flavor to the tomato mixture
  • Garlic Cloves: It is best fresh and minced. If you don’t have any fresh garlic cloves then you can use minced garlic from a jar. 1 garlic clove equals about ½ teaspoon of minced garlic.
  • Basil: Fresh basil is thrown in for color and flavor!
  • Salt and Pepper: These will enhance all of the flavors in the bruschetta.
  • Balsamic Glaze: Drizzle overtop the tomato mixture for a garnish and glaze.

How to Create the Perfect Bruschetta

This recipe is simple to make yet it packs a punch in looks and flavor. Your friends and family will ask you for the recipe because it’s so delicious!

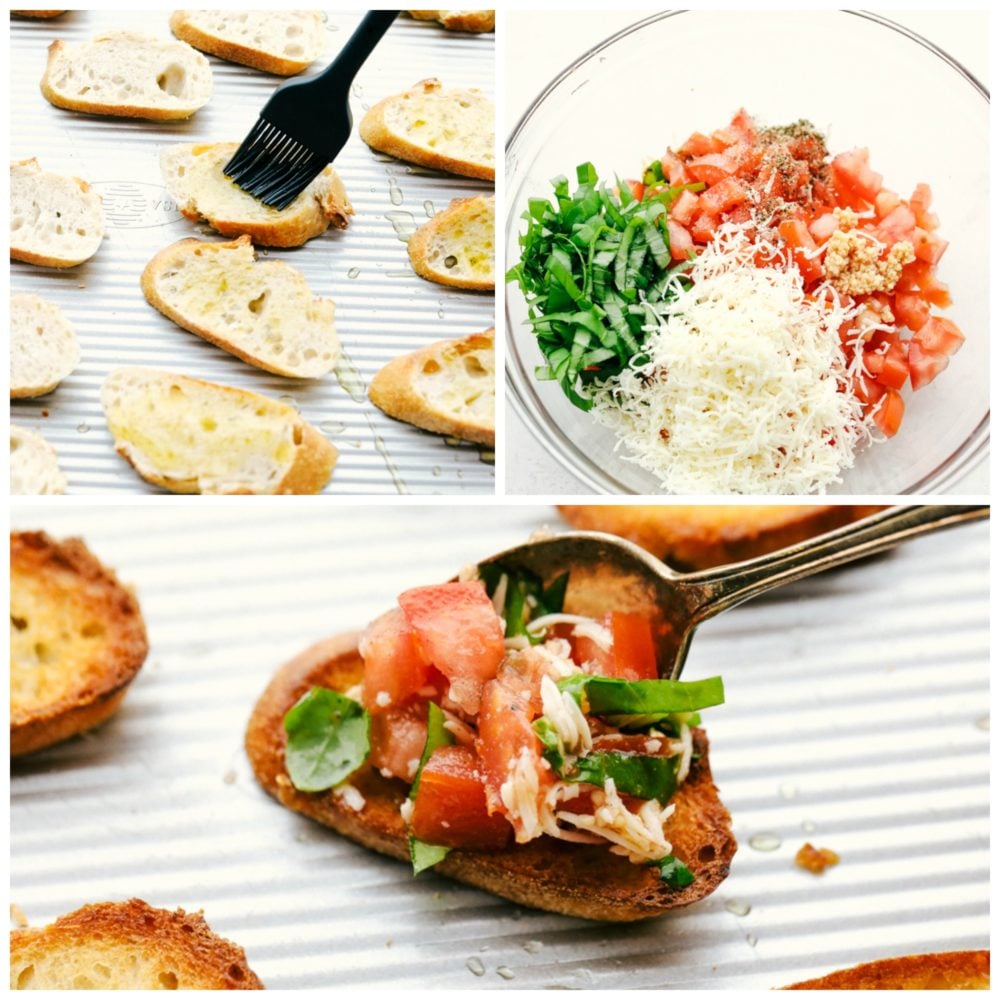
  1. Prepare Bread: Slice a baguette and line it on a baking sheet. Then, brush the top with olive oil and broil it 2-3 minutes until brown. When it’s brown then you can remove from the oven.
  2. Mix Together: In a medium-sized bowl combine the tomatoes, mozzarella, balsamic, olive oil, garlic, basil and salt and pepper. 
  3. Top the Bread: Add the mixture to the top of the bread and then drizzle it with balsamic glaze.
The process of making bruschetta in three photos starting with the brushing on the bread then making the tomato mixture and add it onto of each bread.

Tips and Variations

There are a few things that you can do to make sure that your bruschetta turns out perfectly! Here are a few tips to help you out.

  • Fresh: It is best to try using the freshest ingredients for the tomato mixture. Since fresh produce doesn’t last long then purchase it a day or so before to plan on making this appetizer.
  • Toasting Bread: Move your oven rack a few inches below the top of the oven. Then, broil the bread for a few minutes.
  • Cheese: Store-bought pre-shredded cheese has an extra coat of flour overtop, which is hard to blend together. I like to purchase a block of cheese and then shred it myself.
  • Add In: Try adding in nuts or sunflower seeds to add in a delicious taste and texture!
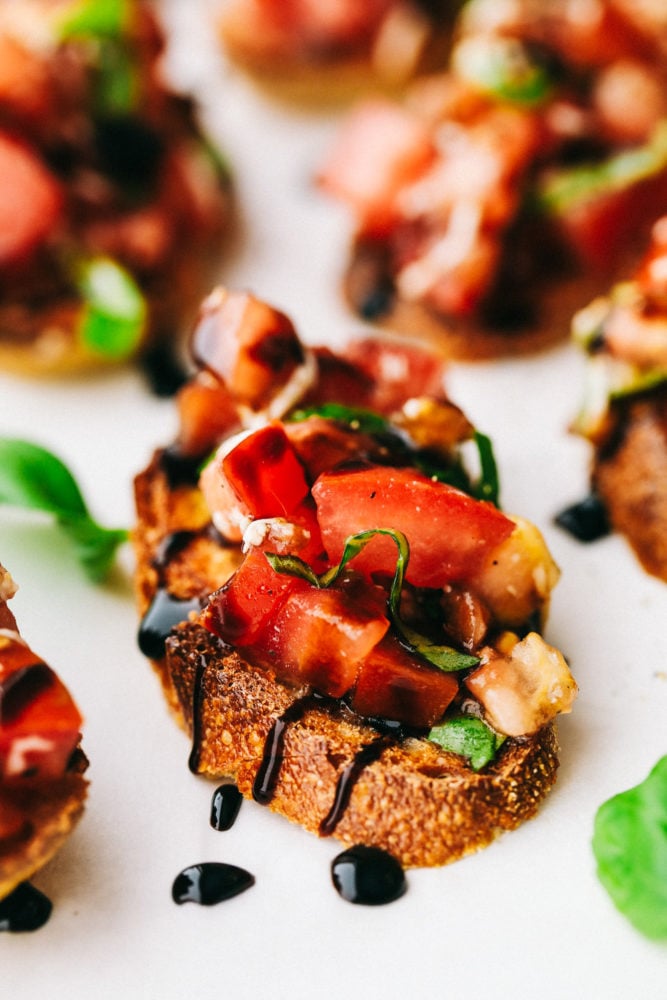
Bruschetta toast on a white countertop garnished with cilantro.

What Kind of Bread Should I Serve With It?

Several slices of bread are best for bruschetta. A classic one is always the baguette. It is crunchy outside a soft and sweet inside. I also love using French bread or crostini. Even crackers or chips taste delicious with this classic and traditional bruschetta.

How Long Does Fresh Bruschetta Keep?

  • Making Ahead: It is best to serve this right away but knowing to have it ready ahead of time will also work. Bruschetta can keep in the refrigerator in an airtight container for 2 to 3 days. Stir it up when you are ready to eat it, and then top it on the toasted bread.
  • Leftovers: If you have any leftover bruschetta, then try adding it on top of baked or grilled chicken!
Print

Easiest Bruschetta Recipe

This bruschetta is easy to make with fresh, ripe Roma tomatoes, shredded mozzarella cheese and drizzled with balsamic vinaigrette over top of a French baguette. Bruschetta comes together quickly and easily! 
Course Appetizer
Cuisine French
Keyword bruschetta, bruschetta recipes
Prep Time 10 minutes
Total Time 10 minutes
Servings 12 Slices
Calories 85kcal
Author Alyssa Rivers

Ingredients

  • 1 Baguette
  • Olive Oil
  • 5 Roma Tomatoes diced
  • 1/4 cup Mozzarella Cheese shredded
  • 1 tbs Balsamic Vinaigrette
  • 1 tbs Olive Oil
  • 2 Garlic Cloves minced
  • 1/4 cup Basil ribboned
  • Salt and Pepper to taste
  • Balsamic Glaze

Instructions

  • Slice a baguette and line it on a baking sheet. Brush the top with olive oil and broil it 2-3 minutes until brown. Remove from the oven.
  • In a medium sized bowl combine the tomatoes, mozzarella, balsamic, olive oil, garlic, basil and salt and pepper. Top the bread with the mixture and drizzle with balsamic glaze.

Notes

Originally Posted on May 24, 2020
Updated on November 3, 2022

Nutrition

Calories: 85kcal | Carbohydrates: 12g | Protein: 3g | Fat: 3g | Saturated Fat: 1g | Cholesterol: 2mg | Sodium: 144mg | Potassium: 84mg | Fiber: 1g | Sugar: 1g | Vitamin A: 257IU | Vitamin C: 4mg | Calcium: 32mg | Iron: 1mg


source https://therecipecritic.com/bruschetta/
Share:

Sweet Potato Cobbler

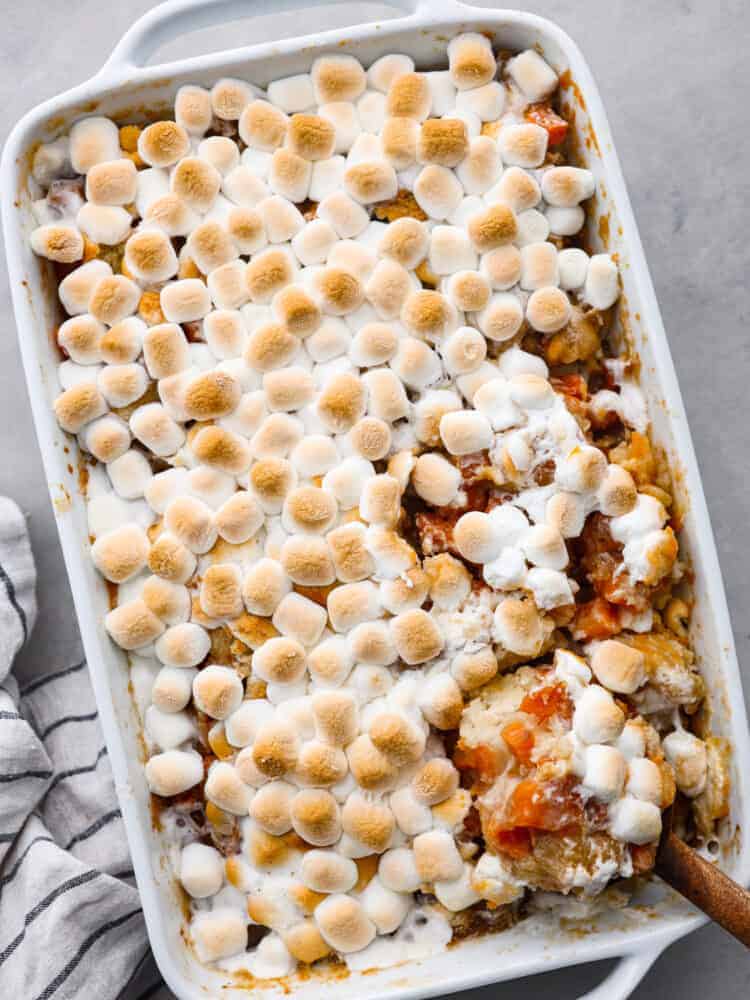
Soft, caramelized sweet potato in a buttery, crumbly crust – what could be better? Sweet potato cobbler is the perfect addition to any holiday dinner table.

Not only are sweet potatoes absolutely delicious, but they’re versatile too! If you love them as much as I do, you’ve got to try this sweet potato pie, sweet potato casserole, and air fryer sweet potato chips!

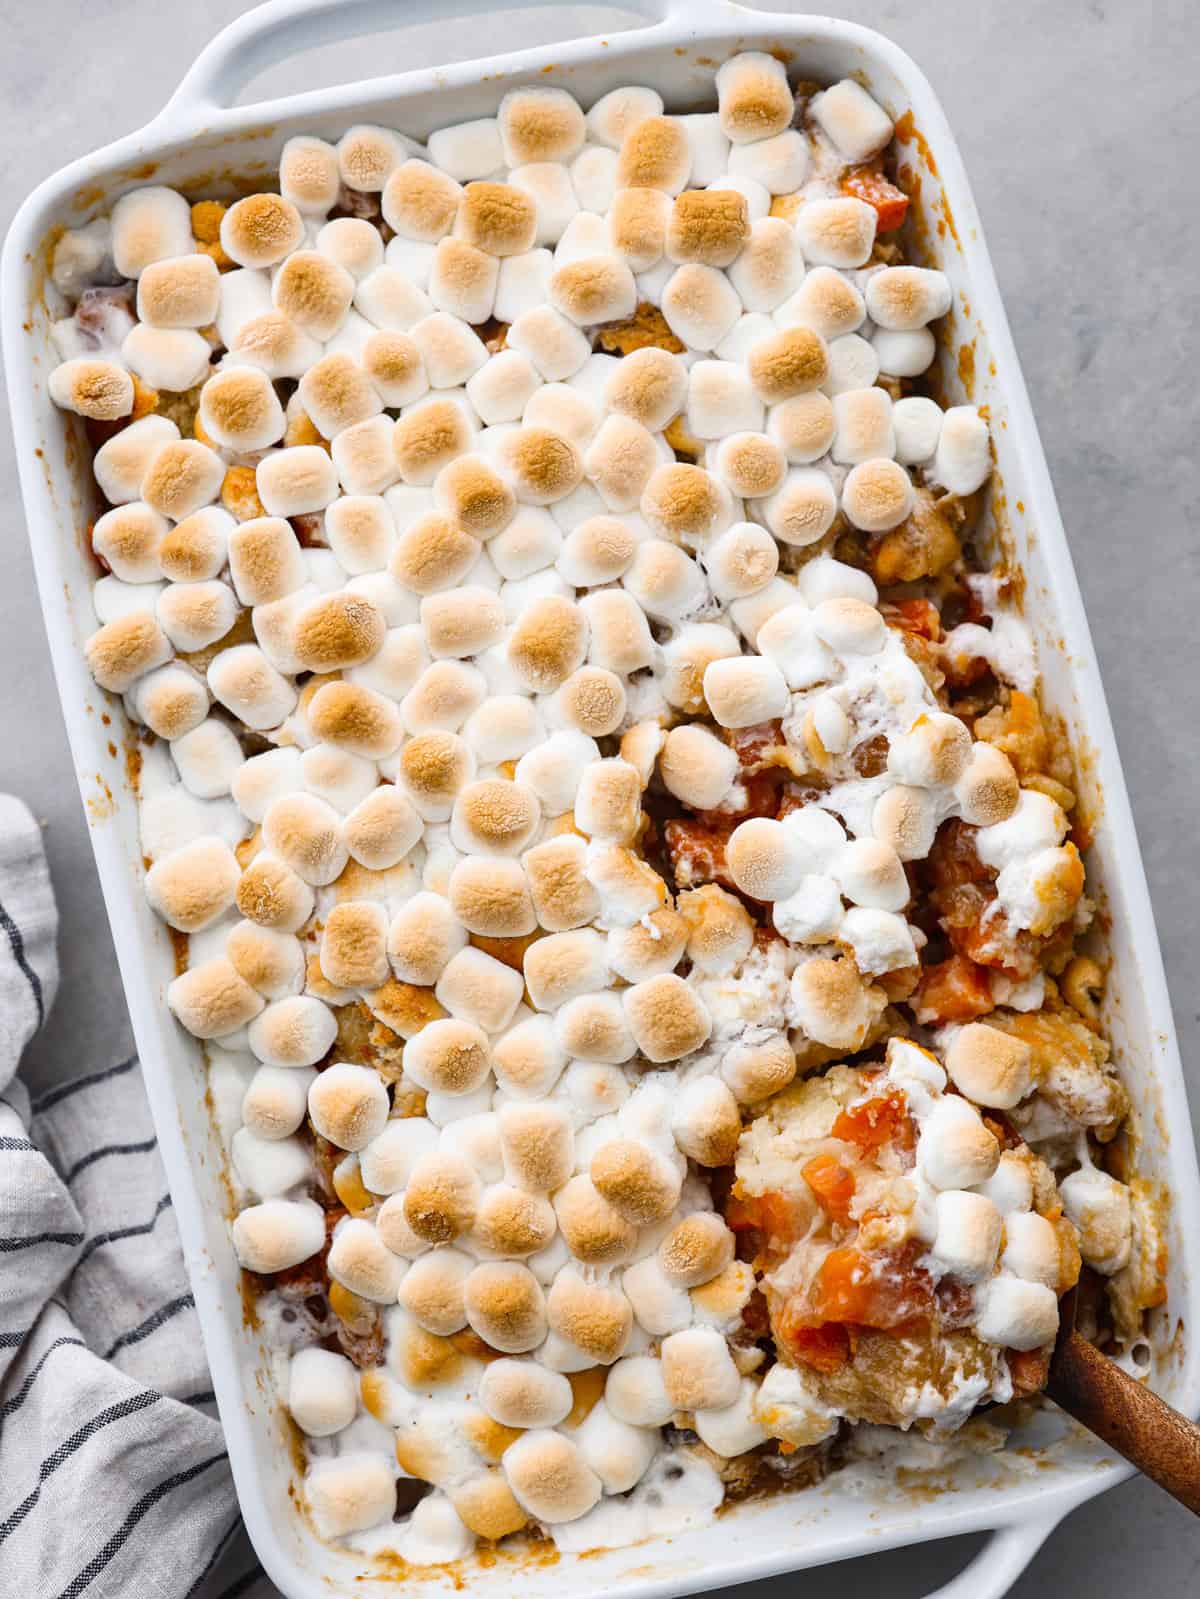
Top-down view of sweet potato cobbler in a white baking dish.

Recipe for Sweet Potato Cobbler

Sweet potatoes always make an appearance around the holidays. With how tasty and versatile they are, it’s no surprise why! (Find more sweet potato recipes here!) If you’re a sweet potato lover like me, this sweet potato cobbler is the dessert for you! It’s warm, rich, crumbly, and spiced to perfection! In other words, the perfect fall dessert.

It’s a great way to use up leftover sweet potatoes if you have any on hand! To be honest, I didn’t think that sweet potato would be such a good flavor in cobbler. Trust me though! When it’s spiced, baked, and caramelized to perfection, it’s absolutely irresistible. You’re going to love it! It’s quickly becoming one of my favorite cobbler recipes! Top it off with some whipped cream or a scoop of vanilla ice cream and you have a winning dessert on your hands. It’s another great recipe to add to your holiday lineup, just in time for Thanksgiving! It’s sure to fly off the table.

Ingredients Needed

One of my favorite things about this sweet potato cobbler is all of the simple ingredients that it uses! As long as you have sweet potatoes and marshmallows, you probably have everything else needed to whip it up! It makes life a little easier. Check out the recipe card below for measurements.

  • Sweet Potatoes: I used medium-sized sweet potatoes! You’ll want these to be diced and boiled before you use them for your cobbler.

Dough:

  • Unsalted Butter: Makes your crust soft and rich!
  • Flour: All-purpose works great here!
  • Baking Powder: Because we want the cobbler to be crumbly and light instead of dense, baking powder is a must-add.
  • Salt: Keeps the dough from tasting bland.
  • Sugar: Regular granulated sugar works just fine!
  • Milk: I recommend using whole milk if you have it. It will make your dough more soft and tender because of the high-fat content.
  • Spices: For the dough, I added a little cinnamon and allspice for that perfect fall flavor.

Syrup Filling:

  • Sugar: I use a mix of white and brown sugar for a deeper sweetness. (You can also use light brown sugar!)
  • Hot Water: Use the leftover water from boiling your potatoes! I love doing this because it adds some extra flavor, too.
  • Vanilla: Helps deepen the flavor of the filling. Use pure vanilla extract if you have it! It’s my favorite to cook with because it adds the BEST flavor.
  • Spices: For the sweet potato cobbler filling, I used cinnamon and cardamom.
  • Mini Marshmallows: (Optional) These may be optional, but no holiday sweet potato recipe is complete without melty marshmallows on top.

Can I Use a Pie Crust?

Absolutely! In fact, this is a great way to cut down on prep time. (Aren’t premade pie crusts such a life-saver?) As much as I love the soft and tender dough in this recipe, using a pie crust on the bottom of your sweet potato cobbler is a great alternative.

How to Make the Best Sweet Potato Cobbler

This sweet potato cobbler recipe is one you’ll want to come back to again and again for the holidays! It’s just too good to pass up. One bite and you’ll understand why it’s so popular!

  1. Preheat Oven: Preheat oven to 350℉ and grab a deep 9X13” baking dish.
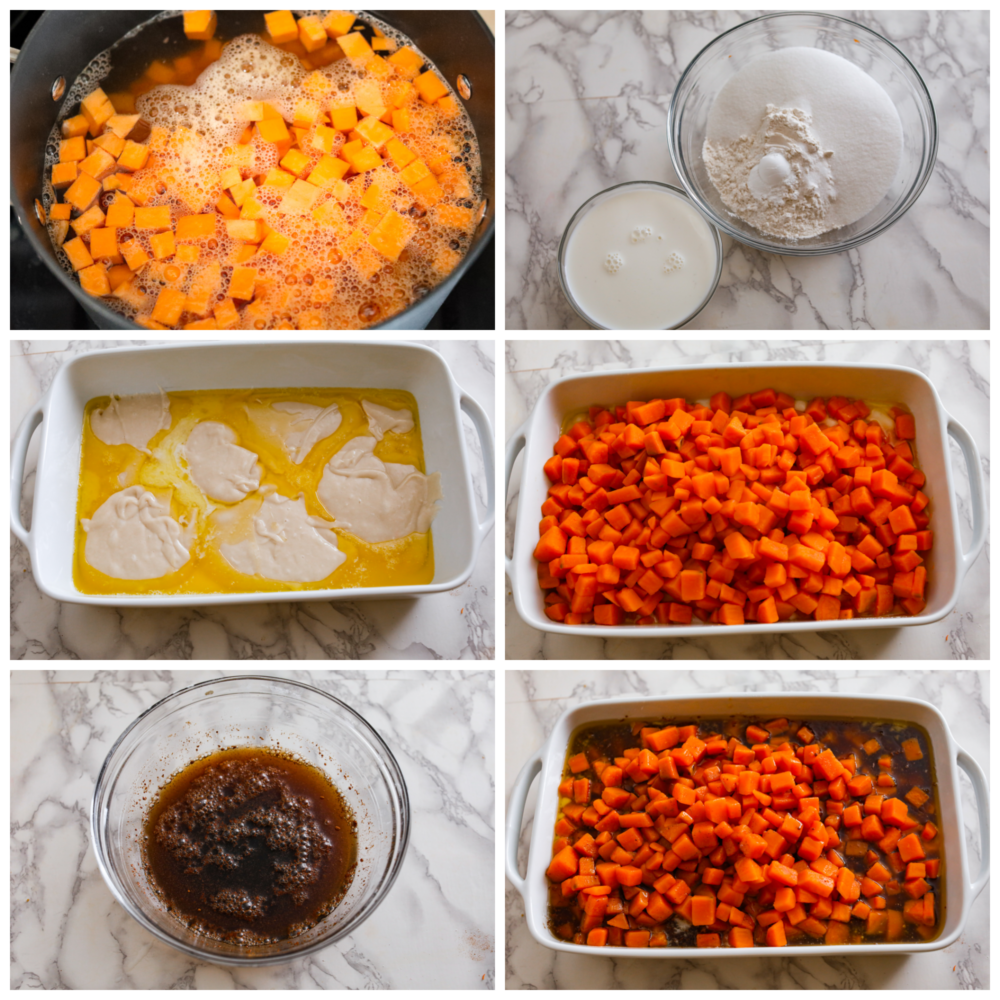
  2. Boil Potatoes: In a large pot, bring water to a boil. You’ll need enough water to cover your potatoes. Peel and chop your potatoes into bite-size pieces. Then put the sweet potato chunks in the boiling water and cook covered for about 10 minutes. Because they’re still going to be baked, you’ll want them to be slightly tender but firm in the middle.
  3. Melt Butter: Add butter to your baking dish and place in the oven until the butter is melted. This will take about 4-5 minutes. Be careful not to burn the butter.
  4. Dough Mixture: In a bowl, mix together the flour, baking powder, salt, sugar, and milk. Dollop the batter into the buttered dish, but don’t stir it!
  5. Prepare Syrup: For the syrup, mix your granulated sugar, brown sugar, hot water (from potatoes) vanilla, cinnamon, and cardamom. Stir until the sugars are dissolved.
  6. Add Filling: Place your boiled potatoes evenly over your batter, then pour the syrup onto the potatoes.
  7. Bake: Bake in your preheated oven for 40-50 minutes or until the top is golden brown.
  8. Marshmallow Topping: (Optional) After about 35 minutes, top your sweet potato cobbler with mini marshmallows. Then let it finish cooking to allow the marshmallows to melt on top.
  9. Enjoy: Serve your sweet potato cobbler as-is or with a scoop of ice cream on top!
6-photo collage of dough and filling being prepared, then added to a baking dish.

Tips and Variations

Sweet potato cobbler is a holiday favorite and sure to be a hit at the dinner table. With soft, caramelized sweet potatoes, a buttery crust, and melty marshmallows, you really can’t go wrong!

  • Partially Cook Sweet Potatoes: Don’t overboil the sweet potatoes, you should be able to poke them with a fork and meet some resistance in the center. They will finish cooking in the oven, and you don’t want them to be too soft.
  • Marshmallow Topping: Marshmallows are a sweet addition and reminiscent of a classic baked sweet potato dish, but for this recipe, it is definitely optional!
  • Add a Lattice: For a picture-perfect finish, use strips of pie crust on top of your cobbler to create a lattice pattern!
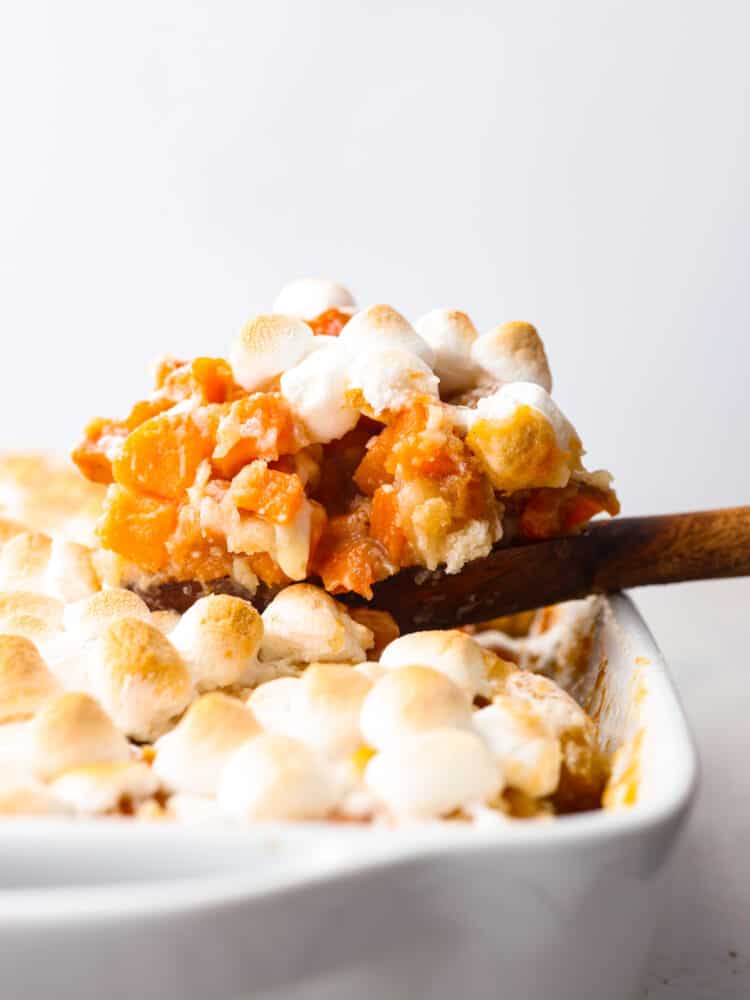
Sweet potato cobbler being scooped out of the pan with a wooden spoon.

Storing Leftovers

With how tasty this sweet potato cobbler is, you probably won’t have any leftovers. If you’re lucky enough to have some, here’s how to keep them tasting fresh!

  • In the Refrigerator: Store wrapped in plastic wrap or in an airtight container for 2-3 days.
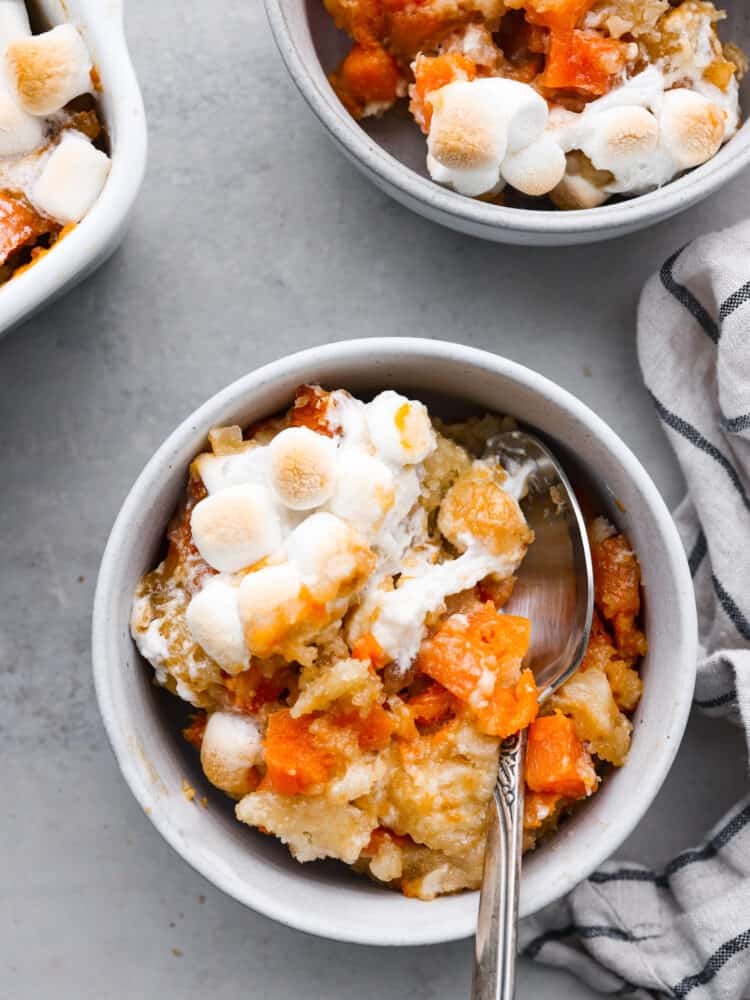
Top-down view of sweet potato cobbler in a white bowl.
Print

Sweet Potato Cobbler

Soft, caramelized sweet potato in a buttery, crumbly crust – what could be better? Sweet potato cobbler is the perfect addition to any holiday dinner table.
Course Dessert
Cuisine American
Keyword sweet potato cobbler recipe
Prep Time 1 hour
Cook Time 50 minutes
Total Time 1 hour 50 minutes
Servings 8 people
Calories 464kcal
Author Alyssa Rivers

Ingredients

  • 3 medium sweet potatoes diced and boiled.

Dough:

  • ½ cup unsalted butter
  • 2 cups all purpose flour
  • 2 teaspoons baking powder
  • 2 teaspoon salt
  • 1 cup granulated sugar
  • ½ cup whole milk
  • ½ teaspoon cinnamon
  • ½ teaspoon allspice

Syrup filling:

  • ⅔ cup granulated sugar
  • ⅔ brown sugar packed
  • 1 cups hot water from boiling potatoes
  • 2 teaspoons vanilla
  • 1 teaspoon cinnamon
  • 1 teaspoon cardamom
  • optional 1 cup mini marshmallows for topping

Instructions

  • Preheat oven to 350℉ and grab a deep 9X13” baking dish
  • In a large pot bring water to a boil (enough water to cover your potatoes). Peel and chop your potatoes into bite size pieces. Put the sweet potato chunks in the boiling water and cook covered for about 10 minutes, slightly tender but firm in the middle.
  • Add butter to your baking dish and place in the oven until the butter is melted, about 4-5 minutes. Be careful not to burn the butter.
  • In a bowl mix together your batter, flour, baking powder, salt, sugar, and milk. Dollop the batter into the buttered dish, but don’t stir it!
  • For the syrup, mix your granulated sugar, brown sugar, hot water (from potatoes) vanilla, cinnamon, and cardamom. Stir until the sugars are dissolved
  • Place your boiled potatoes evenly over your batter, and pour the syrup onto the potatoes.
  • Bake in your preheated oven for 40-50 minutes or until the top is golden brown.
  • (Optional) After about 35 minutes, top your cobbler with the mini marshmallows and finish cooking to allow the mallows to melt on top.

Notes

Don’t over boil the sweet potatoes, you should be able to poke them with a fork and meet some resistance in the center. They will finish cooking in the oven, and you don’t want them to be too soft.
The marshmallows are a sweet addition and reminiscent of a classic baked sweet potato dish, but for this recipe it is definitely optional!

Nutrition

Calories: 464kcal | Carbohydrates: 84g | Protein: 5g | Fat: 13g | Saturated Fat: 8g | Polyunsaturated Fat: 1g | Monounsaturated Fat: 3g | Trans Fat: 0.5g | Cholesterol: 32mg | Sodium: 639mg | Potassium: 455mg | Fiber: 4g | Sugar: 46g | Vitamin A: 12405IU | Vitamin C: 2mg | Calcium: 103mg | Iron: 2mg


source https://therecipecritic.com/sweet-potato-cobbler/
Share:

Popular

Archive

Slider Tag

Facebook

Header Ads

Recent in Food

Blog Archive

Recent Posts

Unordered List

  • Lorem ipsum dolor sit amet, consectetuer adipiscing elit.
  • Aliquam tincidunt mauris eu risus.
  • Vestibulum auctor dapibus neque.

Pages

Theme Support

Need our help to upload or customize this blogger template? Contact me with details about the theme customization you need.