Slow Cooker Mississippi Pork Roast

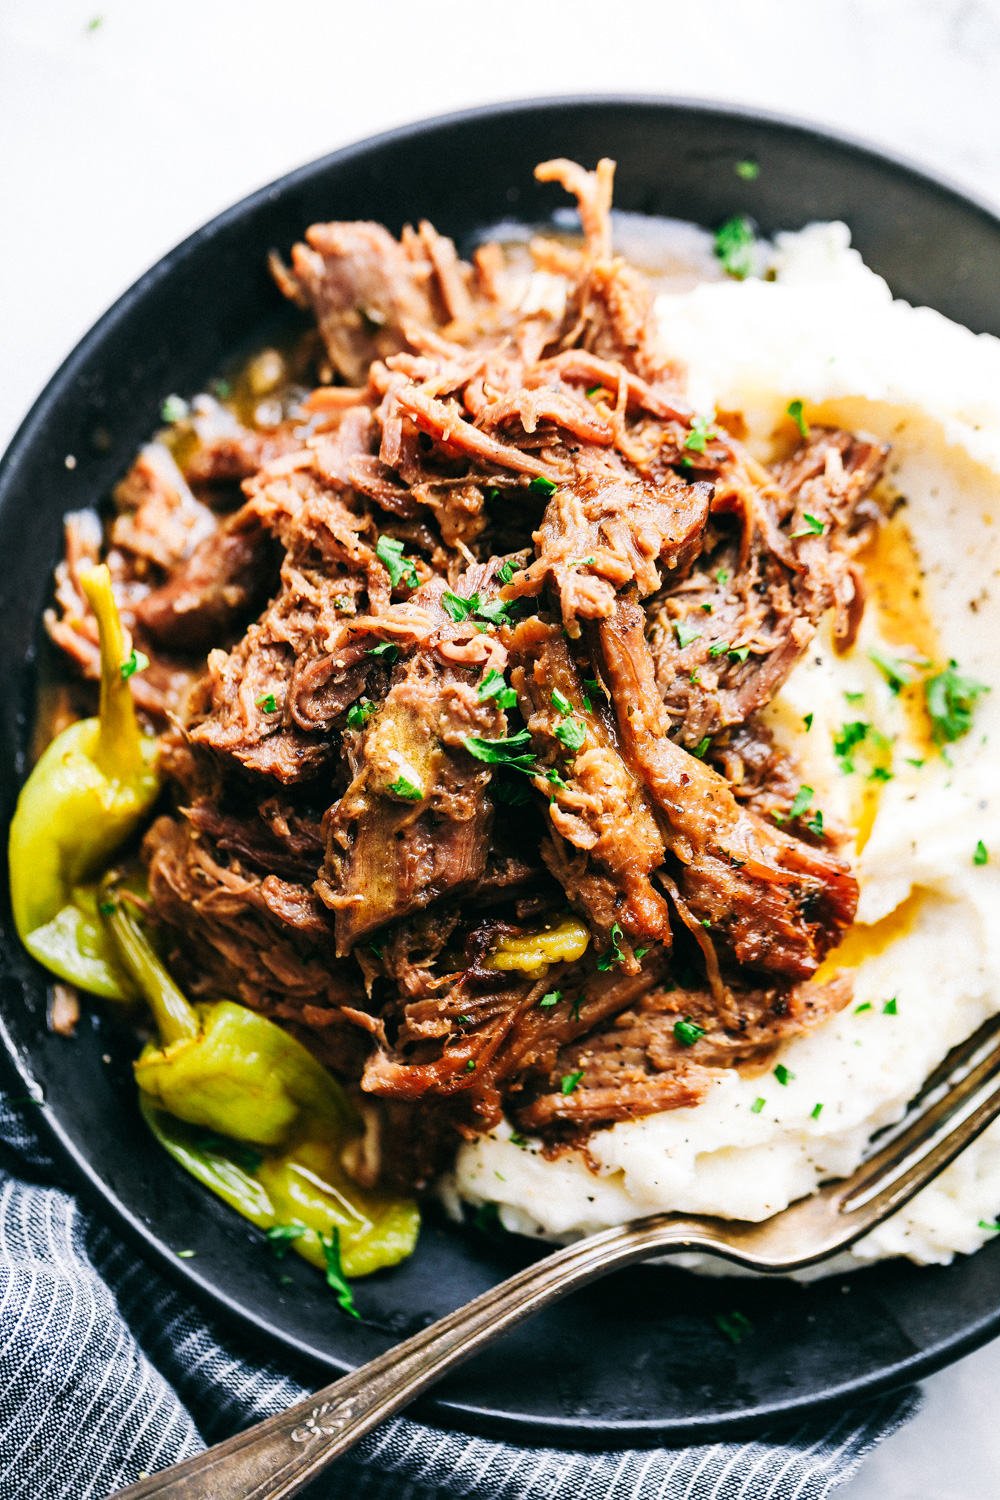
Slow Cooker Mississippi Pork Roast is a savory, sweet and spicy pork roast that is tender to the touch and falls apart with ease. It takes minutes to prepare and can be paired with a variety of sides. Your family will fall in love with this incredibly flavorful, melt-in-your-mouth dinner!

I love a delicious roast! It’s my go to- meal whenever I need to impress guests, feed a crowd, or just have some delicious home-cooked food! Make this delicious roast with these rolls, these yummy mashed potatoes, and these delicious Brussel sprouts, and you will have a simple and easy meal that everyone will love!

Pork roast on a plate with mashed potatoes.

Slow Cooker Mississippi Pork Roast

I have fallen in love with this pork roast recipe. It is tender, juicy, and has all the flavor you need. It turned out perfect in the slow cooker, and I am here to tell you it was one of the best meals that I have ever made. Since making this recipe a couple of weeks ago, I have already made it again… Twice!

One of the best parts about this meal is that it is so incredibly easy. It takes less than 5 minutes to put everything in the slow cooker, and within minutes, it is ready for dinner. This tender, melt-in-your-mouth pork has a flavor that is to die for. Mississippi Roast usually calls for beef roast, but I love that you can always swap it out for pork. Not to mention, the leftovers are fantastic! Use them on top of some nachos, in a sandwich, or make yourself some tacos with the extra meat!

Ingredients in Mississippi Pork Roast

Simplify your life by using marinated fresh pork. It comes in a wide assortment of mouthwatering flavors, including; Roasted Garlic and Herb, Applewood Smoked Bacon, Sweet Teriyaki, and Slow Smoked Mesquite. It also comes in a wide variety of cuts, including; loin filets, chops, ribs, sirloins, and tenderloins.

  • Pork Roast: I like to get a roast that is already marinated and ready to go so that I can get to cooking it right away!
  • Ranch Seasoning: This adds just the right fresh flavor and creates a delicious taste.
  • Au Jus Gravy Mix: The au jus mix adds to the ranch and makes it so that as the post cookies, it tasks on additional flavor.
  • Butter: I used unsalted butter in this recipe.
  • Pepperoncini Peppers: Once the roast is done cooking, you can discard the peppers.

Let’s Cook a Roast!

This is a meal where you put all of the ingredients in the slow cooker, set it, and forget it! This Mississippi pork roast cooks to perfection and is so simple. This will be your new go-to family meal!

  • Add to Crockpot: Add pork roast to the slow cooker. Sprinkle ranch and au jus packages on top. Top with butter and peppers.
  • Cook: Cook on low for 6 hours.
  • Shred: Remove the pepperoncini peppers, shred the meat with a fork and serve.
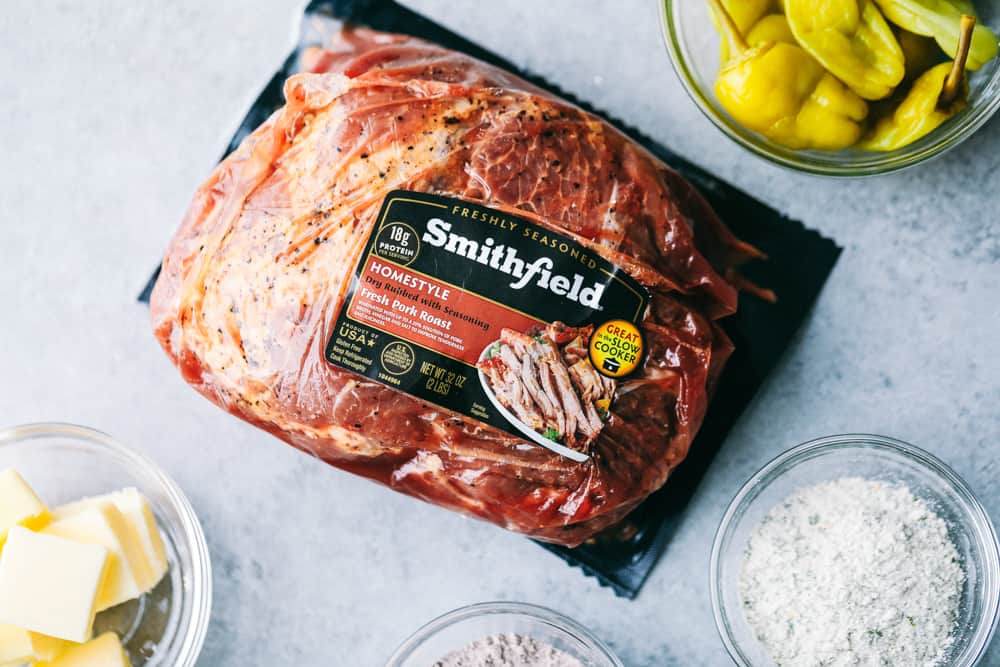
Smithfield pork roast in wrapper.

What Temperature to Cook a Pork Roast

The National Pork Board recommends cooking pork chops, Mississippi pork roasts, and tenderloins to an internal temperature between 145 degrees Fahrenheit (medium rare) and 160 degrees Fahrenheit (medium), followed by a 3-minute rest. Since large cuts increase in temperature by about 10 degrees Fahrenheit while resting, remove them from the heat at 150 degrees Fahrenheit, followed by a 10-minute rest.
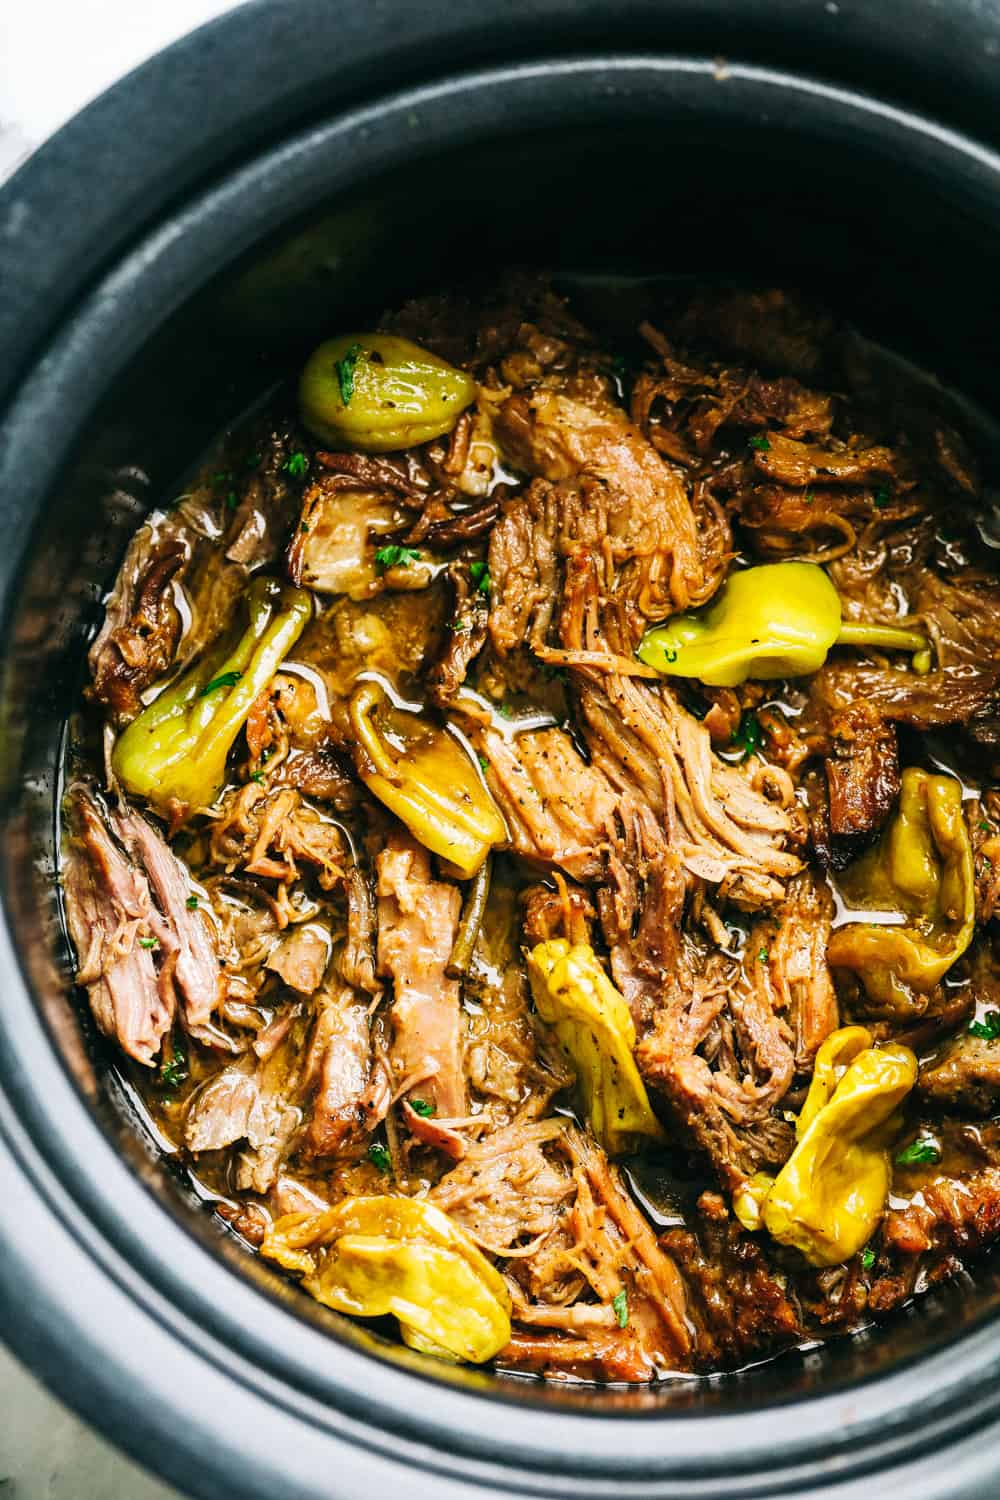
Finished pork roast in crock pot.

How to Store Leftovers

If you have leftovers from this meal, then consider yourself lucky! The leftovers can be used in just about anything (I really loved them in a good sandwich or some tacos).

  • In the Refrigerator: Once your roast has cooled, then you can place it in an airtight container and store it in your fridge. It will last for about 3-4 days.
  • To Reheat: You can easily warm this up in the microwave just before serving!
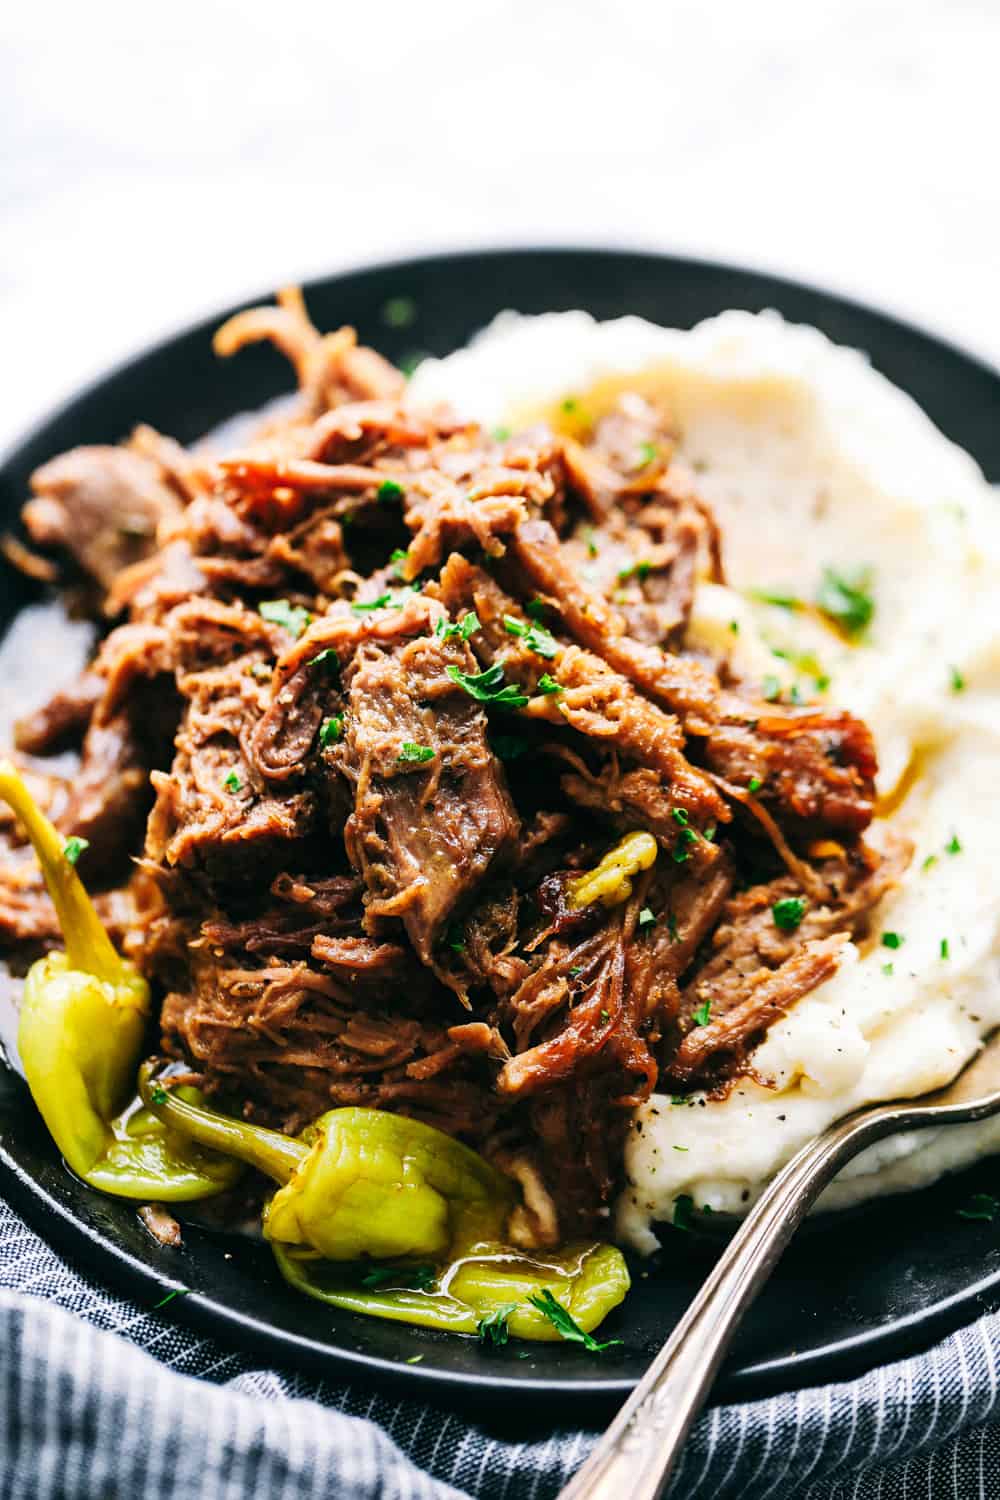
Pork roast on a plate with mashed potatoes.
Print

Slow Cooker Mississippi Pork Roast

Slow Cooker Mississippi Pork Roast is a savory, sweet and spicy pork roast that is tender to the touch and falls apart with ease. 
Course Dinner
Cuisine American
Keyword Mississippi Pork Roast Recipe, Mississippi Roast, Slow Cooker Roast
Prep Time 5 minutes
Cook Time 6 hours
Total Time 6 hours 5 minutes
Servings 6 People
Calories 84kcal
Author Alyssa Rivers

Ingredients

  • 2 pounds marinated fresh pork roast
  • 1 packet ranch seasonings
  • 1 packet au jus gravy mix
  • 1/2 stick butter
  • 8-10 pepperoncini peppers

Instructions

  • Add pork roast to the slow cooker. Sprinkle ranch and au jus packages on top. Top with butter and peppers.
  • Cook on low for 6 hours.
  • Shred with a fork and serve.

Video

Notes

*If you are not a fan of peppers, you do not have to eat them, but they are great to add flavor during the cooking process.
Originally Posted on March 25, 2019
Updated on December 2, 2022

Nutrition

Calories: 84kcal | Carbohydrates: 3g | Protein: 0.3g | Fat: 8g | Saturated Fat: 5g | Polyunsaturated Fat: 0.3g | Monounsaturated Fat: 2g | Trans Fat: 0.3g | Cholesterol: 20mg | Sodium: 413mg | Potassium: 37mg | Fiber: 0.5g | Sugar: 0.3g | Vitamin A: 281IU | Vitamin C: 11mg | Calcium: 4mg | Iron: 0.1mg


source https://therecipecritic.com/mississippi-pork-roast/

Share:

Easy Homemade Ramen

Quick and easy homemade ramen. This broth is simple to make yet bold and flavorful. It’s perfect for pouring over some ramen noodles and loading up with your favorite toppings! This is an easy dinner that everyone will love!

Japanese food is one of my favorite cuisines. I love trying to recreate all of the delicious flavors at home! You should definitely give this hibachi chicken, chicken katsu, and seared ahi tuna a try!

Top-down view of homemade ramen topped with chicken, bokchoy, and a soft boiled egg.

Quick and Easy Japanese-Style Ramen

Ramen is one of my favorite comfort foods, especially when the temperatures drop! It’s important to note that this is NOT the ramen that I’m sure we’ve all had at some point in life, college days maybe? The days before a paycheck when you realize you only have a couple dollars to your name. I’m sure we’ve all had similar experiences.

This recipe is inspired by traditional Japanese ramen. I love it because it has rich, savory broth and of course – all of the delicious toppings! For my take on this recipe, I added sauteed mushrooms, bokchoy, sliced green onions, grilled chicken, and of course soft boiled eggs! The best part about making homemade ramen is that you can customize the broth and toppings exactly how you want! You’ll have to try these yakitori skewers as well for a dinner inspired by delicious Japanese cuisine.

Ingredients Needed

Here is everything you need to make the tasty, savory broth, as well as some topping ideas! The great thing about making homemade ramen is that you can customize the broth and mix and match toppings to your liking. Check out the recipe card below for exact measurements.

  • Sesame Oil: Used for cooking the vegetables in. I love using sesame oil to cook with because it adds the best nutty flavor.
  • Minced Garlic: Makes the broth nice and savory!
  • Ginger Paste: A classic ingredient in Asian cuisine. This adds zip to the flavor of the broth.
  • Sliced Mushrooms: Regular brown mushrooms work great here! You can also use shiitake mushrooms.
  • Chicken Stock: Chicken broth is typically what I have on hand and great for a savory soup base. If you want your ramen to have more of the classic Tonkotsu flavor, use pork broth instead. You can also use vegetable broth as a vegetarian/vegan alternative.
  • Water: Adjusts the consistency of the ramen soup.
  • Soy Sauce: Add a splash for savory flavor!
  • Baby Bokchoy: I love adding greens to ramen. These can be chopped or left whole. You can also use spinach!
  • Instant Ramen Noodles: You only want the uncooked noodles. Throw out those seasoning packets! You can also use fresh ramen noodles if you can find them.
  • Salt and Pepper: Add to taste.

Optional Toppings

  • Grilled Chicken: I added sliced grilled chicken but you can also use pork or chashu. For a vegetarian protein, try adding tofu!
  • Soft Boiled Egg: A must-add for ramen.
  • Sliced Green Onions: Add extra flavor to the broth.
  • Sesame Seeds: For garnish and nutty flavor.

How to Make Homemade Ramen

It’s so easy! Plus, this homemade ramen comes together in less than 30 minutes, making it a great option for dinner on busy weeknights. The family is going to love it!

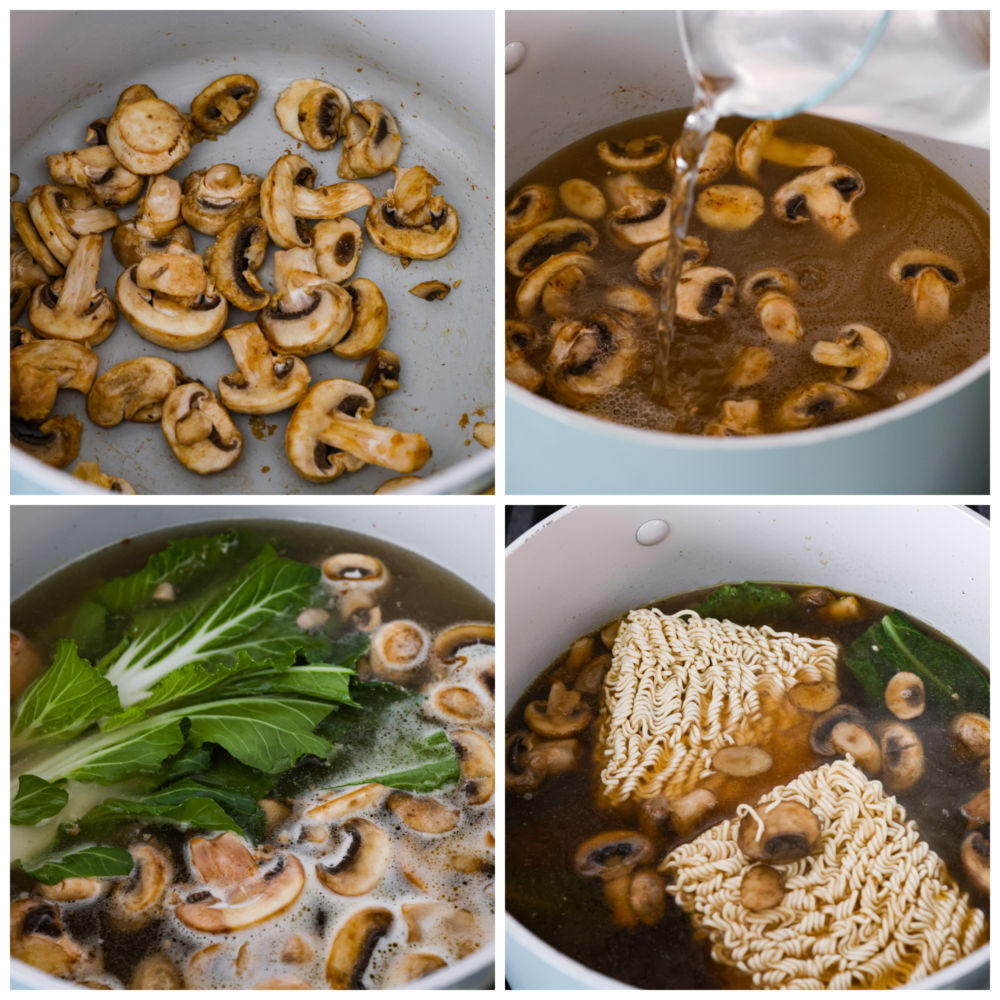
  1. Sauté Vegetables: Add the sesame into a large pot and heat over medium heat. Add in the garlic and ginger and sauté for 30 seconds until fragrant. Add in the sliced mushrooms and cook for 3-5 minutes or until softened.
  2. Add Liquids: Pour in the chicken stock, water, and soy sauce.
  3. Simmer: Then bring to a boil and simmer for about 5 minutes.
  4. Cook Bokchoy: Add the bokchoy and then simmer for an additional 2 minutes to soften the leaves.
  5. Add Noodles: Remove the pot from the heat. Then place the ramen noodles in the hot pot of broth. Allow the noodles to sit for ONLY a couple of minutes until they loosen and soften up. The noodles will soften quickly, so this should be done right before serving. 
  6. Transfer to Serving Bowls: Divide the ramen, veggies, and broth evenly into bowls.
  7. Add Toppings: Top the ramen with sliced grilled chicken and soft boiled eggs. Then garnish with toppings of choice and enjoy!

Making Soft-Boiled Eggs

No ramen is complete without some soft-boiled eggs. I steam my eggs, and anywhere between 7-9 minutes will give a good soft boiled egg depending on how runny you want it. 7 minutes will give a pretty runny egg while 9 minutes gives a more formed center.

4-photo collage of ramen broth being prepared.

Ways to Customize Your Homemade Ramen

This ramen broth comes together easily and it’s so simple to customize. You’re going to love it! Homemade ramen is the perfect winter meal. It just warms the soul!

  • Want to Add More Flavor to Your Broth? Just sauté some aromatics: onion, garlic, ginger, miso, lemongrass. Feeling adventurous? Add in some sliced jalapeños. But be warned, the heat can get intense with just a small amount.
  • Topping Ideas: For the toppings you can really do whatever you want. We have done sliced up pork, beef, bacon, in this instance we went for chicken. Toss in some spring onion, dried seaweed, chopped red peppers, and a soft boiled ramen egg for a pretty epic flavor combo. You can also add narutomaki- these are the flat, round, pink and white fishcakes traditionally added to ramen. You can find them at your local Asian market.

How Long Does Homemade Ramen Last?

Once the noodles and all of the toppings are added, you’ll want to consume your ramen within an hour or two. If you need to store your ramen, store the noodles and broth separately so the noodles don’t get soggy.

Closeup of ramen with noodles, a sliced mushroom, and broth in a white spoon.


Print

Homemade Ramen

Quick and easy homemade ramen. This broth is simple to make yet bold and flavorful. It’s perfect for pouring over some ramen noodles and loading up with your favorite toppings! This is an easy dinner that everyone will love!
Course Dinner
Cuisine Asian American, Japanese
Keyword 20 minute, homemade ramen
Prep Time 5 minutes
Cook Time 18 minutes
Total Time 23 minutes
Servings 4
Calories 126kcal
Author Alyssa Rivers

Ingredients

  • 1 tablespoon sesame oil
  • 2 teaspoons garlic, minced
  • 1 teaspoon ginger paste
  • 1 1/2 cups mushrooms, sliced
  • 4 cups chicken stock or broth of choice
  • 4 cups water
  • 1/4 cup soy sauce
  • 5-6 leaves baby bokchoy, chopped or left whole
  • 4 packs of ramen noodles throw out those seasoning packets!!
  • salt and pepper to taste

Toppings:

  • 1 pound grilled chicken, sliced
  • 2 soft boiled egg, halved
  • 1/4 cup green onions, sliced
  • sesame seeds, for garnish

Instructions

  • Add the sesame into a large pot and heat over medium heat. Add in the garlic and ginger and sauté for 30 seconds until fragrant.
  • Add in the sliced mushrooms and cook for 3-5 minutes or until softened.
  • Pour in the chicken stock, water, and soy sauce.
  • Bring to a boil and simmer for about 5 minutes.
  • Add the boychoy and simmer for an additional 2 minutes to soften the leaves.
  • Remove the pot from the heat. Place the ramen noodles in the hot pot of broth. Allow the noodles to sit for ONLY a couple of minutes until they loosen and soften up. The noodles will soften quickly, so this should be done right before serving.
  • Divide the ramen, veggies, and broth evenly into bowls.
  • Top the ramen with sliced grilled chicken and soft boiled eggs. Garnish with toppings of choice and enjoy!

Notes

 
Originally posted September 20, 2017
Updated December 1, 2022

Nutrition

Calories: 126kcal | Carbohydrates: 9g | Protein: 8g | Fat: 6g | Saturated Fat: 1g | Cholesterol: 7mg | Sodium: 2328mg | Potassium: 283mg | Fiber: 1g | Sugar: 4g | Vitamin C: 0.5mg | Calcium: 18mg | Iron: 0.8mg


source https://therecipecritic.com/easy-homemade-ramen/
Share:

Chocolate Bark

This delicious Chocolate Bark made with Reynolds Wrap® Heavy Duty Foil will be the tastiest and simplest dessert you make all holiday season! It’s quick and easy, and your entire family will go crazy over it!

The holidays are the season for desserts! I especially love easy ones that I can whip up in no time. If you love this simple chocolate bark, then you must also try these Grinch Cookies, this delicious Eggnog Fudge, or this simple Peppermint Pie with an Oreo Crust!

A plate of white chocolate bark, dark chocolate bark and milk chocolate bark with a Reynolds Wrap Foil package next to it.

Reynolds Wrap® Foil Chocolate Bark

I cannot tell you how excited I am that I get to partner with Reynolds Wrap® for this recipe! Did you know Reynolds Wrap® is celebrating its 75th anniversary this year? This is a true testament to their product quality and how easy they make prepping, cooking, and cleanup for my family and me, especially with the holidays upon us/right around the corner. This chocolate bark is so convenient because you can make it ahead of time and use it for dessert at a holiday party or even wrap it up and make some gifts for your neighbors. After all, who doesn’t love a delicious homemade treat to eat during the season?!

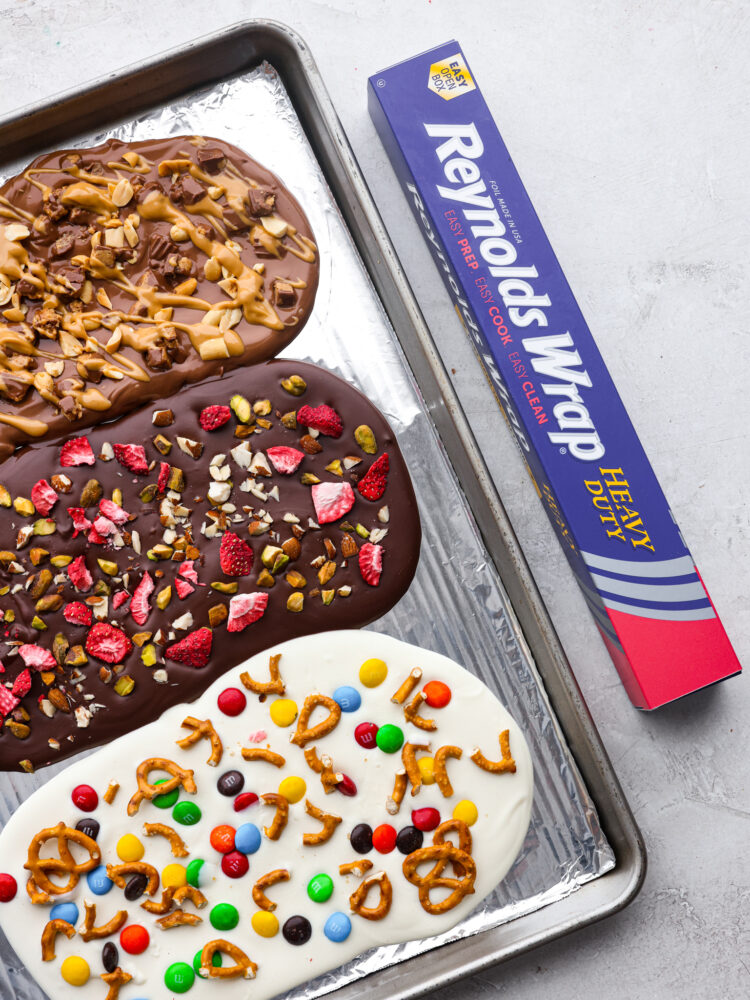
The holidays are the perfect time to use Reynolds Wrap® Heavy Duty Foil. I used this foil to make this delicious chocolate bark, which turned out SO delicious. It will become your go-to treat for this holiday season (or all year round)! I used three different combinations; milk chocolate, white chocolate, and dark chocolate. Each of them has different topping variations, which makes this recipe so versatile. The foil makes cleanup so easy. In fact, you can just use the foil to wrap up any leftovers and store the chocolate bark for later!

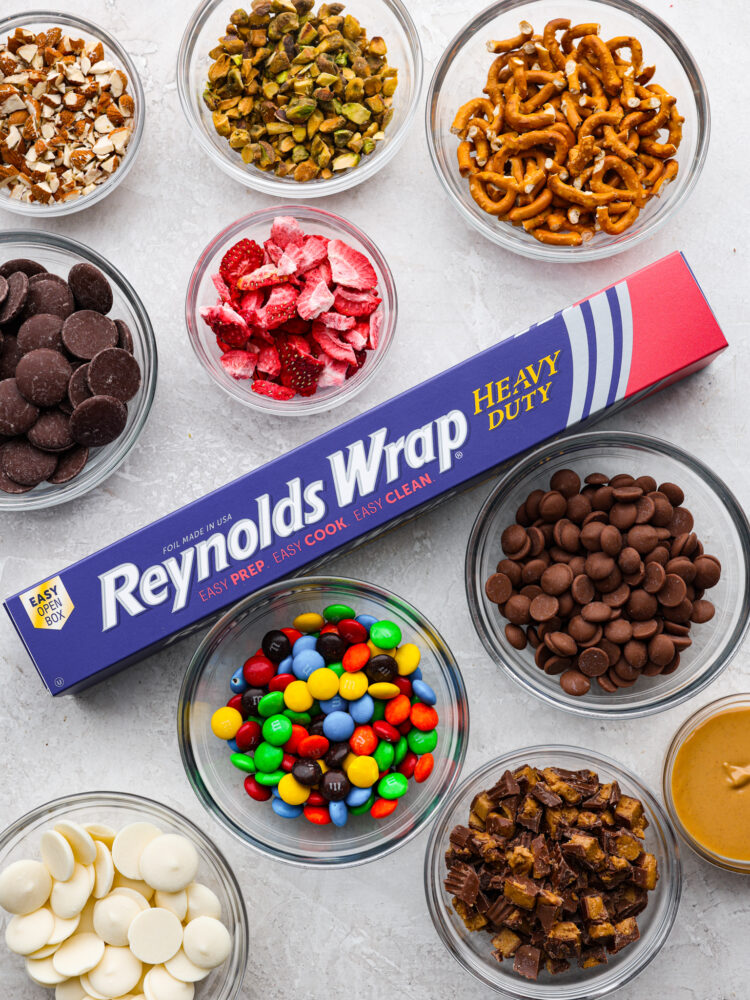
Bowls of topping with chocolate, m &m's. pretzels, nuts and peanut butter with a Reynolds Wrap Foil package in the middle.

Ingredients in Chocolate Bark

I have come up with three different ways to make this chocolate bark. You can choose your favorite or make them all. That way, you have something at the table that everyone will love! I use Reynolds Wrap® Heavy Duty Foil to form this recipe because it helps the chocolate set perfectly and makes for such easy cleanup. Check out the bottom of the post for all the exact measurements.

  • Reynolds Wrap® Heavy Duty Foil: This foil is my favorite to use because it cuts so easily and forms to my pan. That way, it covers the entire pan, allowing the chocolate to set evenly and not stick.

Milk Chocolate

  • Milk Chocolate: This is my favorite of the chocolates because I think classic milk chocolate can go with any topping!
  • Peanut Butter Cups: You can use the regular-size ones and break them apart, or you can use the tiny ones that you find in the baked goods aisle (with the chocolate chips).
  • Peanuts: I like to break these up and add them as an additional crunch of texture.
  • Peanut Butter: When you drizzle the peanut butter on, it not only looks divine, but the taste is out of this world!

White Chocolate

  • White Chocolate: Make sure to use high-quality chocolate so that when you melt it, it becomes nice and creamy.
  • M&M’s: I think these are especially fun on the chocolate because they stand out. Feel free to use seasonal ones to make this chocolate bark extra festive.
  • Pretzels: I used the small, twisted pretzels and broke them into pieces. Chocolate and pretzels are a match made in heaven!

Dark Chocolate

  • Dark Chocolate: Dark chocolate is a classic flavor that looks and tastes so elegant.
  • Pistachios: Chop these up (or crush them with a rolling pin) so that you get some pistachio flavor in every bite!
  • Freeze-Dried Strawberries: Not only do these look stunning against the dark chocolate color, but their subtle taste is delicious.
  • Optional: You can change any of these chocolate bark up by adding in nuts, seeds, sea salt, dried fruit, candy, sprinkles, etc.
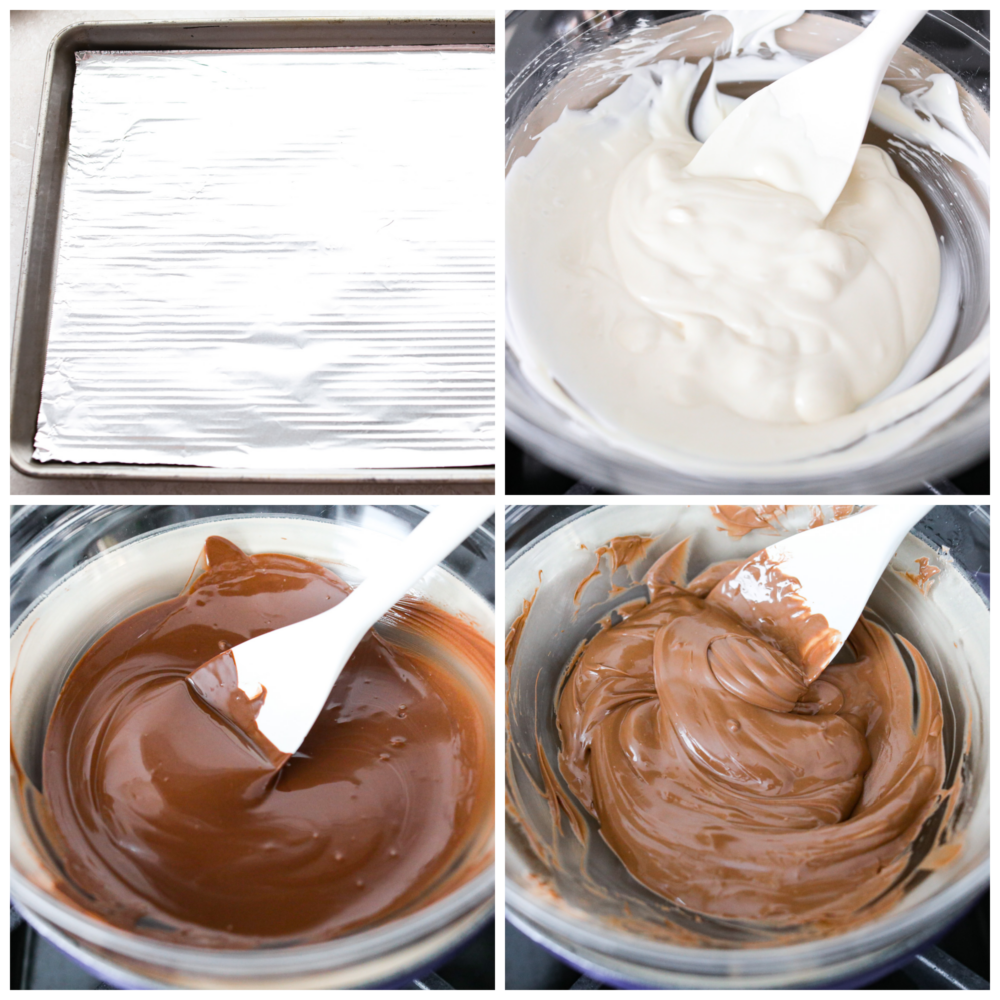
4 bowls showing how to melt chocolate and line a baking sheet with foil.

How to Make Homemade Chocolate Bark

This homemade chocolate bark recipe will become your new holiday favorite. I dare you to stop after just one piece! This dessert elevates chocolate and takes it to the next level with different toppings and combinations. I have a hard time choosing my favorite!

  1. Line with Foil: Line a 9×13 inch pan with Reynolds Wrap® Heavy Duty Foil and set aside. 
  2. Melt Chocolate: Melt the chocolate using a double broiler or in the microwave. If using a double boiler, melt the semi-sweet chocolate over simmering water. If melting in the microwave, melt in a microwave-safe bowl stirring after every 30 seconds being careful not to let it burn and clump. 
  3. Spread Chocolate: Spread the chocolate in a layer on the bottom of your lined 9×13-inch pan. Spread into about a 6×10 rectangle.
  4. Add Toppings: Immediately sprinkle the toppings on top of the melted chocolate.
  5. Cool: Let cool for about 10 minutes to room temperature or until almost set.
  6. Set: Set aside and let set to room temperature for about an hour. Break it into pieces and enjoy!
4 pictures showing how to add toppings to melted chocolate.

Baking Tips

This chocolate bark is so simple and can be changed up to add different toppings, mix-ins, and the different chocolates can even be combined to make marble-like chocolate! Here are some tips to help yours turn out perfect.

  • Use Reynolds Wrap® Heavy Duty Foil: I like to use this foil because it’s tough and durable. It is perfect for cooking heavier foods, especially during the holidays, since you don’t have to worry about ripping or tearing.
  • Use High-Quality Chocolate: The quality of chocolate makes all the difference! For dark chocolate, look for it to be 70%-85% cacao.  You can use milk or white chocolate bars if you don’t like dark. I always try to use good quality brands for the best results!
  • Layered or Marbled Chocolate Bark: Create layered bark with layers of chocolate using a variation of dark, milk, or white chocolate on top. Simply follow the instructions, letting the first layer cool for thirty minutes in the fridge before adding the next layer of melted chocolate.
Finished chocolate bark on a baking sheet with Reynolds Wrap Foil box next to it.

Why Do I Use Reynolds Wrap® Heavy Duty Foil?

There are so many good things about using Reynolds Wrap®! It is high quality and safe to use for cooking, making the foil my go-to in the kitchen for everyday meals and holiday entertaining. I also love that Reynolds Wrap® Heavy Duty Foil is also available in a wide, 18-inch roll which is perfect for lining your pans for recipes like this chocolate bark. I can’t entertain without it this holiday season!

The topview of chocolate bark broken up on a pan lined with foil.

Variations

There are countless ways that you can add different elements to this chocolate bark to make it different and delicious every single time. That’s why this treat is perfect for any occasion!

  • Mix-ins and Toppings: Try switching up the flavors by using different nuts, seeds, or dried fruit. I also love adding spices like a little cayenne pepper to make it taste different. Or, you can make it festive for the season by adding some red and green sprinkles to the top!
  • Make it a Gift: Chocolate bark is a great gift idea for the holidays or any time of year! Break up the bark and then package it in a clear gift bag. Tie it off with a pretty bow, and it’s ready to deliver.
A closeup of dark chocolate bark.

Can I Make Chocolate Bark Ahead of Time?

Yes! This chocolate bark is a great treat to make ahead of time because you have to let it cool and set. Once you finish making it, you can place it in an airtight container and store it on your counter.

A plate of different kinds of chocolate bark with a hand grabbing a piece.
Print

Chocolate Bark

This delicious Chocolate Bark made with Reynolds Wrap® Heavy Duty Foil will be the tastiest and simpliest dessert you make all holiday season! It's quick and easy, and your entire family will go crazy over it! 
Course Dessert
Cuisine American
Keyword chocolate bark, dark chocolate bark, milk chocolate bark, white chocolate bark
Prep Time 10 minutes
1 hour
Total Time 1 hour 10 minutes
Servings 12
Calories 466kcal
Author Alyssa Rivers

Ingredients

Milk Chocolate

  • 10 ounces milk chocolate
  • peanut butter cups
  • peanuts
  • peanut butter, melted

White Chocolate

  • 10 ounces white chocolate
  • m&m's
  • pretzels (broken into pieces)

Dark Chocolate

  • 10 ounces dark chocolate
  • pistachios, chopped
  • freeze-dried strawberries
  • Optional: nuts, seeds, sea salt, dried fruit, etc.

Instructions

  • Line a 9×13 inch pan with Reynolds Wrap® Heavy Duty Foil and set aside.
  • Melt the chocolate using a double broiler or in the microwave. If using a double boiler, melt the semi-sweet chocolate over simmering water. If melting in the microwave, melt in a microwave-safe bowl stirring after every 30 seconds being careful not to let it burn and clump.
  • Spread the chocolate layer on the bottom of your lined 9×13-inch pan. Spread into about a 6×10 rectangle.
  • Immediately sprinkle the toppings on top of the melted chocolate.
  • Let the bark cool for about 1 hour at room temperature or until almost set. Break into pieces and enjoy!

Nutrition

Calories: 466kcal | Carbohydrates: 47g | Protein: 5g | Fat: 31g | Saturated Fat: 18g | Polyunsaturated Fat: 1g | Monounsaturated Fat: 9g | Trans Fat: 0.01g | Cholesterol: 7mg | Sodium: 36mg | Potassium: 366mg | Fiber: 5g | Sugar: 38g | Vitamin A: 20IU | Vitamin C: 0.1mg | Calcium: 84mg | Iron: 4mg


source https://therecipecritic.com/chocolate-bark/
Share:

Popular

Archive

Slider Tag

Facebook

Header Ads

Recent in Food

Blog Archive

Recent Posts

Unordered List

  • Lorem ipsum dolor sit amet, consectetuer adipiscing elit.
  • Aliquam tincidunt mauris eu risus.
  • Vestibulum auctor dapibus neque.

Pages

Theme Support

Need our help to upload or customize this blogger template? Contact me with details about the theme customization you need.