Grinch Cookies

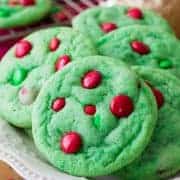
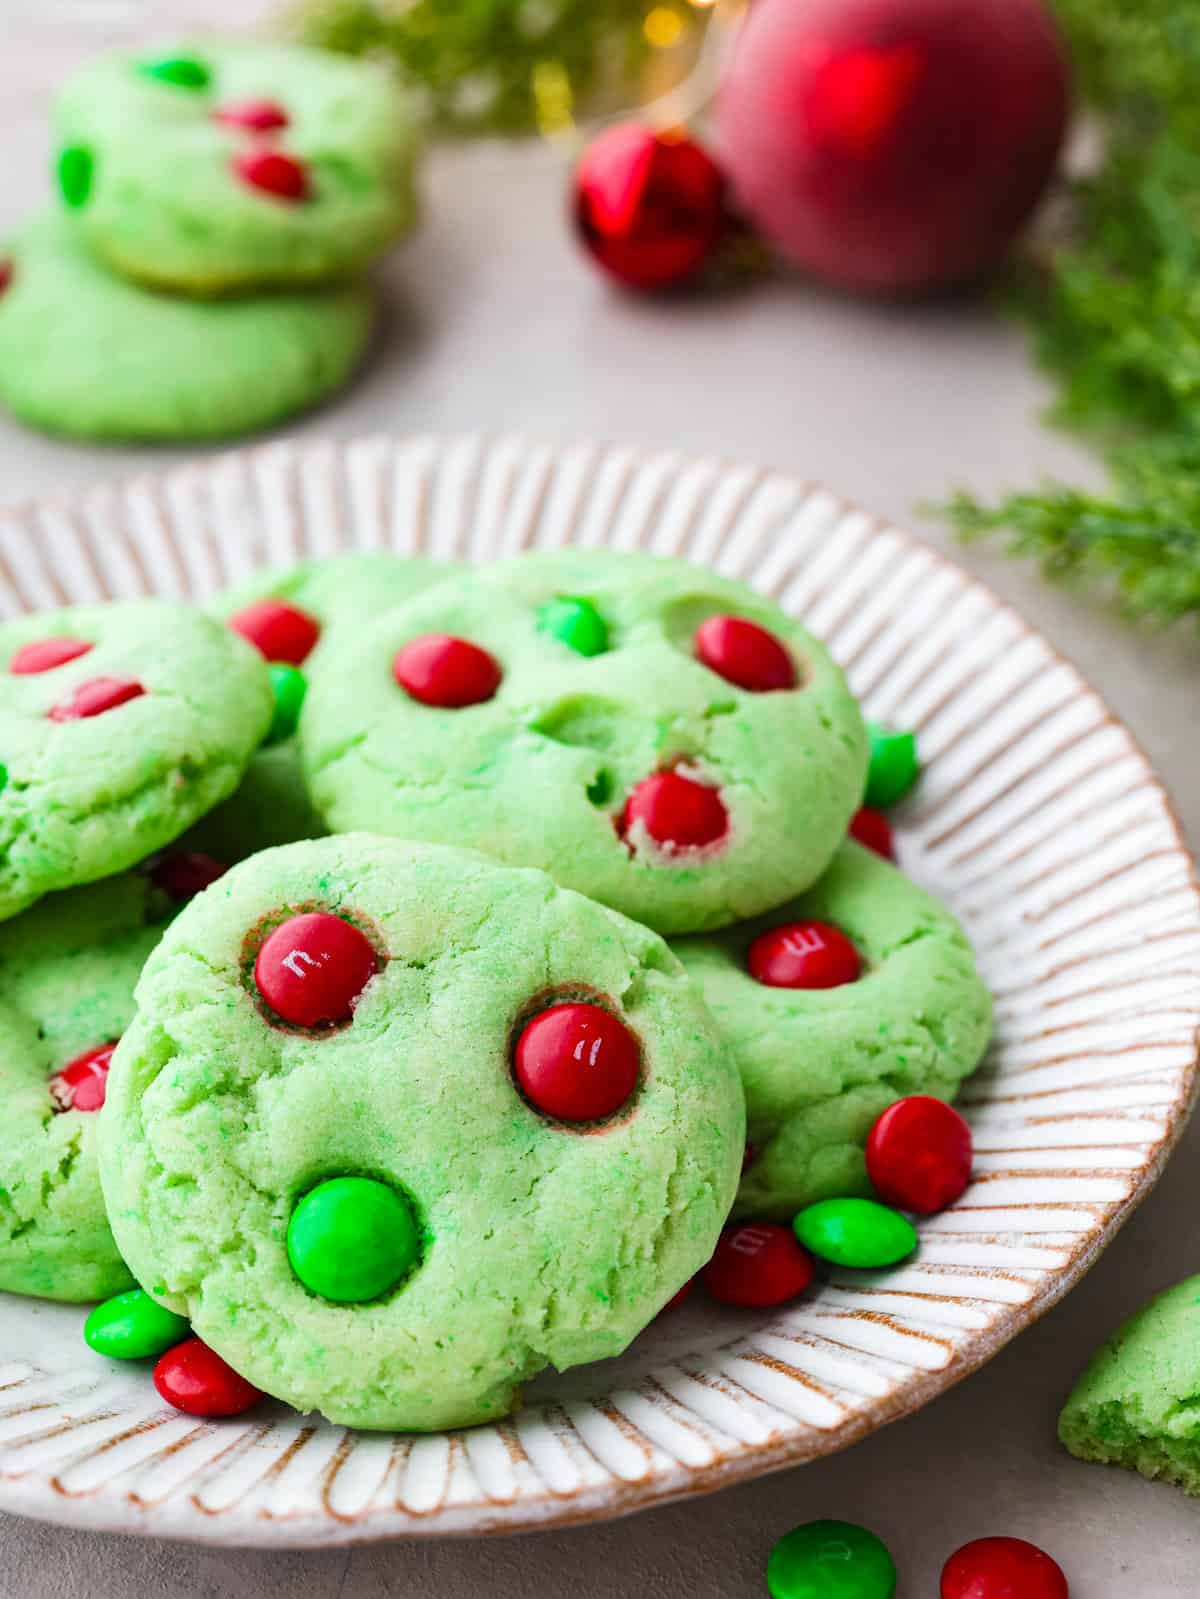
Grinch Cookies are a fun and festive twist on a classic chocolate chip cookie! Inspired by the popular Christmas movie, these soft and chewy cookies are colored Grinch-green and decorated with green and red M&Ms.

Christmas time is the best time for delicious holiday treats, and these Grinch cookies are always a hit! I love bringing these cookies to Christmas parties or to cookie exchanges.  Some of my other favorite cookies to bring to cookie exchanges are cream cheese snickerdoodles, Italian Christmas cookies, or these easy no-bake cookies.
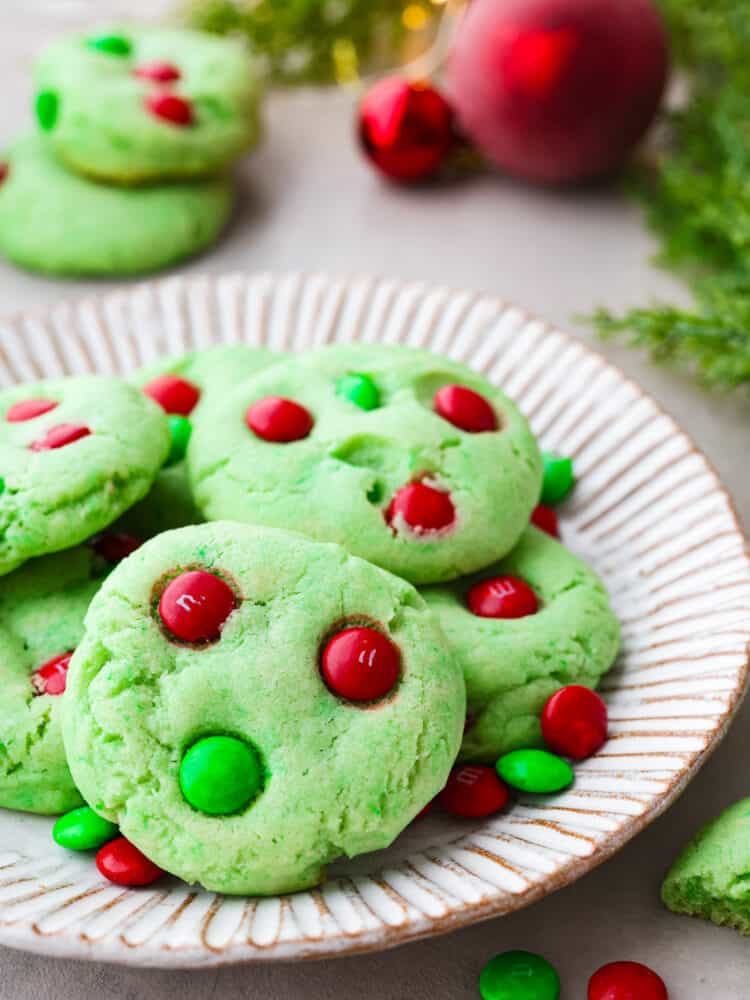
Close up view of Grinch cookies stacked on a cream colored plate. Christmas ornaments, greenery and extra cookies are styled next to the plate.

What Are Grinch Cookies?

These adorable cookies are inspired by the popular Dr. Suess book, “How the Grinch Stole Christmas.” Grinch cookies start with a classic chocolate chip cookie base that everyone will love. With the addition of green food coloring and festive green and red M&Ms, the cookie transforms into Whoville yumminess!

Kids and adults LOVE these cute and delicious cookies and it’s always the first cookie to be gone at the treat table. Everyone loves the bright colors and holiday vibe.  Try more of my cute festive desserts like my cornflake wreaths, Christmas star bread, or these peppermint lollipops.

These easy Grinch cookies start with a classic chocolate chip cookie recipe.  You will be very familiar with the ingredients and have most of them on hand.  All you need to make these Christmas cookies are red and green M&Ms and green food coloring. Then you’re all set to have some fun!

  • Unsalted Butter: Butter always makes the best cookies! It helps if the butter is slightly softened. 
  • Sugar: Just granulated sugar in this recipe.
  • Eggs: Room-temperature eggs are always best for baking.
  • Vanilla Extract: Yes, one full tablespoon. Trust me, it adds sweetness and flavor.
  • Green Food Coloring: Green liquid food coloring or green gel food coloring works in these cookies. You decide how green you want them!
  • All-Purpose Flour: Flour helps keep 
  • Cornstarch: Cornstarch is the secret to soft cookies. it acts as a preservative to preserve softness.
  • Baking Powder: This helps give your cookies a little lift.
  • Baking Soda: Helps with leavening.
  • Salt: Salt enhances sweet flavors.
  • Red and Green M&Ms: The best part of this cookie! You can easily find these at grocery stores during the Christmas season.

Grab your kiddos and make this fun Grinch cookie recipe for the holidays. They are so fun to make, but even more fun to eat! It’s a fun Christmas tradition at my house, and my kids look forward to it every year.  Follow my easy instructions below for how to make Grinch cookies.

  1. Preheat Oven and Prepare Cookie Sheet: Preheat oven to 350 degrees Fahrenheit and line a cookie sheet with parchment paper.
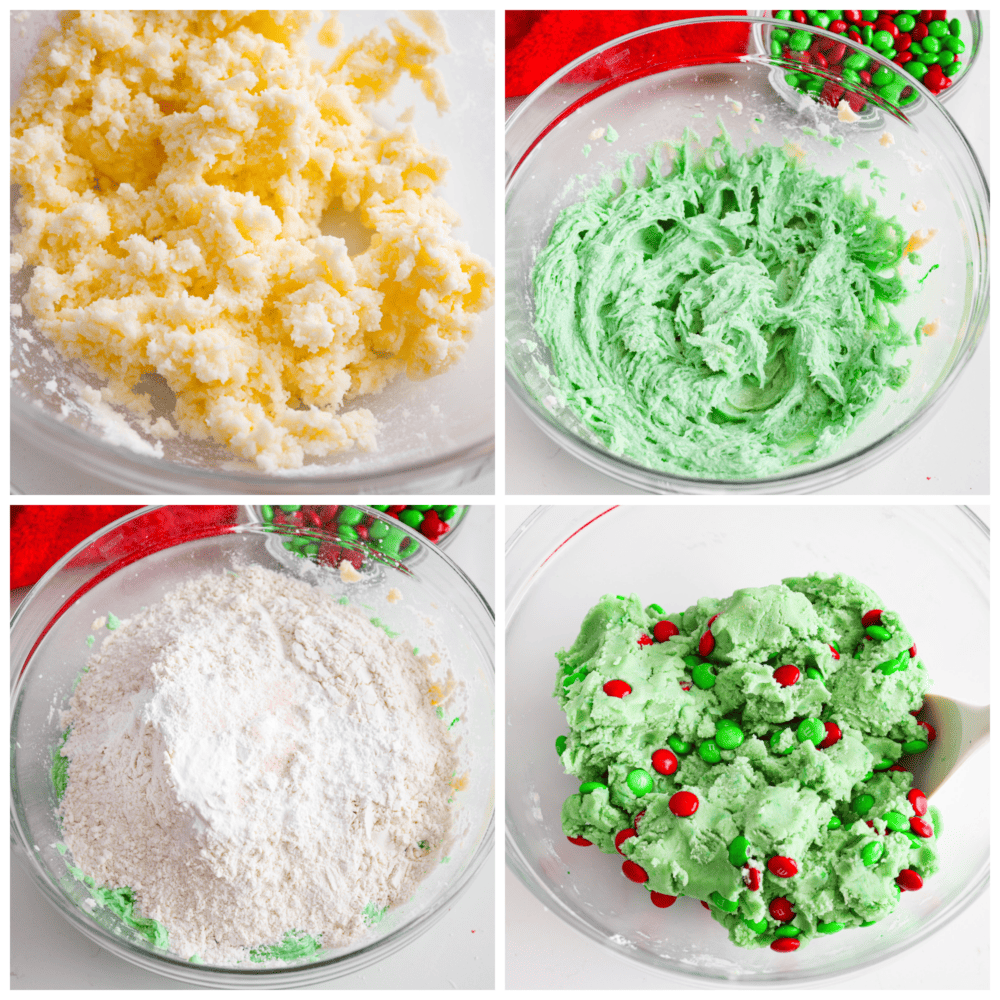
  2. Cream Butter and Sugar: Combine butter and sugar in a large bowl and use an electric mixer to beat until well-combined and light and fluffy (about 1 minute).
  3. Add Eggs: Add eggs, one at a time, beating well after each addition.
  4. Add Vanilla and Food Coloring: Stir in vanilla extract and food coloring, until well combined.
  5. Combine Dry Ingredients: In a separate bowl, whisk together flour, cornstarch, baking powder, baking soda, and salt.
  6. Mix Dry Ingredients Into Butter Mixture: Set mixer to low speed and gradually stir dry ingredients into butter mixture. Add ingredients and stir until well incorporated.
  7. Fold in M&Ms: Fold in M&M candies keeping a few out to press on top of the cookies before baking.
  8. Form Balls: Drop cookie dough by heaping 1 ½ Tbsp-sized scoops onto prepared cookie sheets, for perfectly round cookies roll dough in your hands into a smooth ball.
  9. Bake: Bake for 11-13 minutes. If desired, gently press additional M&Ms into the tops of each cookie for decoration while they are still warm.
  10. Cool and Enjoy: Allow cookies to cool completely on the cookie sheet before removing them.
Tips for Making Homemade Cookies

Here are a few simple ways to ensure your Grinch cookies turn out soft, chewy, and delicious every time! You will love making these with your kids and making this a tradition. They will also love eating them because they are SO GOOD!

  • Underbake: I always take my cookies out of the oven when the centers are still slightly soft. They’ll cook for a few more minutes on the cooling hot cookie sheet. This trick helps prevent your cookies from getting overcooked.
  • Keep the Oven Closed: I know it may be tempting to open the oven door and check on your cookies, but you let out all the hot air needed to cook them thoroughly. Use the oven light to check on them instead!
  • Don’t Over Mix the Dry Ingredients: Avoid mixing your dough on a high speed. Too much beating can cause too much air in the dough. This results in the dough rising and then falling as it bakes. You should beat long enough so that the ingredients are blended until you no longer see white from the flour.
  • Fold in Your M&M’s: Avoid mixing the M&Ms with an electric mixer to prevent the pieces from breaking apart.
  • Chill the Dough: Most cookie recipes don’t require you to chill the dough, but if you have the time, chilling can help elevate your cookies. If your butter was too soft or melted when you made the dough, chilling is necessary. Chill for half an hour before forming, and baking. This allows the flavors to meld together and give the dough a bit of structure. If it’s hardened too much let it sit at room temp for 10 minutes before baking.
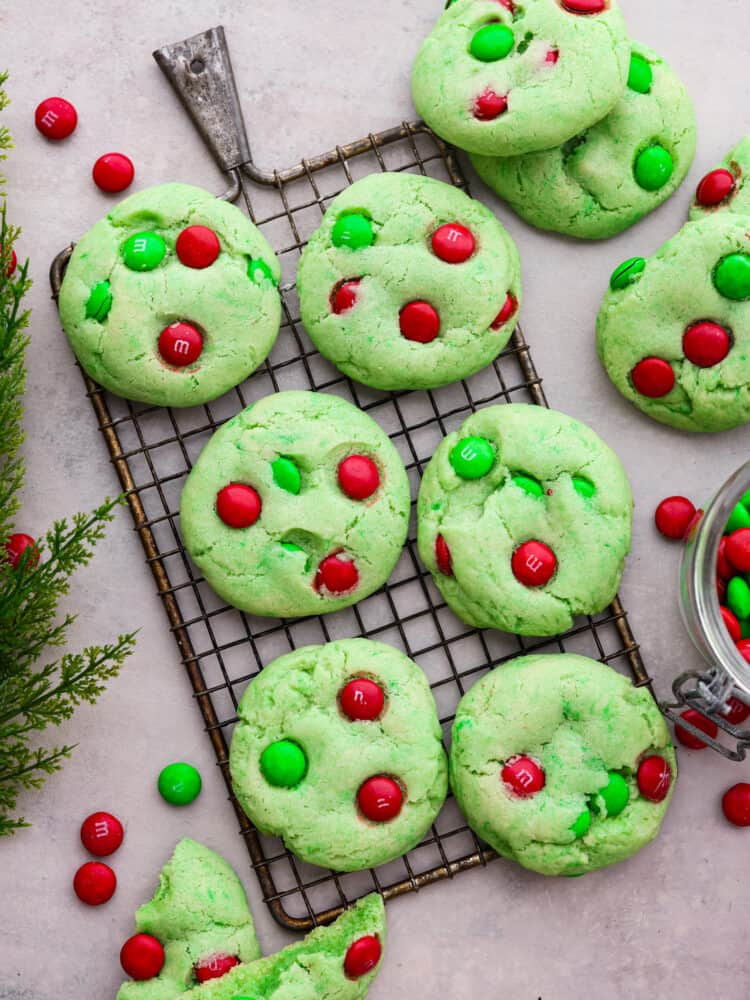
Top view of Grinch cookies on a cooling rack. Extra cookies and M&Ms are scattered around the cookies on a gray counter top.

Storing Leftover Grinch Cookies

These Grinch cookies are so fun and delicious that you’ll want to enjoy them all through the holiday season! If you have some leftovers, here’s how to keep them tasting fresh and tasty for the rest of the week! You’re going to love having them around to take to parties.

  • At Room Temperature: Place cooled cookies in an airtight container then store them at room temperature for up to 1 week. 
  • In the Freezer: Shape the cookie dough into balls as you would when preparing to bake them. Place them on a parchment-lined baking sheet and freeze for a few hours. Once frozen, place the dough balls into an airtight container and freeze for up to 3 months. Thaw dough balls until pliable and bake as directed on the recipe card.
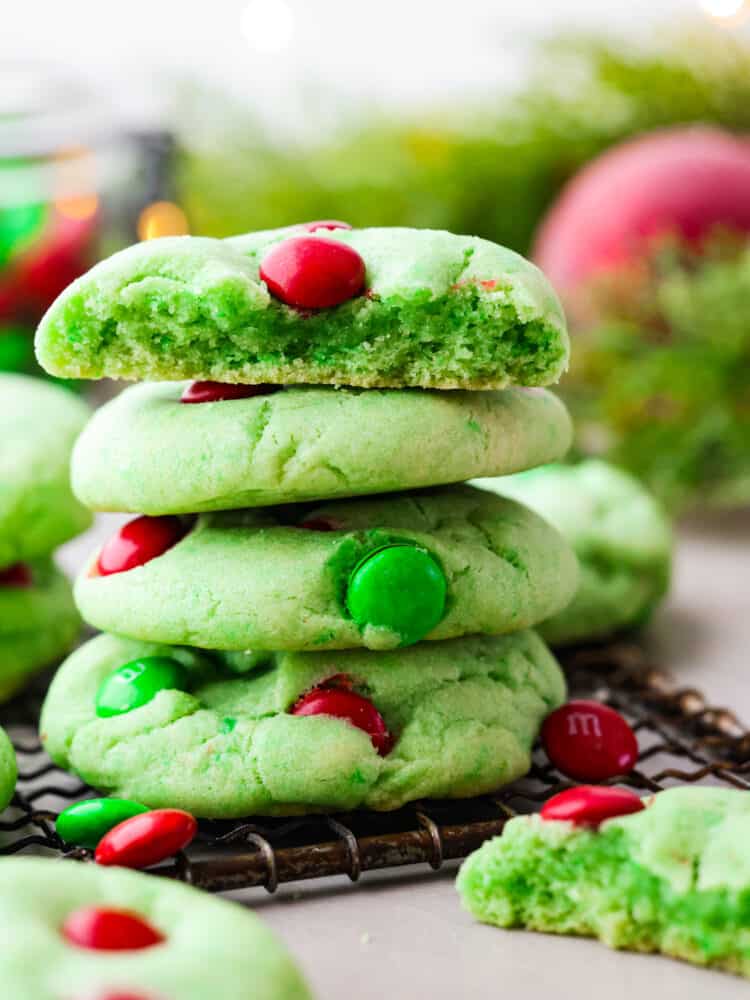
Close up side view of stacked cookies on a cooling rack. A broken cookie and Christmas ornaments are styled next to the stack of Grinch cookies.
Print

Grinch Cookies

Grinch Cookies are a fun and festive twist on a classic chocolate chip cookie! Inspired by the popular Christmas movie, these soft and chewy cookies are colored Grinch-green and decorated with green and red M&Ms.
Course Dessert
Cuisine American
Keyword Grinch cookies, holidays, Kid-friendly
Prep Time 25 minutes
Cook Time 11 minutes
Total Time 36 minutes
Servings 36 cookies
Calories 167kcal
Author Alyssa Rivers

Ingredients

  • 1 cup unsalted butter softened
  • 1 2/3 cup sugar
  • 2 large eggs
  • 1 tablespoon vanilla extract
  • 6 drops bright green food coloring, more if you want it greener
  • 3 cups all-purpose flour
  • 1 teaspoon corn starch
  • 1 teaspoon baking powder
  • 1 teaspoon baking soda
  • 1 teaspoon salt
  • 1 1/2 cup red and green M&Ms plus additional ½ cup for topping cookies, if desired

Instructions

  • Preheat oven to 350° Fahrenheit and line a cookie sheet with parchment paper.
  • Combine butter and sugar in a large bowl and use an electric mixer to beat until well-combined and light and fluffy (about 1 minute).
  • Add eggs, one at a time, beating well after each addition.
  • Stir in vanilla extract and food coloring, until well-combined.
  • In a separate bowl, whisk together flour, cornstarch, baking powder, baking soda, and salt.
  • Set mixer to low speed and gradually stir dry ingredients into butter mixture. Add ingredients and stir until well-incorporated.
  • Fold in M&M candies keeping a few out to press on top of the cookies before baking.
  • Drop cookie dough by heaping 1 ½ Tbsp-sized scoops onto prepared cookie sheets, for perfectly round cookies roll dough in your hands into a smooth ball.
  • Bake for 11-13 minutes. If desired, gently press additional M&Ms into the tops of each cookie for decoration while they are still warm.
  • Allow cookies to cool completely on cookie sheet before removing.

Video

Notes

Originally posted on December 02, 2017
Updated December 5, 2022

Nutrition

Calories: 167kcal | Carbohydrates: 23g | Protein: 2g | Fat: 8g | Saturated Fat: 5g | Polyunsaturated Fat: 0.3g | Monounsaturated Fat: 1g | Trans Fat: 0.2g | Cholesterol: 24mg | Sodium: 105mg | Potassium: 28mg | Fiber: 1g | Sugar: 15g | Vitamin A: 190IU | Vitamin C: 0.1mg | Calcium: 19mg | Iron: 1mg


source https://therecipecritic.com/grinch-cookies/
Share:

Peppermint Meringue Kisses

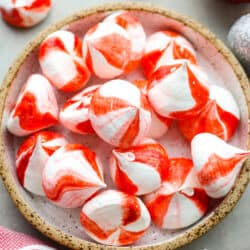
Peppermint Meringue Kisses are crunchy on the outside with a soft and chewy middle, and a peppermint flavor that is sweet and refreshing. They are the cutest little candies and are perfect for gifting this holiday season!

Every once in a while, it is really fun to make a unique candy that isn’t super chocolatey. Every Christmas I make the effort to get my kids in the kitchen and make a Christmas candy. Usually we end up making toffee because it’s easy and everyone loves it. My favorites are this tasty graham cracker toffee (with just 5 ingredients!) and this Christmas crack toffee recipe!

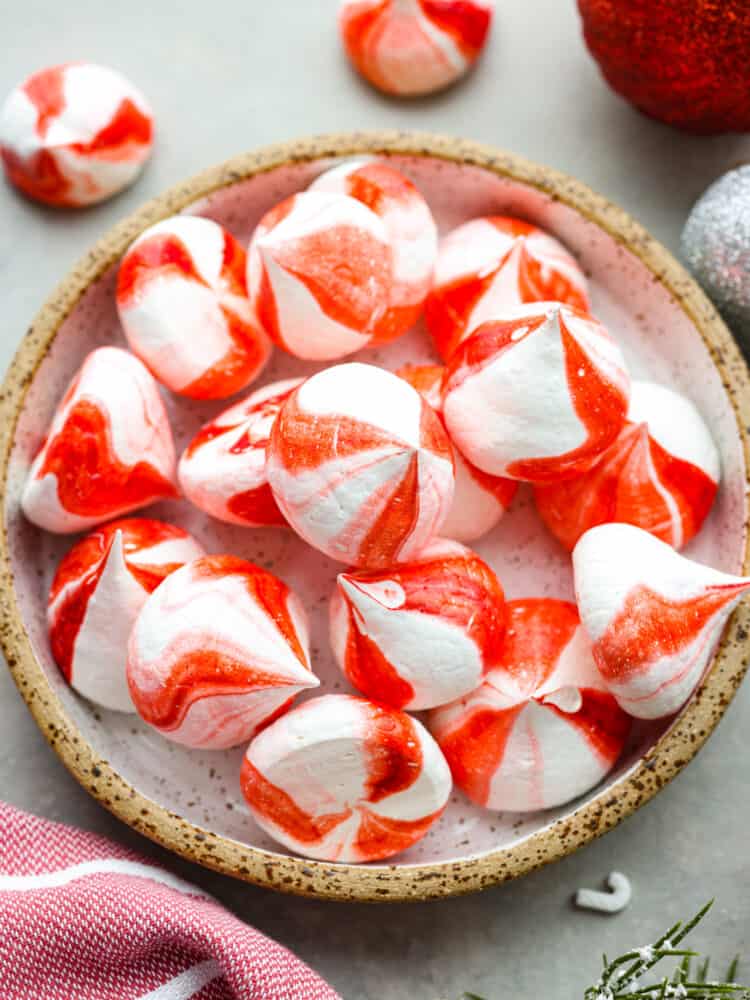
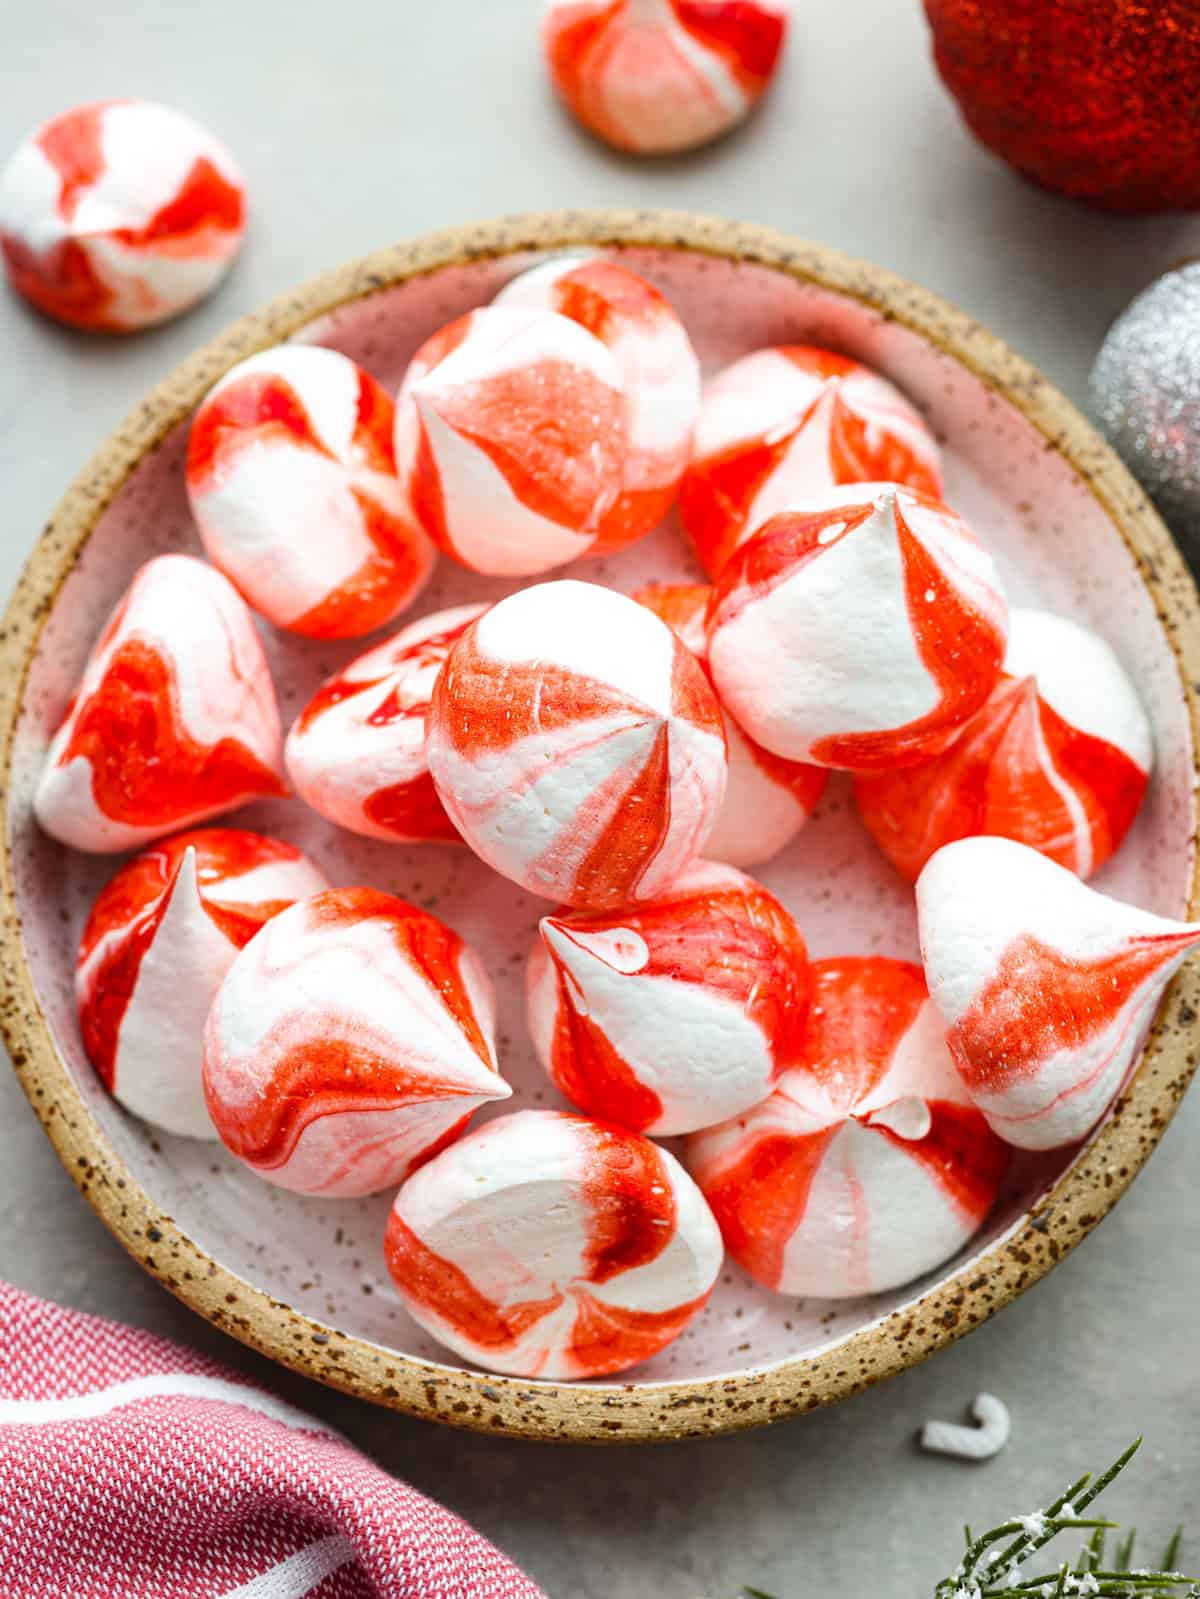
Peppermint meringue kisses in a candy dish on a table with ornaments next to it.

Peppermint Meringue Kisses Recipe

Meringue is mostly egg whites that are whipped until they get nice and fluffy. You put it in a piping bag and pipe them into cute kiss-shaped dollops, and bake them in the oven. When you bite into the peppermint meringue kiss, a nice peppermint flavor fills your mouth! The meringue is crunchy on the outside and then melts into a soft and chewy dessert. It’s so fun to eat!

You can pipe meringue in all kinds of different shapes! While you are making these kisses, you could also try to make these peppermint meringue lollipops. You could shape them in a beautiful spiral like these meringue cookies. Meringue goes great with a cup of hot chocolate! It also looks beautiful on your Christmas dessert charcuterie board. There are so many fun ways to make meringue, it doesn’t just belong on top of a lemon meringue pie (but it is super yummy on the pie too!).

Ingredients

You will need a few simple ingredients to make these peppermint meringue lollipops. They are mostly egg whites, so get ready to use lots of eggs! Maybe you could make some creme brulee to use up all of those egg yolks! You can find the exact measurements below in the recipe card.

  • Granulated Sugar: Your regular sugar pantry will work great!
  • Egg Whites: You will want to separate your egg yolks from whites. You can’t let any part of an egg yolk into your mixture or your meringue won’t turn out!
  • Lemon Juice: Fresh lemon juice is always best, but bottled will work.
  • Salt: A little salt will bring out all of the sweet flavors in this dessert.
  • Vanilla Extract: Vanilla extract adds a little flavor and also helps to bring out the sweet flavors in the meringue.
  • Peppermint Extract: This is where the peppermint flavor will come from!
  • Red Gel Food Coloring: A little red food coloring is how you will get the stripes of red to make the candy cane design.
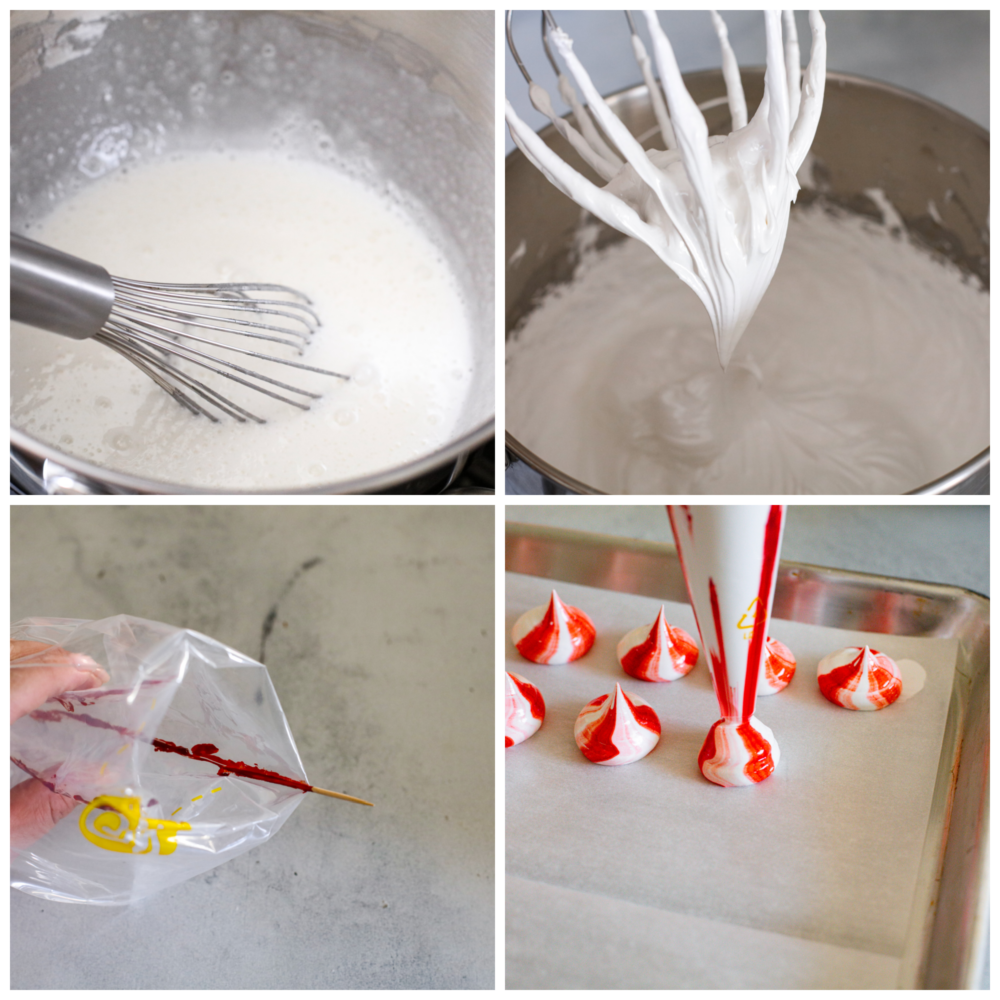
Process pictures showing the egg whites being whipped to stiff peaks, and then piped into a kiss shape.

How to Make Peppermint Meringue Kisses

You are going to love the fun texture and delicious peppermint flavor when you bite into these lovely peppermint meringue kisses. It is so fun to pipe them and watch the meringue come out a red and white mix. You don’t have to be good at piping to make cute little bites that everyone will love. Don’t be intimidated by meringue, you can totally make this!

Make Meringue

  • Prep: Preheat the oven to 200℉ and line two baking sheets with parchment paper.
  • Simmer Water: Add 1 inch of water to a medium saucepan and bring to a slight simmer.
  • Whisk: In a heatproof bowl of a stand mixer, add the egg whites and sugar. Whisk together until combined and place over the simmering water, ensuring the bowl does not touch the water.
  • Whip: Whisk the egg whites and sugar constantly until the mixture reaches 140℉. Remove from the heat and fit on the stand mixer with the whisk attachment. Whip until soft peaks form.
  • Finish Meringue: Add the lemon juice, salt, vanilla extract and peppermint extract. Whip until stiff peaks form. The meringue will begin to pull away from the sides of the bowl and when the whisk is removed, the peak will stand straight up. This can take a good 10-15 minutes of whipping at high speed. Once the meringue is ready, we will get to making the peppermint meringue kisses!

Pipe Meringue Kisses

  • Prep Bags: Prep your piping bags by either snipping the end for round piping or fitting with a large star tip. Use a toothpick to make 3 lines of red food gel coloring going up the inside of the piping bag, this will give the meringue the distinct red stripes of peppermint candies as you pipe it out.
  • Fill Bag: Carefully spoon meringue into the piping bag and twist closed at the top, being careful to not overfill the bag (fill ½-⅔ of the way full)
  • Prep Parchment: Pipe 4 small dots of meringue under the four corners of the parchment paper and press down. This will prevent the parchment from blowing up and sticking to your meringue pops as they bake.
  • Pipe Kisses: Pipe quarter sized dots of meringue, slowing the piping as you lift the bag up, giving the kisses the distinct kiss shape. Leave ½ inch or so between kisses, but fill the baking sheet generously.
  • Bake: Bake for 1-½ to 2 hours, until the outsides of the kisses are crisp to the touch.. Turn off the oven and let the pan cool in the oven as it cools. Once the pan is completely cooled to the touch, remove from the oven.
  • Store: Gently remove the peppermint meringue kisses from the parchment. Store in an airtight container or serve immediately. Do not refrigerate or leave uncovered otherwise you risk the meringue becoming tacky and weepy.

Tips for Making Meringue

Meringue is such a fun thing to know how to make. It isn’t hard, but there are a few things that you have to know how to do. Here are my tips that will make your peppermint meringue kisses a success every time!

  • Don’t Boil Water: Keep the water in the pan at just below simmering. If you let the water boil, you risk cooking the egg whites and ending up with scrambled eggs instead of the beginnings of meringue.
  • Use A Thermometer: When cooking the sugar and egg whites, use a thermometer to make sure the mixture reaches 140℉. The sugar will be completely dissolved at that point and the meringue will be very stable for piping and baking.
  • Take It Easy On The Peppermint: Peppermint is a very strong flavoring, so it’s easy to add too much and the flavor becomes too much and can taste like toothpaste. If you like it a little less intense in peppermint flavor, start by adding ½ teaspoon instead of the full 1 teaspoon. Taste the meringue and then add a little more as needed. Having the marshmallow flavor of the meringue come through is a nice balance to the strong mint flavor.
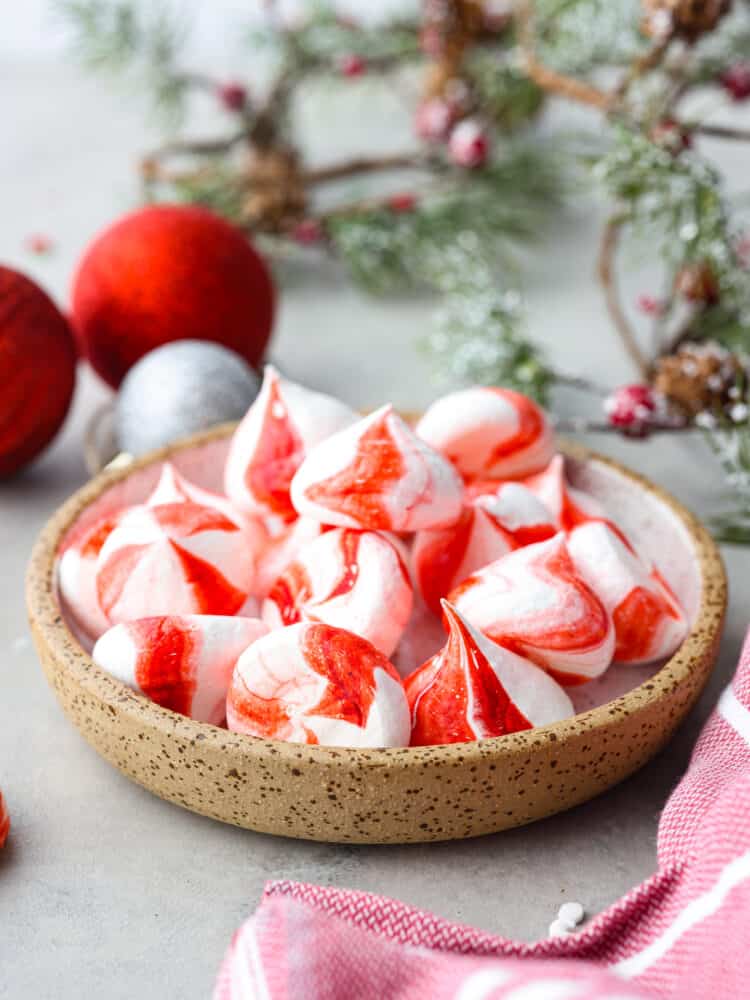
Peppermint meringue kisses in a candy dish with greenery and christmas ornaments in the background.

Storing Leftover Meringue Kisses

Make sure to follow my tips for storing your peppermint meringue kisses to get the most out of this treat!

  • On the Counter: Store your peppermint meringue lollipops in an airtight container for up to 2 weeks. Do not leave uncovered or refrigerate as the meringue will begin to weep and become very sticky and possibly melt.
Print

Peppermint Meringue Kisses

Peppermint Meringue Kisses are crunchy on the outside with a soft and chewy middle, and a peppermint flavor that is sweet and refreshing. They are the cutest little candies and are perfect for gifting this holiday season!
Course Dessert
Cuisine American
Keyword candy, meringue, peppermint meringue kisses
Prep Time 45 minutes
Cook Time 2 hours
Total Time 2 hours 45 minutes
Servings 80 Kisses
Calories 16kcal
Author Alyssa Rivers

Ingredients

  • 1 ½ cups granulated sugar
  • 6 large egg whites room temperature
  • ¼ teaspoon lemon juice
  • 1 pinch salt
  • ½ teaspoon vanilla extract
  • 1 teaspoon peppermint extract
  • Red gel food coloring

Instructions

  • Preheat the oven to 200℉ and line two baking sheets with parchment paper.
  • Add 1 inch of water to a medium saucepan and bring to a slight simmer.
  • In a heatproof bowl of a stand mixer, add the egg whites and sugar. Whisk together until combined and place over the simmering water, ensuring the bowl does not touch the water.
  • Whisk the egg whites and sugar constantly until the mixture reaches 140℉. Remove from the heat and fit on the stand mixer with the whisk attachment. Whip until soft peaks form.
  • Add the lemon juice, salt, vanilla extract and peppermint extract. Whip until stiff peaks form. The meringue will begin to pull away from the sides of the bowl and when the whisk is removed, the peak will stand straight up. This can take a good 10-15 minutes of whipping at high speed.
  • Prep your piping bags by either snipping the end for round piping or fitting with a large star tip. Use a toothpick to make 3 lines of red food gel coloring going up the inside of the piping bag, this will give the meringue the distinct red stripes of peppermint candies as you pipe it out.
  • Carefully spoon meringue into the piping bag and twist closed at the top, being careful to not overfill the bag (fill ½-⅔ of the way full)
  • Pipe 4 small dots of meringue under the four corners of the parchment paper and press down. This will prevent the parchment from blowing up and sticking to your meringue pops as they bake.
  • Pipe quarter sized dots of meringue, slowing the piping as you lift the bag up, giving the kisses the distinct kiss shape. Leave ½ inch or so between kisses, but fill the baking sheet generously.
  • Bake for 1-½ to 2 hours, until the outsides of the kisses are crisp to the touch.. Turn off the oven and let the pan cool in the oven as it cools. Once the pan is completely cooled to the touch, remove from the oven.
  • Gently remove the kisses from the parchment, Store in an airtight container or serve immediately. Do not refrigerate or leave uncovered otherwise you risk the meringue becoming tacky and weepy.

Nutrition

Calories: 16kcal | Carbohydrates: 4g | Protein: 0.2g | Fat: 0.02g | Sodium: 4mg | Potassium: 4mg | Sugar: 4g | Vitamin A: 0.001IU | Vitamin C: 0.01mg | Calcium: 0.2mg | Iron: 0.004mg


source https://therecipecritic.com/peppermint-meringue-kisses/
Share:

Illyanna Maisonet Is Always Pissed Off

Growing up in Sacramento, Illyanna Maisonet felt distant from her Puerto Rican roots. Eventually, through food, she found her connection to the Puerto Rican diaspora, and to the island’s rich culinary history and diversity, which she says are often overlooked by Puerto Ricans themselves. Illyanna talks with Dan about trying to coax recipes out of her grandmother, how her new cookbook Diasporican became a family affair, and being labeled “difficult to work with” by some in food media.

The Sporkful production team includes Dan Pashman, Emma Morgenstern, Andres O'Hara, Tracey Samuelson, and Jared O'Connell, with editing help by Devon DiComo.

Transcript available at www.sporkful.com.


Share:

Soft Boiled Eggs

Why do you need a recipe for boiled eggs? Soft Boiled Eggs are cooked for a specific amount of time to keep them soft and we’ve perfected the recipe for you! You will have a delicious and soft, gooey, flavorful yolk every time!

I really love eggs. They taste great in so many different things! Whenever I need to use up some eggs, egg salad is always my go-to recipe. I also can’t resist a deviled egg, and of course scrambled eggs for breakfast!

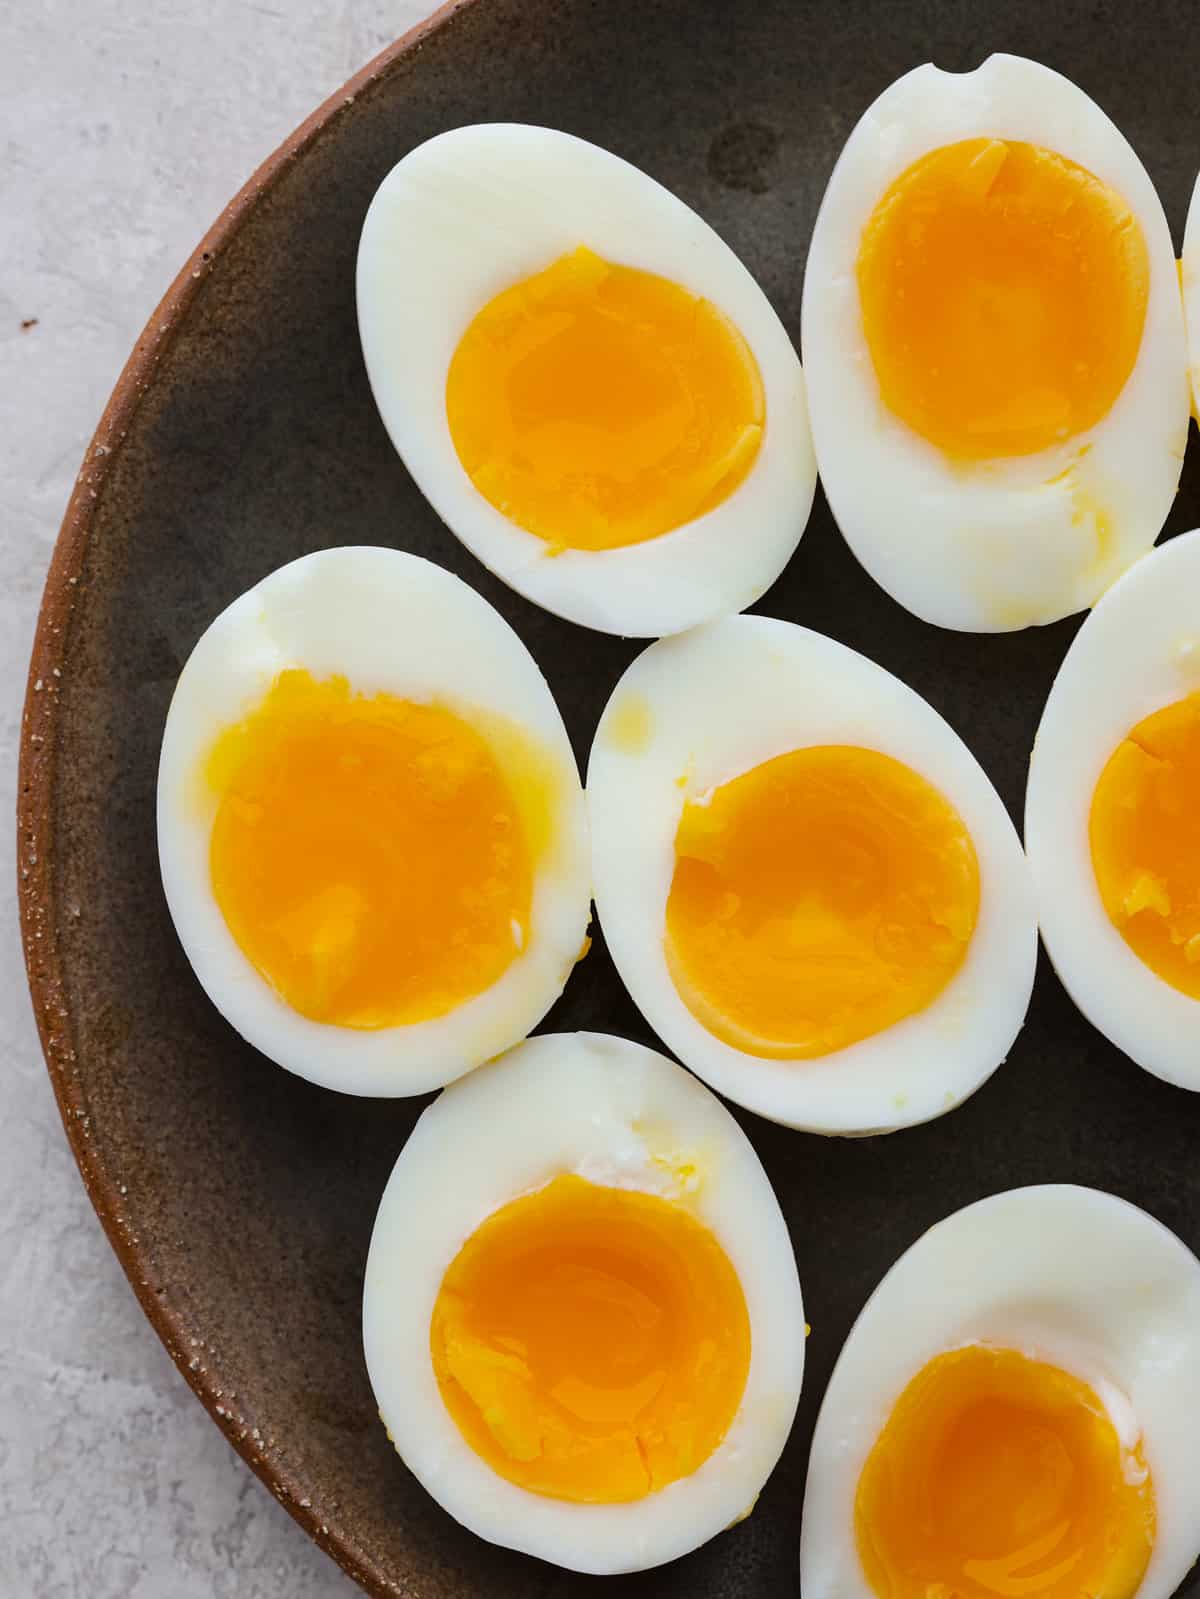
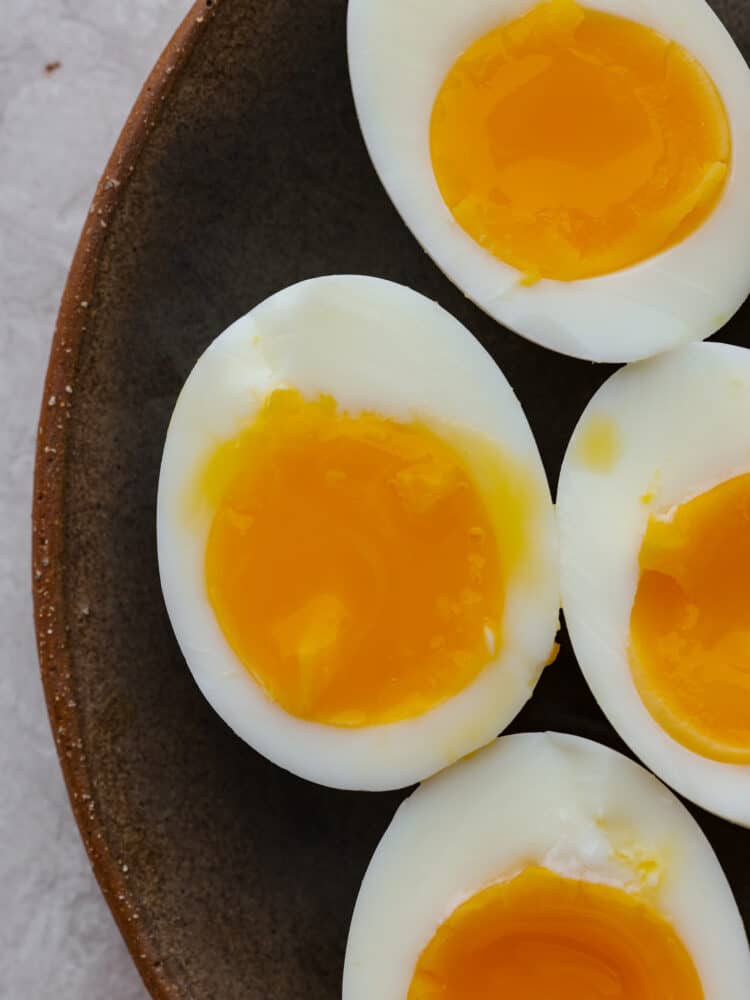
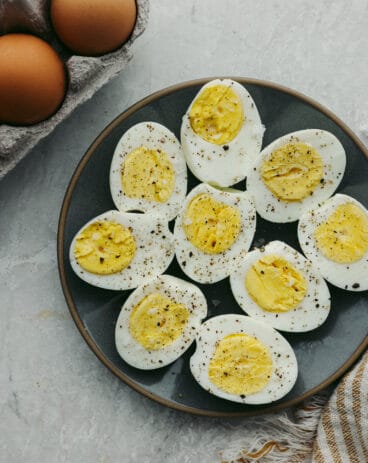
Soft boiled eggs on a dark plate cut in half so you can see the yolks.

Soft Boiled Egg

Soft boiled eggs are the coolest thing since sliced bread! Well, maybe not, but they are super delicious and in my opinion, not made enough! It isn’t any harder to make than a hard boiled egg and the only difference is you don’t boil them as long. They have a soft runny yolk that is so flavorful, and not dry at all. The egg white is far from rubbery, it’s soft and almost melts in your mouth.

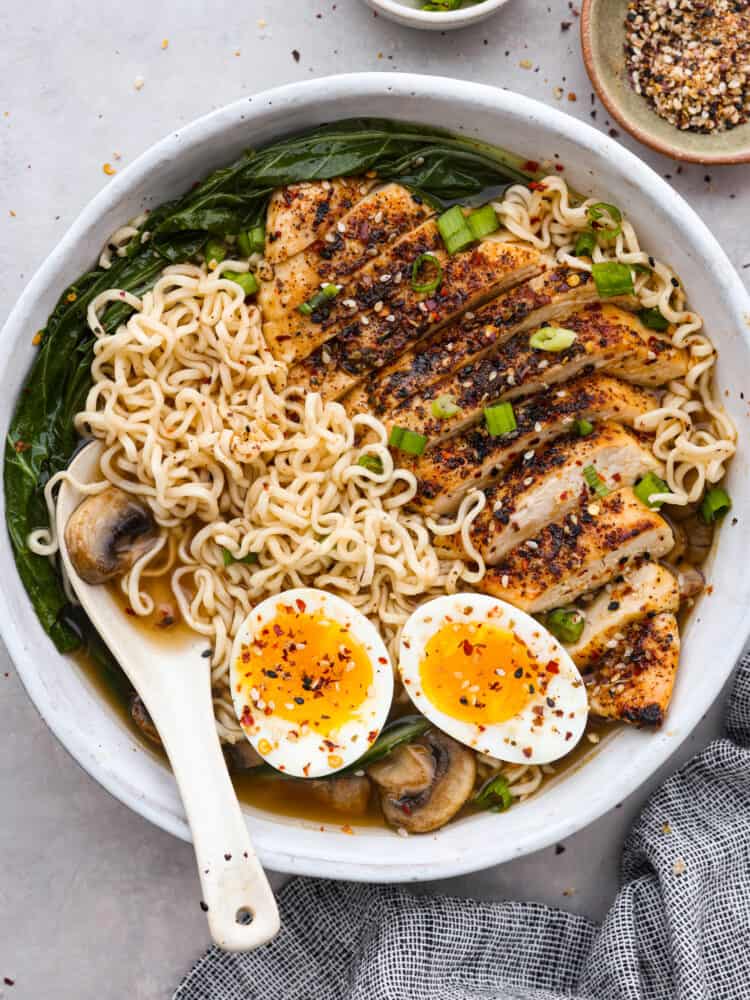
If you are wondering what to eat a soft boiled egg with, don’t overthink it! What do you enjoy eggs with now? It is great with a vegetable stir fry, or paired with some roasted potatoes. A soft boiled egg is most commonly served in ramen, so you have to make these soft boiled eggs in this super easy homemade ramen recipe!

Ingredients

Alright, you really just need water and eggs. You can make as many eggs as you want, but you don’t want to crowd the pot because the water temperature will drop too much and your eggs will not cook the way you want them to. You can add salt or vinegar to the water if you want. Some people feel that adding salt or vinegar to the water keeps the eggs from cracking.

  • 4-6 Large Eggs: I always use large grade A eggs in my recipes. I like to let my eggs sit out for about an hour before boiling them to get them to room temperature. If they are too cold when you drop them in boiling water, they might crack.
  • Water for Boiling: Water from your tap will work great, and you can add vinegar or salt if you want. You want to fill the pot so that there is one inch of water covering the eggs.
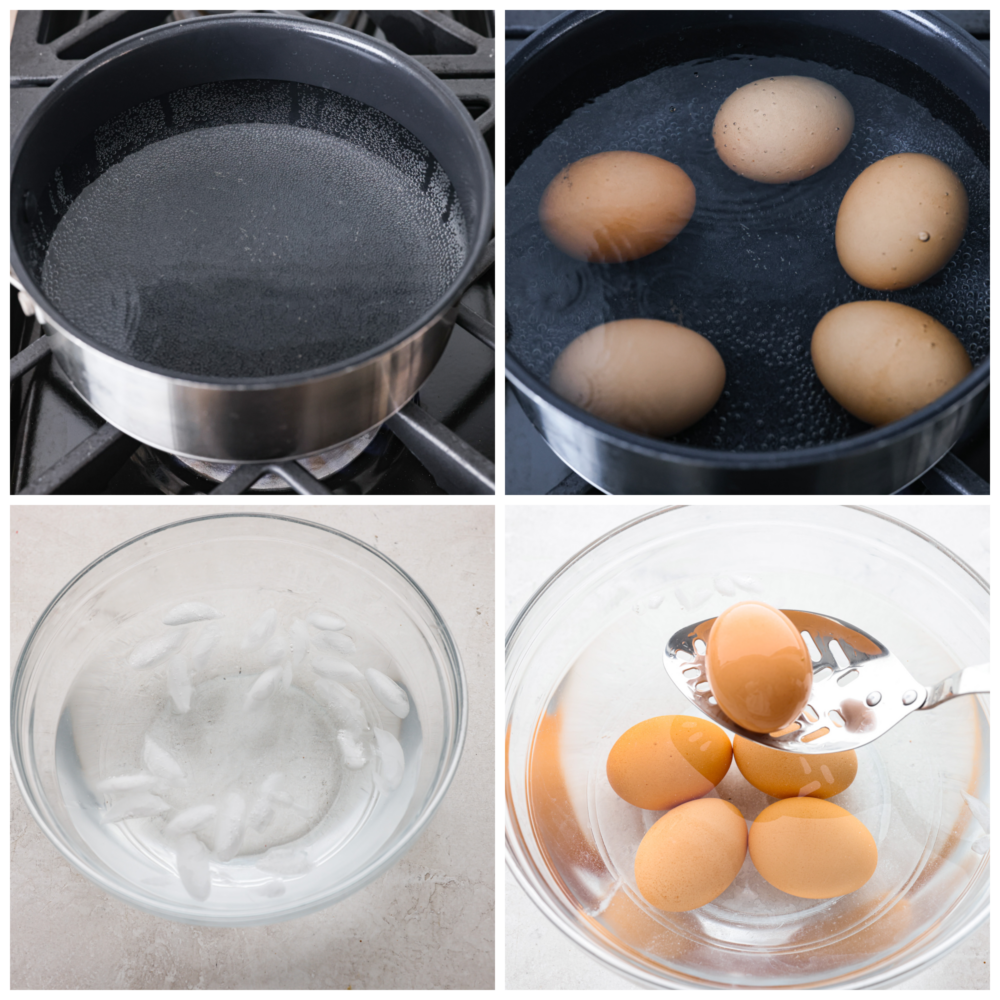
Process photos showing water in a pot, then eggs added to the water, a bowl full of ice water, and the eggs added to the ice water.

How to Make Soft Boiled Eggs

Perfect soft boiled eggs are just as easy as hard boiled! Make sure you have a slotted spoon handy to lower the eggs. You don’t want to drop them in the pot because they might crack when they hit the bottom. You will also want to have a bowl of ice water handy to cool the eggs off quickly so they don’t keep cooking once you take them out of the water.

  1. Boil Water: In a large saucepan of water bring to a boil over medium high heat.
  2. Add Eggs: Once the water is boiling use a slotted spoon to gently lower the eggs. This will help to prevent them from cracking.
  3. Cook: Boil the eggs for 7 minutes. Transfer the eggs to a bowl of ice and cold water. Let the eggs chill in the water until they are no longer hot.
  4. Peel: Crack the eggs all over and start peeling from the wider end which will contain the air pockets.
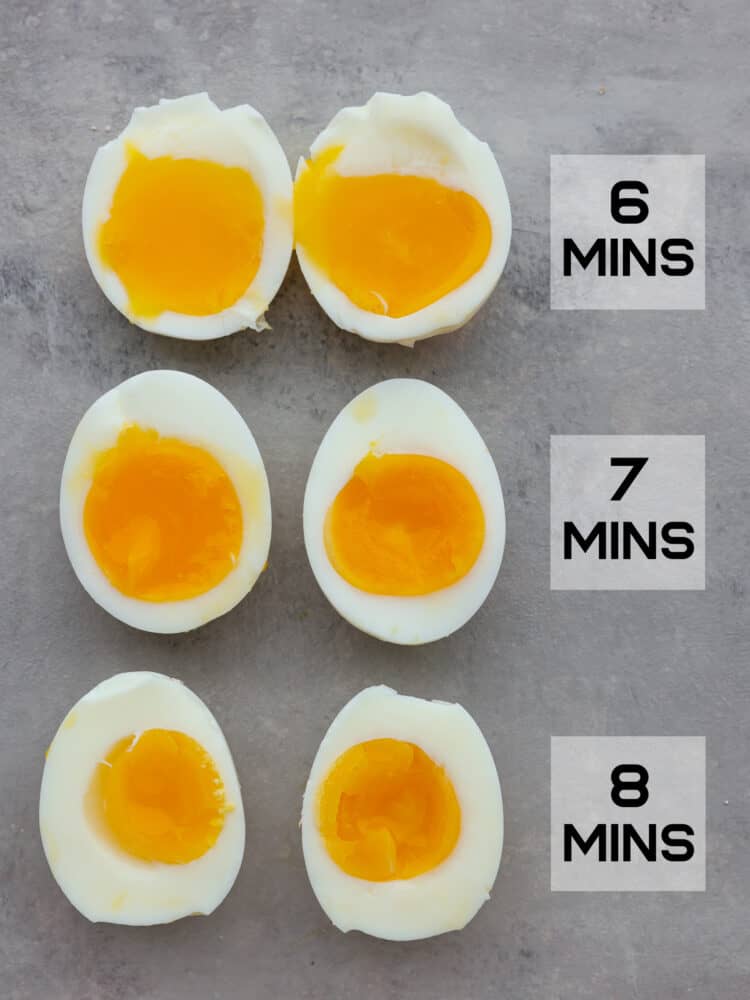
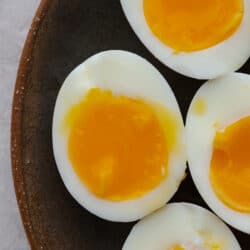
A photo showing the different yolks of different cook times at 6 minutes, 7 minutes, and 8 minutes.

How Long to Soft Boil an Egg

A hard boiled egg is usually cooked for 10-12 minutes, which makes the inside of the yolk very firm and dry. Here is what happens when you cook an egg for different amounts of time. Each of these are considered a soft boiled egg, and they will be slightly different based on the cook time.

  • 6 Minutes: If you like your eggs over easy, that is what these centers are like. They ooze out when you cut into them, and the egg white is nice and soft. This is great for ramen!
  • 7 Minutes: This is just a little more firm, and the egg white has a little more stiffness. It is really yummy on a salad or with roasted asparagus!
  • 8 Minutes: Now you are getting to the edge of a hard boiled egg. If you cook it for a few more minutes, the yolk would be firm. So this is as long as you would want to cook a soft boiled egg.
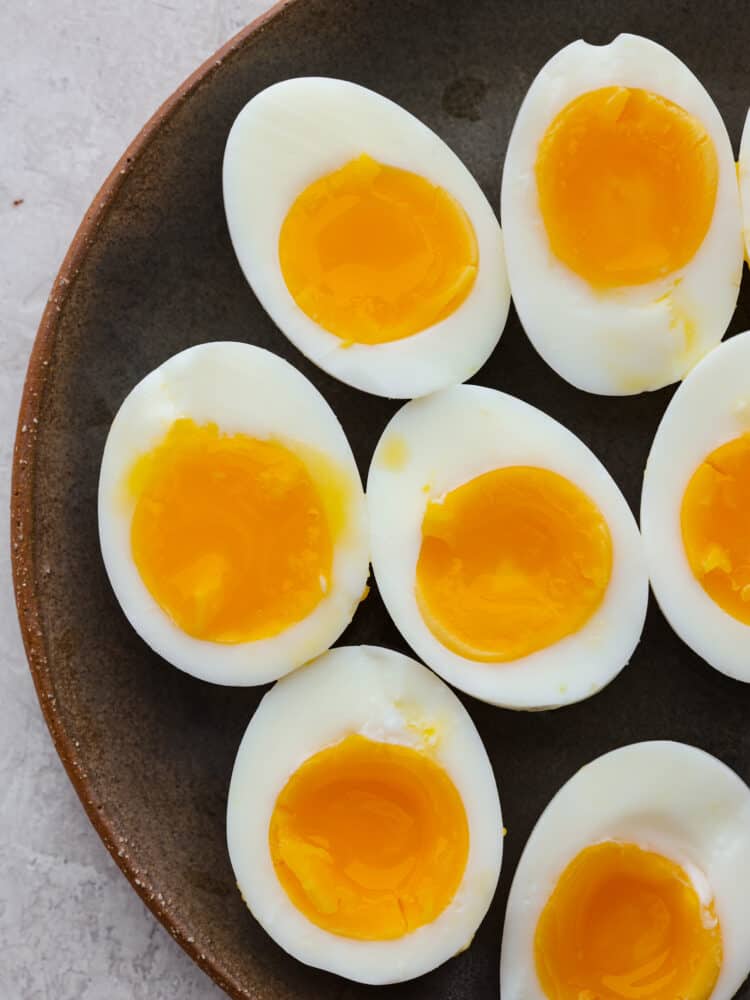
A close up of soft boiled eggs cut open to see the yolks.

Storing Leftovers

You can save a soft boiled egg in the fridge for a few days. They do taste really yummy as leftovers, but they are harder to reheat to get that same runny inside. Here is how you can store your soft boiled eggs.

  • In the Refrigerator: Store your unpeeled soft boiled egg in the fridge for up to two days. You can store a peeled soft boiled egg in an airtight container in the fridge for two days, they are just harder to reheat the right way.
  • Reheat: Put your unpeeled soft boiled eggs in simmering water for about a minute. They will reheat without overcooking.
A bowl of chicken ramen with eggs and a white spoon.
Print

Soft-Boiled Eggs

Why do you need a recipe for boiled eggs? Soft Boiled Eggs are cooked for a specific amount of time to keep them soft and we've perfected the recipe for you! You will have a delicious and soft, gooey, flavorful yolk every time!
Course Breakfast
Cuisine American
Keyword boiled eggs, soft boiled eggs
Prep Time 5 minutes
Cook Time 8 minutes
Total Time 13 minutes
Servings 4
Calories 63kcal

Ingredients

  • 4-6 large eggs
  • water for boiling

Instructions

  • In a large saucepan of water bring to a boil over medium high heat.
  • Once the water is boiling use a slotted spoon to gently lower the eggs. This will help to prevent them from cracking.
  • Boil the eggs for 7 minutes. Transfer the eggs to a bowl of ice and cold water. Let the eggs chill in the water until they are no longer hot.
  • Crack the eggs all over and start peeling from the wider end which will contain the air pockets.

Nutrition

Calories: 63kcal | Carbohydrates: 0.3g | Protein: 6g | Fat: 4g | Saturated Fat: 1g | Polyunsaturated Fat: 1g | Monounsaturated Fat: 2g | Trans Fat: 0.02g | Cholesterol: 164mg | Sodium: 62mg | Potassium: 61mg | Sugar: 0.2g | Vitamin A: 238IU | Calcium: 25mg | Iron: 1mg


source https://therecipecritic.com/soft-boiled-eggs/
Share:

Popular

Archive

Slider Tag

Facebook

Header Ads

Recent in Food

Blog Archive

Recent Posts

Unordered List

  • Lorem ipsum dolor sit amet, consectetuer adipiscing elit.
  • Aliquam tincidunt mauris eu risus.
  • Vestibulum auctor dapibus neque.

Pages

Theme Support

Need our help to upload or customize this blogger template? Contact me with details about the theme customization you need.