Steak Fajita Roll Ups

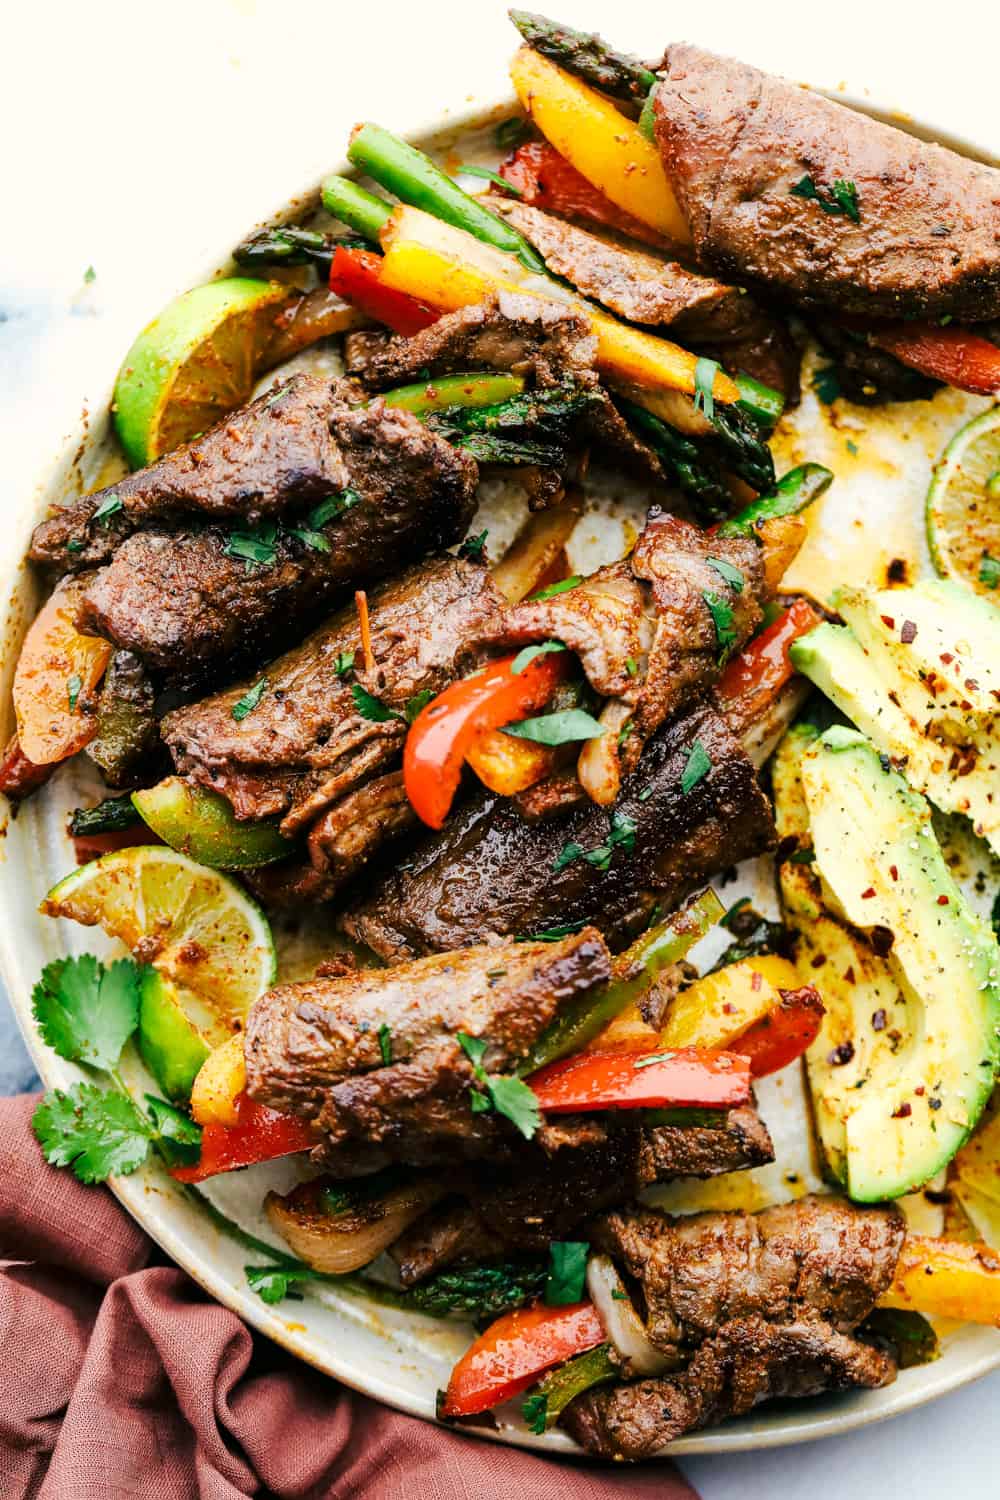
Steak fajita roll ups are fun and festive for the whole family and look extra special sautéed with bright colored bell peppers and fresh asparagus seasoned with my homemade fajita seasoning then rolled up in the flank steak. This makes for a light and delicious dinner!

Steak fajitas are the perfect combination for a fun Mexican meal. These Amazing Steak Fajitas or these Grilled Steak Fajita Skewers with Avocado Chimichurri have the same homemade fajita seasoning that is mouth-watering, good! I also love this quick air fryer version of my Chicken Fajitas, it’s so quick and full of amazing flavor!

Bell peppers and asparagus wrapped up in flank steak with avocados on a plate.

Steak Fajitas Roll Ups

Sizzle your way into this steak fajita recipe! These roll ups are just perfect for a light meal or a quick. I love how easily these are made and come together so quickly on a busy night. They seriously take less than 20 minutes! The best part is, you get SO much flavor packed in this meal without tortillas or even guacamole (although you can totally add those, they are amazing with this too!)

This recipe is so simple I wouldn’t be surprised if it became your new favorite! I added my favorite homemade fajita seasoning, which is super easy to whip up and is made from spices you probably already have in your pantry. You will use a flank steak, which is already thin but pounding it to be a bit thinner helps it cook evenly in the skillet. These fajita roll ups are the perfect dinner completing it with some white or Mexican Rice! Your family will absolutely love these and beg for more.

Ingredients

Steak fajita roll ups are so simple to make! With just a few ingredients, you can make a delicious, filling, and flavorful dish. This is a complete meal that your family is going to love! I would also recommend squeezing fresh lime juice over the top for the perfect finish! You can find the exact measurements below in the recipe card.

  • Olive Oil: Heat the olive oil for the bell peppers, onions and asparagus to cook in.
  • Red, Green and Yellow Bell Peppers: Slice the bell peppers thinly, then sauté and roll up in the flank steak.
  • Onion: Thinly slice the onions to be sautéed with the bell peppers and added to the roll ups.
  • Asparagus: Cut in half and use the top part of the asparagus when sautéing and putting them in the flank steak.
  • Fajita Seasoning: My homemade fajita seasoning is the BEST and adds such a pop of flavor to these roll ups.
  • Flank Steak: Pound the flank steak until it is thin, then cut into long thin strips for wrapping the vegetables in.
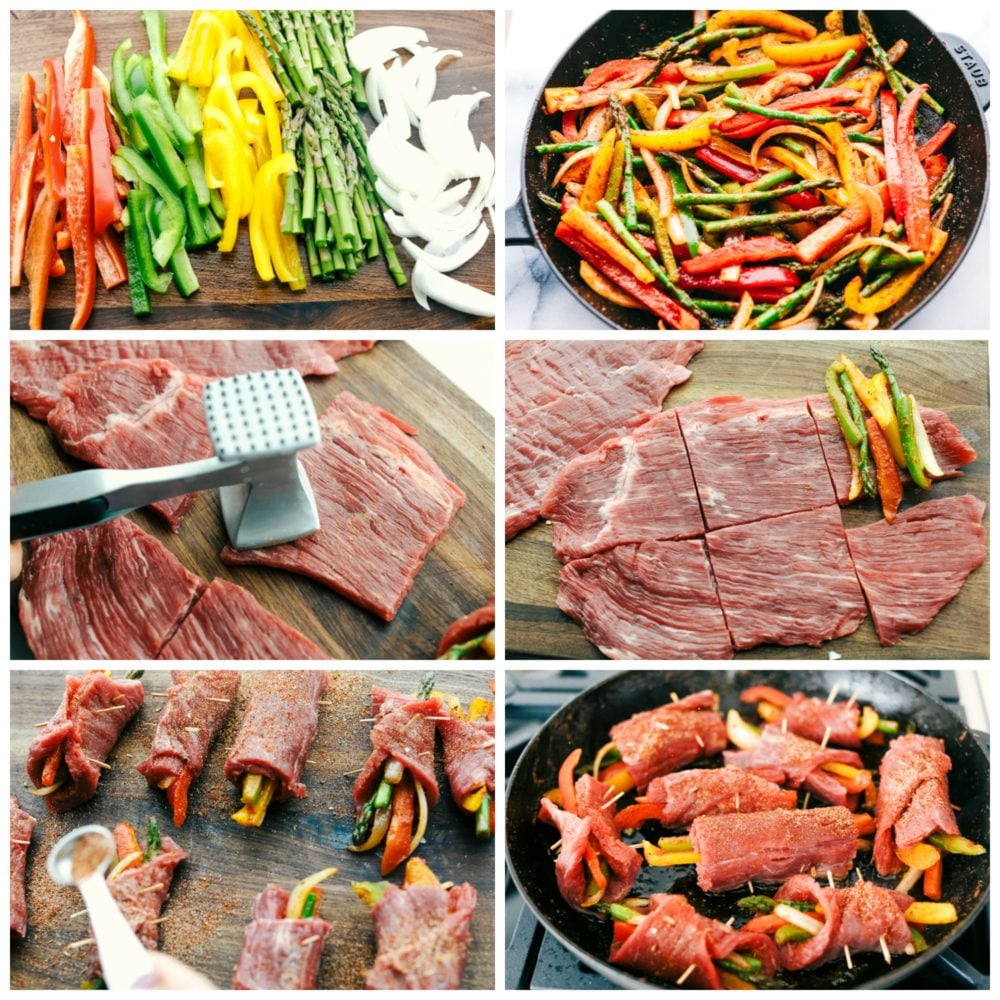
The process shots making steak fajita roll ups.

How to Make Steak Fajita Roll Ups

First, prepare and slice the vegetables then sauté them in a some oil. While they are sautéing prepare the flank steak by pounding and cutting in sections for the roll ups. Now stuff the flank steaks with the fajita vegetables and cook until the steak is cooked through. It is that simple and a light, easy dinner is on the table within minutes.

  1. Sauté the Vegetables: In a large skillet on medium-high heat add the olive oil and place bell pepper strips, onion and asparagus inside. Add 1 tablespoon of fajita seasoning to the veggies. Sauté until almost tender. Remove from heat and set aside.
  2. Prepare the Flank Steak: Pound the flank steak until ¼ inch thick. Slice in half lengthwise and divide equally. Add the vegetables into the center and roll up and secure with a toothpick.
  3. Cook the Steak Roll Ups: Heat the skillet to medium-high heat. Season the steak roll ups with fajita seasoning mix. Add them into the skillet. Cook on each side for 2-3 minutes or until steak is cooked throughout.

How to Eat Steak Fajita Roll Ups

If this is your first time eating steak fajita roll ups, I have some tips! Honestly, I was a little hesitant at first trying to figure out the best way to eat them. I finally just grabbed one a took a bite out of it, oh my goodness amazing! I do have some tips for how to enjoy them in different ways that everyone loved!

  • Taco Style: Looking for something to hold onto while eating? Grab a corn tortilla and warm it up on a skillet with some oil. Then pop one of these roll ups in there with some fresh pico de gallo and you have the ultimate street food.
  • Grab a Fork and Knife: Keep it classy (and low carb) by eating it with a fork and knife! It’s really great and lower in carbs when eaten this way. You could also make a great cilantro ranch dressing to pour over the top to add more flavor to the mix.
  • Stuff a Burrito: One of my kids really wanted to make a burrito, so we grabbed our flour tortillas and made a few. Let me tell you, they were incredible! We added some rice and refried beans to make it official. It was such a hit!
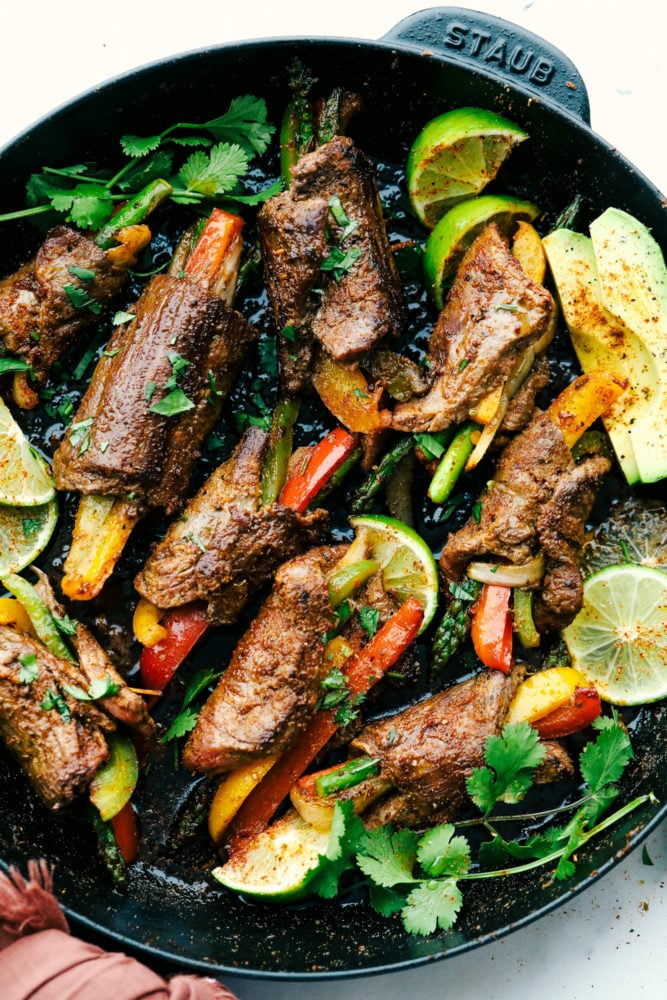
Steak fajita roll ups on the skillet being cooked with lime wedges and cilantro around the skillet for garnish.

Storing Leftovers

These steak fajita roll ups make really great leftovers! They are so flavorful the next day, I might even like them better. Here is how to store your leftover roll ups.

  • In the Refrigerator: You can store your roll ups in an airtight container in the refrigerator for up to 5 days.
Print

Steak Fajita Roll Ups

Steak fajita roll ups are fun and festive for the whole family and look extra special sautéed with bright colored bell peppers and fresh asparagus seasoned with my homemade fajita seasoning then rolled up in the flank steak. This makes for a light and delicious dinner!
Course Dinner, Main Course
Cuisine Mexican
Keyword fajita, Fajita roll up
Prep Time 10 minutes
Cook Time 10 minutes
Total Time 20 minutes
Servings 8 Roll Ups
Calories 84kcal
Author Alyssa Rivers

Ingredients

  • 2 tablespoons olive oil
  • 1 red bell pepper cut into strips
  • 1 green bell pepper cut into strips
  • 1 yellow bell pepper cut into strips
  • 1/2 onion cut into strips
  • 1 bunch asparagus cut in half
  • 1 fajita seasoning recipe
  • 1 flank steak sliced in half

Instructions

  • In a large skillet on medium high heat add the olive oil and place bell peppers, onion and asparagus inside. Add 1 tablespoon fajita seasoning into the veggies. Sauté until almost tender. Remove from heat and set aside.
  • Pound the flank steak until ¼ inch thick. Slice in half lengthwise and divide equally. Add the vegetables into the center and roll up and secure with a toothpick.
  • Heat the skillet to medium high heat. Season the steak roll ups with fajita seasoning. Add them into the skillet. Cook on each side for 2-3 minutes or until steak is cooked throughout.

Notes

Originally posted March 8, 2020
Updated Jan 4, 2022

Nutrition

Calories: 84kcal | Carbohydrates: 3g | Protein: 7g | Fat: 5g | Saturated Fat: 1g | Cholesterol: 17mg | Sodium: 17mg | Potassium: 195mg | Fiber: 1g | Sugar: 1g | Vitamin A: 566IU | Vitamin C: 59mg | Calcium: 11mg | Iron: 1mg


source https://therecipecritic.com/steak-fajita-roll-ups/
Share:

One-Pot Brothy Beans with Herbs & Lemon

Vegan brothy beans are flavorful with herbs, lemon, garlic & umami-rich miso. Deeply savory beans await after 1½ hours of inactive cook time.

The post One-Pot Brothy Beans with Herbs & Lemon appeared first on The First Mess.


from The First Mess https://ift.tt/HVGmObR
via IFTTT
Share:

Greek Yogurt Dip

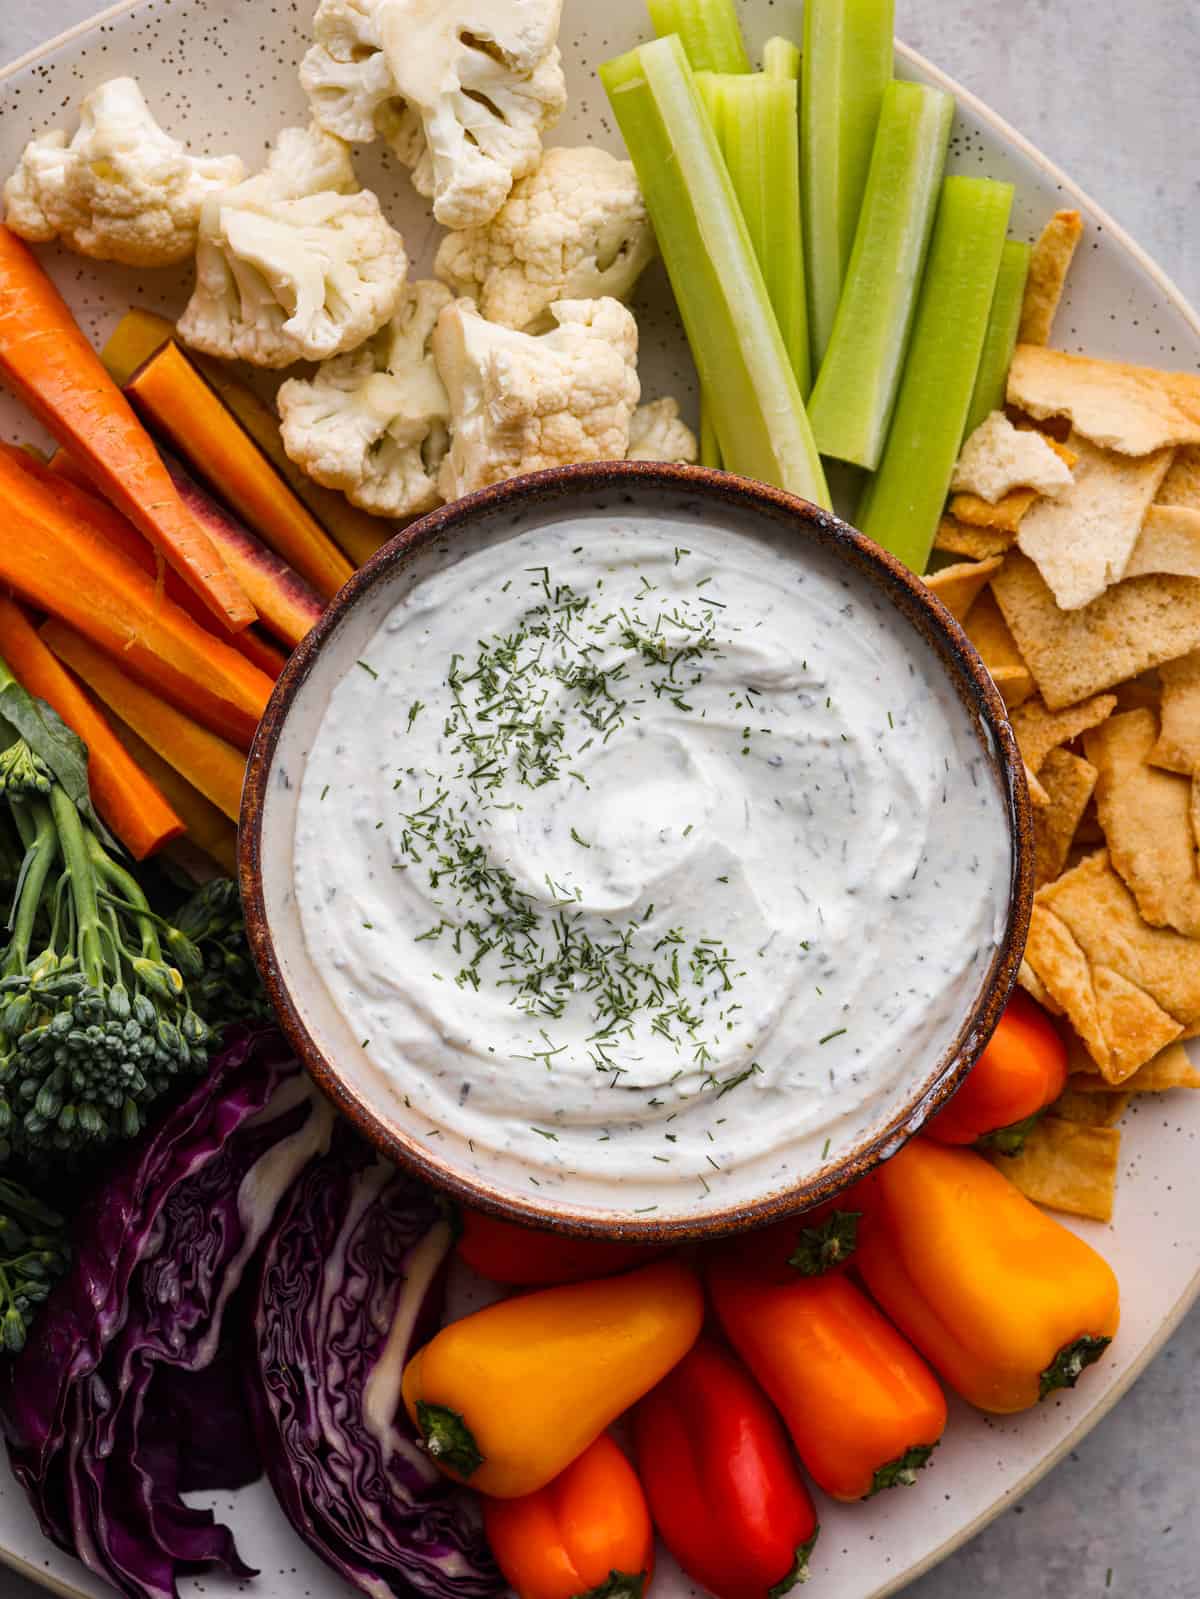
Creamy, tangy, and packed with fresh herbs, this Greek yogurt dip is the best addition to any veggie platter! Serve it up with fresh vegetables and your favorite crackers for a snack that’s both healthy and delicious.

Is there anything better than homemade dip? Not only does homemade dip taste better, but you can usually throw it together with just a few pantry staples. Whipped feta dip, dill pickle dip, and smoked salmon dip are a few more great recipes to try. They’re packed with tasty flavor and elevate fresh vegetables so well! Check out my full list of dips here for more mid-day snack inspiration.

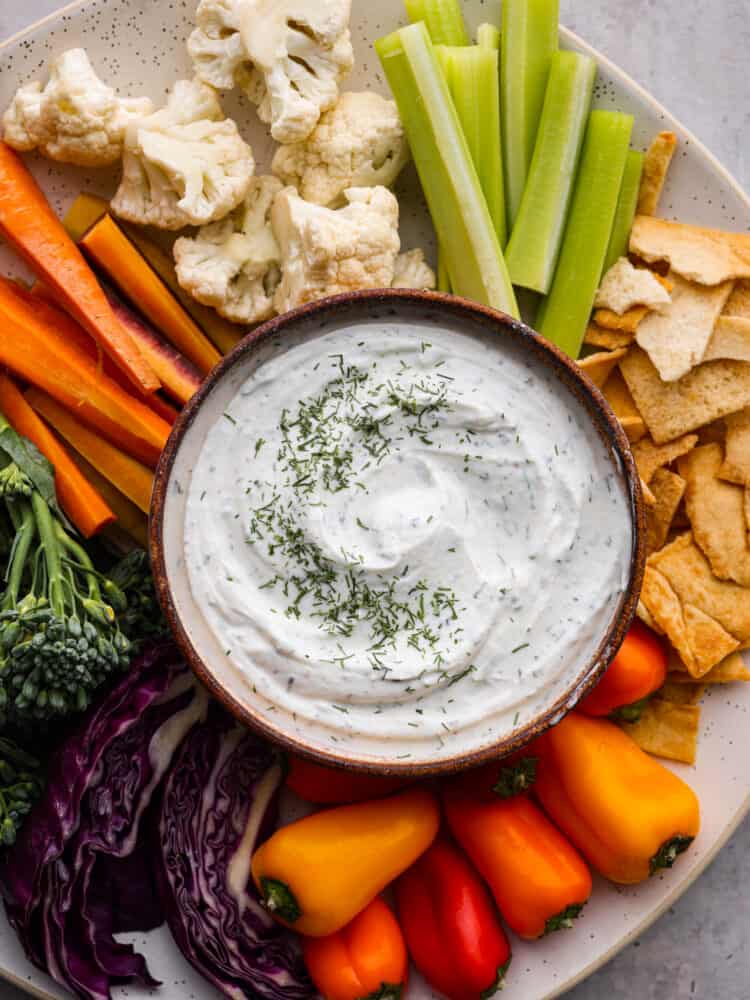
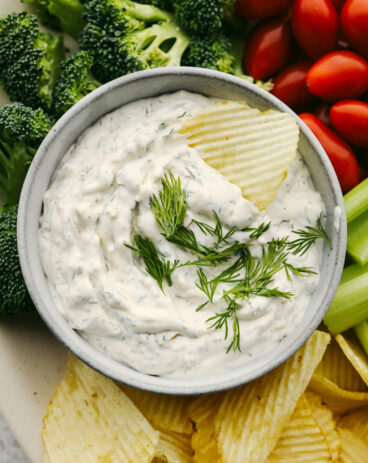
Top-down view of Greek yogurt dip served with baked crackers and fresh veggies.

Greek Yogurt Veggie Dip

If you couldn’t already tell by the million different recipes on the blog, homemade dips are my love. My kids love dips just as much as I do so I make them all the time at our house! The only downside is that dips can be pretty fatty and high in calories. (NOT the best for my New Year’s resolution of eating healthier!) Good news! With this Greek yogurt dip, you get the best of both worlds. A creamy, flavorful dip that’s also filled with protein and probiotics! This dip is totally macro-friendly and the BEST way to add a pop of flavor to your favorite vegetables. You’re going to love it.

If you’re not already convinced, this Greek yogurt dip is super easy to make too! Also, as long as you’ve got some plain Greek yogurt on hand, chances are you have everything else needed to whip it up. You only need a handful of seasonings from your spice rack! Flavors like dill, garlic, onion, and Italian seasoning are what make this dip so good. Once you get a taste, you won’t be able to stop. If you’re making this dip for a crowd, you may want to double it! It goes fast. My advice? Be sure to snag some for yourself!

Ingredients for Greek Yogurt Dip

Greek yogurt, milk, and a handful of seasonings are all you need here. Because this dip uses such simple ingredients, you’ll want to make it all the time! Grab some sliced veggies and your favorite chips or crackers for a tasty, healthy snack! Note: all measurements can be found below in the recipe card.

  • Greek Yogurt: I used plain, non-fat Greek yogurt here to keep things healthy!
  • Italian Seasoning: Italian seasoning is so versatile, I love using it in homemade sauces and dips! You can buy it prepackaged or make your own blend using dried basil, oregano, rosemary, marjoram, and thyme. Find my full recipe here! I always like to make my own seasoning blends at home because they taste better and are free of additives and preservatives.
  • Dried Dill: Dill is a must-add for this dip. It adds that classic Greek flavor!
  • Onion Powder: Gives this dip a pop of sharp flavor.
  • Garlic Salt and Powder: Makes each bite perfectly savory!
  • Cracked Black Pepper: Add to taste.
  • Milk: Adjusts the consistency of the Greek yogurt dip. Any kind of milk works!

Ready to Make This Healthy Dip?

Let’s get started! This Greek yogurt dip only takes 5 minutes to make and will have the whole family hooked. I’ve been trying to wean my kids off of ranch dressing and this yogurt dip is the perfect solution. It has incredible flavor but is also filled with protein and probiotics for guilt-free snacking!

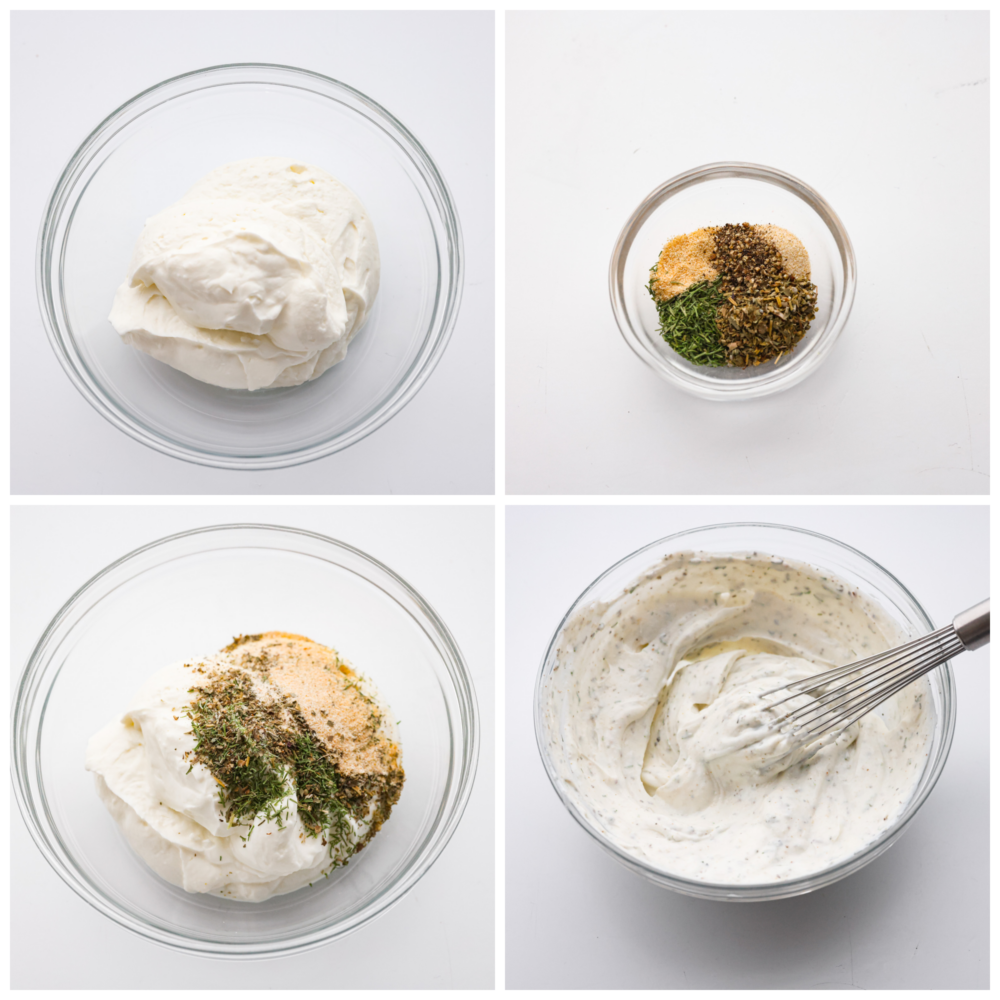
  1. Combine Ingredients: To a medium bowl, add the Greek yogurt, Italian seasonings, dried dill, onion powder, garlic powder, garlic salt, and pepper.
  2. Mix: Whisk well until combined and creamy.
  3. Add Milk: You can also whisk in milk if the dip is too thick. Continue to add more until you reach your desired consistency.
  4. Serve and Enjoy: Serve with fresh veggies or crackers.
4-photo collage of dip ingredients being added to a glass bowl and mixed together.

Tips, Tricks, and Serving Suggestions

This Greek yogurt dip is super straightforward to make, but a few simple fixes can really kick the flavor up a notch.

  • Add Lemon: A squeeze of lemon or dash of lemon pepper will give your dip a pop of tasty Mediterranean flavor!
  • Let it Chill: I always like to let my dip sit in the fridge for an hour or two so the flavors have time to meld. Similarly, you may want to go easy on the seasonings at first since it takes time for them to infuse in the yogurt.
  • Use Fresh Herbs: Dried herbs are usually what I use since I have them on hand, but if you really want to take this dip to the next level, use fresh chopped herbs! They make everything taste better.
  • Add Vinegar: If you’re a lover of tangy dips, try adding a couple tablespoons of white wine vinegar or apple cider vinegar!

What to Serve With Your Greek Yogurt Dip

The creamy, savory flavor of this Greek yogurt dip works well with so many different things. Baby carrots, peppers, sliced cucumber, and celery are a must! This dip is also great with crackers, flatbread, and pita chips. You can use this dip as a spread in gyros, wraps, and over buddha bowls as well! It’s a healthy way to add extra flavor to all of your favorite dishes.

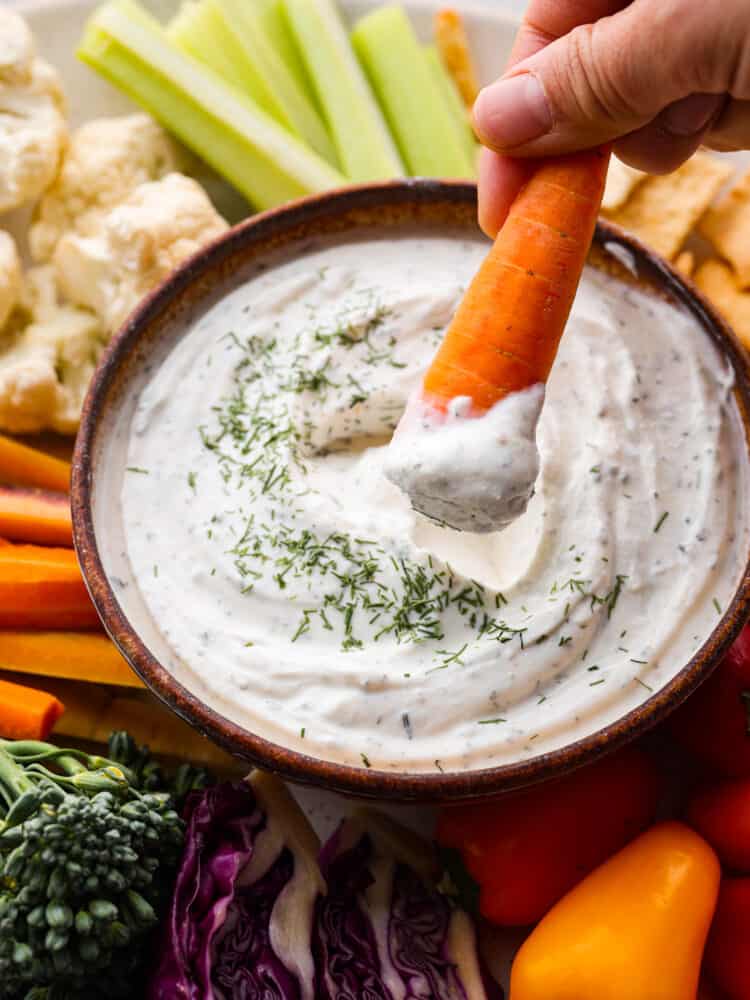
A carrot being dipped into the Greek yogurt dip.

How Long Does Greek Yogurt Dip Last?

Greek yogurt dip will last for about 5 days in the fridge. Make sure it’s stored in an airtight container for best results!

Can You Freeze Greek Yogurt Dip?

Yes! Just make sure it’s in an airtight container or freezer bag. It will keep for 2-3 months. Thaw overnight in the fridge and give it a good mix before you serve it.

Print

Greek Yogurt Dip

Creamy, tangy, and packed with fresh herbs, this Greek yogurt dip is the best addition to any veggie platter! Serve it up with fresh vegetables and your favorite crackers for a snack that's both healthy and delicious.
Course Appetizer, dip
Cuisine Greek
Keyword greek yogurt dip, greek yogurt dip recipe
Prep Time 5 minutes
Total Time 5 minutes
Servings 6
Calories 36kcal
Author Alyssa Rivers

Ingredients

  • 1 1/2 cups non-fat, plain Greek yogurt
  • 1 teaspoon dried Italian seasonings
  • 1 teaspoon dried dill
  • 1 teaspoon onion powder
  • 1 teaspoon garlic powder
  • 1/2 teaspoon garlic salt
  • 1/4 teaspoon cracked black pepper
  • 1-2 tablespoons milk for desired consistency

Instructions

  • To a medium bowl, add the Greek yogurt, Italian seasonings, dried dill, onion powder, garlic powder, garlic salt, and pepper.
  • Whisk well until combined and creamy.
  • If you like a runnier dip, whisk in milk if the dip is too thick. Continue to add more until you reach desired consistency.
  • Serve with fresh veggies or crackers.

Nutrition

Calories: 36kcal | Carbohydrates: 3g | Protein: 5g | Fat: 0.3g | Saturated Fat: 0.1g | Polyunsaturated Fat: 0.02g | Monounsaturated Fat: 0.04g | Trans Fat: 0.003g | Cholesterol: 3mg | Sodium: 214mg | Potassium: 94mg | Fiber: 0.3g | Sugar: 2g | Vitamin A: 22IU | Vitamin C: 0.2mg | Calcium: 69mg | Iron: 0.3mg


source https://therecipecritic.com/greek-yogurt-dip/
Share:

Hot Cocoa Cookies

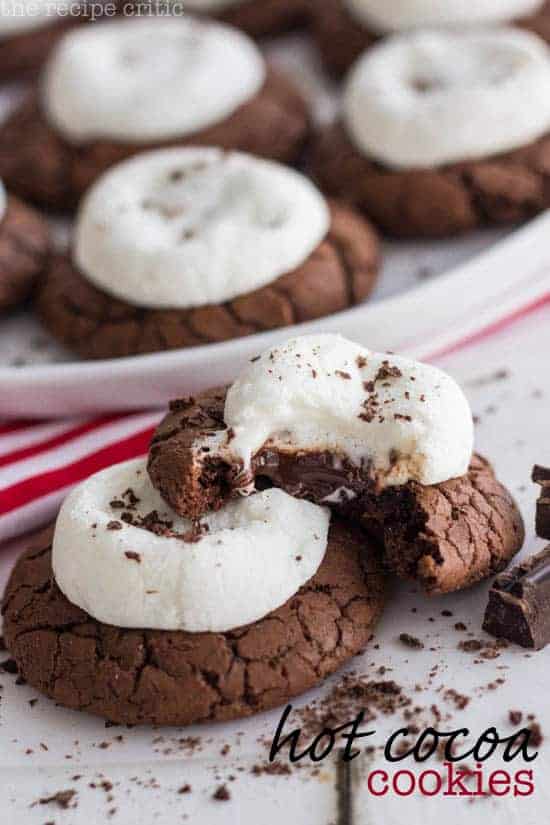
These hot cocoa cookies are the perfect treat for the winter season! These soft and delicious cookies have a marshmallow on top and some ooey, gooey chocolate in the middle. You will be won’t be able to stop at just one!

Cookies, especially holiday cookies, are some of the best things that we make all season long. There are SO many different varieties to choose from but the long standing favorites in our household are these Grinch Cookies, these yummy Christmas Tree Sugar Cookies or, my very favorite… Italian Christmas Cookies!

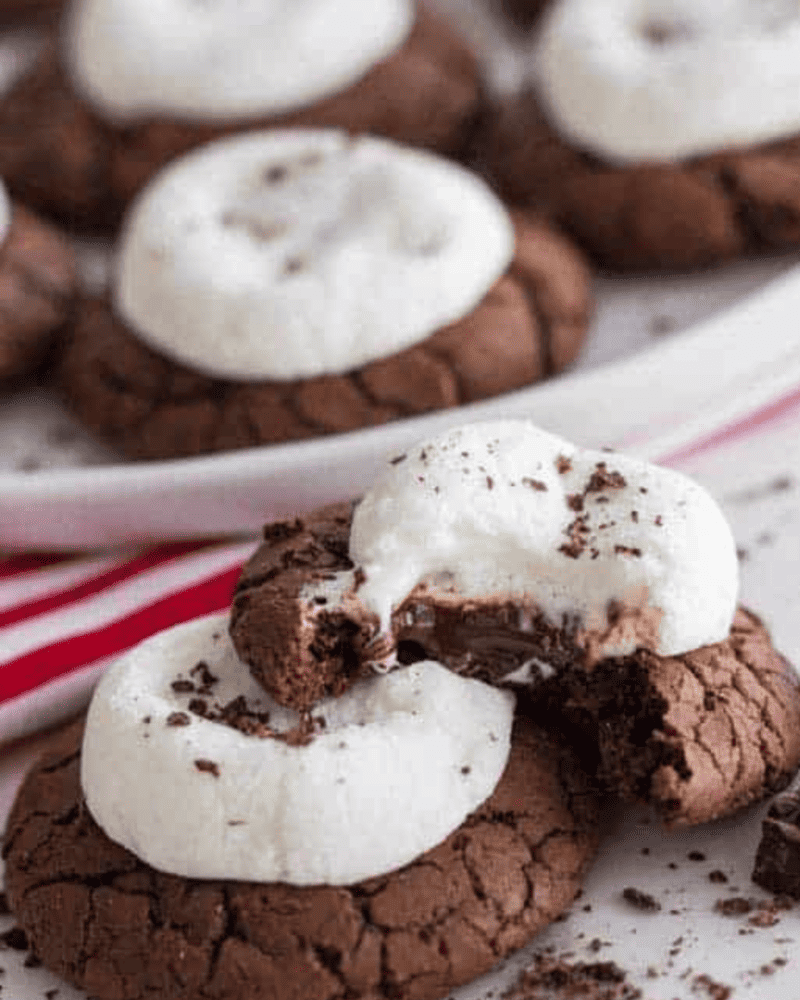
A stack of hot cocoa cookies, the top one with a bite taken out of it.

What are Hot Cocoa Cookies?

These little hot cocoa cookies are packed with chocolate and cocoa. These cookies are topped with a gooey marshmallow and baked to perfection. Just when you think they are just about perfect, you hit the melted chocolate in the center of the cookie. It really represents a cup of hot cocoa perfectly! Needless to say…These were an instant family hit at our house!

Not only are these cookies insanely delicious, but they are simple as well! you probably already have all of the ingredients at home, and trust me… Once you start making them, you will always have the ingredients to make hot chocolate cookies at home because they are SO good! These are perfect for any occasion and are always a hit at a holiday cookie exchange. For more delicious holiday cookies, check out this roundup here.

Ingredients For the Best Hot Cocoa Cookies

These easy hot cocoa cookies are deliciously sweet and so fun to make!  You will be very familiar with the ingredients and have most of them on hand.  The marshmallows and melted chocolate take these cookies to the next level! Check out the recipe card at the bottom of the post for exact measurements.

  • Unsalted Butter: Butter helps the melting of the chocolate.
  • Semisweet Chocolate Bars: Semisweet chocolate is the best in these cookies. Chocolate chips can be used as well.
  • Flour: I used all purpose flour in this recipe.
  • Unsweetened Cocoa Powder: Adds richness and more delicious chocolate flavor.
  • Baking Powder: This helps your cookies rise (no one wants flat cookies)!
  • Salt: The salt balances out the sweetness of the cookie and also enhances all of the flavors of the other ingredients.
  • Light Brown Sugar: Brown sugar adds richness to these cookies.
  • Eggs: Room-temperature eggs are best.
  • Vanilla Extract: Vanilla is a must in cookies and enhances chocolate flavors.
  • Marshmallows: Cut the marshmallows in half… They will get nice and fluffy in the oven.
  • Semisweet Chocolate Bars: The melted chocolate on top is so yummy!

How to Make Hot Cocoa Cookies

Grab your kiddos and make these fun hot cocoa cookies for the holidays or any time of year! This recipe is easy to follow and comes together quickly. Follow my easy instructions below for how to make hot cocoa cookies.

Make Dough

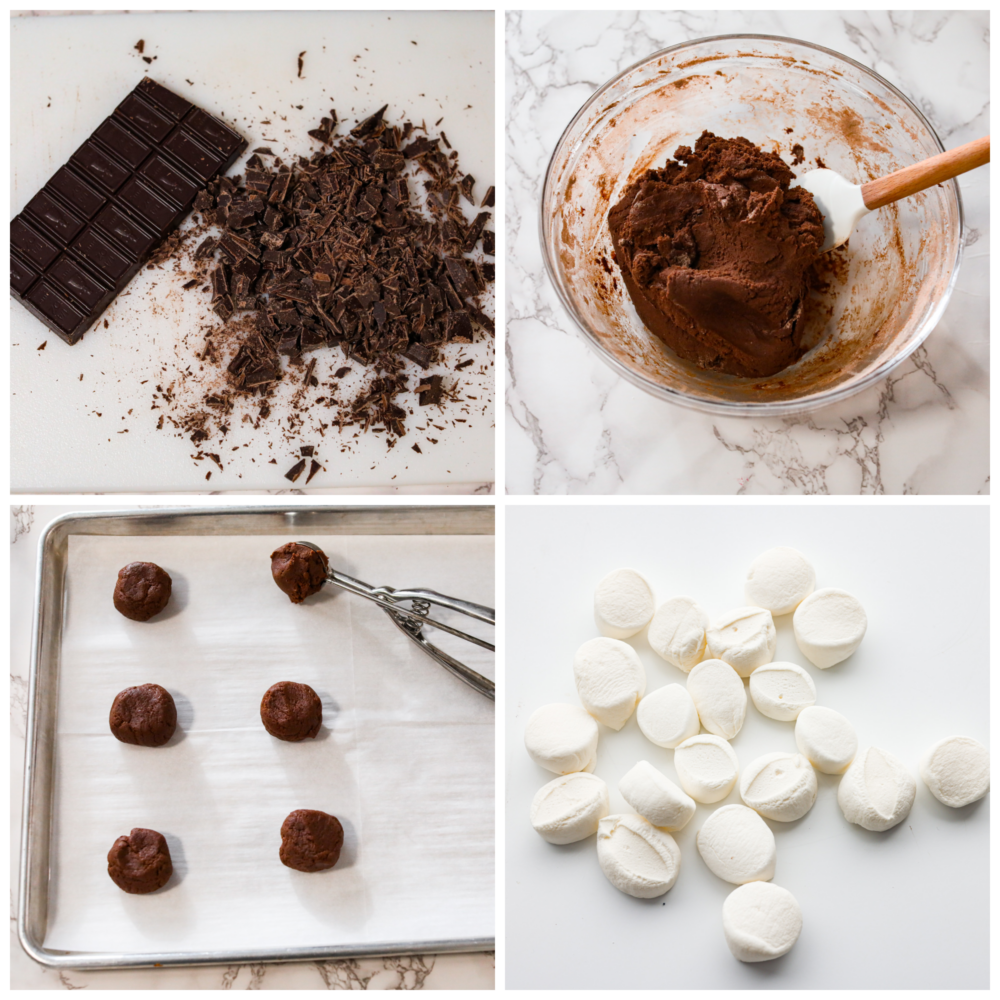
  1. Melt the Butter and Chocolate: In a medium saucepan, melt the butter and chopped chocolate over medium-low heat, stirring frequently. Once melted, then remove the saucepan from the burner and allow it to cool for 15 minutes.
  2. Combine Dry Ingredients: In a medium bowl, whisk together the flour, cocoa powder, salt, and baking powder. Set aside.
  3. Mix Wet Ingredients: In a large mixing bowl, mix together the eggs, brown sugar, and vanilla until smooth using an electric hand mixer.
  4. Add Melted Chocolate Into the Wet Mixture: Add the cooled melted chocolate and mix to combine.
  5. Add the Dry Ingredients: Add the dry flour ingredients in two batches into the dough. The dough will be almost like a thick cake batter consistency.
  6. Cover and Chill: Cover with plastic wrap and chill the dough in the fridge for at least 1 hour.

Bake

  1. Form Balls: Once the dough is chilled then you can line the baking sheets with parchment paper. Roll the dough into 1-inch balls and place 2 inches apart on the parchment paper. Flatten the tops slightly.
  2. Bake: Bake at 325 degrees Fahrenheit for about 12 minutes or until the cookie edges start to crack.
  3. Cut Marshmallows and Chocolate: While they are baking, cut the marshmallows in half. Stick one square of chocolate onto each cut side of the marshmallows. It will be on the sticky side, so the chocolate piece will stay in place.
  4. Place Marshmallows and Chocolate onto Hot Cookies: Remove the hot cocoa cookies from the oven. While still on the baking sheet then stick a marshmallow with the chocolate piece side down on top of each cookie. Then, place the cookies back into the oven for about four additional minutes until the marshmallows are soft.
  5. Cool and Enjoy: Remove from the oven and transfer to cooling racks to cool. Grate additional chocolate over the top for garnish if you would like!

Variations

When I find something that I love (and I love these hot cocoa cookies), then I always want to figure out different ways to switch it up so that I can make it all the time! Here are a few ideas for keeping this recipe unique each time.

  • Toppings: I love drizzling on white chocolate sauce, yummy caramel sauce, or chocolate sauce. You can also top it with festive sprinkles or grated chocolate to make them perfect for the holiday season!
  • Mix-Ins: If you want these hot cocoa cookies to be extra rich, then go ahead and add some mini white chocolate chips, mini marshmallows, or some toffee bits to the dough. You will taste them in every single bite!
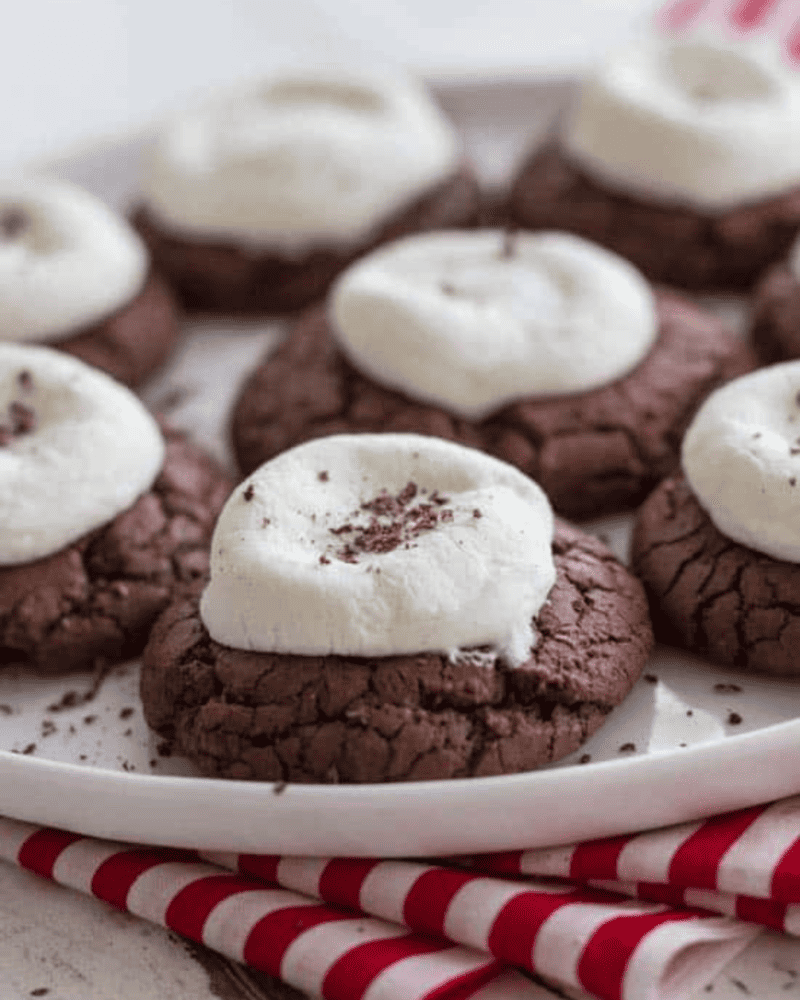
Hot cocoa cookies on a plate, ready to eat.

How to Store Leftover Cookies

These hot cocoa cookies are easy to make ahead of time and make fantastic leftovers. Once your cookies have cooled, then you can place them in an airtight container and store them on your counter at room temperature. They should last about 3-4 days!

Print

Hot Cocoa Cookies

These hot cocoa cookies are the perfect treat for the winter season! These soft and delicious cookies have a marshmallow on top and some ooey, gooey chocolate in the middle. You will be won't be able to stop at just one! 
Course Dessert
Cuisine American
Keyword cookie recipes, cookies, hot chocolate cookies, hot cocoa cookies
Prep Time 20 minutes
Cook Time 12 minutes
Total Time 32 minutes
Servings 24 cookies
Calories 261kcal
Author Alyssa Rivers

Ingredients

  • ½ cup unsalted butter
  • 12 ounces semisweet chocolate bars chopped (or semisweet chocolate chips)
  • 1 1/2 cups flour
  • 1/4 cup unsweetened cocoa powder
  • 1 1/2 teaspoons baking powder
  • 1/4 teaspoon salt
  • 1 1/4 cups light brown sugar packed
  • 3 eggs at room temperature
  • 2 teaspoons vanilla extract
  • 12 marshmallows cut in half
  • 7.5 ounce semisweet chocolate bars cut into ½ inch squares

Instructions

  • In a medium saucepan, melt the butter and chopped chocolate over medium-low heat, stirring frequently. Once melted, remove the saucepan from the burner and allow it to cool for 15 minutes.
  • In a medium bowl, whisk together the flour, cocoa powder, salt, and baking powder. Set aside.
  • In a large mixing bowl, mix together the eggs, brown sugar, and vanilla until smooth using an electric hand mixer.
  • Add the cooled melted chocolate and mix to combine.
  • Add the dry flour ingredients in two batches into the dough. The dough will be almost like a thick cake batter consistency.
  • Cover with plastic wrap and chill the dough in the fridge for at least 1 hour.
  • Once the dough is chilled, line baking sheets with parchment paper. Roll the dough into 1-inch balls and place 2 inches apart on the parchment paper. Flatten the tops slightly.
  • Bake at 325 degrees Fahrenheit for about 12 minutes or until the cookie edges start to crack.
  • While they are baking, cut the marshmallows in half. Stick one square of chocolate onto each cut side of the marshmallows. It will be on the sticky side so that the chocolate piece will stay in place.
  • Remove the cookies from the oven. While still on the baking sheet, stick a marshmallow with the chocolate piece side down on top of each cookie. Place the cookies back into the oven for about four additional minutes until the marshmallows are soft.
  • Remove from the oven and transfer to cooling racks to cool. Grate additional chocolate over the top for garnish if would like!

Notes

Originally Posted on December 29, 2013
Updated on December 1, 2022

Nutrition

Calories: 261kcal | Carbohydrates: 33g | Protein: 3g | Fat: 13g | Saturated Fat: 8g | Polyunsaturated Fat: 1g | Monounsaturated Fat: 4g | Trans Fat: 0.2g | Cholesterol: 32mg | Sodium: 41mg | Potassium: 202mg | Fiber: 2g | Sugar: 22g | Vitamin A: 159IU | Calcium: 41mg | Iron: 2mg


source https://therecipecritic.com/hot-cocoa-cookies/
Share:

Popular

Archive

Slider Tag

Facebook

Header Ads

Recent in Food

Blog Archive

Recent Posts

Unordered List

  • Lorem ipsum dolor sit amet, consectetuer adipiscing elit.
  • Aliquam tincidunt mauris eu risus.
  • Vestibulum auctor dapibus neque.

Pages

Theme Support

Need our help to upload or customize this blogger template? Contact me with details about the theme customization you need.