Weekly Menu Plan {Number 4}

Take advantage of this weekly menu plan that has all the favorite recipes that families love! It is so easy to follow with my daily dinners, a breakfast and a sweet treat making this a delicious combination. 

Some of my reader favorites are a classic lasagna, a simple egg salad and even my number one 45 minute cinnamon roll recipe. You can see all of the (weekly menu plans here). 

Weekly menu plan collage of all the recipes photos

Weekly Menu Plan {Number Four}

Get started with a fresh week knowing what to plan for each night. Breakfast on Saturday is on the menu and even a sweet treat to enjoy during the week or a craving that sparks. It is the perfect menu plan to keep you home with your family gathered around the table.

Every dinner is designed with your family in mind. Tender chicken, fresh salmon and a Thai noodles are just a few of the favorite recipes that are on the menu this week. Enjoy this free weekly menu plan this week with a grocery list to help when shopping. Everything you need for a week at home in one spot!

Garlic parmesan chicken tenders photo

Garlic Parmesan Chicken Tenders Recipe

Delicious chicken tenders breaded in a garlic parmesan panko mixture and baked to crispy perfection! This is a meal the entire family will love!
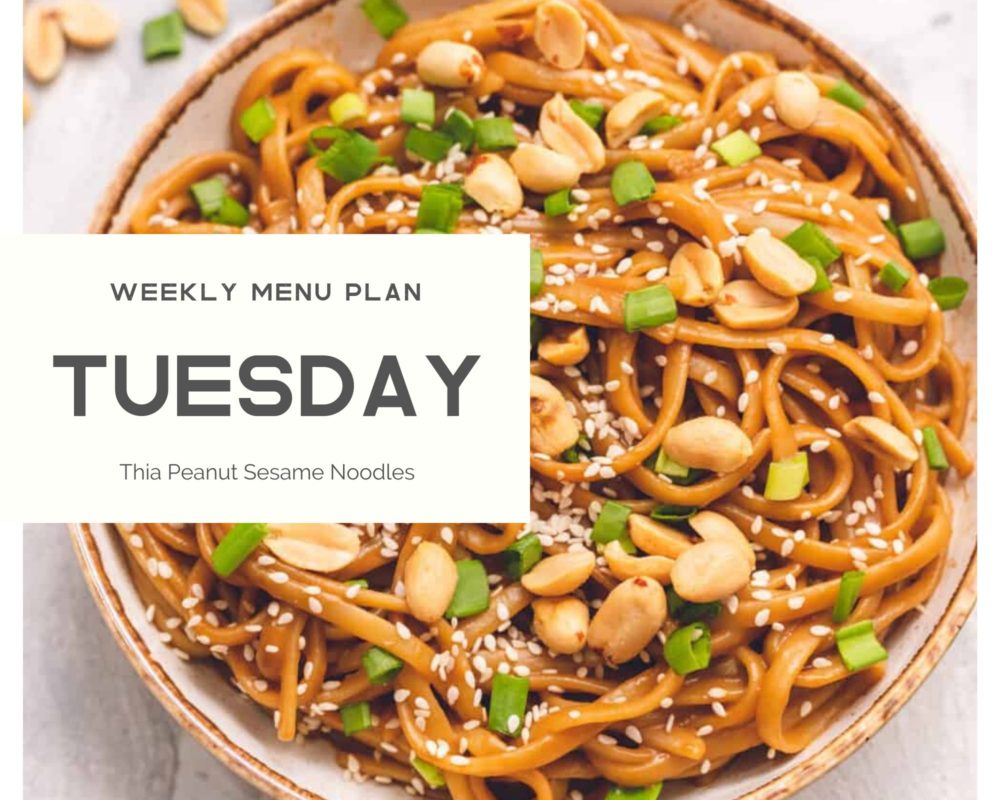
This peanut sesame noodles photos

Thai Sesame Peanut Sauce Noodles Recipe

Thai Peanut Sesame Noodles is an asian favorite that combines creamy peanut butter, soy sauce, sesame oil, minced garlic all mixed with linguine noodles tossed in this amazingly sweet and savory sauce. 
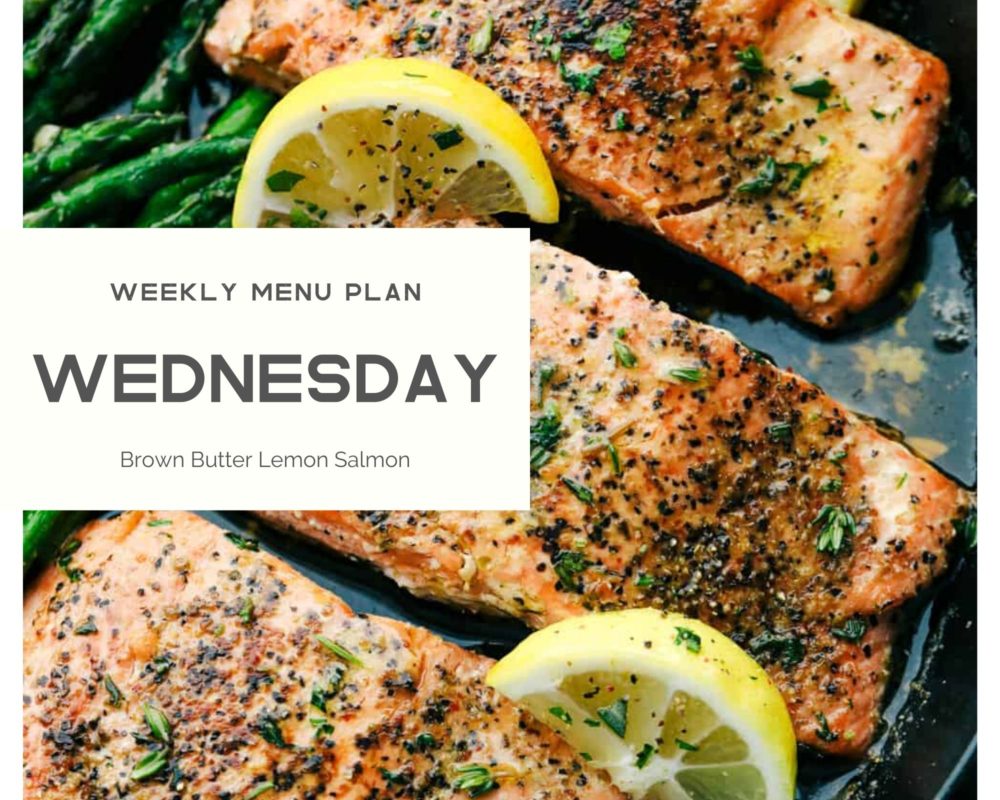
Brown butter lemon salmon photo

Brown Butter Lemon Salmon

Brown Butter Lemon Salmon is a freshly seared salmon sautéed in olive oil, infused with a brown butter glaze with fresh parsley, thyme and rosemary herbs with a squeeze of fresh lemon juice. This is the perfect balance of a light and tasty family meal!
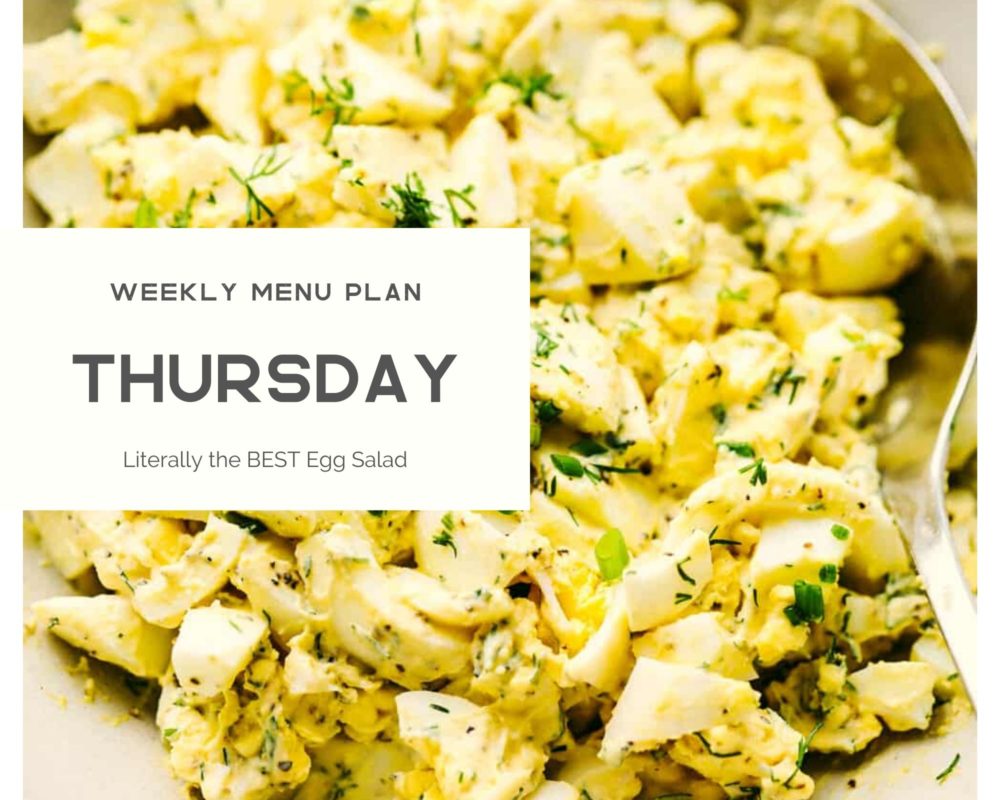
Egg salad photo

The BEST Egg Salad

The Best Egg Salad is made with simple ingredients and is so creamy delicious! So easy to put together with the best flavor and it makes the perfect sandwich! You will make this recipe again and again!

Stuffed pizza bites in a pan on photo

Stuffed Pizza Bites

These pizza bites taste just like pizza using a flattened biscuit and stuffing it full of cheese, pepperoni then baking until golden brown on top. Stuffed pizza bites are the hit of our house!
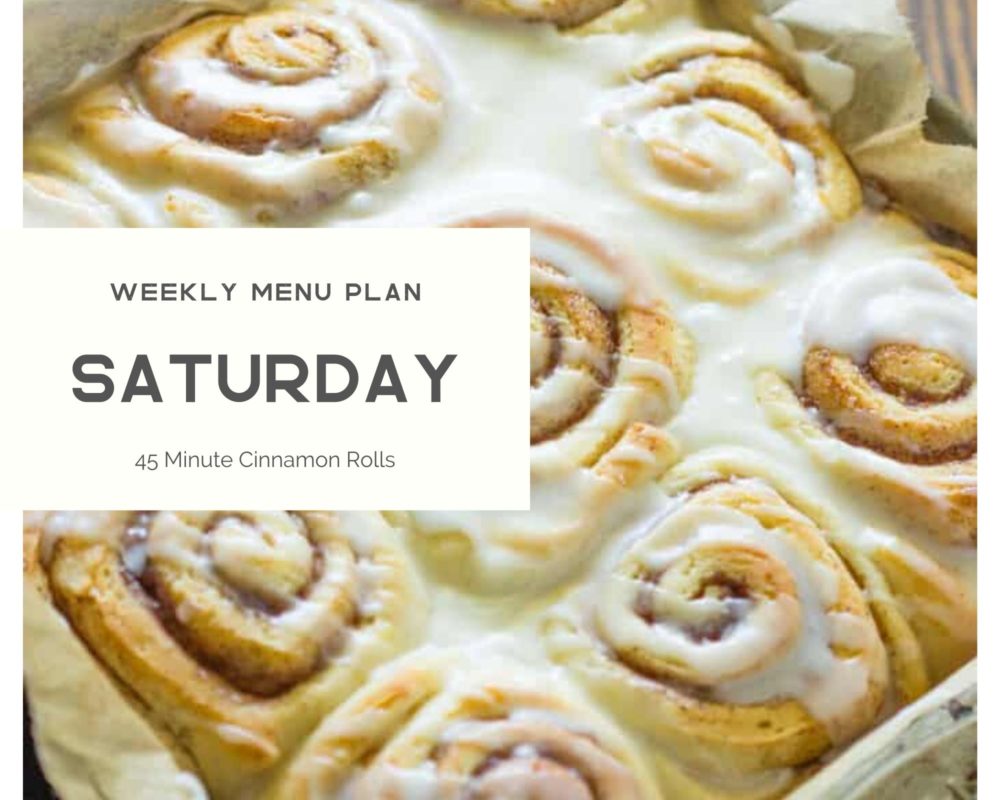
45 minute cinnamon roll photo

Quick 45 Minute Cinnamon Rolls 

Quick 45 Minute Cinnamon Rolls is made with homemade dough, filled with ground cinnamon and a brown sugar mixture rolled and baked in less than an hour. Drizzle a sweet glaze over top making this the VERY BEST holiday breakfast!
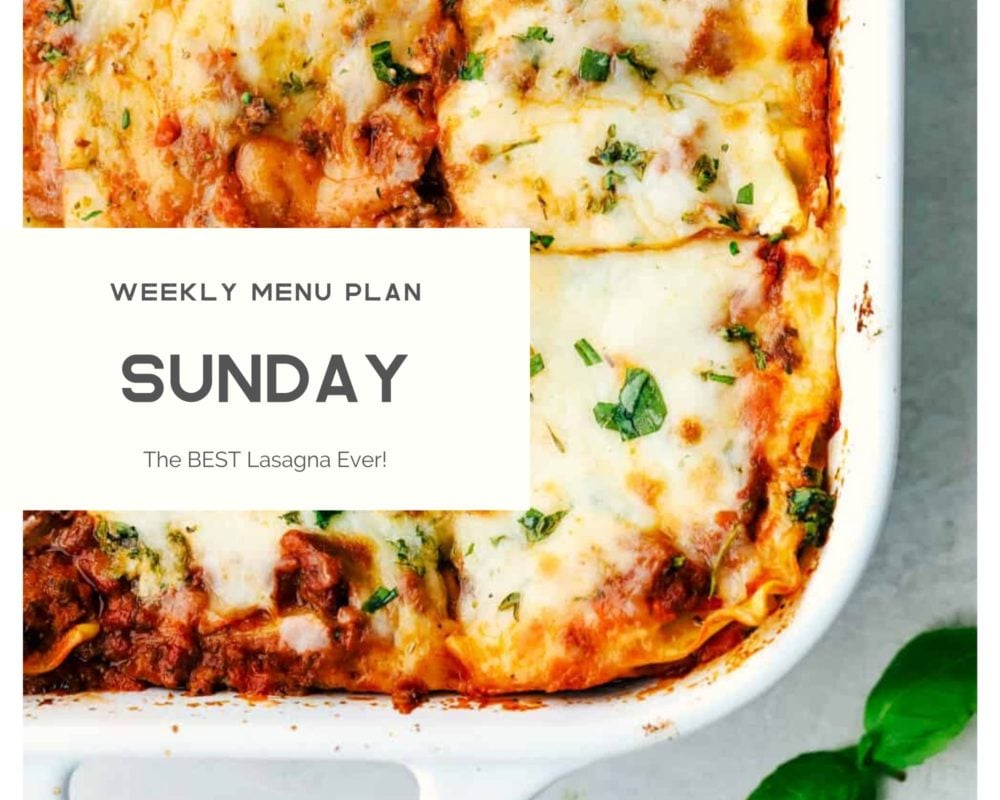
Lasagna photo

The BEST Lasagna Ever!

The BEST Classic Lasagna Ever has layers of sautéed ground beef and Italian sausage that are cooked together, sweet tomato sauce, Italian seasoning all layered with lasagna noodles then covered in ricotta cheese and a parmesan mixture all sprinkled with mozzarella cheese for a mouthwatering baked Italian dinner. Layers of deliciousness!
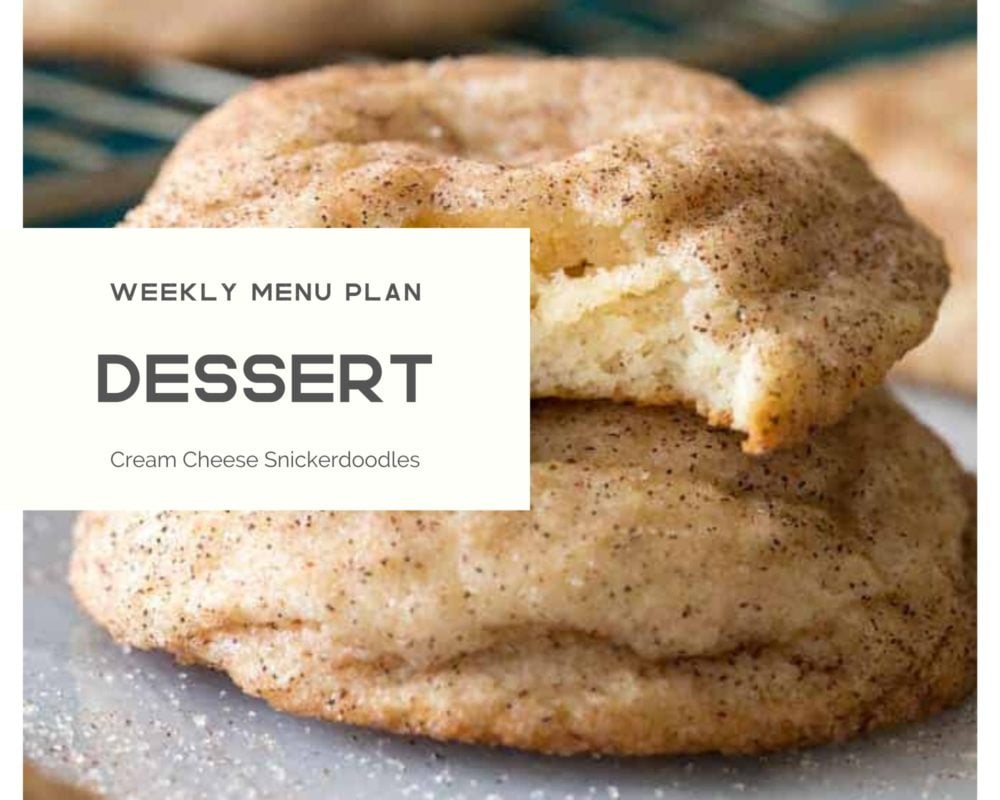
Cream cheese snickerdoodles cookie photo

Cream Cheese Snickerdoodles

These Cream Cheese Snickerdoodles are extraordinarily soft and absolutely melt in your mouth! The cream cheese adds a subtle extra tang to a classic Snickerdoodle cookie. You’re going to want to try this one out for your holiday cookie tray (or, really, for anytime!).

Printable Shopping List:

I made this as easy as possible by even providing a FREE shopping list that is easy to print and makes your grocery shopping days much easier.

This Weekly Menu Plan is just the beginning to SO much greatness. Let me help you plan out a week’s worth of meals plus a sweet treat to compliment the week. No more worrying about dinner plans during the week with this weekly menu plan to help plan and provide you the best meals out there. Each menu plan has a grocery list that is easy to print and convenient for taking with while grocery shopping. Simply cross off or check mark each grocery item as you go!

Click Here for the Grocery List Printable
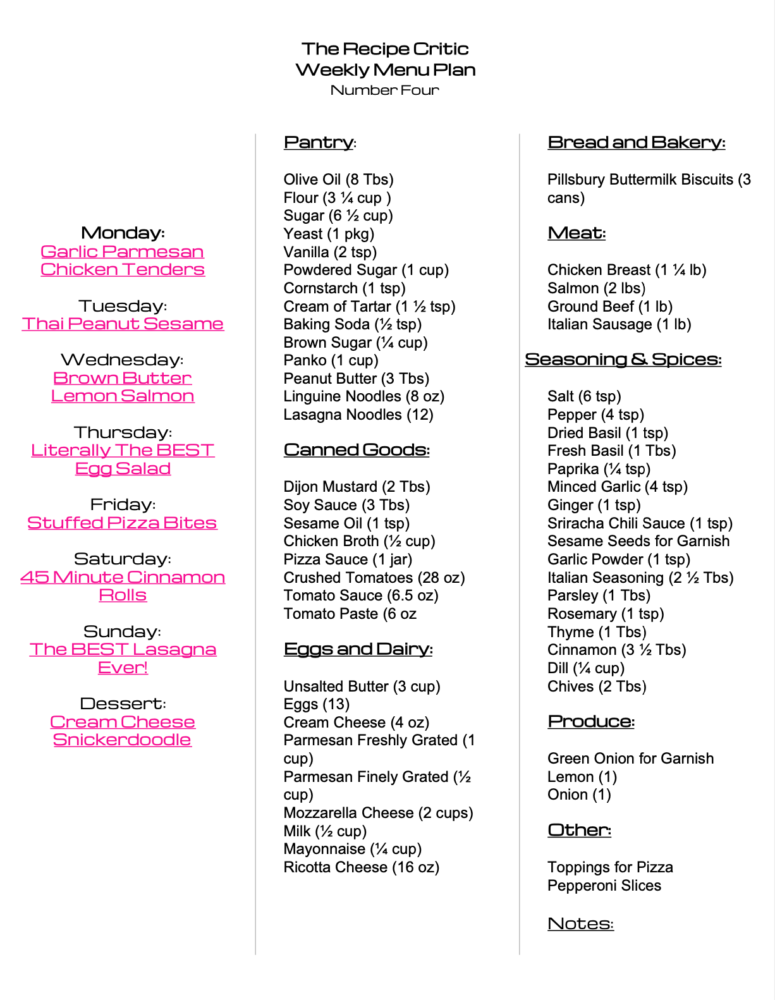
Weekly menu plan grocery list

Click Here for the Grocery List Printable

Post Updated on March 27, 2020

Originally Posted on July 11, 2015


source https://therecipecritic.com/weekly-menu-plan-4/
Share:

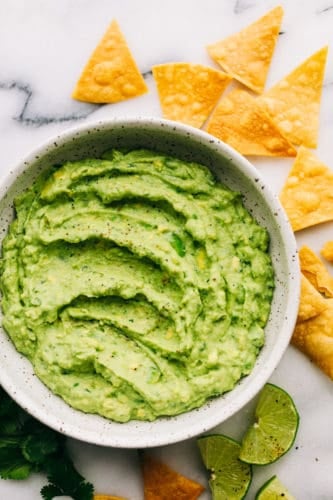
Creamy Avocado Yogurt Dip

This creamy avocado yogurt dip is one of the best dips that I have EVER had!  Creamy, healthy, and full of flavor, you won’t be able to get enough!
Avocados are on sale frequently and have all the flavor plus good stuff to eat often! Enjoy more avocado dips like this California avocado dip that is chunky and full of flavor that makes this another dip to love.
creamy avocado dip in a bowl with chips and lime slices around the edges.

Creamy Avocado Yogurt Dip

After being on a 30 hour roadtrip back to Utah, I couldn’t wait to get back into the kitchen! I am trying to choose healthier snacks lately and this dip sounded delicious. You use Greek Yogurt in it which is Fat free! And all of the ingredients in this are amazing. And it was so easy to make. I loved being able to eat this delicious avocado dip with a few whole wheat chips and stay within my calories!

Ingredients for Avocado Yogurt Dip:

  • Ripe Avocados: Smash them into a bowl mixed with the seasonings and yogurt.
  • Plain Fat-Free Greek Yogurt: Rich and creamy with out the fat is the best way to go when picking the yogurt for this recipe.
  • Garlic: Add garlic in for flavor.
  • Garlic Powder: Tasty seasoning to add a little more garlic.
  • Chopped Fresh Cilantro: Perfect for holding
  • Ground Cumin: An earthly tone and flavoring that is not overpowering.
  • Lime: juice from a fresh lime. 
  • Salt and Ground Black Pepper: Just a pinch!

How to Make Creamy Avocado Yogurt Dip:

  1. Mix ingredients together: In a medium sized mixing bowl add the avocado and greek yogurt.  Mash until it is combined and to desired consistency.  Add in the garlic, cilantro, cumin, lime.  Mix until smooth.  Salt and Pepper to taste.

The Recipe Critic Pro Tip:

Store this avocado yogurt dip in an air tight container and place in the refrigerator for 2 to 3 days long.

Ripe avocados and Greek Yogurt together making a mashed avocado yogurt dip. What Can I Mix with Avocado?

This avocado yogurt dip is simple and easy to make. Simply add seasoning to the yogurt and avocados then experiment your favorite seasoning mixes each time you make it. Add a little more spice with paprika, cayenne or red pepper flakes or balsamic vinegar for a savory yogurt and even a hint of lemon juice to sweeten the dip up.

How Do You Keep Avocado from Turning Brown?

The citric acid from the lime juice is a strong antioxidant that will help slow the browning process down once it is mixed together. This does not take away all of the browning but it will help eliminate it for at least 1 to 2 days long.

Try More Delicious Dip Recipes:

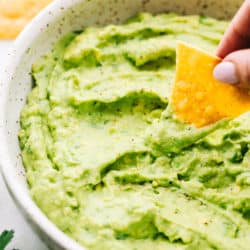
Creamy avocado dip in a bowl with a chip being dipped in and having a little bit of avocado yogurt dip on a chip.

Print

Creamy Avocado Yogurt Dip

This Creamy Avocado dip is one of the best dips that I have EVER had!  Creamy, healthy, and full of flavor, you won't be able to get enough!
Course Appetizer, Snack
Cuisine American
Keyword avocdao yogurt dip, avocdao yogurt dip recipe, yogurt dip
Prep Time 5 minutes
Total Time 5 minutes
Servings 8 People
Calories 93kcal
Author Alyssa Rivers

Ingredients

  • 2 ripe avocados
  • 1/2 cup plain fat-free Greek yogurt
  • 1 clove garlic minced
  • 1/2 teaspoon garlic powder
  • 3 tablespoons chopped fresh cilantro
  • 1/4 teaspoon ground cumin
  • Juice of one lime
  • Salt and ground black pepper to taste

Instructions

  • In a medium sized mixing bowl add the avocado and greek yogurt. Mash until it is combined and to desired consistency. Add in the garlic, cilantro, cumin, lime. Mix until smooth. Salt and Pepper to taste.

Notes

Updated on March 26, 2020
Originally Posted on August 19, 2012

Nutrition

Calories: 93kcal | Carbohydrates: 5g | Protein: 2g | Fat: 8g | Saturated Fat: 1g | Cholesterol: 1mg | Sodium: 10mg | Potassium: 244mg | Fiber: 3g | Sugar: 1g | Vitamin A: 92IU | Vitamin C: 5mg | Calcium: 23mg | Iron: 1mg


source https://therecipecritic.com/creamy-avocado-yogurt-dip/
Share:

Best EVER Ground Beef Tacos

Ground beef tacos are a quick and easy dinner that your whole family will love! Fill a taco with this tender and juicy beef with all your favorite toppings that will become the best weeknight dinner.

This ground beef is tasty and full of flavor! Use this ground beef to make several recipes like these easy homemade Navajo tacos. Make the BEST EVER ground beef with this recipe!

A beef taco with olives, shredded lettuce and shredded cheese being held up with the recipe critic hand.

Ground Beef Tacos

Need an easy family dinner that everyone is going to love?! These ground beef tacos are tender and juicy in every bite plus the ease of making them quickly on a weeknight. Add all your favorite toppings on top of the beef tacos and taste the amazing flavor combination. Perfect for kids to help make in the kitchen and see how easy recipes can be. This was such a flavorful meat that could be made with

This past week with our family home we have tried making all our meals homemade and from scratch. These ground beef tacos are just what we needed, something fresh, full of flavor and perfect for all ages in our home. My boys helped chop and prepare the tortillas and produce. During this time my girls helped set the table as well as cook the ground beef with me and adding in the simple pantry staple ingredients. This time at home has helped us all to become closer and enjoy family meals again!

Ground Beef Tacos Ingredients:

These ingredients are just what your pantry has. My homemade taco seasoning is so easy to make and can have a shelf life of 3 months. It is perfect for this taco recipe and adds just the right amount of seasoning and flavor. Enjoy this quick and easy beef taco recipe with simple ingredients with all the amazing taste!

  • Ground Beef: Lean ground beef is best for less grease and tender meat for these tacos.
  • Homemade Taco Seasoning: This is easy to make and stores for several weeks in an airtight container.
  • Tomato Paste: Thick and rich sauce that adds so much flavor and texture to this beef meat.
  • Water: Helps save time when cooking ground beef and speeds up the process making the beef tender all at the same time.
  • Taco Shells: Personally, I love homemade tortillas or a warmed up tortilla.

Optional Toppings:

  • Shredded Cheese
  • Lettuce
  • Tomatoes 
  • Olives 
  • Avocado 

How to Make Ground Beef Tacos:

  1. Cook ground beef: In a medium sized skillet over medium high heat add the ground beef and cook and crumble until brown. 
  2. Mix in ingredients: Add ingredients for homemade taco seasoning, tomato paste and water.  Stir until combined.  Let it simmer until it starts to thicken, about 5 minutes.
  3. Prepare and serve tacos: Divide evenly into taco shells and top with desired toppings

The Recipe Critic Pro Tip:

The best ground beef is 80/20 unless fresh from the market or local farm. 

Making homemade taco seasoning and adding it to the ground beef after it is cooked then adding in tomato paste and stirred together.

More Optional Toppings:

Just adding a few extra toppings can help add even more deliciousness. The ground beef alone is literally the best ground beef that you will ever have. Add in toppings to enjoy more of variety on each taco that is created.

  • Cheese: Change up the cheese with a spicy Mexican blend or just a classic cheddar cheese.
  • Cilantro: A great garnish to top your taco with.
  • Sour Cream: A rich and creamy topping to lighten the taco.
  • Salsa: So many fun salsa flavors like my 5 Minute Mango Salsa or a classic Homemade Salsa.
  • Avocado: Try guacamole or sliced avocados on top.
  • Jalapeños: Add some spice to each taco with some sliced jalapeños fresh or from a jar.
  • Onions: Chop up onions for a crunchy sweetness topping.

More Delicious Tacos:

Five beef tacos on a plate loaded with shredded lettuce, sliced black olives, shredded cheese, tomato slices with lime slices and an avocado sliced on the side.

Print

Course Dinner, Main Course
Cuisine Mexican
Prep Time 5 minutes
Cook Time 20 minutes
Total Time 25 minutes
Servings 8 People
Calories 124kcal
Author Alyssa Rivers

Ingredients

Optional Toppings:

  • Shredded Cheese
  • Lettuce
  • Tomatoes
  • Olives
  • Avocado diced

Instructions

  • In a medium sized skillet over medium high heat add the ground beef and cook and crumble until brown. Add ingredients for homemade taco seasoning, tomato paste and water. Stir until combined. Let it simmer until it starts to thicken, about 5 minutes.
  • Divide evenly into taco shells and top with desired toppings

Nutrition

Calories: 124kcal | Carbohydrates: 7g | Protein: 13g | Fat: 5g | Saturated Fat: 2g | Cholesterol: 35mg | Sodium: 92mg | Potassium: 258mg | Fiber: 1g | Sugar: 1g | Vitamin A: 61IU | Vitamin C: 1mg | Calcium: 15mg | Iron: 2mg


source https://therecipecritic.com/ground-beef-tacos/
Share:

Pasta Primavera

Pasta Primavera is a classic Italian American recipe that’s loaded with spring vegetables. It has a light and fresh sauce and is the perfect break from heavier winter foods!

Looking for more vegetarian recipes? Try this Farro Caprese Salad, this Buffalo Cauliflower appetizer, or The Best Broccoli Cheese Soup Recipe.

Pasta primavera in a white bowl

Pasta Primavera

Hi everyone! Natasha here from Salt & Lavender. I am soo excited for warmer weather and this spring pasta! This vegetarian Pasta Primavera recipe is wonderful after all the comfort foods we’ve had all winter long. It’s also nice if you want your carb fix but are starting to think about swimsuit season! It has a light lemony sauce that you will love.

What is Pasta Primavera?

“Primavera” means spring in Italian. It’s a simple pasta dish filled with spring vegetables. This recipe was invented in the USA in the 1970s – it’s not an authentic Italian recipe, which was somewhat surprising to me!

Pasta Primavera ingredients

You can feel free to swap for whatever vegetables you prefer or are sold at your local grocery store or farmer’s market, but this particular recipe has:

  • Butter & Oil for the light sauce
  • Zucchini
  • Peas (I used frozen but you could use sugar snap or fresh peas if you have access to them)
  • Bell pepper (use whatever color you prefer)
  • Little tomatoes (grape or cherry work well)
  • Carrots (I slice it very thin into ribbons so it cooks fast. You can also buy pre-cut matchstick carrots)
  • Garlic
  • Fresh lemon juice
  • Italian seasoning (the dried herb blend you can find in the herb/spice aisle)
  • Fresh basil
  • Parmesan cheese (I like to grate my own for the best flavor and texture)

You could definitely add broccoli (or broccolini) or asparagus as well/instead of another ingredient.

Pasta primavera ina skillet cooking.

How to make Pasta Primavera

  1. Prep your ingredients (chop the veggies and grate that cheese!).
  2. Add the oil and butter to a skillet over medium-high heat.
  3. Once the pan is hot, add the vegetables and garlic and sauté, stirring often, for about 5 minutes until the vegetables are tender-crisp.
  4. Stir in the lemon juice, Italian seasoning, and basil.
  5. Before draining the pasta, add a splash of the pasta water (a tablespoon or two) to the skillet. Drain the pasta and add it to the pan and toss. Just before serving, stir in the parmesan cheese.

What kind of pasta to use?

I used penne, but feel free to use your favorite or whatever’s in your pantry.

Can you add protein to Pasta Primavera?

Absolutely! I’d add some raw shrimp in while you’re sautéing the veggies (they won’t take more than 5 minutes or so to cook), or add in cooked/rotisserie chicken and warm it through.

Pasta primavera in a skillet.

Other pasta recipes you’ll love:

Pasta primavera in a bowl with a fork.

Print

Easy Pasta Primavera

Pasta Primavera is a classic Italian American recipe that's loaded with spring vegetables. It has a light and fresh sauce and is the perfect break from heavier winter foods!
Course Main Course
Cuisine Italian American
Keyword Best Pasta Primavera recipe, Pasta Primavera Recipe, Primavera Pasta
Prep Time 15 minutes
Cook Time 15 minutes
Total Time 30 minutes
Servings 4
Calories 381kcal
Author Natasha Bull

Ingredients

  • 2 tablespoons butter
  • 1 tablespoon olive oil
  • 1 small zucchini (diced)
  • 1/2 cup frozen peas
  • 1/2 bell pepper (use any color)
  • 5 ounces tomatoes (I prefer grape or cherry, cut into halves)
  • 1 small carrot (use a vegetable peeler to cut into ribbons)
  • 3 cloves garlic (minced)
  • 1 teaspoon fresh lemon juice
  • 1 dash Italian seasoning
  • 1 tablespoon fresh basil (torn/sliced thin)
  • 1/2 cup freshly grated parmesan cheese
  • 8 ounces uncooked pasta
  • Salt & pepper (to taste)

Instructions

  • Prep your ingredients and boil water for your pasta (cook it al dente according to package directions). Add the oil and butter to a skillet over medium-high heat.
  • Once the pan is hot, add the vegetables and garlic and sauté, stirring often, for about 5 minutes until the vegetables are tender-crisp.
  • Stir in the lemon juice, Italian seasoning, and basil.
  • Before draining the pasta, add a splash of the pasta water (a tablespoon or two) to the skillet. Drain the pasta and add it to the pan and toss. Just before serving, stir in the parmesan cheese. Season with salt & pepper as needed.

Notes

  • Feel free to swap out any veggies you don't like. This is a very forgiving recipe!

Nutrition

Calories: 381kcal | Carbohydrates: 51g | Protein: 14g | Fat: 14g | Saturated Fat: 6g | Cholesterol: 24mg | Sodium: 268mg | Potassium: 424mg | Fiber: 4g | Sugar: 6g | Vitamin A: 3346IU | Vitamin C: 38mg | Calcium: 185mg | Iron: 1mg


source https://therecipecritic.com/pasta-primavera/
Share:

Baked Parmesan Garlic Chicken (4 ingredients!)

This parmesan garlic chicken is perfectly baked tender and juicy chicken that is lightly seasoned with Italian seasoning and garlic powder and then sprinkled with parmesan.  All made in under 30 minutes!

I love everything about this meal. So easy to mix everything together and so delicious. We will be having this again and again! For more recipes like this one try this garlic parmesan chicken tenders recipe or this sheet pan crispy parmesan garlic chicken recipe.


Baked Parmesan Garlic Chicken on a pan with lemon slices garnished around it.

Baked Parmesan Garlic Chicken Breast Recipe

This my friends, was fantastic! The best part about it was that it was so easy and packed with flavor! Seriously. It is only four ingredients. I was able to throw this together in 5 minutes and serve it with a side of rice and veggies and my family thought they had a gourmet meal. I loved how the parmesan cheese gave it a delicious crust and the chicken was full of flavor and so tender. A great easy meal that everyone loved! This will definitely make it on your list of go-to meals when you are short on time but still want a nutritious dish! And on an even better note, it is kid- friendly as well. 

What is baked parmesan garlic chicken breast?

If not one of the greatest, easiest, and tastiest meals ever?! This dish is incredibly simple. Containing only 4 ingredients, it is exactly what it sounds like. Baked chicken breast with a parmesan and garlic rub to it. It is the perfect combination of savory garlic and parmesan paired with juicy chicken! 

It is definitely the meal that will have your house smelling amazing. 

What do you need to make baked parmesan garlic chicken breast?

This is one of those meals that is perfect for when you are in between grocery trips and may not have a lot of stuff to choose from. Because this literally calls for 4 things. You are able to make a gourmet dish with just 4 simple ingredients.

As always, remember the exact measurements for all the ingredients needed will be included in the recipe at the very bottom. 

  • Boneless skinless chicken breasts
  • Dry Italian dressing packet
  • Garlic powder
  • Parmesan cheese 

How do you make baked parmesan garlic chicken breast? 

Preparing dinner has never been so deliciously simple. This meal is by far one of the quickest ones I have ever prepared that is still very rewarding. By the looks and taste of it no one would even know that you whipped this up in just a matter of minutes! Here the 4 simple steps to follow to prepare a mouth watering meal.

  •  Preheat the oven to 400 degrees.
  • Mix together the Italian Dressing Mix, Parmesan Cheese, and garlic powder.
  • Wash the chicken and while still damp, coat them with the cheese mixture.
  • Bake chicken breasts in a shallow dish for 20-25 minutes or until no longer pink.

The process of making Parmesan Garlic Chicken by adding the seasoning on the chicken then placing on sheet pan.

How much does this recipe yield?

So if you are following along with the 4 chicken breasts, this will provide 4 servings. However depending on the cuts of your chicken, you can always cut the breasts in half (making them thinner) if yours are really thick and would rather have smaller servings. 

What can you serve with baked chicken parmesan chicken breast?

This dish is very flavorful yet versatile enough to be served with a variety of things. Having chicken as the main dish opens up a lot of possibilities. There are of course many vegetables you can choose from, having them fresh or steaming them. You can always pair the chicken together with a salad that includes fresh vegetables. Potatoes are also a great side whether you chose to have them mashed, or baked. And for all my garlic lovers there is always the option of putting together some garlic bread or even just some sourdough bread or dinner rolls. 

Are there any variations to this recipe

Everyone has their own preferences and different tastes that they like. The nice thing about the recipe is that it is so simple you can afford to switch or add things that you like. You can choose to use bone in chicken breasts if that is what you already have or prefer that is not a problem! Also another common addition is using lemon juice to zest or varnish your chicken right before serving it. This adds to the flavor and is a quick adjustment to make. 

Baked Parmesan garlic chicken with asparagus on a plate garnished with a lemon and parsley.

You might also enjoy these chicken recipes:

Print

Baked Parmesan Garlic Chicken

This parmesan garlic chicken is perfectly baked tender and juicy chicken that is lightly seasoned with Italian seasoning and garlic powder and then sprinkled with parmesan.  All made in under 30 minutes! 
Course Dinner, Main Course
Cuisine American
Keyword baked parmesan garlic chicken, chicken recipes, parmesan garlic chicken
Prep Time 10 minutes
Cook Time 20 minutes
Total Time 30 minutes
Servings 4 Chicken breasts
Calories 185kcal
Author Alyssa Rivers

Ingredients

  • 4 Boneless Skinless Chicken Breasts
  • 1 package Dry Italian Dressing Packet
  • 1 teaspoon garlic powder
  • 1/2 cup grated parmesan cheese You can also use fresh shredded which I used

Instructions

  • Preheat oven to 400 degrees.
  • Mix together the Italian Dressing Mix, Parmesan Cheese, and garlic powder.
  • Wash chicken and while still damp, coat them with the cheese mixture.
  • Bake chicken breasts in shallow dish for 20-25 minutes or until no longer pink.

Notes

Updated on March 23, 2020
Originally Posted on April 11, 2013

Nutrition

Calories: 185kcal | Carbohydrates: 1g | Protein: 29g | Fat: 7g | Saturated Fat: 3g | Cholesterol: 83mg | Sodium: 323mg | Potassium: 443mg | Fiber: 1g | Sugar: 1g | Vitamin A: 142IU | Vitamin C: 1mg | Calcium: 144mg | Iron: 1mg


source https://therecipecritic.com/baked-parmesan-garlic-chicken/
Share:

Popular

Archive

Slider Tag

Facebook

Header Ads

Recent in Food

Blog Archive

Recent Posts

Unordered List

  • Lorem ipsum dolor sit amet, consectetuer adipiscing elit.
  • Aliquam tincidunt mauris eu risus.
  • Vestibulum auctor dapibus neque.

Pages

Theme Support

Need our help to upload or customize this blogger template? Contact me with details about the theme customization you need.