Glazed Lemon Brownies

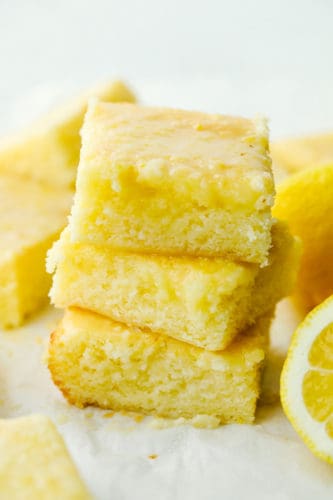
Quick and easy Lemon Brownies that are perfectly moist and chewy! The Lemon Glaze on top is the perfect finishing touch, it will be hard to stop at one!

Lemon is a favorite flavor that makes winning favorites divine! You have to try this Chicken, Scallops and Shortbread Cookies.
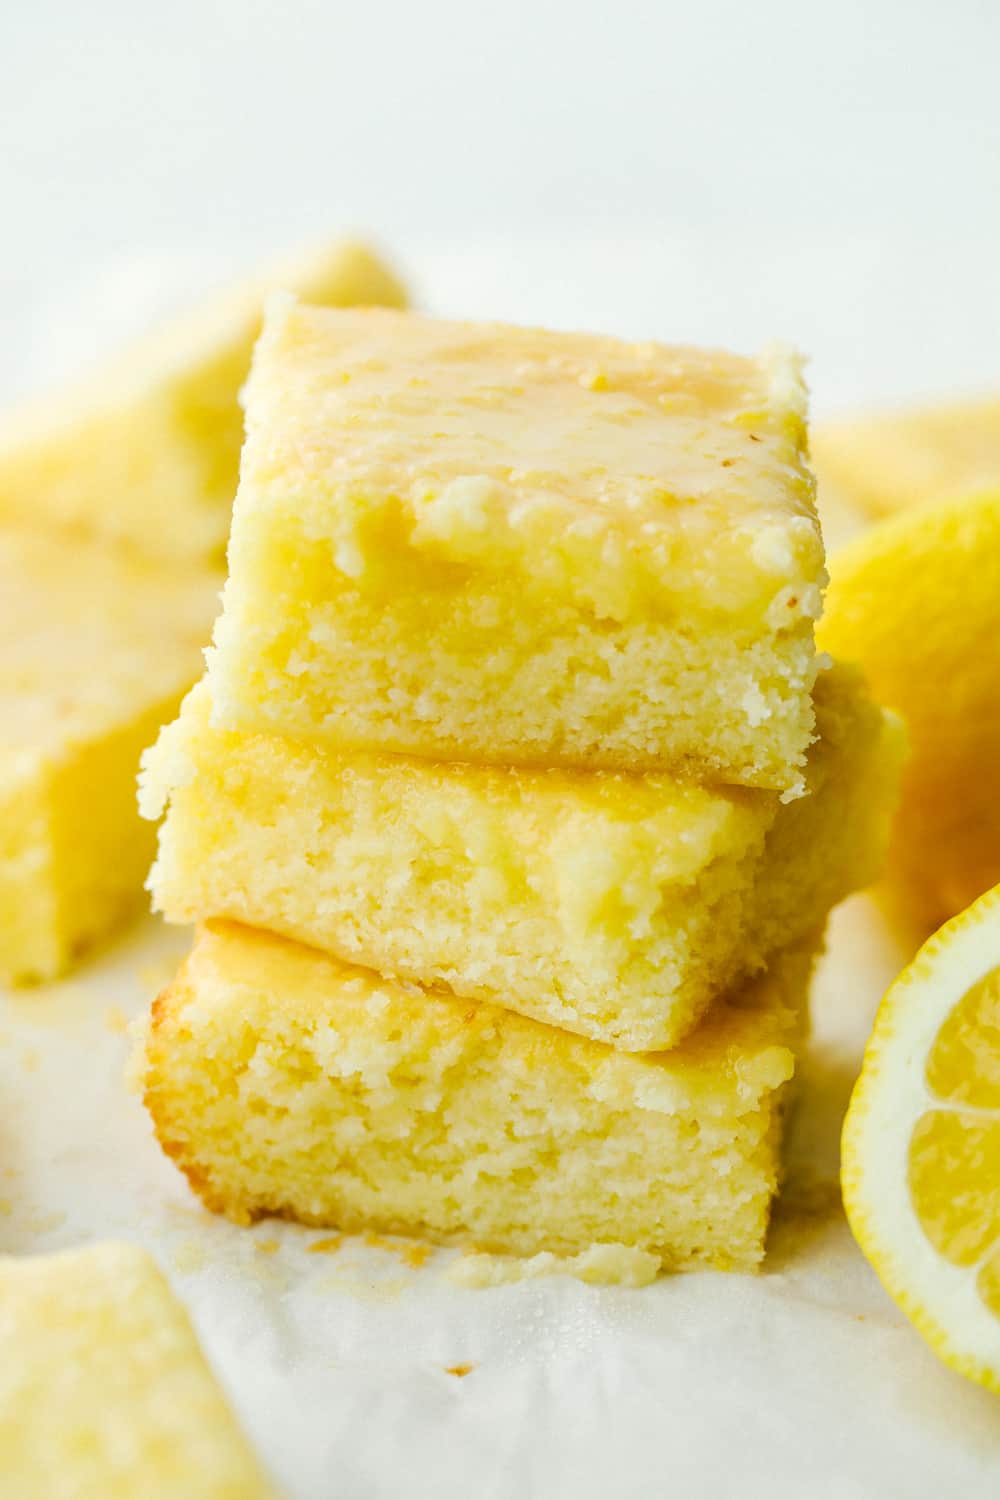
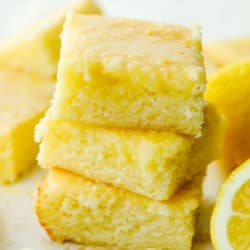
Rich and zippy Lemon Brownies cut and stacked.

Lemony Lemon Brownies

These lemon brownies are AMAZING!!! Like I can’t stop thinking about them, I want to make another pan right now amazing. Even my family members that do not appreciate lemon like I do, loved these brownies. They are tart and sweet. Thick and chewy these lemon brownies can really satisfy your sweet lemon cravings.

My favorite part about these brownies is that they are so easy! Grab some lemons from the store and you probably have all of the ingredients on hand. They mix in no time at all and are ready to throw into the oven! But let’s be honest. The glaze is probably my favorite part to these brownies. It is the perfect sweet n’ tart, lemony finishing touch. I know that you guys are going to love these brownies! You have to try them today!

What you Need for Easy Lemon Brownies

All you need is a lemon or two and you are set for the best lemon brownies ever!

  • Butter: Soften the butter by bringing to room temperature or softening in the microwave. Do not melt.
  • Sugar: Adds the necessary sweet.
  • Eggs: Adds richness and acts as the binder.
  • Lemon Juice: Use fresh lemon juice.
  • Lemon Zest: From the same lemon you juiced.
  • Flour: All purpose flour will work perfectly.
  • Salt: Adds balance to the flavors.

Lemon Glaze Ingredients 

  • Powdered Sugar: Perfect counterbalance to the lemon.
  • Lemon Juice: Fresh from the same lemon you used for the bars.
  • Lemon Zest: From the other half of the lemon.

How to Make One Bowl Lemon Brownies

These only make a 8×8 inch pan. This can cause problems when everyone eats them before you get one! Don’t take chances and make a double batch. hide the other half just for you.

  1. Prep: Preheat oven to 350 degrees. Line an 8×8 inch pan with aluminum foil or parchment paper for easy removal.
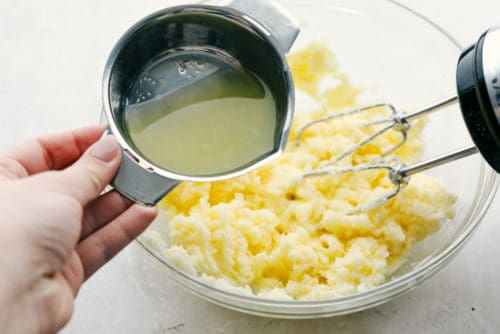
  2. Mix: In a large mixing bowl or using a stand mixer add the butter, sugar, and lemon zest and beat until it is fluffy.
  3. Add: Add in the eggs and lemon juice, mix till combined.
  4. Beat: Add in the flour and baking powder and beat until it is combined.
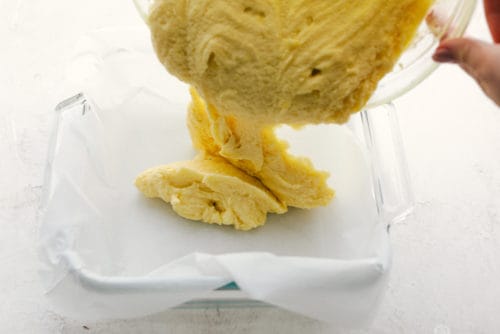
  5. Bake: Pour into the 8×8 inch prepared pan and bake for 25 minutes. remove and let cool.
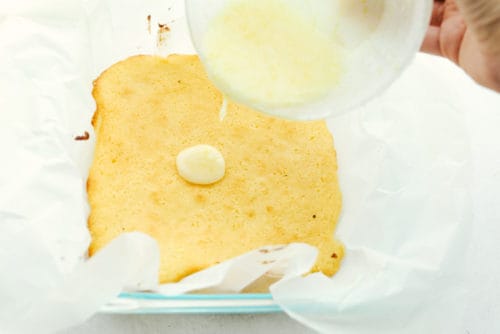
  6. Glaze: Whisk together the powdered sugar, lemon juice, and zest from the other half of the lemon. Pour over the top of the slightly cooled lemon brownies.
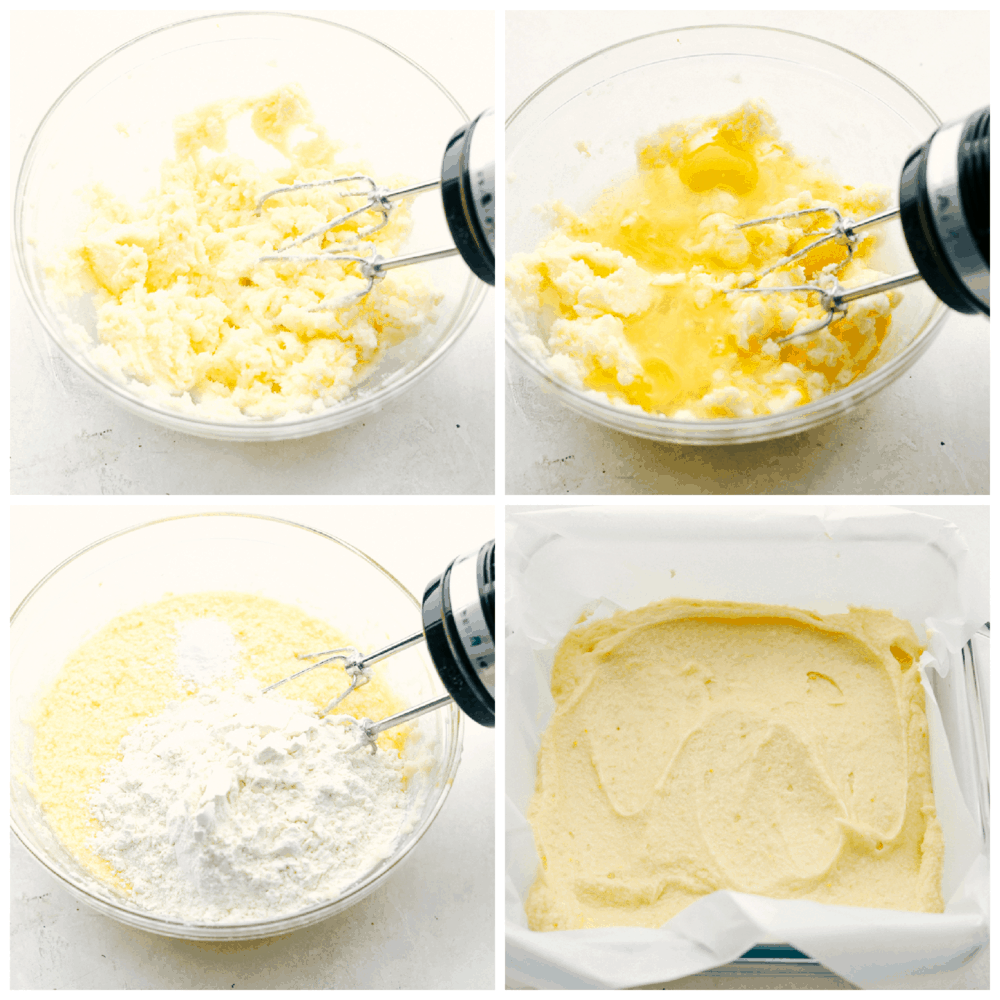
Mixing the ingredients and spreading it in the pan for lemon brownies.

Why Are They Called Brownies?

If these are filled with lemons instead of chocolate, how can they be called brownies? It is because these Lemon morsels have the same texture as your favorite fudgy brownie.  They are thick and rich. Yet you find them a bit lighter than your average fudgy brownie, which is divine. The fudge like texture melts in your mouth, leaving you wanting more. You’ll notice there is no leavening agent (baking soda or powder) in this lemon brownie recipe. This helps create that fudgy brownie like texture you are going to fall in love with. Now when you want a dense rich dessert but not the chocolate, you can reach for these!

Tips for the Best Lemon Brownies

You might need more than 1 lemon depending on its size. Look for bright yellow lemons with thin firm skin.

  • Zesting Lemons: Wash your lemons thoroughly before zesting. If you don’t have a zester you can use the smallest holes of a cheese grater. You want to stop zesting once you hit the pith or white part as it is quite bitter.
  • Juicing Tip: Cut and quarter your lemons and then microwave them for about 30 seconds. This helps the lemons release more of its juice.
  • Can I use bottled lemon juice instead of lemons? You can but it will definitely change the flavor a bit. I always prefer fresh. When substituting lemon concentrate for real lemon juice in a recipe, use two tablespoons of bottled lemon juice to replace the juice of one lemon. Substitute lemon juice concentrate for equal proportions in any recipe calling for lemon juice.
  • Glaze: If you add the glaze while the lemon brownies are slightly warm, it’ll seep in to the brownie making it that much more moist and tender. But make sure they have cooled mostly first.
  • Add more Lemon: If you are fan of lemons like me, add more zest for more zing.
  • Store: Keep these in an airtight container for up to 4 days at room temperature or in the fridge for 1 week. Note they will become more moist and dense as they sit. Day 2 is divine. Freeze these as well for up to 3 months. Thaw on the counter till ready to serve.
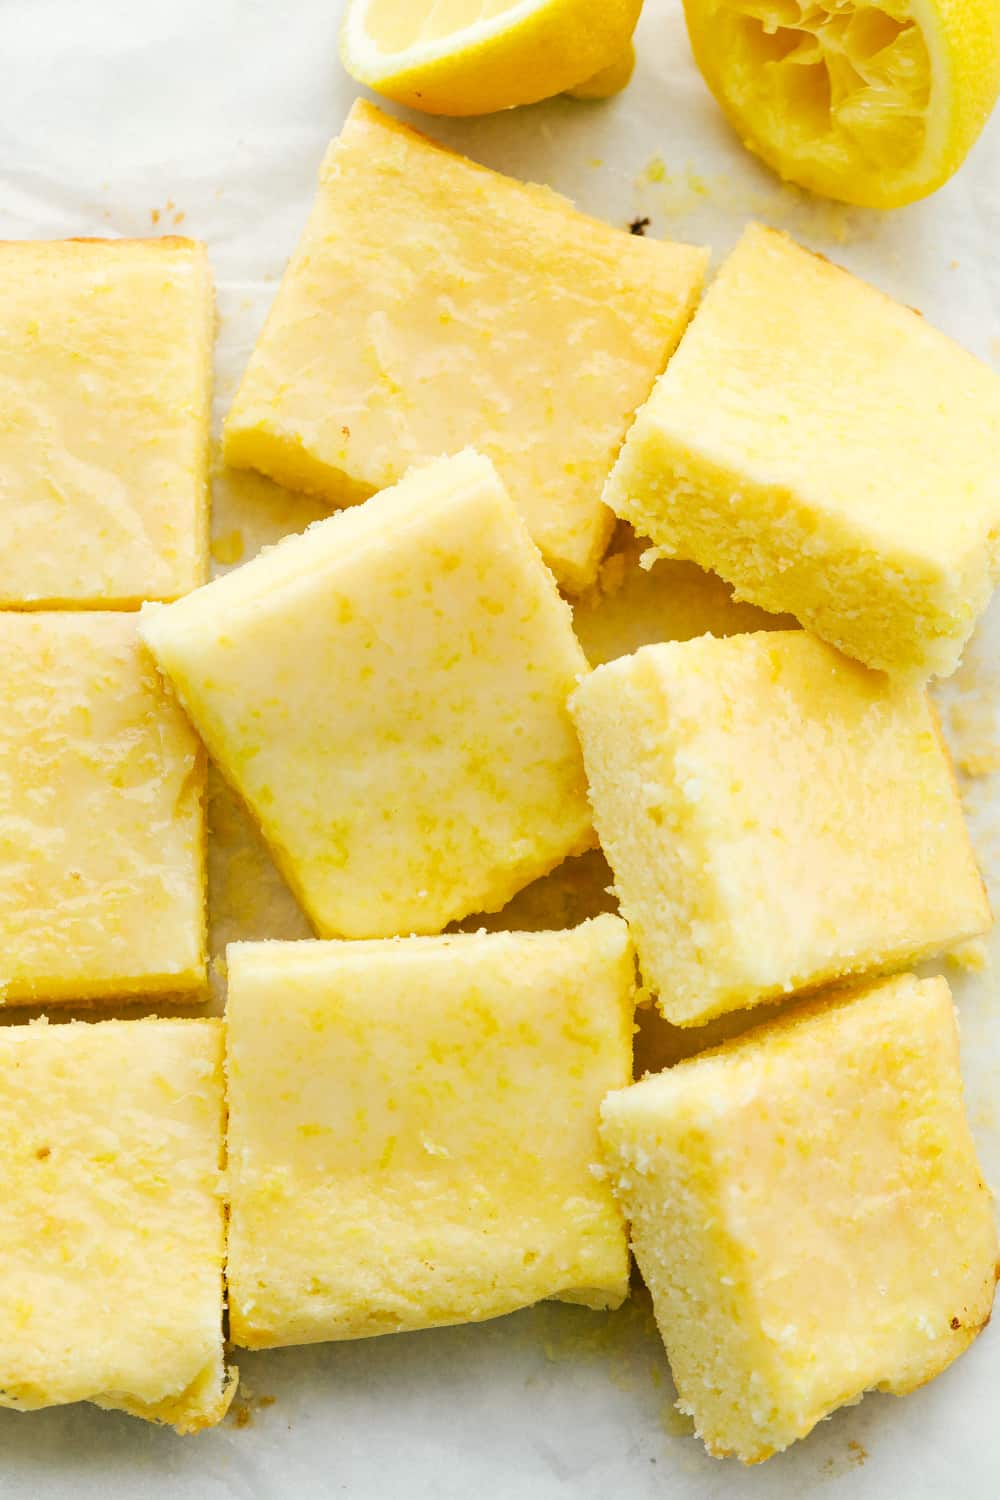
Lemon Brownies cut into squares ready to eat.

More Brownie Recipes to try

Whether it is a truly fudgy chocolate rich brownie or these lemon brownies, they are just exquisite. Brownies are a comfort food that satisfies with the moist dense texture and flavors that explode in the mouth. When you want to reach for a brownie next time, reach for one of these AMAZING recipes. You will not be sorry!

Print

Glazed Lemon Brownies

Quick and easy lemon brownies that are perfectly moist and chewy! The Lemon Glaze on top is the perfect finishing touch! It will be hard to stop at one!
Course Dessert
Cuisine American
Keyword brownies, lemon, lemon brownies
Prep Time 5 minutes
Cook Time 25 minutes
Total Time 30 minutes
Servings 10 Bars
Calories 212kcal
Author Alyssa Rivers

Ingredients

  • 1/2 cup butter softened
  • 3/4 cup sugar
  • 2 large eggs
  • 1 Tablespoon of Lemon juice
  • zest from ½ of a lemon
  • 3/4 cup flour
  • 1/4 teaspoon salt

Lemon Glaze:

  • 1/2 cup powdered sugar
  • 1 Tablespoon lemon juice
  • zest from ½ lemon

Instructions

  • Preheat oven to 350 degrees. Line an 8x8 inch pan with aluminum foil or parchment paper for easy removal.
  • In a large mixing bowl or using a stand mixer add the butter, sugar, and lemon zest and beat until it is fluffy.
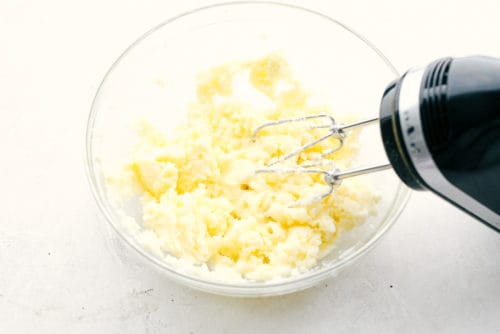
  • Add in the eggs and lemon juice.
  • Add in the flour and baking powder and beat until it is combined.
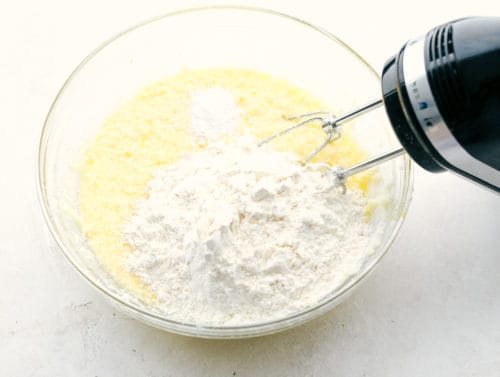
  • Pour into the 8x8 inch prepared pan and bake for 25 minutes. Remove and let cool.
  • To make the glaze: Whisk together the powdered sugar, lemon juice, and zest from the other half of the lemon. Pour over the top of the cooled lemon brownies.
Video

Notes

Updated on February 26, 2021
Originally Posted on March 22, 2015

Nutrition

Calories: 212kcal | Carbohydrates: 28g | Protein: 2g | Fat: 10g | Saturated Fat: 6g | Trans Fat: 1g | Cholesterol: 62mg | Sodium: 154mg | Potassium: 30mg | Fiber: 1g | Sugar: 21g | Vitamin A: 338IU | Vitamin C: 1mg | Calcium: 10mg | Iron: 1mg


source https://therecipecritic.com/glazed-lemon-brownies/
Share:

Cashew Chicken ( Way Better than Takeout!)

This homemade Cashew Chicken is way better than takeout!  Tender chicken is stir-fried and tossed with a luscious garlic sauce and cashews.

Better than take out in the comfort of your own home is the best! Combine this dish with Egg Rolls, Fried Rice and some Wontons for a complete dinner.

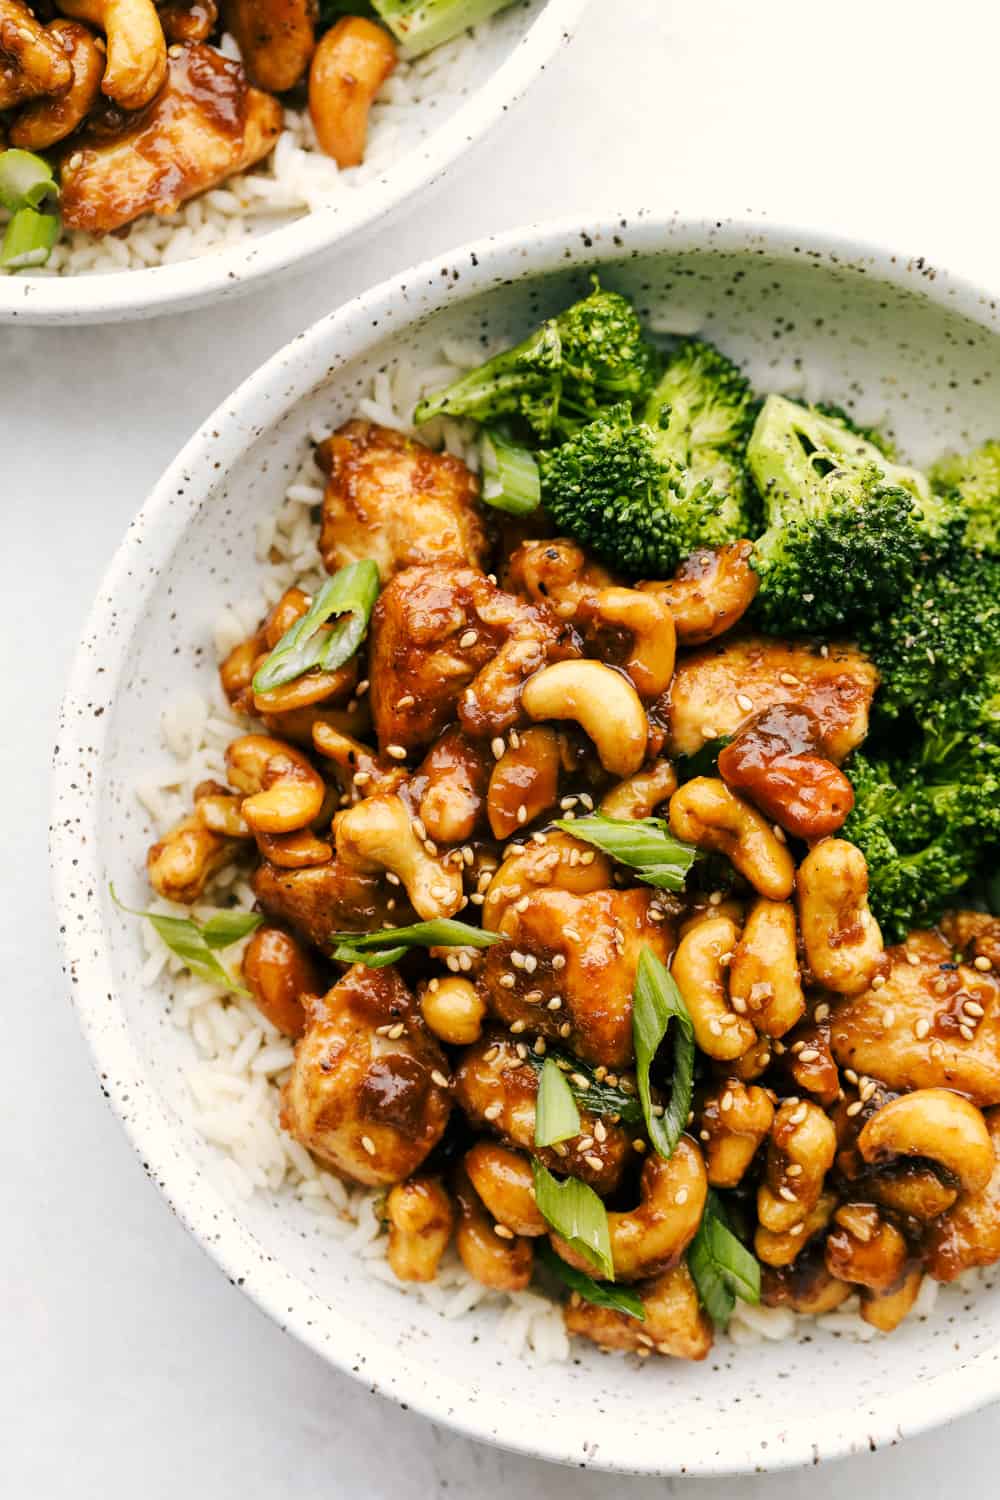
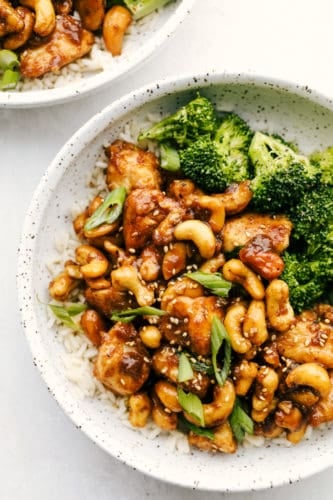
Cashew chicken on bed of rice with broccoli

Homemade Cashew Chicken

Chinese take out is one of America’s favorites with good reason. It is a comfort food that is jam packed with flavor and diversity. The chicken is tender, the cashews are crunchy and the sauce is the perfect combination of sweet and zing. You have to try this tried and true recipe!

Coating the chicken in the cornstarch creates a nice crisp crust and will also thicken the sauce. The sauce has the perfect balance of sweetness with saltiness and  bit of zing from the garlic. If you want more kick you can add red pepper flakes to the sauce. The different combinations of textures will more than satisfy. The chicken is tender with a light crust. The cashews add a bit of crunch and the sauce is creamy smooth. We like to serve it with rice and vegetables.

Ingredients in Easy Chicken Cashew

Simple ingredients come together to make this tangy, with a hint of spicy cashew chicken. Everything is easy to find in your local grocery store. No need to go to a specialty store.

  • Chicken: Skinless boneless chicken breasts.
  • Salt and Pepper: To taste
  • Cornstarch: This acts as a coating and thickener for the sauce.
  • Olive Oil: To stir fry the chicken in.
  • Soy Sauce: You can either use low sodium or regular.
  • Chicken Broth: For the sauce.
  • Garlic Cloves: Adds a bit of a kick and a ton of flavor.
  • Brown Sugar: Provides a bit of sweetness to the sauce.
  • Hoisin Sauce: Classic sauce used in many asian dishes.
  • Sesame Oil: Helps with the flavor and cooking.
  • Whole Cashews: Unsalted are best, you can use pieces if those are easier to find.

Making Better than Takeout Cashew Chicken

This better than take out is actually quite easy to make.  All it takes is a bit of time and you’ve got cashew chicken that will taste amazing.

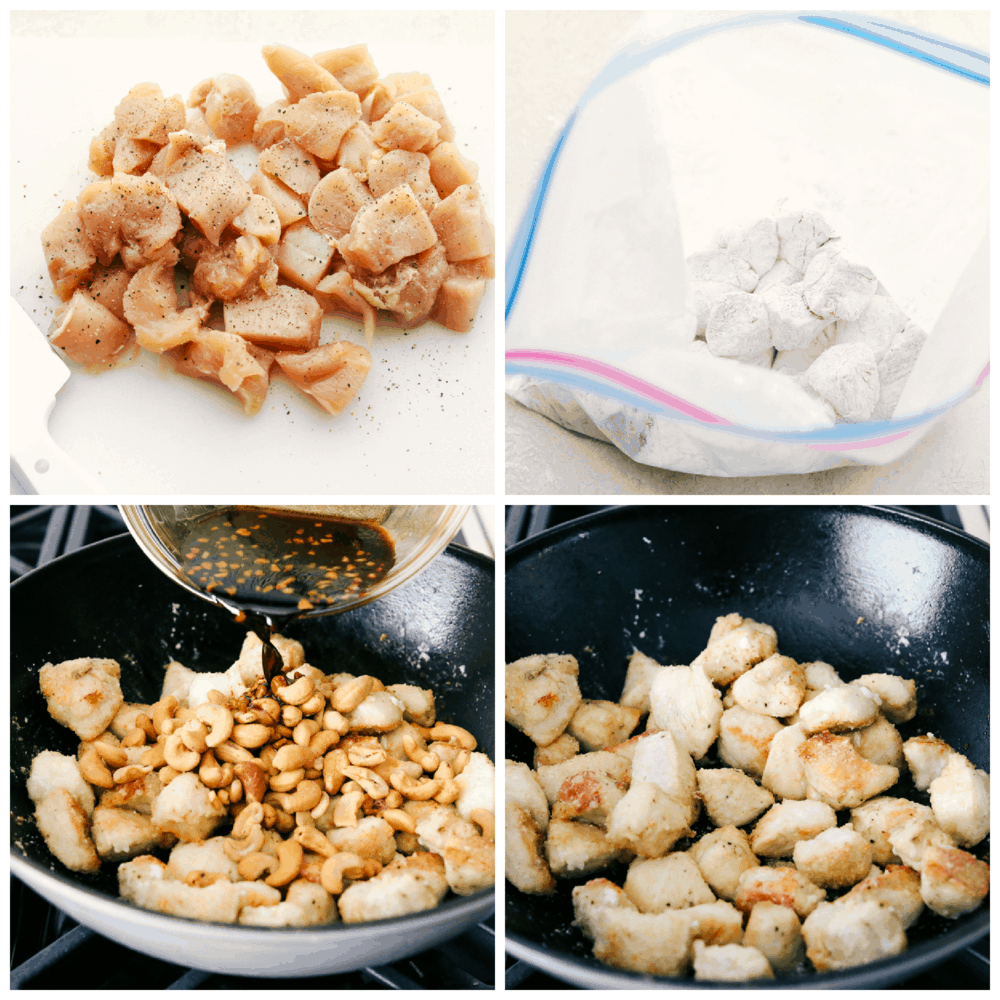
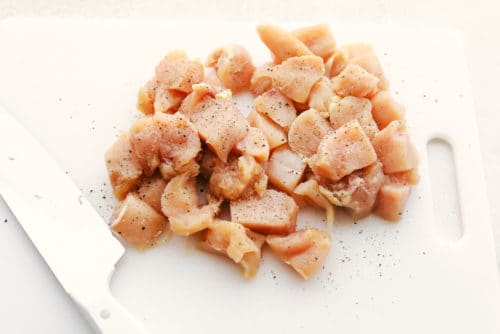
  1. Cut: Dice your chicken breast into one inch pieces. Salt and pepper to taste.
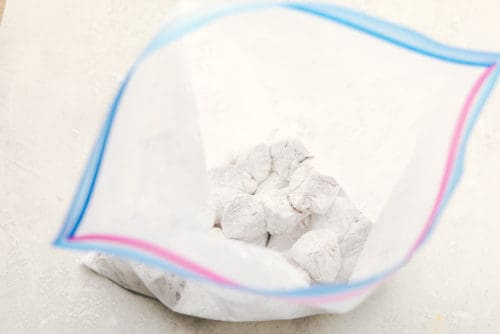
  2. Mix: Toss the chicken with the cornstarch mixture in a ziplock bag.
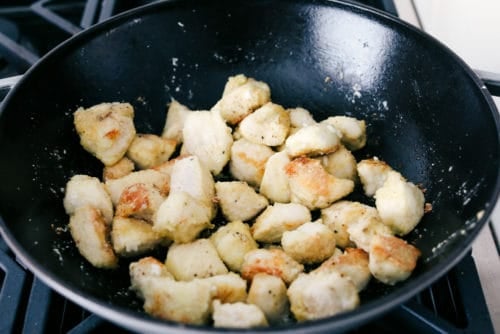
  3. Stir Fry: Add olive oil to wok or large skillet over medium high heat. Once the oil gets to the smoking point then add the chicken in a single layer in batches. Cook each side until golden brown.
  4. Sauce: In a small bowl whisk the soy sauce, chicken broth, garlic, brown sugar, hoisin and sesame oil.
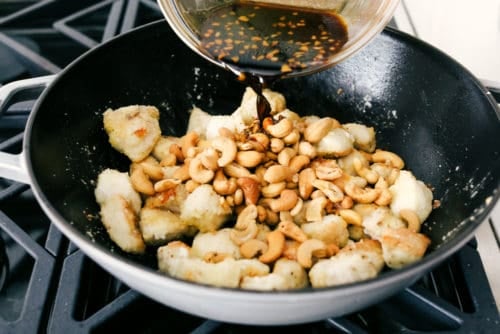
  5. Combine: Add to the pan with the cashews.Toss until the sauce has thickened.
  6. Serve: Serve over rice with vegetables if desired.


Cut up chicken, breading and sauteing the chicken for Cashew chicken.

Tips for The Best Cashew Chicken

This will come together fast so make sure you have everything ready to go. The extra time to prep everything before you start cooking will make all the difference.

  • Wok: If you don’t have a wok, no worries. You can use a large fry pan with the same success.
  • Chicken: Cut the chicken into the same sized pieces so they cook evenly. It is important that you do not overcook the chicken. It will turn rubbery instead of juicy and tender. Just brown each side and then begin adding the other ingredients. It will finish cooking in the sauce. You can also use chicken thighs cut up, use boneless skinless for easy preparation.
  • Roast the Cashews:  If you bought your cashews raw, you will want to roast them to bring out their flavor. Place them on a sheet pan and put in the oven at 350 degrees for about 5 minutes or until fragrant. They will crisp up as they cool.
  • Garnish: I like to cut up some green onions and add at the very end for a bit of flavor and color.
  • Serve: We love this over rice and some stir fried vegetables for a complete meal that is so scrumptious. You can also try cauliflower rice, quinoa or noodles to serve this cashew chicken over.
  • Vegetables: You can also stir fry bell peppers, mushrooms, zucchini and broccoli right in the wok after the chicken is done. Remove the chicken, stir fry the vegetables. When tender add the chicken back in and the sauce.

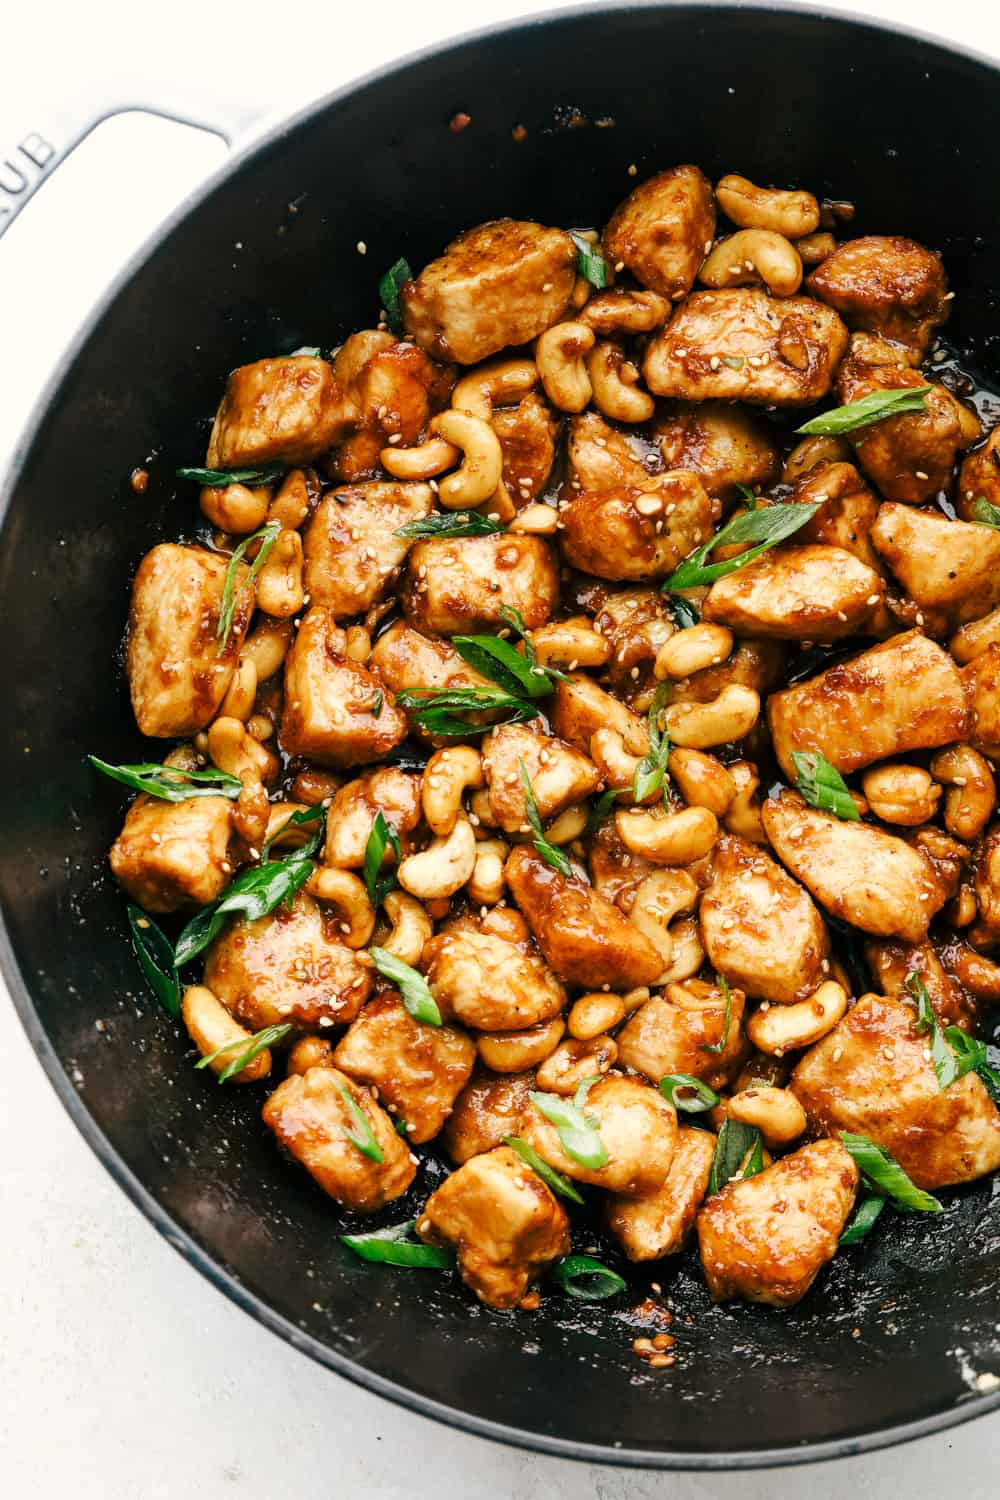
Cashew chicken in a wok with garnish.

Storing Chinese Cashew Chicken

While cashew chicken is amazing the leftovers can be a little soggy. Especially the cashews! The flavor, however, intensifies as it melds together overnight.

  • Store: Keep leftovers in the fridge for up to 4 days in a well sealed container.
  • Reheat: To reheat you can use the microwave or add back to a pan and flash fry in the pan on medium high till heated through. This will help crisp up the chicken and nuts a bit.

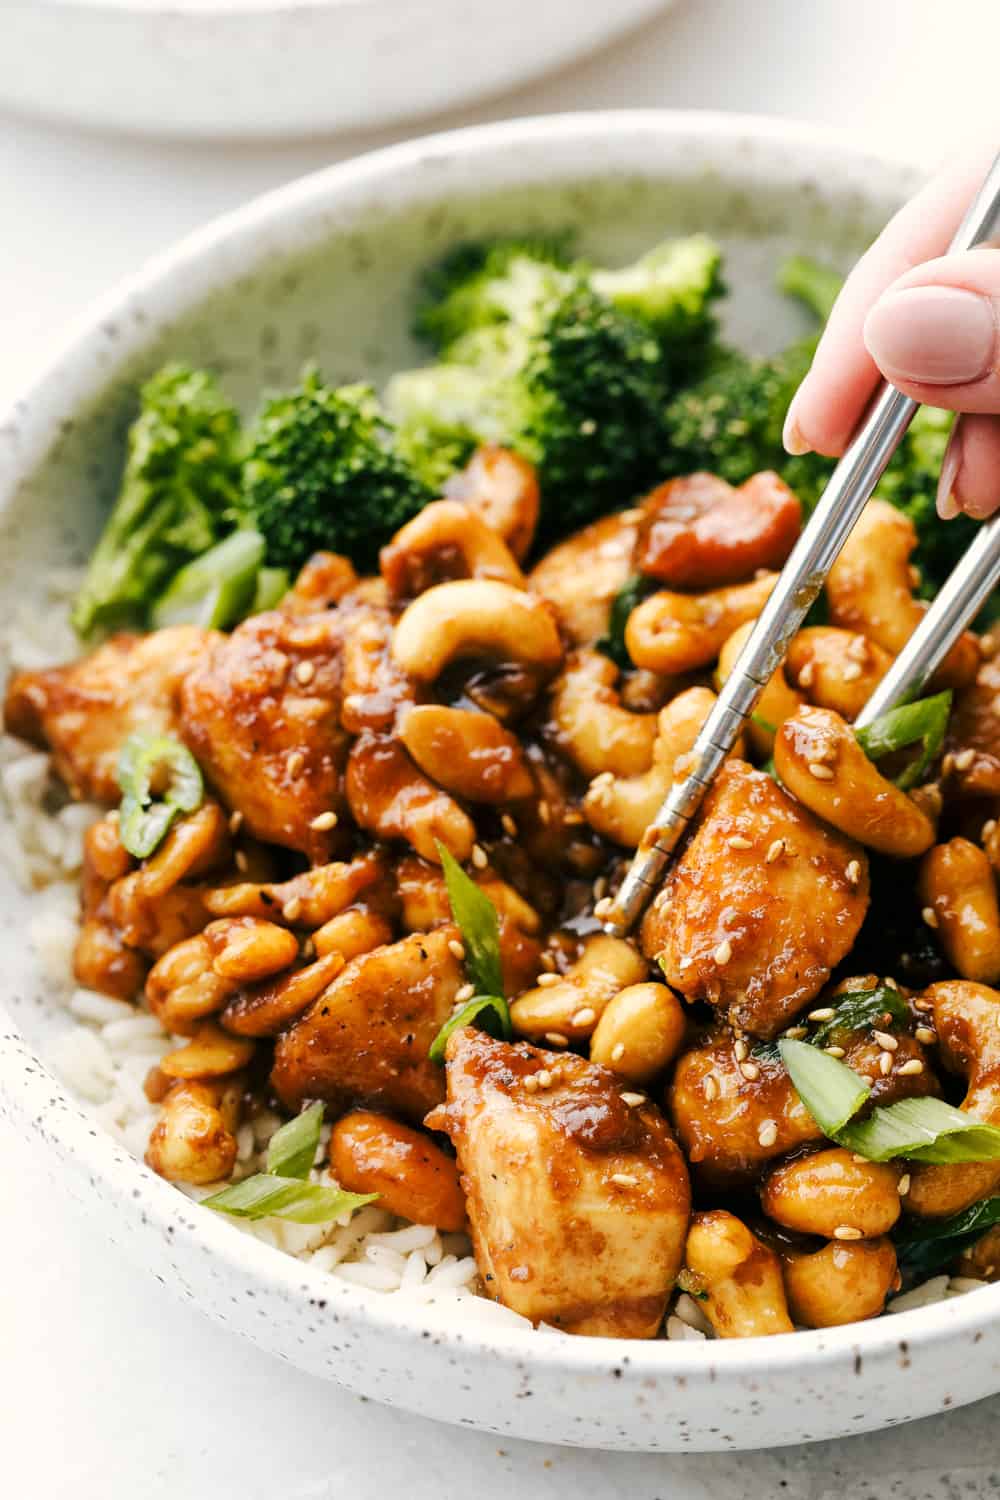
Picking up Cashew Chicken with chopsticks.

More Better Than Takeout Favorites to Try

It is always a culinary success when I can make my favorite takeout meals at home. More often than not, they also taste better than the restaurants too. Save money and know exactly what is going into your favorite dishes by making them at home. When you are looking for a favorite, you have to try these first. They are all so good! You may never go out again!

Print

Cashew Chicken

This homemade Cashew Chicken is way better than takeout!  Tender chicken is stir-fried and tossed with a luscious garlic sauce and cashews.
Course Dinner, Main Course
Cuisine Asian American
Keyword Cashew Chicken
Servings 4 People
Calories 329kcal
Author Alyssa Rivers

Ingredients

  • 1 1/2 pounds chicken breasts
  • salt and pepper
  • 1/4 cup cornstarch
  • 2 Tablespoons olive oil
  • ¼ cup Soy Sauce low sodium if preferred
  • 1/2 cup chicken broth
  • 3 Garlic Cloves minced
  • 1 Tablespoons Brown Sugar
  • 1 Tablespoon Hoisen Sauce
  • 1 teaspoon Sesame Oil
  • 1 cup whole unsalted cashews

Instructions

  • Cut your chicken breast into one inch pieces. Salt and pepper.
  • Toss the chicken with the cornstarch mixture in a ziplock bag.
  • Add olive oil to a wok or large skillet over medium high heat. Once the oil gets to the smoking point then add the chicken in a single layer in batches. Cook each side until golden brown.
  • In a small bowl whisk the soy sauce, chicken broth, garlic, brown sugar, hoisin and sesame oil. Add to the pan with the cashews. Toss until the sauce has thickened. Serve over rice and with veggies if desired.

Nutrition

Calories: 329kcal | Carbohydrates: 14g | Protein: 38g | Fat: 13g | Saturated Fat: 2g | Trans Fat: 1g | Cholesterol: 109mg | Sodium: 1181mg | Potassium: 702mg | Fiber: 1g | Sugar: 4g | Vitamin A: 52IU | Vitamin C: 5mg | Calcium: 21mg | Iron: 1mg


source https://therecipecritic.com/cashew-chicken/
Share:

Mission: ImPASTAble Trailer

For the last three years, Dan has been on a quest to invent a new pasta shape, actually get it made, and actually sell it. And things have not gone as planned. Starting this Monday, March 1, we’re telling the story of this quest in a five-part series.//

Get 500+ more great Sporkful episodes from our catalog and lots of other Stitcher goodness when you sign up for Stitcher Premium: www.StitcherPremium.com/Sporkful (promo code: SPORKFUL).

Transcript available at www.sporkful.com.


Share:

Perfect “Roasted” Air Fryer Asparagus

Air Fryer Asparagus is crisp, tender and delicious. This is hands down the best way to roast asparagus!

Air frying sides dishes is a game changer, it is fast, easy and amazing. You have to try the air fried french fries, broccoli and brussel sprouts.

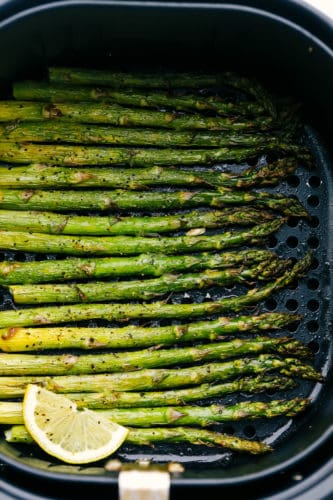
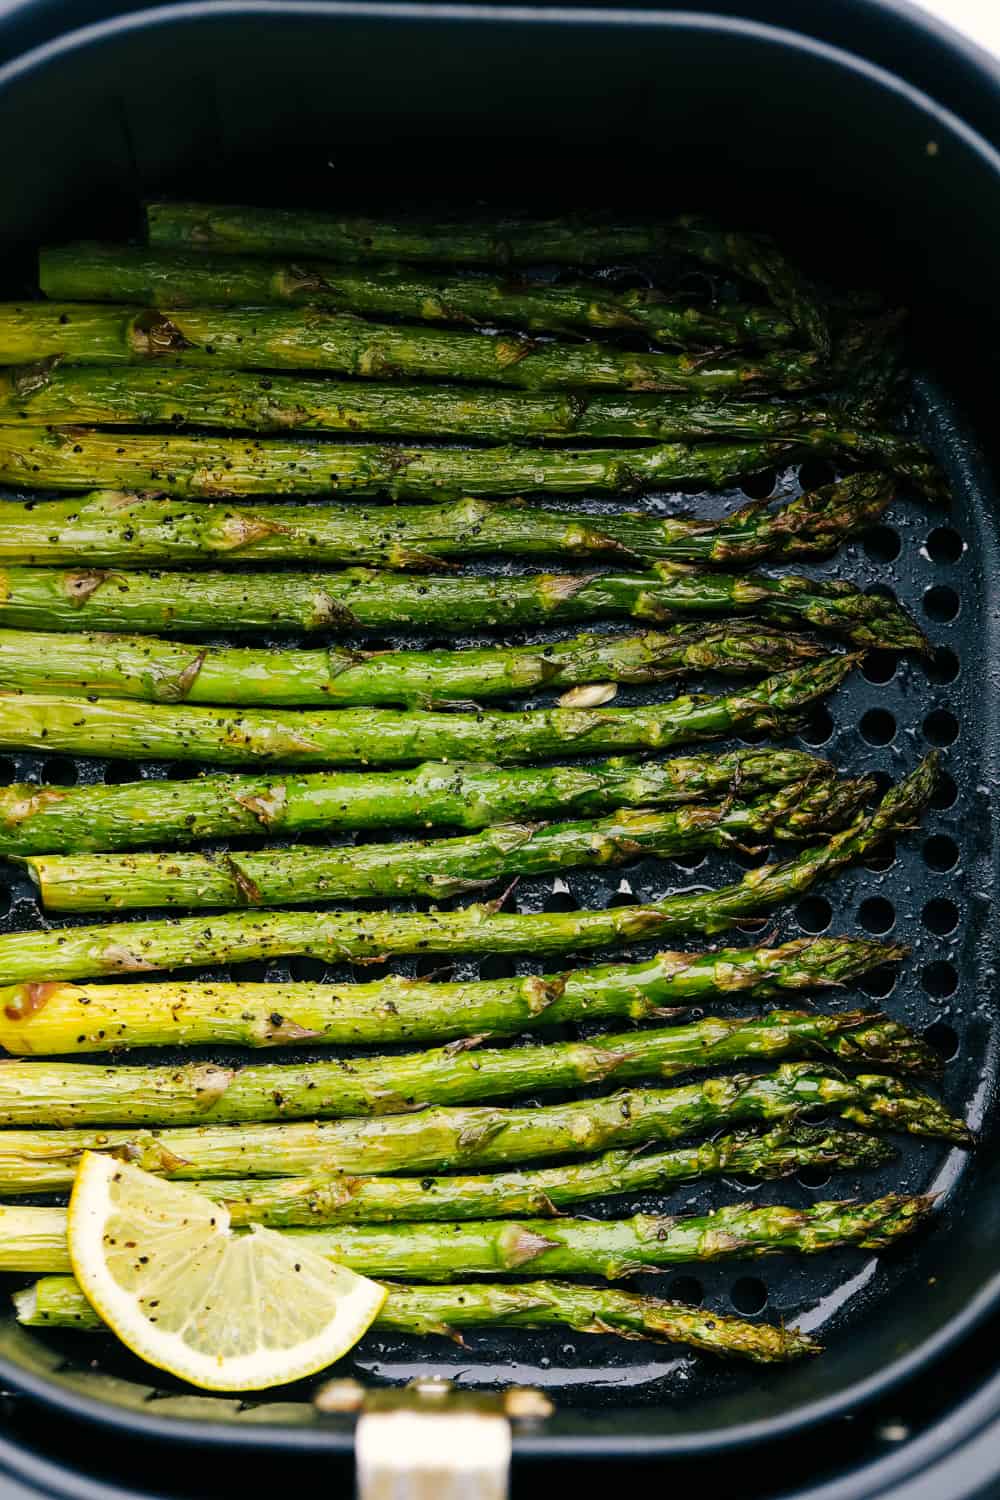
Air fryer roasted asparagus in an air fryer basket with lemon.

Air Fryer Asparagus

Nothing says spring quite like blooming flowers and when asparagus hits the supermarket! Asparagus is one of the first fresh vegetables to hit stores that begins the trickle of fruits and vegetables in season. Tall woodsy stalks that turn into incredibly delicious tender goodness. As a kid all I remember about asparagus that it was limp mushy green stuff I did not like. But roasting it, makes them crispy tender, bright and absolutely delectable.

Adding the lemon brightens the asparagus and adds a bit of zing. Much faster than oven roasting, air frying gives you an even better crunch and flavor. Serve these up as a side dish with your favorite main dish. Chicken, Beef, Pasta and even Fish will be a perfect addition to this tempting side. If you love asparagus or even if you are on the fence about it, you have to try it in the air fryer. It will change everything.

Perfect Air Fryer Asparagus Ingredients

Simple ingredients keep this healthy and allows the asparagus flavor to shine.

  • Asparagus: One stalk for this recipe.
  • Olive Oil: To help them crisp up.
  • Lemon: Adds the best flavor.
  • Salt and Pepper: Add to taste.

Making Air Fryer Roasted Asparagus

This is faster than roasting it in the oven and the asparagus gets cooked more evenly. It is so good!

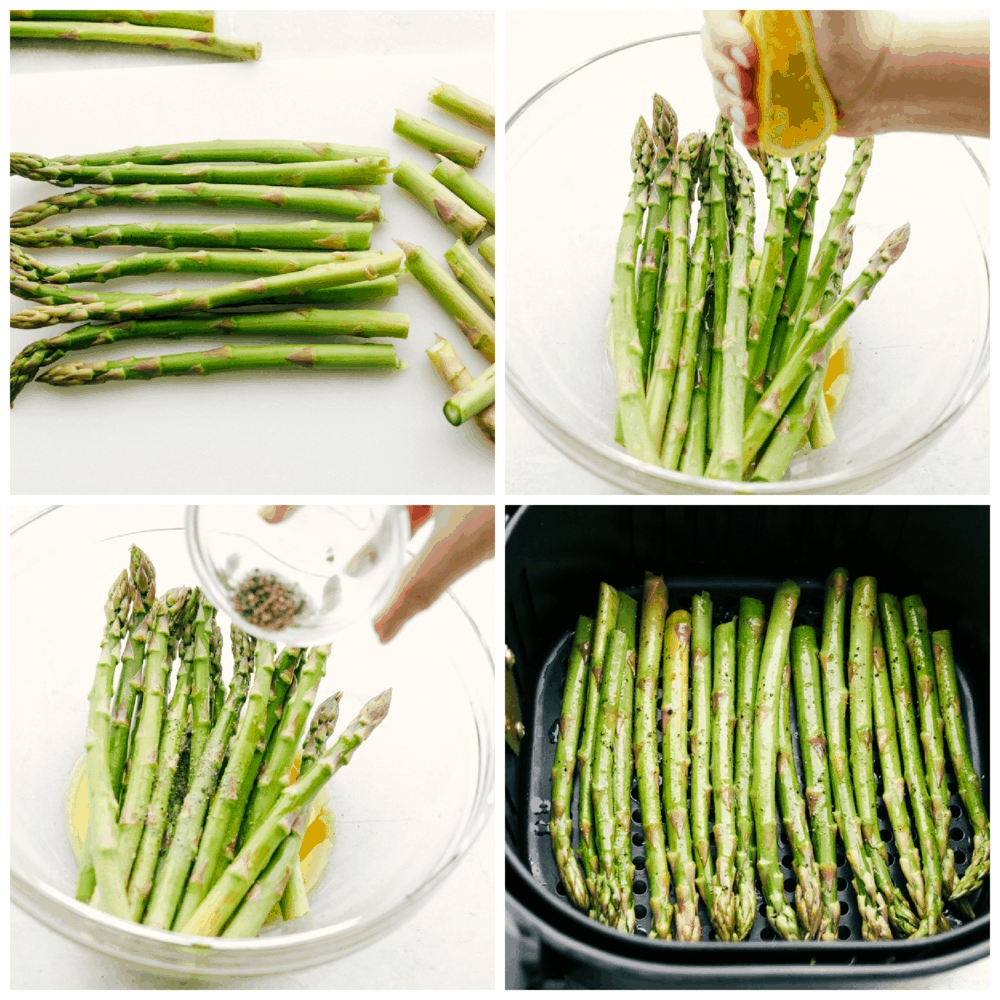
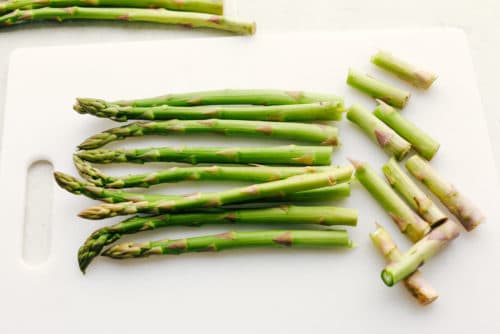
  1. Trim: Snap the hard ends off of the asparagus.
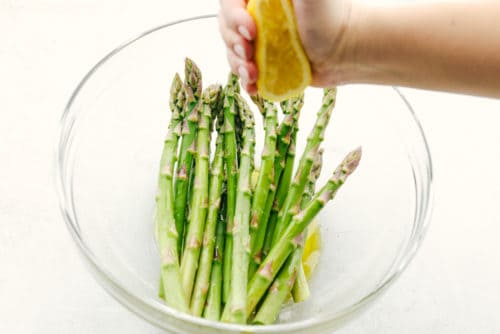
  2. Season: In a medium sized bowl add the olive oil and lemon.
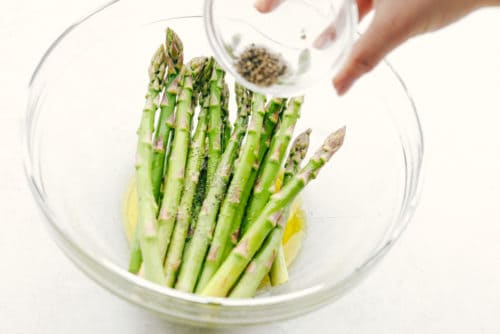
  3. Sprinkle: Salt and Pepper to taste.
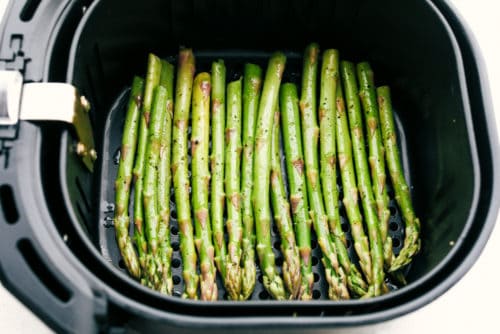
  4. Cook: Line the asparagus in an even row in the air fryer basket. Cook at 400 degrees for 8-10 minutes. For thinner sized asparagus check at 6 minutes.

The Recipe Critic Pro Tip:

Hold the spear firmly by its ends. Bend it up and away from yourself by pulling both ends down. Keep bending till it snaps.What is almost magical is how each spear will snap right where the stalk turns woodsy and firm. Throw away the tough ends, all you will be left with is the tender stalks.

Trimming and adding seasoning to the asparagus for air frying.

Picking and Trimming Asparagus

Having the best air fried asparagus begins with picking and trimming your asparagus so that it can turn out perfect. Here is how.

  • Texture: Asparagus stalks should be firm to the touch and stand straight. Avoid stalks that are limp or wilted. The tips of the asparagus should be compact and closed, not spreading or soft.
  • Color: A good bunch of asparagus will be a rich green color, gradually fading to white at the bottom of the stalk. If it dull in color it means it is past its peak. It is ok if the tips have a dark green or even purple hue.
  • Size: Great asparagus can come in all sizes, from small to jumbo. If they are fresh they are all flavorful. What matters is that the bundle you pick is uniform in length and thickness. This preparing and cooking will be more consistent than if they are uneven in size.
  • Trimming: Work with one asparagus spear at a time.

Tips and Variations for Air Fryer Roasted Asparagus

Super quick and easy, you will have a healthy full of flavor side dish in no time.

  • Know Your Air Fryer: Every air fryer is a bit different, so it takes a bit of trial and error to know how yours cooks. Half way through the suggested cook time check your asparagus and give it a bit of a shake. Check again at 6 min and then again every 2 minutes till desired doneness.
  • Same Size: Buy asparagus that is similar in size for even cooking. Do multiple batches for multiple bunches.
  • Seasonings: Add parmesan, garlic, season salt, smoked paprika, Italian seasoning or ranch seasoning for different flavors.
  • Bacon:  Bacon and asparagus just go together, toss in some bacon to cook along with the asparagus. Crumble and serve as a garnish.
  • Store: Keep leftover asparagus in a tightly sealed container for up to 5 days in the fridge. Simply reheat for 2-3 minutes in the air fryer.

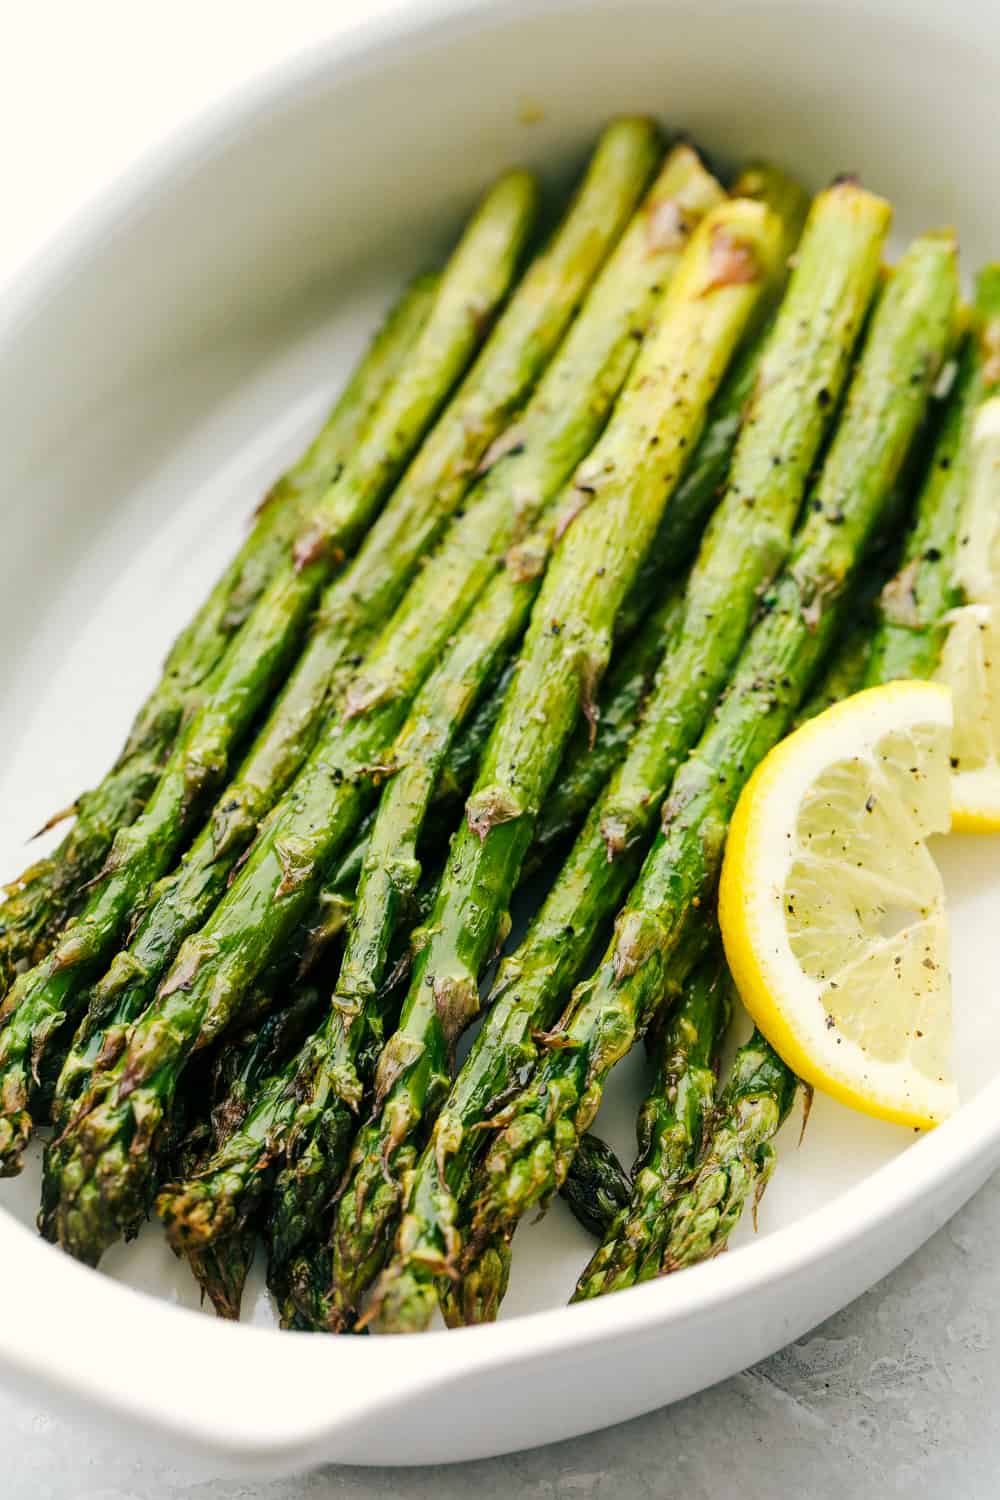
Air fryer roasted asparagus in a white dish.

More Air Frying Recipes to Try

If you are new to the air frying craze, then you know this countertop contraption is a dream come true. It makes unhealthy food healthier, and cooks it up way faster than the oven or stove could. It also saves you from heating up the kitchen or allows you to use the oven for something else. The circulating air crisps the outside and forms immaculate crusts and cooks the insides to tender juicy perfection. You have to try these other perfected air fryer recipes. They are so good!

Print

Air Fryer Asparagus

Air Fryer Asparagus is crisp, tender and delicious. This is hands down the best way to roast asparagus!
Course Side Dish
Cuisine American
Keyword air fryer asparagus
Prep Time 5 minutes
Cook Time 10 minutes
Total Time 15 minutes
Servings 4 People
Calories 32kcal
Author Alyssa Rivers

Ingredients

  • 1 stalk asparagus
  • 1 tablespoons olive oil
  • juice of half lemon
  • salt and pepper

Instructions

  • Snap the hard ends off of the asparagus.
  • In a medium sized bowl add the olive oil and lemon.
  • Add salt and pepper to taste.
  • Line the asparagus in an even row in the air fryer basket. Cook at 400 degrees for 8-10 minutes. For thinner sized asparagus check at 6 minutes.

Nutrition

Calories: 32kcal | Carbohydrates: 1g | Protein: 1g | Fat: 4g | Saturated Fat: 1g | Sodium: 1mg | Potassium: 8mg | Fiber: 1g | Sugar: 1g | Vitamin A: 30IU | Vitamin C: 1mg | Calcium: 1mg | Iron: 1mg


source https://therecipecritic.com/air-fryer-asparagus/
Share:

Hot Cross Buns

These Hot Cross Buns are an Easter tradition you are going to want to make all year long. Soft, spiced and full of flavor, this is the perfect recipe for your Holiday.

Hot Cross Buns are a traditional Easter bread that graces tables either on Good Friday or on Easter. Other Easter favorites of mine includes Ham, Lamb and Cheesy Potatoes.

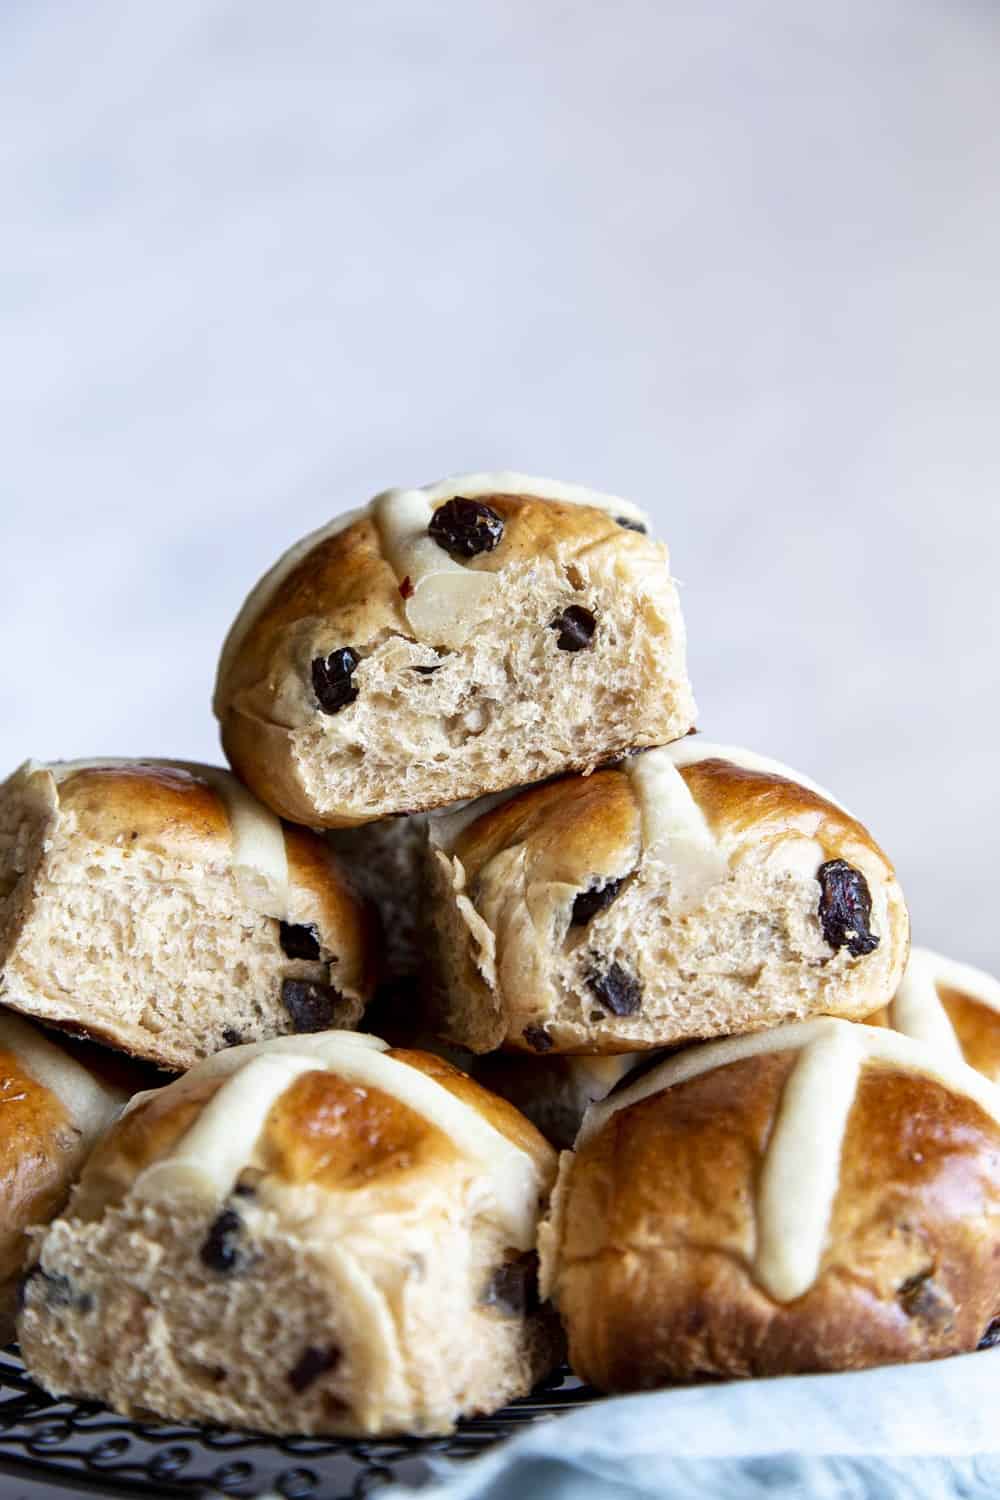
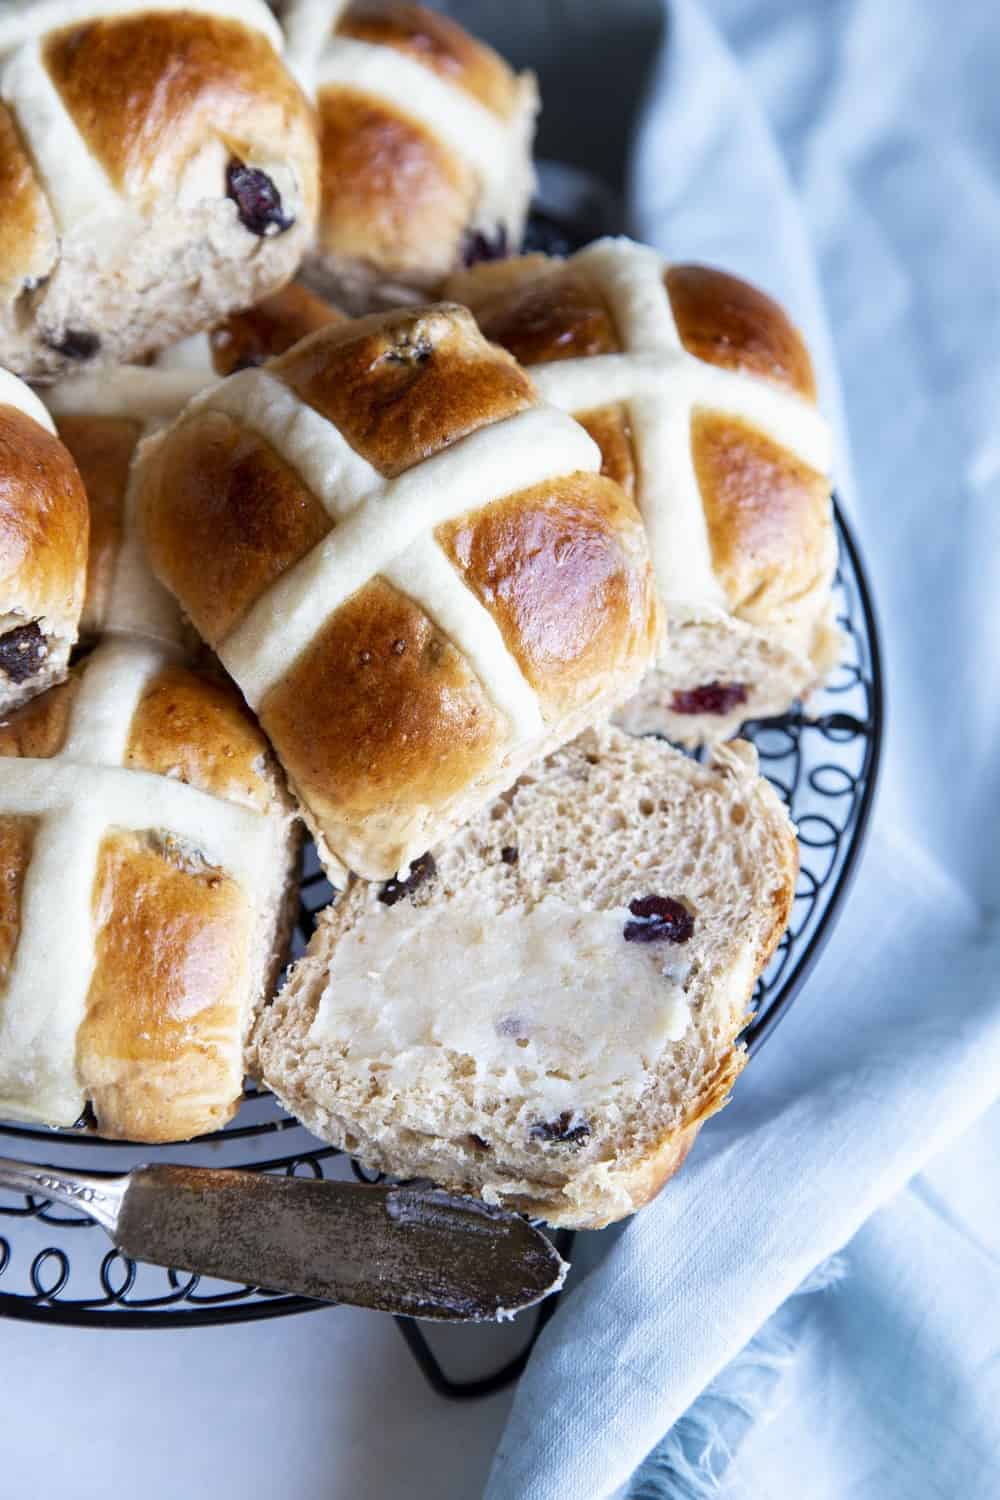
Soft fluffy Hot Cross Buns in a stack.

Homemade Hot Cross Buns

Hot Cross Buns are an Easter tradition that everyone will love, whether you celebrate Easter or not. Bread is one of the ultimate comfort foods and these buns bring just that to the table. There are so many tasty creations when it comes to bread, hot cross buns is just one of them. This recipe is simple and perfect for beginners to experts. It is super delicious and easy to master. You have to try these for your next complete dinner!

Even if you do not celebrate Easter, you can enjoy these enriched buns filled with spices and dried fruit. They are tender, soft and have wonderful flavor. These would make a great breakfast or brunch roll served with a Breakfast Casserole or Yogurt Parfait. A favorite way to eat Hot Cross Buns is to toast them with a bunch of butter. So yummy! You have to include delightful buns at your next spring occasion.

Easy Hot Cross Buns Ingredients

Making Hot cross buns is just as easy as making bread. The butter, milk and sugar will create a rich dense dough that will need all the time you can give for rising. All of these ingredients are simple to find and use.

  • Whole Milk: Yes, whole milk will work best. 2% is ok but your buns will not be as rich.
  • Granulated Sugar: Adds sweetness and richness.
  • Unsalted Butter: Make sure it is at room temperature.
  • Instant Yeast: (Or Active Dry Yeast)
  • All-Purpose Flour: Unbleached flour will work too.
  • Kosher Salt: Needed for flavor and balance.
  • Cinnamon: Adds intense flavor.
  • A Pinch Of Nutmeg: Just a pinch will do it.
  • Dried Fruits: (Raisins, Currants, Craisins, Figs, Or A Mixture)
  • Extra Flour For Rolling: No  one wants their dough to stick.
  • Oil Or Butter For Bowl And Baking Pan: Either will work perfectly.
  • Flour And Water: This creates the cross over top the dough before baking.
  • Egg and Whole Milk: this will make the egg wash that will be over the hot cross buns.

Preparing the Dough

To get the best results you will need to allow lots of time for your dough to rise. The milk, sugar and butter create a rich soft texture that will take longer to proof than regular non-enriched dough.

  1. Scald: In a medium saucepan, heat milk and sugar over medium heat, stirring frequently until simmering. Turn off the heat and add butter to the hot milk, stir until completely dissolved. Allow the mixture to cool to at least 110°F. 
  2. Add Yeast: Sprinkle the yeast over the warm milk mixture, stir and allow it to bloom for 5 – 10 minutes.
  3. Flour Mixture: Add flour, salt, cinnamon and nutmeg to the stand mixer bowl and stir to distribute evenly. Toss in the dried fruits. I used a mixture of craisins and chopped dried figs.
  4. Create Dough: When the yeast is bubbly, add the yeast/milk mixture to the flour mixture. Knead with the dough hook on speed 2 for about 10 minutes. The dough should start pulling away from the side of the bowl.
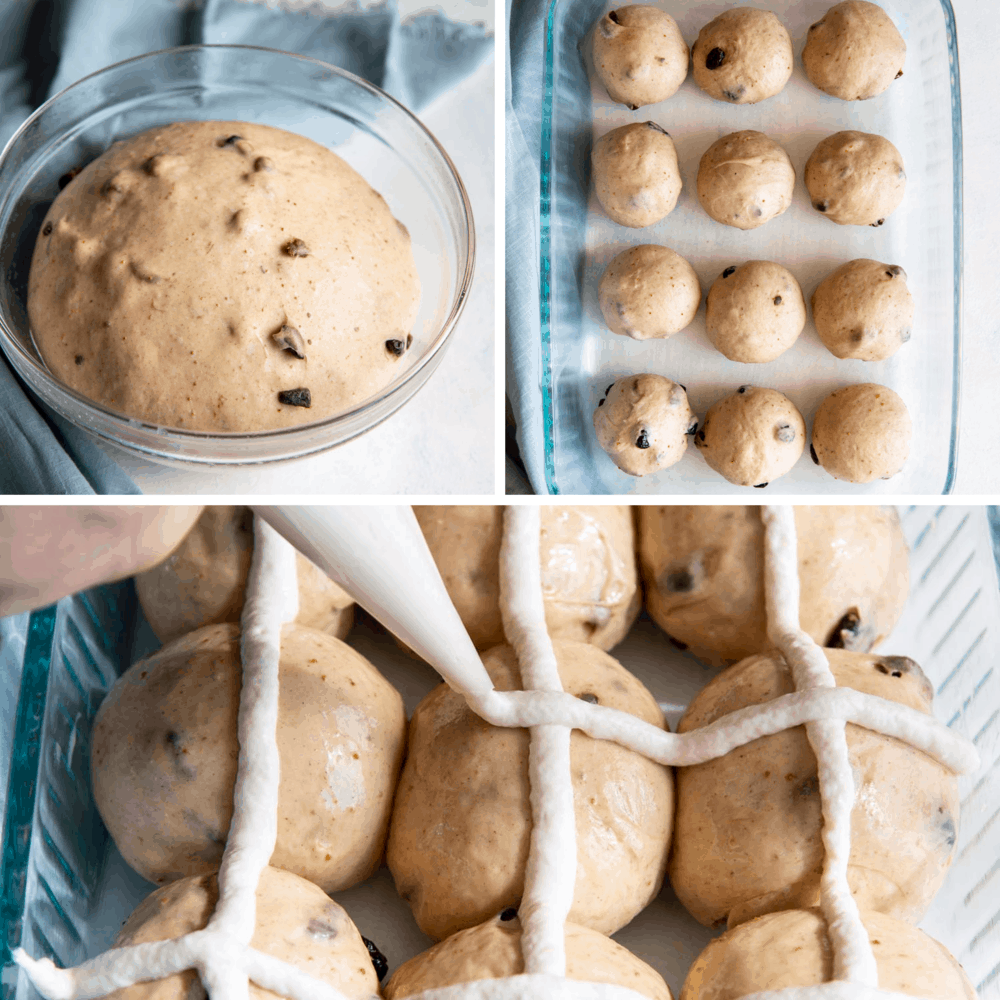
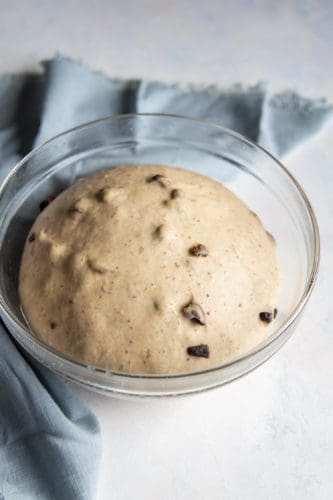
  5. First Rise: Oil a glass bowl and your hands. Scrape the dough out of the mixing bowl and shape it into a ball on a lightly floured surface and place it in the oiled bowl. Cover, and let rise in a warm place for 1 – 2 hours until at least double in size.
  6. Prep Pan: Oil or butter a 9×13” baking dish and set aside.

Second Rise on Your Buns

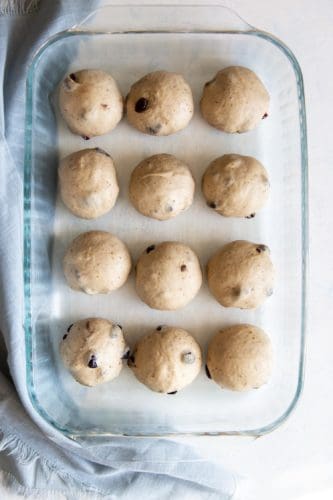
  1. Shaping: When the dough is ready, dump it out onto a floured countertop and divide it into 12 equal portions. Knead and shape each portion into a small ball, place dough balls into the prepared baking pan, and allow to rise the second time for 30 minutes to an hour.
  2. Oven: Preheat the oven to 400°F.
  3. Egg Wash: Beat an egg with a tablespoon of whole milk to make egg wash. Brush egg wash on top of the risen buns generously.
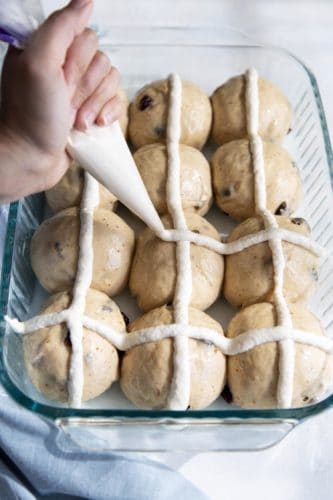
  4. Cross: To make the cross, mix flour and 5 tablespoons of water in a small bowl until a soft pipe-able paste forms, add more water if the paste seems too thick. Transfer the paste to a piping bag or a zip top bag and snip the corner to create a small hole. Pipe the flour paste on top of the buns in a cross pattern.
  5. Bake: Bake for 20 – 25 minutes until the top is golden brown. Allow to cool to the touch on a wire rack. Best served slightly warm.

Hot Cross buns rising, rolled out and being crossed before baking.

Tips and Variations for Perfect Hot Cross Buns

Everyone loves a good bun. They are soft and scrumptious. Warmed or toasted with a bit of butter, they practically melt in your mouth. Spiced with cinnamon and nutmeg and sweetened with dried fruit, they are a bit of heaven.

  • Yeast:  When working with yeast there are a few things to remember. First you need to feed it, usually this is done with some type of sugar. The second thing to remember is that it needs warm water to grow, but if you get it too hot, you’ll kill it. That is why you need to make sure you do not add the hot milk mixture till it reaches 110 degrees, an ideal temperature to grow, but not kill yeast.
  • Be Patient: One of the biggest mistakes when working with yeasted breads is not allowing it enough time to rise. The hot cross bun dough should double in size each time. The fat in the milk and butter that make taste so good also slows the rise of the yeast. Check it often, and once it has doubled in size or is close move on to the next step. If you gently push on the dough it should spring back. Do not let it over rise though, that will create flat rolls.
  • Make it Sweet: For a variation for the cross, omit the paste. Cook as normal and add the cross decoration with frosting. Mix ¾ cup powdered sugar, 1 teaspoon vanilla and 2-3 Tablespoons of milk. Pipe the cross on completely cooled buns.
  • Spices: If you like a bit more spice to your hot cross buns trying adding in allspice, cardamom, and or more nutmeg, all to taste.
  • Fruit:  Dried fruit of some sort is tradition. If you are not a fan of them in your buns, you can omit them. Take note that the dried fruit adds sweetness and flavor, however.
  • Sticky: Keep in mind the hot cross bun dough is meant to be a bit sticky. Use parchment on the bottom of your pan if you don’t want to spray it.

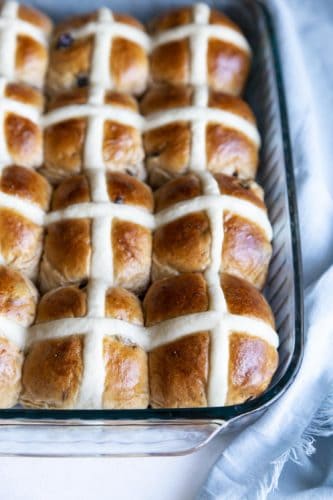
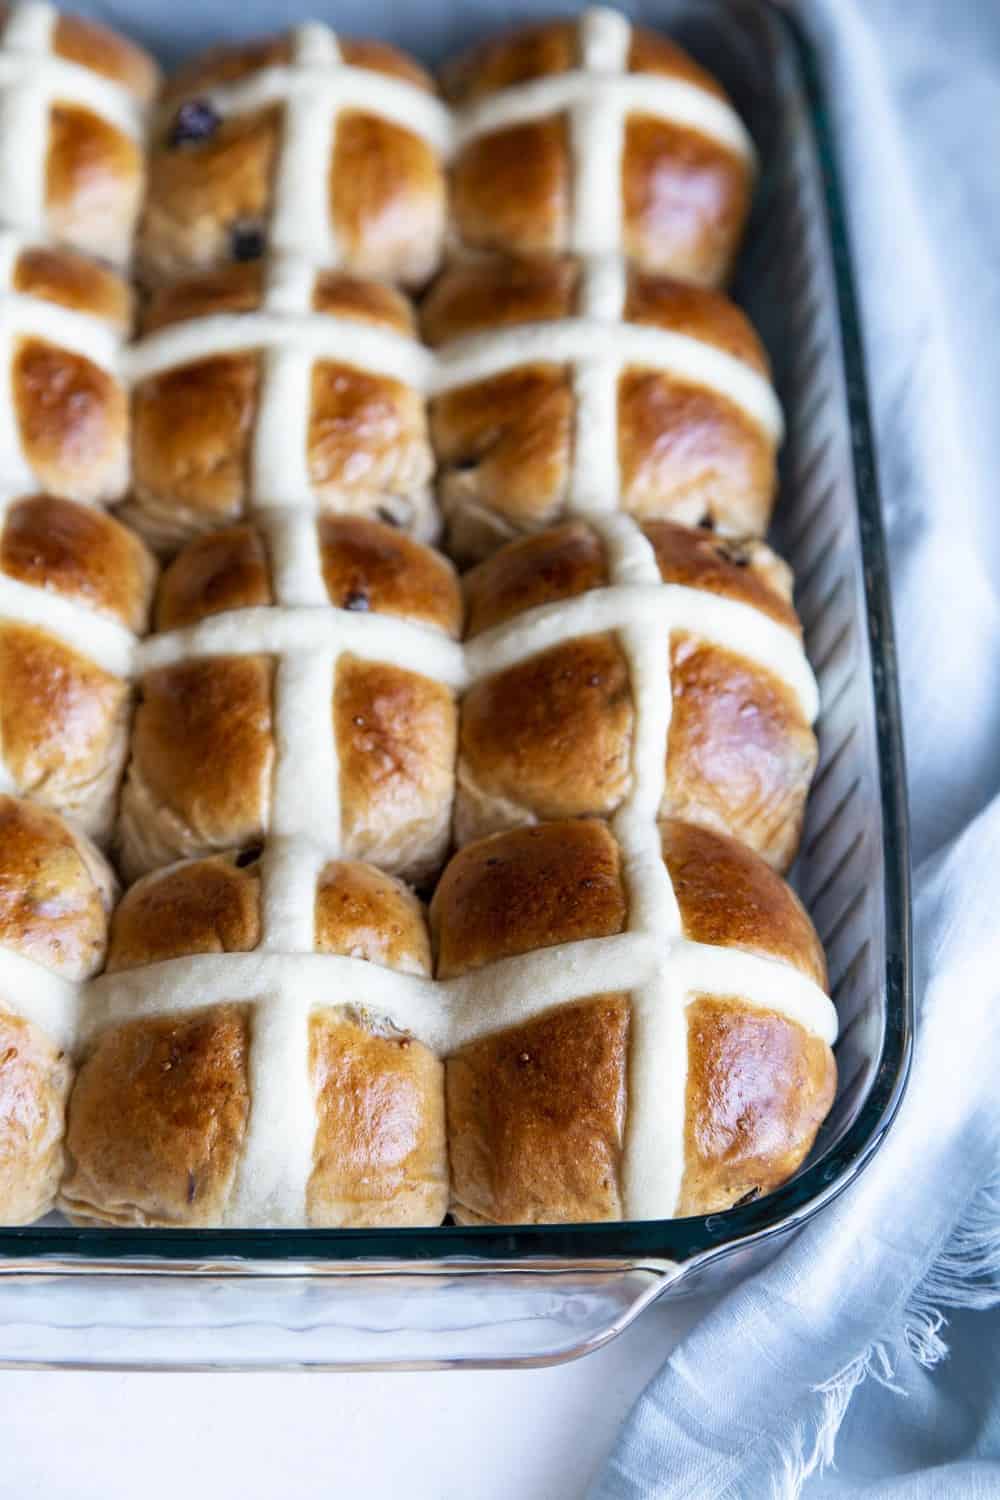
Golden brown Hot Cross Buns in a pan.

Storing your Hot Cross Buns

If you are like me, I love to have buns or roll leftovers. They give me something to look forward to the next day. So making sure these hot cross buns are as good on the second day as the first is important.

  • Store: Make sure the hot buns are no longer hot, but cooled completely before storing. Place buns in an airtight container or plastic air tight bag. I prefer the bags as I can get all the air out of them and keep them from drying out as fast. Keep at room temperature for 2-3 days. If you use a frosting cross, note that they might get messy to try to store in a single layer.
  • Freezer: These buns can be frozen for up to 3 months in an airtight freezer safe bag.
  • Reheat:  Hot cross buns are luscious either toasted or warmed for about 8-10 seconds in the microwave with a bit of butter.

A plate of hot cross buns and one cut open with butter.

More Bread Dishes

Print

Hot Cross Buns

These Hot Cross Buns are an Easter tradition you are going to want to make all year long. Soft, spiced and full of flavor, this is the perfect recipe for your Holiday.
Course Bread, Side Dish
Cuisine American
Keyword hot cross buns, hot cross buns recipe
Prep Time 20 minutes
Cook Time 20 minutes
Total Time 40 minutes
Servings 12 Buns
Calories 222kcal
Author Alyssa Rivers

Ingredients

Bread

  • 1 ¼ cup whole milk
  • ¼ cup granulated sugar
  • 3 oz unsalted butter
  • 1 packet instant yeast or active dry yeast
  • 3 cup all-purpose flour
  • 1 teaspoon kosher salt
  • 1 teaspoon cinnamon
  • A pinch of nutmeg
  • 1 cup dried fruits raisins, currants, craisins, figs, or a mixture
  • Extra flour for rolling
  • Oil or butter for bowl and baking pan

Cross

  • ½ cup all-purpose flour
  • 5 - 6 tablespoon water
  • Egg wash
  • 1 large egg
  • 1 tablespoon whole milk

Instructions

  • In a medium saucepan, heat milk and sugar over medium heat, stirring frequently until simmering. Turn off the heat and add butter to the hot milk, stir until completely dissolved. Allow the mixture to cool to at least 110°F.
  • Sprinkle the yeast over the warm milk mixture, stir and allow it to bloom for 5 - 10 minutes.
  • Add flour, salt, cinnamon and nutmeg to the stand mixer bowl and stir to distribute evenly. Toss in the dried fruits. I used a mixture of craisins and chopped dried figs.
  • When the yeast is bubbly, add the yeast/milk mixture to the flour mixture. Knead with the dough hook on speed 2 for about 10 minutes. The dough should start pulling away from the side of the bowl.
  • Oil a glass bowl and your hands. Scrape the dough out of the mixing bowl and shape it into a ball on a lightly floured surface and place it in the oiled bowl. Cover, and let rise in a warm place for 1 - 2 hours until at least double in size.
  • Oil or butter a 9”x13” baking dish and set aside.
  • When the dough is ready, dump it out onto a floured countertop and divide it into 12 equal portions. Knead and shape each portion into a small ball, place dough balls into the prepared baking pan, and allow to rise the second time for 30 minutes to an hour.
  • Preheat the oven to 400°F.
  • Beat an egg with a tablespoon of whole milk to make egg wash. Brush egg wash on top of the risen buns generously.
  • To make the cross, mix flour and 5 tablespoons of water in a small bowl until a soft pipeable paste forms, add more water if the paste seems too thick. Transfer the paste to a piping bag or a zip top bag and snip the corner to create a small hole. Pipe the flour paste on top of the buns in a cross pattern.
  • Bake for 20 - 25 minutes until the top is golden brown. Allow to cool to the touch on a wire rack. Best served slightly warm.

Nutrition

Calories: 222kcal | Carbohydrates: 33g | Protein: 5g | Fat: 7g | Saturated Fat: 4g | Trans Fat: 1g | Cholesterol: 32mg | Sodium: 213mg | Potassium: 82mg | Fiber: 1g | Sugar: 6g | Vitamin A: 241IU | Vitamin C: 1mg | Calcium: 42mg | Iron: 2mg


source https://therecipecritic.com/hot-cross-buns/
Share:

Popular

Archive

Slider Tag

Facebook

Header Ads

Recent in Food

Blog Archive

Recent Posts

Unordered List

  • Lorem ipsum dolor sit amet, consectetuer adipiscing elit.
  • Aliquam tincidunt mauris eu risus.
  • Vestibulum auctor dapibus neque.

Pages

Theme Support

Need our help to upload or customize this blogger template? Contact me with details about the theme customization you need.