Chicken Bacon Garlic Alfredo Roll Ups

Alfredo Roll Ups are cheesy, perfectly portioned servings of deliciousness. This is going to be one of the best meals you will ever make!

Anything with lasagna noodles is just fun to make and delightful to eat! You have to try these favorites, Classic Lasagna, Zucchini Lasagna and Lasagna Soup!
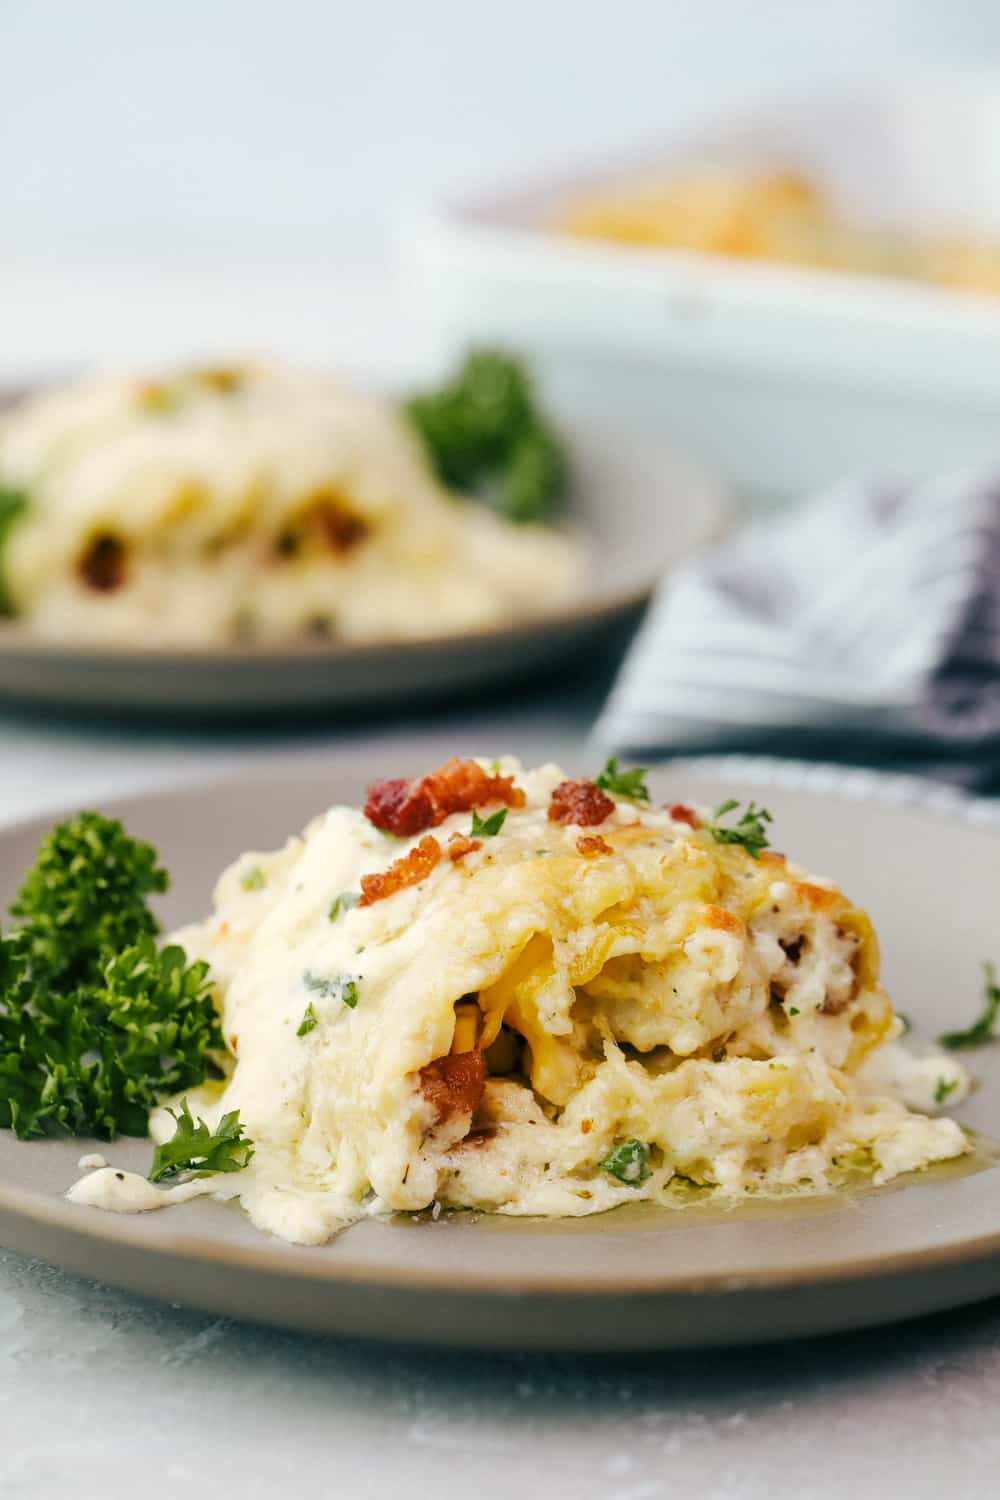
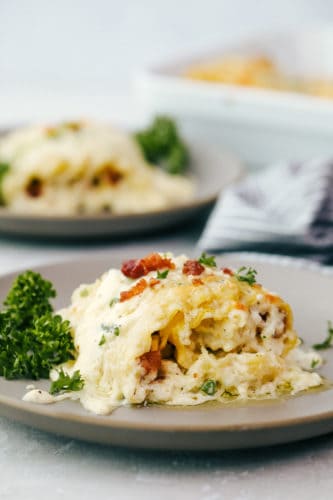
Chicken Bacon Garlic Alfredo Roll ups on a plate.

Easy Chicken Alfredo Roll Ups

Some things I make on the blog that I really hope everyone tries. This is one of those recipes. I have already made it twice in one week. And because I loved it so much I invited my family over for Sunday dinner. They had to experience how amazing this meal was, and they could not get enough. This will turn your ordinary roll ups upside down. It is different, creamy, decadent and full of flavor!

It all started with these Alfredo Roll Ups. An early recipe on the blog that I’ve been tweaking over the years and have now perfected. The homemade alfredo sauce is absolutely perfect,  I promise you won’t find a better one out there. Then I added the bacon, because bacon makes everything better. It was a simple addition that turned these into divine individually portioned bites of heaven. This is a dish the whole family will love! I bet you will make them again and again!

Ingredients for Chicken Roll Ups

All of these ingredients can be easily found at the grocery store. I used a rotisserie chicken or use chicken from this incredible whole chicken in the instant pot recipe. So good!

  • Lasagna Noodles: Precooked but just to al dente. Drain and rinse your noodles in cold water and separate to avoid sticking together.
  • Chicken: Cooked and shredded. Rotisserie chicken works well here.
  • Bacon: Cooked and crumbled, use the air fryer for a quick way to cook your bacon.
  • Mozzarella Cheese: Grated, but shred your own to avoid cheese that has anti caking agents on it.

Garlic Alfredo Sauce Ingredients 

  • Butter: Adds a bit of salt and tons of flavor.
  • Heavy whipping Cream: Creates a creamy decadent sauce.
  • Cream Cheese: Not only adds flavor but helps to thicken it as well.
  • Garlic: Freshly minced garlic works best.
  • Garlic Powder: This will add more flavor without the chunks.
  • Italian seasoning: A great seasoning with all the best herbs. Make your own here.
  • Salt and Pepper: Add to taste
  • Parmesan Cheese: Grated fresh will give you the best flavor.

How to Make Chicken Lasagna Roll Ups

This may seem hard, but it is not! It is actually quite simple. My kids love to help me roll the noodles up, they also love to eat the filling.

  1. Prep: Preheat the oven to 350 degrees. Spray a 9×13 inch pan with cooking spray and set aside.
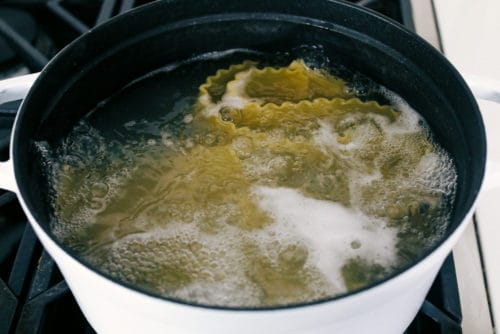
  2. Cook: In a large pot cook the lasagna noodles according to the package directions until al dente. Drain and rinse the noodles with cold water and lay them on a paper towel to remove excess water.
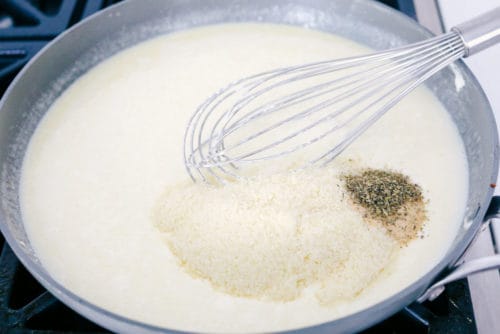
  3. Alfredo: In medium saucepan add butter, heavy whipping cream and cream cheese. Cook over medium heat and whisk until melted.
  4. Season: Add the minced garlic, garlic powder, Italian seasoning, salt and pepper. Continue to whisk until smooth.
  5. Cheese: Add the grated parmesan cheese. Bring to a simmer and continue to cook for about 3-5 minutes or until it starts to thicken.
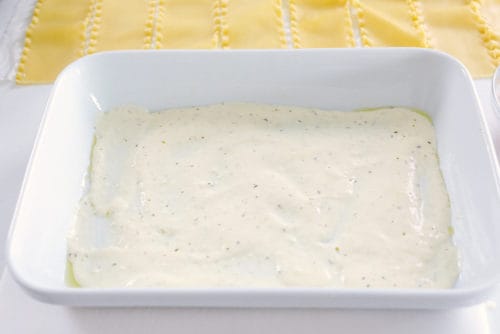
  6. Bottom of Pan: Line the bottom of the 9×13 pan with 1 cup of the alfredo sauce.
  7. Layer Noodles: Spread 2 Tablespoons of the alfredo sauce over each noodle. Take 1/8th of the shredded chicken and bacon and spread evenly over each noodle and top with about 3 tablespoons shredded cheese.
  8. Roll it: Carefully roll up each lasagna noodle and place seam side down in your 9×13 prepared pan. Repeat.
  9. Cover: Once they are all in the pan, pour the remaining alfredo sauce over the top and sprinkle with the remaining cheese.
  10. Bake it: Bake at 350 for about 30 minutes until heated through and cheese is bubbly.
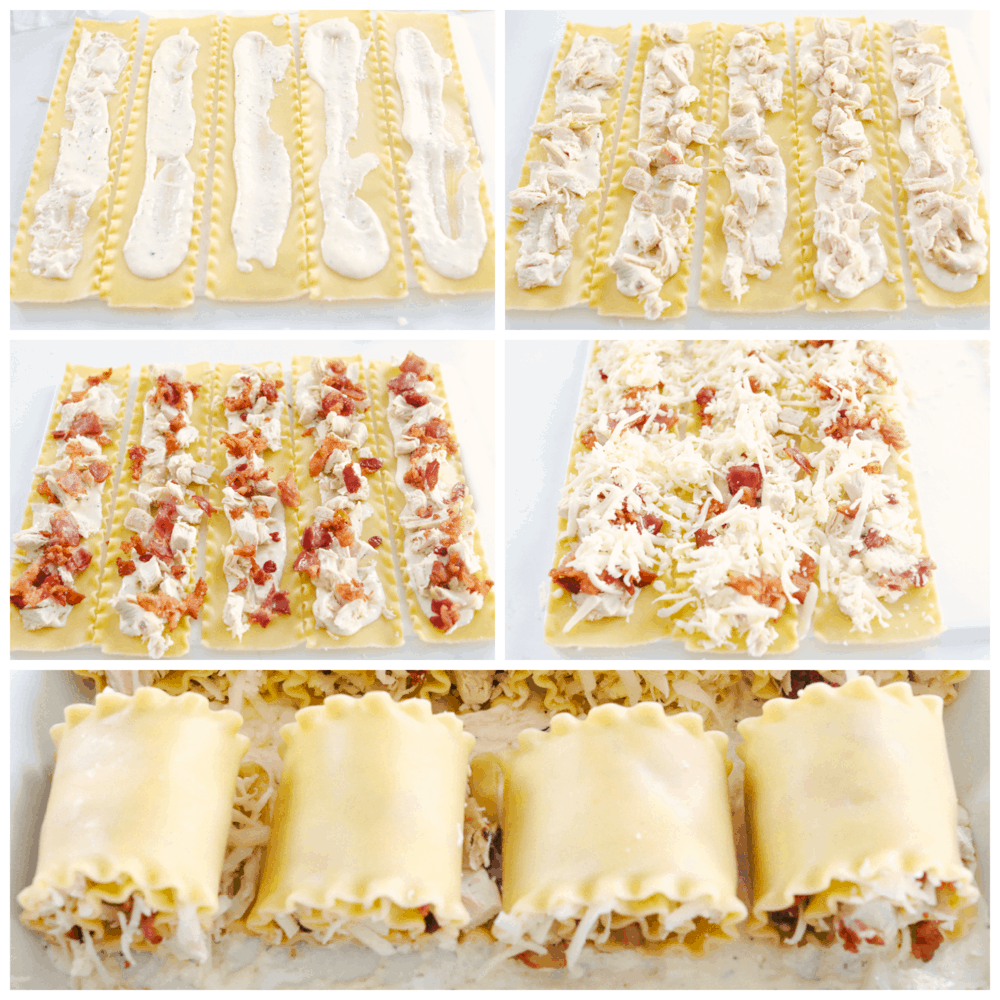
Placing alfredo chicken and bacon on lasagna noodles and then rolling them up.

Tips for the Best Chicken Alfredo Roll Ups

These roll ups are absolutely divine. They are fun and different and are going to be a family favorite for sure.

  • Noodles: Make sure you cook your noodles al dente. You want them to soft and pliable but firm enough to roll. I do not recommend using no boil noodles. They just do not work with this recipe.
  • Chicken: This is a great recipe to use up extra chicken you may have from another dinner. I like to cook thighs and breasts in the air fryer to use for recipes. They both would be amazing in this recipe.
  • Cheese: Mozzarella is a classic cheese for this lasagna dish, be sure to grate your own. It will melt easier and more evenly. Other cheese you could use is provolone or gouda.
  • Alfredo Sauce: If you want a lighter alfredo you can use half and half, it will still you all the flavor and creaminess. Also try subbing out the parmesan for romano, asiago or pecorino romano.
  • Cover while cooking: If you are worried about the noodles exposed edges becoming crunchy, cover the dish with foil before placing it in the oven. Everything is already cooked so you essentially you are heating the insides. Uncover the roll ups the last 5-10 minutes to brown the cheese.
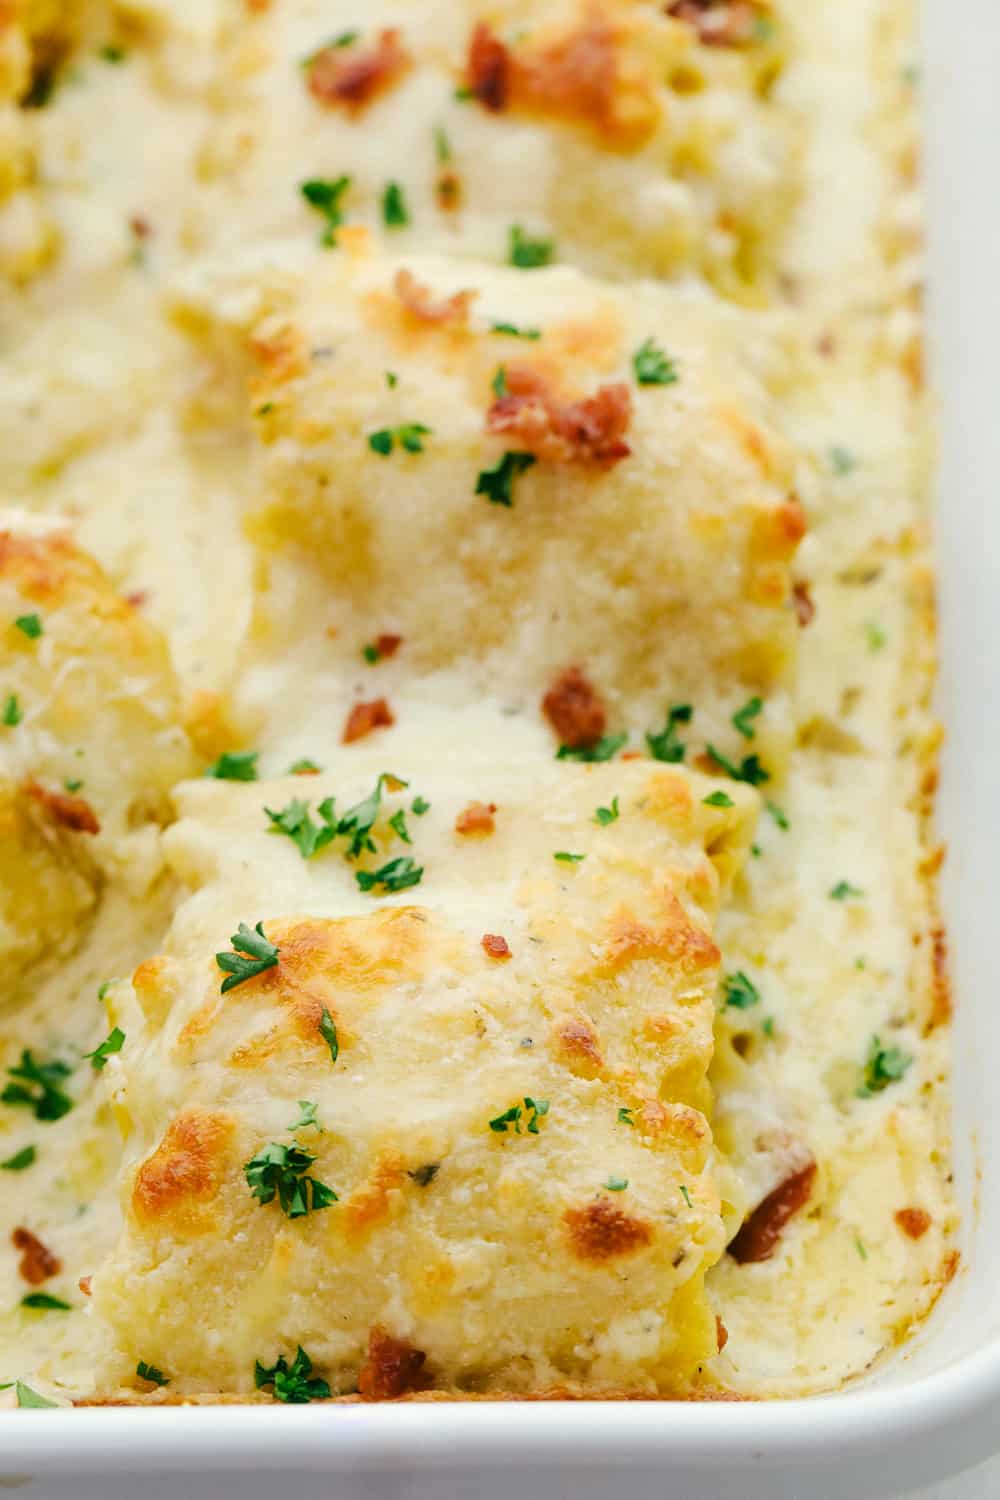
Baked chicken bacon alfredo roll ups in a pan.

Double it and Freeze!

One of the best things about this meal is that it is so easy to prep ahead of time and or freeze for another day. Since I am making one batch of these roll ups, I might as well make two. It is just as easy and i can freeze one to have later or to give away. It just makes sense.

  • Make ahead:  Make these chicken bacon alfredo roll ups up to a day ahead and place in the fridge tightly covered. When ready to bake, remove from fridge half hour before cooking. Bake for regular time and uncover the last 5-10 minutes.
  • Freeze: To freeze, make the chicken bacon roll ups and place in the pan. Tightly cover with plastic wrap and then with foil. Freeze for up to 2 months. Remove from freezer and let thaw in the fridge. Bake as directed. Note: Dairy does not freeze well so you might notice a bit of separation in the sauce. It will not change the flavor, just the look.  It is totally normal and still good to eat.
  • Leftovers: Store leftovers in the fridge for up to 5 days. Reheat in the microwave.
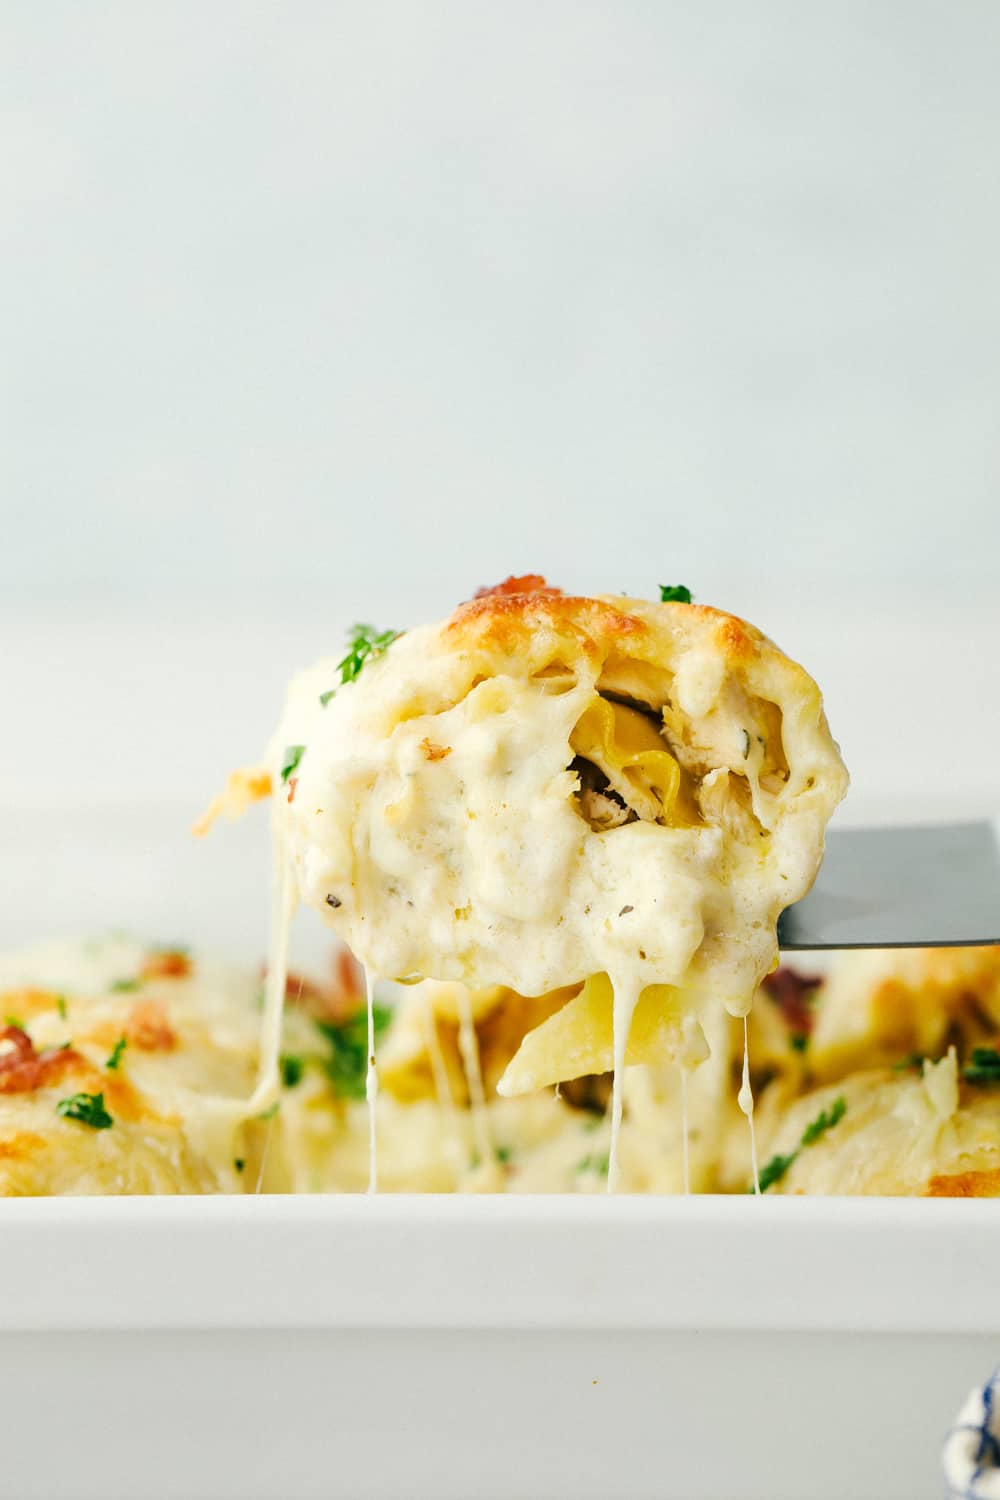
Scooping out a lasagna roll up out of the pan.

More Roll up Fun to Have with Your Food

Rolling your food up isn’t just a fun way to play with your food, it is a fun way to eat your food too. You can either unroll them bite by bite or just cut into them. Roll up food can include so many different foods from sweet to savory. If you want to have more fun with your food, try these tried and true roll up recipes today!

Print

Chicken Bacon Garlic Alfredo Roll Ups

Chicken, Bacon, and cheese all rolled up into perfect portions and topped with the BEST homemade garlic alfredo sauce!  One of the best meals that you will make!
Course Dinner, Main Course
Cuisine Italian American
Keyword chicken alfredo roll ups, chicken bacon garlic alfredo roll ups, chicken roll ups
Prep Time 20 minutes
Cook Time 30 minutes
Total Time 50 minutes
Servings 8 Servings
Calories 859kcal
Author Alyssa Rivers

Ingredients

  • 8 Lasagne noodles
  • 2 cups chicken cooked and shredded, I used rotisserie
  • 1 pound bacon cooked and crumbled
  • 2 cups mozzarella cheese shredded

Garlic Alfredo Sauce:

  • 1/2 cup butter
  • 1 pint heavy whipping cream 2 cups
  • 4 ounces cream cheese
  • 1/2 teaspoon garlic minced
  • 1 teaspoon garlic powder
  • 1 teaspoon italian seasoning
  • 1/4 teaspoon salt
  • 1/4 teaspoon pepper
  • 1 cup parmesan cheese grated

Instructions

  • Preheat oven to 350 degrees. Spray an 9x13 inch pan with cooking spray and set aside.
  • Cook the lasagna noodles according to package directions until al dente. Drain and rinse the noodles with cold water and lay them on a paper towel to remove excess water.
  • In a medium saucepan add butter, heavy whipping cream, and cream cheese. Cook over medium heat and whisk until melted. Add the minced garlic, garlic powder, italian seasoning, salt and pepper. Continue to whisk until smooth. Add the grated parmesan cheese. Bring to a simmer and continue to cook for about 3-5 minutes or until it starts to thicken.
  • Line the bottom of the 9x13 inch pan with 1 cup of the alfredo sauce.
  • Spread 2 Tbs of the alfredo sauce over each noodle. Take 1/8th of the shredded chicken and bacon and spread evenly over each noodle and top with about 3 Tbs shredded cheese.
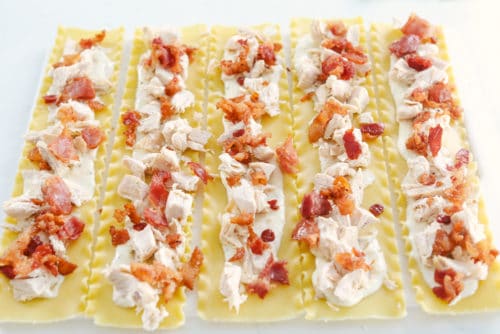
  • Carefully roll up each lasagna noodle and place seam side down in your 9×13 prepared pan. Repeat.
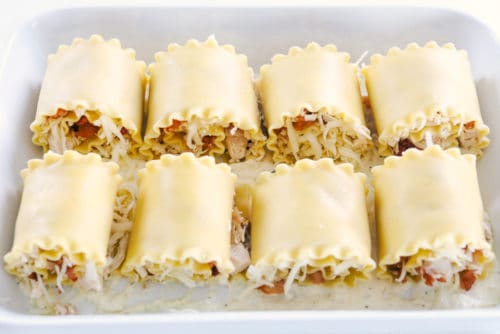
  • Once they are all in the pan, pour the remaining alfredo sauce over the top and top with remaining cheese. Bake at 350 for about 30 minutes until heated through and cheese is bubbly.

Notes

Updated on March 27, 2021
Originally Posted on July 13, 2015

Nutrition

Calories: 859kcal | Carbohydrates: 25g | Protein: 26g | Fat: 73g | Saturated Fat: 38g | Cholesterol: 205mg | Sodium: 1005mg | Potassium: 302mg | Fiber: 1g | Sugar: 2g | Vitamin A: 1741IU | Vitamin C: 1mg | Calcium: 359mg | Iron: 1mg


source https://therecipecritic.com/chicken-bacon-garlic-alfredo-roll-ups/
Share:

Air Fryer Whole Chicken

Air Fryer Whole Chicken is going to change the way you do chicken! Super easy, it comes out perfectly tender, juicy and full of flavor!

Air frying is an easy way to get dinner done, and done right! Serve with Potatoes, Salad, and some Rolls for a winner, winner, chicken dinner!


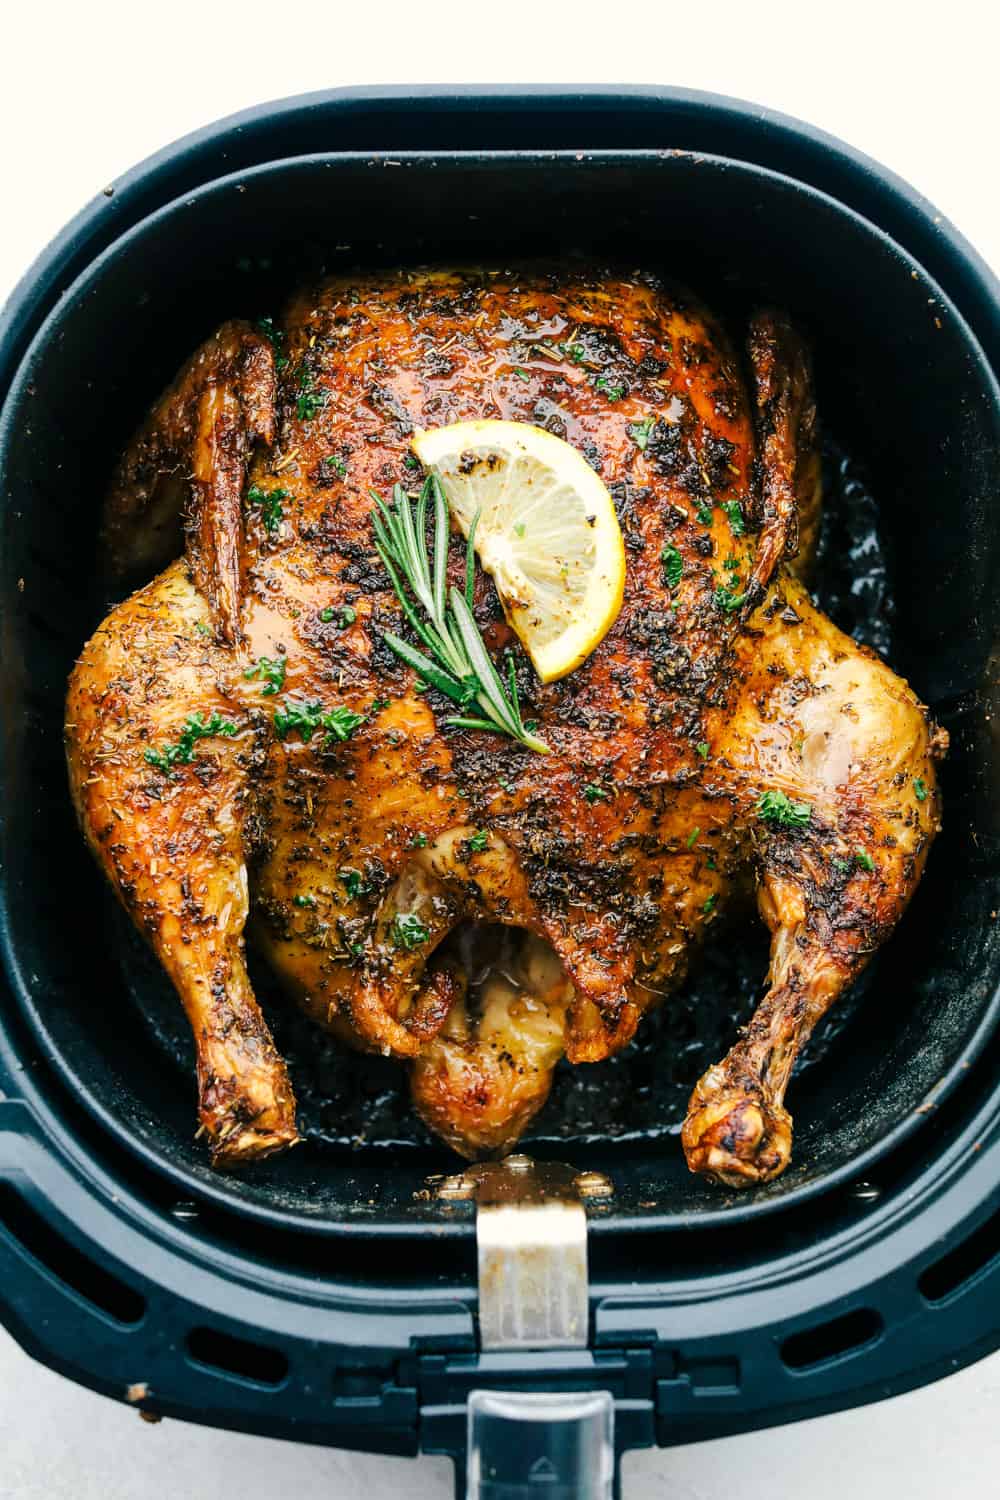
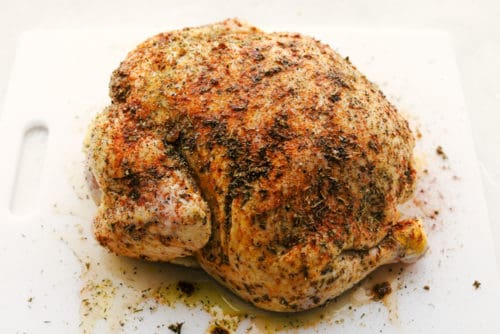
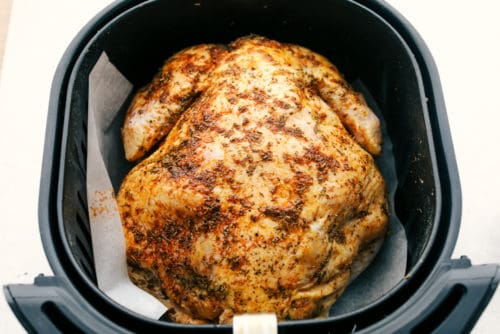
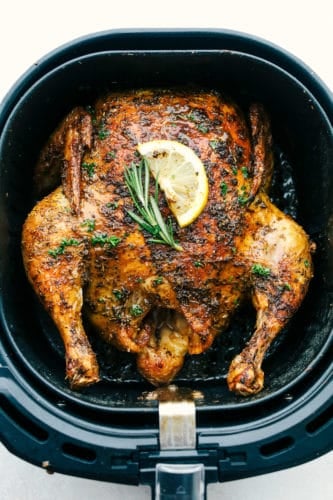
A whole chicken covered with herbs in an air fryer basket.

The Best Air Fryer Whole Chicken

Everyone loves those succulent rotisserie chickens you can buy at the grocery store. You pick one up and you can do so many things with it. Well, I have the perfect recipe that completely puts those rotisserie chickens to shame. Air frying a whole chicken, is super easy and it gives you this incredible crispy full of flavor outside. And tender, juicy, flavorful inside. I used to be intimidated by cooking a whole chicken, but it is so easy and the air fryer guarantees delish results every time.

Air frying whole chicken is also cheaper than buying one and you can have it on your time. I also love the fact that I can customize the spices if needed to. My whole family loves this chicken and I can use it so many different ways. Use the chicken all by itself or use it to make soups, casseroles, wraps, and more. You have to try this air fryer chicken recipe today!

What You Need For Air Frying

With just a few ingredients, you can have a rotisserie style chicken in no time. Change up the seasonings to your likings.

  • Whole chicken:  4-5 pounds and with the giblets removed.
  • Olive Oil: For coating the chicken to help it fry and the seasoning to stick.
  • Italian Seasoning: A wonderful combination of spices that will are delicious on chicken. You can make your own here.
  • Garlic Powder: Garlic and chicken are a good match, they will taste incredible.
  • Paprika: Adds color and flavor to the chicken.
  • Salt and Pepper: Add to taste.

How To Air Fry A Whole Chicken

You are going to love how hands off this chicken is. Just flip it once and you end up with impeccable juicy chicken every time.

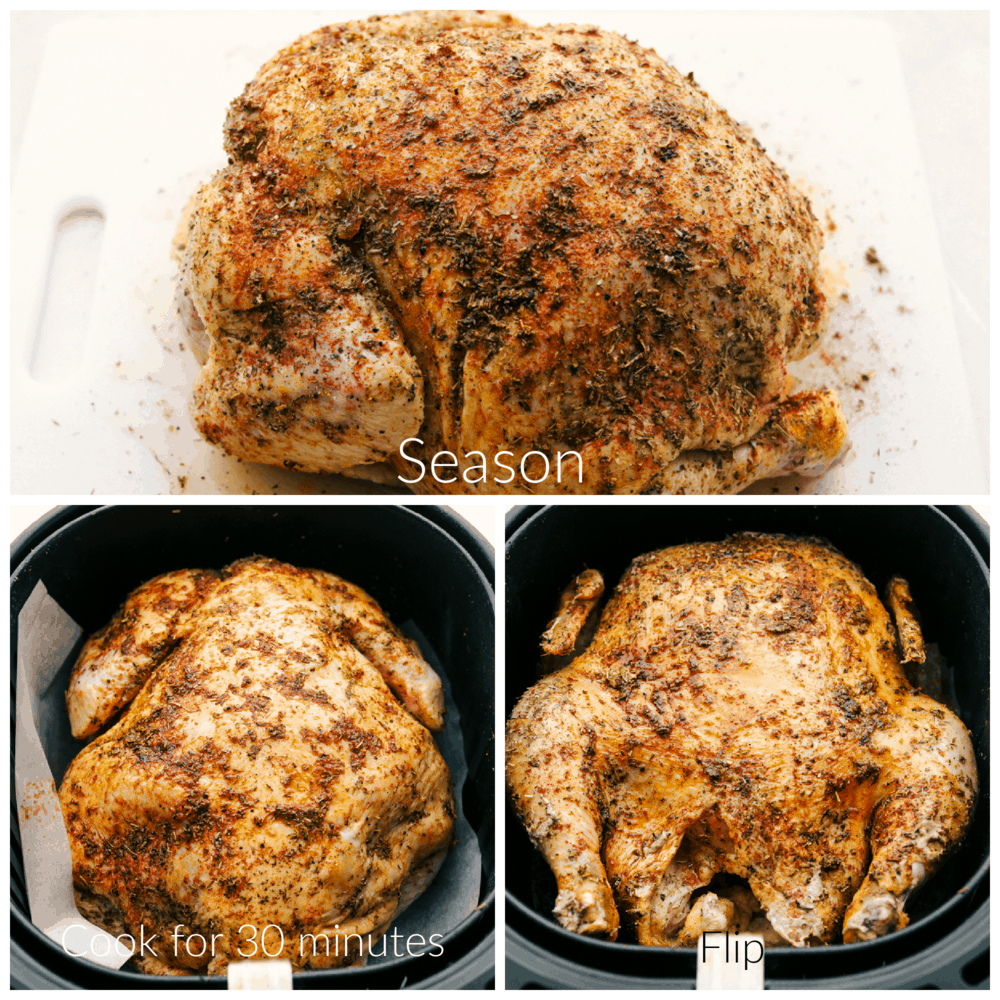
  1. Prep the Chicken: Rub the chicken with the oil.
  2. Seasoning:  In a small bowl combine Italian seasoning, garlic powder, paprika and salt and pepper. Rub all over the chicken
  3. Air Fry: Place the chicken breast side down in the air fryer. Cook at 360 degrees for 30 min.
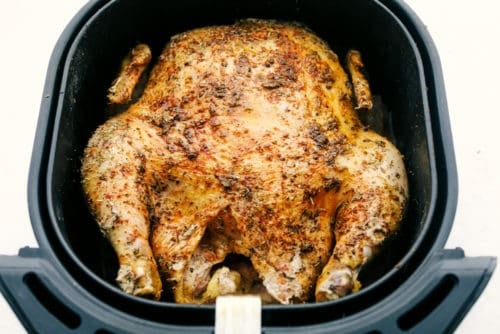
  4. Flip: Turn the chicken and cook for an additional 30 minutes or until the chicken reaches an internal temperature of 165 degrees.

Seasoning the chicken, cooking it and flipping it in the air fryer.

Tips For Tender and Juicy Whole Chicken

Truly air frying a whole chicken could not be any easier. And with just a few tips you can have the best chicken ready in about an hour.

  • Pat It Dry: After you remove the giblets from the inside, pat the chicken dry. This will help the oil and seasonings stick to the chicken. It will also crisp the skin up better because if there is extra moisture on the skin it will just steam.
  • Season: When you season the chicken, do it generously and completely. You want to cover the bird well so it will taste amazing all over.
  • Internal Temperature: This is super important, you want to cook the chicken till it 165 degrees inside. Insert the meat thermometer into the thigh area of the chicken and away from the bone. The temperature will continue to rise 1-3 degrees after the chicken is removed.
  • Start with Breasts down: You will want to place your chicken breast side down at first. This will help the juices keep the white, drier part of the chicken juicier as it cooks. Starting with the breasts up will result in a drier bird.
  • Flip: But you do want to flip the chicken halfway through to make sure the skin gets crispy all over. Trust me you don’t want to miss that step.
  • Let it Rest: Once the chicken is done, you can either leave it in the basket and cover or remove and place on a cutting board and tent the chicken with foil. Let the chicken rest 10-15 minutes to allow the juices to reabsorb in to the meat before cutting.

Variations of Seasonings

With this recipe being so easy, it also amazingly customizable and you can use the chicken in so many ways. Depending on what you want to use it for, your spices and seasonings can be changed up.

  • Mexican: If you are using it in Mexican dishes, use cumin, chili powder, garlic, smoked paprika and even a taco or fajita seasoning blend.
  • Italian: For a more Italian flavor, keep the Italian seasoning, and add some extra oregano and basil
  • Dry Rub: Use ranch or Italian dry dressing as a rub with the olive oil or this French onion soup mix would be incredible.
  • Mix it Up! Other ideas include lemon pepper, Asian 5 spice, or any other flavoring you think will be good.

How to Serve Air Fryer Chicken

Possibilities are almost endless, besides being delicious on its own, this chicken taste scrumptious in so many things.

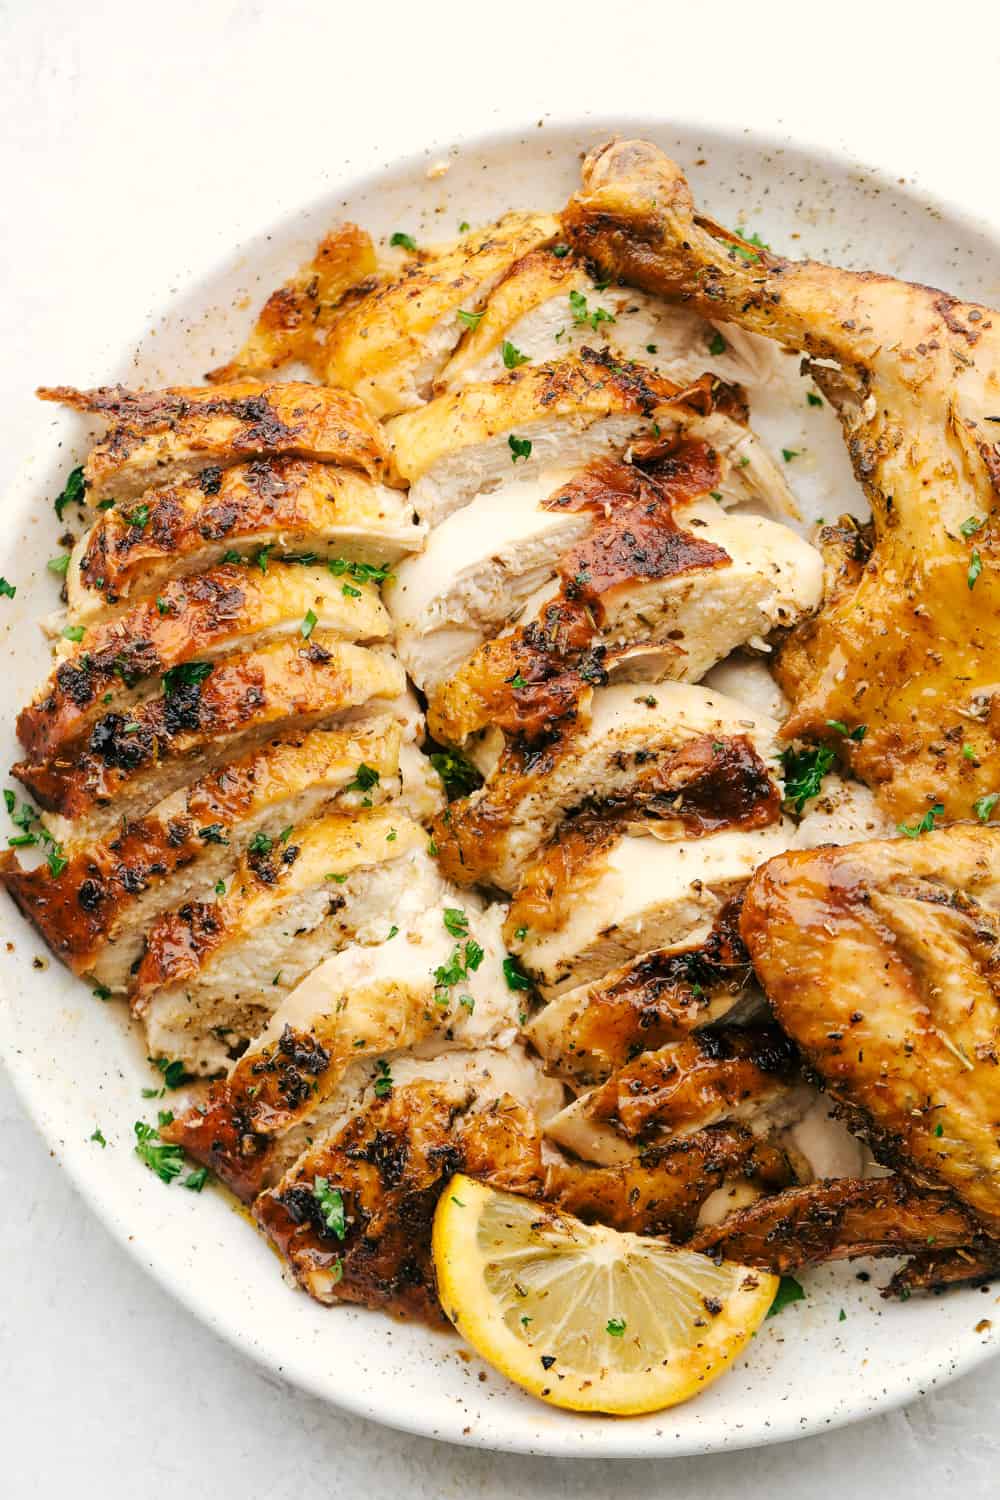
Sliced juicy chicken on a plate with a wedge of lemon.

More Chicken Dinners to Love

Chicken for dinner is one of the best things you can have. It is easy to cook, super versatile and good for you too. Lower in fat and calories it is a favorite protein among everyone. I always have chicken in the freezer and I usually don’t go home from the store without buying some. Because it is so fast to cook, it is awesome for those busy nights and you can dress it up so easily to make it super fancy if you need to. BBQ, baked, fried, it does not matter how you cook it, I have a recipe for you.

Print

Air Fryer Whole Chicken

Air Fryer Whole Chicken is going to change the way you do chicken! Super easy, it comes out perfectly tender, juicy and full of flavor!
Course Dinner, Main Course
Cuisine American
Keyword air fryer chicken, air fryer whole chicken
Servings 8 People
Calories 327kcal
Author Alyssa Rivers

Ingredients

  • 1 (4-5) pound whole chicken giblets removed
  • 2 Tablespoons olive oil
  • 1 Tablespoon Italian seasoning
  • 1 teaspoon garlic powder
  • 1/2 teaspoon paprika
  • salt and pepper

Instructions

  • Rub the chicken with the oil. In a small bowl combine italian seasoning, garlic powder, paprika and salt and pepper. Rub all over the chicken.
  • Place the chicken breast side down in the air fryer. Cook at 360 degrees for 30 minutes.
  • Flip the chicken and cook for an additional 30 minutes or until the chicken reaches an internal temperature of 165 degrees.

Nutrition

Calories: 327kcal | Carbohydrates: 1g | Protein: 25g | Fat: 24g | Saturated Fat: 6g | Trans Fat: 1g | Cholesterol: 102mg | Sodium: 96mg | Potassium: 272mg | Fiber: 1g | Sugar: 1g | Vitamin A: 263IU | Vitamin C: 2mg | Calcium: 26mg | Iron: 2mg


source https://therecipecritic.com/air-fryer-whole-chicken/
Share:

Creamed Peas and Potatoes

Creamed Peas and Potatoes are a classic side dish that is absolutely delish! Super creamy and full of flavor it’s a side dish that is hearty and comforting!

This amazingly hearty side dish pairs perfectly with a good meat dish. Try one of these favorites from the blog, Glazed Ham, Lamb Shanks and Pot Roast.

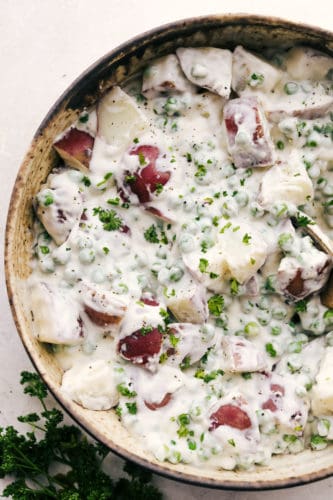
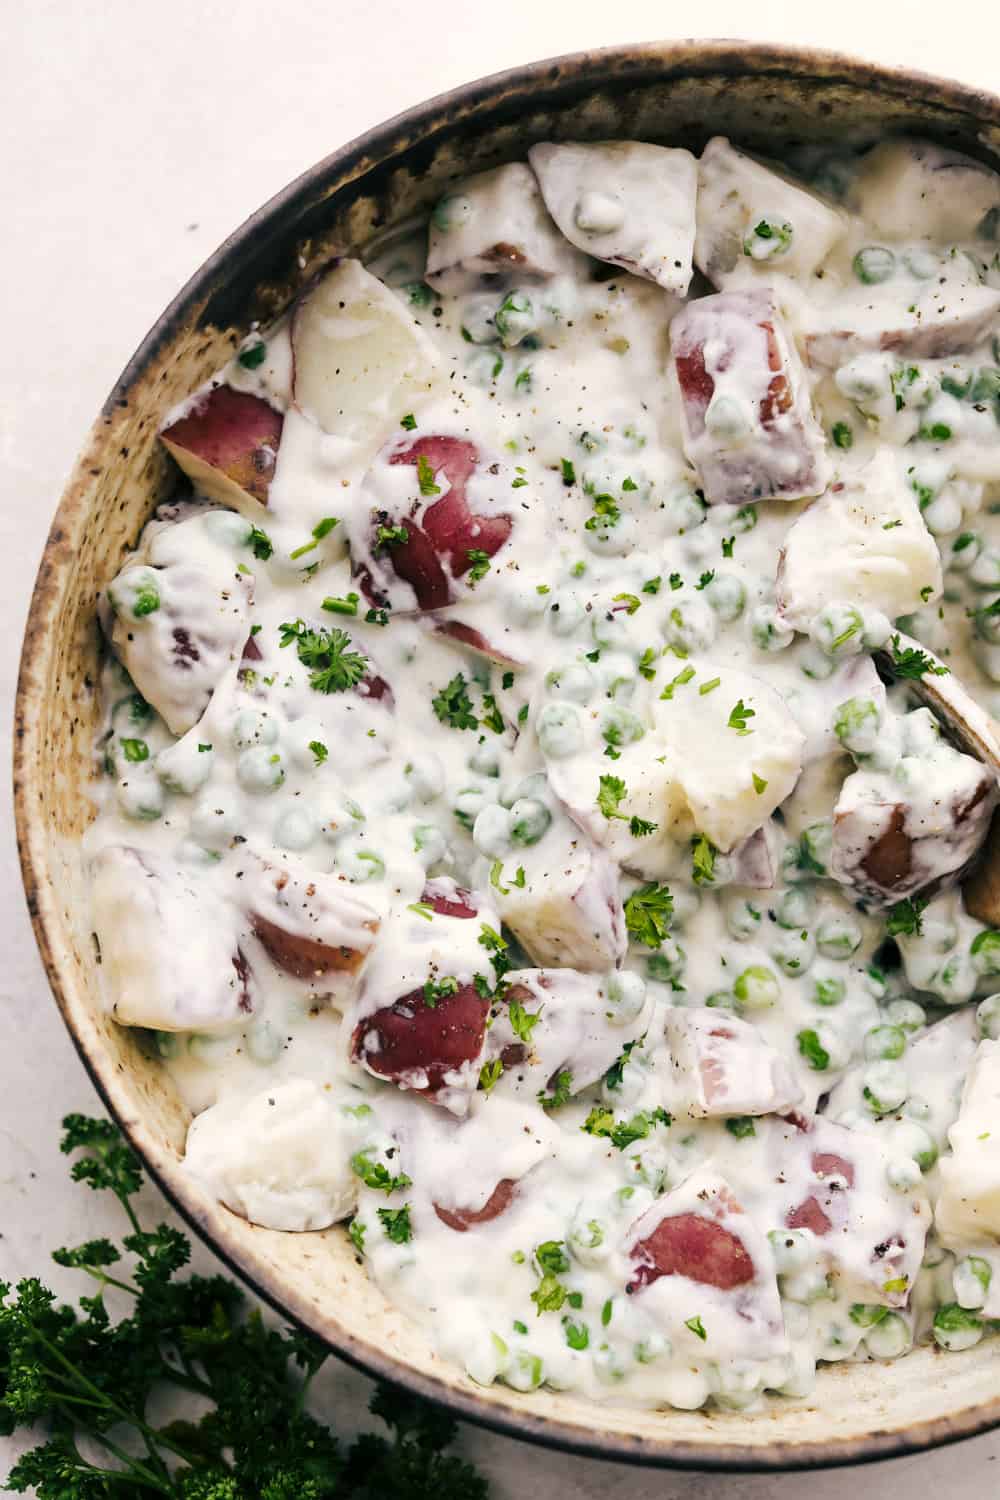
Creamed potatoes and peas in a bowl ready to eat.

Creamed Peas and Potatoes

Creamed peas and potatoes is a side dish made popular back when everyone had gardens and the peas and baby potatoes were ready at the same time. It is a dish that was often made in the springtime.  I remember having these creamed peas and potatoes growing up as a kid and I loved it. There is something so comforting and hearty about these peas and potatoes.  Now it’s a side dish my whole family loves and I know you will too!

Creamed peas and potatoes and divine when you can get your hands on fresh peas, but frozen peas will work just as well. This is a hearty side dish that works well just about any main dish and serves a lot. I like to take it to big family gatherings or potlucks. If you haven’t tried it, this is the time to do it! You are going to love it!

What You Need For Creamed Peas and Potatoes

Basic ingredients combine for a delightful side dish that could be the most popular dish on the table.

  • Red Potatoes: Baby red potatoes work really well or cut up larger reds.
  • Peas: Use frozen or fresh.
  • Butter: Do not substitute out, this is the foundation for the roux.
  • Flour: Together with the butter this will create a thickener.
  • Salt and Pepper: Add to taste.
  • Milk: Combined with the cream, this is creates incredible sauce.
  • Heavy Cream: Definitely a must if you want ultimately creamy potatoes.
  • Parmesan Cheese: Use grated parmesan so it will melt easier. Adds the best flavor to the vegetables.

Making Creamed Peas and Potatoes

Creamed peas and potatoes are a classic that comes together easily. You just need a little bit of time.

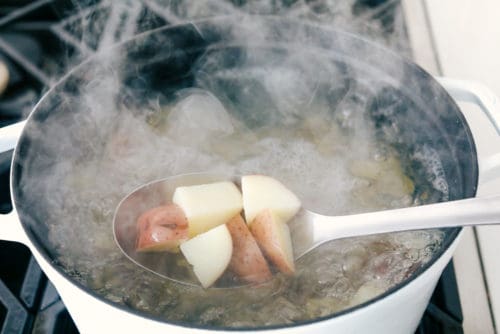
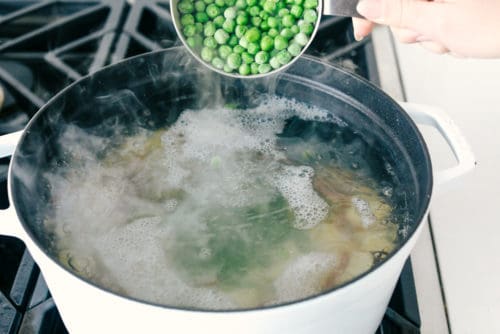
  1. Potatoes:  Bring a large pot to boil the potatoes for 10-12 minutes or until fork tender.
  2. Peas: Add the peas the last 3 minutes of cooking time. Drain.
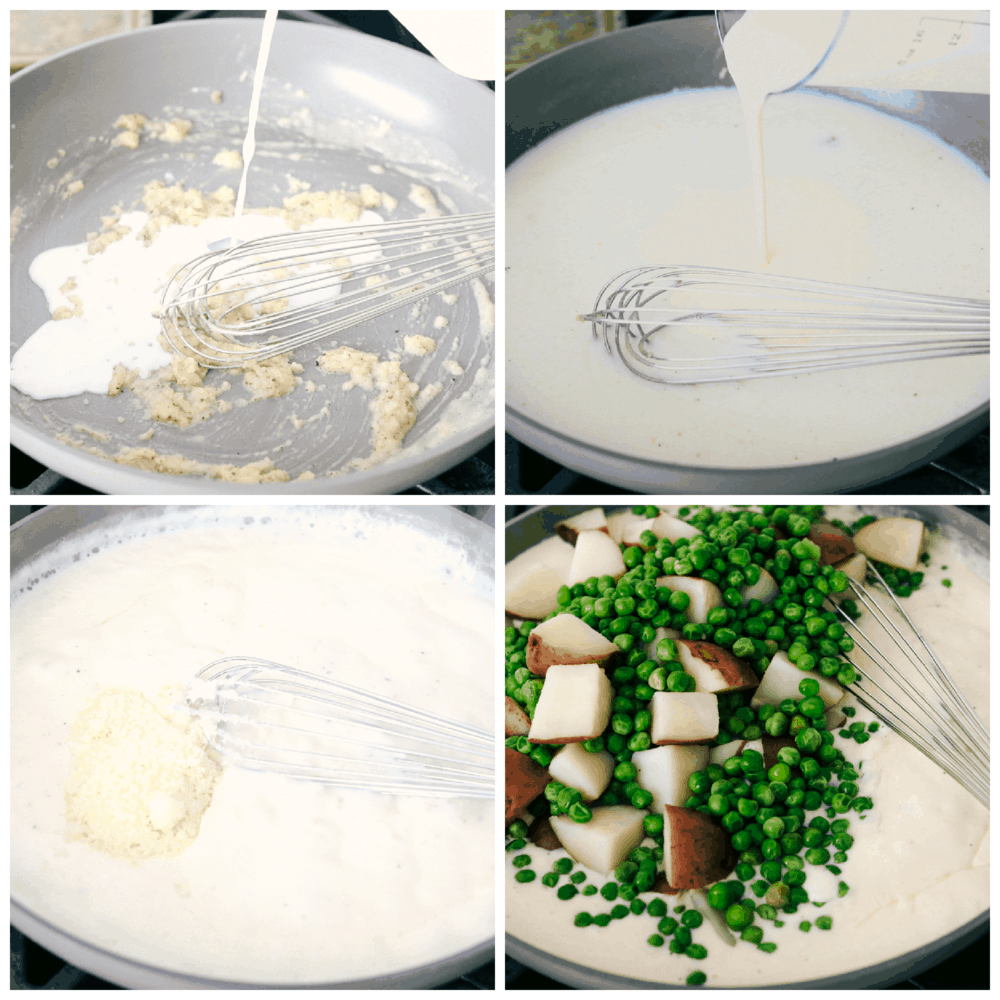
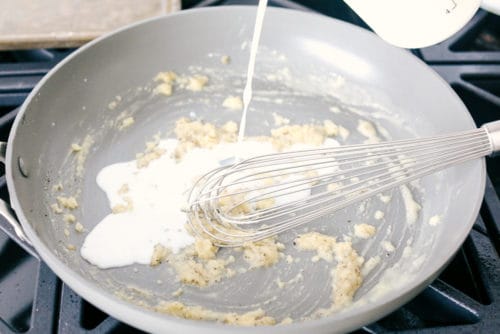
  3. Roux: In a large saucepan over medium high heat add the butter and melt. Whisk in the flour, salt and pepper until it thickens up.
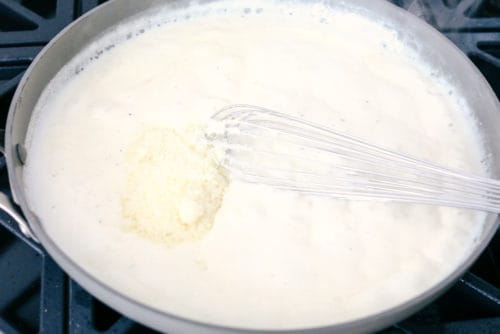
  4. Thicken: Whisk in the milk, heavy cream and parmesan over medium high heat until thick.
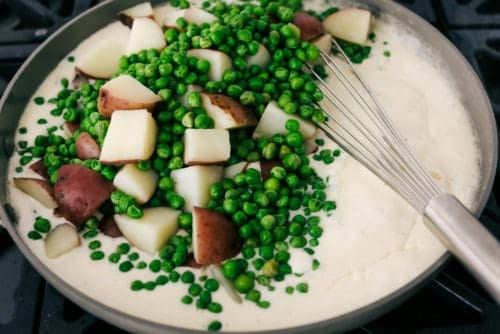
  5. Add:  Add the potatoes and peas back to the sauce for 2-3 minutes and serve.

Making the cream sauce and adding in cooked peas and potatoes.

Pro Tips For Creamed Peas and Potatoes

Simple and basic, this recipe highlights the vegetables of spring, peas and new potatoes. The cream sauce adds texture and binding and just a hint of flavor. The cream sauce is delicious but it really lets the peas and potatoes shine.

  • Potatoes: You want to use baby reds or fingerling potatoes for this dish. They are a waxy potato that holds up to being boiled and keeping their shape. They won’t turn to mush like your high starch Idaho russets can.
  • Peas: If you don’t have peas growing in your own backyard, a trip to the farmers market just might be worth it. The fresh peas are so yummy in this dish.
  • Frozen Peas:  I will say frozen are pretty darn good too. Buy petite green peas however, they have a better fresh flavor and hold up better with the potatoes than regular frozen peas. Also if you use frozen peas you can skip the blanching and just thaw them on the counter or in the fridge. They will cook enough in the sauce with the potatoes.
  • Sauce:  Yes you can use skim milk or regular milk and half and half in this sauce and it will still taste great, it just may not be quite as creamy or thick.
  • Salt and Pepper: Be sure to taste the potatoes, peas and sauce and salt and pepper accordingly. Because you are not adding any other spice to the dish, you do not want to skimp on the salt and pepper. It will actually help the potatoes and peas taste amazing.

Variations and Storing Peas and Potatoes

This recipe is a classic and very traditional. The added Parmesan gives it just a touch of flavor and that added salty flavor that takes it above and beyond. Make it your own and enjoy!

  • Cheese: Feel free to change out the cheese or leave it out all together. For a bit of a different flavor use shredded swiss cheese, or a stronger flavored Parmigiano-Reggiano.
  • Bacon: Because everything is better with a bit of bacon. Cook and crumble bacon and add as a garnish or stir it in.
  • Onion:  Add some extra depth to the flavor by sauteing finely chopped onion in butter and then add to the sauce with the peas and potatoes.
  • Flavor: If you want to add more flavor to the sauce, try adding some herbs. Dill is a go to favorite in this dish that keeps it fresh, but you can try others such as tarragon and parsley.
  • Adjust it: If you are making creamed peas and potatoes for the family, keep the recipe as is. If you are making it for a crowd or a potluck, feel free to double the recipe.
  • Storage: Store leftovers in the fridge in a tightly sealed container for up to 4 days. Reheat in a saucepan on the stove or in the microwave. Creamed peas and potatoes make wonderful leftovers!

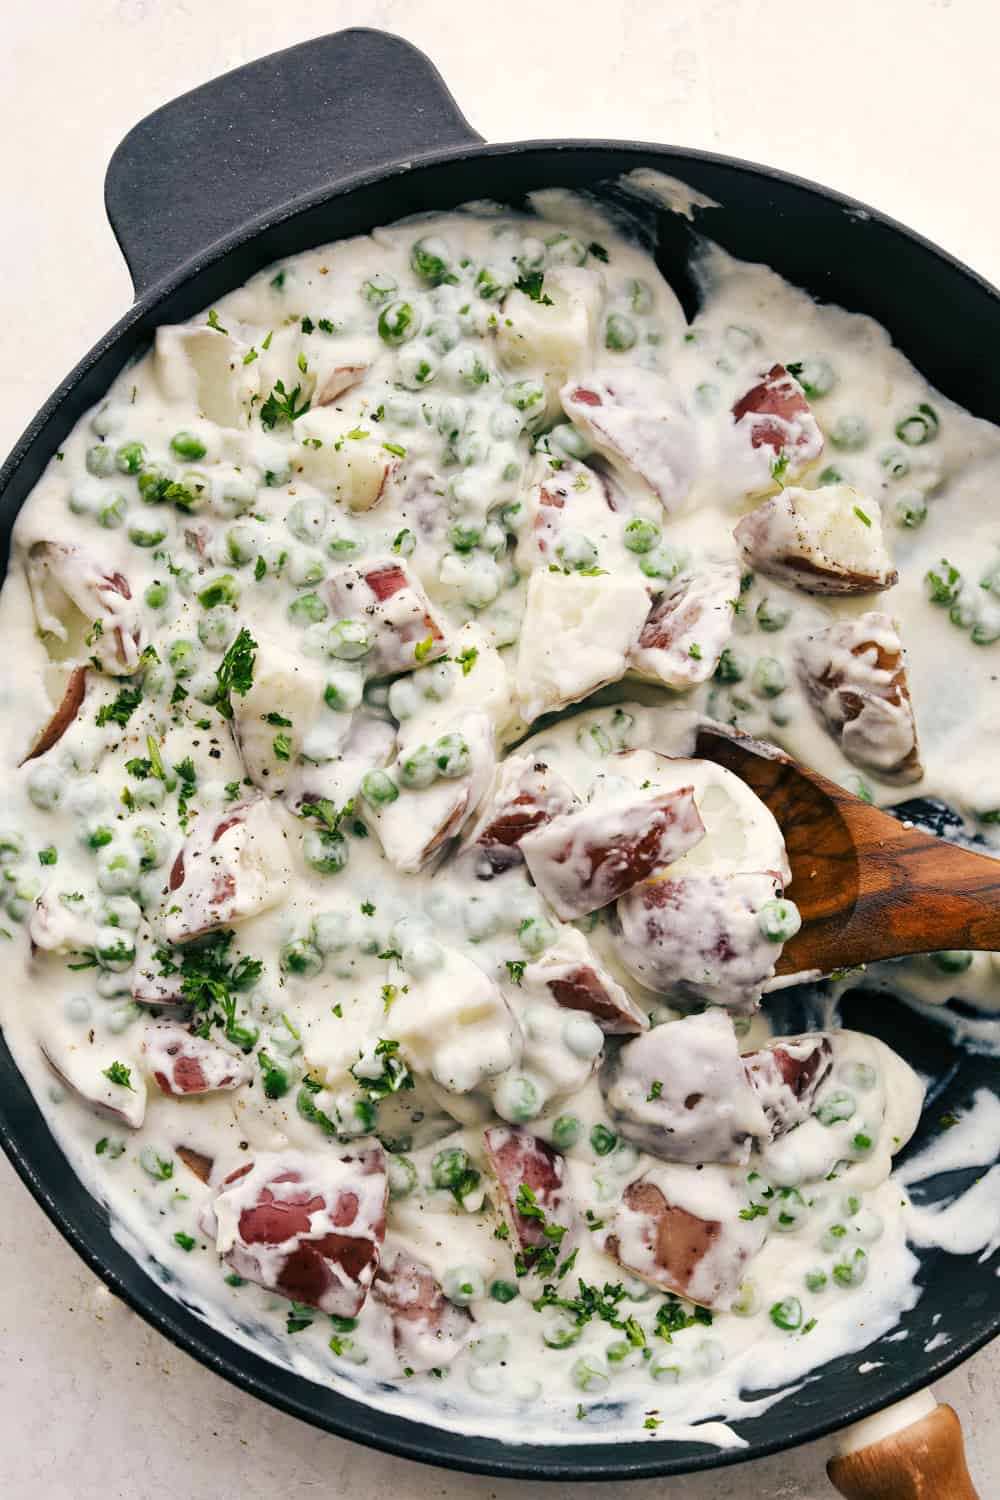
Scooping the creamed peas and potatoes from the pan.

More Side Dishes to Try

Side dishes can be just as important as the main meal. They balance out your main dish and add nutrition, flavor and texture. I have had many a meal where the side dish was more delicious than the main dish, which is totally fine with me. You can even make a whole meal out of simple side dishes. Side dishes are so customizable and diverse. I often make a side dish or two to make sure all my kids will eat something at dinner time, especially if I am trying a new dish out on them and I don’t know how they’ll react. With these tried and true sides, I am guaranteed they’ll eat something and I don’t have to spend more time making several meals to satisfy them.

Print

Creamed Peas and Potatoes

Creamed Peas and Potatoes are a classic side dish that is absolutely delish! Super creamy and full of flavor it's a side dish that is hearty and comforting!
Author Alyssa Rivers

Ingredients

  • 1 pound red potatoes
  • 4 cups peas fresh or frozen
  • 2 Tablespoons butter
  • 2 Tablespoons flour
  • 1 teaspoon salt
  • 1/2 teaspoon pepper
  • 2 cups milk
  • 1 cup heavy cream
  • 1/4 cup parmesan grated

Instructions

  • Bring a large pot to boil and boil the potatoes for 10-12 minutes or until until fork tender.
  • Add the peas the last 3 minutes of cooking time. Drain.
  • In a large saucepan over medium high heat add the butter and melt. Whisk in the flour, salt and pepper until it thickens up.
  • Whisk in the milk, heavy cream, and parmesan over medium high heat until thick.
  • Add the potatoes and peas back to the sauce for 2-3 minutes and serve.


source https://therecipecritic.com/creamed-peas-and-potatoes/
Share:

Homemade Air Fryer French Toast Sticks

Air Fryer French Toast Sticks are a super fun fast way to make breakfast in the morning. Coated in a vanilla and cinnamon egg mixture, these fry up absolutely amazing!

Inspired by my tried and true French Toast, these sticks are incredible. Serve them with some fresh fruit, Perfectly fluffy Scrambled Eggs and amazing Baked Bacon.

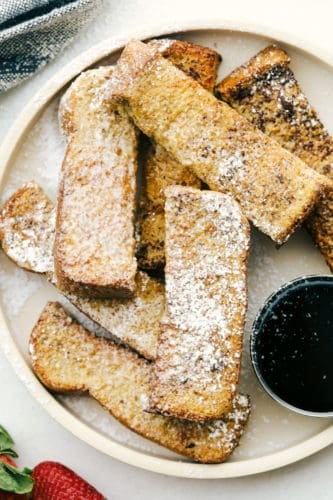
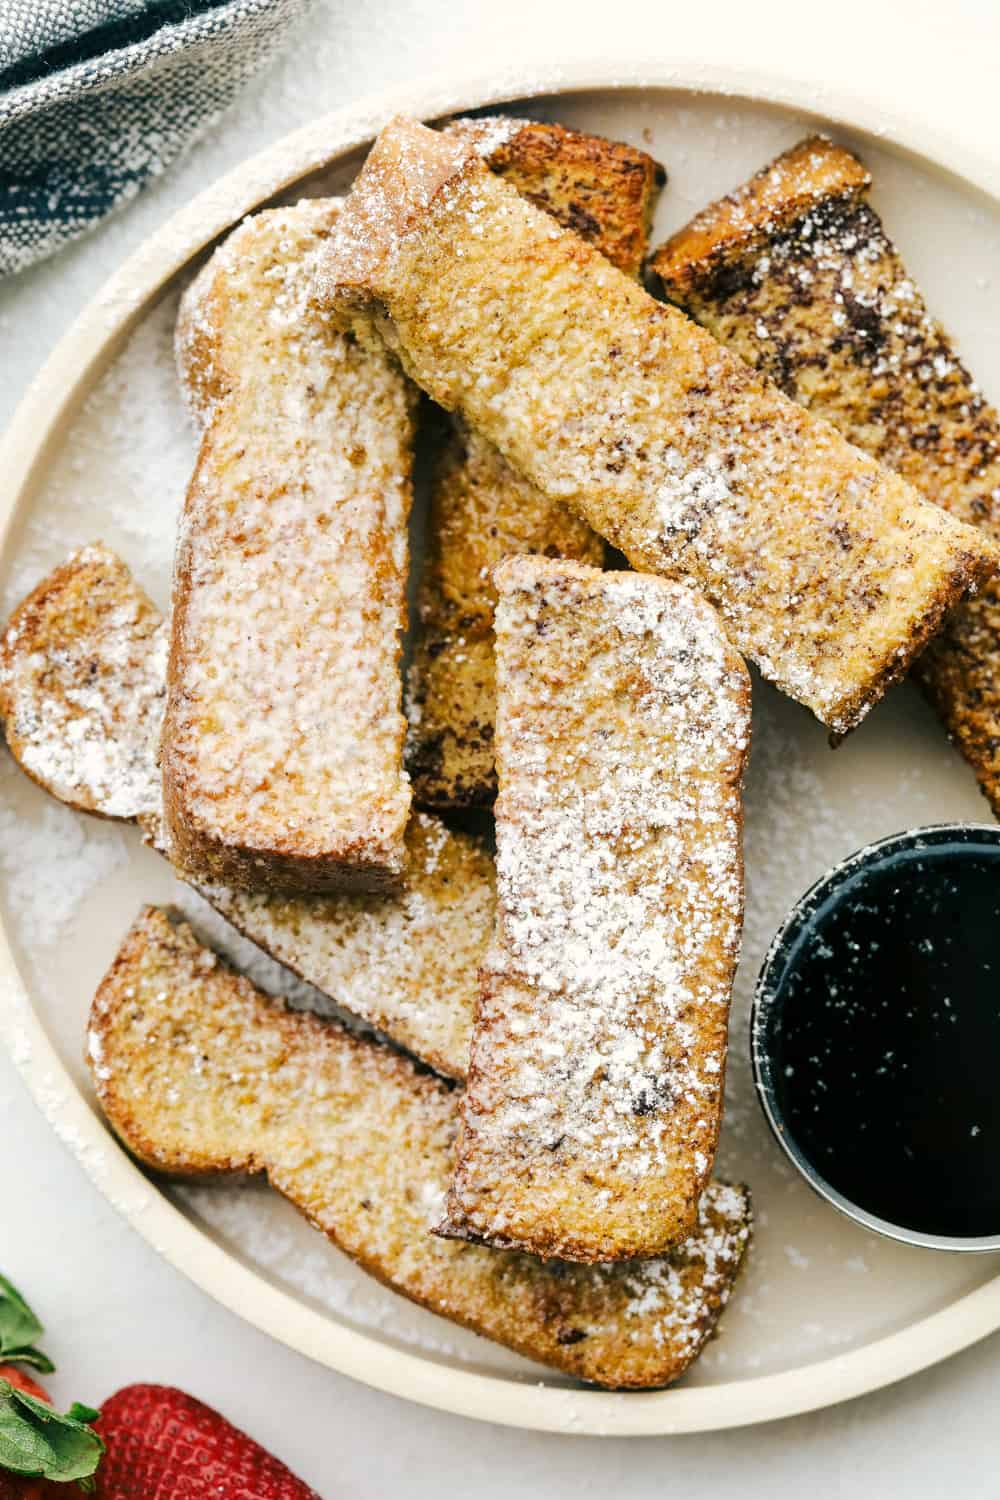
Air fryer french toast sticks layered on a plate with powdered sugar

Air Fryer French Toast Sticks

My family love french toast, but they go insane when I turn them into french toast sticks. It gives them permission to eat with their fingers. They get to dunk them into warmed homemade maple syrup and they love it.  I love how quick and easy is to make. It truly does not take but a minute more to make french toast sticks vs regular and they are so much more fun to eat. I also love how the air fryer transforms them into the Best french toast ever!

When you use the air fryer to cook these french toast sticks, they take on that being “fried” texture without the extra fat and calories. The circulating air beautifully crisps the outsides and leaves the insides soft and tender, but cooked. Using the air fryer you can also control how crispy you want your french toast. It makes french toast sticks magical just like these homemade poptarts, donuts and even grilled cheese sandwiches. You have to check out my other air fryer recipes for the best in air frying!

French Toast Sticks Ingredients

These ingredients are probably sitting in your pantry. Having a good quality bread is key. Pick a bread that is stout and will soak up the egg mixture, but not disintegrate in it.

  • Eggs: Large eggs beaten well for the dredging.
  • Milk: You can also use heavy cream or half and half.
  • Cinnamon: Adds the best bit of flavor.
  • Vanilla: The vanilla makes all the difference in the sweetness.
  • Texas Toast: You want thick sliced bread that is thick and hearty.
  • Brown Sugar: For adding a bit of sweetness to the tops
  • Oil: This is for spraying the air fryer, do not use cooking spray

How To Make French Toast Sticks in the Air Fryer

This could not be any easier. Just like making french toast, it only takes one extra step to cut the bread. It’s fun and the whole family is going to love it!

  1. Egg Mixture: In a small bowl whisk together the eggs, milk, cinnamon, and vanilla.
  2. Oil: Spray the bottom of the basic with olive oil spray.
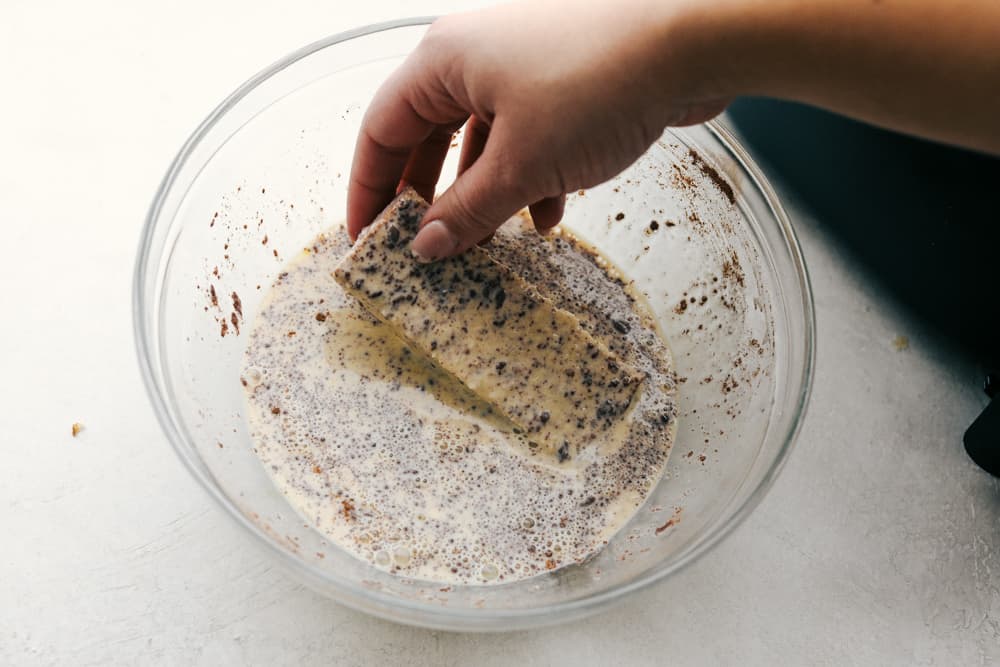
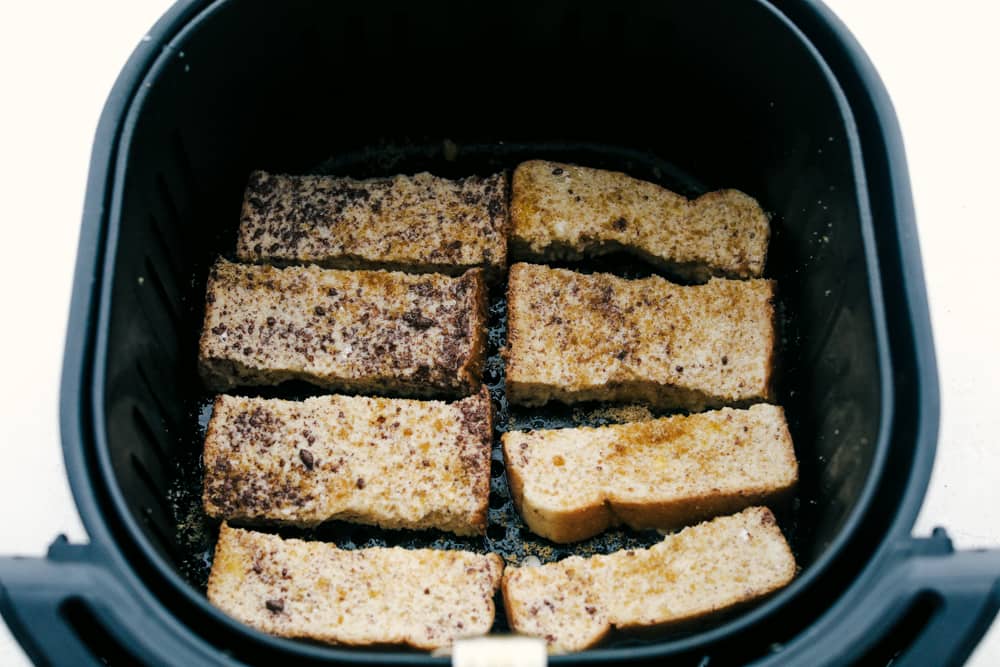
  3. Bread: Cut the Texas toast into 3 sections. Dredge into the egg mixture and place in a single layer in the basket. Sprinkle the tops with brown sugar.
  4. Fry: Cook at 360 degrees for 6-8 minutes or until golden.
  5. Serve: Serve with syrup and dust with powdered sugar if desired.

Dipping french toast sticks in egg mixture.

Tips for The Best French Toast Sticks

Truly the best french toast starts with the bread and what you put in the egg mixture. I have tips for the air fryer too.

  • Air Fryer: When you oil the air fryer, do not use a cooking spray. It has additives that over time will leave your air fryer basket gummy and ruin it. You will want to use a pure oil spray with no added solvents or ingredients.
  • Do not over crowd: Probably the number one rule when air frying is to not over crowd. If you do the circulating air cannot get all the way around your food and it will cook unevenly or not at all. So leave space and cook in batches if you need to.
  • Egg Mixture: To dial up your egg mixture a notch use heavy whipping cream or half and half instead of milk. Trust me it is divine.
  • Cinnamon: If you notice the first few bread pieces seem to take all the cinnamon, leaving not much behind for the rest of your bread. Add cinnamon to your egg mixture as you dip and when you notice its disappearing. That way every piece of your french toast sticks will have that divine cinnamon flavor.
  • Bread: Yes, a good quality bread is key. But it should also be stale. I know it doesn’t sound appealing but it works. The more dried out the bread the less soggy it will be when it is air fried. If you bread is really fresh, place it in the air fryer for about 1-2 minutes to dry it out a bit before dipping it in the egg mixture.
  • What Kind of Bread to Use: Any bread will work, but to get the best results, you want a hearty bread that will stand up to the egg mixture. Texas toast, french bread, brioche, challah, sourdough and even fun bread like cinnamon raisin bread. YUM!

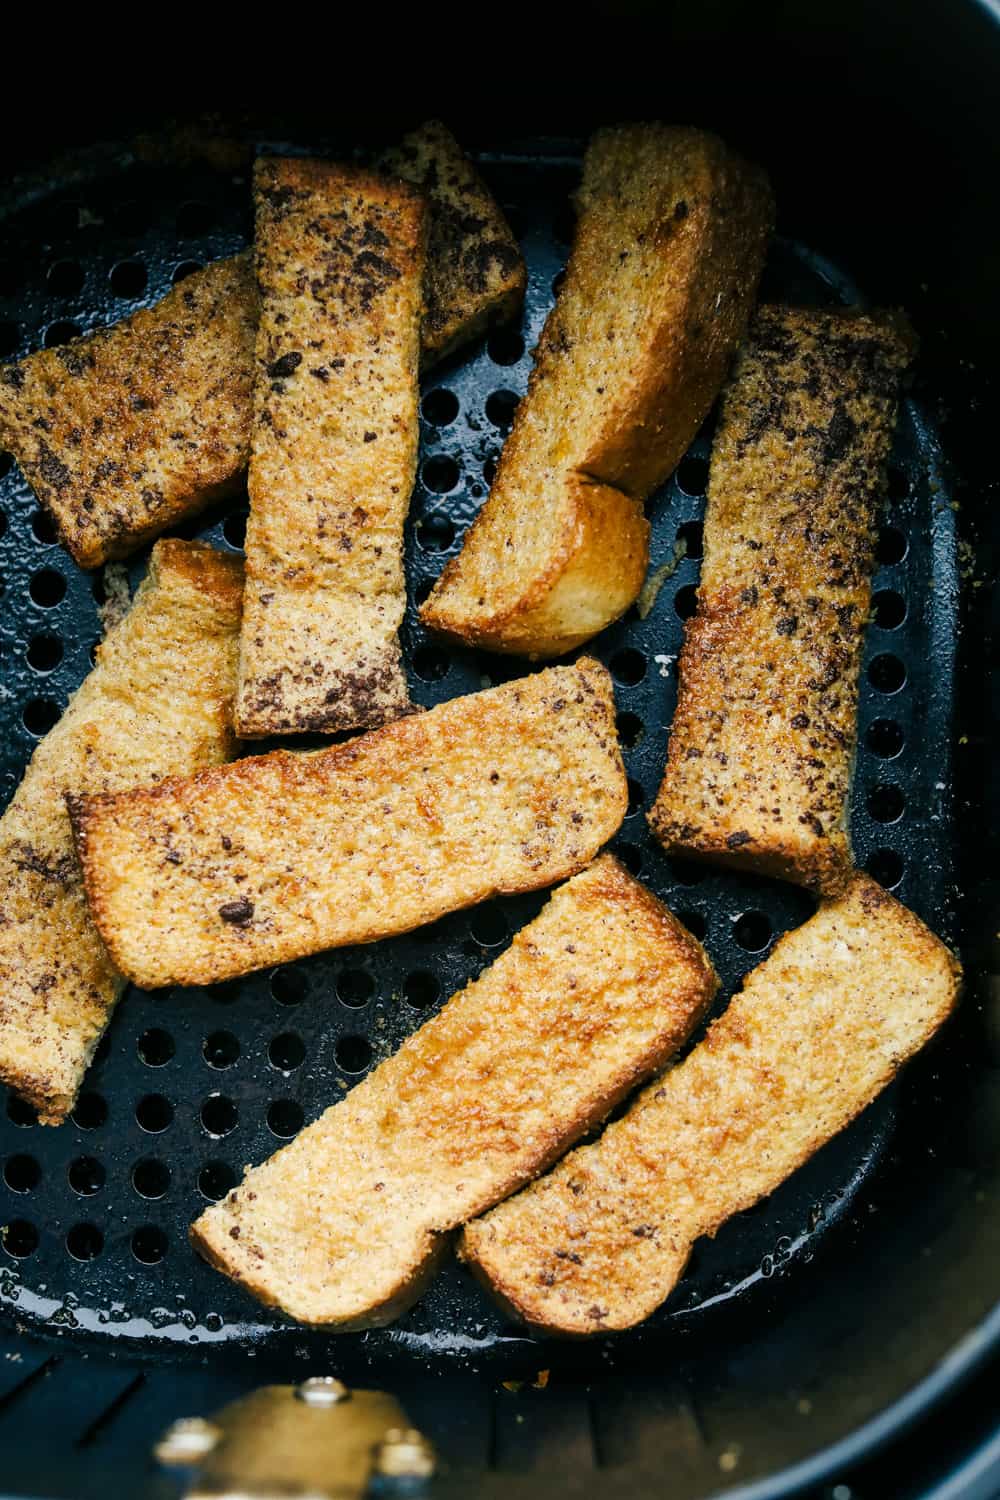
Placing french toast sticks in air fryer basket.

Toppings For Easy French Toast Sticks

Besides dipping them in the best homemade maple syrup you can do a lot with these sticks.

  • Syrup:  Besides maple you can dip these french toast sticks in other syrups, you can totally get creative, but try, coconut, buttermilk, huckleberry or apricot syrup.
  • Spreads: You can spread the sticks with Nutella, caramel sauce, peanut butter or cookie butter.
  • Fruit: Serve alongside or on top with your favorite fruit. Strawberries, raspberries, blueberries,  peaches, bananas or even try orange zest.
  • Nuts: Nuts can be used to top them too, after the whip cream of course to keep them on the french toast sticks. Try chopped pecans, walnuts or pistachios.
  • Jam: French toast sticks are easy to dip in jam as well. We love peach, apricot, strawberry or huckleberry jam.
  • Chocolate: Chocolate in the morning makes everything better! Sprinkle with chocolate chips, mint chocolate chips or dark chocolate chips.
  • Extras:  These are not exactly extras, but more of necessities at my house. Dip and spread with butter, whipped cream, sprinkles, powdered sugar or shredded coconut.

Golden brown french toast sticks.

Storing and Freezing French Toast Sticks

One thing I love about french toast is how easy it is to make and store. You have to try this trick.

  • Make a Double Batch: I will use two loaves of bread when I want to make extras. I spend a little extra time in the beginning but it pays off in the end.
  • Freeze Extras: Place cooled french toast sticks on a parchment lined cookie sheet and place in the freezer for about 20-40 minutes. You just want to partially freeze them.
  • Freezer Bags: Then place in a freezer safe sealed bag.
  • Eat: On those busy mornings when you need a quick breakfast, grab these french toast sticks and throw them in the air fryer, or microwave. Perfect and fast!

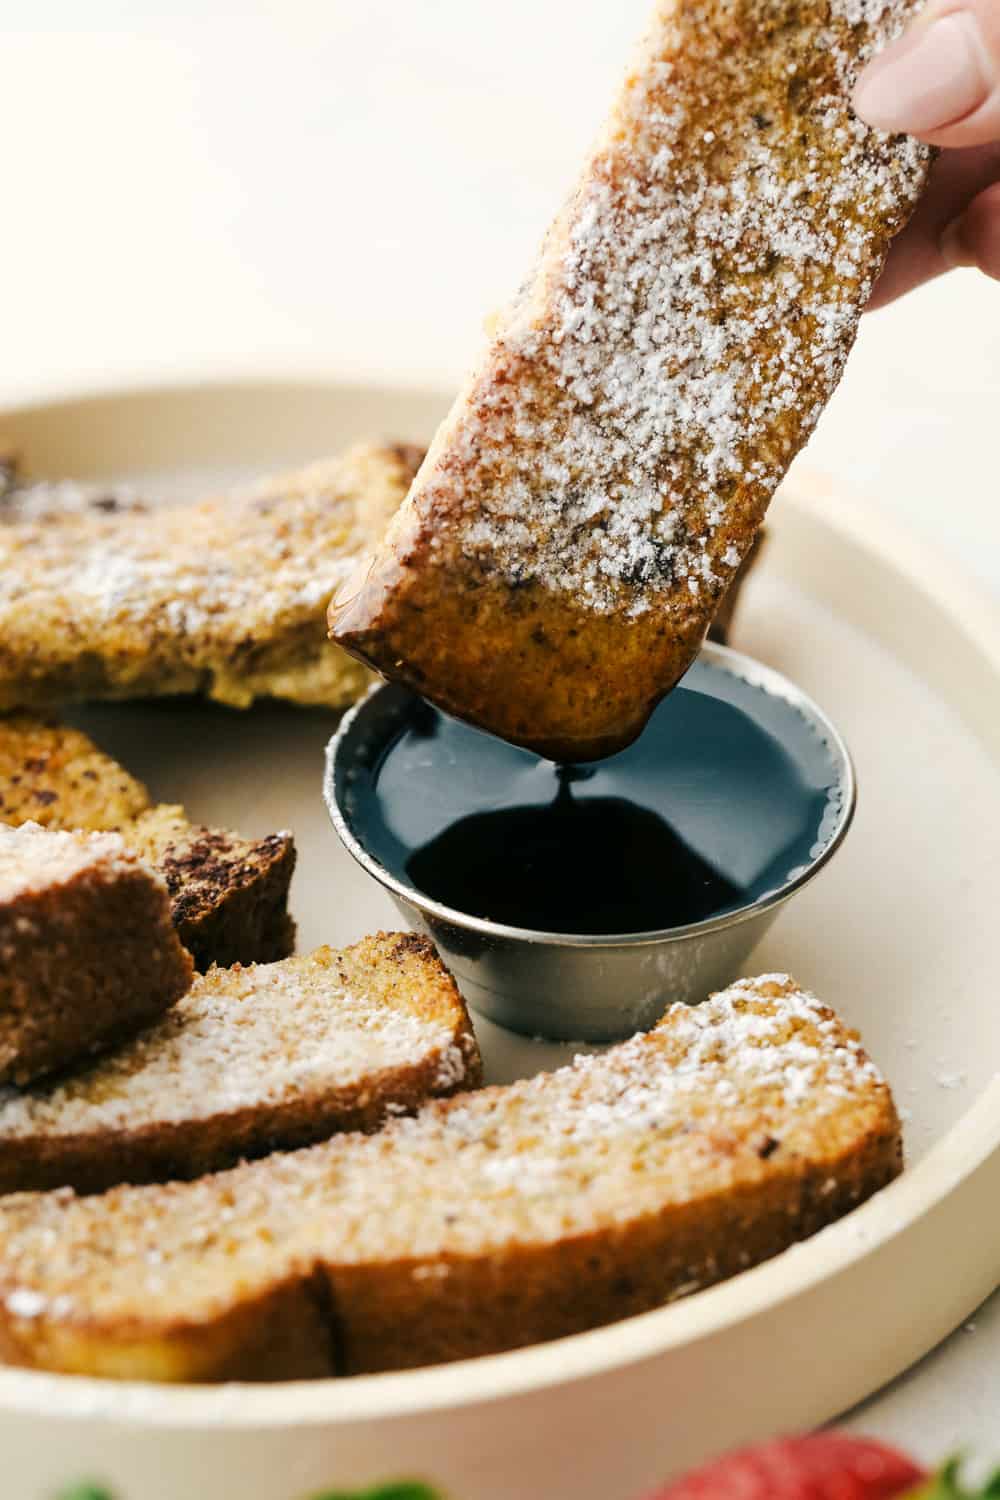
Dipping a french toast stick in maple syrup.

More Breakfast Foods To Love

Breakfast is the most important meal of the day, so they say. I am all for it. So is my family. In fact we often have breakfast for dinner, it’s a family favorite meal anytime of the day. With so many variations of sweet to savory and hearty to light, there is something for everyone to love. Breakfast meals can be quick and easy or take a little time and planning. Either way you love your breakfasts I have the perfect recipes for you to try.

Print

Air Fryer French Toast Sticks

Air Fryer French Toast Sticks are a super fun fast way to make breakfast in the morning. Coated in a vanilla and cinnamon egg mixture, these fry up absolutely amazing!
Course Breakfast
Cuisine American
Keyword air fryer french toast, air fryer french toast sticks, French toast, french toast sticks
Prep Time 5 minutes
Cook Time 10 minutes
Total Time 15 minutes
Servings 4 People
Calories 64kcal
Author Alyssa Rivers

Ingredients

  • 2 large eggs
  • 1/3 cup milk
  • 1 teaspoon cinnamon
  • 1 teaspoon vanilla
  • 6 slices thick bread Texas toast or French bread
  • 1 tablespoon brown sugar
  • olive oil spray

Instructions

  • In a small bowl whisk together the eggs, milk, cinnamon, and vanilla.
  • Spray the bottom of the basic air fryer with olive oil spray. Cut the Texas toast into 3 sections. Dredge into the egg mixture and place in a single layer in the basket. Sprinkle the tops with brown sugar.
  • Cook at 360 degrees for 6-8 minutes or until golden. Serve with syrup and dust with powdered sugar if desired.

Nutrition

Calories: 64kcal | Carbohydrates: 5g | Protein: 4g | Fat: 3g | Saturated Fat: 1g | Trans Fat: 1g | Cholesterol: 95mg | Sodium: 45mg | Potassium: 69mg | Fiber: 1g | Sugar: 4g | Vitamin A: 169IU | Vitamin C: 1mg | Calcium: 45mg | Iron: 1mg


source https://therecipecritic.com/air-fryer-french-toast-sticks/
Share:

Popular

Archive

Slider Tag

Facebook

Header Ads

Recent in Food

Recent Posts

Unordered List

  • Lorem ipsum dolor sit amet, consectetuer adipiscing elit.
  • Aliquam tincidunt mauris eu risus.
  • Vestibulum auctor dapibus neque.

Pages

Theme Support

Need our help to upload or customize this blogger template? Contact me with details about the theme customization you need.