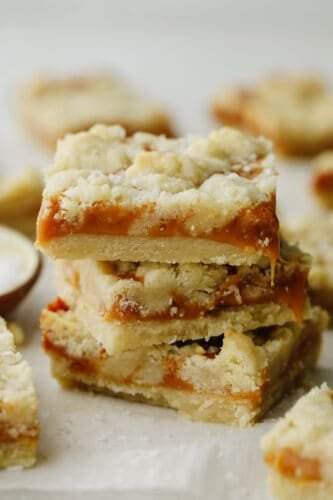
Salted Caramel Butter Bars

Salted caramel butter bars are the perfect easy-to-make dessert. With a buttery and crumbly shortbread crust that is topped with a smooth layer of caramel, there will be a little bit of sweet and savory in each bite!

Sweet and savory dessert bars are a perfect treat for pot lucks with family and friends. Try these s’mores bars, peanut butter bars, or even these snickerdoodle bars if you want something that everyone will love!
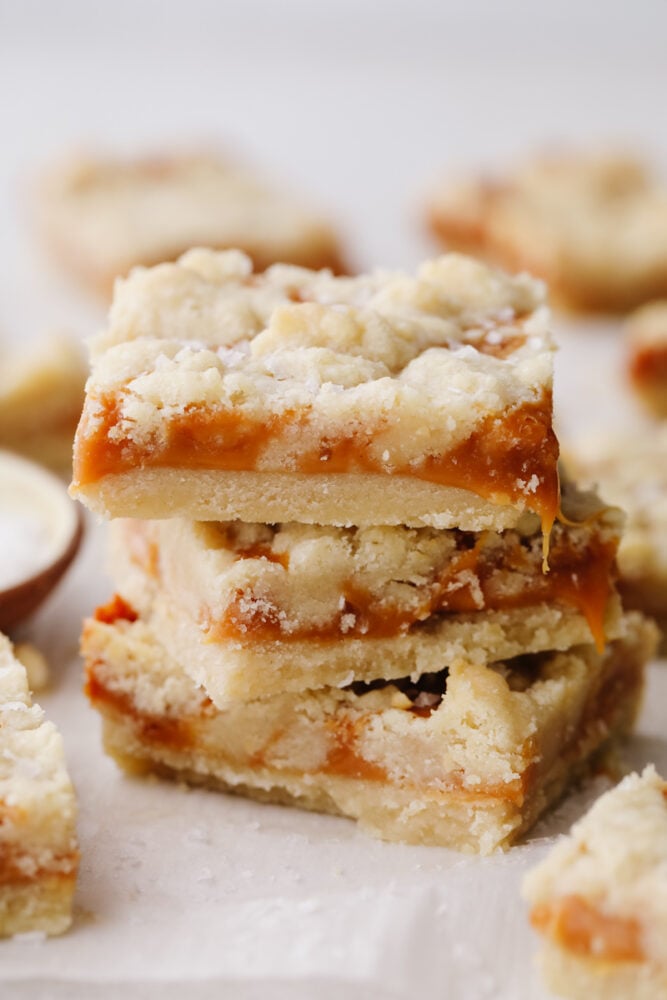
A stack of salted caramel butter bars.

Salted Caramel Butter Bars

Caramel is one of my food obsessions. Anything that is baked with ooey, gooey caramel becomes an instant favorite for me!  These are called salted caramel BUTTER bars for a reason. Sorry friends, but these will not help you out with any weight loss programs! They are packed with butter! But I promise they are worth every single bite!

These are the bars that someone brings to a get-together and you HAVE to get the recipe. They disappear off of any plate and platter so quickly that I’m telling you right now that you should just double the recipe. I mean, a delicious butter shortbread crust with a gooey salted caramel center… It’s simple yet amazing! These are the perfect balance of salty and sweet and will always be a hit.

Ingredients for Salted Caramel Butter Bars:

The list of ingredients for these salted caramel butter bars is short and sweet! (Literally!) The two types of sugar give the shortbread crust an extra sweet flavor. See the recipe card at the bottom of the post for exact measurements.

  • Butter: Make sure to leave the butter out for 2 hours on the counter so that it will come to room temperature before creaming together to form the dough.  This will mix into your dough so much better!
  • White Sugar: Adds sweetness to the shortbread crust and topping.
  • Powdered Sugar: Since this sugar is less dense it creates that melt in your mouth texture and flavor.
  • Vanilla: Use premium vanilla when possible for a richer flavor.
  • Flour: All purpose flour is best for a crumbly texture.
  • Bag of caramels: Mix together with heavy cream and vanilla and melt it the microwave for one minute.
  • Heavy Whipping Cream: Smooths, sweetens, and thins out the caramel to spread over the shortbread crust.
  • Salt: Coarse sea salt is the best!  Just be careful not to add to much!

Let’s Make Some Delicious Salted Caramel Butter Bars:

You will be amazed at how quickly this recipe comes together. The most time-consuming thing is allowing the butter to come to room temperature and unwrapping the caramels! It is a great recipe to make with kids. My kids love that they can help with the candies and putting dough crumbles on top!

  • Preheat and prep: Preheat oven to 325 degrees. Line a 9×13 pan with parchment paper or aluminum foil. Lightly spray with cooking spray.
  • Combine ingredients to make dough: In a large mixing bowl cream together butter, sugar, and powdered sugar. Add vanilla and beat until combined. Mix in the flour and combine until it forms a soft dough.
  • Bake half of the dough, refrigerate other half: Press half of the dough in the bottom of a 9×13 dish and place the other half of the dough into the refrigerator. Bake in preheated oven for 15 minutes.
  • Make caramel sauce: Remove the pan from the oven and melt the caramels, heavy cream and ½ tsp vanilla in the microwave for 1 minute. Stir together until smooth. Pour evenly over the hot crust. Lightly sprinkle the coarse sea salt over the crust. I didn’t end up using the entire amount. Just lightly sprinkle evenly on top. You don’t want them too salty.
  • Take refrigerated dough out and add to top, bake: Take the remaining dough out of the refrigerator and crumble over the top of the caramel. Return the pan to the oven and bake for 25-30 minutes until filling is bubbly and the top is firm. Let them cool completely before cutting.
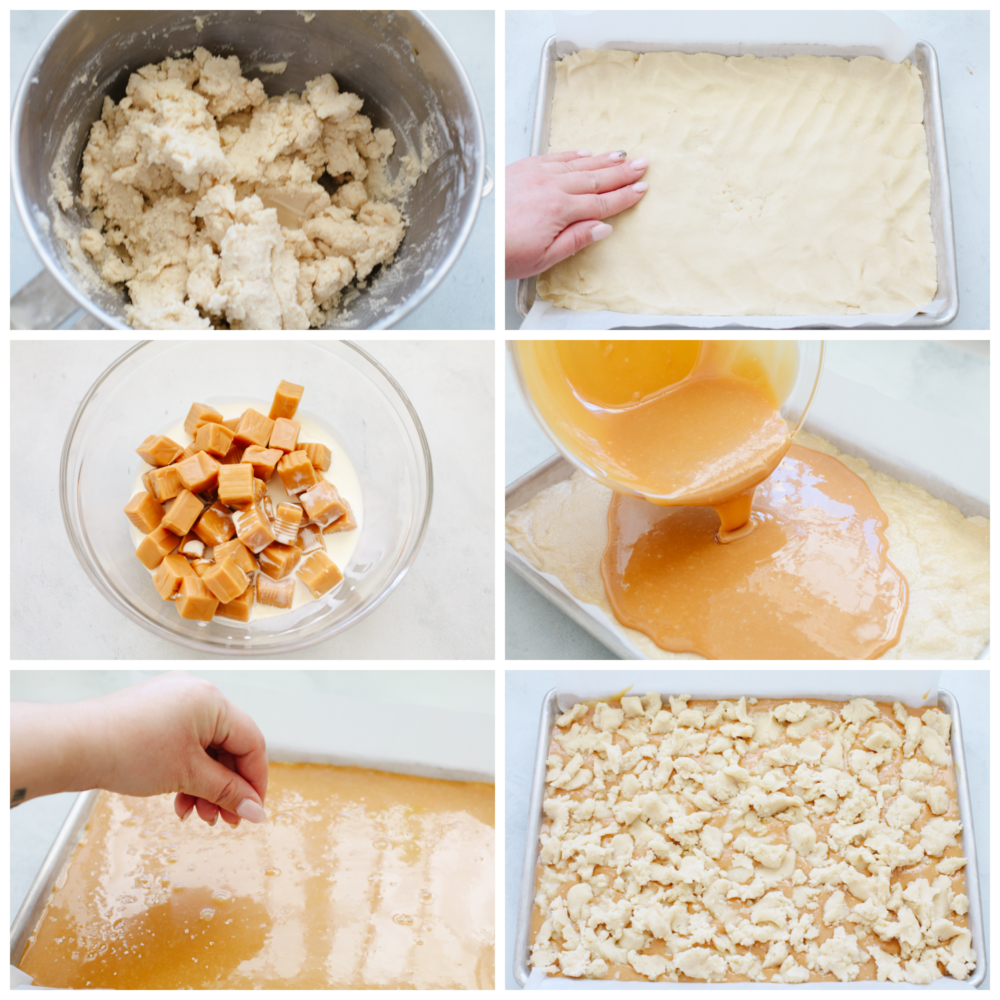
6 step by step pictures showing how to make dough and caramel.

Variations

This salted caramel butter bars recipe is seriously SOO GOOD! I love how the bars turn out and make them over and over. Here are a few ideas on how to change things up!

  • Caramel lovers: Substitute some or all of your granulated sugar for light brown sugar. This gives the bars an even stronger caramel flavor!
  • Can’t have flour? Use finely ground rolled oats instead of the flour. This will make your dough a little stickier so chill a few hours before pressing into your pan and baking.
  • Brown butter: Brown your butter first for an even richer crust.  Is that even possible you ask.  Yes it is!  To brown your butter cook it over medium heat until browned.  Strain out any brown pieces you don’t want to use.  Or leave them in if you don’t mind seeing them in your finished crust.  Then, chill your brown butter so that it is room temperature and not warm before you cream it into the crust.
  • Caramels: Use soft caramel candies instead of hard.  They will melt much easier!
  • Don’t have heavy cream? Use milk or water instead in a pinch.
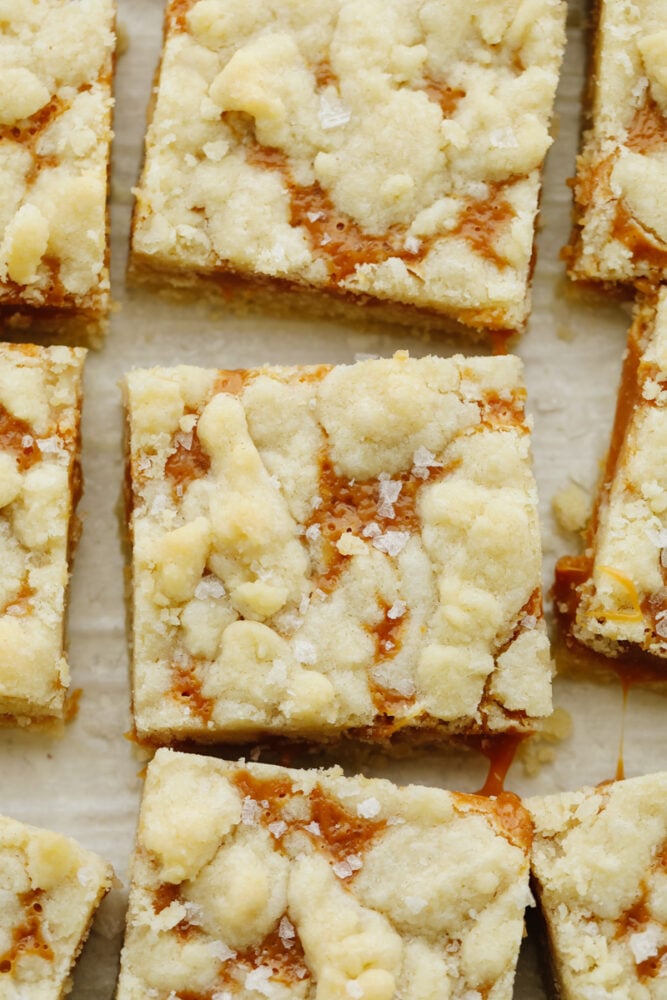
Salted caramel butter bars on a baking sheet cut up.

Baking Tips

Although this is a super simple recipe, I do have a few tips to achieve the most perfect salted caramel butter bars possible. Pay close attention to these few things because they will really give you the results you want.

  • Cool Dough: Keep your dough slightly cool before baking.  Do not allow it to get to warm (chill dough in the refrigerator before placing in oven if your dough feels too warm).  Also, after cooking, chill the bottom layer of crust for about 30 minutes in the refrigerator before adding the caramel.  This will ensure the crust is completely set.
  • Microwave-Free: Melt the caramels over a double broiler or in a pan instead of using a microwave.  To do this, you will frequently stir the candies over medium heat for 10-15 minutes.  Stir in the cream as you go until you get your desired consistency.
  • Don’t overmix: Do not overmix ingredients when forming your dough.  If you overmix it, air will get in and the crust will become too oily and become tough or chewy as it bakes.
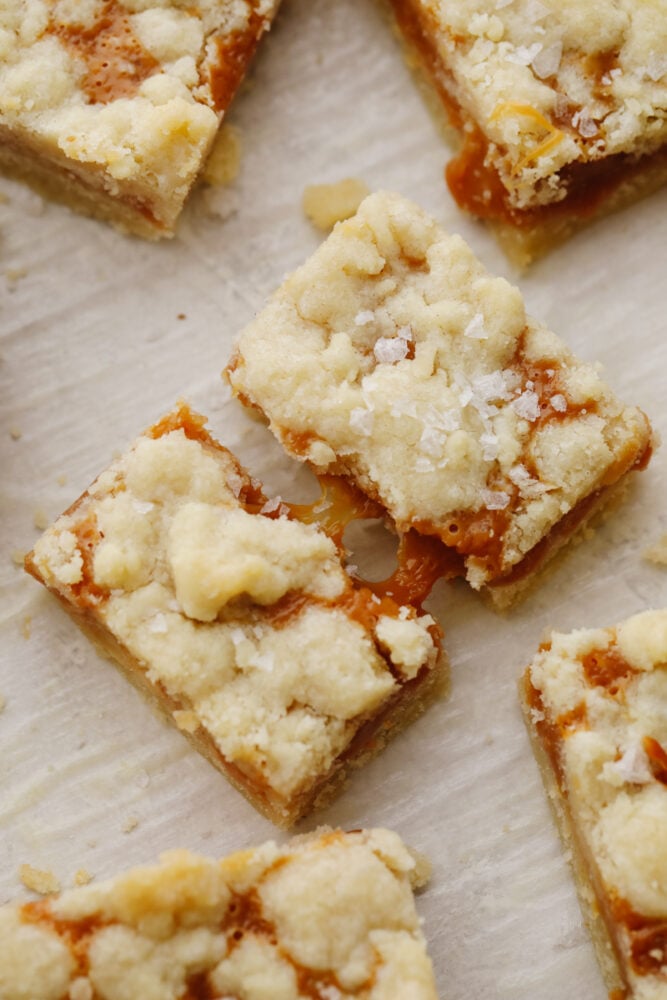
A broken salted caramel bar with caramel dripping.

Storing Salted Caramel Butter Bars:

Most of the time mine are all gone so I don’t have to worry about storing them.   However, on the rare occasion that you do need to store leftovers… Wrap them tightly or pack them in an airtight container and store them in the refrigerator for 5-7 days or in the freezer for 3-4 weeks. If you want to make the dough ahead of time it can be stored for up to 10 days in the refrigerator and pull it out when you are ready to make your bars.
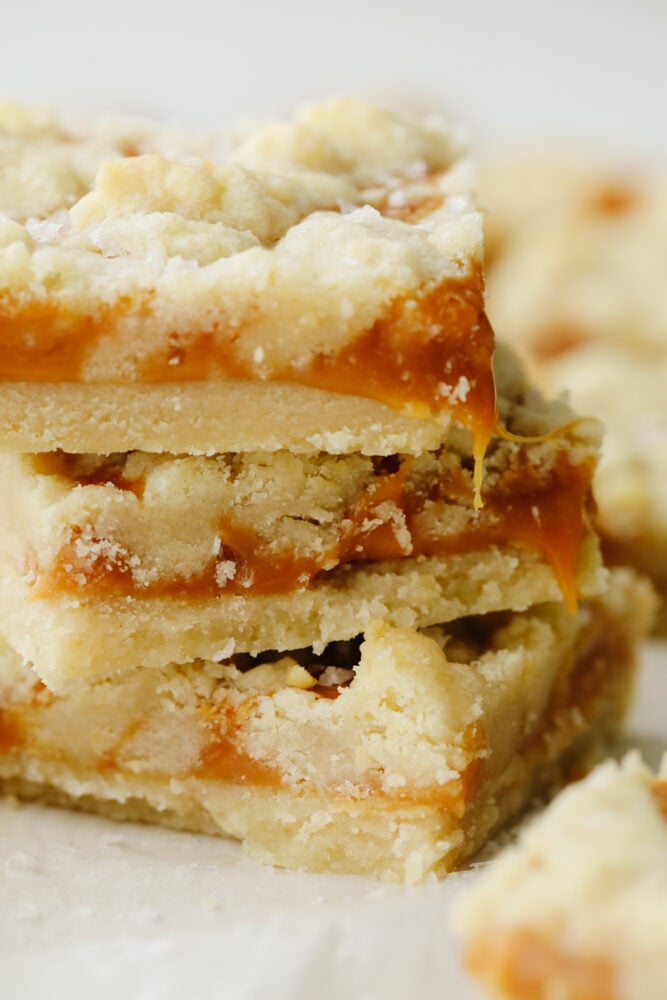
A zoomed in stack of salted butter caramel bars.
Print

Salted Caramel Butter Bars

Salted caramel butter bars are the perfect easy-to-make dessert. With a buttery and crumbly shortbread crust that is topped with a smooth layer of caramel, there will be a little bit of sweet and savory in each bite!
Course Dessert
Cuisine American
Keyword caramel butter bars, salted caramel bars, salted caramel butter bars
Prep Time 10 minutes
Cook Time 45 minutes
Total Time 55 minutes
Servings 20 Bars
Calories 425kcal
Author Alyssa Rivers

Ingredients

  • 2 cups butter softened
  • 1 cup white sugar
  • 1 1/2 cups powdered sugar
  • 1 Tablespoon vanilla
  • 4 cups flour
  • 1 (14 ounces) bag caramels unwrapped or 11 oz unwrapped Caramel Bits work great
  • 1/3 cup whipping cream
  • 1/2 teaspoon vanilla
  • 1 Tablespoon coarse sea salt

Instructions

  • Preheat oven to 325 degrees. Line a 9×13 pan with parchment paper or aluminum foil. Lightly spray with cooking spray.
  • In a large mixing bowl cream together butter, sugar, and powdered sugar. Add vanilla and beat until combined. Mix in the flour and combine until it forms a soft dough.
  • Press half of the dough in the bottom of a 9×13 dish and place the other half of the dough into the refrigerator. Bake in preheated oven for 15 minutes.
  • Remove the pan from the oven and melt the caramels, heavy cream and ½ tsp vanilla in the microwave for 1 minute. Stir together until smooth. Pour evenly over the hot crust. Lightly sprinkle the coarse sea salt over the crust. I didn't end up using the entire amount, just lightly sprinkle evenly on top. You don't want them too salty.
  • Take the remaining dough out of the refrigerator and crumble over the top of the caramel. Return the pan to the oven and bake for 25-30 minutes until filling is bubbly and the top is firm. Let them cool completely before cutting.

Video

Notes

Updated on December 29, 2021
Originally Posted on October 22, 2013

Nutrition

Calories: 425kcal | Carbohydrates: 55g | Protein: 4g | Fat: 22g | Saturated Fat: 13g | Cholesterol: 56mg | Sodium: 565mg | Potassium: 81mg | Fiber: 1g | Sugar: 33g | Vitamin A: 635IU | Vitamin C: 1mg | Calcium: 41mg | Iron: 1mg


source https://therecipecritic.com/salted-caramel-butter-bars/
Share:

Homemade Marshmallows

Once you make marshmallows from scratch, you’ll never go back! These homemade marshmallows are ultra-soft and delicious, ready for hot chocolate and s’mores!

Homemade marshmallows are so easy to make and they upgrade so many recipes. Try them in rice krispies, s’mores cookies, and oreo fluff to see the difference for yourself!

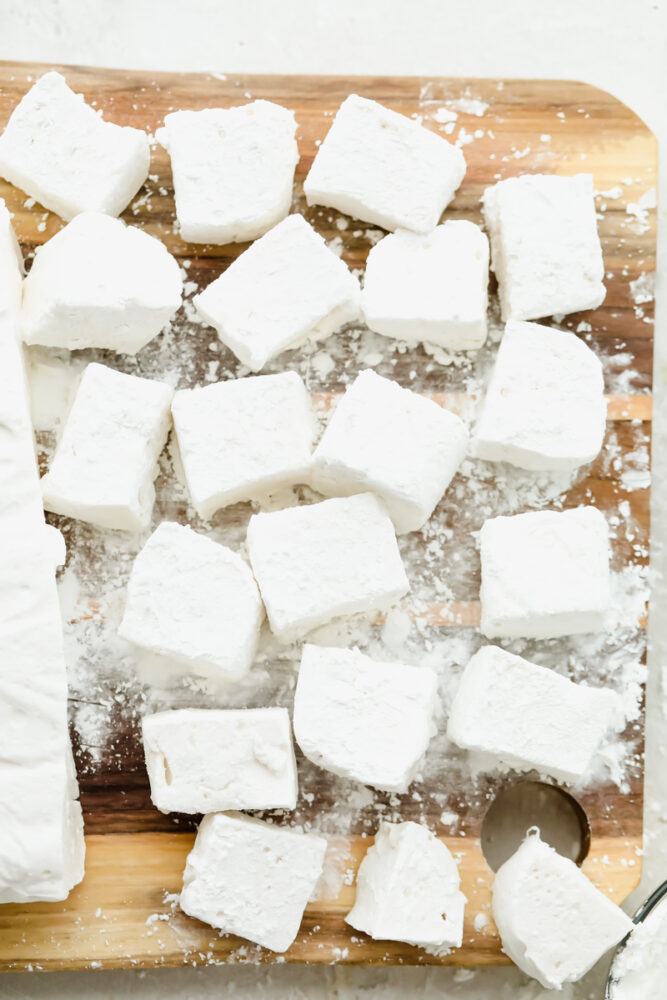
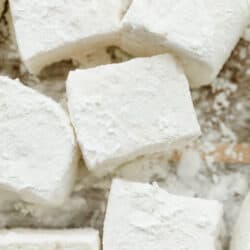
Homemade marshmallows on a wooden cutting board.

Easy Homemade Marshmallow Recipe

You may be thinking, why go through the hassle of making marshmallows when I can just buy them at the store? Trust me, once you’ve made them from scratch, you’ll wonder why you ever questioned yourself. Not only are homemade marshmallows beyond easy, but they have an extra pillowy, melt-in-your-mouth quality to them. Storebought marshmallows just don’t compare. If you’re anything like me, you’ll find yourself munching on them before they ever find their way to a s’more.

My kids love making these with me. It’s so much fun to see it go from marshmallow cream to springy, bite-sized pieces! The other fun thing about making marshmallows at home is that you can make them in any shape you want. Any color you want, too, with just a splash of food coloring! These tasty treats have a long shelf life. Because of this, you’ll be able to make mouthwatering treats like fluff, pie, and cookies for weeks!

Everything You Need for Homemade Marshmallows

Another great thing about making marshmallows at home is that you can use so many different substitutes! Here’s what I used to make my marshmallows, and other ingredients you can use instead! And if you’re looking for measurements, they can all be found in the recipe card below.

  • Unflavored Gelatin: This is what gives marshmallows their iconic springy texture. To make this recipe vegan, subsitute gelatin with agar agar.
  • Cold Water: Added to activate gelatin.
  • Granulated Sugar: I like using granulated sugar because it melts down smoothly and keeps your marshmallows bright white.
  • Light Karo Syrup: This syrup prevents the sugar from crystalizing. You can substitute this with maple syrup or even honey.
  • Water: Added to the sugar syrup mixture.
  • Fine Salt: Adding a little table salt helps to enhance the flavor of the marshmallows.
  • Vanilla Extract: Vanilla extract gives your marshmallows an amazing, sweet flavor! Use pure vanilla extract for the best results.
  • Powdered Sugar: Used to coat each marshmallow piece and add a little extra sweetness!
  • Cornstarch: Keeps the outside of each marshmallow from getting too sticky.

Let’s Make Marshmallows!

Making marshmallows at home is fun! The steps to make them are super straightforward, too, which is great! You’ll love having them around to make desserts with. From butterscotch bars to fudge, it’s amazing how homemade marshmallows enhance the taste!

  1. Prep Pan: First, line a 9×9-inch baking pan with plastic wrap. Spray lightly with non-stick cooking spray. Set aside.
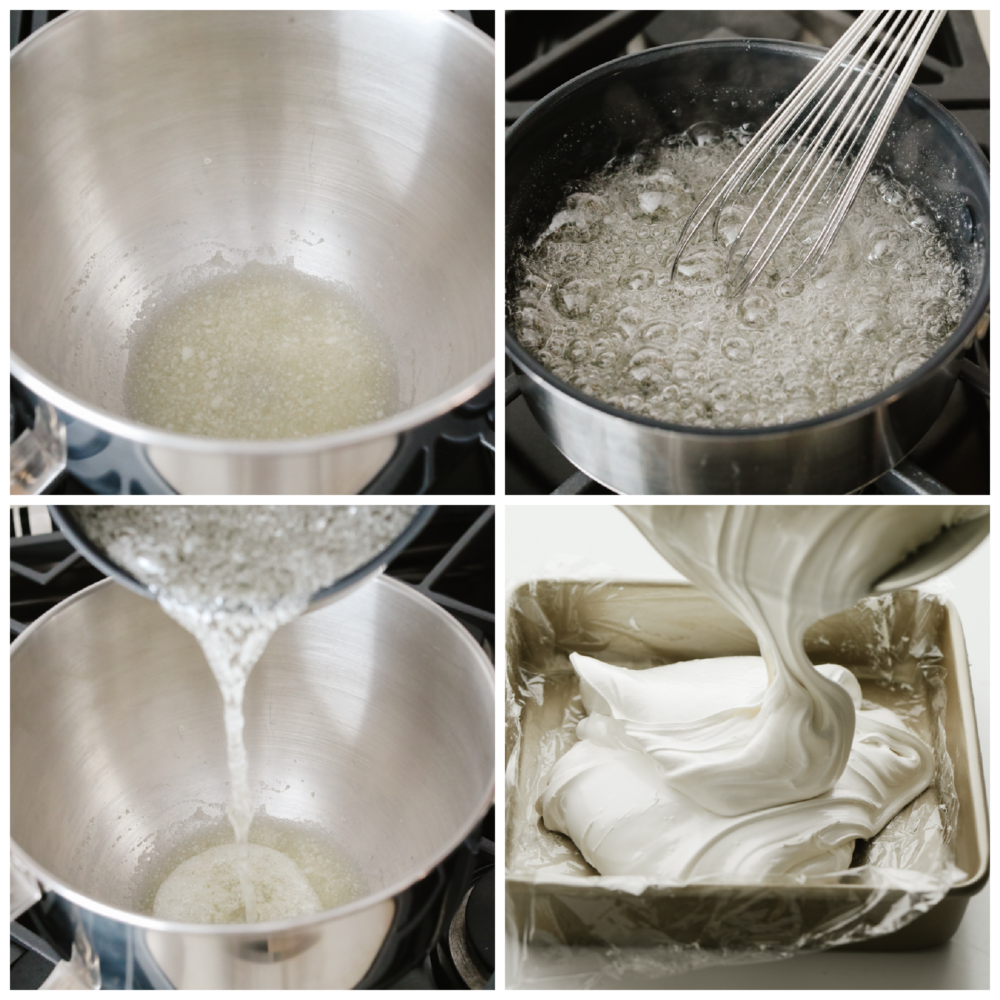
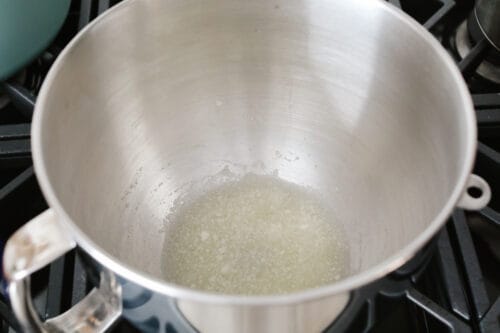
  2. Soak Gelatin: In the bowl of a standing electric mixer, pour in the unflavored gelatin. Add the ½ cup cold water, and let it sit and soak for 10 minutes.
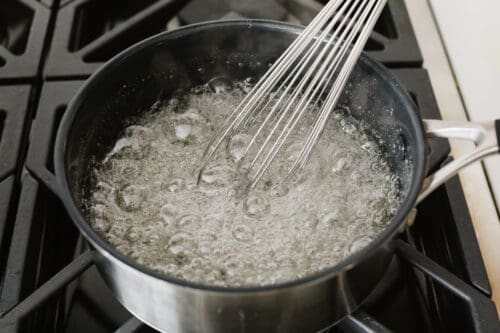
  3. Sugar Syrup Mixture: In a medium saucepan, add the sugar, Karo syrup, and ¼ cup of water. Heat over the stove on medium-high heat, and whisk together until it comes to a rolling boil. Boil for 1 minute.
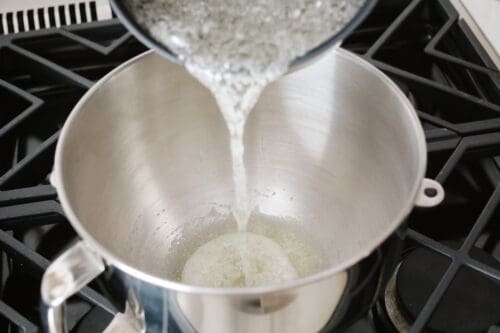
  4. Mix Gelatin and Syrup: Pour the boiling syrup over the soaked gelatin. Add the salt. Using the whisk attachment, turn the mixer on high speed. Beat on high for 12 minutes.
  5. Add Vanilla: Next, add the vanilla extract, and mix until incorporated.
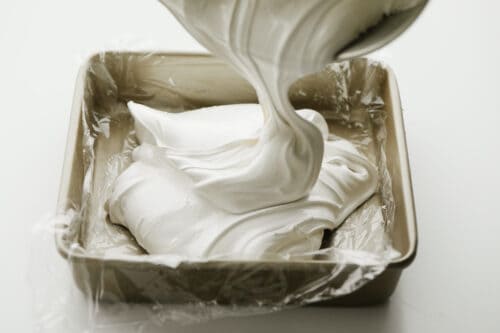
  6. Transfer to Pan: Using a rubber spatula lightly sprayed with non-stick cooking spray, scrape the marshmallow cream into the prepared pan. Smooth the top evenly.
  7. Allow to Set: Lightly spray another piece of plastic wrap to gently place over the top of the marshmallow cream. Seal around the pan or marshmallow cream to set for 4 hours or overnight.
  8. Mix Powdered Sugar and Cornstarch: Add the powdered sugar and cornstarch in a bowl, and stir to combine.
  9. Cut Into Pieces: Remove the marshmallow from the pan, and cut into desired sizes. Dredge each piece in the powdered sugar/cornstarch mixture and serve!
Preparing syrup, gelatin, and pouring marshmallow cream into a pan.

Homemade Marshmallow Tips and Tricks

Here are a few great tips and variations you can use when making marshmallows at home! This recipe is easily customizable. The great thing about making them from scratch is you have control over everything- flavor, shape, and color! You can make the marshmallows of your dreams!

  • Flavorings: Want a little extra flavor to your marshmallows? Add in cocoa powder, cinnamon sugar, lemon curd, citrus zest, pureed fruit, you name it! Just keep in mind, you may need to add in extra gelatin to compensate for your flavor additions so your marshmallows set properly.
  • Fondue: For a fun, delicious treat, use these homemade marshmallows for fondue at home! All you need are skewers, chocolate sauce, and caramel!
  • Use a Candy Thermometer: Using a candy thermometer is the best way to make sure you’ve cooked your sugar mixture long enough. You’ll want it to be at the soft ball stage, or around 240 degrees Fahrenheit. If your mixture isn’t hot enough, you’ll have runny marshmallows that don’t set.
  • Making Marshmallow Cream: Have a recipe that calls for marshmallow cream? You can make it easily by melting some of your homemade marshmallows down with 2 tablespoons of Karo syrup.
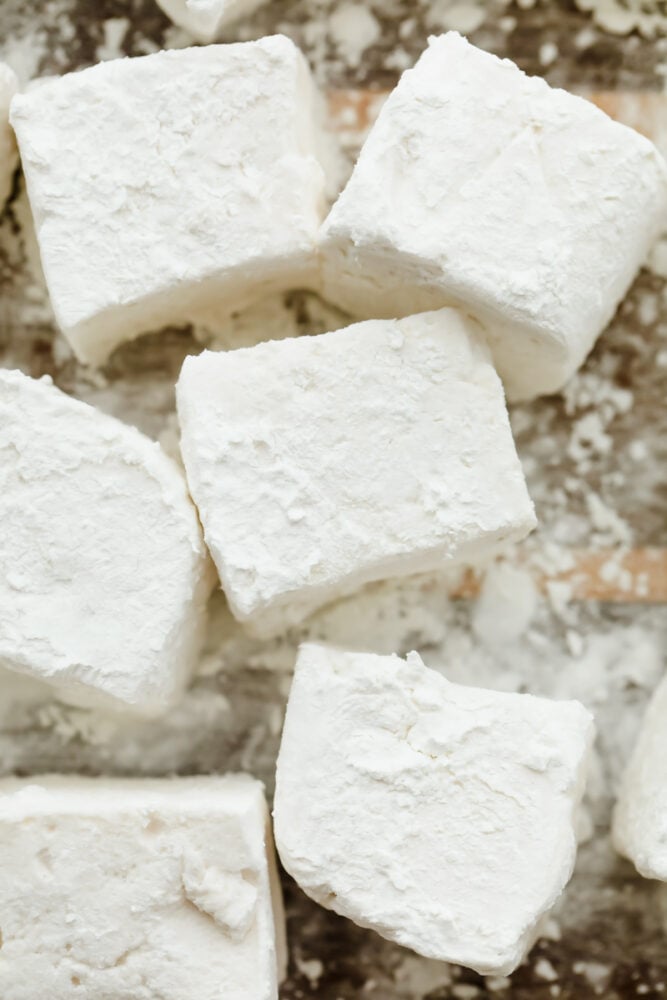
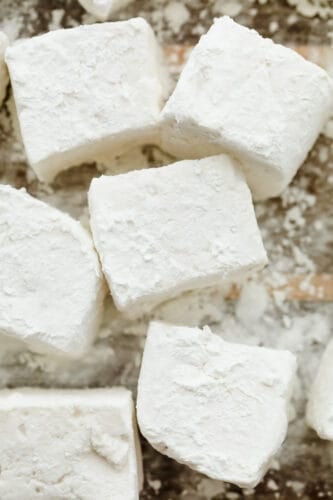
Closeup of homemade marshmallows, dusted in powdered sugar.

Storing Your Marshmallows

The best part of this recipe, easily, is the fact they have such a long shelf life! I absolutely love having them on hand for hot chocolate throughout the winter.

  • At Room Temperature: Store either in an airtight container or covered in plastic wrap. Your marshmallows will keep for up to 3 weeks in a cool, dry place away from direct sunlight.
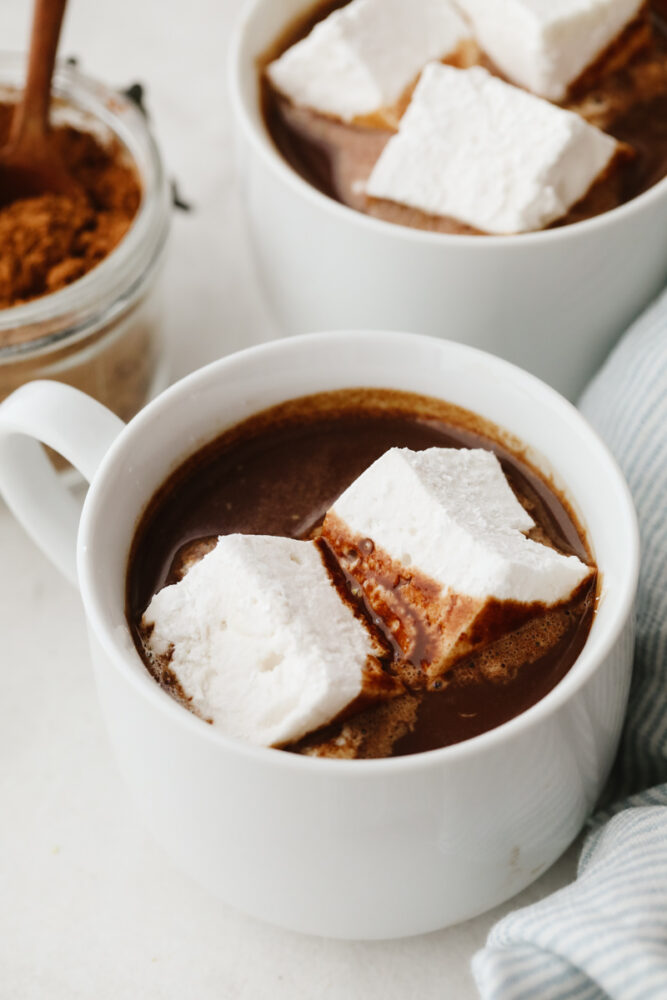
2 homemade marshmallows in a cup of hot chocolate.
Print

Homemade Marshmallows

Once you make marshmallows from scratch, you'll never go back! These homemade marshmallows are ultra-soft and delicious, ready for hot chocolate and s'mores!
Course Dessert
Cuisine American
Keyword homemade marshmallows, marshmallow
Prep Time 25 minutes
Total Time 25 minutes
Servings 48 marshmallows
Calories 54kcal
Author Alyssa Rivers

Equipment

  • Standing Electric Mixer

Ingredients

  • 3 envelopes unflavored gelatin (.75 oz)
  • 1/2 cup cold water
  • 2 cups granulated sugar
  • 2/3 cup light Karo Syrup
  • 1/4 cup water
  • 1/4 teaspoon fine salt
  • 4 tesapoons vanilla extract
  • 1/3 cup powdered sugar
  • 1/3 cup cornstarch

Instructions

  • Line a 9X9 inch baking pan with plastic wrap. Spray lightly with non-stick cooking spray. Set aside.
  • In the bowl of a standing electric mixer, pour in the unflavored gelatin. Add the ½ cup cold water, and let it sit and soak for 10 minutes.
  • In a medium saucepan, add the sugar, Karo syrup, and ¼ cup of water. Heat over the stove on medium-high heat, and whisk together until it comes to a rolling boil. Boil for 1 minute.
  • Pour the boiling syrup over the soaked gelatin. Add the salt. Using the whisk attachment, turn the mixer on high speed. Beat on high for 12 minutes.
  • Add the vanilla extract, and mix until incorporated.
  • Using a rubber spatula lightly sprayed with non-stick cooking spray, scrape the marshmallow cream into the prepared pan. Smooth the top evenly.
  • Lightly spray another piece of plastic wrap to gently place over the top of the marshmallow cream. Seal around the pan or marshmallow cream to set for 4 hours or overnight.
  • Add the powdered sugar and cornstarch to a bowl, and stir to combine.
  • Remove the marshmallow from the pan, and cut into desired sizes. Dredge each piece in the powdered sugar/cornstarch mixture and serve!

Notes

Not sure how to add the setting time : 4 hours or overnight

Nutrition

Calories: 54kcal | Carbohydrates: 14g | Protein: 1g | Fat: 1g | Saturated Fat: 1g | Polyunsaturated Fat: 1g | Monounsaturated Fat: 1g | Sodium: 16mg | Potassium: 1mg | Fiber: 1g | Sugar: 13g | Calcium: 1mg | Iron: 1mg


source https://therecipecritic.com/homemade-marshmallows/
Share:

Ham Balls

This tasty midwestern dish is ready to win the hearts of your family! With a thick, zesty brown sugar glaze, these delicious ham balls are the best addition to your dinner rotation!

Meatballs are a staple dish that everyone in my family loves! Porcupine, creamy Cajun, and Swedish meatballs are some of our favorites that you’ve got to try!

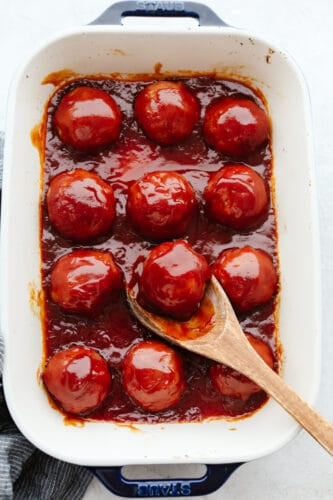
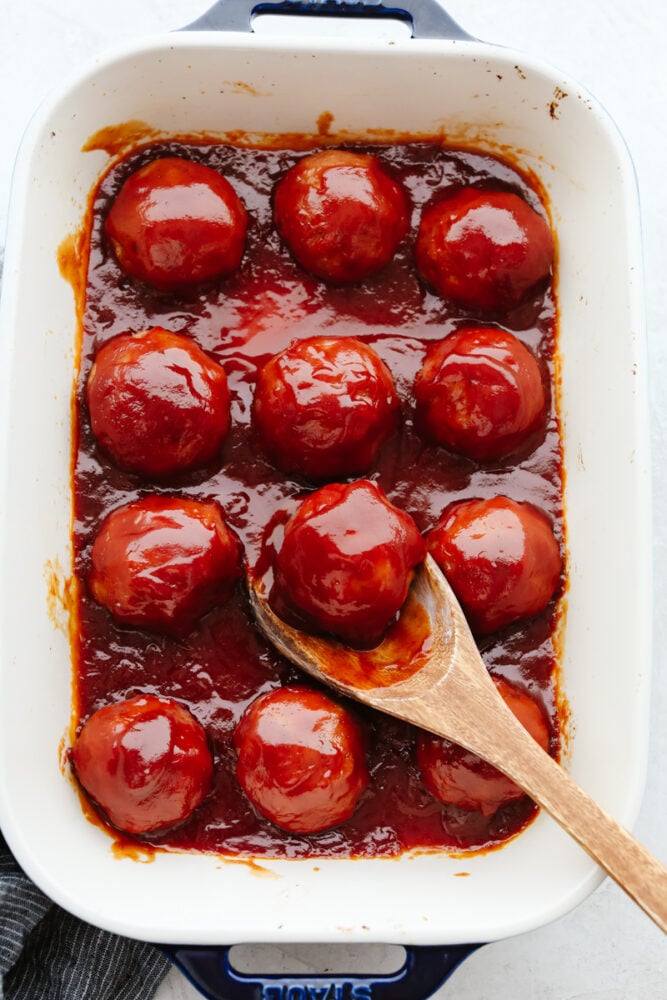
12 meatballs in a white casserole dish.

Brown Sugar Glazed Ham Balls Recipe

The holidays are so busy, so here’s a super easy dinner that your family will go crazy over! Ham balls have been a new favorite with my family. They’re so delicious! This is a beloved traditional dish from the midwest. It’s extremely popular – and for good reason! What sets these meatballs apart is the unique ingredients needed to make them! In this recipe, I use a mix of pork, ham, (it’s a great way to use up leftovers) parsley, and… *drumroll* graham cracker crumbs! It seems unlikely but adding graham crackers gives your ham balls a delicious, complex flavor with a hint of nuttiness. You’ll love them! They’re perfect for eating as-is, in a slider or sandwich, or over rice.

What really brings the ham balls together, however, is its thick and tasty sauce! It’s a simple blend of ketchup, brown sugar, mustard, and apple cider vinegar. The end result is hearty, tangy, and the perfect balance of savory and sweet. Even the picky eaters in my family love it! It’s so flavorful and delicious. Combined with the juicy, savory meatballs, this dish gets an A+ in my book. Impressive enough for a holiday dinner, easy enough for a busy weeknight meal! I know your family will love them just as much as mine does!

What You’ll Need for Ham Balls

The simple ingredients are the best part of this recipe, truly! I already had them on hand which makes this the easiest dinner ever to throw together. Perfect for those busy nights when my kids keep hounding me to make dinner. Measurements for each ingredient can be found in the recipe card at the end of the post.

  • Ground Ham and Ground Pork: A mix of both is used for the best flavor possible! I use a 1:1 ratio in this recipe but you can adjust it to preference.
  • Egg: A beaten egg is added to the meatball mix to help bind ingredients together.
  • Graham Cracker Crumbs: I love the nutty flavor and texture that graham cracker crumbs add to the ham balls. It’s great!
  • Milk: A little milk helps your meatballs come together smoothly.
  • Salt and Pepper: Add to taste!
  • Chopped Parsley: Parsley has an aromatic, peppery flavor that tastes amazing in ham balls.

Brown Sugar Tomato Glaze

  • Ketchup: This is the base of the sauce. It gives it a thick texture and sweet flavor.
  • Brown Sugar: Brown sugar gives the sauce a deep, smoky sweetness.
  • Mustard: Perfect for making the sauce nice and tangy!
  • Apple Cider Vinegar: Adds a hint of zip and fresh flavor.

Making Ham Balls

Ham balls only have a few minutes of prep time and then it’s off to the oven! I love how hands-off this recipe is. It gives me time to run errands, do chores, or even prepare some tasty sides. Green bean casserole and mashed potatoes are some of my favorites to make with this recipe!

  1. Preheat Oven: To begin, preheat the oven to 350 degrees Fahrenheit.
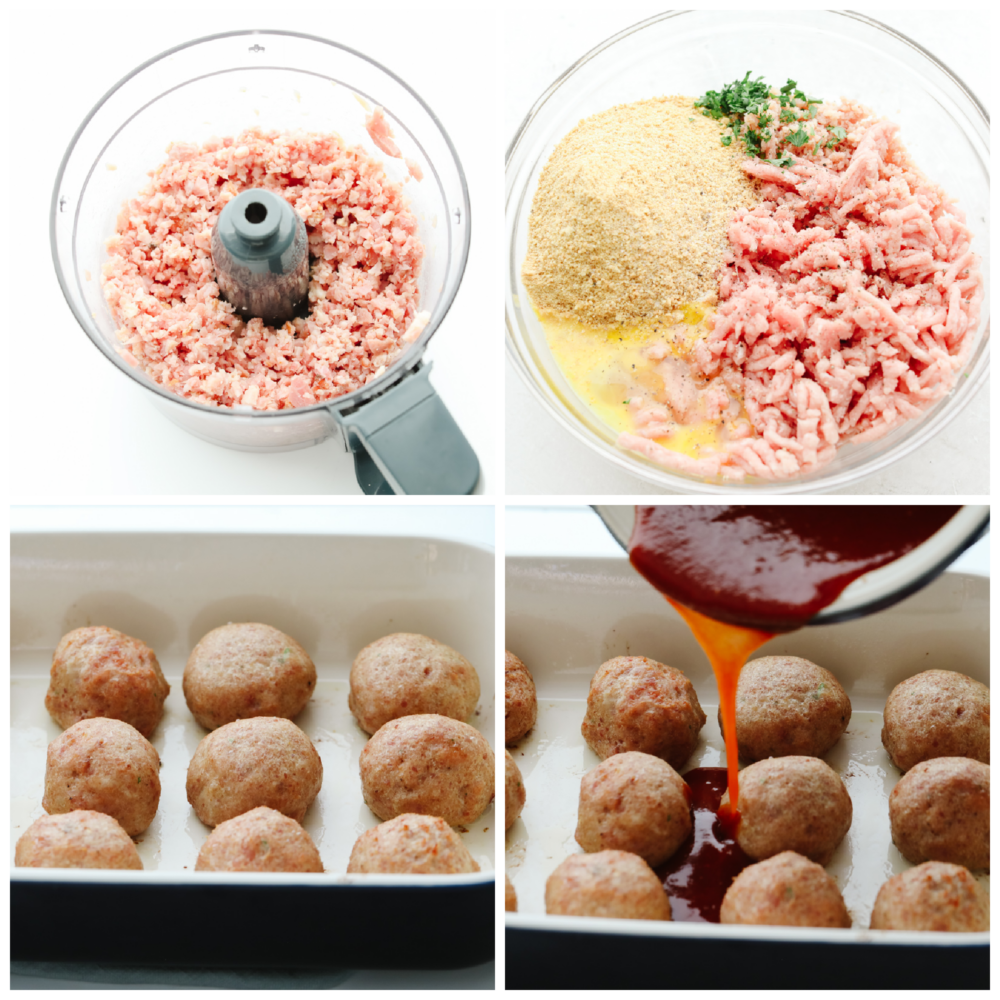
  2. Ham Ball Mixture: Next, grind your ham and pork up in the food processor. In a large bowl, add the ham, pork, beaten egg, graham cracker crumbs, milk, salt, pepper, and parsley. Combine all the ingredients together.
  3. Shape: Then, take about two tablespoons out and roll into a ball with your hands. Place onto a greased 9×13 baking sheet.
  4. Bake: Bake for 50-60 minutes or until golden and cooked through.
  5. Prepare Sauce: While the ham balls are baking, in a medium-sized pot over medium heat, whisk together the ketchup, sugar, mustard, and vinegar. After 2 minutes reduce to a simmer.
  6. Cover: The last 5 minutes of the balls baking, pour the sauce over ham balls. Serve warm and enjoy!
Photos of preparing ham balls and covering them in brown sugar tomato sauce.

Tips for Making Ham Balls

This easy dish is great for holiday parties, game days, and weeknight dinners alike! They are so tangy, saucy, and delicious! You’re going to absolutely love them! Here are a few variations and tips for making the tastiest ham balls possible.

  • Switch Crumbs: I love the sweetness that graham cracker crumbs give the meatballs, but if you’re feeling something more savory, try using crushed Ritz crackers instead!
  • Forming Ham Balls: Be gentle when shaping your meatballs. You don’t need to roll them too tightly. To keep the mixture from sticking, you can add a little oil to your hands before you start shaping.
  • Adding Pineapple: For a fruitier variation of this dish, you can add a cup of pineapple juice to your glaze. The tangy pineapple flavor tastes amazing with the savory-sweet flavor of the brown sugar tomato sauce.

What to Serve With Your Ham Balls

Ham balls are great as an appetizer or the main course! To complete your meal, here are a few of my favorite sides that taste amazing with these flavorful meatballs. They’re absolutely tasty and so easy to throw together. You’ll have a hearty dinner ready in no time!

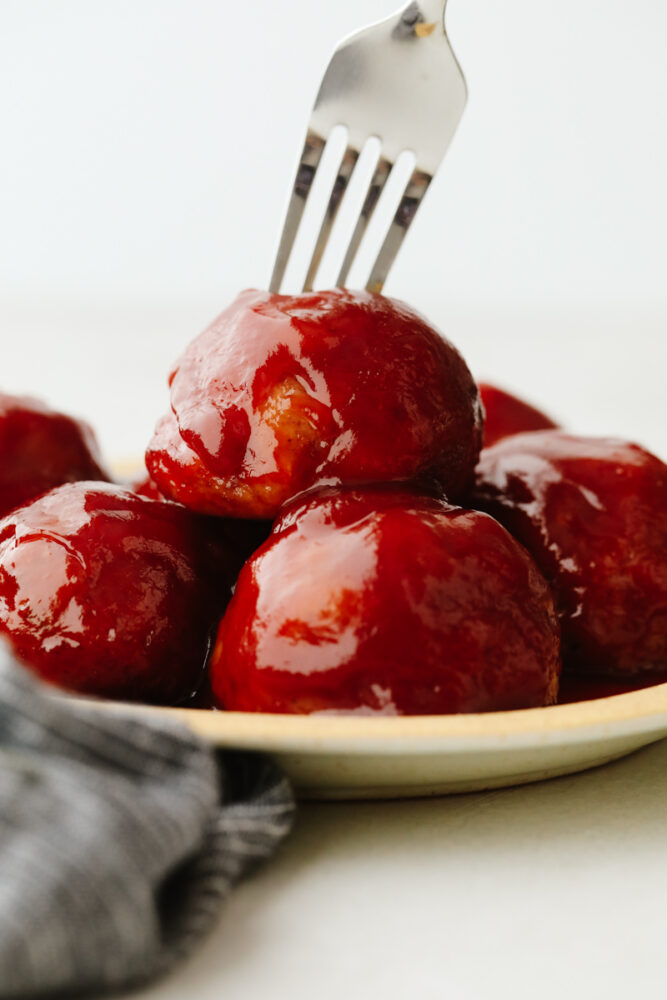
Closeup of ham balls, one being stuck with a fork.

Storing Leftovers

These ham balls are great as leftovers! They make a delicious after-school snack and are great for popping in the microwave.

  • In the Refrigerator: Your ham balls will keep for up to 5 days. Cover casserole dish with plastic wrap or lid.
  • In the Freezer: Your meatballs will keep for 1 month in a freezer bag. Thaw overnight in the fridge before reheating.
  • Reheating: Transfer your ham balls to a microwave safe bowl. Heat for 30 second intervals until warmed through.
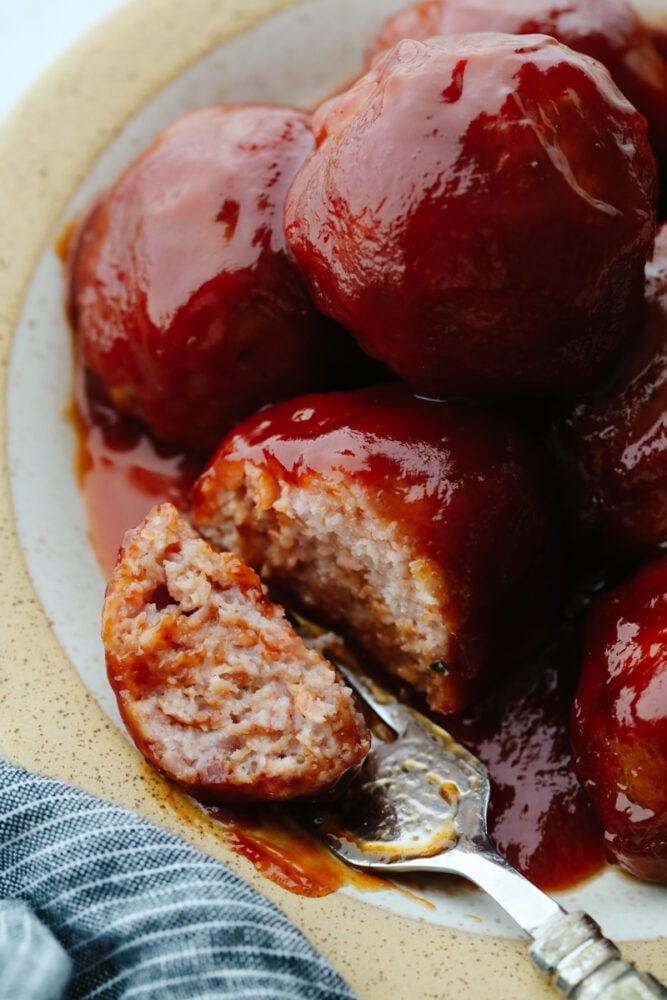
Closeup of a ham ball being cut in half.
Print

Ham Balls

This tasty midwestern dish is ready to win the hearts of your family! With a thick, zesty brown sugar glaze, these delicious ham balls are the best addition to your dinner rotation!
Course Dinner
Cuisine American
Keyword ham balls
Prep Time 15 minutes
Cook Time 1 hour
Total Time 1 hour 15 minutes
Servings 12 meatballs
Calories 343kcal
Author Alyssa Rivers

Ingredients

  • 1 pound ground ham
  • 1 pound ground pork
  • 1 large egg beaten
  • 1 cup graham cracker crumbs
  • 1/2 cup milk
  • Salt and pepper to taste
  • 1 teaspoon chopped parsley

Sauce

  • 1 1/2 cup ketchup
  • 1 cup brown sugar
  • 1 teaspoon mustard
  • 1/2 cup apple cider vinegar

Instructions

  • Preheat the oven to 350 degrees. Grind your ham up in the food processor. In a large bowl add the ham, pork, beaten egg, graham cracker crumbs, milk, salt, pepper, and parsley. Combine all the ingredients together.
  • Take about two tablespoons out and roll into a ball with your hands. Place into a greased 9×13 baking sheet. Bake for 50-60 minutes or until golden and cooked through.
  • While the ham balls are baking, in a medium-sized pot over medium heat whisk together the ketchup, sugar, mustard, and vinegar. After 2 minutes reduce to a simmer. The last 5 mins of the balls baking, for the sauce over the entire thing. Serve warm.

Nutrition

Calories: 343kcal | Carbohydrates: 32g | Protein: 15g | Fat: 17g | Saturated Fat: 6g | Polyunsaturated Fat: 1g | Monounsaturated Fat: 7g | Trans Fat: 1g | Cholesterol: 71mg | Sodium: 385mg | Potassium: 369mg | Fiber: 1g | Sugar: 26g | Vitamin A: 197IU | Vitamin C: 2mg | Calcium: 52mg | Iron: 2mg


source https://therecipecritic.com/ham-balls/
Share:

Popular

Archive

Slider Tag

Facebook

Header Ads

Recent in Food

Blog Archive

Recent Posts

Unordered List

  • Lorem ipsum dolor sit amet, consectetuer adipiscing elit.
  • Aliquam tincidunt mauris eu risus.
  • Vestibulum auctor dapibus neque.

Pages

Theme Support

Need our help to upload or customize this blogger template? Contact me with details about the theme customization you need.