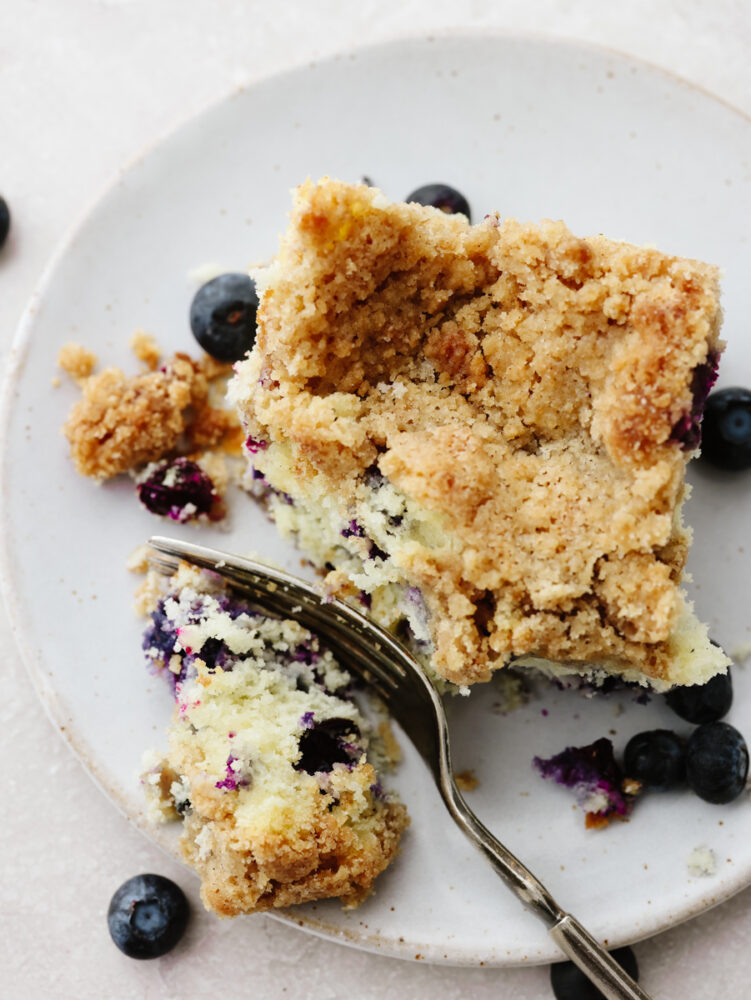
Creamy Garlic Parmesan Mushrooms

Calling all mushroom lovers! These creamy garlic parmesan mushrooms are waiting for you! Sautéed in garlic butter until tender and then tossed in the most AMAZING creamy parmesan sauce, these easy mushrooms will be off the plate and in your mouth in less than 10 minutes!

Mushroom dishes are perfect for any dinner and occasion. Try out this chicken and mushroom dish, this fantastic mushroom risotto, and this mushroom soup. They will knock your socks off!
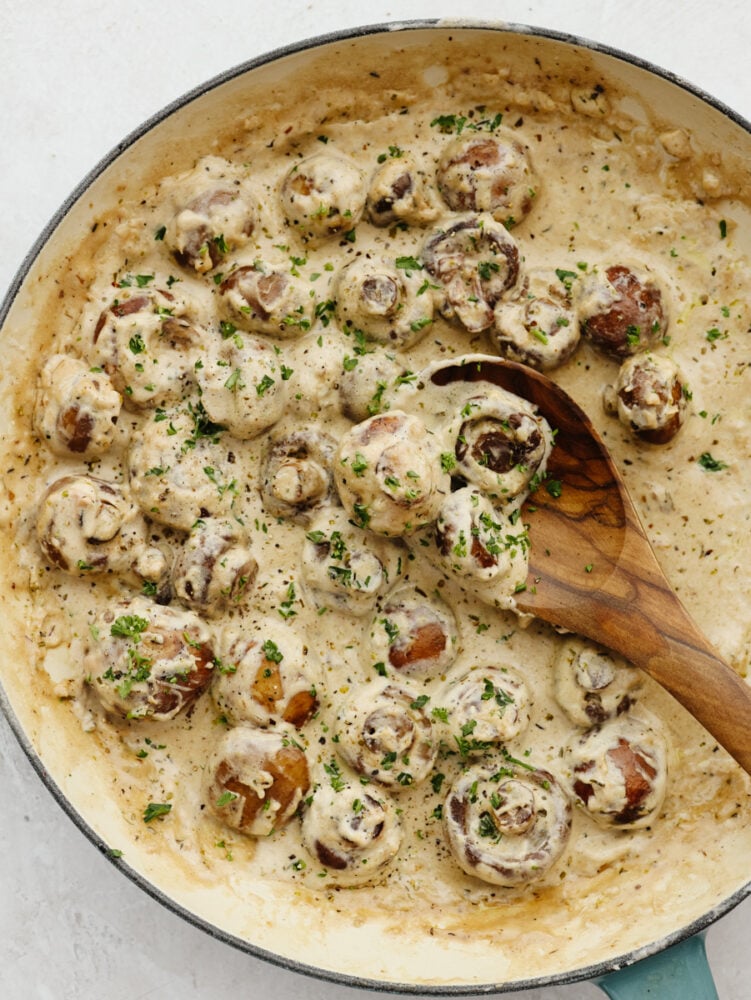
Mushrooms in a creamy, garlic, parmesan sauce.

A Reader’s Review

I make a quadruple batch of these for every party I go to and they’re ALWAYS a hit with people begging for the recipe! Delicious!
-Elizabeth

Creamy Garlic Parmesan Mushrooms

Believe it or not, mushrooms were once on my do not make list. They aren’t my favorite, and I never knew how to cook them up and make them delicious. Until I found out that mushrooms taste incredible if sautéed in a creamy sauce. So that’s where this recipe came in! These mushrooms have made me a little obsessed. You can use them on the side or cook this up as a meal for lunch. Trust me; you will be so happy that you did!

It begins with sautéing them in butter and fresh minced garlic until tender. But then bring on the heavy cream and turn this dish into something fantastic! The heavy cream, parmesan, garlic, and cream cheese… Well, they are the best mushrooms that you will ever eat! Not only are they delicious, but they go with just about everything. Cook them up with some pork chops, some simple and easy rolls, and a quick salad and you will have a meal for the books!

Ingredients You Need to Make Creamy Garlic Parmesan Mushrooms

If you are looking for a delicious mushroom recipe, you need to look no further; this is it! It’s easy, simple, and tastes divine! See the recipe card at the bottom of the post for exact measurements.

  • Butter: Unsalted butter is what I used in this recipe.
  • Olive Oil: This will be used to cook the mushrooms in.
  • White Mushrooms: You can keep these whole or you can slice them up. Whichever you prefer.
  • Garlic Cloves: If you don’t have fresh garlic cloves on hand then you can use minced garlic. ½ teaspoon equals about 1 clove of garlic.
  • Heavy Cream: You want that creamy mushroom then douse them in this delicious stuff!
  • Parmesan Cheese: If you can use freshly grated parmesan intead of pre-packaged, it will melt better into the sauce.
  • Cream Cheese: Soften your cream cheese to room temperature before cooking so that it mixes well with the other ingredients.  
  • Italian Seasoning: You can use store bought Italian seasoning or, go ahead and try making this Homemade Italian Seasoning. It’s super easy and great to have on hand!
  • Salt and Pepper: These are used to add in some flavor and enhance all of the other ingredients.
  • Fresh Parsley: This will be used as a garnish on top!

How to Make Simple and Creamy Mushrooms

I am not kidding when I tell you that these mushrooms take less than 10 minutes to make! Once you make them, everyone at your dinner table is going to consider themselves very lucky!

  1. Saute Mushrooms: In a medium sized skillet over medium high heat add the butter and olive oil. Then, add the mushrooms and garlic and saute until tender.
  2. Stir in sauce: Add the heavy cream, parmesan cheese, cream cheese, italian seasoning, salt and pepper. Stir with the mushrooms and heat until the sauce is bubbly and smooth.
  3. Garnish and serve: Garnish with fresh parsley and then serve immediately.
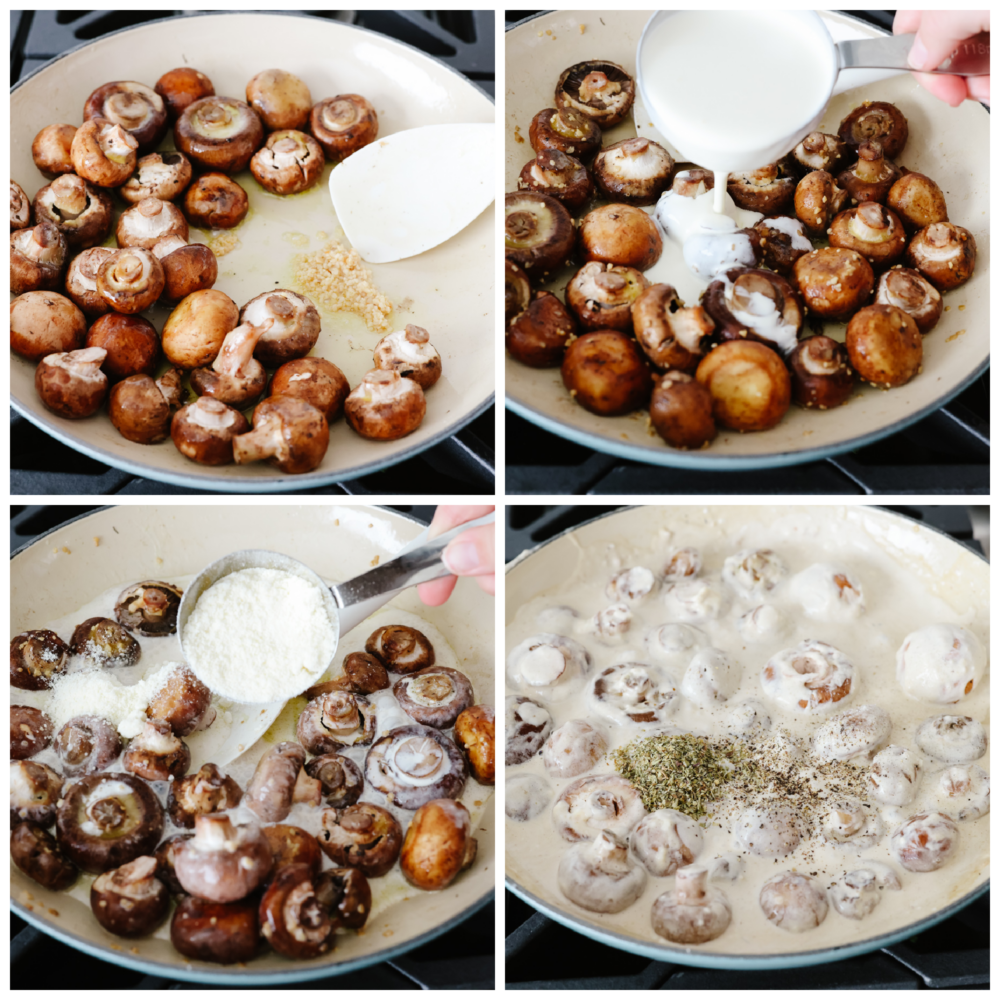
4 pictures showing how to cooke mushrooms and add the sauce to a pan.

Variations

These mushrooms can be used as a side, or you can dress them up by adding them to other main dishes and really elevating your meal! Here are a few ideas:

  • Protein: These mushrooms taste fantastic on top of chicken, pork shops or steak. Adding them to some protien takes these from side dish to main dish that everyone will love!
  • Pasta: Who never liked a pasta with some veggies and a creamy sauce? Add these delicious mushrooms to some fettucine, linguine or really any pasta that you love.
  • Bread: A hard crust bread tastes AMAZING with these creamy garlic parmesan mushrooms! Try putting these mushrooms on this French Baguette or Crostini!
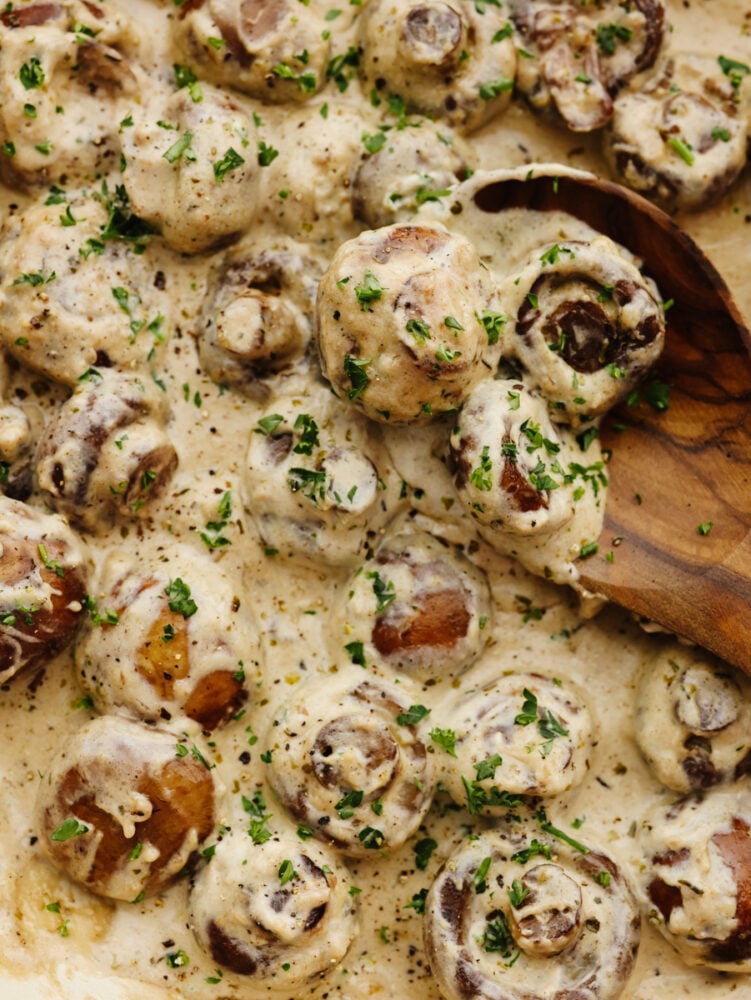
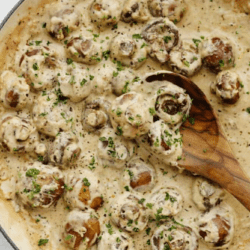
Creamy, garlic parmesan mushrooms being served with a wooden spoon.

How to Store Leftover Mushrooms

Call yourself lucky if you have any extra of these creamy garlic parmesan mushrooms leftover! And don’t worry, you can easily store them to eat tomorrow.

  • In the Refrigerator: Once your mushrooms have cooled the you can place them in an airtight container. Put it in your fridge and they will last 3-4 days.
  • To Reheat: To reheat your mushrooms, put them in a saucepan on the stove and heat them on low until they are warmed through.
Print

Creamy Garlic Parmesan Mushrooms

Calling all mushroom lovers! These creamy garlic parmesan mushrooms are waiting for you! Sautéed in garlic butter until tender and then tossed in the most AMAZING creamy parmesan sauce, these easy mushrooms will be off the plate and in your mouth in less than 10 minutes!
Course Side Dish
Cuisine American
Keyword garlic mushrooms
Prep Time 5 minutes
Cook Time 5 minutes
Total Time 10 minutes
Servings 4 Servings
Calories 276kcal
Author Alyssa Rivers

Ingredients

  • 2 Tablespoons Butter
  • 1 Tablespoon olive oil
  • 8 Ounces white mushrooms whole or sliced to preference
  • 2 cloves garlic minced
  • 1/2 cup heavy cream
  • 1/4 cup grated parmesan cheese
  • 2 ounces cream cheese softened
  • 1 teaspoon italian seasoning
  • 1/2 teaspoon salt
  • 1/4 teaspoon pepper
  • fresh chopped parsley for garnish

Instructions

  • In a medium-sized skillet over medium-high heat add the butter and olive oil. Add the mushrooms and garlic and saute until tender.
  • Add the heavy cream, parmesan cheese, cream cheese, Italian seasoning, salt, and pepper. Stir with the mushrooms and heat until the sauce is bubbly and smooth.
  • Serve immediately and garnish with fresh parsley.

Notes

Updated on January 30, 2022
Originally Posted on August 30, 2016

Nutrition

Calories: 276kcal | Carbohydrates: 4g | Protein: 6g | Fat: 27g | Saturated Fat: 15g | Cholesterol: 77mg | Sodium: 496mg | Potassium: 222mg | Fiber: 1g | Sugar: 2g | Vitamin A: 857IU | Vitamin C: 2mg | Calcium: 113mg | Iron: 1mg


source https://therecipecritic.com/creamy-garlic-parmesan-mushrooms/
Share:

Blueberry Buckle

Tangy and sweet, this soft blueberry buckle is a great choice for breakfast or dessert! It’s a buttery, moist cake with juicy blueberries in every bite!

Looking for more sweet cakes to have in the morning with a cup of coffee? Clementine cake, banana coffee cake, and glazed lemon pound cake are all must-try treats! They’re great for adding a little sunshine to your day.

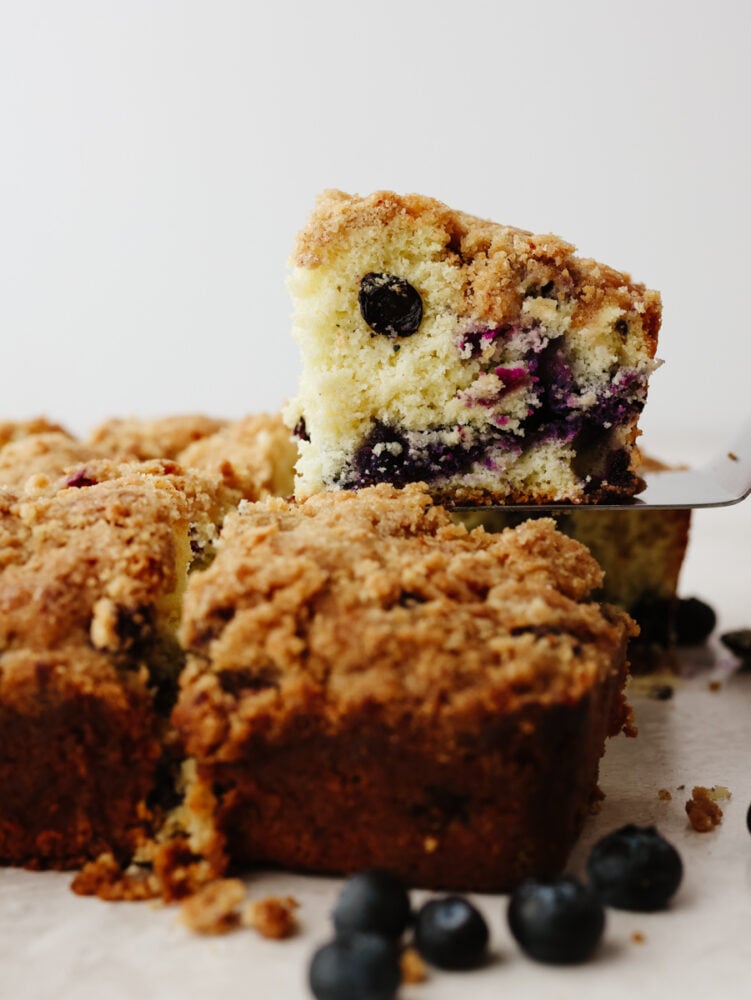
Taking a slice of blueberry buckle with an icing spatula.

Old-Fashioned Blueberry Buckle Recipe

If you’ve never had a buckle before, prepare to be amazed! It’s essentially a coffee cake but filled with fruit. Once it’s baked, the fruit pieces create a bumpy or “buckled” appearance, hence the name! It’s softer than coffee cake but more cake-like than a cobbler. It’s a must-try for sure! Each bite is a moist, buttery, berry-filled heaven. The crumbly streusel on top is the perfect finishing touch and makes this treat absolutely irresistible. I always find myself going back for another piece… or 5.

Not only is this blueberry buckle beyond delicious, but it’s also easy to make, too! It uses simple baking ingredients, and you can even switch in different fruits! See my tips below for more yummy variations! Honestly, though, this blueberry buckle has been the star of breakfast at my house. It seems my family can’t get enough of the fluffy texture and juicy blueberries! And if you’re looking for more ways to utilize this amazing berry, find my full list of desserts here. Let’s get baking!

Ingredients for Blueberry Buckle

You bring the fresh blueberries, and your pantry has the rest of the ingredients ready to go! This recipe is something I can throw together easily since I always have these ingredients on hand! It’s the perfect treat to make in a pinch when you’re craving something sweet. Measurements for each ingredient can be found in the recipe card below!

Cake Base

  • Flour: I always use all-purpose flour here, it’s given my buckle a nice and fluffy texture each time! If you want a finer crumb, you can use cake flour instead.
  • Baking Powder: A must for getting that perfect airy texture!
  • Salt: Used to amplify overall flavor.
  • Granulated Sugar: White sugar will give your cake its perfect sweetness.
  • Butter: The fat content in butter helps to add moisture to the buckle. Butter gives your cake a rich flavor, too.
  • Egg: Needed to bind everything together!
  • Milk: Added for moisture and to make your batter smooth.
  • Fresh Blueberries: Always use fresh blueberries for your buckle, not frozen. Frozen blueberries have a higher liquid content and will make your buckle mushy when baked. Use frozen blueberries for these hand pies instead!

Crumb Topping

  • Flour: All-purpose flour works great for streusel topping.
  • Granulated Sugar: White sugar gives your crumb topping a sweet foundation.
  • Brown Sugar: On top of white sugar, I add brown sugar for a deeper, more caramelized flavor.
  • Salt: Add to make everything taste better!
  • Ground Cinnamon: Nothing brings a pastry together like a pinch of warm spice!
  • Unsalted Butter: For richness and flaky goodness.

How to Make a Blueberry Buckle

Making bakery-worthy coffee cakes isn’t hard at all! With just a few steps of mixing and layering, you’ll have this tasty old-fashioned dessert warm and ready to be devoured. I’m sure it will be a hit with you and yours!

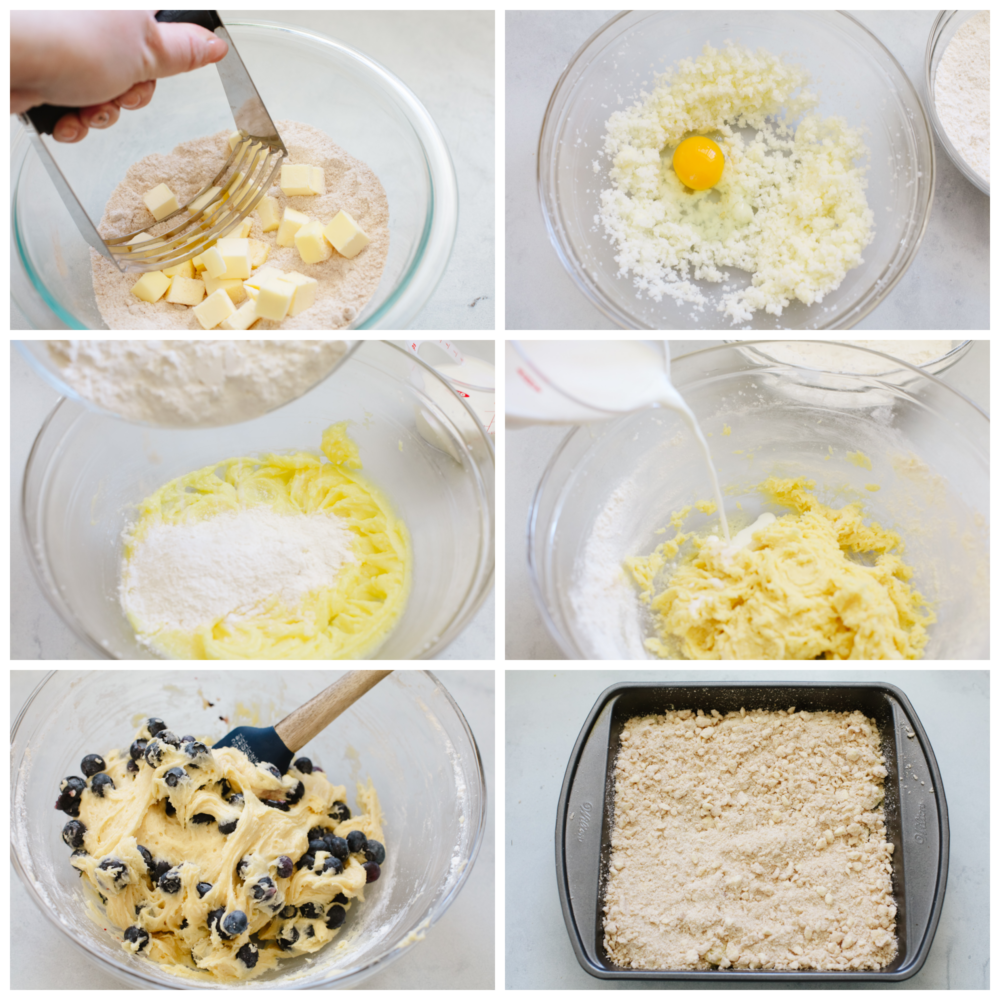
  1. Prepare Topping: Start by preparing the crumb topping so it can chill in the fridge while the batter is prepared. In a medium bowl, combine the flour, sugar, brown sugar, salt and cinnamon. Dice the cold butter into small cubes and add to the flour and sugar mixture. Use a fork or pastry cutter to cut in the butter until crumbly. Set in the fridge until needed.
  2. Preheat Oven, Prep Pan: Next, preheat the oven to 375°F. Spray an 8×8 baking pan with pan spray and set aside.
  3. Whisk Dry Ingredients: In a medium bowl, whisk together the flour, baking powder and salt.
  4. Mix Wet Ingredients, Combine: In a large bowl, beat together the sugar and butter until creamy. Add the egg and mix until well combined. Add in the flour mixture and milk alternating, starting with the flour. Once the flour and milk are fully incorporated into the batter, gently fold in the blueberries until just barely evenly distributed.
  5. Layer and Bake: Next, pour the batter into the prepared pan and top evenly with the chilled crumb topping. Bake for 30-35 minutes, until a toothpick comes out clean from the center. Let cool before serving.
Process shots of preparing buckle batter, streusel topping, and adding to pan.

Blueberry Buckle Tips and Tricks

If you’re a blueberry lover, this is the ultimate dessert for you! Juicy, buttery, and so easy to make, don’t be surprised if this becomes one of your new favorite recipes! Here are a few tips and variations to make the best blueberry buckle around.

  • Mix Gently: When mixing your batter and adding blueberries, be sure to use a gentle hand. You don’t want to smash your berries!
  • Don’t Overmix: Overmixing your batter can cause gluten to develop. This will make your buckle dense and rubbery, the exact opposite of what we want!
  • Use Cold Butter: The secret to making the flakiest streusel topping? Use cold butter! Lower temperatures = flakier result.
  • Switching Fruits: You can easily swap out blueberries for other berries like blackberries or raspberries. It also tastes great with chopped strawberries, peaches, or cherries! You can even mix and match to create the fruity cake of your dreams.
  • Add Lemon: To balance the sweetness of the cake a little, sometimes I’ll add a hint of lemon zest to the batter. After all, nothing complements the rich flavor of blueberry as well as some tart lemon! Layer in dollops of lemon curd for even more bright flavor.
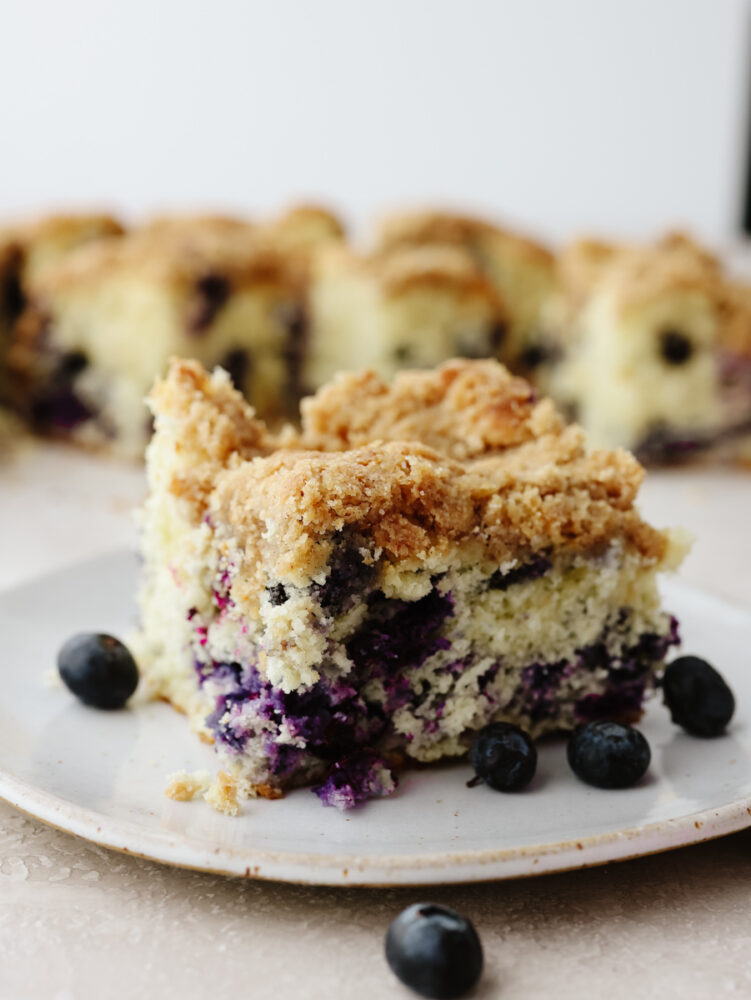
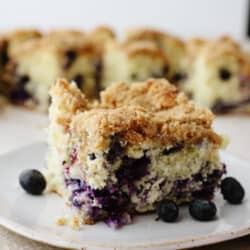
A slice of blueberry buckle on a white plate.

Storing Leftover Buckle

Your blueberry buckle is best served fresh for that light and fluffy texture. It can, however, be stored for 3-4 days in an airtight container at room temperature. The sooner you consume it, the better it will taste!

Taking a bite of blueberry buckle with a fork.
Print

Blueberry Buckle

Tangy and sweet, this soft blueberry buckle is a great choice for breakfast or dessert! It's a buttery, moist cake with juicy blueberries in every bite!
Course Breakfast, Dessert
Cuisine American
Keyword blueberry buckle
Prep Time 30 minutes
Cook Time 35 minutes
Total Time 1 hour 5 minutes
Servings 9 Servings
Calories 345kcal
Author Alyssa Rivers

Ingredients

Cake

  • 1 and 2/3 Cup flour
  • 2 teaspoons baking powder
  • ½ teaspoon salt
  • ¾ cup granulated sugar
  • ¼ cup butter
  • 1 large egg
  • ½ cup milk
  • 1 ¾ cup fresh blueberries

Crumb Topping

  • 1/3 Cup Flour
  • ¼ cup granulated sugar
  • ¼ cup brown sugar
  • ¼ teaspoon salt
  • ½ teaspoon ground cinnamon
  • 5 tablespoons unsalted butter cold

Instructions

  • Start by preparing the crumb topping so it can chill in the fridge while the batter is prepared.
  • In a medium bowl combine the flour, sugar, brown sugar, salt, and cinnamon. Dice the cold butter into small cubes and add to the flour and sugar mixture. Use a fork or pastry cutter to cut in the butter until crumbly. Set in the fridge until needed.
  • Preheat the oven to 375°. Spray an 8×8 baking pan with pan spray and set aside.
  • In a medium bowl whisk together the flour, baking powder, and salt.
  • In a large bowl beat together the sugar and butter until creamy. Add the egg and mix until well combined. Add in the flour mixture and milk alternating, starting with the flour. Once the flour and milk are fully incorporated into the batter, gently fold in the blueberries until just barely evenly distributed.
  • Pour the batter into the prepared pan and top evenly with the chilled crumb topping. Bake for 30-35 minutes, until a toothpick, comes out clean from the center. Let cool before serving.

Nutrition

Calories: 345kcal | Carbohydrates: 55g | Protein: 4g | Fat: 13g | Saturated Fat: 8g | Polyunsaturated Fat: 1g | Monounsaturated Fat: 3g | Trans Fat: 1g | Cholesterol: 52mg | Sodium: 257mg | Potassium: 180mg | Fiber: 2g | Sugar: 32g | Vitamin A: 420IU | Vitamin C: 3mg | Calcium: 73mg | Iron: 2mg


source https://therecipecritic.com/blueberry-buckle/
Share:

Shrimp Boil

A southern classic, this shrimp boil recipe includes corn, potatoes, sausage, and shrimp boiled together in one pot and packed full of delicious flavor! It’s a tried and true favorite that you don’t want to miss!

I can’t seem to get enough of southern food around here! If you love it as much as I do, then you need to try these hush puppies, this gumbo, and this perfectly crisp chicken fried steak!

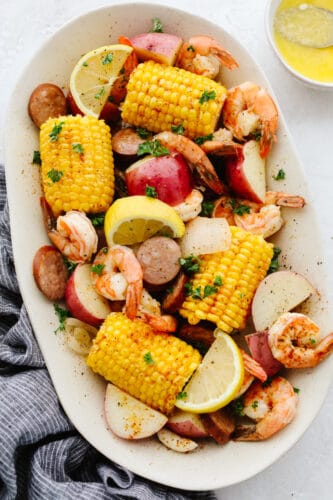
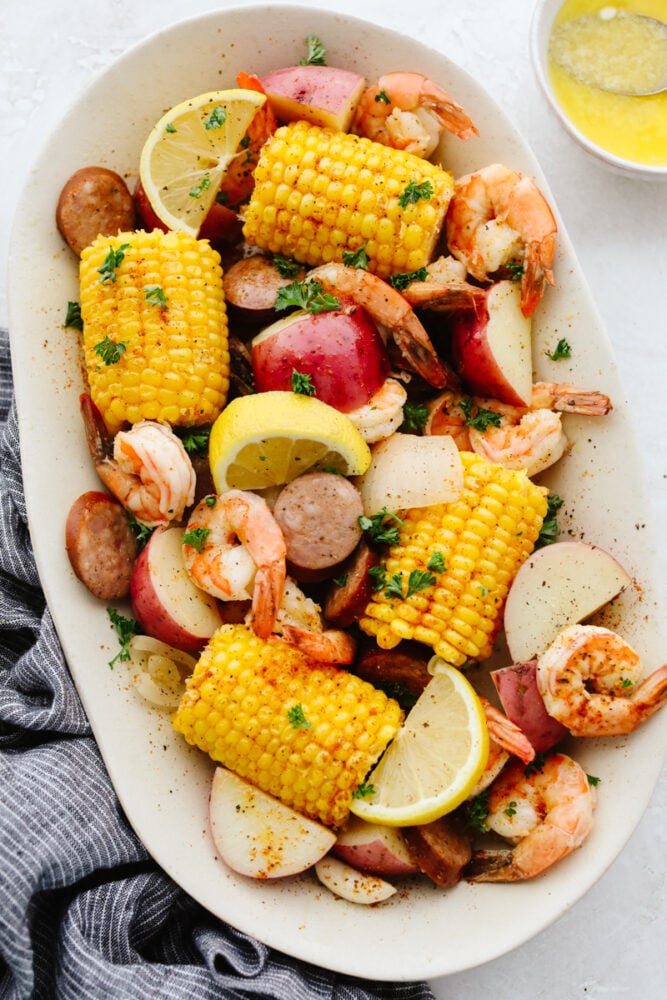
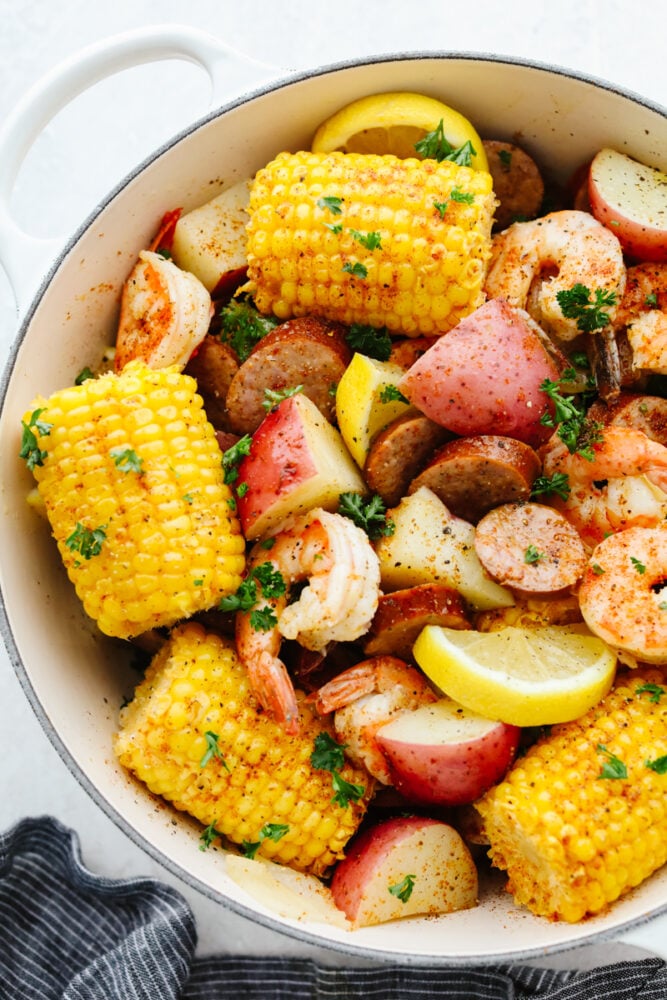
Shrimp boil ingredients on a serving platter.

What IS a Shrimp Boil?

Oh boy! If you haven’t cooked up a shrimp boil before then, you are in for some mind-blowing food! A shrimp boil is when you take some sausage, corn, potatoes, and ultimately shrimp and boil them all together in a large pot. It creates a divine flavor! Plus, because all ingredients are cooked together, they are packed to the brim with delicious seasoning. Old bay seasoning is the star of the show! It enhances all of the flavors of the ingredients. Then, you add in some freshly squeezed lemon wedges to top it off! That brings a bright flavor to the dish.

If you have ever seen how a shrimp boil is eaten, then you know you are in for some FUN! After it’s cooked, you typically will place all of the food straight onto a table lined with a paper tablecloth. Yep, you read that right! You put it all straight onto the table! Everyone eats right from the middle, and it’s an experience! This dinner is southern cooking at its finest. It makes a great family dinner and is easy because you don’t have to make any extra sides! You need to make sure to keep this recipe on hand and cook it more than once this year.

What Ingredients to Put in a Shrimp Boil

Now that you know what a shrimp boil is, you need to know what to put in it! You will be blown away once you put all of these ingredients together! They taste SO good and create such a delicious and hearty meal! See the recipe card at the bottom of the post for exact measurements.

  • Water: This is the base to boil everything in.
  • Lemon: The lemon brings a fresh, bright flavor to the dish.
  • Garlic Cloves: You will want to leave these whole to get the most flavor out of them! Just peel and smash them before popping them in with the rest of the ingredients.
  • Onion: The pieces of the onion need to be large so that you get lots of flavor. So just go ahead and quarter the onions.
  • Old Bay Seasoning: This classic seasoning is perfect for a shrimp boil!
  • Red potatoes: Cut these up into quarters and leave the skin on. No need to peel them!
  • Salt: The salt will enhance all of the flavors in this recipe.
  • Fresh Corn on the Cob: You can find pre-cut and already husked corn at your local grocery store if you want to make this easier on yourself.
  • Andouille Sausage: This heatry meat adds in some great flavor.
  • Shrimp: Make sure that you get shrimp that is peeled and deveined. To make it look nice then leave the tails on!
  • Butter: Unsalted butter works great in this recipe.
  • Fresh Parsley: This will be used as a garnish on top.

How to Make a Shrimp Boil

Now comes the fun part! You get to put this all together and create a hearty and delicious meal that the entire family is going to love! It’s that good! Once you cook this, you will see why the south has such a good reputation for their food!

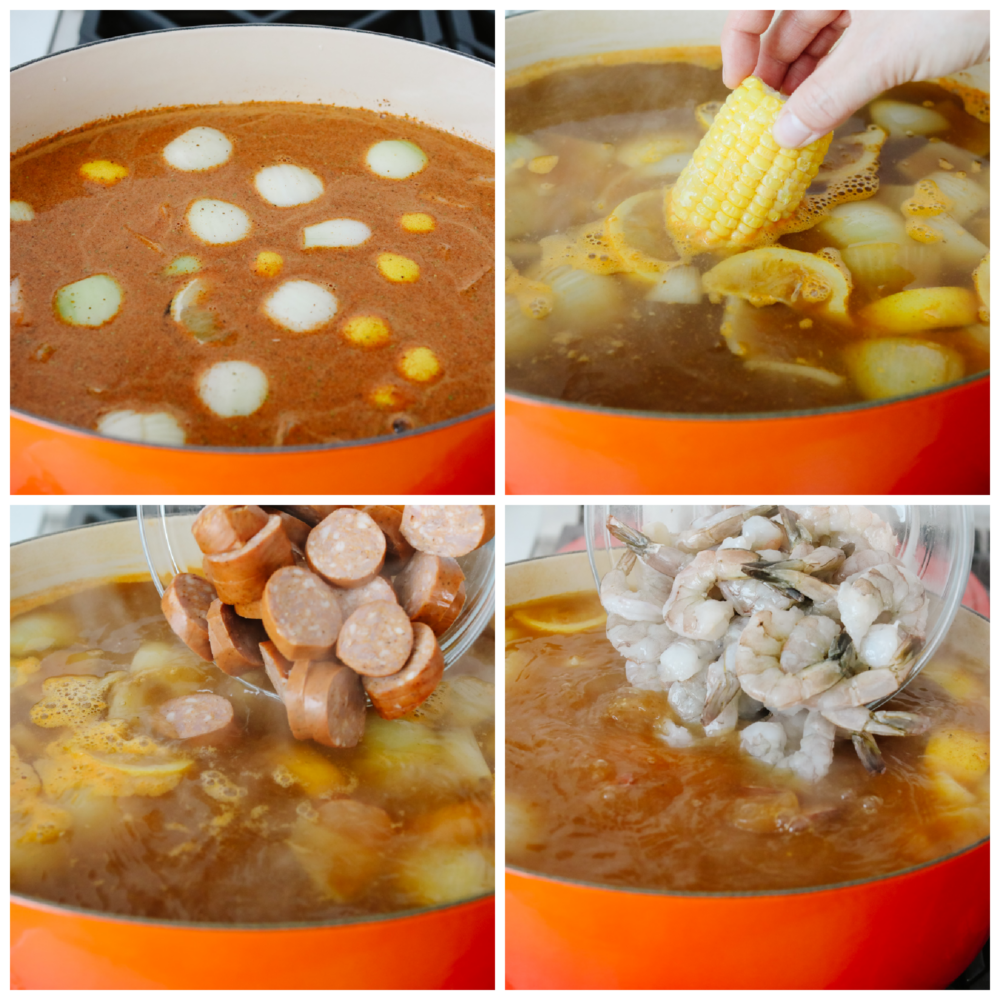
  1. Boil: Fill a large stock pot with 6 quarts of water. Add the squeezed lemon wedges, garlic cloves, quartered onion, and Old Bay Seasoning to the water. Stir to combine and bring to a boil over medium high heat.
  2. Add salt and cook potatoes: Add the potatoes and salt, and allow to cook for about 10-15 minutes until the potatoes are start to be tender.
  3. Cook in the corn and sausage: Add the corn and sausage pieces. Cook covered for 5 minutes.
  4. Add the shrimp: Add the shrimp to the pot. Cover and cook until the shrimp start to turn opaque, 2 to 3 minutes. 
  5. Drain and transfer: Using a slotted spoon to drain the water, transfer the shrimp, sausage, and vegetables to a large bowl. Save some of the cooking broth for the next step. Remove the boiled lemons and garlic cloves, and use fresh lemon for serving.
  6. Melt the butter in broth: Place ¼ cup butter to a small bowl. Pour in 1 cup of the seasoned cooking broth to the bowl. Stir until the butter is melted. 
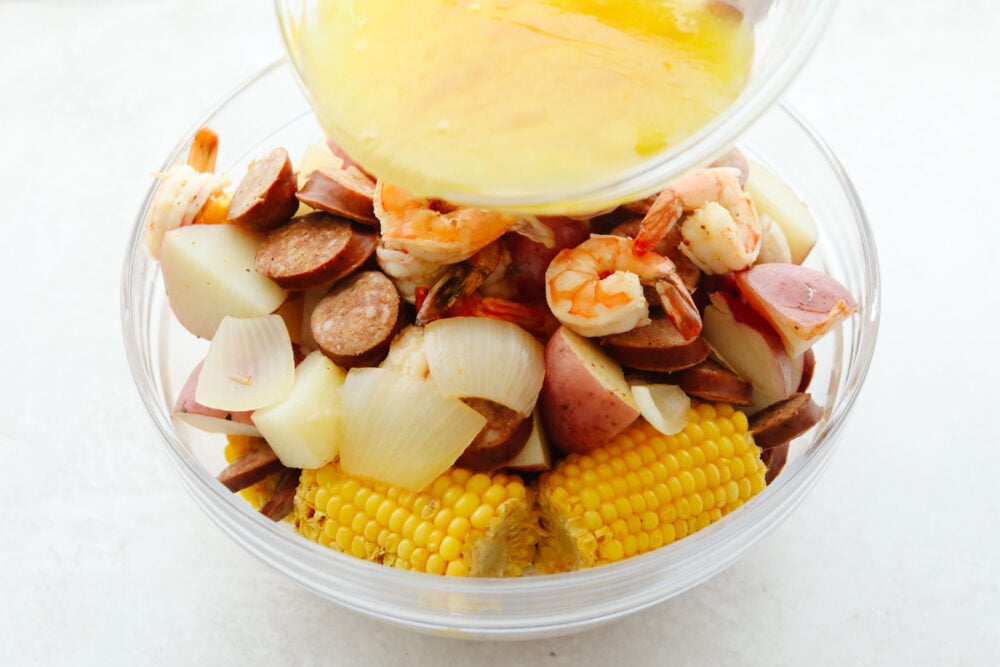
  7. Pour, toss and coat: Pour the butter liquid over the bowl of shrimp, sausage, and vegetables. Gently toss to coat.
  8. Transfer to table: Transfer the shrimp and vegetables to a platter, or traditionally on a dining table lined with plastic tablecloths or newspaper. Serve with fresh lemon wedges, chopped parsley, and hot sauce, if desired. 
4 pictures showing how to add ingredients to seasoned, boiling water.

Variations

A shrimp boil is a casual dish, so adding your other favorite things to it is totally welcome! Here are a couple of ideas that you can try to change things up!

  • Add more seafood: If you are a seasfood lover and more is calling your name then add some to this dish! Try adding in some crab, lobster, clams or scallops for some delicious added flavor and texture!
  • Sausage: You can use any type of sausage in this recipe. I like to use andouille aausage in this recipe because of the unique flavor that it brings to the dish but you can use Cajun sausage for a different flavor and some added spice!
  • Add more veggies: You don’t have to stop at the potatoes and onions! Add in some mushroom, asparagus and bell peppers to this shrimp boil!
Melted butter being poured onto ingredients in a bowl.

What to Serve with a Shrimp Boil

Because this recipe has SO many things in it then side dishes aren’t necessary! But if you are really wanting to go big then for sure add some to the table! Southern cooking is all about variety so this is a great way to add to the meal!

Shrimp boil ingredients in a pot.

How to Store Leftovers

If you are lucky enough to have leftovers from this shrimp boil, then you are going to have the best meal the next day! Here are a few tips on safely storing this meal to eat later.

  • In the refrigerator: Once your shhrimp boil has cooled then place all of it in an airtight container in your fridge. It will last for 3-4 days.
  • How to Reheat: You can place the ingredients in the microwave and cook it for 30 second increments until the ingredients are warmed through. Enjoy!
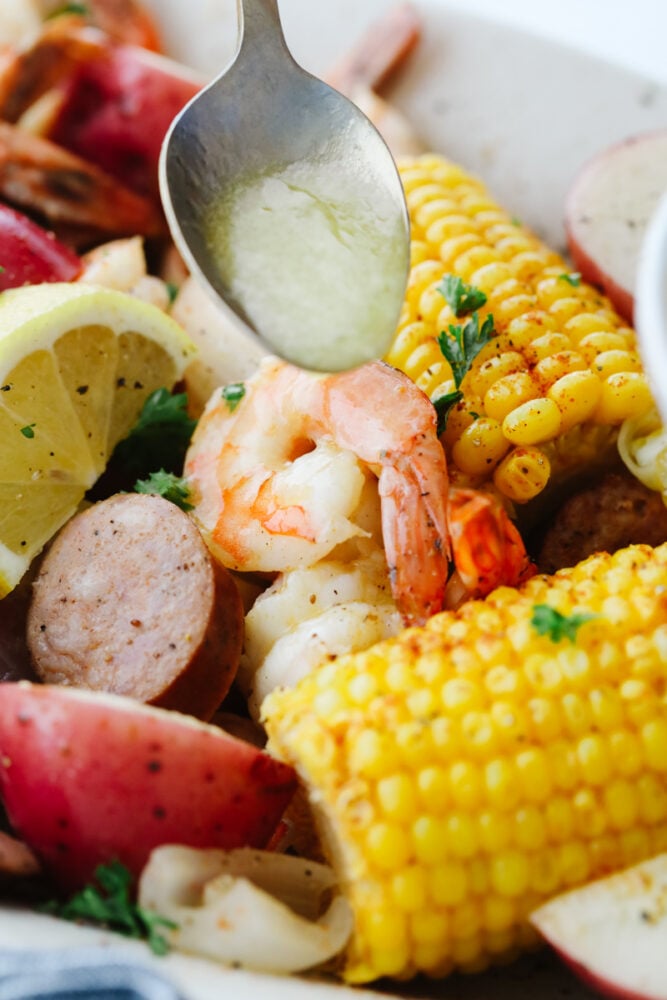
Melted butter being drizzled onto ingredients from a spoon.
Print

Shrimp Boil

A southern classic, this shrimp boil recipe includes corn, potatoes, sausage, and shrimp boiled together in one pot and packed full of delicious flavor! It's a tried and true favorite that you don't want to miss!
Course Dinner, main dish
Cuisine American
Keyword seafood, shrimp boil
Prep Time 25 minutes
Cook Time 30 minutes
Total Time 55 minutes
Servings 6 people
Calories 527kcal
Author Alyssa Rivers

Equipment

  • Large stock pot

Ingredients

  • 6 quarts water
  • 1 whole lemon, cut into wedges
  • 8 cloves garlic, peeled and smashed (leave whole)
  • 1 large yellow onion, quartered
  • 1/2 cup Old Bay Seasoning
  • 1 pound medium red potatoes, quartered (leave the skin on)
  • 3 teaspoon salt
  • 4 ears fresh corn, husked, cut into 3 inch pieces
  • 14 ounces Andouille sausage, cut into 1 inch pieces
  • 1 1/2 pounds shrimp, peeled and deveined (leave the tail on for a pretty look)
  • 1/4 cup butter, melted
  • 2 Tablespoon fresh parsley, minced
  • 1 whole lemon, sliced for serving

Instructions

  • Fill a large stockpot with 6 quarts of water. Add the squeezed lemon wedges, garlic cloves, quartered onion, and Old Bay Seasoning to the water. Stir to combine and bring to a boil over medium-high heat.
  • Add the potatoes and salt, and allow to cook for about 10-15 minutes until the potatoes are starting to be tender.
  • Add the corn and sausage pieces. Cook covered for 5 minutes.
  • Add the shrimp to the pot. Cover and cook until the shrimp start to turn opaque, 2 to 3 minutes.
  • Using a slotted spoon to drain the water, transfer the shrimp, sausage, and vegetables to a large bowl. Save some of the cooking broth for the next step. Remove the boiled lemons and garlic cloves, and use fresh lemon for serving.
  • Place ¼ cup butter in a small bowl. Pour in 1 cup of the seasoned cooking broth in the bowl. Stir until the butter is melted.
  • Pour the butter liquid over the bowl of shrimp, sausage, and vegetables. Gently toss to coat.
  • Transfer the shrimp and vegetables to a platter, or traditionally on a dining table lined with plastic tablecloths or newspaper. Serve with fresh lemon wedges, chopped parsley, and hot sauce, if desired. 

Notes

You can find ears of corn already cut in the freezer section.

Nutrition

Calories: 527kcal | Carbohydrates: 31g | Protein: 40g | Fat: 28g | Saturated Fat: 11g | Polyunsaturated Fat: 3g | Monounsaturated Fat: 11g | Trans Fat: 1g | Cholesterol: 258mg | Sodium: 2031mg | Potassium: 1102mg | Fiber: 4g | Sugar: 6g | Vitamin A: 648IU | Vitamin C: 17mg | Calcium: 194mg | Iron: 5mg


source https://therecipecritic.com/shrimp-boil/
Share:

Popular

Archive

Slider Tag

Facebook

Header Ads

Recent in Food

Blog Archive

Recent Posts

Unordered List

  • Lorem ipsum dolor sit amet, consectetuer adipiscing elit.
  • Aliquam tincidunt mauris eu risus.
  • Vestibulum auctor dapibus neque.

Pages

Theme Support

Need our help to upload or customize this blogger template? Contact me with details about the theme customization you need.