Marry Me Chicken (Creamy Sun-Dried Tomato Chicken)

Marry me chicken is juicy and flavorful and smothered in a creamy parmesan sauce. Seasoned with savory herbs and sun-dried tomatoes, this dish will melt in your mouth, and will leave you begging for a proposal!

This dish comes together easily, and “marries” beautifully in just one skillet. It will literally “knock your socks off!” It will also leave you wanting more delicious chicken recipes like my garlic mushroom chicken, Tuscan garlic chicken, or lemon chicken piccata that you can quickly whip up for a weeknight meal!
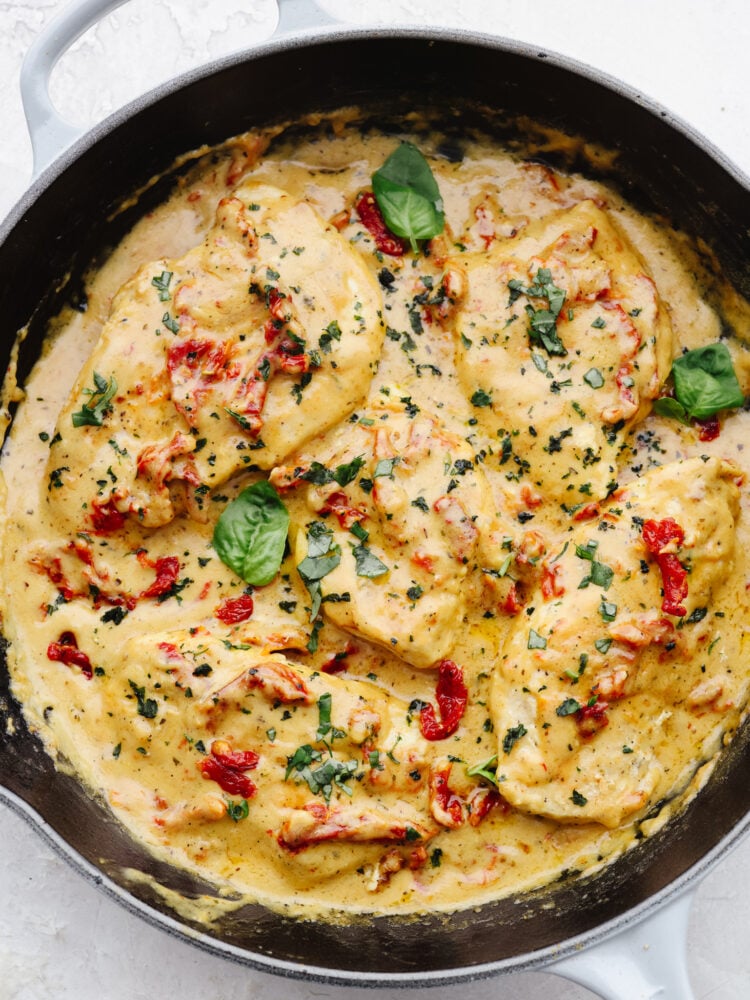
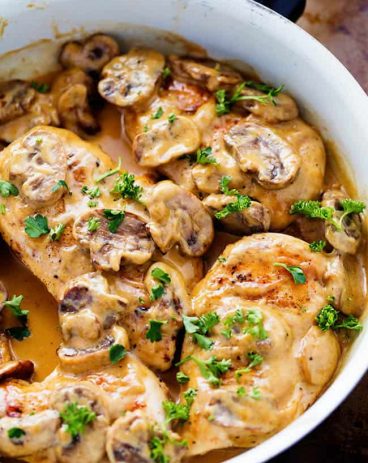
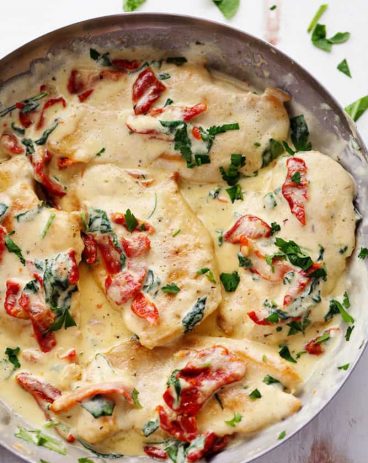
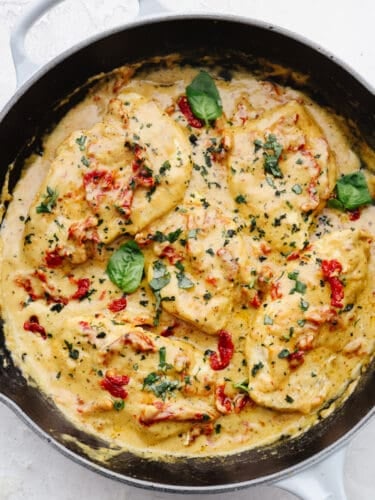
A skillet with marry me chicken cooked and ready to eat.

Why is it Called Marry Me Chicken?

Marry me chicken gets it name from how delicous it is and how the ingredients “marry one another” and taste so much better together! One bite, and you’ll be coming back for more. This tender chicken is nestled in a creamy flavor-packed sauce full of cream, parmesan cheese, herbs! The star of the show is the amazing sun-dried tomatoes. I love to serve this dish with pasta to help soak up the creamy sauce. Just wait until it touches your lips…you really will want to marry it!

The best part about this recipe is that it comes together quickly and you only have to use one skillet! Easy one skillet meals really help me on those busy weeknights taking the kids to all of their activities. This marry me chicken is the best of the best because it’s not only easy and delicious but the cleanup is a breeze! Serve this will some rolls and a salad and it will become a family favorite around your house for sure!

What Ingredients Are in Marry Me Chicken?

These ingredients are great because chances are you already have them on hand. But, if you don’t, they are easy to get and keep in your pantry and refrigerator until you’re ready to make it! Check out the recipe card at the bottom of the post for exact measurements.

  • Boneless Skinless Chicken Breasts: Tender juicy chicken is the star of this dish.
  • Salt: Season your chicken on both sides to enhance the flavor of the chicken.
  • Pepper: Adds a little spice to balance out the salt.
  • Butter: You need melted butter to create the thickening of your creamy sauce. And it adds awesome flavor!
  • Garlic: Added flavor of garlic is so delicious in this dish.
  • Flour: Along with the butter, the flour helps create the roux in thickening the sauce.
  • Chicken Broth: Liquid needed to add to your roux for creating the sauce.
  • Heavy Cream: Creamy addition to giving the dish a rich flavor, and adds to the thickness of the sauce.
  • Parmesan Cheese: This salty creamy cheese melts into the sauce and is a key player in flavor.
  • Sun-Dried Tomatoes: Sweet and tangy and packed with incredible flavor! Pairs so well with the creamy sauce.
  • Dried Italian Seasoning: Most recipes call for one herb, but we want them all for that maximum Italian flavor!
  • Fresh Basil: Garnish this marry me chicken with fresh chiffoned basil for beautiful presenaton and added flavor.

How To Make Marry Me Chicken

I love this dish because it all comes together in one skillet making it easy for serving and for clean up! Using the same skillet to brown the chicken and make the sauce just makes my life so much easier!

  1. Prepare the Chicken: Slice the chicken breasts thinner to help them cook evenly. You can even pound the chicken thinner using a mallet if needed.
  2. Season: Chicken on both sides with salt and pepper.
  3. Cook the chicken: In a large skillet, heat the olive oil over medium high heat. Add the chicken and then cook it for 5 minutes on both sides. Cook it until it’s browned on the outside and mostly cooked through. It will continue to fully cook later. 
  4. Transfer: Place the cooked chicken to a plate, and set aside while you make the sauce.
  5. Make the Roux: Return to the same skillet, and add the butter. Add the garlic and sauté it for 30 seconds until it’s fragrant. Then, add in the flour and stir to make a paste. 
  6. Whisk: Use a whisk to stir in the chicken stock, heavy cream, and grated parmesan cheese. 
  7. Stir: Add the drained sun-dried tomatoes and Italian seasoning and stir in to combine. Season with more salt and pepper if needed.
  8. Simmer: On low heat, simmer the sauce for a few minutes for it to thicken.
  9. Add the Chicken: Return the chicken back to skillet and then layer on top of the sauce.
  10. Heat: Turn the heat to medium low, and continue to simmer for an additional 10 minutes.
  11. Garnish: Add chiffoned or chopped fresh basil leaves for added flavor and beautiful presentation of this marry me chicken.
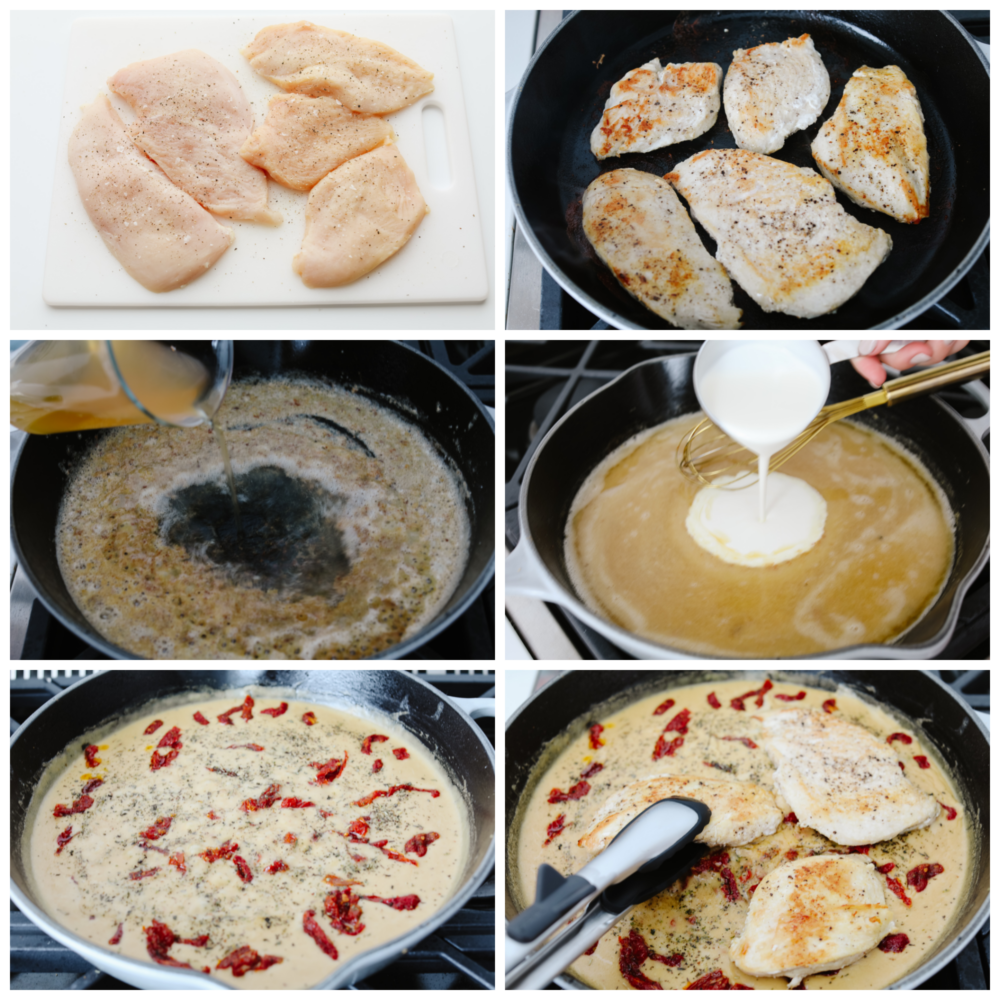
6 pictures showing how to cook the chicken, make the sauce and cook them together in a skillet.

Tips For Cooking the Chicken

This marry me chicken is cooked through when juices run clear when the chicken is pierced with a knife. You can also check the internal temperature using a meat thermometer. Make sure it reaches 165 degrees fahrenheit. The thinner the chicken, the quicker and more evenly it cooks!
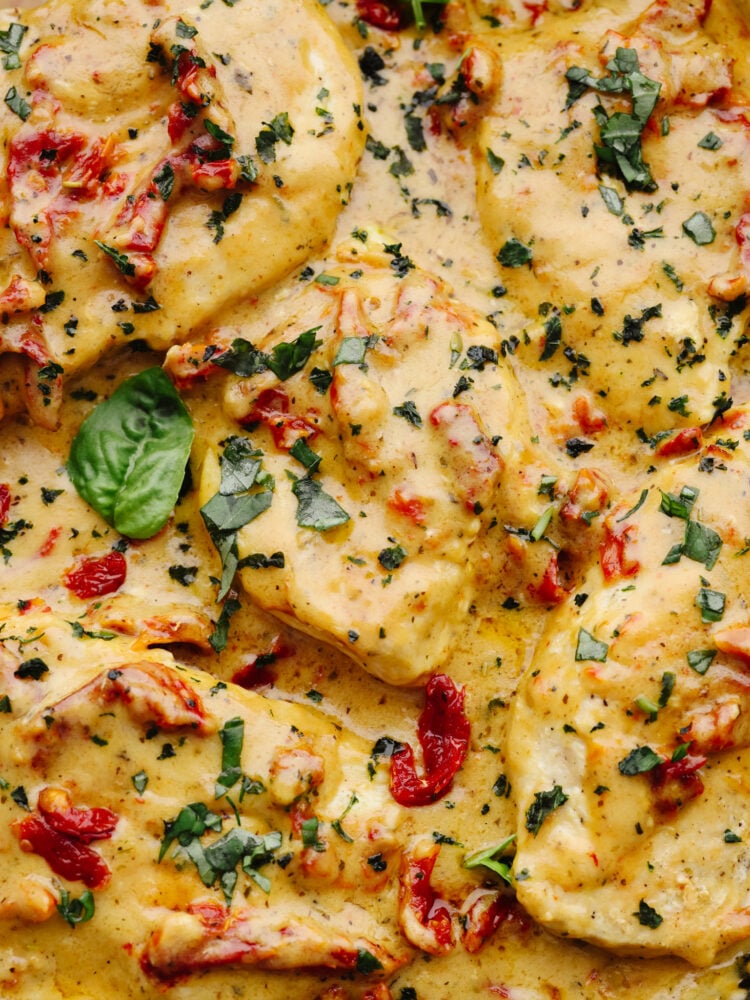
A close up of marry me chicken.

What to Serve with This

This marry me chicken goes with so many different things!! It is insanely delicious smothered on rice, mashed potatoes, or pasta! If you are looking for some delicious side options then to make this meal complete, try pairing it with a few of my favorite sides!

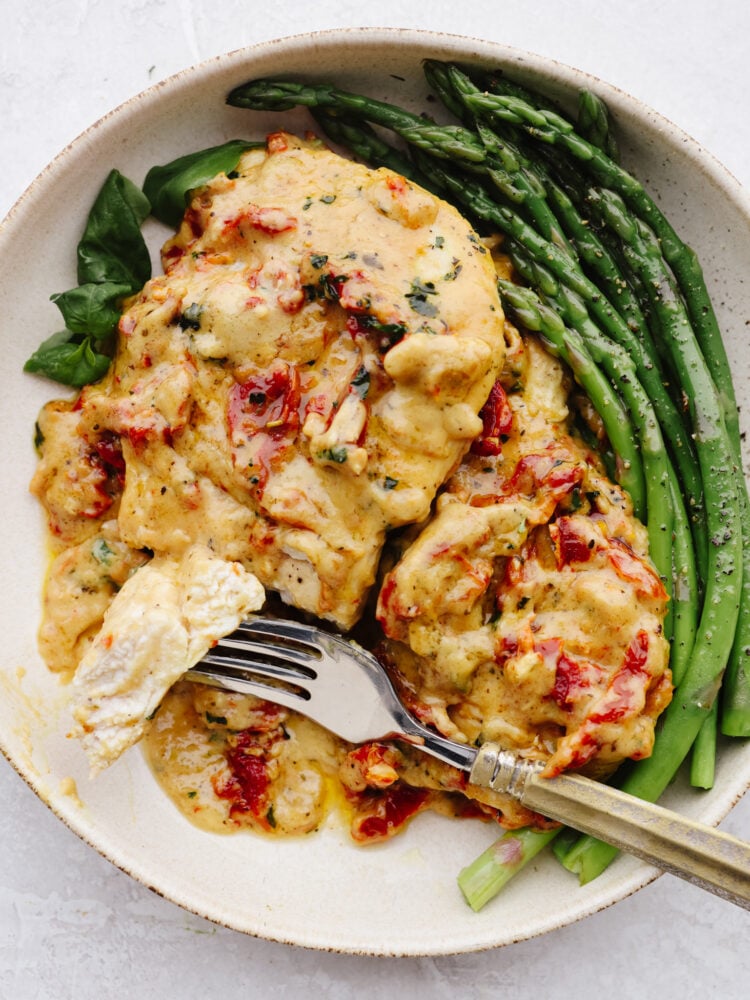
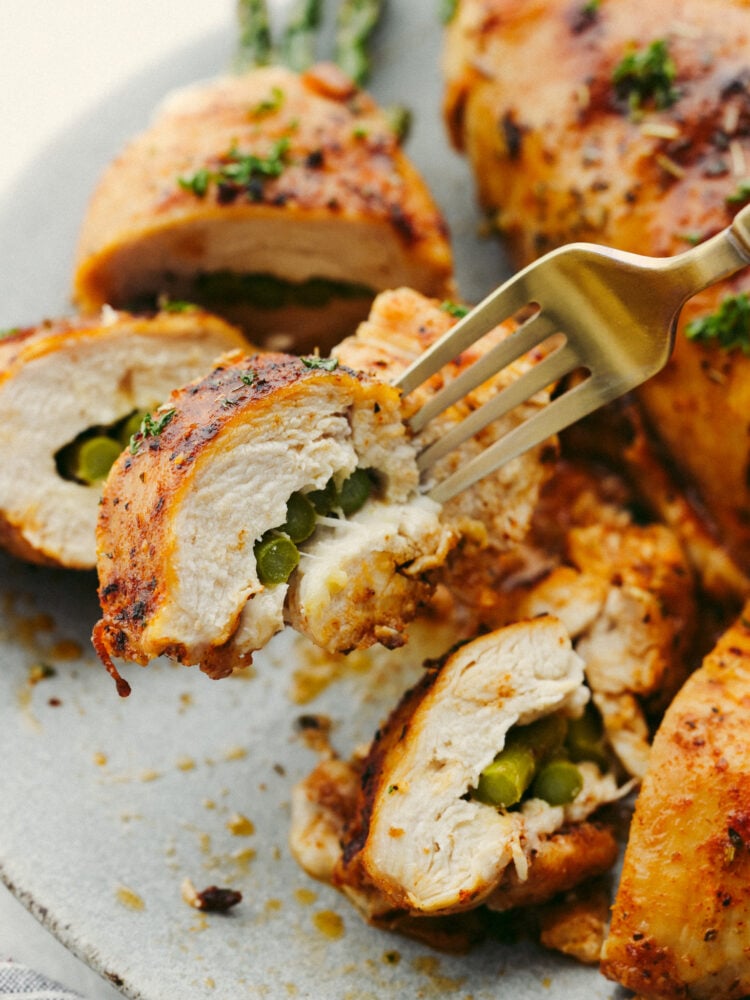
A plate with chicken and asparagus. A silver fork is cutting into the chicken.

How to Store Leftovers

If you are lucky enough to have leftovers of this marry me chicken then you will be so happy! It keeps great in the fridge for another dinner! My husband even loves it for lunch the next day.

  • In the Refrigerator: Store leftover chicken in a shallow, airtight container in your fridge for up to 3 days. 
  • In the Freezer: This recipe is best if it isn’t frozen. Best results are served the day of or refrigerated and reheated.
  • To Reheat: Heat this up in the microwave or in a skillet until the chicken is warmed through.
Print

Marry Me Chicken

Marry me chicken is juicy and flavorful and smothered in a creamy parmesan sauce. Seasoned with savory herbs and sun-dried tomatoes, this dish will melt in your mouth, and will leave you begging for a proposal!
Course Dinner
Cuisine American
Keyword marry me chicken
Prep Time 10 minutes
Cook Time 25 minutes
Total Time 35 minutes
Servings 4
Calories 533kcal
Author Alyssa Rivers

Ingredients

  • 1 1/2 pounds Boneless Skinless Chicken Breasts
  • 1/2 teaspoon Salt
  • 1/4 teaspoon Pepper
  • 3 Tablespoon Butter
  • 2 teaspoon Garlic (minced)
  • 3 Tablespoon Flour
  • 1 Cup Chicken Broth
  • 3/4 Cup Heavy Cream
  • 1/2 Cup Parmesan (grated)
  • 1/2 cup Sun-Dried Tomatoes (drained)
  • 1 teaspoon Italian Seasoning (dried)
  • Fresh Basil (for garnish)

Instructions

  • Slice the chicken breasts thinner to help them cook evenly. You can even pound the chicken thinner using a mallet if needed.
  • Season the chicken on both sides with salt and pepper.
  • In a large skillet, heat the olive oil over medium-high heat. Add the chicken and cook for 5 minutes on both sides until the chicken is mostly cooked through. It will continue to fully cook later.
  • Transfer the cooked chicken to a plate, and set it aside while you make the sauce.
  • Return to the same skillet, and add the butter. Once it is melted, sauté the garlic for 30 seconds until it's fragrant. Add in the flour and stir to make a paste.
  • Whisk in the chicken stock, heavy cream, and parmesan cheese.
  • Stir in the drained sun-dried tomatoes and Italian Seasoning. Season with more salt and pepper if needed.
  • Simmer the sauce for a few minutes for it to thicken.
  • Return the chicken back to skillet and layer on top of the sauce.
  • Turn the heat to medium low, and continue to simmer for an additional 10 minutes.
  • Garnish with chopped fresh basil leaves and serve warm over pasta or rice.

Nutrition

Calories: 533kcal | Carbohydrates: 15g | Protein: 45g | Fat: 33g | Saturated Fat: 19g | Polyunsaturated Fat: 2g | Monounsaturated Fat: 9g | Trans Fat: 1g | Cholesterol: 192mg | Sodium: 1001mg | Potassium: 1188mg | Fiber: 2g | Sugar: 7g | Vitamin A: 1198IU | Vitamin C: 8mg | Calcium: 218mg | Iron: 3mg


source https://therecipecritic.com/marry-me-chicken/
Share:

Spring Thaw Smoothie

The Spring Thaw Smoothie is perfect for welcoming sunny days. Carrots, citrus & banana combine with warm spices for a hearty vegan smoothie.

The post Spring Thaw Smoothie appeared first on The First Mess.


from The First Mess https://ift.tt/0jSvMLk
via IFTTT
Share:

Dog Birthday Cake

Making your dog a birthday cake is the best way to spoil them on their special day! This furry friend-approved cake is filled with healthy ingredients like yogurt, pumpkin, applesauce and carrots! They’ll love every bite!

I love making treats for my dog at home because I know exactly what’s in them! No fillers, no preservatives, just healthy ingredients! You’ll have to try my homemade dog treats too for a tasty, anytime snack for your fur baby!

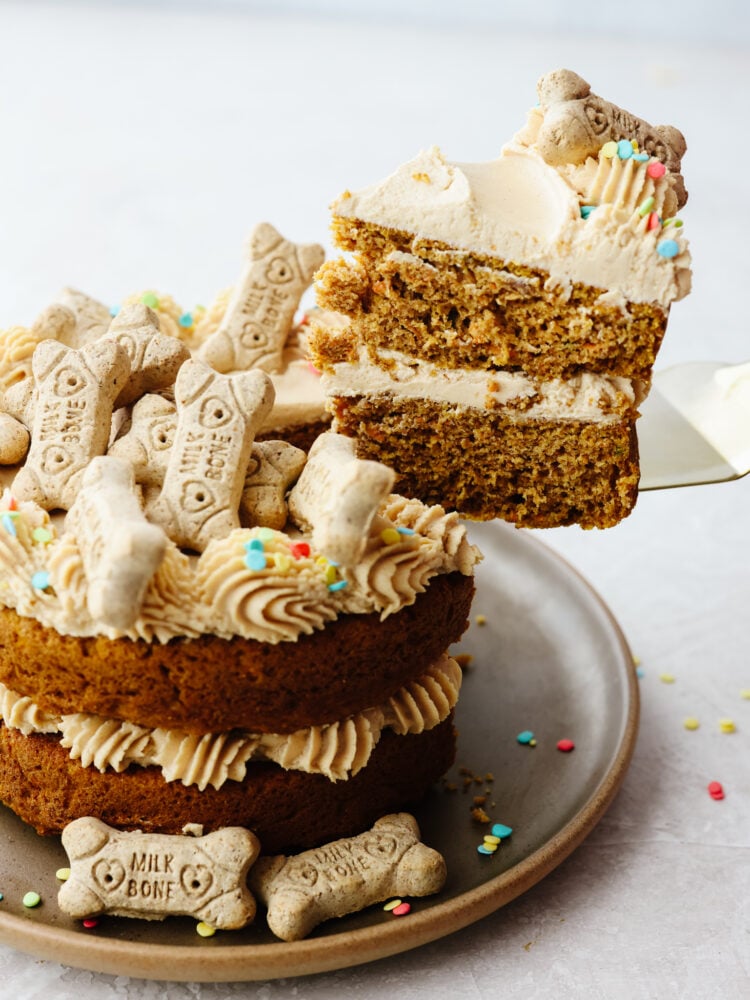
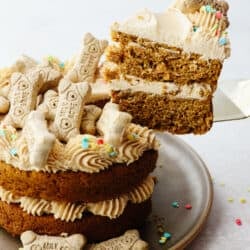
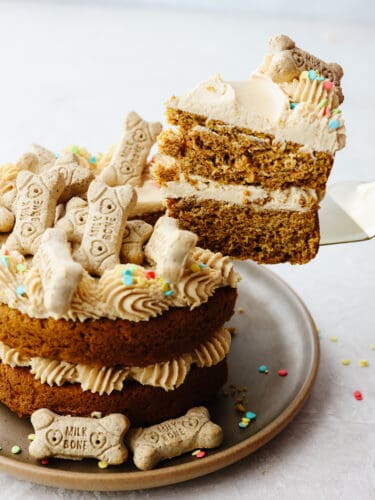
Taking a slice of dog birthday cake with an icing spatula.

Peanut Butter Dog Birthday Cake With Yogurt Frosting

Our Portuguese Water Dog, Leia, is turning 3, so we decided to celebrate her birthday with a cake filled with all of her favorite ingredients! Pumpkin, applesauce, carrots, and of course – peanut butter! This cake is also smothered with peanut butter yogurt ’frosting.’ My dog couldn’t get enough! I know your pooch will love it too! Whether it’s their birthday or you just want to spoil them a little extra, this cake is the way to go.

The great thing about this recipe is that it’s made with all-natural ingredients. No fillers here! Only the best for your furry friends! Fresh veggies, peanut butter, and yogurt are all great sources of fiber, protein, and calcium. Like any dog treat, however, this cake is best given to your dog in moderation. It’s best shared with other furry friends! Without further ado, let’s get making a dessert your pooch is going to go crazy over!

Ingredients Needed For a Dog Birthday Cake

The ingredients for this cake are super simple! They’re all human-grade and easily digestible by your pets. Garnish your cake with your dog’s favorite treats for the ultimate doggy dessert! Measurements for each ingredient can be found in the recipe card below.

  • Whole Wheat Flour: I like using whole wheat flour as my cake base for its added fiber. If your dog has a gluten intolerance, you can use gluten-free flour instead.
  • Baking Soda: Helps your cake rise.
  • Vegetable Oil: Adds moisture and helps ingredients stick together.
  • Creamy Peanut Butter: Make sure it’s Xylitol-free! Xylitol is toxic to animals. See more below on why you need to avoid this ingredient.
  • Plain Applesauce: Make sure your applesauce doesn’t have any added sugars. Apples are a great source of fiber for your pup!
  • Pumpkin Puree: Not only is pumpkin loaded with fiber, but dogs love it! You can buy this canned or make it at home.
  • Shredded Carrots: Carrots are a great snack for dogs! I like to shred mine or cut them into very small pieces to avoid any choking.
  • Milk: Adds moisture to the cake mix.
  • Egg: Used to bind everything together.

Peanut Butter Frosting

  • Plain Greek Yogurt: Greek yogurt is a great source of protein and calcium for your pup, just make sure to feed them this in moderation.
  • Natural Creamy Peanut Butter: Adds flavor to the frosting. Again, make sure this is Xylitol-free!
  • Dog Treats: (Optional) For garnish on top. Use your pup’s favorite here!
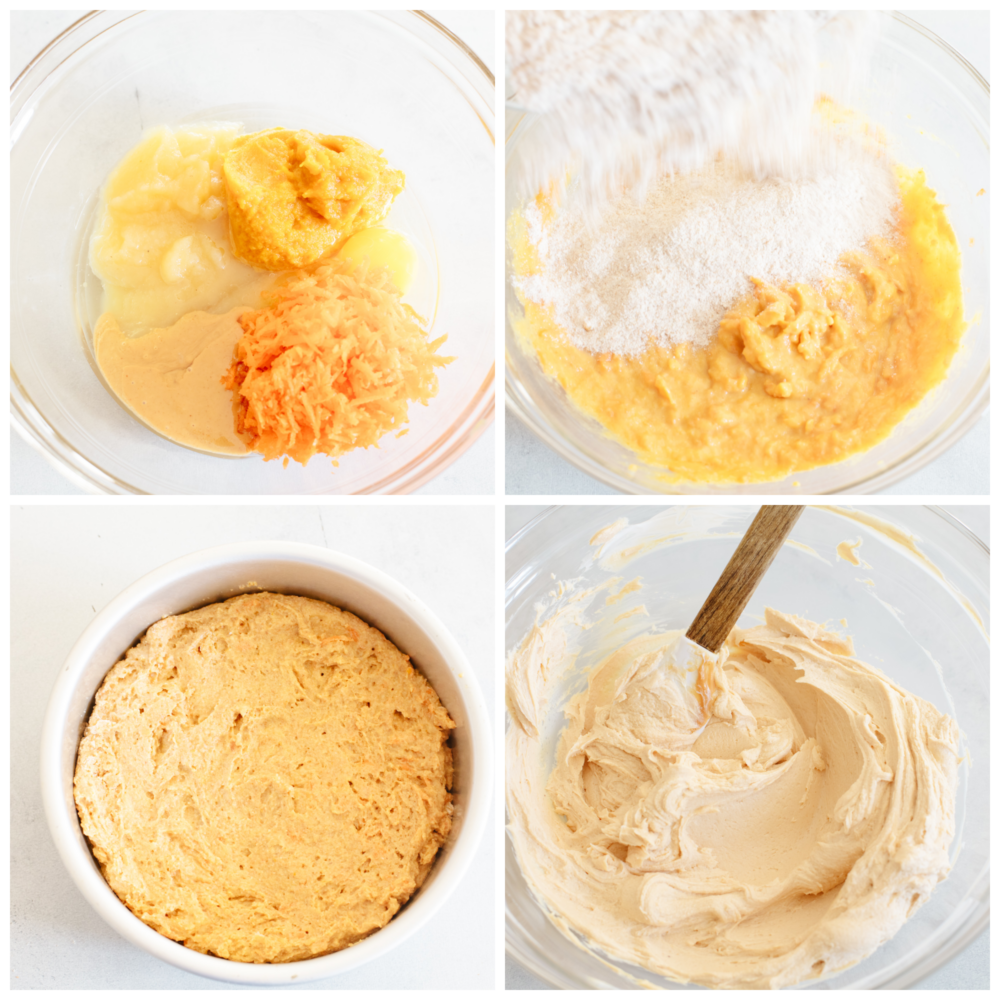
Process shots of making cake batter.

How to Make a Birthday Cake for Your Dog

This doggy dessert is super easy to make! It’s also a fun activity for the kids. My girls are obsessed with our dog so they loved making a special treat for her! Find my full list of kid-friendly recipes here!

  1. Preheat Oven, Prep Pans: To begin, preheat the oven to 350°F and spray two 6-inch cake pans with non-stick spray.
  2. Mix Dry Ingredients: In a small bowl, whisk together the flour and baking soda.
  3. Mix Wet Ingredients: In a large bowl, combine the vegetable oil, peanut butter, applesauce, pumpkin puree, carrots, milk, and egg. Add the dry ingredients to the wet ingredients and mix until combined.
  4. Bake: Separate the batter into the two prepared pans and bake for 22-25 minutes, until a toothpick comes out clean from the center of the cakes.
  5. Cool and Frost: Let the cakes cool completely on a cooling rack before frosting and serving to your pup.

Preparing the Frosting

  1. Mix Peanut Butter and Yogurt: In a medium bowl, combine the yogurt and peanut butter until smooth.
  2. Frost and Decorate: Frost the cake immediately or store the frosting in the fridge until ready to use. Decorate with dog treats as desired.
2 photos of serving cake to a black and white dog wearing a party hat.

Tips for Making Treats for Your Dog at Home

Dogs have sensitive stomachs so it’s super important to use the right ingredients! Here are a few tips on making your dog treats healthy, delicious, and nutritious! Once you know what ingredients to avoid, you’ll want to make homemade treats for your dogs all the time!

  • Xylitol/Birch Sugar: Xylitol is a sweetener that is most commonly found in things like gum, peanut butter, baked goods, and ice cream. It can also be listed as birch sugar. Xylitol is highly toxic to dogs and may cause liver failure, so be sure to check ingredient lists before you give anything new to your pup.
  • Avoid Nutmeg: If you want to add a little extra flavor to your dog’s birthday cake, cinnamon and ginger are both safe in small amounts. However, avoid nutmeg at all costs. It’s toxic to dogs.
  • Avoid Added Sugars: Giving your dog too much sugar can lead to diabetes and digestive issues. Look for plain Greek yogurt and applesauce when making your cake.
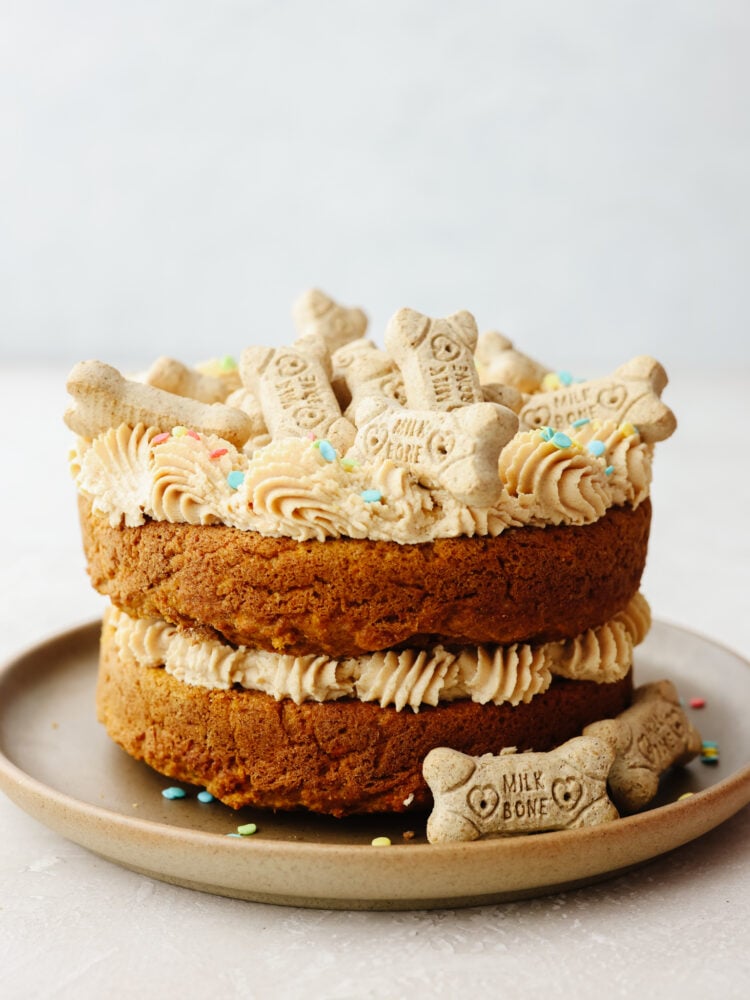
A whole dog birthday cake topped with dog treats.

How Long Will My Cake Last?

If your dog is anything like mine, the birthday cake will be gone before you get a chance to store it! It’s filled with all the tasty flavors they love.

  • In the Refrigerator: Wrap with plastic wrap or store in an airtight container for 3-4 days.
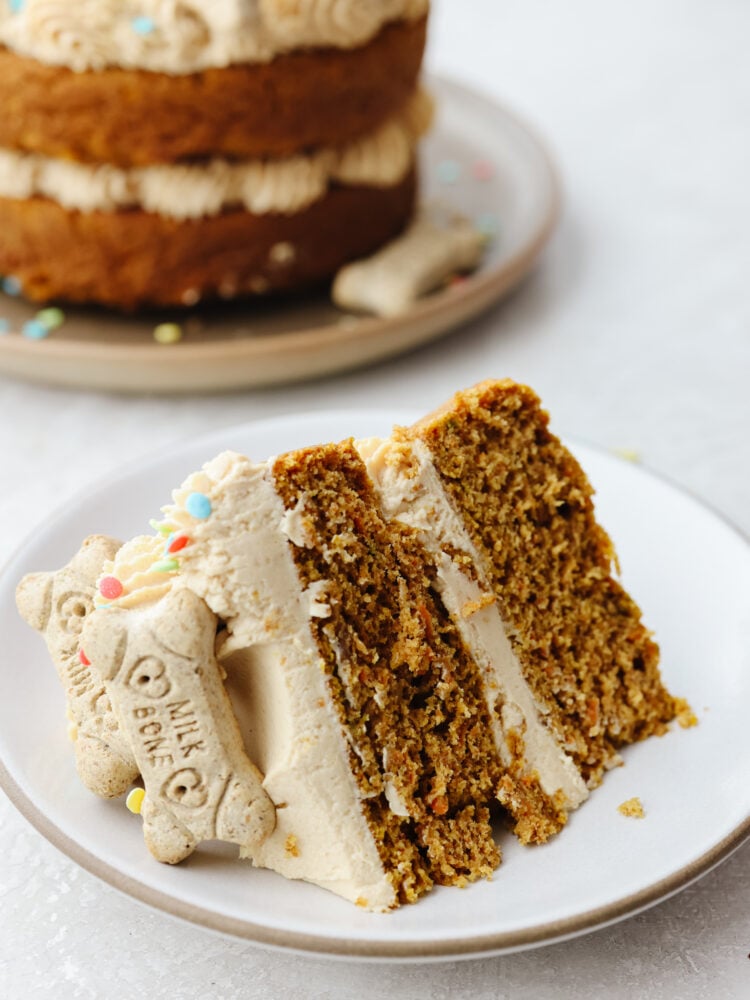
Closeup shot of a slice of dog birthday cake.
Print

Dog Birthday Cake

Making your dog a birthday cake is the best way to spoil them on their special day! This furry friend-approved cake is filled with healthy ingredients like yogurt, pumpkin, applesauce, and carrots! They’ll love every bite!
Course Cake
Prep Time 20 minutes
Cook Time 25 minutes
Total Time 45 minutes
Servings 8 slices
Calories 237kcal
Author Alyssa Rivers

Ingredients

Cake

  • 1 Cup Whole Wheat Flour
  • 1 Teaspoon Baking Soda
  • 2 Tablespoons Vegetable Oil
  • ¼ Cup Natural Creamy Peanut Butter Must be Xylitol free!
  • ½ Cup Plain Applesauce
  • ½ Cup Pumpkin Puree
  • ½ Cup Shredded Carrots
  • 3 Tablespoons Milk
  • 1 Egg

Frosting

  • 1 Cup Plain Greek Yogurt
  • ½ Cup Natural Creamy Peanut Butter Must be Xylitol Free
  • Dog treats for garnish optional

Instructions

Cake

  • Preheat the oven to 350° and spray two 6-inch cake pans with non-stick spray.
  • In a small bowl, whisk together the flour and baking soda.
  • In a large bowl combine the vegetable oil, peanut butter, applesauce, pumpkin puree, carrots, milk, and egg. Add the dry ingredients to the wet ingredients and mix until combined.
  • Separate the batter into the two prepared pans and bake for 22-25 minutes, until a toothpick comes out clean from the center of the cakes.
  • Let the cakes cool completely on a cooling rack before frosting and serving to your pup.

Frosting

  • In a medium bowl combine the yogurt and peanut butter until smooth. Frost the cake immediately or store the frosting in the fridge until ready to use.
  • Decorate with dog treats as desired.

Nutrition

Calories: 237kcal | Carbohydrates: 21g | Protein: 11g | Fat: 14g | Saturated Fat: 3g | Polyunsaturated Fat: 3g | Monounsaturated Fat: 6g | Trans Fat: 1g | Cholesterol: 22mg | Sodium: 266mg | Potassium: 311mg | Fiber: 4g | Sugar: 6g | Vitamin A: 3765IU | Vitamin C: 1mg | Calcium: 62mg | Iron: 1mg


source https://therecipecritic.com/dog-birthday-cake/
Share:

Cheesy Asparagus Stuffed Chicken

This asparagus stuffed chicken is incredibly juicy and tender. Flavored with the most delicious spices and stuffed with the incredibly healthy vegetable, asparagus, you will want to lick your plate clean!

Chicken is a go-to in our house for dinner. It’s delicious, and everyone loves it! For more chicken dinner ideas, try out this chicken Madeira, air fryer chicken, or this absolutely delicious grilled honey balsamic chicken.

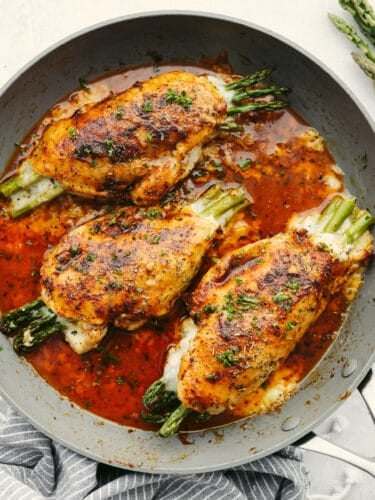
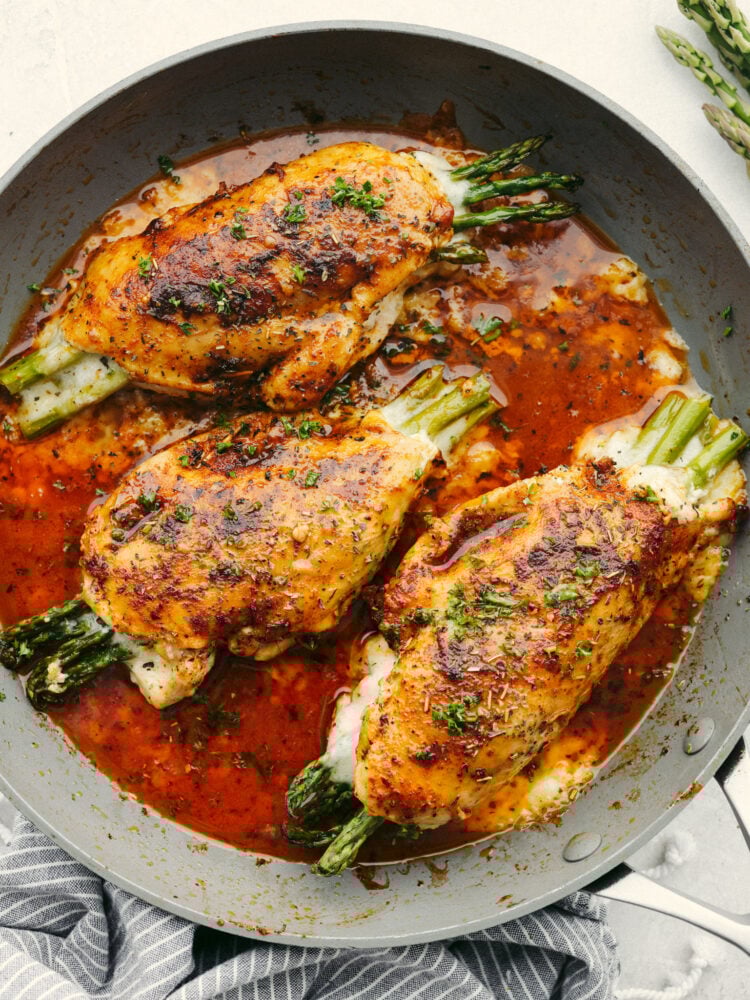
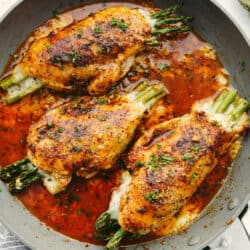
A pan nwith 3 asparagus stuffed chicken breasts.

What is Asparagus Stuffed Chicken?

Exactly as the title says, this is chicken stuffed with asparagus. But that’s not all… It’s so much more than that! There is the cheese that melts and becomes the base of the filling. Then, you put in your stalks of asparagus. The best part is the seasoning rub that goes on top! Made with some spices like chili powder, garlic powder, brown sugar, and more, this seasoning really takes the flavor of this chicken to the next level!

Not only do the spices brings in a delightful array of flavors, but it carmelizes with the brown sugar and creates a sauce while it cooks that adds so much moisture to the chicken. When you bite into it, it’s so juicy and tender! Even your kids will love this meal and be asking you for seconds! Make it a meal by serving this with some delicious dinner rolls, some potatoes, and a salad.

Ingredients in Asparagus Stuffed Chicken

Once you have your chicken and your asparagus all ready to go, the rest of these ingredients are simple and easy. Gather up your spices because this chicken packs a punch when it comes to flavor! Check out the recipe card at the bottom of the post for exact measurements.

  • Chicken Breasts: I like to use large chicken breast for this recipe. Make sure that they are all similar in size so that they will cook evenly and at the same time.
  • Mozzarella Cheese: I used sliced mozzarella cheese because it completements the other flavors so well and adds in a great texture too!
  • Asparagus Stalks: Your asparagus stalks should be firm and the tips shouldbe tightly closed when you are picking your asparagus.
  • Brown Sugar: This adds in a sweet, deep flavor.
  • Chili Powder: The chili power adds in a lot of flavor. To crank up the heat, add a little more!
  • Paprika: Paprika is sweet and blends so well with the other spices.
  • Italian Seasoning: You can use store-bought or, if you want, you can try out this homemade Italian seasoning instead!
  • Garlic Powder: I love using garlic any chance that I get and this subtle flavor tastes delicious with the chicken.
  • Salt and Pepper: The final seasonings to take this chicken to the next level!
  • Olive Oil: You will use this to cook the chicken in as you sear each side.
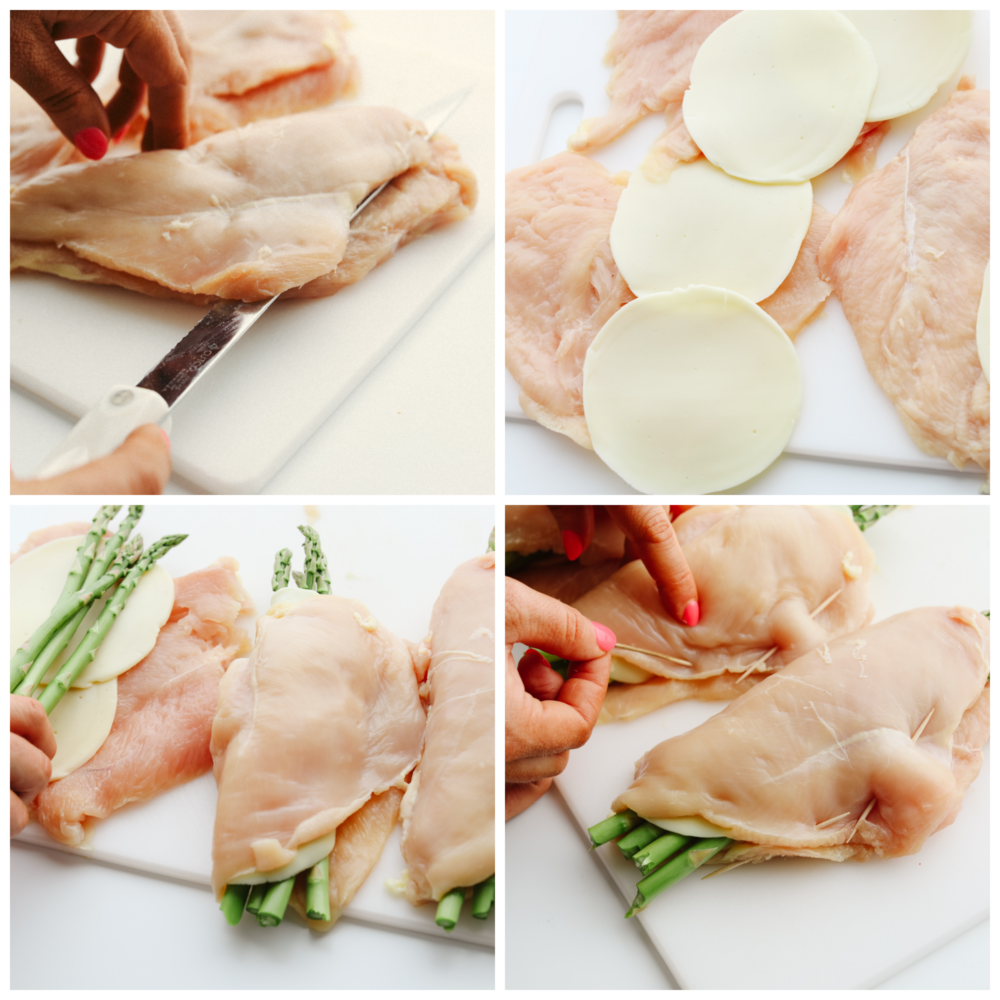
4 pictures showing how to slice and stuff a chicken breast with cheese and asparagus.

How to Make Asparagus Stuffed Chicken

This whole recipe takes less than 30 minutes from start to finish! So it’s an excellent meal for any of those busy, on-the-go nights, but it tastes like you spent all day working in the kitchen!

  1. Preheat Oven and Pound Chicken: Preheat oven to 375 degrees. Slice the chicken in half about ¾ of the way. Open the chicken and pound each side to be about ¼ inch thick.
  2. Stuff the Chicken: Stuff the chicken breasts each with 2 slices cheese, and 3 asparagus stalks. Fold the chicken oven and secure with toothpicks around the edges.
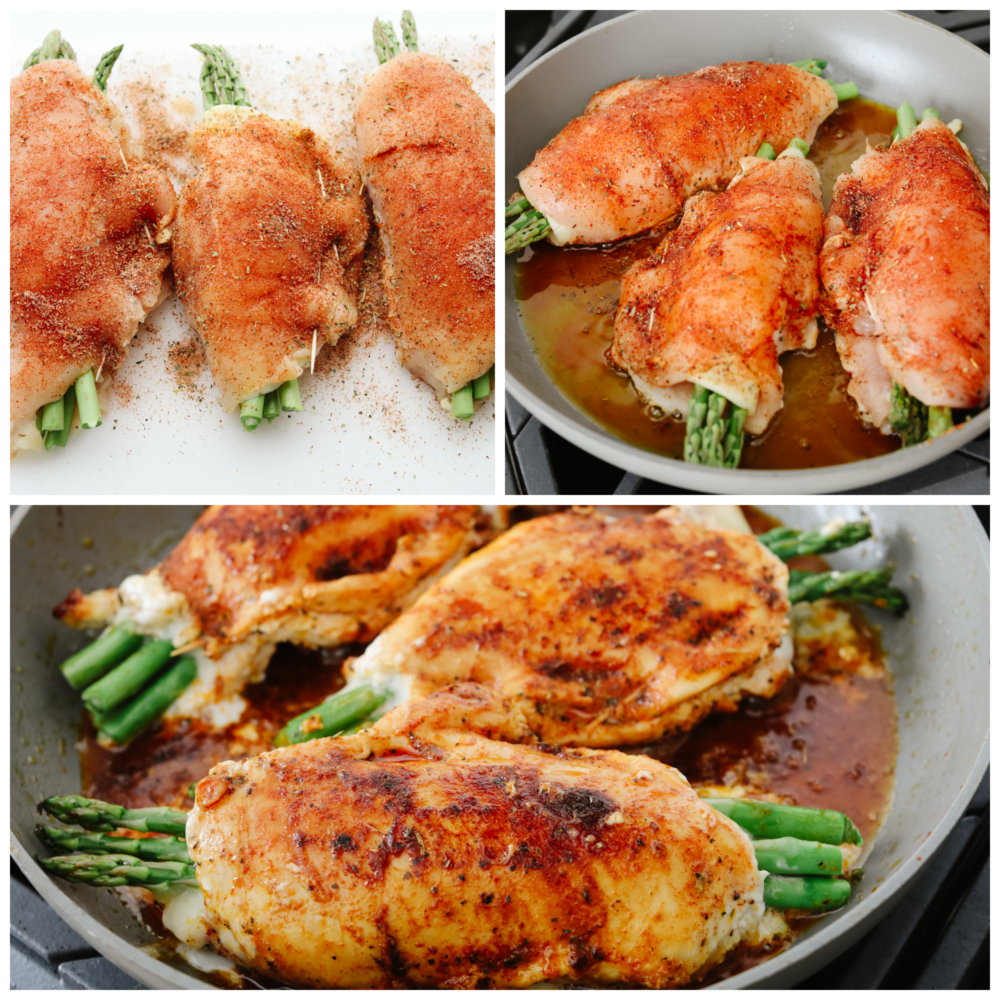
  3. Rub with Seasoning: In a small bowl combine the brown sugar, chili powder, paprika, italian seasoning, garlic powder, salt and pepper. Rub generously on each sides of the chicken.
  4. Cook: Add the olive oil to a medium sized skillet and turn to medium high. Add the chicken and sear on each side for 2-3 minutes. Cover the pan with foil and put into the oven. Cook for about 15-20 minutes or until the chicken is cooked throughout.
3 pictures showing 3 chicken breasts in a pan getting seared.

How to Know When Chicken is Safe to Eat?

When cooking meat, it’s always important to check the internal temperature before eating. An internal digital meat thermometer can help you do just that! Stick the meat thermometer into the thickest part of the breast. Chicken is safe to eat at 165°F.

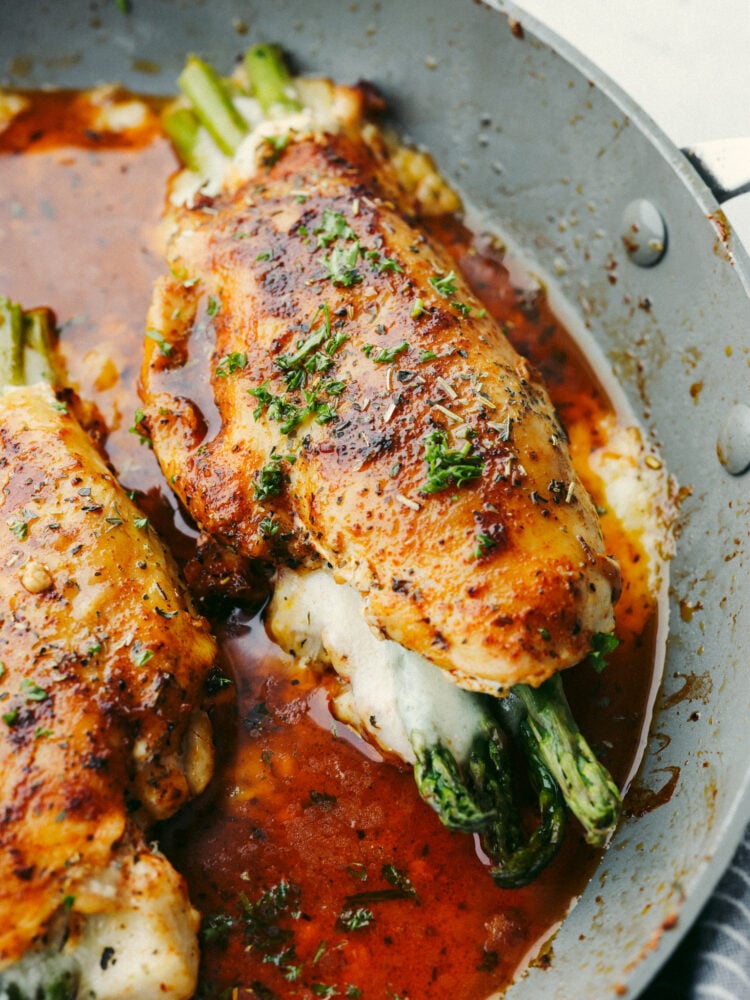
A close up of a pan with a chicken breast stuffed with cheese and asparagus.

Chicken Cooking Tips

When you cook this asparagus stuffed chicken, there are a few things that you should do to make sure that it turns out perfectly. Here are some suggestions for you!

  • If you want the best, let it rest! A lot of times, people will skip this part… Don’t! It’s so easy and SO important! Once your meat is done cooking and out of the oven, leave it alone! This is the moment where your meat is locking in all of the juice and can dry out if you cut into it soon.
  • High Temperature: If you are worried about drying out your chicken or burning it, don’t be tempted to lower the temperature. A lower temperature means that you have to cook your chicken longer, therefore drying it out! The high temperature and lower cooking time is what will deliver on the juicy, tender inside!
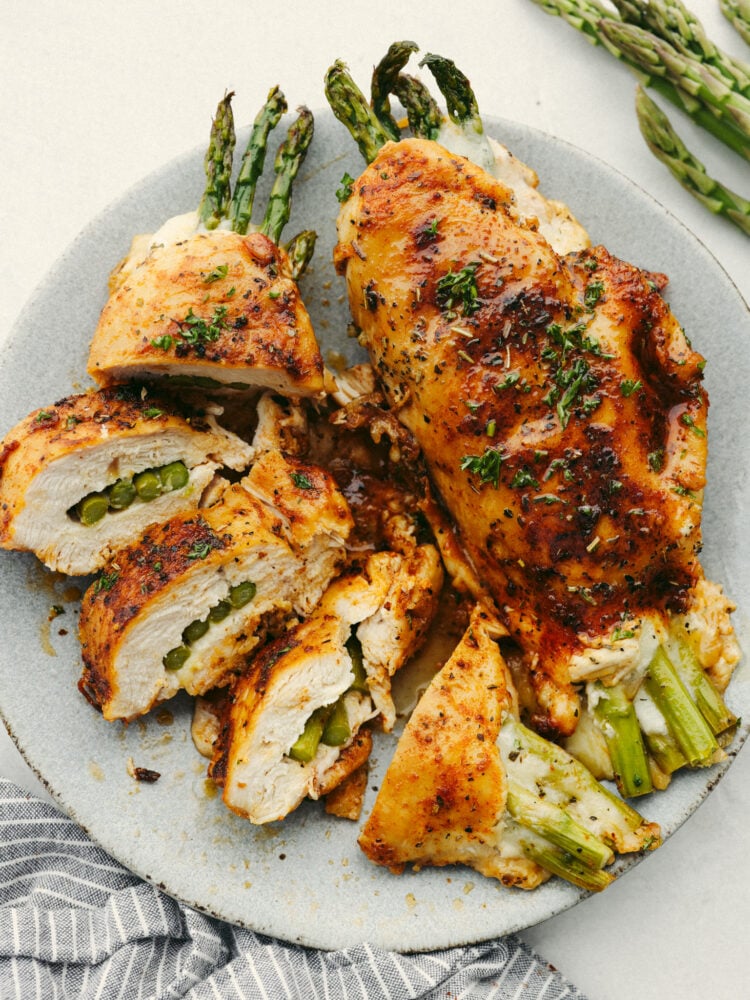
A gray plate with one whole asparagus stuffed chicken breast and another breast that is sliced into 5 pieces.

How to Store Leftovers

This tender and juicy asparagus stuffed chicken makes fantastic leftovers! You can have it the next day for dinner or even lunch!

  • Refrigerate: Wait until the chicken has cooled completely and then place it into an airtight container. It can be stored for up to 3 days in the fridge.
  • To Reheat: You can place your chicken in the oven and bake it at 350 degrees for about 10 minutes or until it’s heated through.
A chicken breast being cut into with a gold fork.
Print

Cheesy Asparagus Stuffed Chicken

This asparagus stuffed chicken is incredibly juicy and tender. Flavored with the most delicious spices and stuffed with the incredibly healthy vegetable, asparagus, you will want to lick your plate clean! 
Course Dinner
Cuisine American
Keyword asparagus stuffed chicken breast
Prep Time 5 minutes
Cook Time 20 minutes
Total Time 25 minutes
Servings 3 People
Calories 543kcal
Author Alyssa Rivers

Ingredients

  • 3 large Chicken Breasts
  • 6 slices Mozzarella Cheese
  • 9 Asparagus Stalks
  • 1 Tablespoon Brown Sugar
  • 1 teaspoon Chili Powder
  • 1/2 teaspoon Paprika
  • 1 teaspoon Italian Seasoning
  • 1 teaspoon Garlic Powder
  • 1/2 teaspoon Salt
  • 1/4 teaspoon Pepper
  • 2 Tablespoons Olive Oil

Instructions

  • Preheat the oven to 375 degrees. Slice the chicken in half about ¾ of the way. Open the chicken and pound each side to be about ¼ inch thick.
  • Stuff the chicken breasts each with 2 slices of cheese, and 3 asparagus stalks. Fold the chicken oven and secure it with toothpicks around the edges.
  • In a small bowl combine the brown sugar, chili powder, paprika, Italian seasoning, garlic powder, salt, and pepper. Rub generously on each side of the chicken.
  • Add the olive oil to a medium-sized skillet and turn to medium-high. Add the chicken and sear on each side for 2-3 minutes. Cover the pan with foil and put it into the oven. Cook for about 15-20 minutes or until the chicken is cooked throughout.

Nutrition

Calories: 543kcal | Carbohydrates: 9g | Protein: 62g | Fat: 28g | Saturated Fat: 10g | Polyunsaturated Fat: 2g | Monounsaturated Fat: 12g | Trans Fat: 1g | Cholesterol: 189mg | Sodium: 1019mg | Potassium: 1025mg | Fiber: 2g | Sugar: 5g | Vitamin A: 1188IU | Vitamin C: 5mg | Calcium: 328mg | Iron: 3mg


source https://therecipecritic.com/asparagus-stuffed-chicken/
Share:

Popular

Archive

Slider Tag

Facebook

Header Ads

Recent in Food

Blog Archive

Recent Posts

Unordered List

  • Lorem ipsum dolor sit amet, consectetuer adipiscing elit.
  • Aliquam tincidunt mauris eu risus.
  • Vestibulum auctor dapibus neque.

Pages

Theme Support

Need our help to upload or customize this blogger template? Contact me with details about the theme customization you need.