Lemon Ricotta Cookies

These lemon ricotta cookies are a lemon lover’s dream come true! They are soft, moist, and drizzled with amazingly fresh lemon glaze. You will want to serve these up every chance that you get!

That lovely and bright taste brought by a lemon never gets old! Lemon is the most versatile ingredient, and I Iove using it in all meal courses! Try out this lemon salad, this lemon pasta, and these amazing lemon potatoes.

A stack of lemon ricotta cookies wiht a lemon glaze on a wooden cutting board.

These cookies have a secret ingredient (well, not so secret since it’s in the title) that makes them the perfect texture. That ingredient is ricotta. I’ve used ricotta in some lemon pancakes before, and the end result is fantastic every time! Think soft, creamy, and moist all at the same time. Once you add in the ricotta and mix in some lemon flavor, these cookies have just the right amount of subtle lemon tang to keep you wanting to come back for more!

These cookies not only taste amazing, but they are actually really simple to make. In fact, you probably already have most of the stuff on hand. These are like a bite-size, handheld lemon cake mixed with a cookie. They make my mouth water just thinking about them! Be careful, though… the lemon glaze is so good that you might just want to lick that bowl clean. So save some room for the actual cookies after they are baked!

Ingredients You Need to Make Lemon Ricotta Cookies

Ok, so you know there is lemon and ricotta in these, but what else is there?? All of your standard cooking ingredients are in these cookies, so go ahead and whip some up. And save some for later (they freeze so well)! Check out the exact measurements on the recipe card at the bottom of the post.

Cookies

  • Flour: I used all purpose flour in this recipe.
  • Baking Soda and Baking Powder: These will help the cookies to rise and have a soft texture.
  • Salt: The salt enhances all of the flavors in the recipe.
  • Butter: Use unsalted butter that has been softened to room temperature.  
  • Granulated Sugar: Good cookies always have sugar in them! Yum!
  • Eggs: Set your eggs out so that they are at room temperature before mixing and they will combine better with the other ingredients.
  • Ricotta Cheese: I like to make sure that the ricotta cheese is whole milk and not a lower fat content.
  • Lemon Juice and Lemon Zest: This will add that tangy, lemon flavor to the acual cookie dough!

Glaze

  • Powdered Sugar: I always use this to make a glaze because it is sweet and dissolves into a smooth texture.
  • Lemon Juice and Lemon Zest: These bring the perfect amount of lemon flavor to the glaze!

Let’s Make Some Lemon Ricotta Cookies!

These cookies are super simple to make! Just make sure that you leave enough time to fit in the necessary chilling of the dough. The rest is quick and easy!

  • Mix Dry Ingredients: In a medium bowl combine and whisk together the flour, baking soda, baking powder, and salt.
  • Beat: In a large bowl, beat together the butter and sugar until fluffy, about 5 minutes. Add the eggs one at a time, mixing each time until combined. Add the ricotta, lemon juice, and lemon zest. Beat until combined.
  • Combine and CHILL: Add the dry ingredients to the wet ingredients and mix until just barely combined. Cover the dough and refrigerate for at least 4 hours.
  • Scoop Cookies: Preheat the oven to 375°. Line two baking sheets with parchment. Scoop about 1 ½ tablespoons (you can use a cookie scoop) of the chilled dough onto the baking sheets, leaving about 2 inches between the cookies.
  • Bake: Bake for 15 minutes, until the cookies are cooked through but aren’t browning. Leave the cookies on the baking sheets for an additional 15 minutes before transferring to a cooling rack.

Glaze

  • Combine: In a small bowl combine the powdered sugar, lemon juice, and lemon zest until smooth.
  • Drizzle: Gently spoon about ½ teaspoon of glaze on each cookie. Let the glaze harden before serving.
4 pictures showing how to mix lemon dough, scoop it onto parchment paper and then drizzle a glaze onto cooked cookies.

Toppings, Mix-In’s and Variations

Lemon goes with everything, so adding things into these lemon ricotta cookies and changing things up to fit your needs are super easy! Here are a few ideas that you can try:

  • Almonds: Lemons and almonds complement each other so well! Try adding some sliced almonds to the top of the glaze before it hardens and they will stick! Add a splash of almond extract to the dough to really take it up a notch.
  • Blueberries: These two (lemon and blueberries) are a match made in heaven! Add some to the dough or add them as a garnish just before eating.
  • Juice: If you are out of lemons but want some zesty cookies, then try using oranges or limes instead! It makes a totally different cookie but it’s also very delicious!
The top view of glazed lemon ricotta cookies on a wire baking rack.

Leftover Tips

Lemon ricotta cookies store so well in the fridge and the freezer. So double the batch and you can have them on hand anytime you need them!

  • In the Refrigerator: Once your cookies have cooled then store them in an airtight container in the fridge. They will last about a week!
  • In the Freezer: Place your cooked cookies in an airtight container or ziplock bag and label it with the date. Your cookies will last for up to 3 months in the freezer.
Lemon ricotta cookies on a cutting board with lemon slices scattered around.
Print

Lemon Ricotta Cookies with a Lemon Glaze

These lemon ricotta cookies are a lemon lover's dream come true! They are soft, moist, and drizzled with amazingly fresh lemon glaze. You will want to serve these up every chance that you get! 
Course Dessert
Cuisine American
Keyword lemon cookies, lemon ricotta cookies
Prep Time 20 minutes
Cook Time 15 minutes
Chill Time 4 hours
Total Time 4 hours 35 minutes
Servings 40 Cookies
Calories 122kcal

Ingredients

Cookies

  • 2 ½ Cups All-Purpose Flour
  • ½ Teaspoon Baking Soda
  • 1 Teaspoon Baking Powder
  • 1 Teaspoon Salt
  • ½ Cup Unsalted Butter Softened
  • 1 ¾ Cups Granulated Sugar
  • 2 Eggs Room Temperature
  • 15 Ounces Whole Milk Ricotta Cheese
  • 3 Tablespoons Lemon Juice
  • 2 Tablespoons Lemon Zest

Glaze

  • 1 ½ Cups Powdered Sugar
  • 3 Tablespoons Lemon Juice
  • 1 Tablespoon Lemon Zest

Instructions

  • In a medium bowl, whisk together the flour, baking soda, baking powder, and salt.
  • In a large bowl, beat together the butter and sugar until fluffy, about 5 minutes. Add the eggs one at a time, mixing each time until combined. Add the ricotta, lemon juice, and lemon zest. Beat until combined.
  • Add the dry ingredients to the wet ingredients and mix until just barely combined. Cover the dough and refrigerate for at least 4 hours.
  • Preheat the oven to 375°. Line two baking sheets with parchment. Scoop about 1 ½ tablespoons of the chilled dough onto the baking sheets, leaving about 2 inches between the cookies.
  • Bake for 15 minutes, until the cookies are cooked through but aren’t browning. Leave the cookies on the baking sheets for an additional 15 minutes before transferring to a cooling rack.

Glaze

  • In a small bowl combine the powdered sugar, lemon juice, and lemon zest until smooth.
  • Gently spoon about ½ teaspoon of glaze on each cookie. Let the glaze harden before serving.

Nutrition

Serving: 1cookie | Calories: 122kcal | Carbohydrates: 20g | Protein: 2g | Fat: 4g | Saturated Fat: 2g | Polyunsaturated Fat: 1g | Monounsaturated Fat: 1g | Trans Fat: 1g | Cholesterol: 20mg | Sodium: 85mg | Potassium: 37mg | Fiber: 1g | Sugar: 13g | Vitamin A: 130IU | Vitamin C: 1mg | Calcium: 30mg | Iron: 1mg


source https://therecipecritic.com/lemon-ricotta-cookies/
Share:

Monte Cristo Sandwich (Disneyland Copycat)

Get ready for the best Disneyland food out there with this copycat Monte Cristo sandwich!! The melted cheese combined with delicious turkey and ham sandwiched in crispy bread, all dipped into delicious raspberry jam… It’s enough to make anyone’s mouth water!

I love a good, hearty sandwich. Although I may be partial to loving this Monte Cristo the very best, there are a few other tried and true favorites that taste insanely delicious! Try this air fryer grilled cheese sandwich, this amazing meatloaf sandwich, and this easy Cuban sandwich recipe.

A monte cristo sandwich, ready to eat on a cooling rack.

What is a Monte Cristo Sandwich?

I am here to tell you about the best sandwich there ever was. Nope, I’m not even exaggerating. This Monte Cristo sandwich is based on the classic served at a restaurant named Cafe Orleans in Disneyland. The outside is bread that is grilled to perfection. The inside has cheese and turkey and ham. The cheese is so melty and delicious, and then get this… When it’s all cooked and ready to eat, you dip it in some….jam.

Yep, you read that right! If you have never had one before, then I know that sounds so weird. But this is one of Disney’s most popular sandwiches for a reason. The combination of the sandwich and the jam is pure HEAVEN. You won’t find another like it, and you won’t have to. This will become your favorite and your go-to forever and always! Trust me… Make the sandwich!

Ingredients in a Monte Cristo Sandwich Recipe

The best part about this sandwich (well, aside from tasting heavenly) is how simple and easy it is to make. You probably already have all of the ingredients in your kitchen! Check out the recipe card at the bottom of the post for exact measurements.

  • Butter: I used unsalted butter in this recipe.
  • Olive Oil: You can use canola oil or vegetable oil if you have those on hand instead.
  • White Bread: No special bread is needed for this recipe! Plain white bread is perfect!
  • Mayonaise and Mustard: These will be mixed together to make a spread.
  • Swiss Cheese: Using swiss cheese gives this sandwich a delicious flavor.
  • Deli Ham and Turkey: Both of these meats are a MUST!
  • Eggs: You will dredge the sandwich in the eggs before you cook it, similar to how you would cook french toast.
  • Powdered Sugar: Sprinkle this on top for a slight dusting and it not only looks pretty but it”s the signature of a delicious Monte Cristo!
  • Raspberry Jam: I like the flavor of Raspberry jam the best with this sandwich but you can use any kind that you want! Try out this homemade strawberry jam for something fresh!

How to Make a Homemade Monte Cristo Sandwich

If you want to feel as if you are eating right in New Orleans’ Square at Disneyland, then you MUST make this sandwich. It’s so simple, and it’s worth every minute spent making it!

  1. Prep Bread: Add the butter and oil to a large skillet or pan on medium heat and then lay the slices of bread on a baking sheet.
  2. Combine: Combine the mayo and mustard and spread on each slice of bread.
  3. Add Cheese and Ham: Add the cheese to each side of the bread. On one side, add 2 slices of ham followed by another slice of cheese.
  4. Add Turkey: Add the turkey and top with the other side of the bread.
  5. Dredge and Cook: In a shallow bowl whisk the eggs. Then, dredge each side of the bread into the egg mixture and add to the hot skillet. Cook on each side for 2-3 minutes or until golden brown and heated throughout.
  6. Dust and Serve: Dust with powdered sugar and serve with raspberry preserves.
6 pictures shoiwng how to assemble and cook a monte cristo sandwich.

Can You Make this Ahead of Time?

Yes! You can make this Monte Cristo sandwich ahead of time! Prepare the sandwiches with the mustard and mayonnaise, and add the meat and cheese. Then, wrap each sandwich in foil. You can store them for up to 2 days in the refrigerator. When you are ready to eat them, then dredge the sandwiches in eggs and cook them up! Don’t forget the powdered sugar and jam!

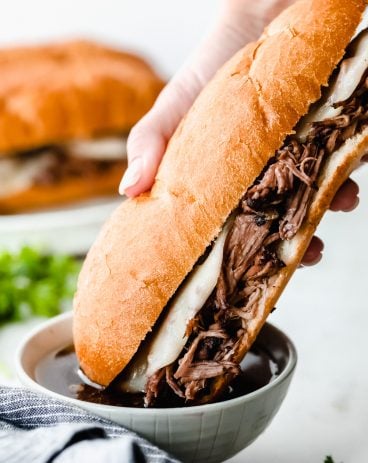
Half of a monte cristo sandwich being dipped into raspberry jam.
Print

Monte Cristo Sandwich (Disneyland Copycat)

Get ready for the best Disneyland food out there with this copycat Monte Cristo sandwich!! The melted cheese combined with delicious turkey and ham sandwiched in crispy bread, all dipped into delicious raspberry jam… It's enough to make anyone's mouth water!
Course Dinner
Cuisine French
Keyword Disneyland, disneyland copycat, monte cristo sandwich
Prep Time 5 minutes
Cook Time 5 minutes
Total Time 10 minutes
Servings 4
Calories 748kcal
Author Alyssa Rivers

Ingredients

  • 2 Tablespoons Butter
  • 2 Tablespoons Olive Oil
  • 8 slices White Bread
  • 3 Tablespoons Mayonaise
  • 1 Tablespoon Mustard
  • 12 slices Swiss Cheese
  • 8 slices Ham
  • 8 slices Turkey
  • 3 Eggs
  • Powdered Sugar for dusting
  • Raspberry Jam for serving

Instructions

  • Add the butter and oil to a large skillet and heat to medium. Lay the slices of bread on a baking sheet.
  • Combine the mayonnaise and mustard and spread on each slice of bread.
  • Add the cheese to each side of the bread. On one side add 2 slices of ham followed by another slice of cheese.
  • Add the turkey and top with the other side of the bread.
  • In a shallow bowl whisk the eggs. Dredge each side of the bread and add to the hot skillet. Cook on each side for 2-3 minutes or until golden and heated throughout.
  • Dust with powdered sugar and serve with raspberry jam.

Nutrition

Calories: 748kcal | Carbohydrates: 26g | Protein: 42g | Fat: 53g | Saturated Fat: 20g | Polyunsaturated Fat: 9g | Monounsaturated Fat: 19g | Trans Fat: 1g | Cholesterol: 246mg | Sodium: 1232mg | Potassium: 378mg | Fiber: 1g | Sugar: 3g | Vitamin A: 804IU | Vitamin C: 1mg | Calcium: 590mg | Iron: 3mg


source https://therecipecritic.com/monte-cristo-sandwich/
Share:

Pupcakes

Pupcakes are a dog-friendly dessert your 4-legged friend will go crazy over! They’re super easy to make and full of healthy ingredients for your pup!

Making homemade treats for your dog is so fun, and the best part is- you know exactly what’s going into them! You’ll have to try making a dog birthday cake and homemade dog cookies next! My dog absolutely loves them and I know yours will too!

Multiple frosted pupcakes on a cake board.

Easy Dog Cupcake Recipe

I have to admit, making homemade dog treats has become a new obsession for me and my girls. They get so excited to bake something for our pup, Leia! The smiles on their faces when they reveal the finished product to her are the best! (Find more kid-friendly recipes here!) I love that we can create something together that is fun and cute but also full of healthy ingredients for our pup. Only the best for our furry friends!

Make a batch of these and I assure you there will be tails wagging! They have a peanut butter, carrot, pumpkin, and applesauce base, topped with peanut butter frosting. All the treats my dog loves combined into one single-serving dessert! Because moderation is key, you may want to invite some neighborhood dogs over to join in on the fun! I swear my pupper could eat a whole pan of these by herself.

What Are Pupcakes Made Of?

Just a few simple, all-natural ingredients! They’re great for digestion and have flavor your dog will go crazy over! You can find measurements for each ingredient in the printable recipe card at the end of the post.

  • Whole-Wheat Flour: I use whole wheat flour in pet treats for a boost of fiber. If you don’t have any on hand, all-purpose works well too!
  • Baking Soda: Helps pupcakes rise.
  • Vegetable Oil: Adds moisture and helps ingredients mix together smoothly.
  • Natural Creamy Peanut Butter: It wouldn’t be a dog treat without a little peanut butter! Just make sure the peanut butter you are using is xylitol-free! See more on the dangers of xylitol in the tips section below.
  • Plain Applesauce: Adds a subtle sweetness your dog will love. You can also swap this out for mashed banana.
  • Pumpkin Puree: I like making this from scratch to assure there aren’t any fillers or additives in it.
  • Shredded Carrots: Carrots are a great snack for dogs! Make sure these are shredded into small enough pieces to avoid choking.
  • Milk: Adds moisture to pupcake mixture.
  • Egg: Binds everything together and adds a boost of protein!

Frosting Ingredients

  • Plain Greek Yogurt: In moderation, greek yogurt is a great source of both protein and calcium for your dog!
  • Natural Creamy Peanut Butter: Gives the “frosting” a thick, pipeable consistency. Again, make sure this is xylitol-free!
  • Dog Treats: (Optional) Use dog bone treats as a garnish on top!
4-photo collage of dog cupcake batter being prepared.

How to Make Peanut Butter Pupcakes

Pupcakes are so easy to make, they’re ready in 30 minutes start to finish! They’re great treats to make for your dog’s birthday or gotcha day!

  1. Prep Pan, Preheat Oven: Preheat the oven to 350° and spray a muffin tin with non-stick spray.
  2. Whisk Dry Ingredients: In a small bowl, whisk together the flour and baking soda.
  3. Combine Remaining Ingredients: In a large bowl, stir the vegetable oil, peanut butter, applesauce, pumpkin puree, carrots, milk, and egg together. Add the dry ingredients to the wet ingredients and mix until combined.
  4. Add to Muffin Tin: Scoop the batter evenly into six cavities of the muffin pan and bake for 18-20 minutes, until a toothpick comes out clean from the center of the pupcakes.
  5. Cool and Frost: Let the pupcakes cool completely on a cooling rack before frosting and serving to your pup.

Making the Frosting

  1. Combine and Frost: In a medium bowl, combine the yogurt and peanut butter until smooth. Frost the pupcakes immediately or store the frosting in the fridge until ready to use.
  2. Garnish: Decorate with dog treats as desired.
Top-down view of pupcake batter in a muffin tin.

Ingredients to Avoid

Since we want to keep our furry friends happy and healthy, here are a few ingredients you’ll need to avoid when making treats for them at home!

  • Xylitol/Birch Sugar: Xylitol, also known as birch sugar, is toxic to dogs. This is an artificial sweetener found in things like peanut butter, candy, and gum. Always check the labels of anything you use to make dog treats with for this lethal ingredient.
  • Added Spices: Alone, spices like ginger and cinnamon are safe for dogs in small amounts, but you’ll want to avoid nutmeg at all costs. It can cause seizures and a high heart rate in dogs.
  • Added Sugars: Opt for plain applesauce and Greek yogurt when making your cupcakes. Added sugars can lead to digestive problems with your pup.
Closeup of a black and white Portuguese Water Dog eating a pupcake.

Storing Leftover Pupcakes

These doggy desserts can be kept in the fridge for a few days after you’ve made them. My two daughters love having these on hand to give to our dog when she’s being extra good.

  • In the Refrigerator: Store pupcakes covered in plastic wrap or in an airtight cupcake container. They will stay good for up to 4 days.
A peanut butter dog cupcake topped with frosting and a dog treat.
Print

Pupcakes

Pupcakes are a dog-friendly dessert your 4-legged friend will go crazy over! They're super easy to make and full of healthy ingredients for your pup!
Course Cake
Keyword pet-friendly
Prep Time 15 minutes
Cook Time 20 minutes
Total Time 35 minutes
Servings 6 Pupcakes
Calories 316kcal
Author Alyssa Rivers

Ingredients

Pupcakes

  • 1 Cup Whole Wheat Flour
  • 1 Teaspoon Baking Soda
  • 2 Tablespoons Vegetable Oil
  • ¼ Cup Natural Creamy Peanut Butter Must be Xylitol free!
  • ½ Cup Plain Applesauce
  • ½ Cup Pumpkin Puree
  • ½ Cup Shredded Carrots
  • 3 Tablespoons Milk
  • 1 Egg

Frosting

  • 1 Cup Plain Greek Yogurt
  • ½ Cup Natural Creamy Peanut Butter Must be Xylitol Free
  • Dog treats for garnish optional

Instructions

Pupcakes

  • Preheat the oven to 350° and spray a muffin pan with non-stick spray.
  • In a small bowl, whisk together the flour and baking soda.
  • In a large bowl combine the vegetable oil, peanut butter, applesauce, pumpkin puree, carrots, milk, and egg. Add the dry ingredients to the wet ingredients and mix until combined.
  • Scoop the batter evenly into six cavities of the muffin pan and bake for 18-20 minutes, until a toothpick comes out clean from the center of the pupcakes.
  • Let the pupcakes cool completely on a cooling rack before frosting and serving to your pup.

Frosting

  • In a medium bowl combine the yogurt and peanut butter until smooth. Frost the pupcakes immediately or store the frosting in the fridge until ready to use.
  • Decorate with dog treats as desired.

Nutrition

Calories: 316kcal | Carbohydrates: 28g | Protein: 15g | Fat: 18g | Saturated Fat: 4g | Polyunsaturated Fat: 4g | Monounsaturated Fat: 9g | Trans Fat: 1g | Cholesterol: 30mg | Sodium: 355mg | Potassium: 414mg | Fiber: 5g | Sugar: 8g | Vitamin A: 5020IU | Vitamin C: 2mg | Calcium: 83mg | Iron: 2mg


source https://therecipecritic.com/pupcakes/
Share:

Popular

Archive

Slider Tag

Facebook

Header Ads

Recent in Food

Blog Archive

Recent Posts

Unordered List

  • Lorem ipsum dolor sit amet, consectetuer adipiscing elit.
  • Aliquam tincidunt mauris eu risus.
  • Vestibulum auctor dapibus neque.

Pages

Theme Support

Need our help to upload or customize this blogger template? Contact me with details about the theme customization you need.