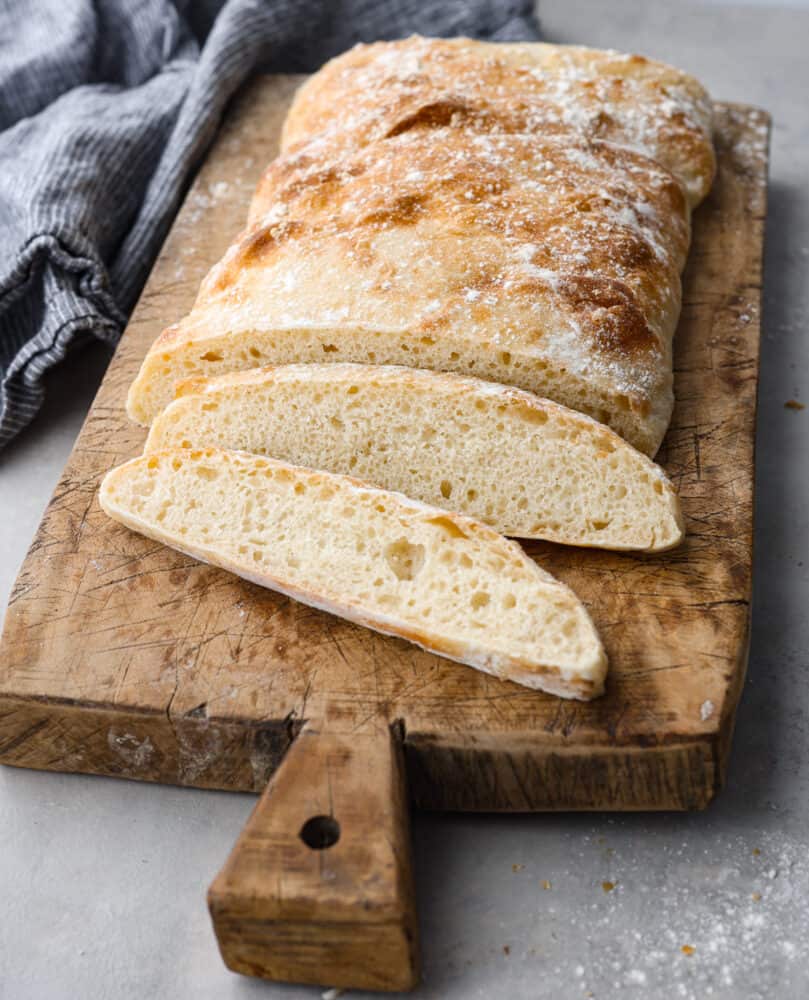
Ciabatta Bread

Make this classic Italian ciabatta bread recipe at home with just four simple ingredients! Crusty on the outside and perfectly chewy on the inside, this bread is delicious for sandwiches, served with soup, or simply toasted.

I love making homemade bread, and I have recently discovered how easy it is to make ciabatta bread! It’s so versatile because I can serve it with so many different recipes. Ciabatta is incredible with beef stew, and spaghetti, or enjoy it with this olive oil dip.
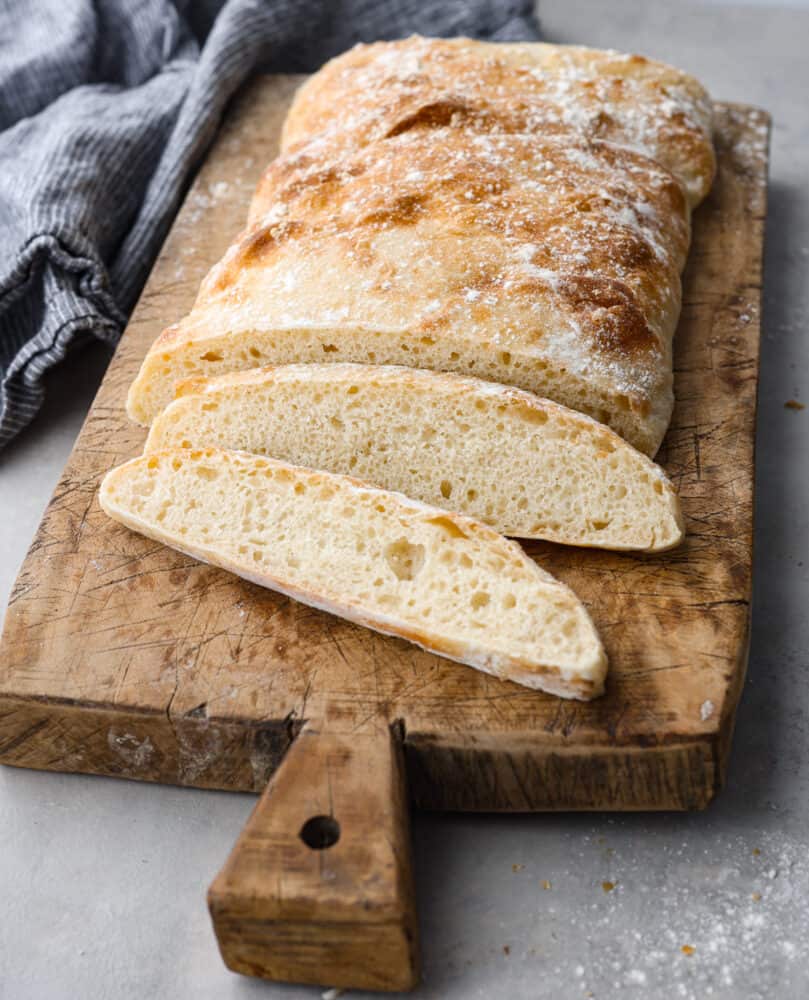
Side view of baked and slice ciabatta bread on a wood cutting board. A blue kitchen towel is next to the wood board.

What Is Ciabatta Bread?

This white Italian bread has a crispy outer crust with an airy texture on the inside. The wet dough helps produce the irregular holes that form on the inside as it bakes. I love the unique characteristics of this beautiful bread, but I also love the delicious flavor!

Ciabatta has an incredibly chewy and sturdy texture. That is why it is perfect for dips and sauces because it absorbs so well. You have to slice up this ciabatta bread and serve it with this artichoke dip, creamy cheese sauce, or my crab dip!

Bread Ingredients Needed

One of the reasons I love making this ciabatta bread recipe is that it only takes four ingredients to make! It’s so convenient because it uses such simple baking ingredients. Most likely, you have all of the ingredients on hand too! Check out the recipe card below for exact measurements!

  • Active Dry Yeast: All you need is about half of a packet!
  • Warm Water: Make sure the water is about 90° Fahrenheit.
  • Bread Flour: Bread flour is key! It’s what gives the bread a nice chewy texture.
  • Salt: Salt is a must in bread!

Ciabatta Bread Recipe

You are going to love learning how to make homemade ciabatta bread. There is something so rewarding when that warm loaf comes out of the oven! It’s pretty easy to make, you just have to allow it plenty of time to rise, and you’re all set.

Prepare the Dough

  1. Combine Yeast, Water, Flour, and Salt: In the bowl of a stand mixer fitted with a dough hook, add the yeast, water, 2 cups flour, and salt. Mix on low speed until everything is well incorporated. At this point, you may need to add more flour but only mix in ¼ cup at a time. It will be a very wet dough but still workable.
  2. Mix the Dough: Increase the speed to medium once everything is mixed well. Mix for an additional 3-4 minutes. This will help develop the gluten structure. As it proofs, and each time you give it a fold, the dough will strengthen and come together more.
  3. Place Dough in Bowl, Cover, and Proof: Remove the dough from the mixer and place it in a bowl coated with olive oil. Cover the dough and let it rise until doubled in size. This will take about 45 minutes to an hour. I always keep my hands oiled with olive oil while working with this ciabatta dough, as it is a sticky dough.

Rise and Fold the Dough

  1. Fold the Dough: Once the ciabatta dough has doubled in size, fold the dough by stretching it out and folding it in on itself. You should degas the dough during this step. Oil the bowl again if needed.
  2. Cover, Proof, and Fold: Cover and let rest for another 30-40 minutes and perform a second fold on the dough.
  3. Cover, Rest, and Prepare Baking Sheet: Cover and allow the ciabatta dough to rise again but not quite double in size, rest about 20-30 minutes. While the dough is resting, prepare a sheet pan by lining it with parchment paper and spreading a liberal amount of flour on it.
  4. Gently Place Dough on Prepared Sheet Pan: GENTLY remove dough from the bowl and place it on the lined sheet pan, lightly spread it into an even rectangle, working from under the loaf. You don’t want to put any downward pressure on the loaf and force the air out.

Rise and Bake the Bread

  1. Cover and Rise: Cover and allow the ciabatta loaf to rise again for another 30-45 minutes. Preheat oven to 420° Fahrenheit
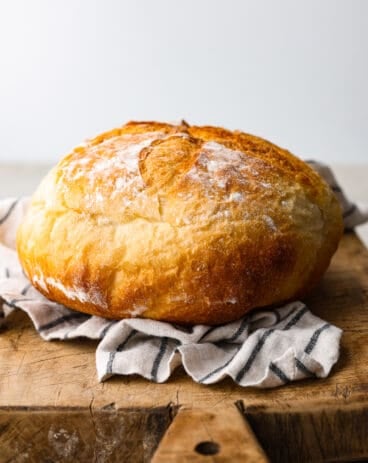
  2. Dust with Flour and Bake: The loaf is ready to bake when it is raised and airy. Dust the top of the ciabatta loaf with flour, then bake for 15-25 minutes. The bread should be an even light golden color with some brown spotting.
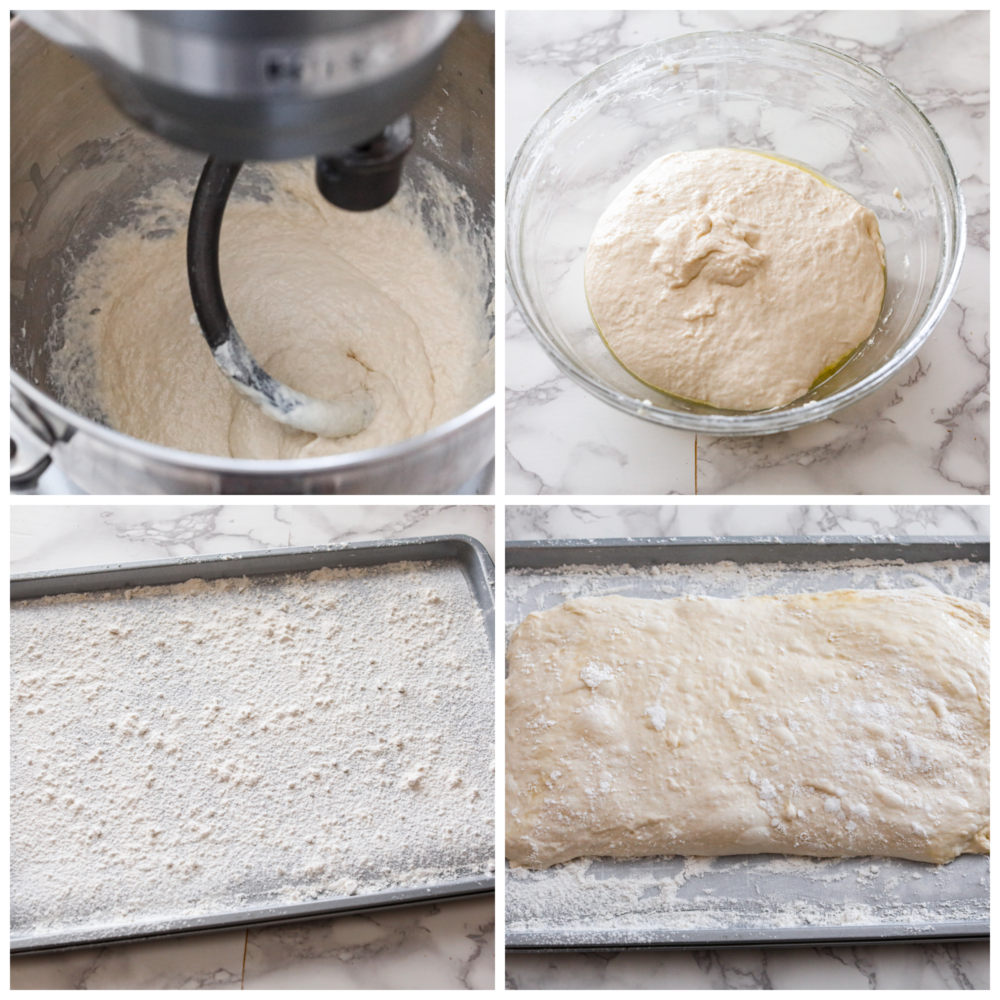
First photo is the dough in a stand mixer with the dough hook. Second photo is the dough rising in a glass bowl. Third photo is the floured prepared baking sheet pan. Fourth photo is the dough formed on the prepared pan.

Tips and Ideas

Here are some important tips when making ciabatta bread. I also have some ideas on how to use your leftover bread! There are so many yummy ideas when is comes to ciabatta because it’s so versatile.

  • Bread Flour is a Must: Bread flour is what gives the bread its chewy texture. You can use all-purpose flour if you need it, but the texture won’t be as chewy.
  • Handle Dough With Care: This loaf should have a loose, open crumb. It’s important you don’t overhandle this dough when it’s in its final form.
  • Cool Before Cutting: Allow the ciabatta loaf to cool before cutting.
  • Make Ciabatta Rolls: This dough is great for making ciabatta rolls. Once the loaf has been made into a rectangle on the floured parchment, dip a pizza cutter into flour, then cut the loaf into 6 squares.
  • Other Uses: Use up any leftover ciabatta by making it into garlic bread. It’s also great for sandwiches and croutons.
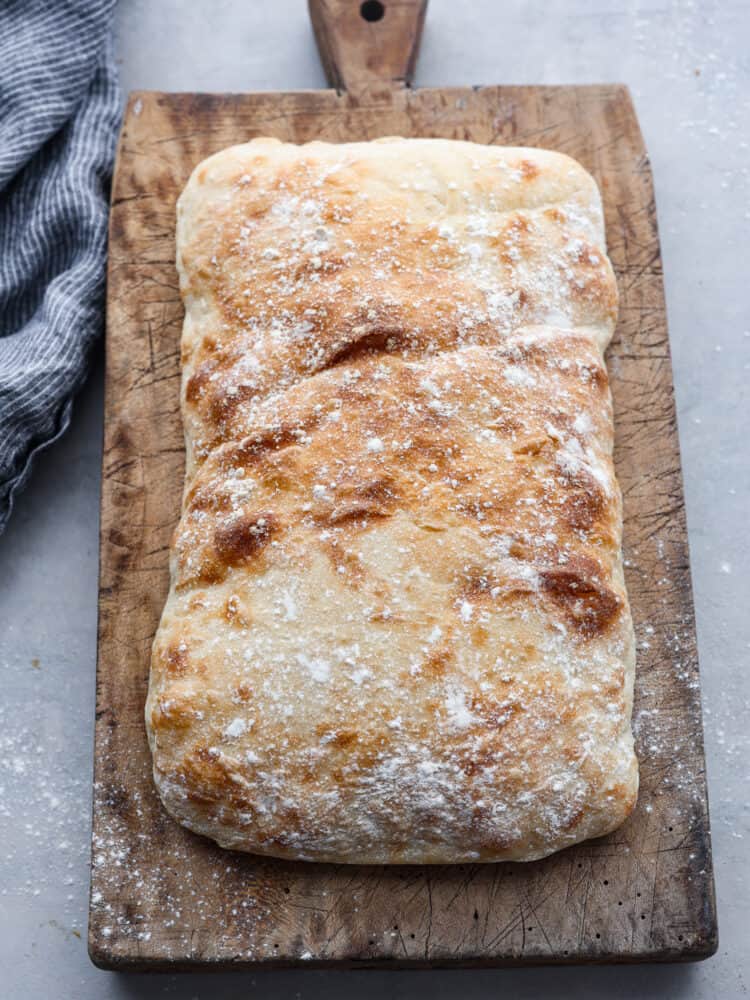
Top view of a loaf of ciabatta bread on a wood cutting board. A blue kitchen towel is next to the wood board. Flour is sprinkled on top of the loaf.

How to Store and Freeze Leftovers

Ciabatta bread is awesome to use throughout the week for sandwiches. I love having a fresh loaf to make my lunches. This bread also freezes perfectly! It thaws and tastes just as fresh as it does from the oven.

  • On the Counter: Leftover ciabatta bread can be stored in an airtight container for up to 3 days. Store on the counter at room temperature.
  • In the Freezer: Ciabatta freezes perfectly! Wrap leftover bread tightly in foil and seal in a sealable plastic bag. Freeze for up to 3 months. You can either slice it before you freeze it, or freeze it whole and slice when it’s thawed.
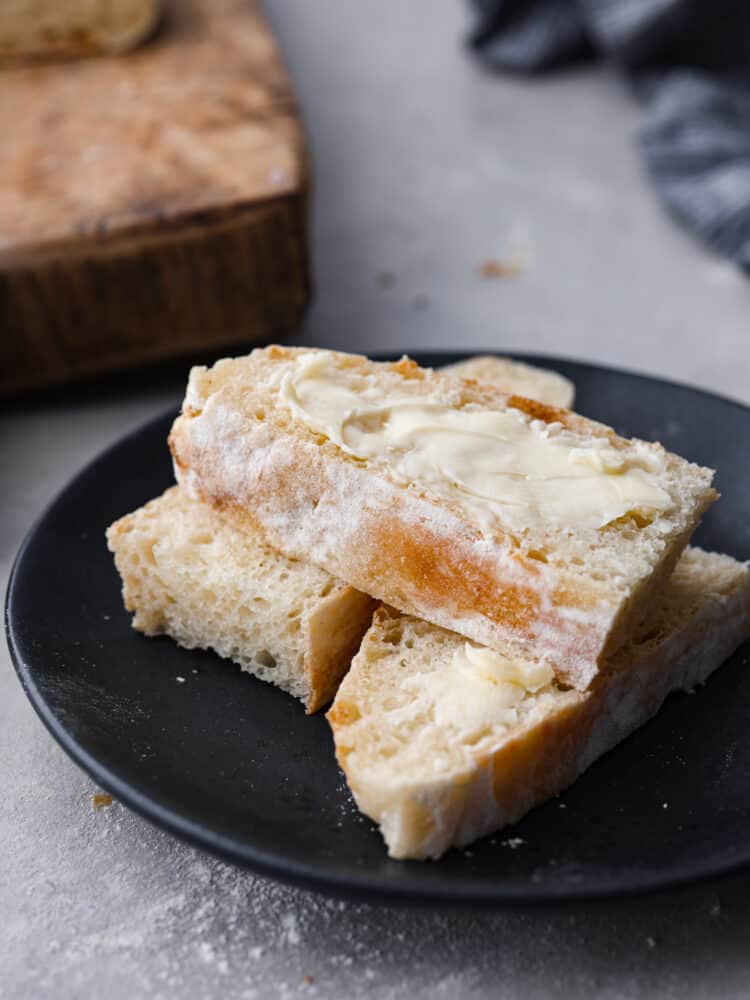
Close up view of sliced and buttered bread on a black plate. A wood cutting board nearby with scattered crumbs around the plate.
Print

Ciabatta Bread

Make this classic Italian ciabatta bread recipe at home with just 4 simple ingredients! Crusty on the outside, and perfectly chewy on the inside, this bread is delicious for sandwiches, served with soup, or simply toasted.
Course Appetizer, Bread
Cuisine Italian
Keyword Ciabatta bread
Prep Time 10 minutes
Cook Time 25 minutes
proofing time 2 hours
Total Time 2 hours 35 minutes
Servings 10 people
Calories 92kcal
Author Alyssa Rivers

Ingredients

  • 1 ½ tablespoons active dry yeast, about half a packet
  • 1 ½ cups warm water, about 90° Fahrenheit
  • 2-3 cups bread flour
  • 1 ½ teaspoons salt

Instructions

Prepare the Dough

  • In the bowl of a stand mixer fitted with a dough hook add yeast, water, 2 cups flour, salt and mix on low speed until everything is well incorporated. At this point you may need to add more flour, only mix in ¼ cup at a time. This should be a fairly wet dough, but workable.
  • Once everything is well mixed, increase speed to medium and mix for an additional 3-4 minutes. This will help develop the gluten structure. Again, this dough is fairly wet, but as it proofs and each time you give it a fold, the dough will strengthen and come together more.
  • Remove dough from mixer and place in a bowl coated in olive oil, cover and let it sit until it’s doubled in size, about 45 minutes to an hour. I always keep my hands oiled with olive oil while working with this dough, as it is a sticky dough.

Rise and Fold the Dough

  • Once the dough has doubled in size, fold the dough by stretching it out and folding it in on itself. You should degas the dough during this step. Oil the bowl again if needed.
  • Cover and let rest for another 30-40 minutes and preform a second fold on the dough.
  • Cover and allow the dough to rise again but not quite double in size, rest about 20-30 minutes. While the dough is resting, prepare a sheet pan by lining it with parchment paper and spreading a liberal amount of flour on it.
  • GENTLY remove dough from the bowl and place it on the lined sheet pan, lightly spread it into an even rectangle, working from under the loaf. You don’t want to put any downward pressure on the loaf and force the air out.

Rise and Bake the Bread

  • Cover and allow the ciabatta to rise again for another 30-45 minutes. Preheat oven to 420° Fahrenheit
  • Once the loaf is ready it should be raised and airy, dust the top of the loaf with flour and bake for 15-25 minutes. The bread should be an even light golden color with some brown spotting.

Nutrition

Serving: 1slice | Calories: 92kcal | Carbohydrates: 18g | Protein: 3g | Fat: 0.5g | Saturated Fat: 0.1g | Polyunsaturated Fat: 0.2g | Monounsaturated Fat: 0.1g | Sodium: 351mg | Potassium: 31mg | Fiber: 1g | Sugar: 0.1g | Vitamin A: 1IU | Vitamin C: 0.002mg | Calcium: 5mg | Iron: 0.2mg


source https://therecipecritic.com/ciabatta-bread/
Share:

Apple Brown Betty

An Apple Brown Betty is a warm and comforting apple dessert that is full of fall flavors. The apples are coated in lemon juice with a brown sugar spiced crumble throughout that satisfies with every bite. If you don’t like oats, this recipe is for you!

I love a good apple dessert! I even have a whole round up that I put together that has them all in one place. We’ve made so many good ones over the years! If you are looking for a great fall apple recipe, you should try this easy Apple Dump Cake, this delicious and satisfying Caramel Apple Upside Down Cake, or this stunning Apple Tart.

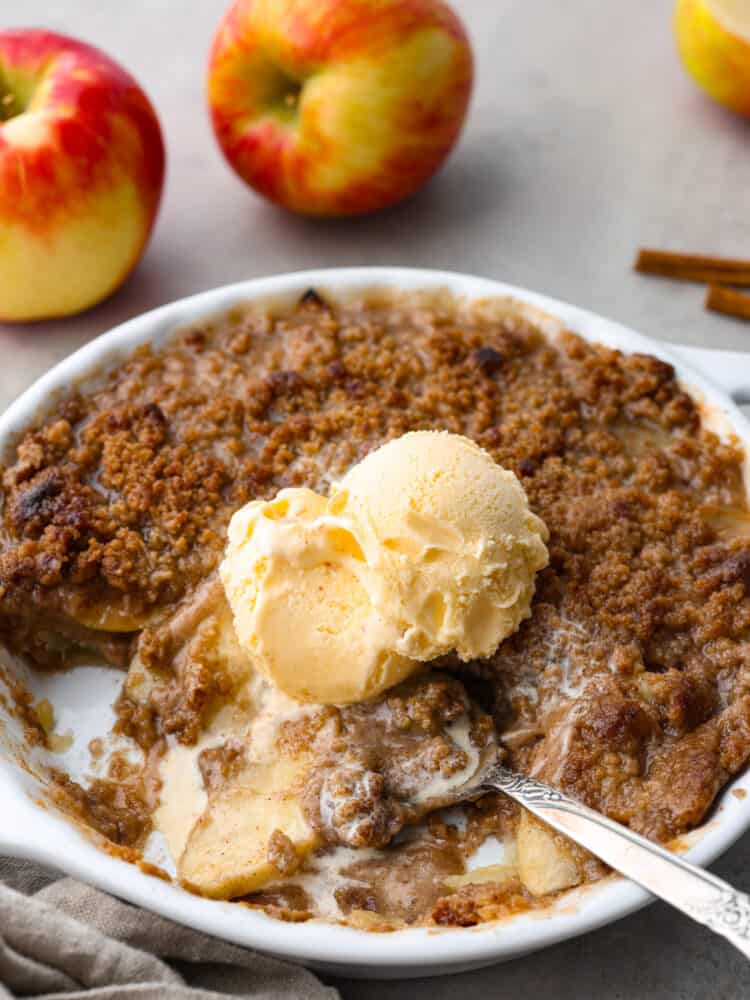
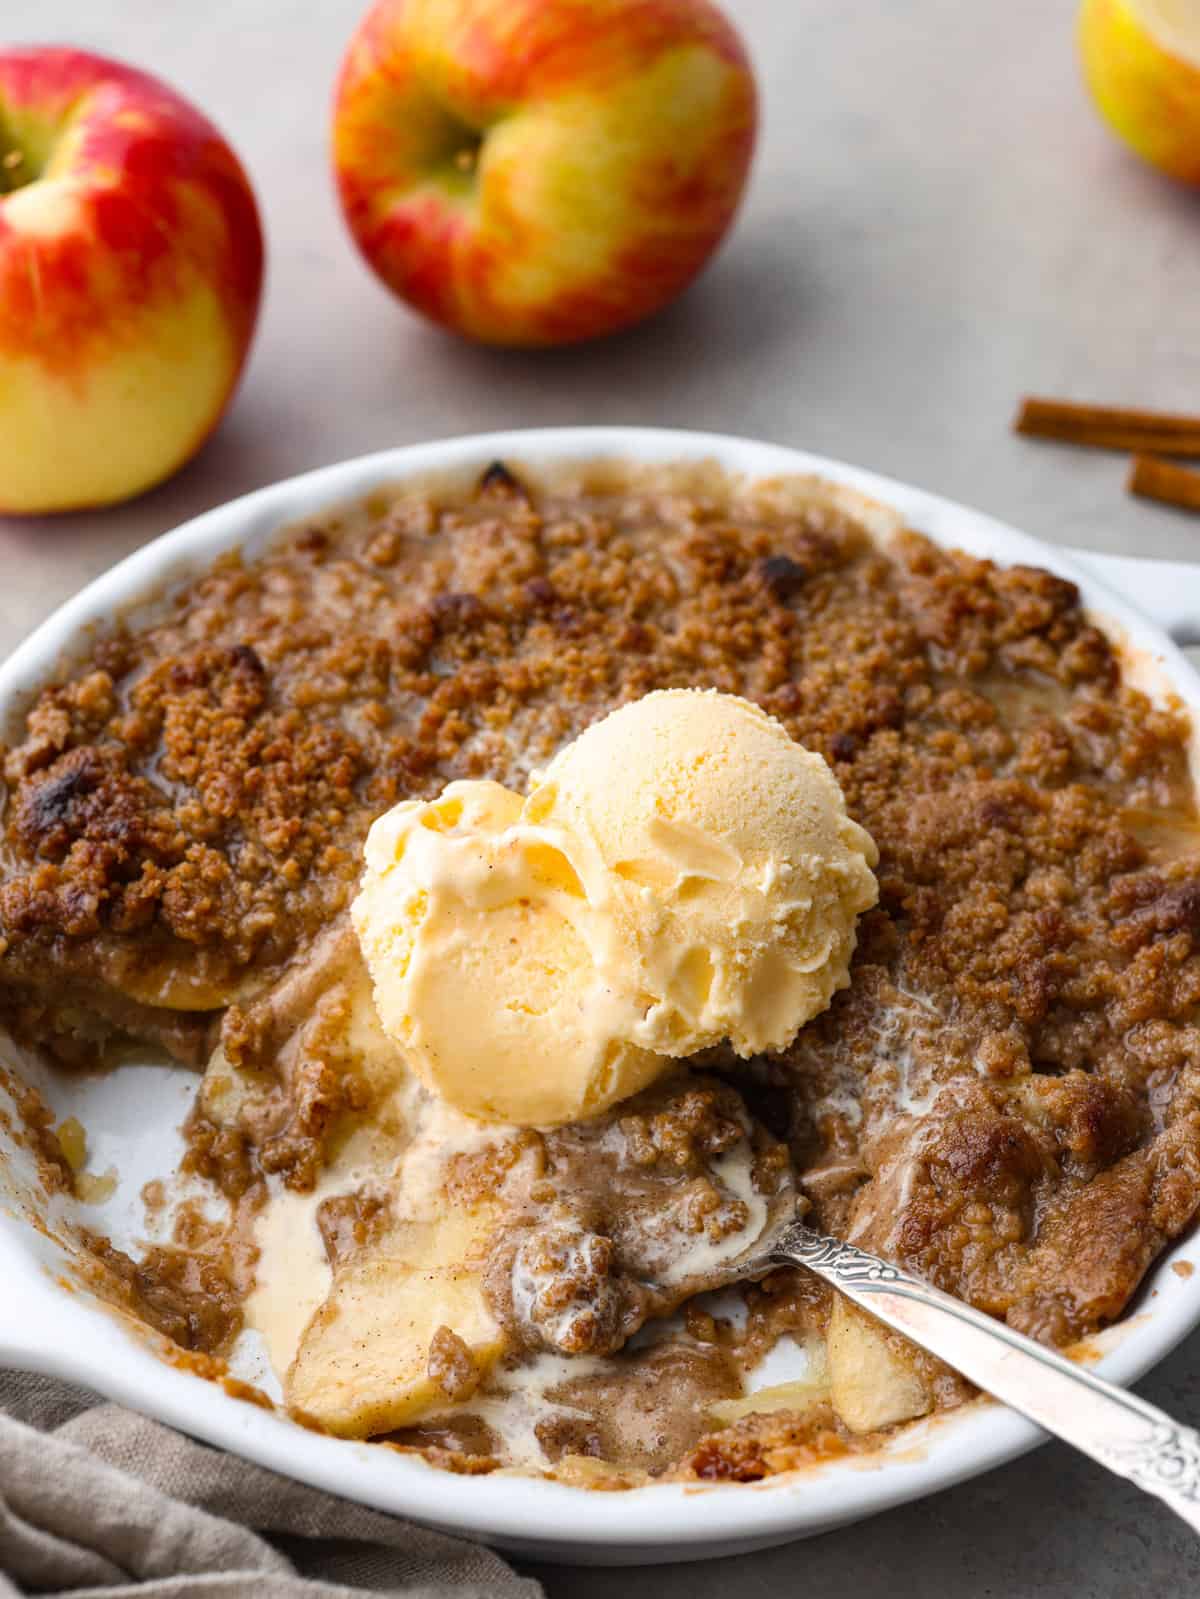
Apple Brown Betty in a white dish with vanilla ice cream on top and scoops taken out. A metal spoon is sitting in the dish with apples in the background

Apple Brown Betty

If you are a fan of fall flavors, then this is the dessert for you! Every bite is packed with warm spices and soft (but not TOO soft) apples. An apple brown betty is similar to an apple cobbler or apple crisp. What sets it apart is that the crumble mixture is spread throughout the dish instead of just sprinkled on top. Which, if we are being totally honest, is why I love this recipe so much! The topping is always my favorite part in a cobbler because it has all of the flavor! I want lots of it with every bite, and this recipe delivers!

I also really like that it doesn’t have any oats in it, it’s just flour. So if you don’t like oats, this is the perfect recipe for you! You still get that nice crumbly texture because of the way the butter is incorporated into the flour mixture. Serve it with some whipped cream or vanilla ice cream and it’s the ultimate crowd pleaser!

Ingredients

This Apple Brown Betty recipe is so easy to make, and is simple ingredients that you probably have on hand already! I love the fall spices in this recipe because apples are at their sweetest in fall. It’s a great recipe to share with family and friends! You can find exact measurements below in the recipe card.

  • Apples: I love Honeycrisp apples and Grannysmith for this recipe. You can use your favorite apple, the most important thing is how you prepare, peel, and slice the apples.
  • Lemon Juice: This helps to bring all of the fresh flavor out of the apples and brightens up the whole dish.
  • All Purpose Flour: This goes on the top to make a crumble instead of using oats.
  • Granulated Sugar: Sugar helps to make the sticky gooey topping we all love.
  • Brown Sugar: Brown sugar has mollases in it which gives it a nice deep flavor.
  • Ground Cinnamon: It’s a must in this recipe! It is the perfect fall flavor and goes great with apples.
  • Nutmeg: This spice is a little sweet and full of flavor.
  • Allspice: It is actually just from one plant but it tastes like all of your favorite fall spices combined!
  • Cardamom: It’s fruity with a little kick and I love it in this recipe!
  • Salt: A little salt helps to balance out the sweetness and to bring out all of the delicious flavors in this dessert.
  • Butter: You will want to use unsalted butter, and make sure it’s cold! You want it cold when you put it into the food processor to help it crumble.
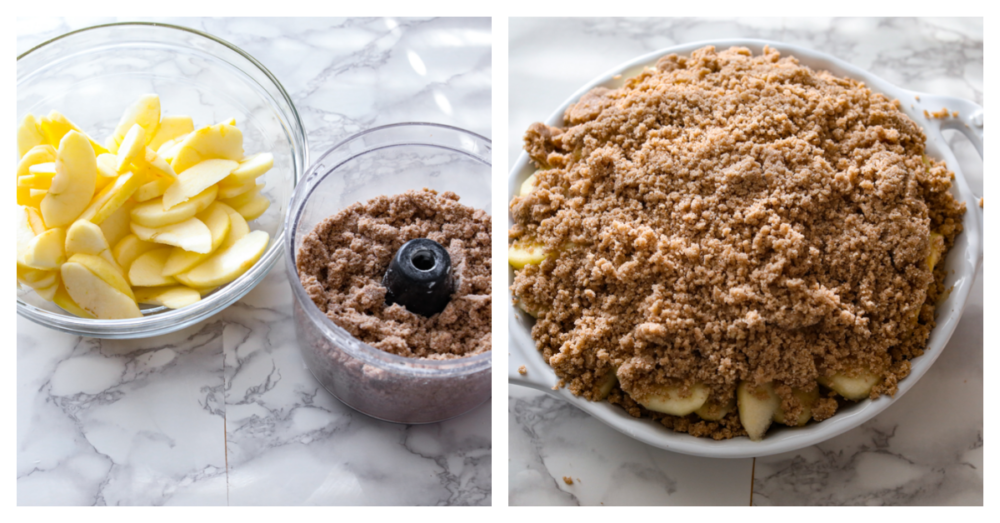
Process photos showing cut up apples in a bowl next to a food processor with the crumble in it, and then all of them combined in a baking dish.

Apple Brown Betty Recipe

Prepping the apples for baking is a bit of a labor of love, but it’s SO worth it! If you have one of those apple peelers-corers-slicers, you could definitely use that here to move things along. Other than that, this recipe is a breeze and so fun too!

  1. Prep: Preheat oven to 375 degrees Fahrenheit and lightly grease a baking dish (I used a standard pie dish) with nonstick spray or butter.
  2. Add Lemon: In a bowl, pour your lemon juice over your apples and mix to coat well.
  3. Pulse: In a food processor, pulse your flour, sugar, brown sugar, cinnamon, nutmeg, allspice, cardamom, and salt until it’s well-mixed.
  4. Add Butter: Start pulsing in your cubed butter, about 1 tablespoon at a time, until it is all incorporated. No chunks of butter should remain,
  5. Layer: In your baking dish, layer ½ of your apples on the bottom, ½ of your crumb mixture on the apples, then your remaining apples on top of the crumb mixture, and finally, the last of your crumb mixture on top.
  6. Bake: Bake for 40-50 minutes. Your apples should be tender, and your crumbs will be crisp and golden brown.

All About the Apples!

If you are wondering what kind of apples to use and how many to buy, read on!

  • Best Apples: You will want to use apples that are best for baking like Honeycrisp, Granny Smiths, and Pink Lady. I personally love Honeycrisp but Granny Smiths are usually what I have on hand so I’ve used those more than once!
  • How Many Apples to Use: 4 cups of sliced apples is about 5-6 large apples. I used 5 in this recipe. What’s most important is that you have apples in every bite, so if you have to eyeball it that works too!
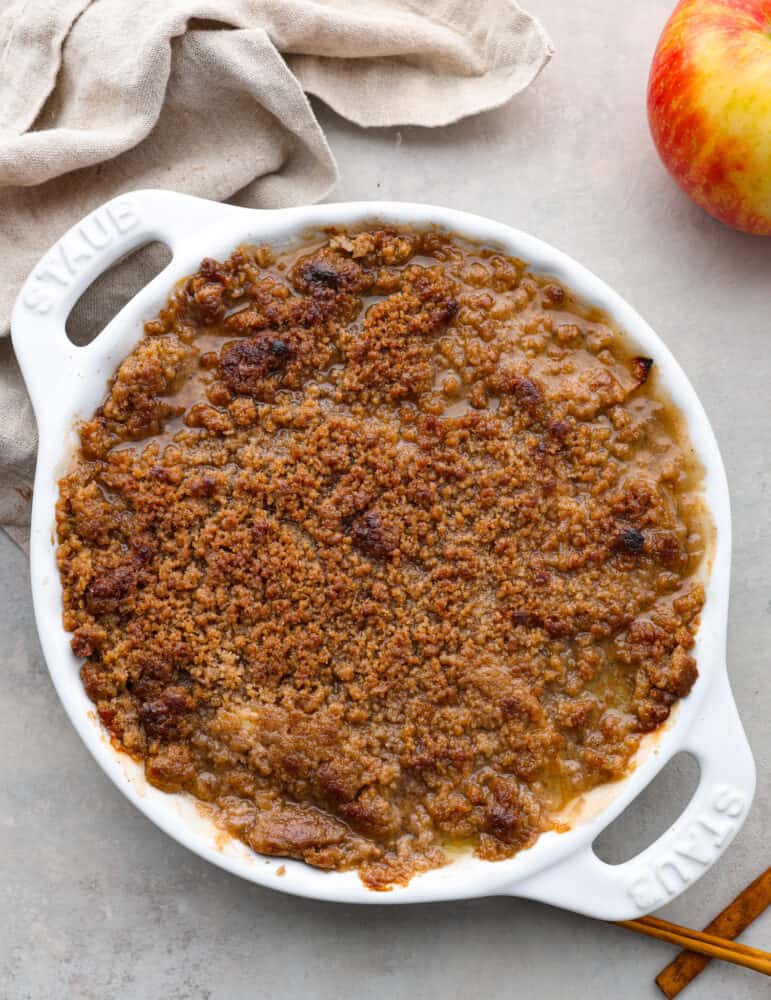
A finished and whole Apple Brown Betty in a white baking dish with a tan tea towel next to it.

Tips for Making Apple Brown Betty

This recipe is really simple and easy. You’re going to love the flavors in this dish! Here are a few tips to get the most out of this recipe.

  • Spice Blend Options: You can use any spices you like in this recipe! I love making homemade spice blends, so I’ve tried Pumpkin Pie Spice and Apple Pie Spice. They were both delicious! To substitute the spices in this recipe for a spice blend you can just leave out the spices in this recipe and add about a tablespoon of your spice blend.
  • How to Prepare the Apples: It is so important to prep the apples in a similar size so that they all bake evenly. If you have really thick slices and really thin slices, the thin ones will get mushy and the thick ones will be hard. If you have an apple peeler-corer-slicer you could use that. Just make sure you pull the dish out of the oven before they get overcooked. The thin slices will cook faster!
  • Baking Dish: You can use a pie dish or a 9×9 inch pan. It doesn’t need to be a certain shape to still bake evenly. The most important thing is to prepare the apples correctly and it will turn out great no matter what dish you use!
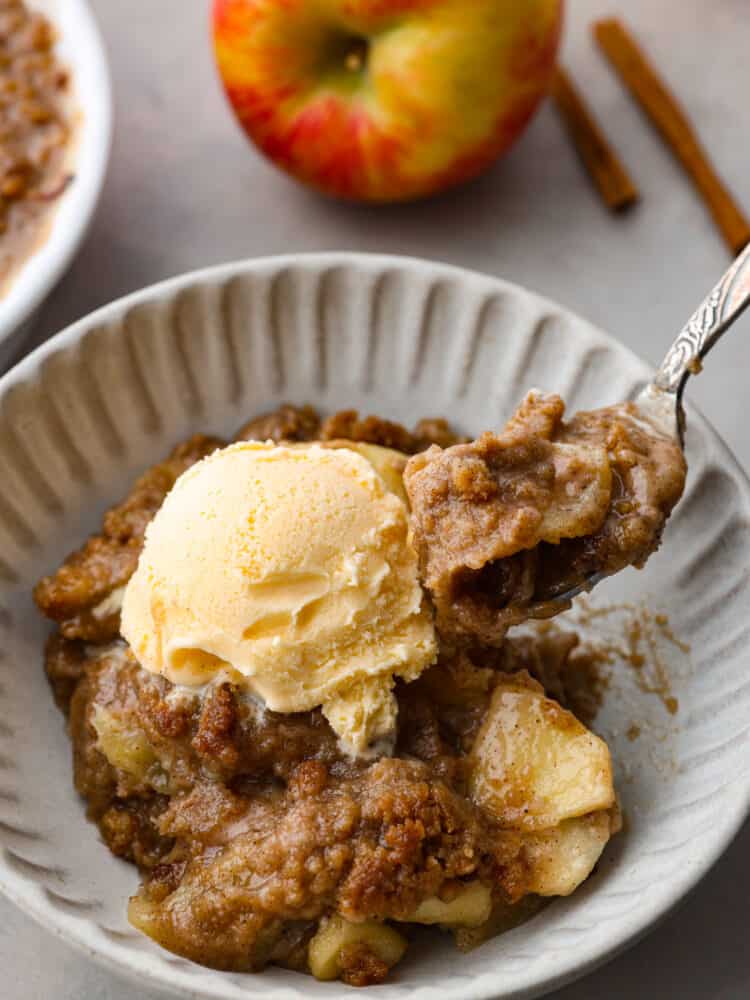
A slice of brown apple betty on a white ribbed plate with a fork taking a bite out of it.

Storing Leftovers

This Apple Brown Betty makes awesome leftovers! It’s so easy to reheat and the gooey crumble just gets, well, gooier!

In the Refrigerator: Store your leftovers in an airtight container or covered with plastic wrap and put it in the fridge. It will stay good for up to 5 days.

To Reheat: Just pop it in the microwave until warm and enjoy! You can eat it cold too, but I prefer it warmed with some vanilla ice cream.

Print

Apple Brown Betty

An Apple Brown Betty is a warm and comforting apple dessert that is full of fall flavors. The apples are coated in lemon juice with a brown sugar spiced crumble throughout that satisfies with every bite. If you don't like oats, this recipe is for you!
Course Dessert
Cuisine American
Keyword apple brown betty, apple dessert
Prep Time 30 minutes
Cook Time 50 minutes
Total Time 1 hour 20 minutes
Servings 8 people
Calories 377kcal
Author Alyssa Rivers

Ingredients

  • 4 cups apples peeled cored and thinly sliced
  • 3 tablespoons lemon juice
  • 1 cup all purpose flour
  • 1 cup granulated sugar
  • ⅓ cup brown sugar packed
  • 2 teaspoons ground cinnamon
  • ½ teaspoon nutmeg
  • ½ teaspoon allspice
  • ½ teaspoon cardamom
  • ½ teaspoon salt
  • ¾ cup cold butter cubed

Instructions

  • Preheat oven to 375℉ and lightly grease a baking dish (I used a standard pie dish) with non stick spray, or butter.
  • In a bowl pour your lemon juice over your apples and mix to coat well.
  • In a food processor pulse your flour, sugar, brown sugar, cinnamon, nutmeg, allspice, cardamom, and salt until it’s well mixed.
  • Start pulsing in your cubed butter about 1 tablespoon at a time until it is all incorporated. No chunks of butter should remain,
  • In your baking dish, layer ½ of your apples on the bottom, ½ of your crumb mixture on the apples, then your remaining apples on top of the crumb mixture, and finally the last of your crumb mixture on top.
  • Bake for 40-50 minutes, your apples should be tender and your crumbs will be crisp and golden brown.

Nutrition

Calories: 377kcal | Carbohydrates: 55g | Protein: 2g | Fat: 18g | Saturated Fat: 11g | Polyunsaturated Fat: 1g | Monounsaturated Fat: 4g | Trans Fat: 1g | Cholesterol: 46mg | Sodium: 286mg | Potassium: 113mg | Fiber: 2g | Sugar: 41g | Vitamin A: 568IU | Vitamin C: 5mg | Calcium: 26mg | Iron: 1mg


source https://therecipecritic.com/apple-brown-betty/
Share:

Tomato Basil Soup

Tomato basil soup is a healthy classic that’s simple to make from scratch and full of flavor! It only takes just over half an hour. The whole family will enjoy it as the temperatures drop and the evenings become crisper.

It’s soup season! You may also like these yummy soups: Creamy Pumpkin Soup, Classic Italian Wedding Soup, Vegetable Detox Soup, or this Easy Cauliflower Soup.

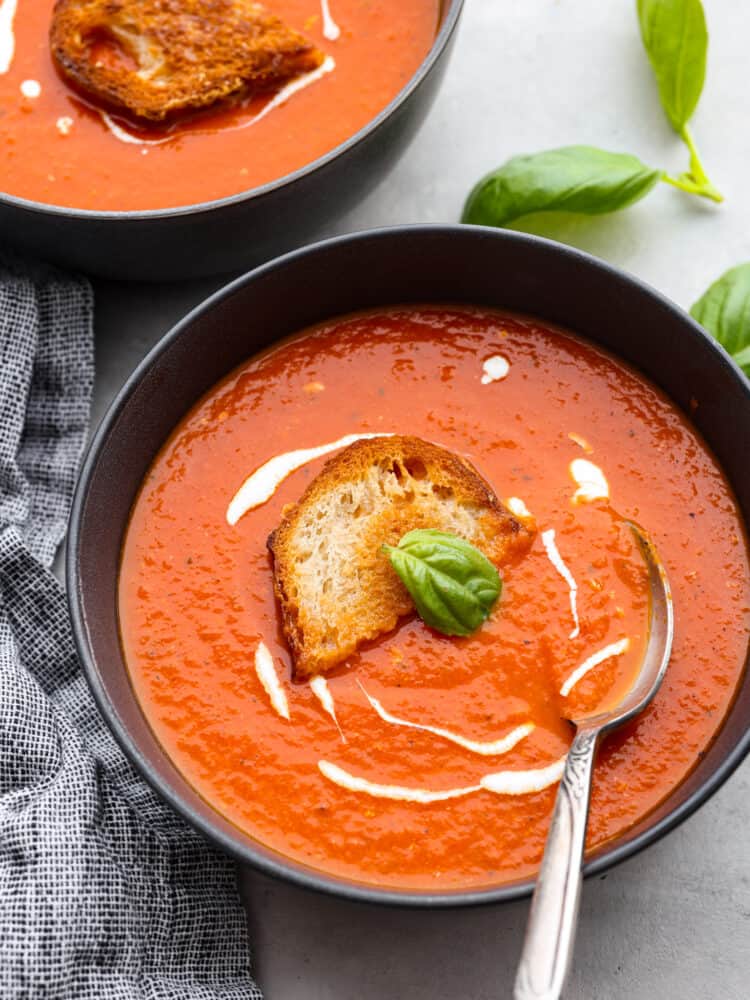
Top-down view of tomato basil soup, drizzled with cream and served with bread.

Tomato Basil Soup Recipe

I hope you’re all enjoying the fall weather! Even though I’m a warm weather girl at heart, I can’t resist soup season. Soups are some of my favorite things to make, and I know you’ll love this easy tomato soup recipe! Tomato soup has always been one of my favorites. Basil and a splash of cream take it to the next level of yumminess!

We are well into fall now, but I can eat tomato soup all year. It’s such a classic! I always keep some fresh basil plants during the warmer months, and this soup is perfect for using it up if you have some. It adds the most amazing flavor and aroma! Really though, this is going to be some of the best soup you make this season. Pair your tomato basil soup with a grilled cheese for dipping and you have a winning combo on your hands.

All Ingredients Needed

The great thing about this tomato soup recipe is that is has such a short ingredient list. The one thing you want to make sure you don’t substitute are the San Marzano tomatoes! They give this soup the best flavor ever. Note: If you are looking for exact measurements, they can all be found in the recipe card below.

  • Olive Oil: Used for sautéing your onions in.
  • Butter: Adds rich, delicious flavor!
  • Onion: I love adding chopped onion because it will give your whole pot of soup the best savory taste.
  • Minced Garlic: You can never go wrong with garlic. Add some in for an extra pop of savory flavor and aromatics!
  • Italian Seasoning: Add a dash of Italian seasoning for another layer of flavor.
  • San Marzano Tomatoes: These are a high quality type of canned tomato that will make all the difference in the way your soup tastes!
  • Chicken Broth: Adjusts the consistency of the soup and also adds flavor. For a vegetarian version, use vegetable broth.
  • Heavy Cream: Makes your tomato basil soup extra creamy! You can also add a drizzle on top for a pretty garnish.
  • Fresh Basil: Fresh basil really takes the flavor of this soup to the next level. Because it can be tricky to find in the winter months, you can substitute it with dried basil. See my tips section below for more information and how much to use!
  • Salt & Pepper: Add to taste.

What are San Marzano Tomatoes?

San Marzano tomatoes are known as some of the best quality/tasting canned tomatoes available. They’re a variety of plum tomatoes that are grown in the San Marzano region of Italy, and various brands sell them (you should be able to find them fairly easily in most grocery stores).

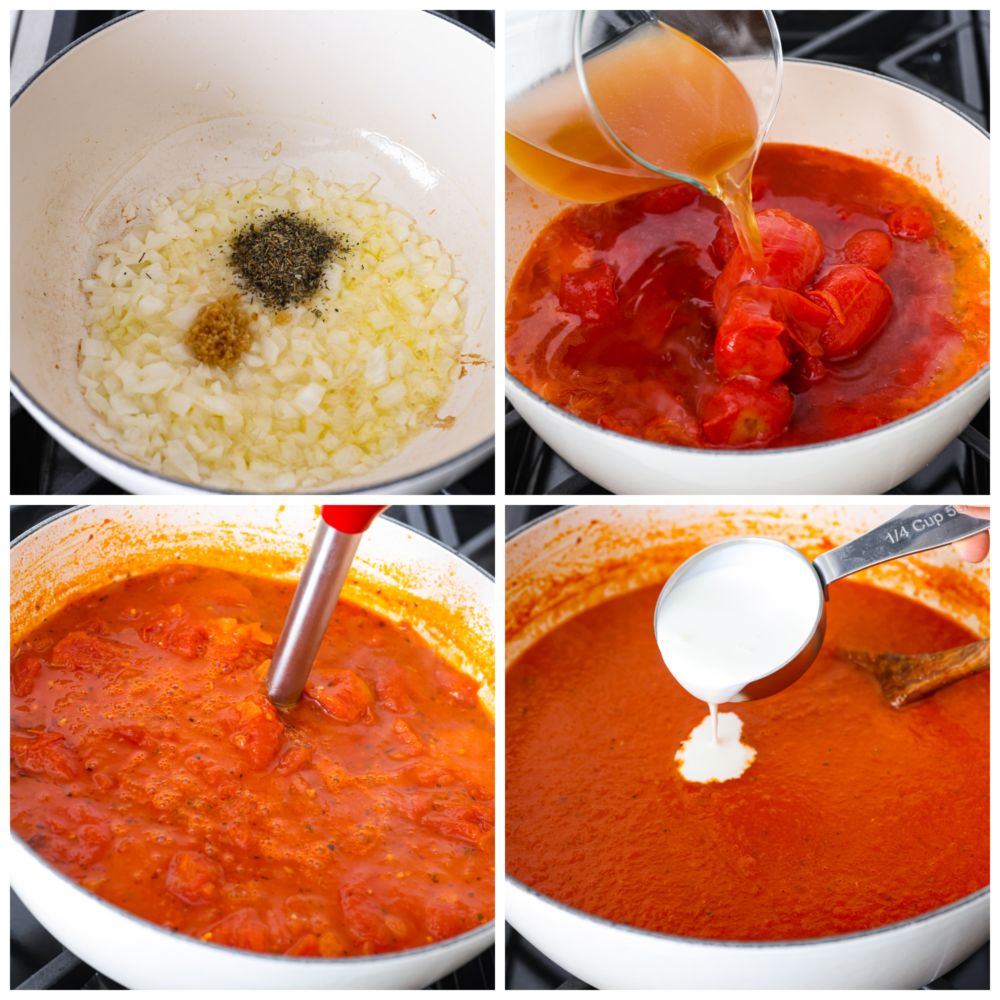
4-photo collage of tomato soup being prepared.

How to Make Tomato Basil Soup

Tomato basil soup is one of my favorite recipes for chilly days because it’s so easy to whip up! It’s such a delicious lunch and especially good served with bread (or a grilled cheese!) for dipping.

  1. Sauté Onions: Add the oil, butter, and onion to a soup pot over medium-high heat. Sauté the onion for 5-7 minutes or until it’s lightly browned.
  2. Add Garlic and Seasonings: Stir in the garlic and Italian seasoning, followed by the tomatoes and chicken broth. 
  3. Cook: Increase the heat to high and bring the soup to a boil. Reduce the heat and simmer for 8 minutes, covered, with the lid slightly ajar. 
  4. Blend and Garnish: Blend the soup (I like to use an immersion blender) until it’s smooth (you may want to let it cool a little bit first). Stir in the cream and basil and season with salt & pepper as needed.
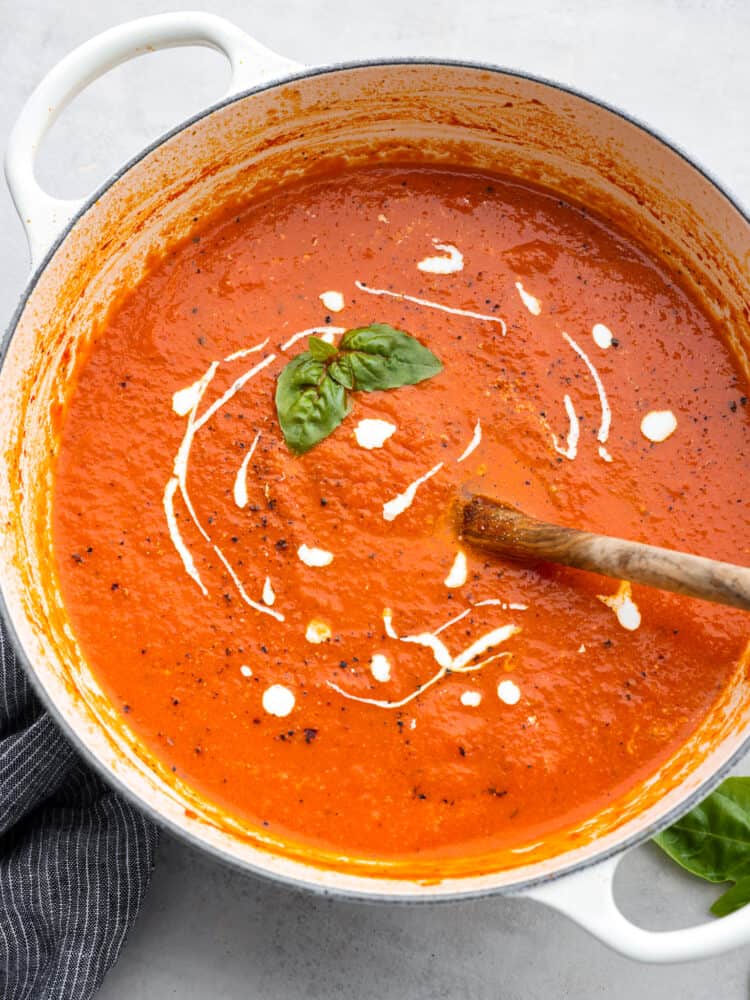
Top-down view of tomato basil soup in a blue pot, garnished with herbs and a dollop of cream.

Tips and Serving Suggestions

Whether you’re wanting to use dried basil or need some ideas on what to serve your soup with, I’ve got you covered! Here’s how to make your tomato basil soup extra tasty!

  • Can I Use Dried Basil? I recommend fresh for this soup if you can get your hands on it, but the rule is that 2 teaspoons of fresh basil = about 1 teaspoon of dried basil. I’d start with 1 teaspoon, taste the soup, and then add more if necessary.
  • Adjust Flavor: If you find the soup is a little too tart for your liking, add a little bit of sugar (it’s an old trick). Start with ½ teaspoon.
  • Serve With:  You can’t go wrong with some crusty bread (sourdough or French bread are my favorites), or try these Grilled Cheese Pull Aparts! A normal grilled cheese sandwich is delicious as well. Some fresh parmesan cheese grated over top would also taste heavenly.
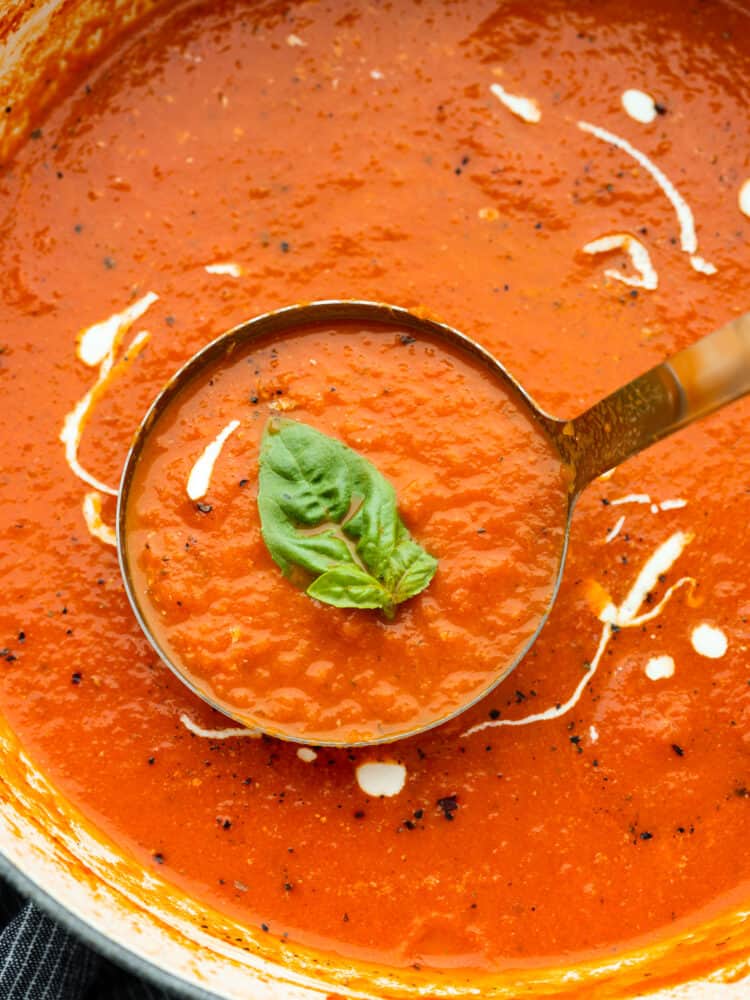
Closeup of a ladle filled with soup. There is a piece of basil in the ladle.

How Long Does Homemade Tomato Soup Last?

Here’s how to store your tomato basil soup so you can enjoy it for a tasty lunch throughout the week! I love it because it’s so easy to heat up and serve.

  • In the Refrigerator: Store in an airtight container for 3-4 days.
  • In the Freezer: Store in a freezer bag for 4-6 months. Thaw overnight in the fridge before reheating.
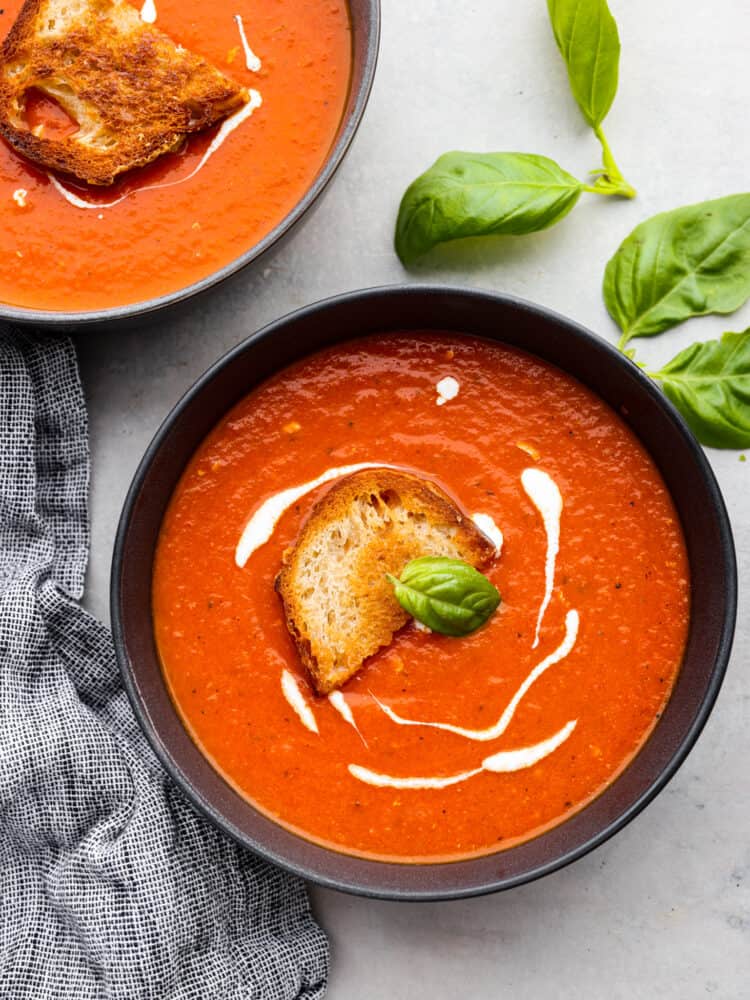
Two black bowls filled with soup.
Print

Tomato Basil Soup

Tomato basil soup is a healthy classic that's simple to make from scratch and full of flavor! It only takes just over half an hour. The whole family will enjoy it as the temperatures drop and the evenings become crisper.
Course Dinner, Main Course
Cuisine American
Keyword Tomato Basil Soup Recipe
Prep Time 10 minutes
Cook Time 25 minutes
Total Time 35 minutes
Servings 6
Calories 134kcal
Author Alyssa Rivers

Ingredients

  • 1 tablespoon olive oil
  • 2 tablespoons butter
  • 1 medium onion (chopped)
  • 1 clove garlic (minced)
  • 1 dash Italian seasoning
  • 2 (28 fluid ounce) cans whole San Marzano tomatoes (with juices)
  • 1.5 cups chicken or vegetable broth
  • 1/2 cup heavy cream (or to taste)
  • 12 leaves fresh basil (torn)
  • Salt & pepper (to taste)

Instructions

  • Add the oil, butter, and onion to a soup pot over medium-high heat. Sauté the onion for 5-7 minutes or until it's lightly browned.
  • Stir in the garlic and Italian seasoning, followed by the tomatoes and chicken broth.
  • Increase the heat to high and bring the soup to a boil. Reduce the heat and simmer for 8 minutes, covered, with the lid slightly ajar.
  • Blend the soup (I like to use an immersion blender) until it's smooth (you may want to let it cool a little bit first). Stir in the cream and basil and season with salt & pepper as needed.

Notes

  • I recommend using the canned whole San Marzano tomatoes (it’s a variety of tomatoes available from different brands). They’re great for cooking with and have wonderful flavor.

Nutrition

Calories: 134kcal | Carbohydrates: 3g | Protein: 1g | Fat: 13g | Saturated Fat: 7g | Cholesterol: 37mg | Sodium: 277mg | Potassium: 42mg | Fiber: 1g | Sugar: 1g | Vitamin A: 586IU | Vitamin C: 2mg | Calcium: 22mg | Iron: 1mg


source https://therecipecritic.com/tomato-basil-soup/
Share:

Popular

Archive

Slider Tag

Facebook

Header Ads

Recent in Food

Blog Archive

Recent Posts

Unordered List

  • Lorem ipsum dolor sit amet, consectetuer adipiscing elit.
  • Aliquam tincidunt mauris eu risus.
  • Vestibulum auctor dapibus neque.

Pages

Theme Support

Need our help to upload or customize this blogger template? Contact me with details about the theme customization you need.