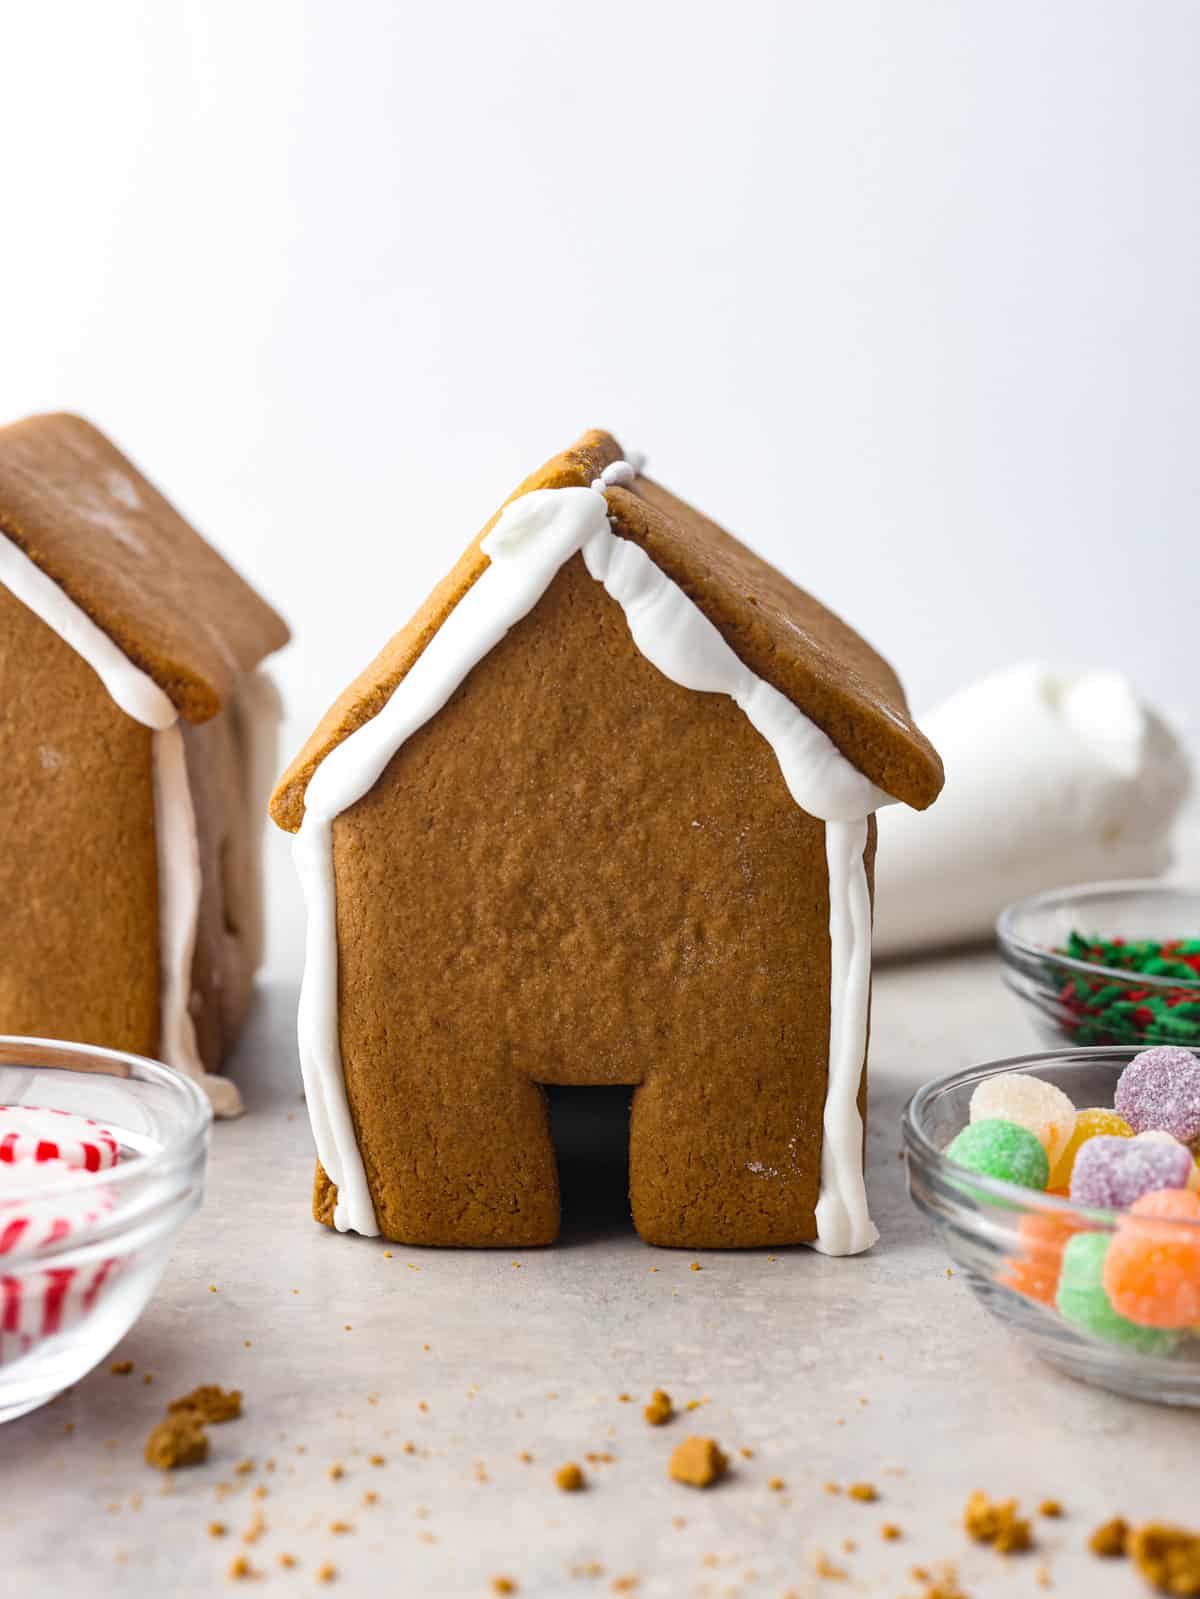
Gingerbread House

Nothing says holiday season like a Gingerbread house sitting on the counter! This recipe includes the recipe for gingerbread, a template to print out the ginger bread house pieces, and how to make the royal icing. This is the perfect recipe for the whole family to enjoy!

I love making desserts together with my family during the colder months. Warming up the house with the oven is my favorite way to spend chilly evenings. I also love the way that the house smells when you have spiced desserts baking. This holiday season you have to try these delicious Pumpkin Pecan Pie Bars, these cute and festive Christmas Tree Sugar Cookies, and this classic Old Fashioned Apple Cobbler.
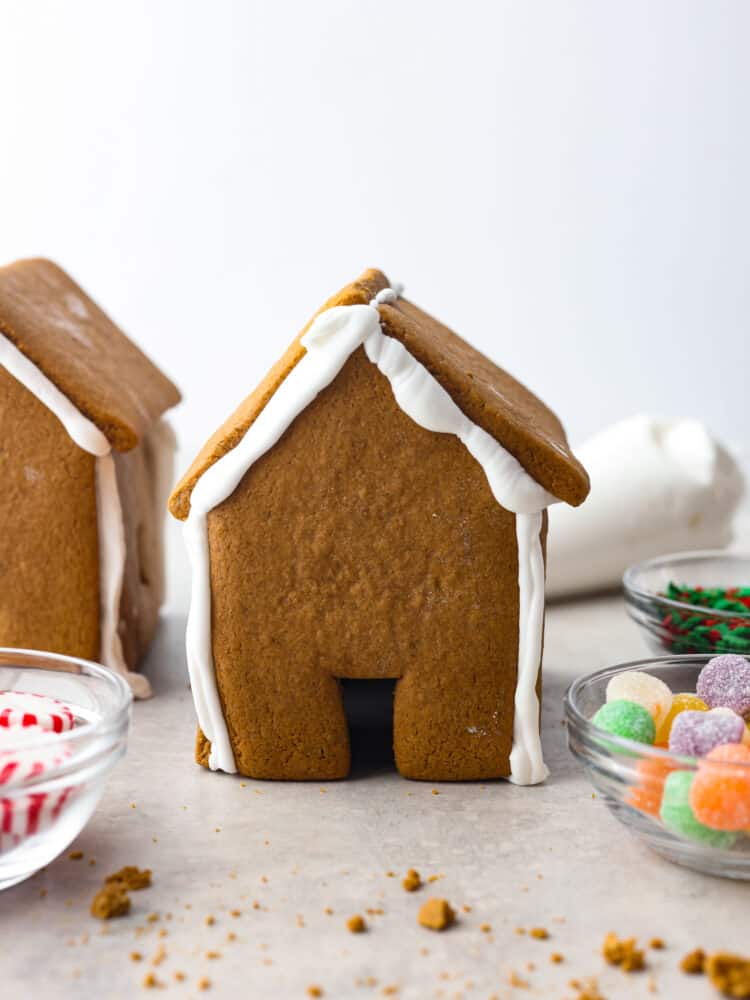
Gingerbread house with bowls of candy around it and another house in the background.

Gingerbread House Recipe

Ok, this is the most fun I’ve had writing a recipe! There is nothing like getting the family together and putting together the most adorable holiday decor. You can also eat the gingerbread house, which is a big bonus. I will say, this recipe is meant to make firm gingerbread that will hold up to the weight of stacking and decorations, so it is pretty hard and not as sweet as traditional gingerbread. But if you want some gingerbread that is soft and delicious, you can make these cute gingerbread people to go with your houses!

This recipe comes with everything you will need to build your houses! First, print off the templates for the houses. Then make the gingerbread dough and cut out the pieces. While the pieces are baking, make your royal icing that will act as the glue. Then you get to decorate! The decorations are up to you, but gum drops, candy canes, and peppermint candies make great additions. So whip up some white hot chocolate or wassail and get to baking!

Ingredients

You are making a cookie dough, so you will need the basic pantry items. You will also need molasses to make these gingerbread houses, which you should be able to find in the baking aisle of your grocery store. Don’t forget to pick up the meringue powder as well, you will need it to get your icing nice and firm! You can find exact measurements below in the recipe card.

Gingerbread

  • Butter: You will want unsalted butter, and make sure to leave it out so that it is at room temperature when you go to make your dough.
  • Dark Brown Sugar: Dark brown sugar has a deeper flavor and color because it has more molasses in it. It will make a difference in your dough.
  • Granulated Sugar: Your regular pantry sugar will work great.
  • Vanilla: Vanilla extract gives the cookie a little extra vanilla flavor and brings out the other warm flavors in the gingerbread.
  • Molasses Unsulphered: Most molasses is unsulphered. It is the more pure version of molasses and it is what you will want for this dough.
  • Egg: I always use grade A eggs in my recipes.
  • All-Purpose Flour: Your regular pantry flour will work great for this recipe.
  • Ground Cinnamon: Cinnamon is a warm spice that is a MUST in gingerbread!
  • Ground Ginger: Ginger gives a little spice to the cookie, and makes it taste warmer. You will miss this flavor if you leave it out!
  • Cloves: Ground cloves are actually a little sweet, but still have a warm flavor.
  • Salt: Salt brings out all of the flavors in this dough and helps to cut down on sweetness.
  • Baking Powder: Baking powder helps the dough rise while it’s baking in the oven. You don’t want it to rise a lot. Just enough to make a nice looking cookie.
  • Milk: Milk has fat that helps the ingredients come together and adds great flavor.

Royal Icing

  • Powdered Sugar: Powdered sugar is really fine sugar that makes the perfect royal icing. It melts into the water and becomes really smooth and shiny.
  • Meringue Powder: Meringue powder is a stabilizer that helps the royal frosting get stiff. It will be the perfect consistency to act as your glue for the gingerbread house with this ingredient.
  • Water: You can adjust the consistency of the frosting by adding more or less water. If the frosting gets too runny, then add more powdered sugar until it gets thicker.
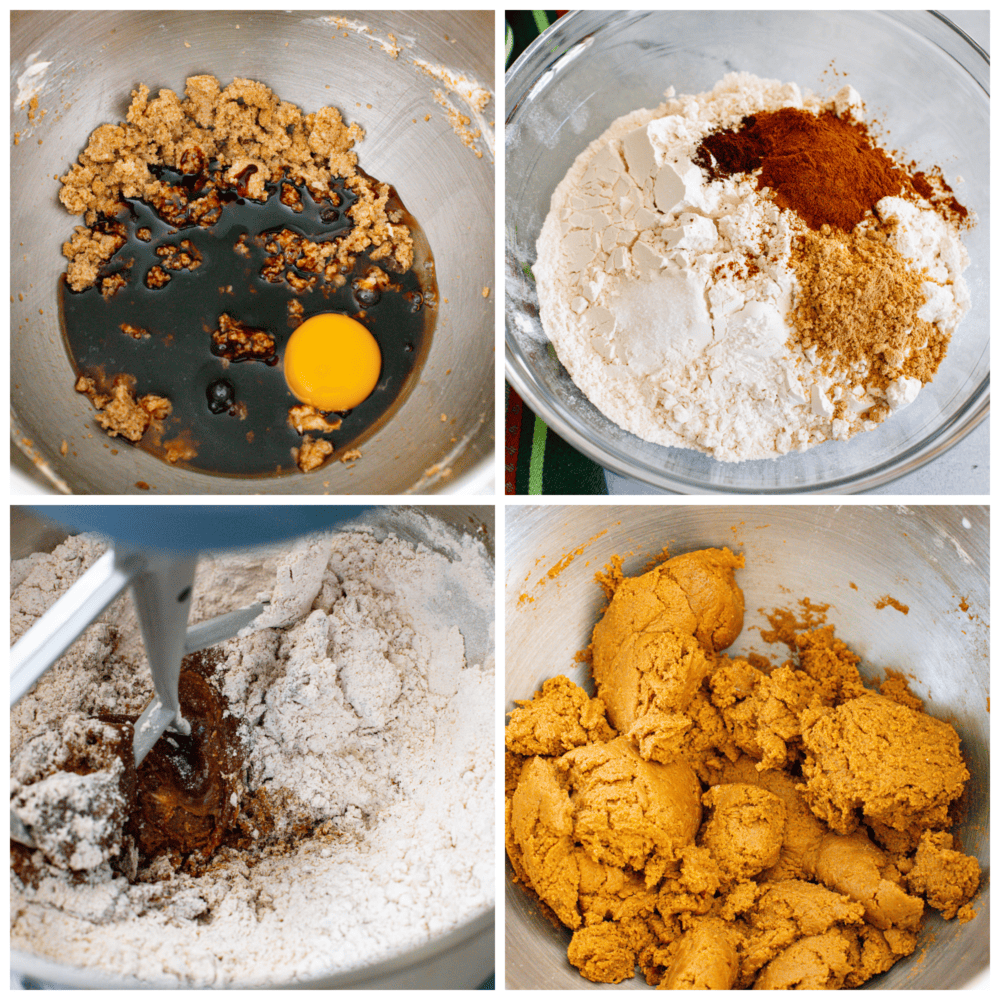
Process photos showing the ingredients to be creamed in a bowl, the dry ingredients mixed together, the dry ingredients added to the wet, and them all mixed together.

How to Make a Homemade Gingerbread House

This is such a fun recipe! The dough is not hard to make, which makes this the perfect recipe to make with kids and friends. It also makes the house smell like the holidays and fills the kitchen with Christmas cheer! I loved making this recipe, and I know you’ll enjoy it too.

Make Dough

  1. Prep: Preheat the oven to 375° and line two baking sheets with parchment paper. Set aside.
  2. Cream Butter and Sugar: In the bowl of a stand mixer, use the paddle attachment to beat together the butter, both sugars and vanilla until light and fluffy, about 3 minutes. Scrape down the sides and bottom of the bowl and add the molasses and egg. Beat again for 1-2 minutes, until incorporated.
  3. Whisk: In a medium bowl, whisk together the flour, cinnamon, ginger, cloves, salt, and baking powder. Add the dry ingredients to the wet and mix on low until a dough begins to form. Scrape down the sides and bottom of the bowl again before mixing on medium speed. Add the milk to help the dough not be too crumbly.
  4. Roll Out Dough: Transfer the dough to a lightly floured surface and roll out to ¼ inch thick. Using the already printed and cut out template for the house pieces, use a sharp paring knife to cut out the pieces of the house.

Bake and Make Frosting

  1. Bake: Carefully transfer the cut-out gingerbread house pieces to the prepared baking sheets, leaving at least 2 inches between them. Bake for 11-14 minutes, until the edges and centers are set. Let cool completely on the baking sheets.
  2. Make Icing: Once completely cooled, prepare the royal icing to use as glue for construction.
  3. Whisk: In the bowl of a mixer, add the powdered sugar and meringue powder. Whisk together. Add 4 tablespoons of water and use the paddle attachment to mix on low speed. As the powdered sugar becomes more moistened as it mixes, increase the speed and beat until a very thick, smooth icing is made. If it is not moist enough to incorporate all the dry ingredients, add the 5th tablespoon of water. This icing should be very, very thick in order to hold together the heavy gingerbread.
  4. Prep Piping Bag: Transfer the royal icing to a piping bag or a large ziplock bag. It will dry quickly if left exposed, so be sure to cover any extra icing tightly with plastic wrap.
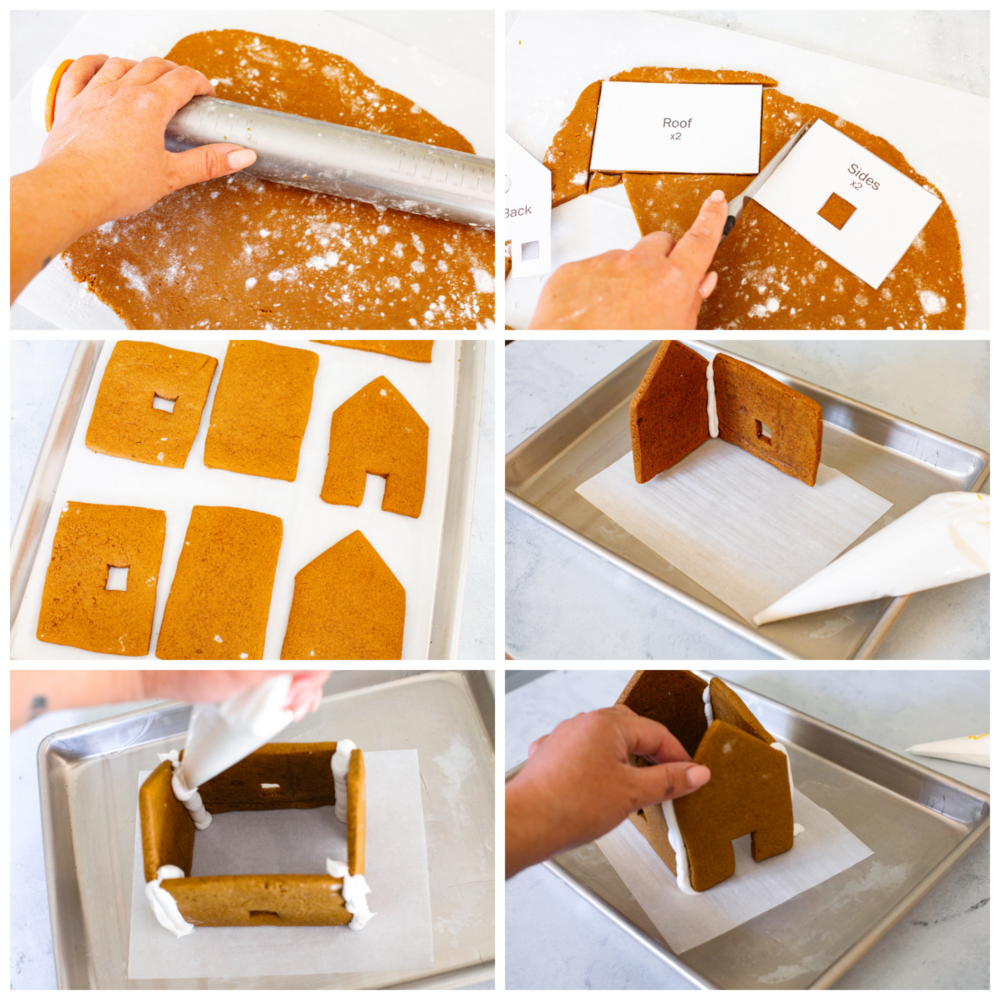
Process photos showing the dough rolled out and cut into gingerbread house shapes, then baked and assembled on a pan with parchment.

Assemble The Houses

  1. Assemble: Assemble the houses by using the royal icing as glue. Be generous and work quickly, as the royal icing will begin to crust over quite quickly. Pipe icing along the side of the front of the house then press the side piece to it to form the first corner. Repeat with the second side.
  2. Pipe: Pipe icing along the two sides of the back piece and press firmly against the two standing sides to form the third and fourth corners. Add more icing the inside of the corners as needed to reinforce their stability.
  3. Add Roof: Pipe icing along the roofline and top of the side on one side of the house. Press the first roof piece in place. Outline the remaining opening with icing and carefully press the last roof piece on. This is the trickiest piece to put on and must be done carefully so the rest of the house does not collapse.
  4. Dry: Allow the houses to sit at least 24 hours to let the royal icing dry and harden before decorating.
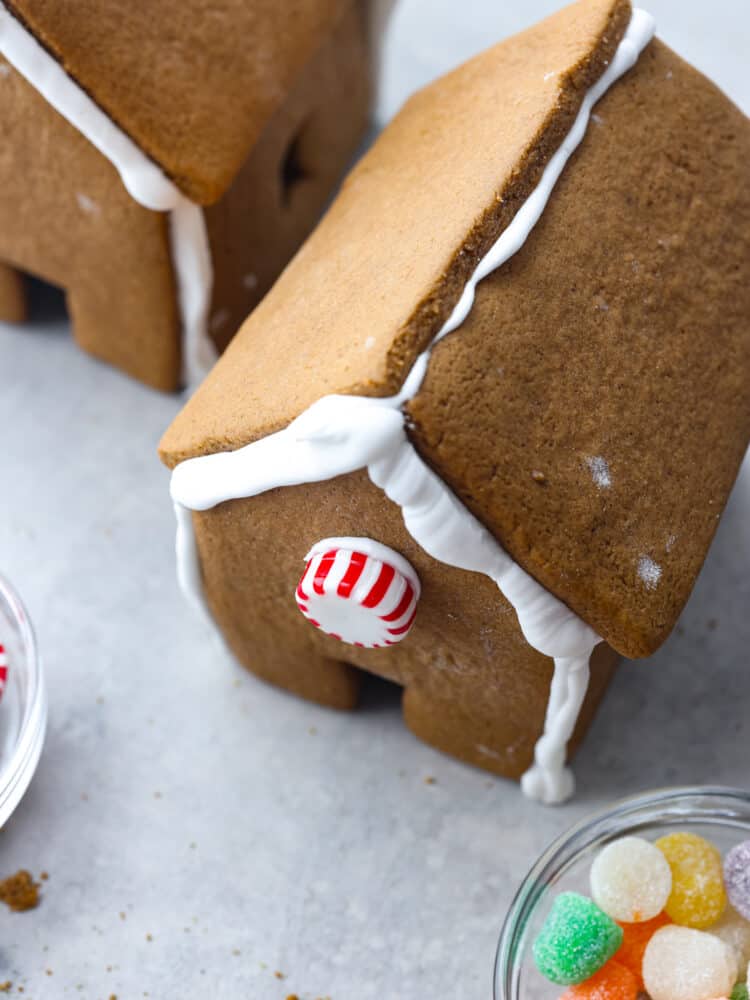
A top view of a gingerbread house with a peppermint candy on the front.

Tips for Making Gingerbread Houses

If this is your first time making gingerbread, then you will want to read through these tips. It isn’t hard, but it helps to know a little about your dough!

  • About this Gingerbread: This recipe isn’t really designed for gingerbread to eat, more so for a stable building gingerbread (also called construction grade gingerbread). It IS edible and it tastes pretty good, but it’s not as sweet as a regular gingerbread cookie.
  • Softer Gingerbread: It can be baked a few minutes less for a softer bite (but not recommended for houses/structures because it won’t withstand the weight of the royal icing) and it can be baked a few minutes longer for an even stronger construction cookie.
  • Using Another Template: If using a different house template, the baking time will vary because of the size. The larger the piece, the longer the bake.
  • When Chilling Before Baking: It can be chilled before cutting or baking, but will need at least an extra minute or two in the oven.
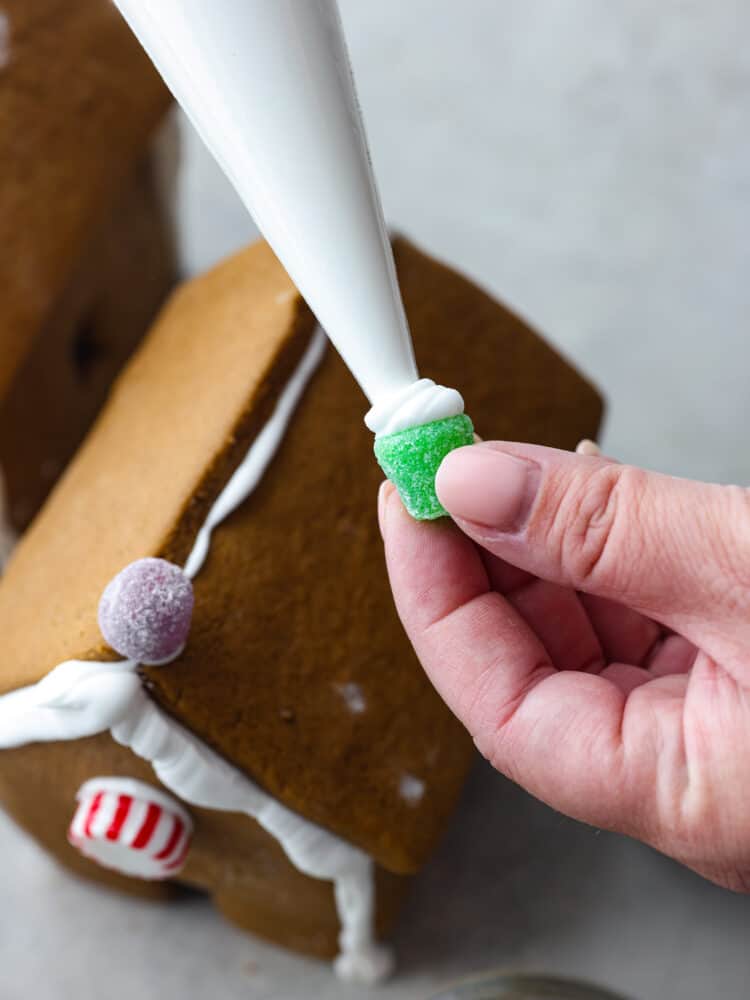
A hand piping royal icing onto the bottom of gumdrops with a gingerbread house in the background.

Storing Gingerbread Houses

If you are not planning on eating your gingerbread house, then it is really easy to store! You will want to keep it out on the counter for everyone to see and enjoy!

  • On the Counter: Keep your gingerbread house on your counter to enjoy throughout the holidays. It will last on your counter as long as you want to show it off! If you plan to eat it, keep it in an airtight container or wrapped in plastic wrap. It will last for about a week. After a week it will be too hard to eat!
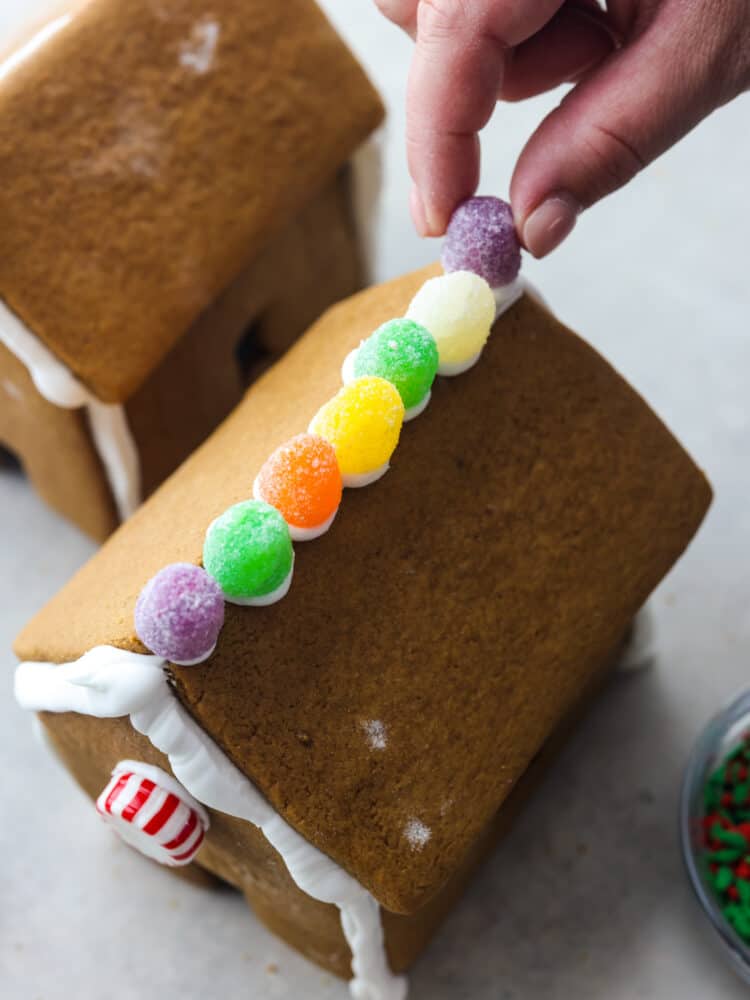
A hand placing the gum drops on top of the roof of a gingerbread house.
Print

Gingerbread House

Nothing says holiday season like a Gingerbread house sitting on the counter! This recipe includes the recipe for gingerbread, a template to print out the ginger bread house pieces, and how to make the royal icing. This is the perfect recipe for the whole family to enjoy!
Course Dessert
Cuisine American
Keyword gingerbread, gingerbread house
Prep Time 45 minutes
Cook Time 14 minutes
Total Time 59 minutes
Servings 2 Gingerbread Houses
Calories 2616kcal
Author Alyssa Rivers

Ingredients

Gingerbread

  • 6 Tablespoons Unsalted Butter Softened
  • ¾ Cup Dark Brown Sugar
  • 2 Tablespoons Granulated Sugar
  • 2 Teaspoons Vanilla
  • ½ Cup Molasses Unsulphered
  • 1 Egg
  • 3 Cups All-purpose Flour
  • 1 Tablespoon Ground Cinnamon
  • 1 Tablespoon Ground Ginger
  • ½ Teaspoon Cloves
  • ½ Teaspoon Salt
  • ½ Teaspoon Baking Powder
  • 2 Tablespoons Milk

Royal Icing

  • 4 Cups Powdered Sugar
  • 3 Tablespoons Meringue Powder
  • 6-7 Tablespoons Water

Instructions

  • Preheat the oven to 375° and line two baking sheets with parchment paper. Set aside.
  • In the bowl of a stand mixer, use the paddle attachment to beat together the butter, both sugars and vanilla until light and fluffy, about 3 minutes. Scrape down the sides and bottom of the bowl and add the molasses and egg. Beat again for 1-2 minutes, until incorporated.
  • In a medium bowl, whisk together the flour, cinnamon, ginger, cloves, salt, and baking powder. Add the dry ingredients to the wet and mix on low until a dough begins to form. Scrape down the sides and bottom of the bowl again before mixing on medium speed. Add the milk to help the dough not be too crumbly.
  • Transfer the dough to a lightly floured surface and roll out to ¼ inch thick. Using the already printed and cut out template for the house pieces, use a sharp paring knife to cut out the pieces of the house.
  • Carefully transfer the cut-out pieces to the prepared baking sheets, leaving at least 2 inches between them. Bake for 11-14 minutes, until the edges and centers are set. Let cool completely on the baking sheets.
  • Once completely cooled, prepare the royal icing to use as glue for construction.
  • In the bowl of a mixer, add the powdered sugar and meringue powder. Whisk together. Add 4 tablespoons of water and use the paddle attachment to mix on low speed. As the powdered sugar becomes more moistened as it mixes, increase the speed and beat until a very thick, smooth icing is made. If it is not moist enough to incorporate all the dry ingredients, add the 5th tablespoon of water. This icing should be very, very thick in order to hold together the heavy gingerbread.
  • Transfer the royal icing to a piping bag or a large ziplock bag. It will dry quickly if left exposed, so be sure to cover any extra icing tightly with plastic wrap.
  • Assemble the houses by using the royal icing as glue. Be generous and work quickly, as the royal icing will begin to crust over quite quickly. Pipe icing along the side of the front of the house then press the side piece to it to form the first corner. Repeat with the second side.
  • Pipe icing along the two sides of the back piece and press firmly against the two standing sides to form the third and fourth corners. Add more icing the inside of the corners as needed to reinforce their stability.
  • Pipe icing along the roofline and top of the side on one side of the house. Press the first roof piece in place. Outline the remaining opening with icing and carefully press the last roof piece on. This is the trickiest piece to put on and must be done carefully so the rest of the house does not collapse.
  • Allow the houses to sit at least 24 hours to let the royal icing dry and harden before decorating.

Nutrition

Calories: 2616kcal | Carbohydrates: 546g | Protein: 28g | Fat: 39g | Saturated Fat: 23g | Polyunsaturated Fat: 3g | Monounsaturated Fat: 10g | Trans Fat: 1g | Cholesterol: 174mg | Sodium: 768mg | Potassium: 1836mg | Fiber: 8g | Sugar: 392g | Vitamin A: 1206IU | Vitamin C: 0.2mg | Calcium: 406mg | Iron: 15mg


source https://therecipecritic.com/gingerbread-house/

Share:

Lumpia

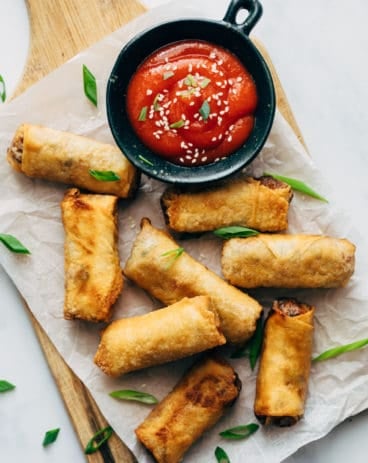
Lumpia is a delicious savory fried roll filled with ground pork, carrots, and cabbage. Traditionally found in the Philippines, lumpia is a perfect appetizer that is crispy and golden and served with dipping sauce on the side.

Lumpia would be the perfect appetizer or side dish to make any Asian meal complete! Lumpia is a great addition because they aren’t too heavy and overfilled with meat. It’s the perfect size! I love to serve these along side fried rice, vegetable stir fry, and beef and broccoli lo mein.

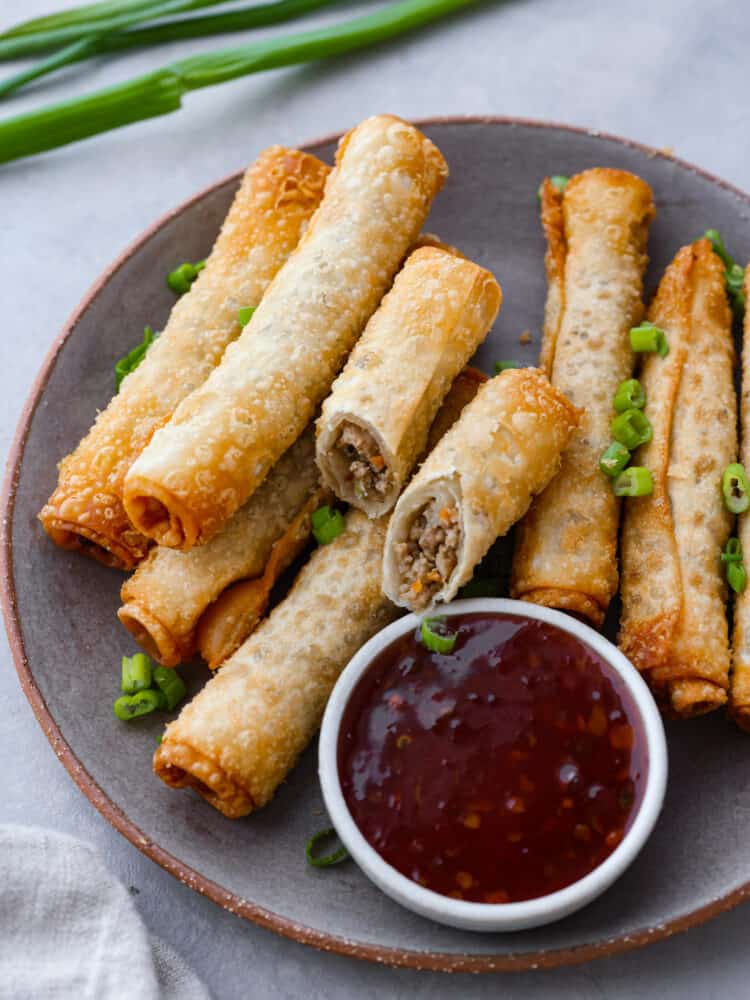
Top view of lumpia on a gray plate with a side of dipping sauce. Chopped green onion on top for garnish.

What Is Lumpia?

Lumpia is referred to as the Filipino spring roll. Filled with ground pork and vegetables, this delicious appetizer is a favorite in the Philippines! They are light in texture, and great for dipping! Lumpia is a perfectly crispy fried roll that is irresistible at any meal or celebration.

The best part about these darling little rolls is that they are perfect for dipping! I love to serve them with several different dipping sauces for my guests to enjoy. Lumpia is traditionally served with a side of dipping sauce. I love to serve it with my sweet chili sauce because it’s the best! But you can also make my homemade sweet and sour sauce or teriyaki sauce. Or even better, serve a side of all three!

Filipino Spring Roll Ingredients

The lumpia filling is made with fresh ingredients and loaded with authentic Filipino flavors. The filling is most commonly pork based, but can consist of a variety of savory meat, poultry, or seafood. Prepare the filling, assemble the rolls, then fry to crispy perfection! Everyone will enjoy these appetizers and ask for them again and again.

  • Sesame Oil: Any oil works, but sesame oil gives it a great Asian flavor.
  • Garlic: Fresh garlic always.
  • Fresh Ginger: Fresh ginger adds great flavor.
  • Ground Pork: Ground pork is most common, but any type of meat works.
  • Green Onion: I love that green onion isn’t too strong.
  • Carrots: I like to mince the carrots really small.
  • Green Cabbage: Cabbage adds great texture and crunch.
  • Onion Powder: For added onion flavor!
  • Ground Black Pepper: Pepper for seasoning.
  • Salt: Salt to taste and balance flavors
  • Wrappers: Lumpia wrappers are thin and traditional, but if you can’t find them you can use egg roll or spring roll wrappers.
  • Oil: Oil for frying.
  • Water: A small bowl of water to help seal the edges of the lumpia wrapper.

Lumpia Recipe

Lumpia recipes are passed down from generations! It’s fun to hear what cute Filipino Grandma’s have added to their recipe. Add seasonings and veggies of your choice. The filling is so easy to make, and assembly can just fast if you have your kids to help! Check out the pictures for step by step instructions. It’s actually super easy.

Lumpia Filling

  1. Heat the Oil in the Pan: Heat the oil in a medium pan over medium-high heat.
  2. Add the Garlic and Ginger: Add the garlic and ginger. Cook for 20 seconds until fragrant.
  3. Cook the Pork: Add the ground pork and cook for about 6 minutes, or until cooked through.
  4. Add the Green Onion, Carrots, and Cabbage: Add the green onion, carrots, and cabbage. Stir until mixed well and cook for an additional 2 minutes to heat through.
  5. Add Salt, Pepper, and Soy Sauce: Stir in the salt, pepper, and soy sauce. Taste and add more seasonings if needed. Let the mixture cool slightly before assembling.

Rolling and Frying Lumpia

  1. Cut the Wrappers if Needed: If using egg roll wrappers, cut them down to a rectangular size to help achieve a thinner roll.
  2. Add the Filling to the Wrapper: Scoop around 1 to 1 ½ tablespoons of filling then place near the bottom half of the lumpia wrapper. Spread the filling out to make rolling easier.
  3. Roll up Lumpia: Starting from the bottom, roll-up tight until completely wrapped.
  4. Seal the Wrapper with Water: Dip your finger in a bowl of water and run it along the edge of the wrapper. Then seal lightly press to seal the edge.
  5. Heat the Oil for Frying: Heat oil in a large skillet deep enough for frying. Deep fry lumpia in medium heat until it floats.
  6. Enjoy Warm With Dipping Sauce: Remove from the oil on a plate with paper towels. This will help absorb any excess oil. Serve warm with your favorite dipping sauce!
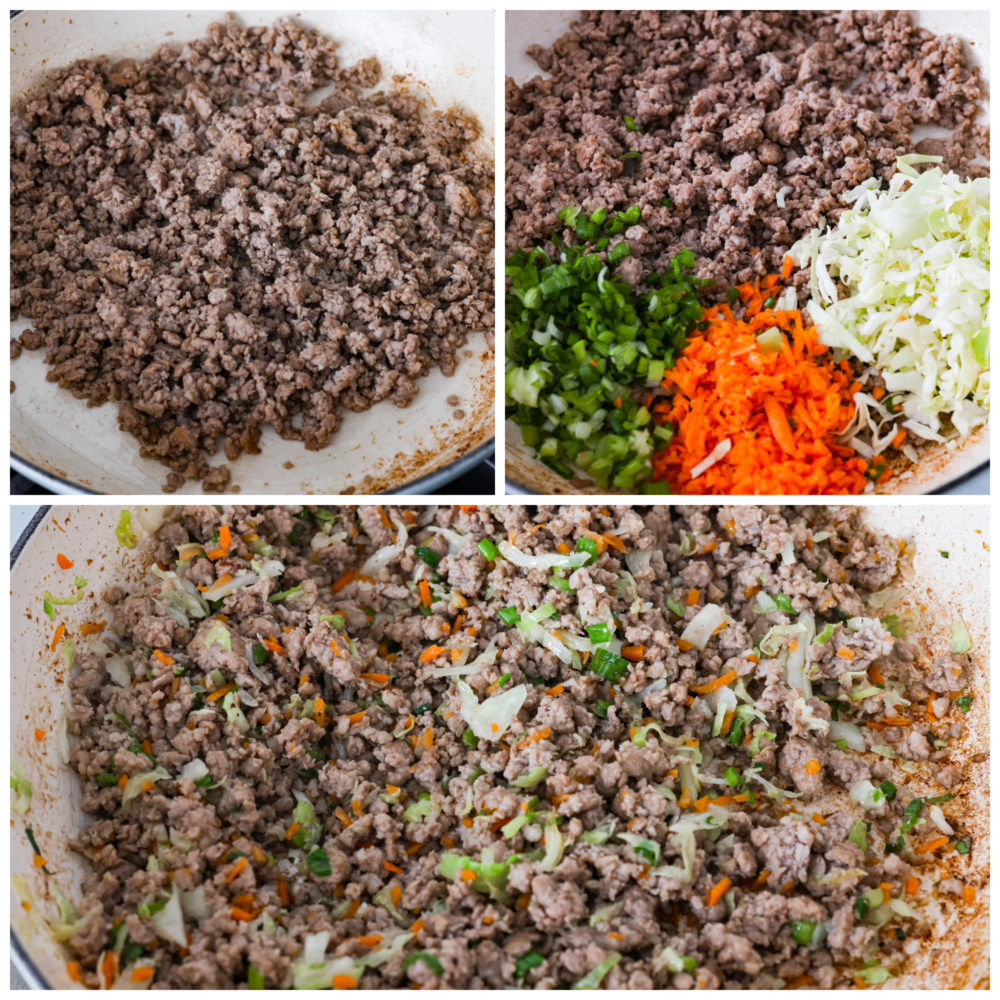
First photo of cooked ground pork in a pan. Second photo of onions, carrots, and cabbage added to the meat. Third photo of the meat mixture in a pan.
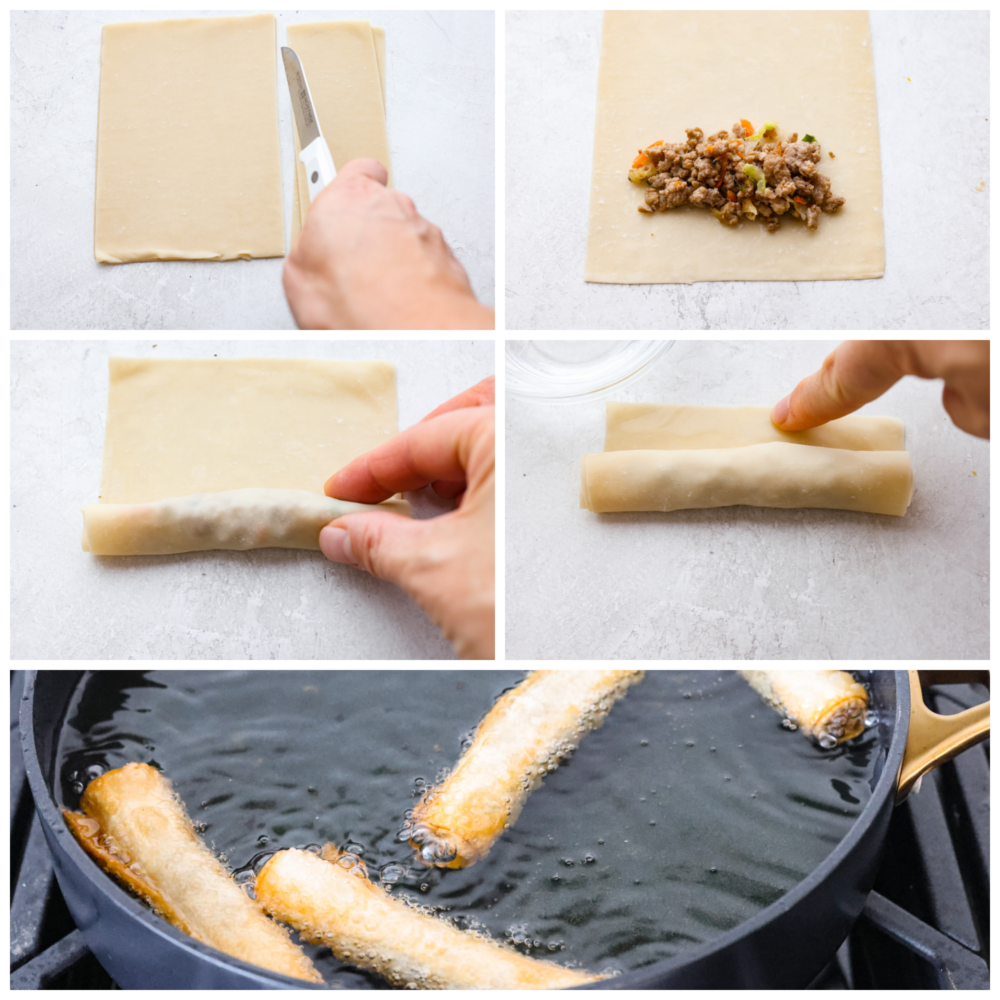
First process photo of assembling lumpia by cutting the egg roll wrapper to a rectangular size. Second photo of meat added to the wrapper. Third photo of rolling the lumpia. Fourth photo of adding water to the edge to seal the wrapper. The fifth photo is a photo of lumpia frying.

Tips For Frying

Frying Lumpia is simple and fast! Follow my tips below to help you along the way. Lumpia is light and crispy and fried to perfection! I can’t wait for you to make them. You’re going to love them!

  • The Right Temperature: Make sure the temperature of the oil is 350 degrees Fahrenheit for frying. If the temperature is less than 350 degrees Fahrenheit, the wrappers will absorb the oil too much. Then the lumpia will be too greasy. When the oil is too hot, the wrappers will too fast. Then the filling won’t have enough time to warm through.
  • Use Paper Towels: Lay the fried lumpia on paper towels to cool. Paper towels absorb any excess oil and will help the rolls stay crispy.

Lumpia Wrappers

Authentic lumpia is a Filipino spring roll fried in a lumpia wrapper. The wrappers are paper thin and smooth and is similar to a crepe. When fried in hot oil, the texture of the wrapper is crispy and flakey. Each bite is light and crunchy and full of flavor! Traditional lumpia is made with actual lumpia wrappers. If you can’t find them, then that’s ok! I wasn’t able to find mine locally, so here are some alternatives.

  • Wonton Wrappers: Wonton wrappers are thin in texture.
  • Spring Roll Wrappers: Rice paper wrappers that are thin and translucent.
  • Egg Roll Wrappers: Most common wrapper available at grocery stores.
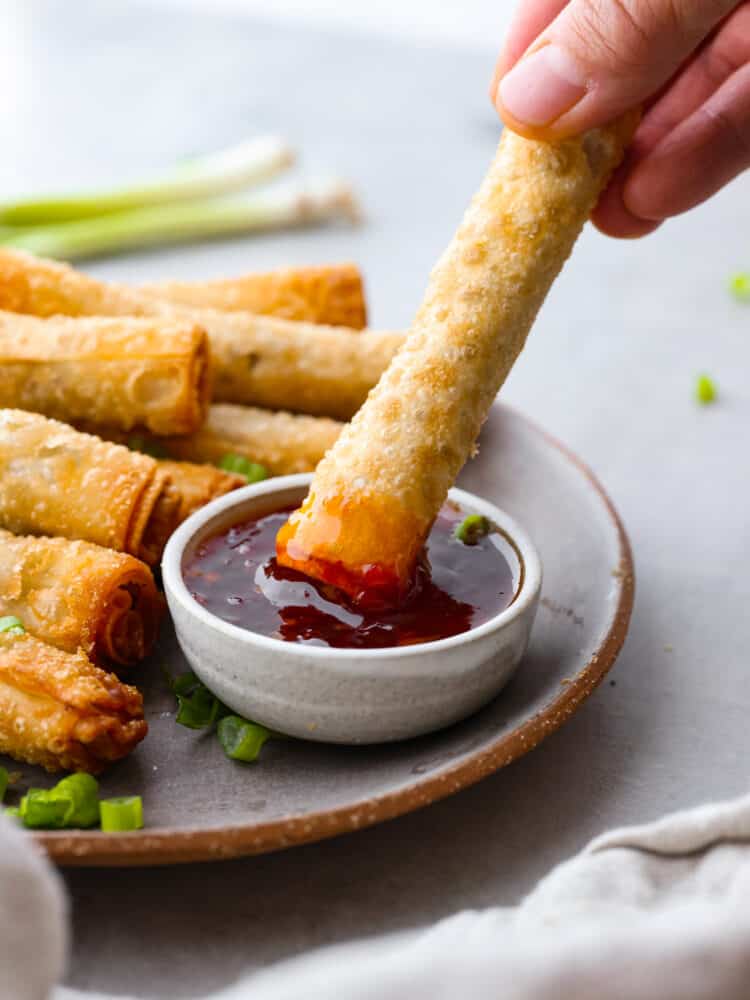
Top view of lumpia on a gray plate with a side of dipping sauce. Chopped green onion on top for garnish.

Storing Leftovers

This lumpia recipe makes a lot, so here are instructions for storing. I also have instructions for freezing leftovers for months at a time. My tip for reheating cooked lumpia is to do it in the air fryer! It restores the crispiness and is delicious to enjoy all week.

  • In the Refrigerator: Once lumpia has cooled, then transfer the leftovers to an airtight container. Store the leftovers in the refrigerator for up to 4 days.
  • In the Freezer: Lumpia is best stored in the freezer before frying. Arrange the rolls on a baking sheet, then cover with foil wrap. Freeze the lumpia for a few hours. When the rolls are frozen solid, transfer the them to a zip-top freezer bag. Lumpia can be frozen for up to 3 months.
  • To Reheat: Reheat cooked rolls in the air fryer at 360 degrees Fahrenheit for 4 minutes.
  • Fry Frozen Lumpia: There’s no need to thaw frozen lumpia. Simply fry the rolls right from the freezer.
Close view of lumpia on a gray plate with a side of dipping sauce. Sliced onions garnished on top.
Print

Lumpia

Lumpia is a delicious savory fried roll filled with ground pork, carrots, and cabbage. Traditionally found in the Philippines, lumpia is a perfect appetizer that is crispy and golden and served with dipping sauce on the side.
Course Appetizer
Cuisine Filipino
Keyword lumpia
Prep Time 20 minutes
Cook Time 20 minutes
Total Time 40 minutes
Servings 30
Calories 266kcal
Author Alyssa Rivers

Ingredients

  • 1 tablespoon sesame oil
  • 1 teaspoon garlic, minced
  • 1/2 teaspoon fresh ginger
  • 1 lb ground pork
  • 1/4 cup green onion, minced
  • 1/2 cup carrots, minced
  • 3/4 cup green cabbage, finely sliced
  • 1 teaspoon onion powder
  • 1 teaspoon ground black pepper
  • 1 teaspoon salt, to taste
  • 30 wrappers, lumpia wrappers or egg roll wrappers
  • 3 cups oil, for frying
  • water

Instructions

Lumpia Filling

  • Heat the oil in a medium pan over medium-high heat.
  • Add the garlic and ginger. Cook for 20 seconds until fragrant.
  • Add the ground pork and cook for about 6 minutes, or until cooked through.
  • Add the green onion, carrots, and cabbage. Stir until mixed well and cook for an additional 2 minutes just to slightly soften the veggies.
  • Stir in the salt, pepper, and soy sauce. Taste and add more seasonings if needed. Let the mixture cool slightly before assembling.

Rolling and Frying the Lumpia

  • If using egg roll wrappers, cut them down to a rectangle size to help achieve the look of lumpia.
  • Scoop around 1 to 1 ½ tablespoons of filling and place near the bottom half of the lumpia wrapper. Spread the filling out to make rolling easier.
  • Starting from the bottom, roll-up tight until completely wrapped.
  • Dip your finger in a bowl of water and run it along the edge of the wrapper. Then seal lightly press to seal the edge. Repeat the steps until all the mixture is used.
  • Heat oil in a cooking pot. Deep fry lumpia in medium heat until it floats.
  • Remove from the oil on a plate with paper towels. This will help absorb any excess oil. Serve warm with your favorite dipping sauce and enjoy!

Nutrition

Serving: 1roll | Calories: 266kcal | Carbohydrates: 5g | Protein: 3g | Fat: 26g | Saturated Fat: 3g | Polyunsaturated Fat: 7g | Monounsaturated Fat: 16g | Trans Fat: 0.1g | Cholesterol: 12mg | Sodium: 131mg | Potassium: 64mg | Fiber: 0.3g | Sugar: 0.2g | Vitamin A: 369IU | Vitamin C: 1mg | Calcium: 8mg | Iron: 0.4mg


source https://therecipecritic.com/lumpia/
Share:

Meringue Cookies

Meringue cookies are crispy on the outside and chewy on the inside. The whipped egg white base just melts in your mouth and tastes absolutely divine. They are a beautiful dessert for any occasion!

Cookies are the perfect gift if you ask me. They are delicious and they don’t clutter up your counters or your storage bins. They are filled with love and are a thoughtful gift, and I’ve never met a cookie I didn’t like! If you are like me and love gift-able cookies, you’ve got to try these crowd-pleasing Sugar Cookies, and these scrumptious Twix Thumbprint Cookies, and these perfect for the holidays Snowball Cookies.

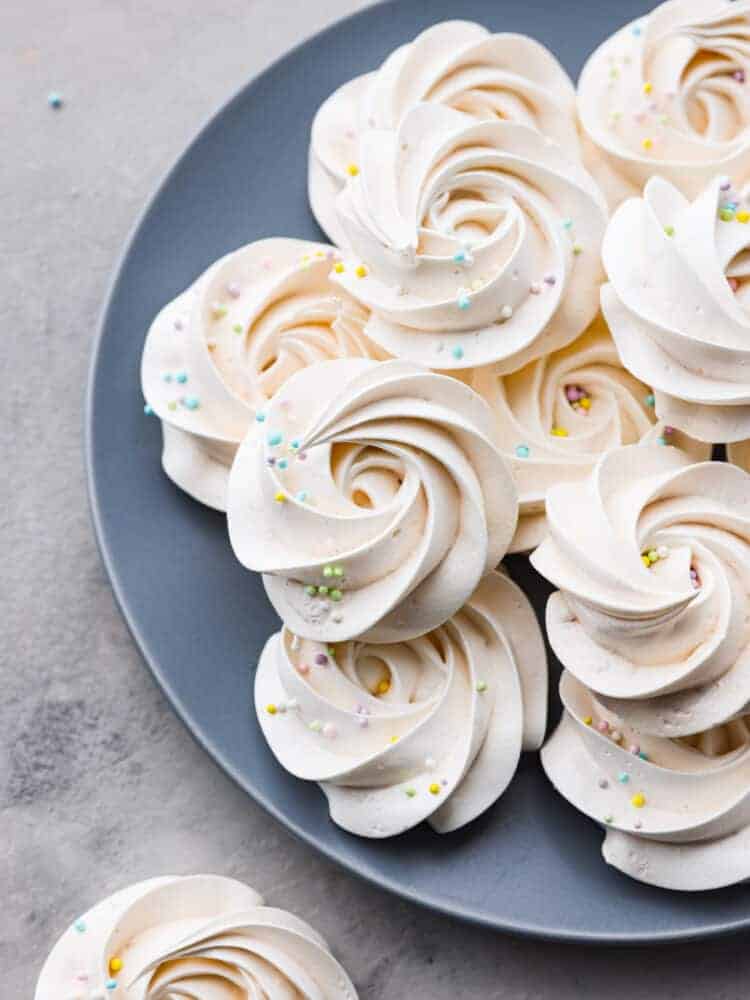
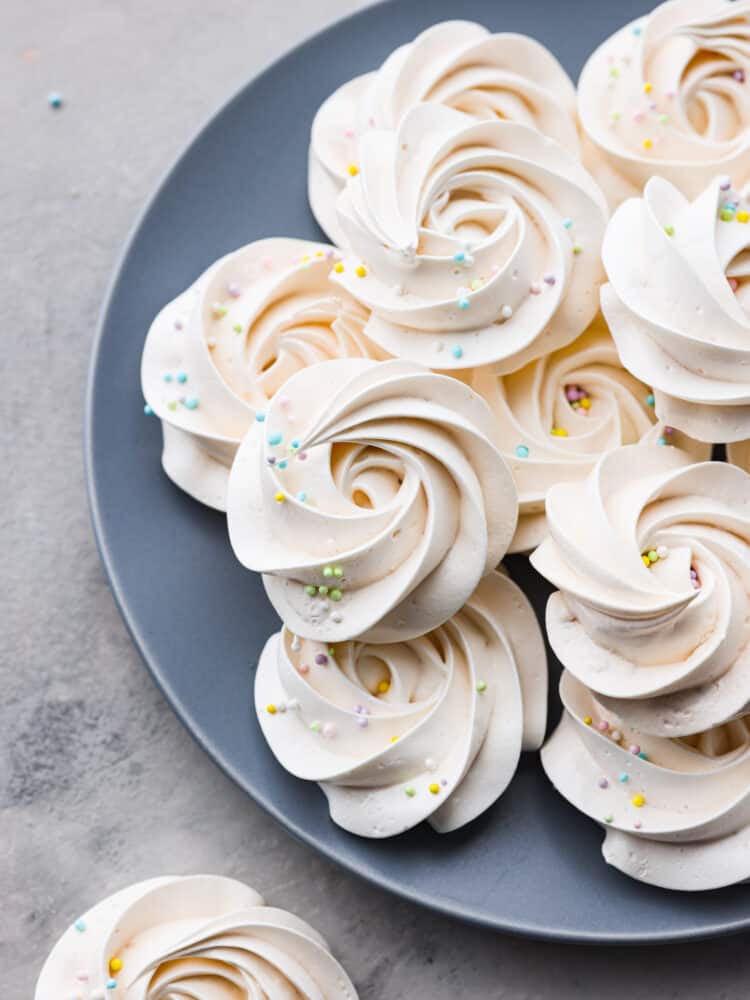
Meringue cookies sitting on a blue plate with sprinkles on top.

Meringue Cookies Recipe

If you have never made meringue, you are going to love this recipe! I give you all the tips and tricks for this recipe to turn out perfectly. If you have made meringue, it might have been to top a lemon meringue pie. This meringue will have a different texture because you will be baking it in the oven. Meringue is mostly egg whites that are whipped until they get nice and fluffy. You put them in a piping bag and pipe them into cute shapes, and bake them in the oven. The meringue is crunchy on the outside and then melts into a soft and chewy dessert. It’s so fun to eat!

If you add food coloring or matcha powder, you can make them green and perfect for Christmas. You could add flavoring to them to make them chocolate, peppermint, or almond. I like making the cookies because it is like a mini pavlova but a little less work to make. I love pavlova so much, so these are great to whip up when I don’t have the time to make something more complicated!

Ingredients

The ingredients for meringue cookies are so simple, so the quality of the ingredients will make a difference in the taste. Make sure you give yourself time to separate the egg whites and let them come to room temperature before using them. You will have 6 egg yolks left over that aren’t needed for this recipe, so it would be a great time to try making a creme brulee too! You can find the exact measurements below in the recipe card.

  • Granulated Sugar: Your regular pantry sugar will work great.
  • Egg Whites: You will need 6 egg whites for this recipe. It is really important that you have ONLY egg whites, and no egg yolk gets into your meringue. If there is any egg yolk, the eggs will not whip up and get fluffy. Make sure to leave your egg whites out at room temperature for a few hours before you plan on making your cookies.
  • Lemon Juice: Lemon juice adds a little acid which helps the meringue to set up nicely. You want it to hold its shape when you pipe it out, and lemon juice helps that happen. You could use cream of tartar or vinegar instead.
  • Salt: Salt helps to cut down on the sweetness and brings more flavor out of the cookies.
  • Vanilla Extract: Vanilla extract helps to enhance the flavors in the cookie and adds a little vanilla flavor so they don’t taste like sugar.
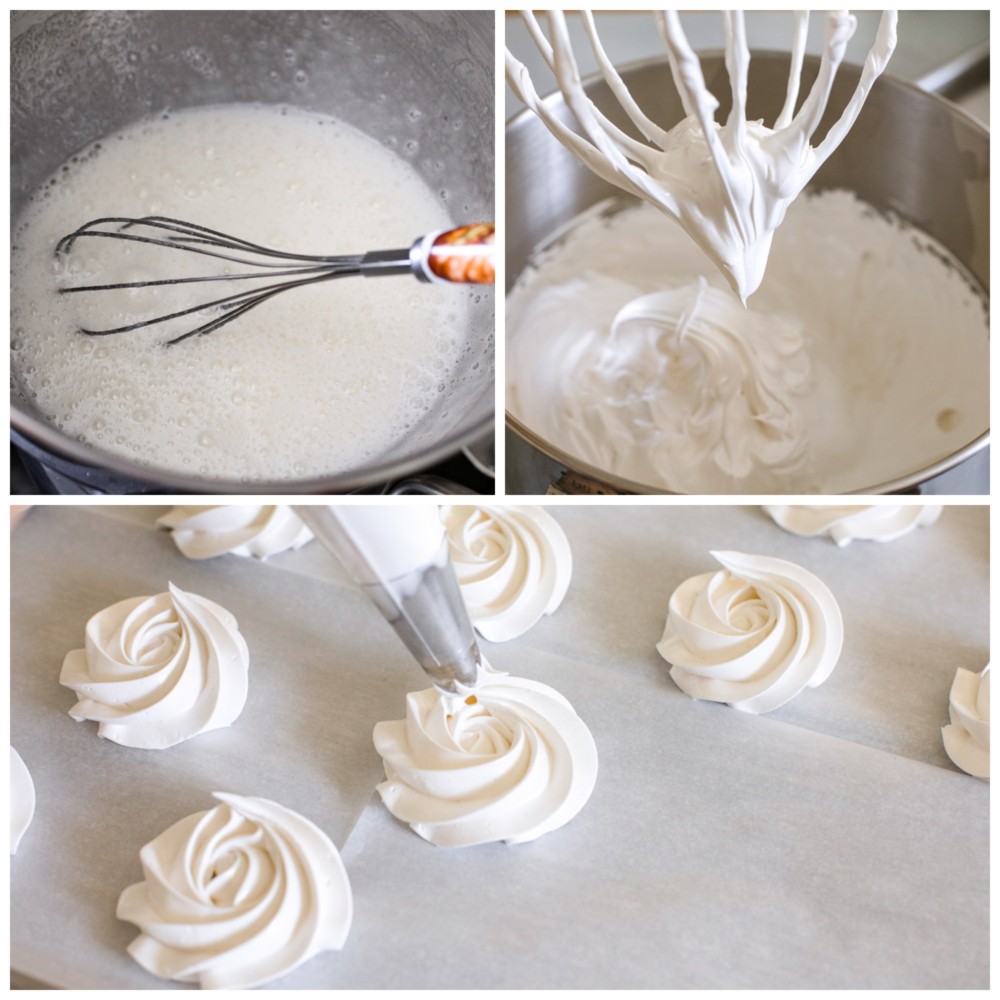
Process photos showing egg whites in a bowl, them whipped into stiff peaks, and then them piped onto parchment paper.

How to Make Meringue Cookies

They are actually pretty simple to make. You do have to pay attention to details for this meringue cookie to turn out right, so follow the instructions! I’ve made them quite a few times, and I’ve given you all my tips and tricks. I promise they will turn out delicious and beautiful!

  1. Prep: Preheat the oven to 200℉ and line two baking sheets with parchment paper.
  2. Simmer: Add 1 inch of water to a medium saucepan and bring to a slight simmer.
  3. Whisk: In a heatproof bowl of a stand mixer, add the egg whites and sugar. Whisk together until combined and place over the simmering water, ensuring the bowl does not touch the water.
  4. Whip: Whisk the egg whites and sugar constantly until the mixture reaches 140℉. Remove from the heat and fit on the stand mixer with the whisk attachment. Whip until soft peaks form.
  5. Add Ingredients and Whip: Add the lemon juice, salt, and vanilla extract. Whip until stiff peaks form. The meringue will begin to pull away from the sides of the bowl and when the whisk is removed, the peak will stand straight up. This can take a good 10-15 minutes of whipping at high speed.

Pipe and Bake

  1. Prep Piping Bag: Prep your piping bags by fitting with a large star tip. Carefully spoon meringue into the piping bag and twist closed at the top, being careful to not overfill the bag (fill ½-⅔ of the way full).
  2. Pipe: Pipe 4 small dots of meringue under the four corners of the parchment paper and press down. This will prevent the parchment from blowing up and sticking to your meringue cookies as they bake. Pipe 2 inch rosettes onto the parchment, leaving about 1 inch between them. Sprinkle with sprinkles, if desired.
  3. Bake: Bake for 1-½ to 2 hours, until the outsides of the cookies are crisp to the touch. Turn off the oven and let the pan cool in the oven. Once the pan is completely cooled to the touch, remove from the oven.
  4. Cool and Store: Gently remove the cookies from the pan. Store in an airtight container or serve immediately. Do not refrigerate or leave uncovered otherwise you risk the meringue becoming tacky and weeping.
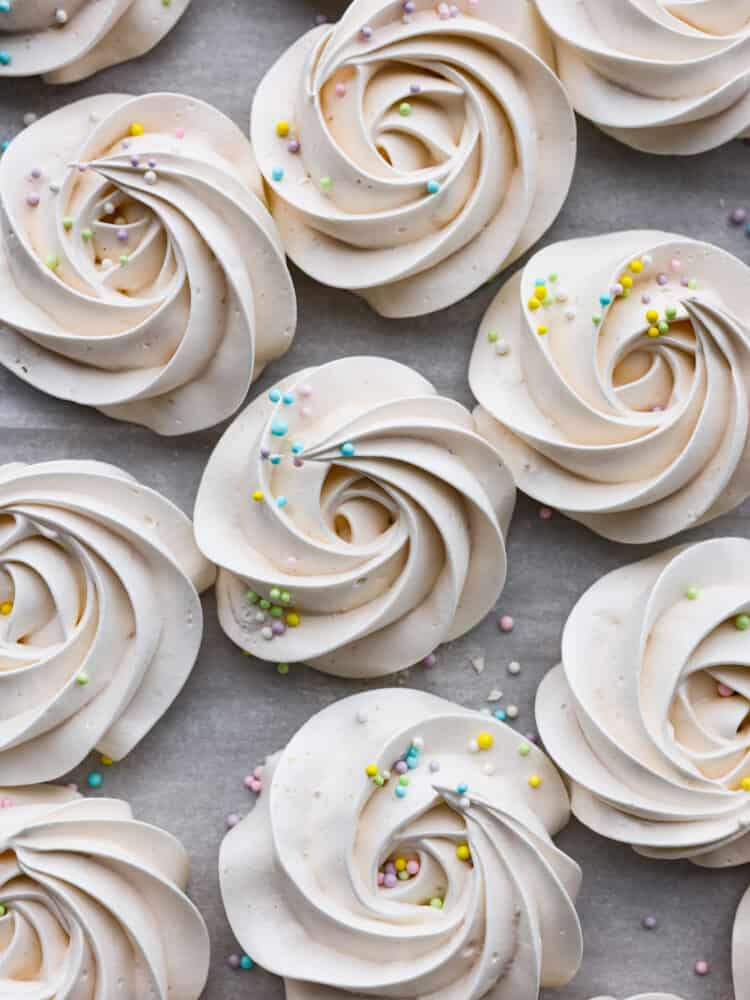
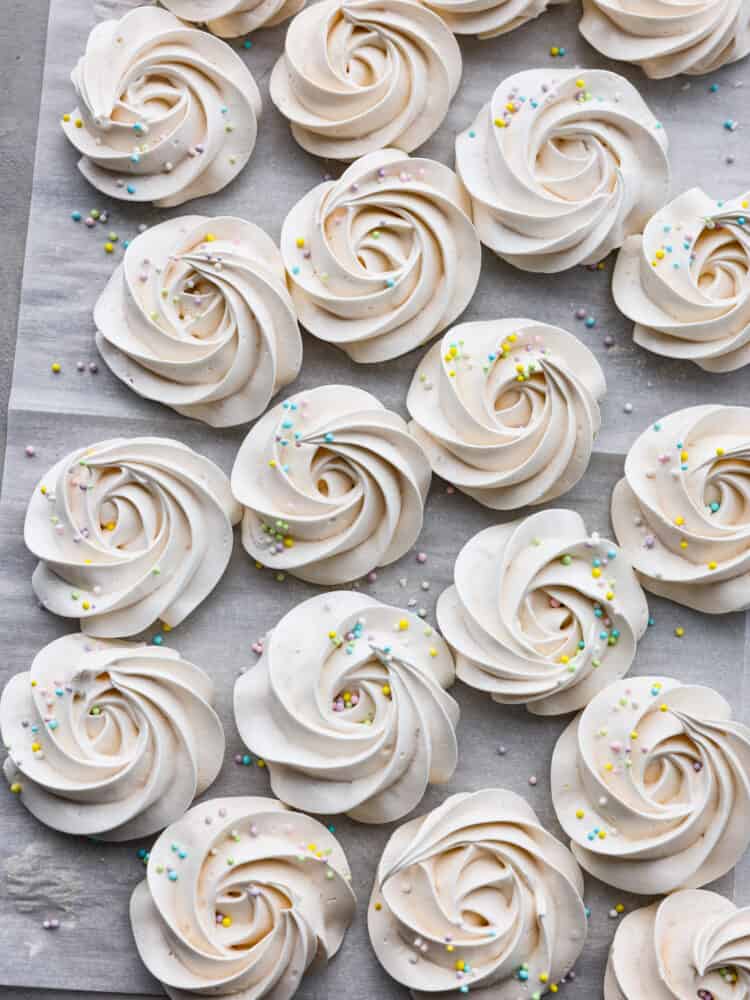
Meringue cookies with colorful sprinkles on top sitting on top of parchment.

Tips for Making Meringue Cookies

They may have a reputation for being hard to make, but with a few simple tips, you’ll make the best meringue cookies around! I love the flavor and texture of these cookies so much. Your friends and family will love them too!

  • Don’t Boil Water: Keep the water in the pan at just below simmering. If you let the water boil, you risk cooking the egg whites and ending up with scrambled eggs instead of the beginnings of meringue.
  • Use A Thermometer: When cooking the sugar and egg whites, use a thermometer to ensure the mixture reaches 140℉. The sugar will be completely dissolved at that point and the meringue will be very stable for piping and baking.
  • Experiment with Designs: You can choose your design! I did the wheels to make it look simple and classic, but you could make them any design you like. I made cute peppermint meringue lollipops that I piped on top of straws that were all kinds of designs and they turned out great!
A zoomed out shot of the cookies on parchment paper with sprinkles.

Storing Meringue Cookies

Meringue cookies are best eaten fresh. They can get soft and saggy if they are not stored the right way. Here is how to store your cookies so they stay fresh and crispy.

On the Counter: Store your peppermint meringue lollipops in an airtight container for up to 2 weeks. Do not leave uncovered or refrigerate as the meringue will begin to weep and become very sticky and possibly melt.

Print

Meringue Cookies

Meringue cookies are crispy on the outside and chewy on the inside. The whipped egg white base just melts in your mouth and tastes absolutely divine. They are a beautiful dessert for any occasion!
Course Dessert
Cuisine American
Keyword cookies, meringue cookies
Prep Time 20 minutes
Cook Time 2 hours
Total Time 2 hours 20 minutes
Servings 40 cookies
Calories 32kcal
Author Alyssa Rivers

Ingredients

  • 1 ½ cups granulated sugar
  • 6 large egg whites room temperature
  • ¼ teaspoon lemon juice
  • 1 pinch salt
  • 2 teaspoon vanilla extract

Instructions

  • Preheat the oven to 200℉ and line two baking sheets with parchment paper.
  • Add 1 inch of water to a medium saucepan and bring to a slight simmer.
  • In a heatproof bowl of a stand mixer, add the egg whites and sugar. Whisk together until combined and place over the simmering water, ensuring the bowl does not touch the water.
  • Whisk the egg whites and sugar constantly until the mixture reaches 140℉. Remove from the heat and fit on the stand mixer with the whisk attachment. Whip until soft peaks form.
  • Add the lemon juice, salt, and vanilla extract. Whip until stiff peaks form. The meringue will begin to pull away from the sides of the bowl and when the whisk is removed, the peak will stand straight up. This can take a good 10-15 minutes of whipping at high speed.
  • Prep your piping bags by fitting with a large star tip. Carefully spoon meringue into the piping bag and twist closed at the top, being careful to not overfill the bag (fill ½-⅔ of the way full).
  • Pipe 4 small dots of meringue under the four corners of the parchment paper and press down. This will prevent the parchment from blowing up and sticking to your meringue cookies as they bake. Pipe 2 inch rosettes onto the parchment, leaving about 1 inch between them. Sprinkle with sprinkles, if desired.
  • Bake for 1-½ to 2 hours, until the outsides of the cookies are crisp to the touch. Turn off the oven and let the pan cool in the oven. Once the pan is completely cooled to the touch, remove from the oven.
  • Gently remove the cookies from the pan.. Store in an airtight container or serve immediately. Do not refrigerate or leave uncovered otherwise you risk the meringue becoming tacky and weeping.

Nutrition

Calories: 32kcal | Carbohydrates: 8g | Protein: 0.5g | Fat: 0.03g | Sodium: 9mg | Potassium: 8mg | Sugar: 8g | Vitamin A: 0.002IU | Vitamin C: 0.01mg | Calcium: 0.4mg | Iron: 0.01mg


source https://therecipecritic.com/meringue-cookies/
Share:

Popular

Archive

Slider Tag

Facebook

Header Ads

Recent in Food

Blog Archive

Recent Posts

Unordered List

  • Lorem ipsum dolor sit amet, consectetuer adipiscing elit.
  • Aliquam tincidunt mauris eu risus.
  • Vestibulum auctor dapibus neque.

Pages

Theme Support

Need our help to upload or customize this blogger template? Contact me with details about the theme customization you need.