Tuna Steak

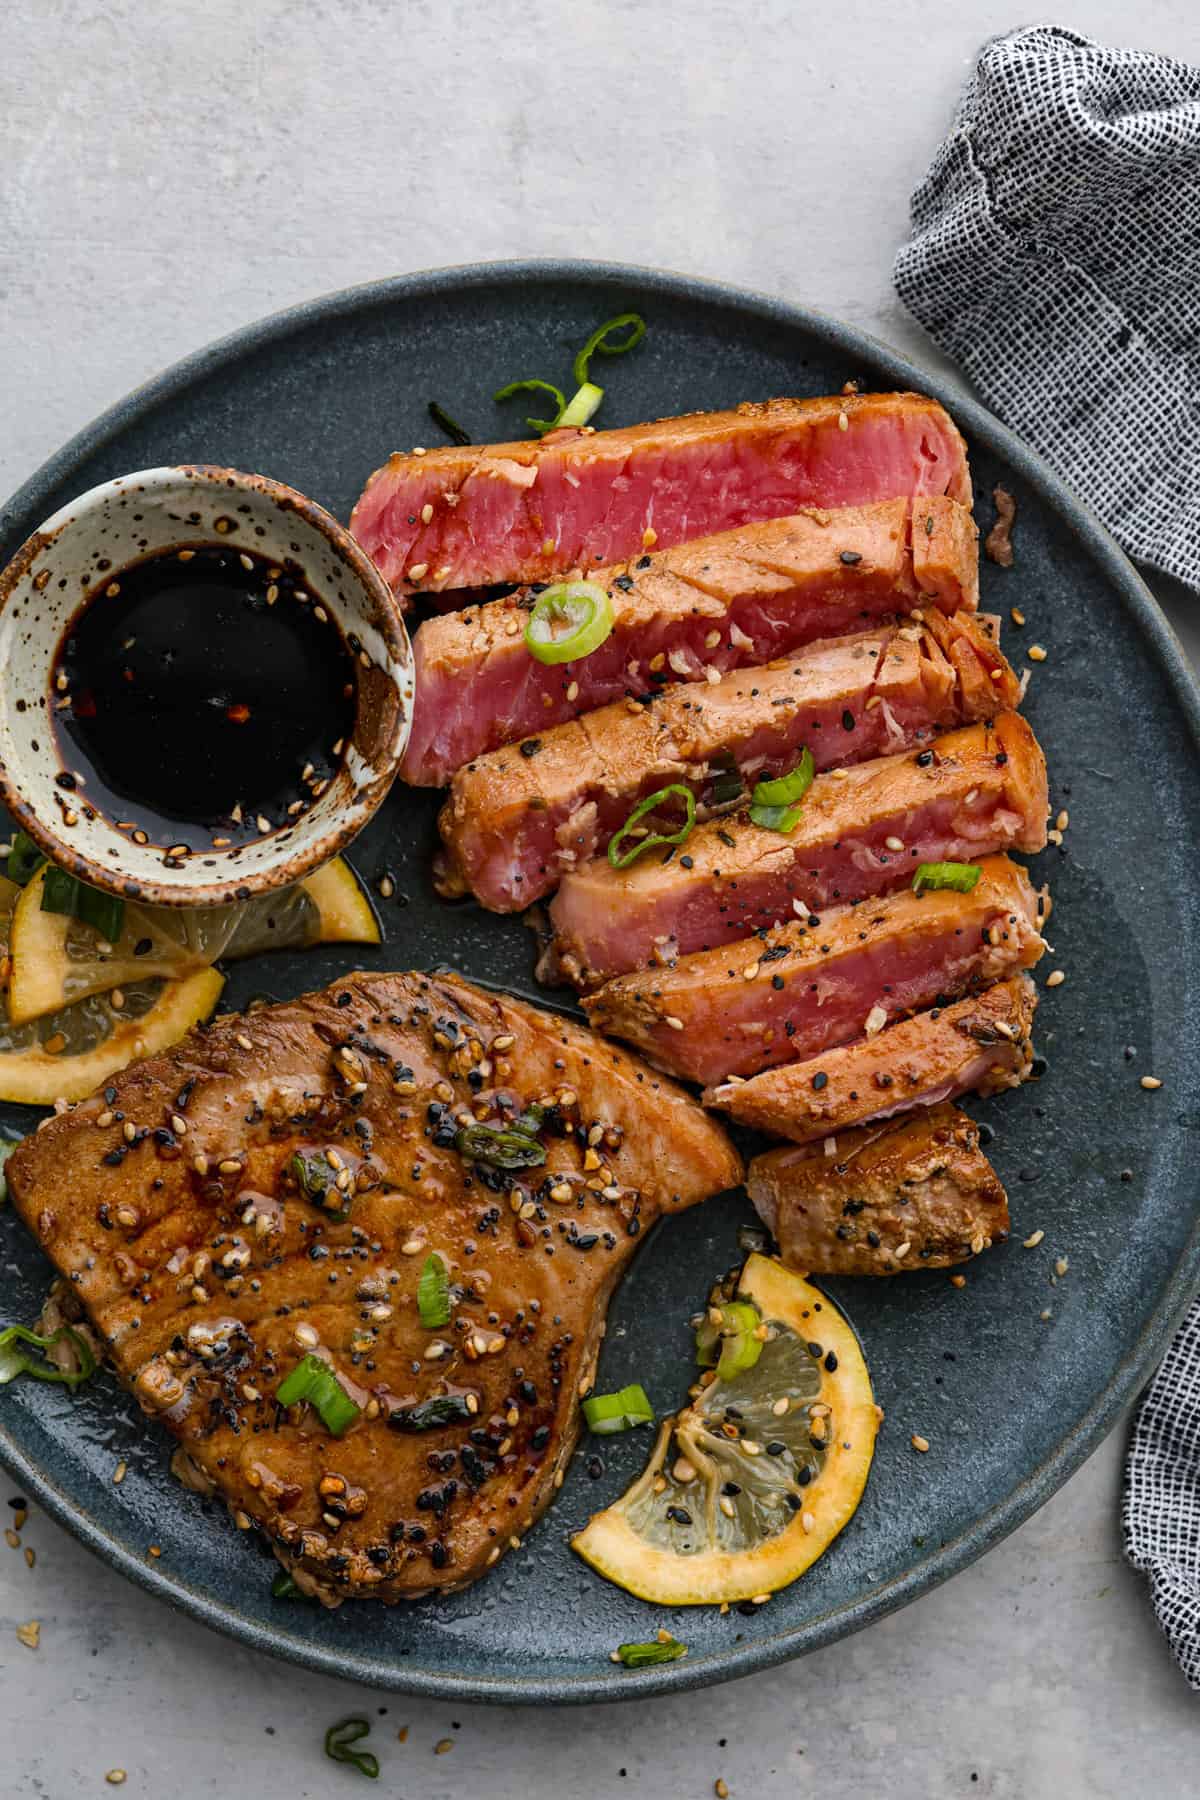
There’s no reason to save Tuna Steaks for eating out, make them yourself for a gourmet restaurant experience in the comfort of your home. Not only are they full of healthy nutrients, they are delicious and a real treat any day of the week.

I love all things sushi. If sushi is on the menu, I am definitely ordering it! I love tuna especially. I never really cooked with tuna at home because I thought it would be too difficult to cook, and I didn’t want to mess it up. But it’s actually easier to work with than you think! You’ll fall in love with these tuna steaks. Then you’ll have to try this Seared Ahi Tuna, this delicious Tuna Melt, and this yummy Poke Bowl with Tuna.
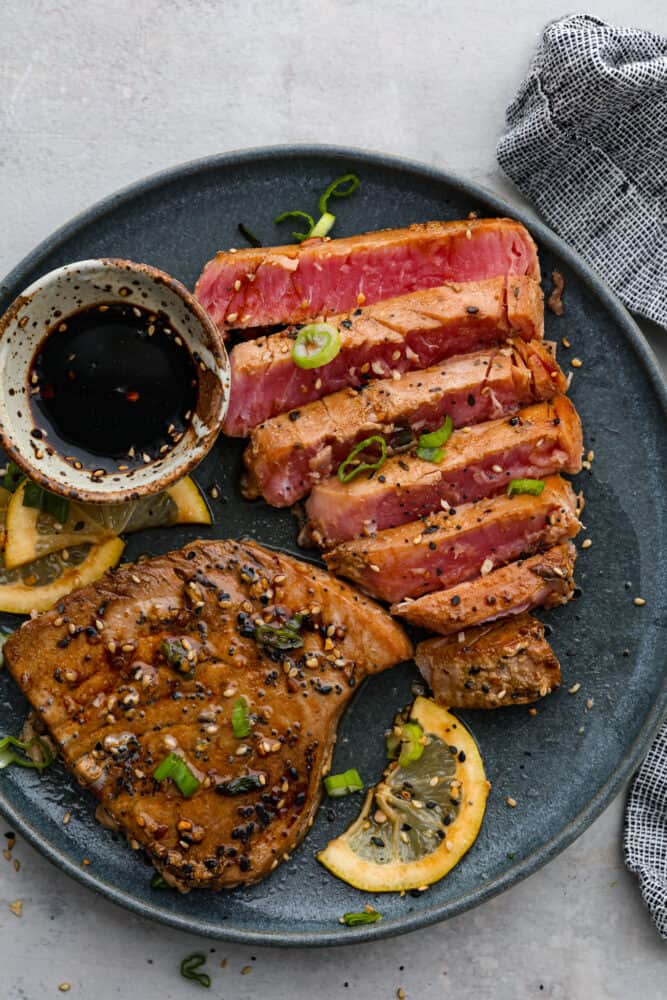
Seared ahi tuna steak on a plate cut up with a dipping sauce.

Tuna Steak

Tuna steaks are the best addition to any salad (especially this Asian Ramen Salad), or just served on top of some rice along with garlic edamame. They are so juicy and flavorful, and a great dish to serve for a special occasion. You can actually find tuna for a great price, which makes this dish a great option any day of the week. I ended up making this recipe twice in one week because we all loved it so much!

I answer a lot of questions about what kind of tuna to choose and how to pick out the best piece in my tip box below. The best part about this recipe is it takes just minutes to cook! If you didn’t want to let it marinade, you can have these stakes ready in under 10 minutes. It’s flavorful and really unique! You can add more to the meal to make it more filling. I prefer serving them with instant pot rice and air fryer green beans.

Ingredients

You could get away with less ingredients than this, but I like to make a yummy marinade for these tuna steaks. It’s fun to add different flavors because you get a whole new experience each time. You could add things like honey, sesame seeds, parsley, and cayenne pepper. I love switching up the flavors all the time. You can find the measurements below in the recipe card.

  • Water: This is to make the marinade.
  • Lemon Juice: Acid goes great with tuna, and helps to bring out all the amazing flavors.
  • Soy Sauce: Soy sauce is a fermented bean sauce that is salty and full of flavor. You can choose a low sodium version if you are worried about the salt content.
  • Sesame Oil: It’s nutty and so flavorful, you’re going to love it!
  • Cardamom: This adds warmth and sweetness to the dish.
  • Thyme: Fresh or dried thyme goes great with tuna.
  • Pepper: Freshly ground black pepper has more flavor, I always use it in the recipes that call for pepper.
  • Garlic: Garlic cloves are the perfect pair with these other ingredients.
  • Tuna Steaks: You should be able to find tuna steaks at your local grocery store in the fish section. Mine were a little less than an inch thick.
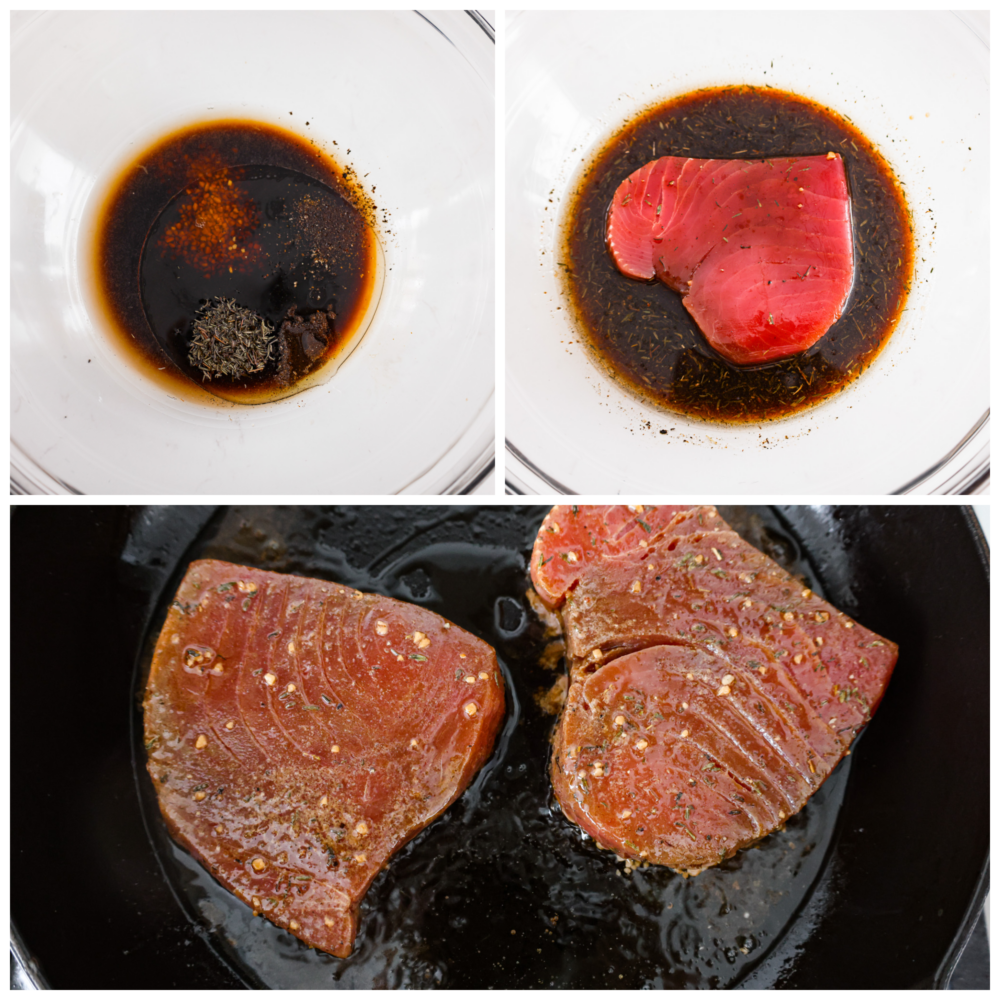
Process photos showing how to make the marinade and cook the tuna.

Tuna Steak Recipe

If you are confident cooking a regular steak, then you are overqualified for cooking a tuna steak. All you do is marinade and sear on a skillet! I prefer to use my cast iron, but a non-stick skillet will work great. Make sure that you pay attention to how thick your steak is because a thinner steak will cook faster, and a thicker steak may need a few more minutes on both sides. If you are cooking on a grill, then they will likely cook faster than on the skillet. The steaks should be seared on the outside and medium-rare on the inside.

  1. Mix Marinade: In a mixing bowl, combine your water, lemon juice, soy sauce, sesame oil, cardamom, thyme, and minced garlic. Then mix until well combined.
  2. Add Marinade to Steaks: Pour your marinade into a large plastic bag and then place your tuna steaks in the bag with the marinade. Push out as much air as you can and thoroughly coat the steaks in the marinade.
  3. Marinade for 20 Mins: Allow the tuna steaks to marinate for 20 minutes at room temperature.
  4. Cook in Skillet: Heat a skillet over medium high heat, once the steaks are marinated and ready, then remove them from the bag and then place them on the heated skillet, cook each side for about 2 minutes. Brush the steaks with more of the marinade as they cook to add more flavor.
  5. Rest: Once you have cooked both sides of each steak remove them from the skillet, the internal temperature should reach 125 degrees fahrenheit. Allow them to rest for 2 minutes, they will continue to cook while they rest.
  6. Eat: Enjoy fresh!
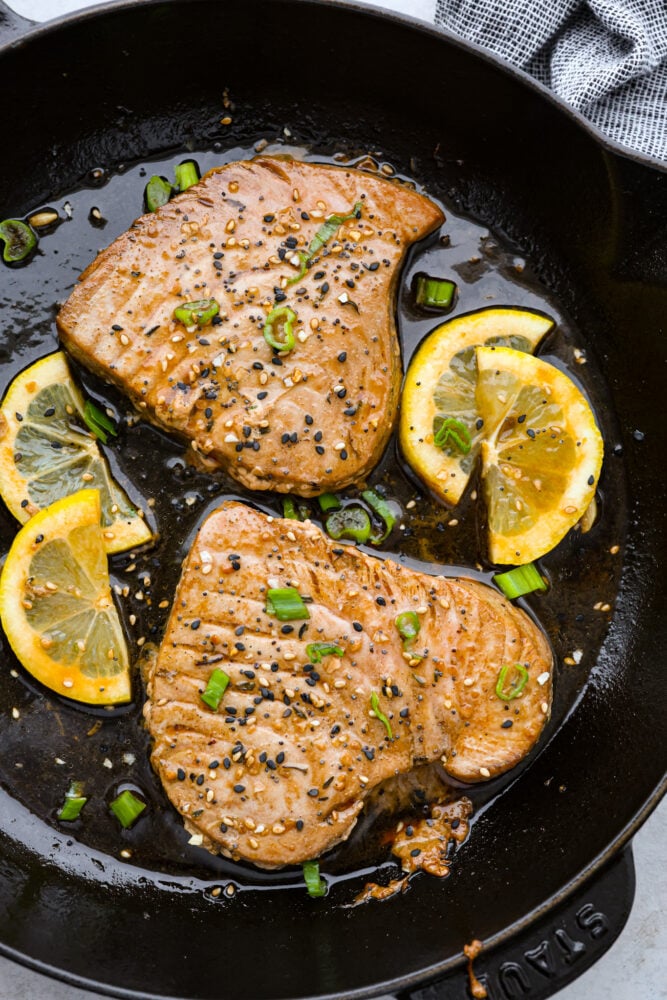
Seared tuna steaks in a pan.

Tips for Making Tuna Steak

I think we’ve all assumed that tuna steaks are hard to cook and expensive. Now that we know differently, here are a few more tips to make this recipe a huge hit. You and your family are going to love this one!

  • Type of Skillet: I prefer to use my cast iron skillet. I have a very well-seasoned skillet which makes it pretty non-stick. Fish can stick to the pan if your pan isn’t hot enough and properly seasoned. Make sure to follow the instructions with the heat, or use a non-stick skillet if you are worried. The last thing you want is half of your steak sticking to the bottom of the pan!
  • Choosing Tuna Steaks: If you have never bought a tuna steak before, don’t be intimidated! They should be in the seafood section at your local grocery store. You can even find them for a good price most of the time. The color should be a nice dark pink. If it is turning brown or looks dull and matte, then that is an older steak and won’t taste as good. The steaks I chose were 4 ounces each and about an inch or ¾ of an inch thick. If you choose a thinner steak, you will not need to cook them for as long to get them to the perfect temperature. Make sure to not overcook your steak or it can become chewy and dry, and way less flavorful. Any kind of tuna will work, I prefer sushi-grade tuna like ahi tuna, bigeye tuna, yellowfin tuna, or bluefin tuna.
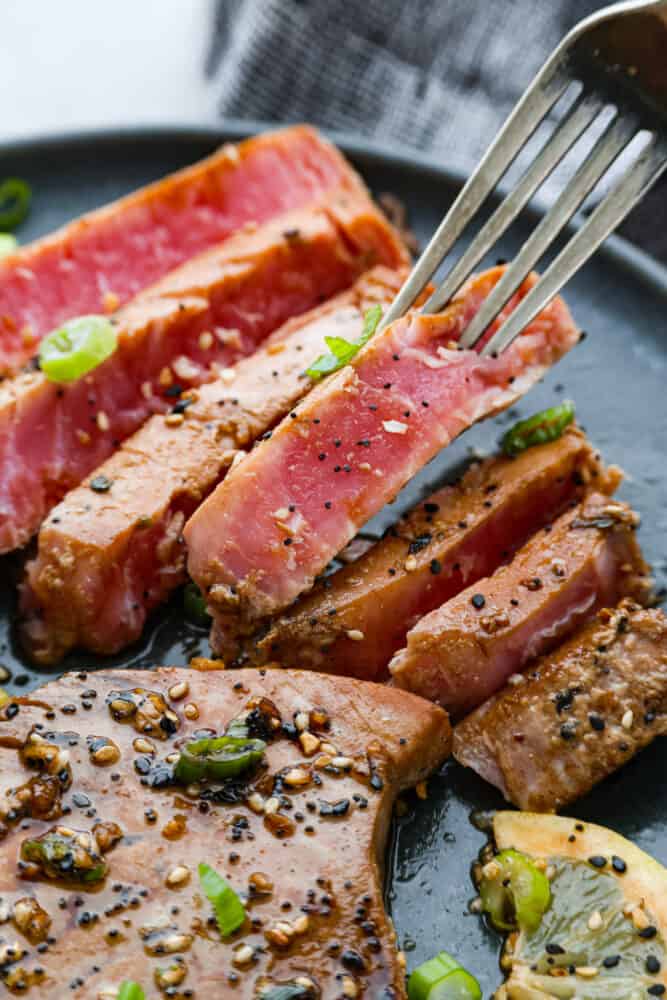
A close up on the dish with a fork taking a slice.

Storing Leftovers

Tuna steaks are best eaten fresh. You definitely don’t want to be making these ahead of time for your guests. If you do have leftovers, then here is how to store them.

  • In the Refrigerator: Store your leftovers in an airtight container in the refrigerator for up to 3 days.
Print

Tuna Steak

There's no reason to save Tuna Steaks for eating out, make them yourself for a gourmet restaurant experience in the comfort of your home. Not only are they full of healthy nutrients, they are delicious and a real treat any day of the week.
Course Dinner
Cuisine American, Asian American
Keyword ahi tuna steaks, tuna steak
Prep Time 30 minutes
Cook Time 4 minutes
Total Time 34 minutes
Servings 4 people
Calories 189kcal
Author Alyssa Rivers

Ingredients

  • ¼ cup water
  • 2 tablespoons lemon juice
  • ¼ cup soy sauce
  • 3 tablespoons sesame oil
  • 1 teaspoon cardamom
  • 1 teaspoon thyme
  • ½ teaspoon pepper
  • 1 clove garlic minced
  • 4 4 ounce tuna steaks

Instructions

  • In a mixing bowl, combine your water, lemon juice, soy sauce, sesame oil, cardamom, thyme, and minced garlic. Mix until well combined.
  • Pour your marinade into a large plastic bag and place your tuna steaks in the bag with the marinade. Push out as much air as you can and thoroughly coat the steaks in the marinade.
  • Allow the tuna steaks to marinate for 20 minutes at room temperature.
  • Heat a skillet over medium high heat, once the steaks are marinated and ready, remove them from the bag and place them on the heated skillet, cook each side for about 2 minutes. Brush the steaks with more of the marinade as they cook to add more flavor.
  • Once you have cooked both sides of each steak remove them from the skillet, the internal temperature should reach 125 degrees fahrenheit. Allow them to rest for 2 minutes, they will continue to cook while they rest.
  • Enjoy fresh!

Nutrition

Calories: 189kcal | Carbohydrates: 2g | Protein: 15g | Fat: 13g | Saturated Fat: 2g | Polyunsaturated Fat: 5g | Monounsaturated Fat: 5g | Cholesterol: 22mg | Sodium: 833mg | Potassium: 196mg | Fiber: 0.4g | Sugar: 0.4g | Vitamin A: 1263IU | Vitamin C: 4mg | Calcium: 15mg | Iron: 1mg


source https://therecipecritic.com/tuna-steak/
Share:

Korean Strawberry Milk

Homemade Korean strawberry milk is a sweet and fruity treat that is sure to satisfy your taste buds. The blend of fresh strawberries and creamy milk creates a perfectly balanced flavor that is both indulgent and refreshing. Sipping on a glass of this cute and tasty beverage brings the café culture of Seoul straight to your kitchen!

With the temperatures rising slowly but surely, it’s time to break out all of the refreshing drink recipes! Some of my favorites are Brazilian lemonade, a mango lassi, or a mint julep! Check out my full list of beverages here for more ideas.

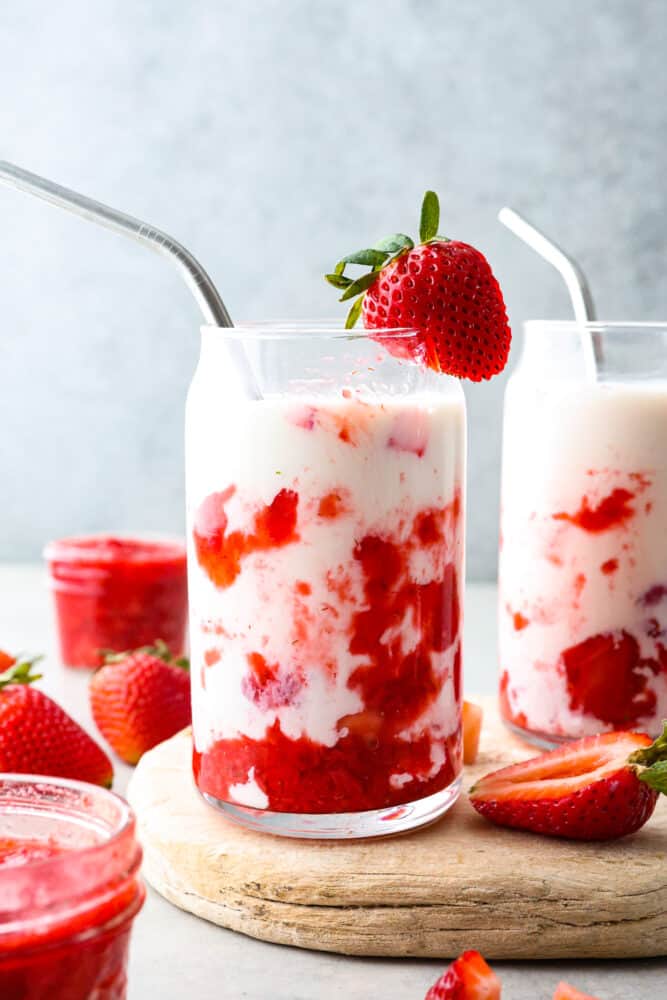
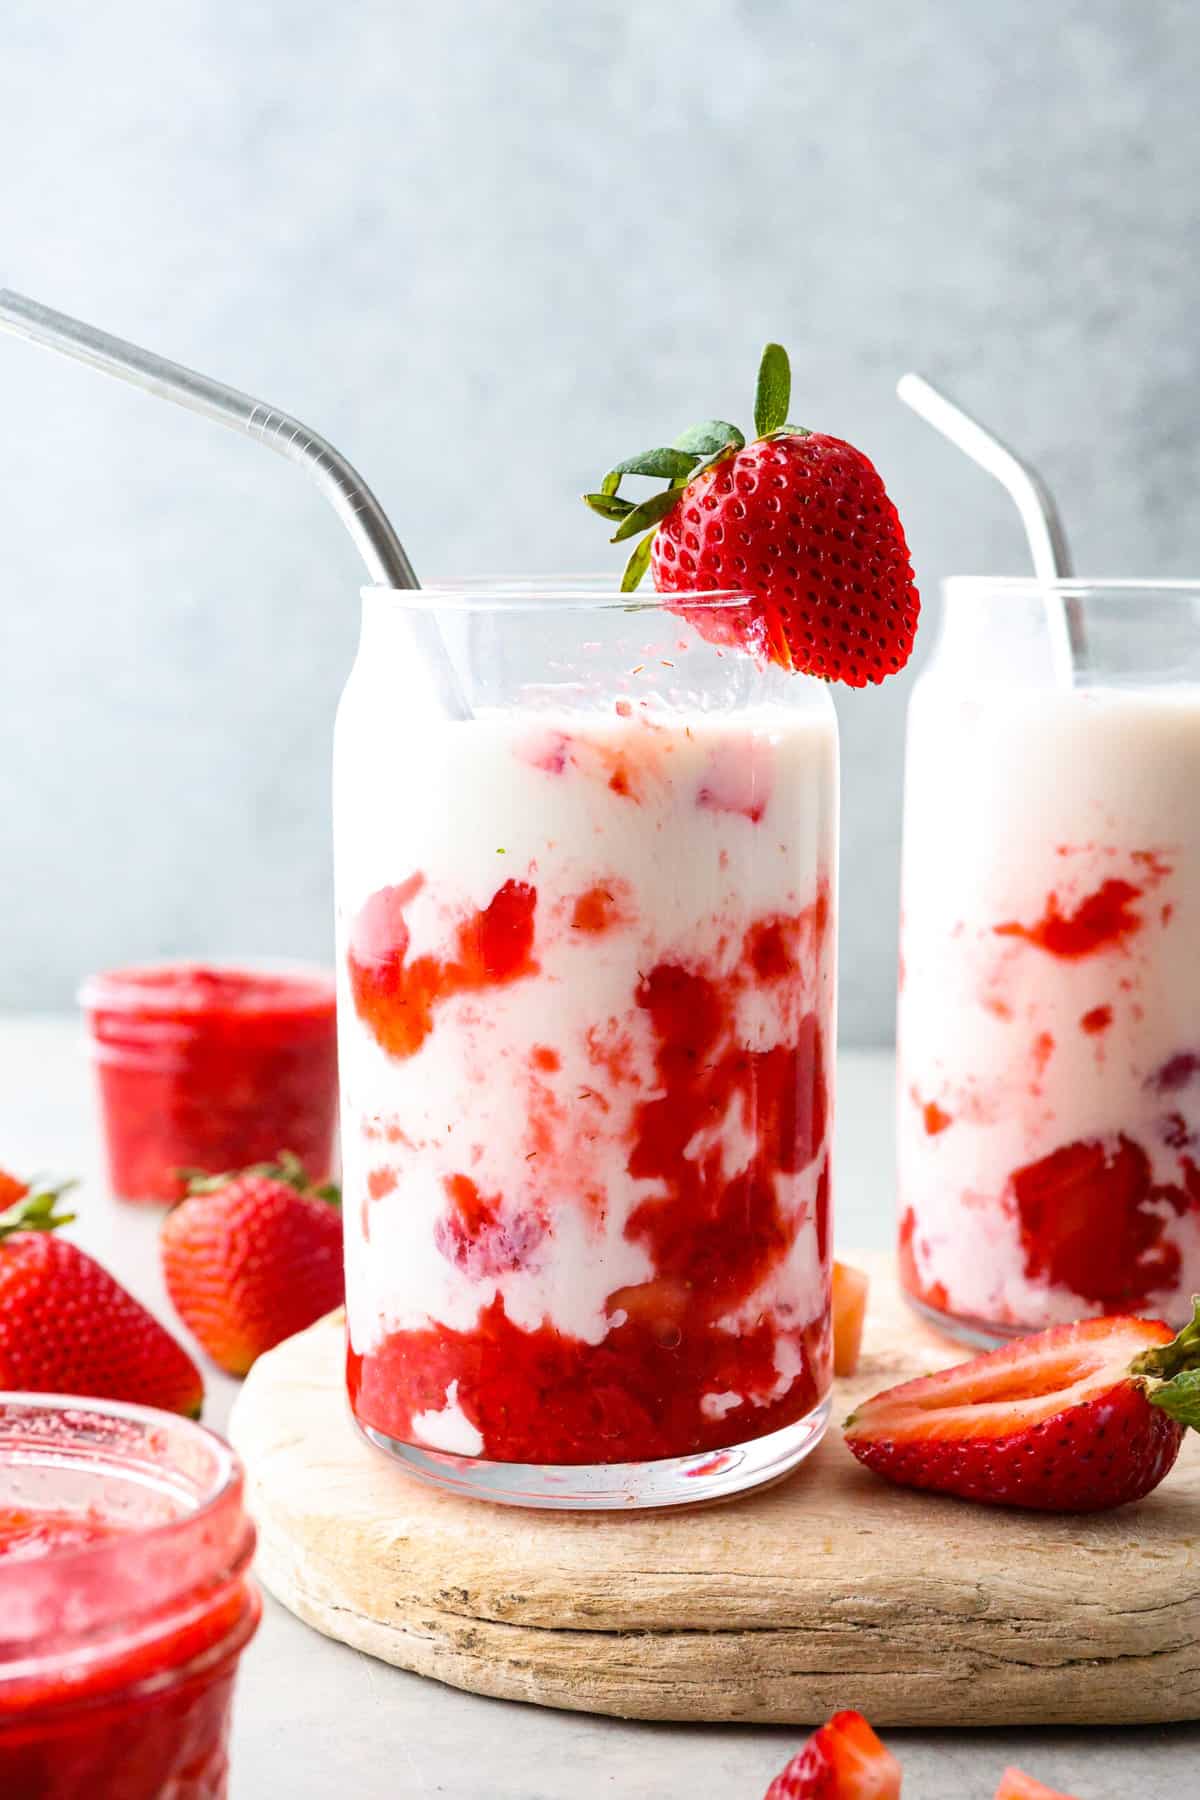
2 glasses of strawberry milk served on a wooden board.

Homemade Korean Strawberry Milk

My younger sister went to university in Korea, and one of the things she would always talk about was how amazing the cafes there were. She would send us pictures of all of the cute drinks, cakes, and pastries. The presentation was always beautiful! In Korea, cafe culture is huge. There’s even a name for it! “Hu-sik” is a term used for dessert, snacks, (or in this case drinks) that you have after dinner. It usually means going out for coffee and socializing with friends. Coffee and tea are both popular choices, but flavored milk is a unique offering in Korean cafes. It’s so delicious, you’re going to love it!

Some of the popular flavors of milk drinks you’ll see are banana, melon, and strawberry. Don’t knock it ‘til you try it! To start off your new obsession, today’s recipe is for delicious strawberry milk. It’s super creamy, refreshing, and filled with chunks of juicy strawberry. The fresh strawberry flavor is out of this world! Plus, it’s beyond easy to make. You’ll have to try it out with all of your favorite fruits.

Ingredients Needed

This is everything I used to make this Korean strawberry milk! I wanted my drink to be creamy but still refreshing and filled with fruity flavor. Feel free to adjust yours to taste! If you’re looking for exact measurements, they can all be found in the recipe card below.

  • Strawberries: The star of the show! You will want these to be hulled and chopped. Some of them will be made into a puree while others will be left in chunks to give the drink delicious texture.
  • Granulated Sugar: To make the drink nice and sweet. You could also use simple syrup, maple syrup, honey, or agave. If you’re looking to cut down your sugar intake, you can also use Stevia or monkfruit sweetener.
  • Lemon Juice: Just a splash to brighten up the overall flavor of the Korean strawberry milk.
  • Vanilla Extract: Adds a warm, sweet flavor to the drink. I recommend using pure vanilla extract or making your own blend for best results.
  • Milk: I used 2% milk, but this recipe is super easy to make dairy-free. Feel free to use your favorite nut milk here! Check out my tips section below for more ideas.
  • Additional Chopped Strawberries: (Optional) for garnish if desired. After all, the presentation is a huge component in making Korean-inspired drinks!

How to Make Korean Strawberry Milk

It’s so easy! Basically, what we’re going to do is make a strawberry puree, and then combine that with the rest of our ingredients to create the most creamy and delicious drink ever!

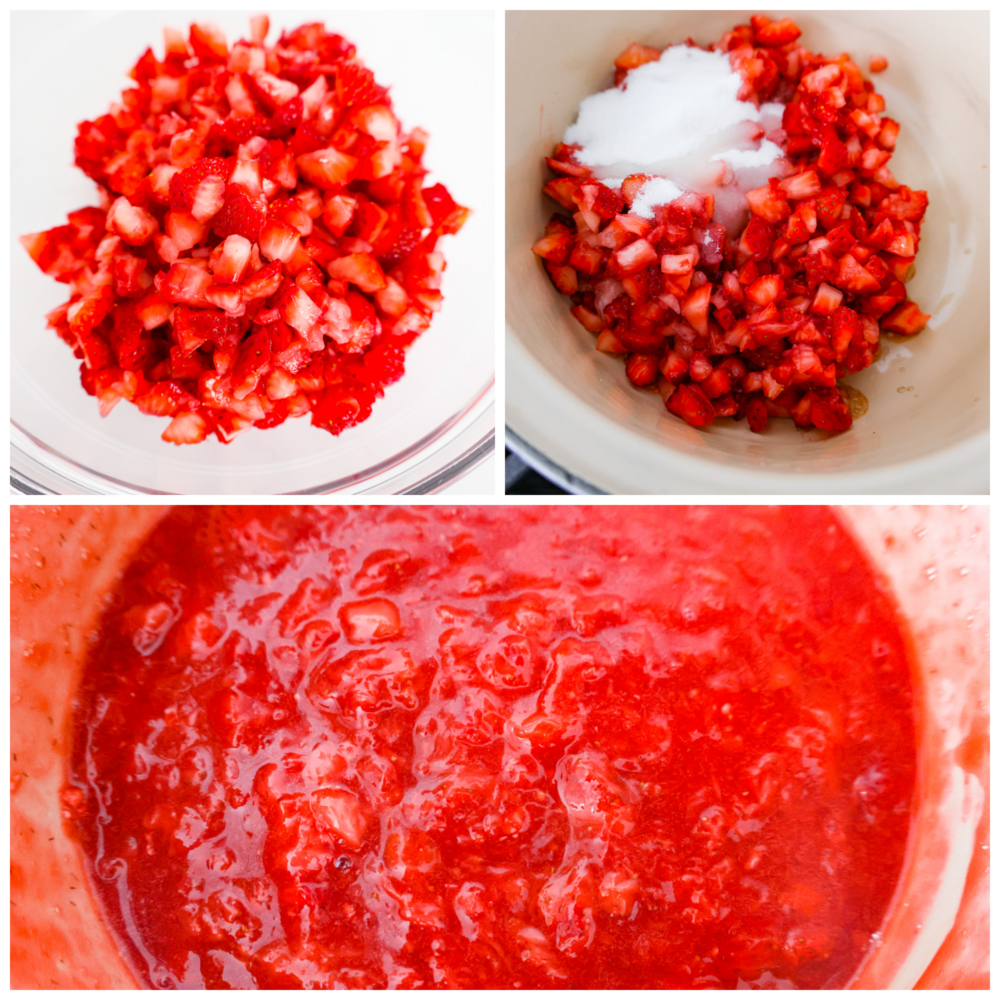
  1. Add Ingredients to Pot: Combine strawberries, sugar, lemon juice, and vanilla in a medium-sized pot.
  2. Cook and Stir: Cook strawberry mixture over medium-low heat for about 15-20 minutes. Stir frequently until the berries release their juices and the sauce starts to thicken.
  3. Cool: Remove from heat and allow the strawberry jam to cool on the counter or in the refrigerator. The sauce will continue to thicken as it cools.
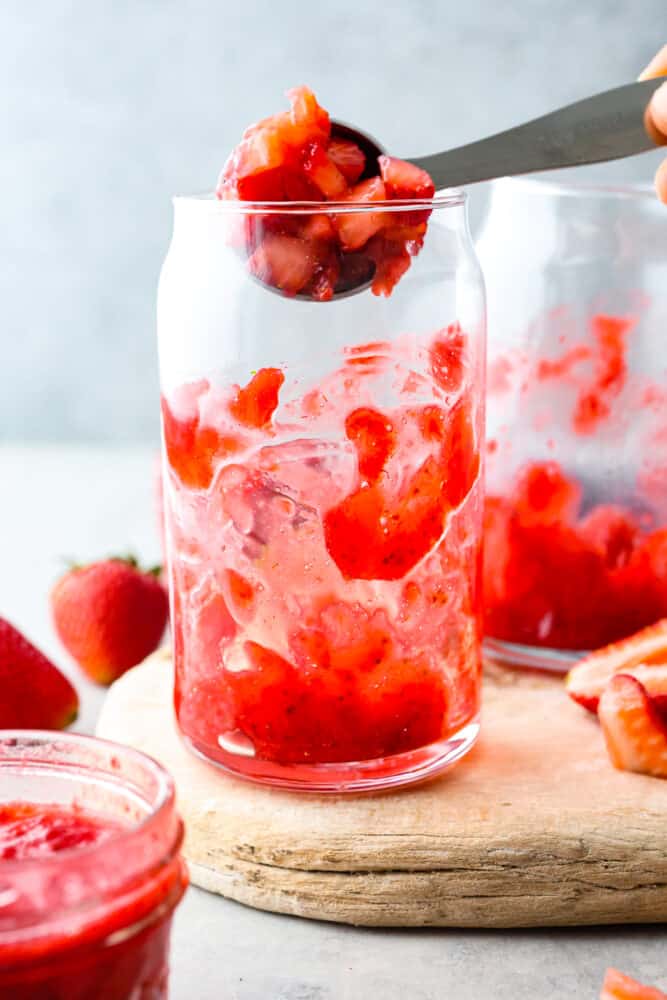
  4. Add to Glass: To assemble the strawberry milk, add ¼ cup of strawberry sauce to a tall glass. I like to smear the sauce around the inside of the glass to make it pretty! Add additional diced strawberries at this time if you would like.
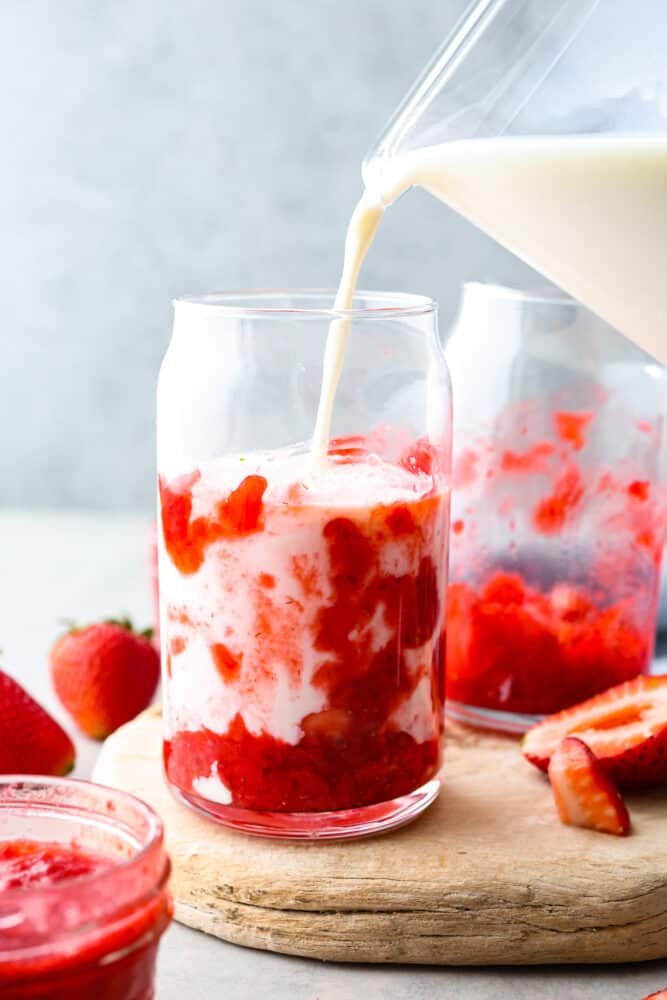
  5. Pour in Milk: Pour milk into the glass stirring to incorporate the sauce throughout the milk and enjoy!
Collage of strawberries being made into puree.

Tips and Variations

Korean strawberry milk is so easy to customize. You can easily make it vegan and also switch up the flavors to personal preference! No matter how you prepare it, I know you will love this refreshing Korean drink as much as I do!

  • Dairy-Free Milk Alternatives: Korean strawberry milk is so easy to make vegan! My favorite milk is light coconut milk because it adds refreshing coconut flavor. (Pink drink, anyone?) Full-fat coconut milk doesn’t blend as well but it’s very creamy! Just know that most non-dairy milk alternatives are more watery so the result of your drink will be different. You’ll have to test out different milks to see what your favorite is! Try: almond milk (unsweetened or vanilla), soy milk (great for creaminess!) cashew milk or almond milk, oat milk, or rice milk!
  • Adding Other Flavors: Hybrid drinks are super popular in Korea. One popular combo is strawberry milk that has been layered with matcha green tea. Not only is it beautiful with the green and pink colors, but it tastes amazing! It’s earthy, creamy, and sweet!
  • The Best Straws to Use: In Korea, these types of drinks are served with big straws similar to what you’d get with bubble tea. This way, you get delicious chunks of strawberry in each sip!
  • Toppings: Try adding in tapioca pearls to make strawberry boba, or popping pearls for an extra burst of juicy flavor! You can typically find these online or at your local Asian market. A scoop of vanilla ice cream or whipped cream is great too if you want something sweeter!
Adding chopped strawberries to a glass cup.

Storing Leftovers

Korean strawberry milk is best served fresh, but you can also keep it in an airtight bottle or jar in the fridge for a few days after it’s made.

  • In the Refrigerator: Store in an airtight bottle or jar for up to 3 days. The ingredients may settle, so give it a stir before serving it.
Milk being poured into a glass.
Print

Korean Strawberry Milk

Homemade Korean strawberry milk is a sweet and fruity treat that is sure to satisfy your taste buds. The blend of fresh strawberries and creamy milk creates a perfectly balanced flavor that is both indulgent and refreshing. Sipping on a glass of this cute and tasty beverage brings the café culture of Seoul straight to your kitchen!
Course Beverage
Cuisine Korean
Keyword Korean strawberry milk, korean strawberry milk recipe
Prep Time 5 minutes
Cook Time 15 minutes
Total Time 20 minutes
Servings 8
Calories 288kcal
Author Alyssa Rivers

Ingredients

  • 1 pound strawberries, hulled and chopped
  • 1/3 cup granulated sugar
  • 2 teaspoons lemon juice
  • 1/2 teaspoon vanilla extract
  • 1 gallon 2 % milk, or nut milk of choice
  • additional chopped strawberries for garnish if desired

Instructions

  • Combine strawberries, sugar, lemon juice, and vanilla in a medium-sized pot.
  • Cook over medium-low heat for about 15-20 minutes. Stir frequently until the berries release their juices and the sauce starts to thicken.
  • Remove from heat and allow the sauce to cool on the counter or in the refrigerator. The sauce will continue to thicken as it cools.
  • To assemble the strawberry milk, add ¼ cup of strawberry sauce to a tall glass. I like to smear the sauce around the inside of the glass to make it pretty! Add additional diced strawberries at this time if you would like.
  • Pour milk into the glass stirring to incorporate the sauce throughout the milk and enjoy!

Nutrition

Serving: 2cups | Calories: 288kcal | Carbohydrates: 35g | Protein: 16g | Fat: 10g | Saturated Fat: 6g | Polyunsaturated Fat: 0.4g | Monounsaturated Fat: 3g | Trans Fat: 0.4g | Cholesterol: 38mg | Sodium: 223mg | Potassium: 751mg | Fiber: 1g | Sugar: 35g | Vitamin A: 490IU | Vitamin C: 35mg | Calcium: 577mg | Iron: 0.3mg


source https://therecipecritic.com/korean-strawberry-milk/
Share:

Soup Dumplings (Xiao Long Bao)

Chinese soup dumplings are delicious homemade wrappers filled with perfectly seasoned pork and soup. Yes, these dumplings are FILLED with soup! How do you get soup inside of a dumpling? It’s like magic! This recipe is simple, delicious, and something everyone will enjoy.

I love Chinese food. It’s definitely my takeout of choice. Luckily for me, the whole family loves it too! I really enjoy making simple Chinese food at home too, because it’s a great way to save a little money and get the best flavors. Some of my favorite homemade recipes are Wonton Soup, this delicious Moo Goo Gai Pan, and this Firecracker Chicken.

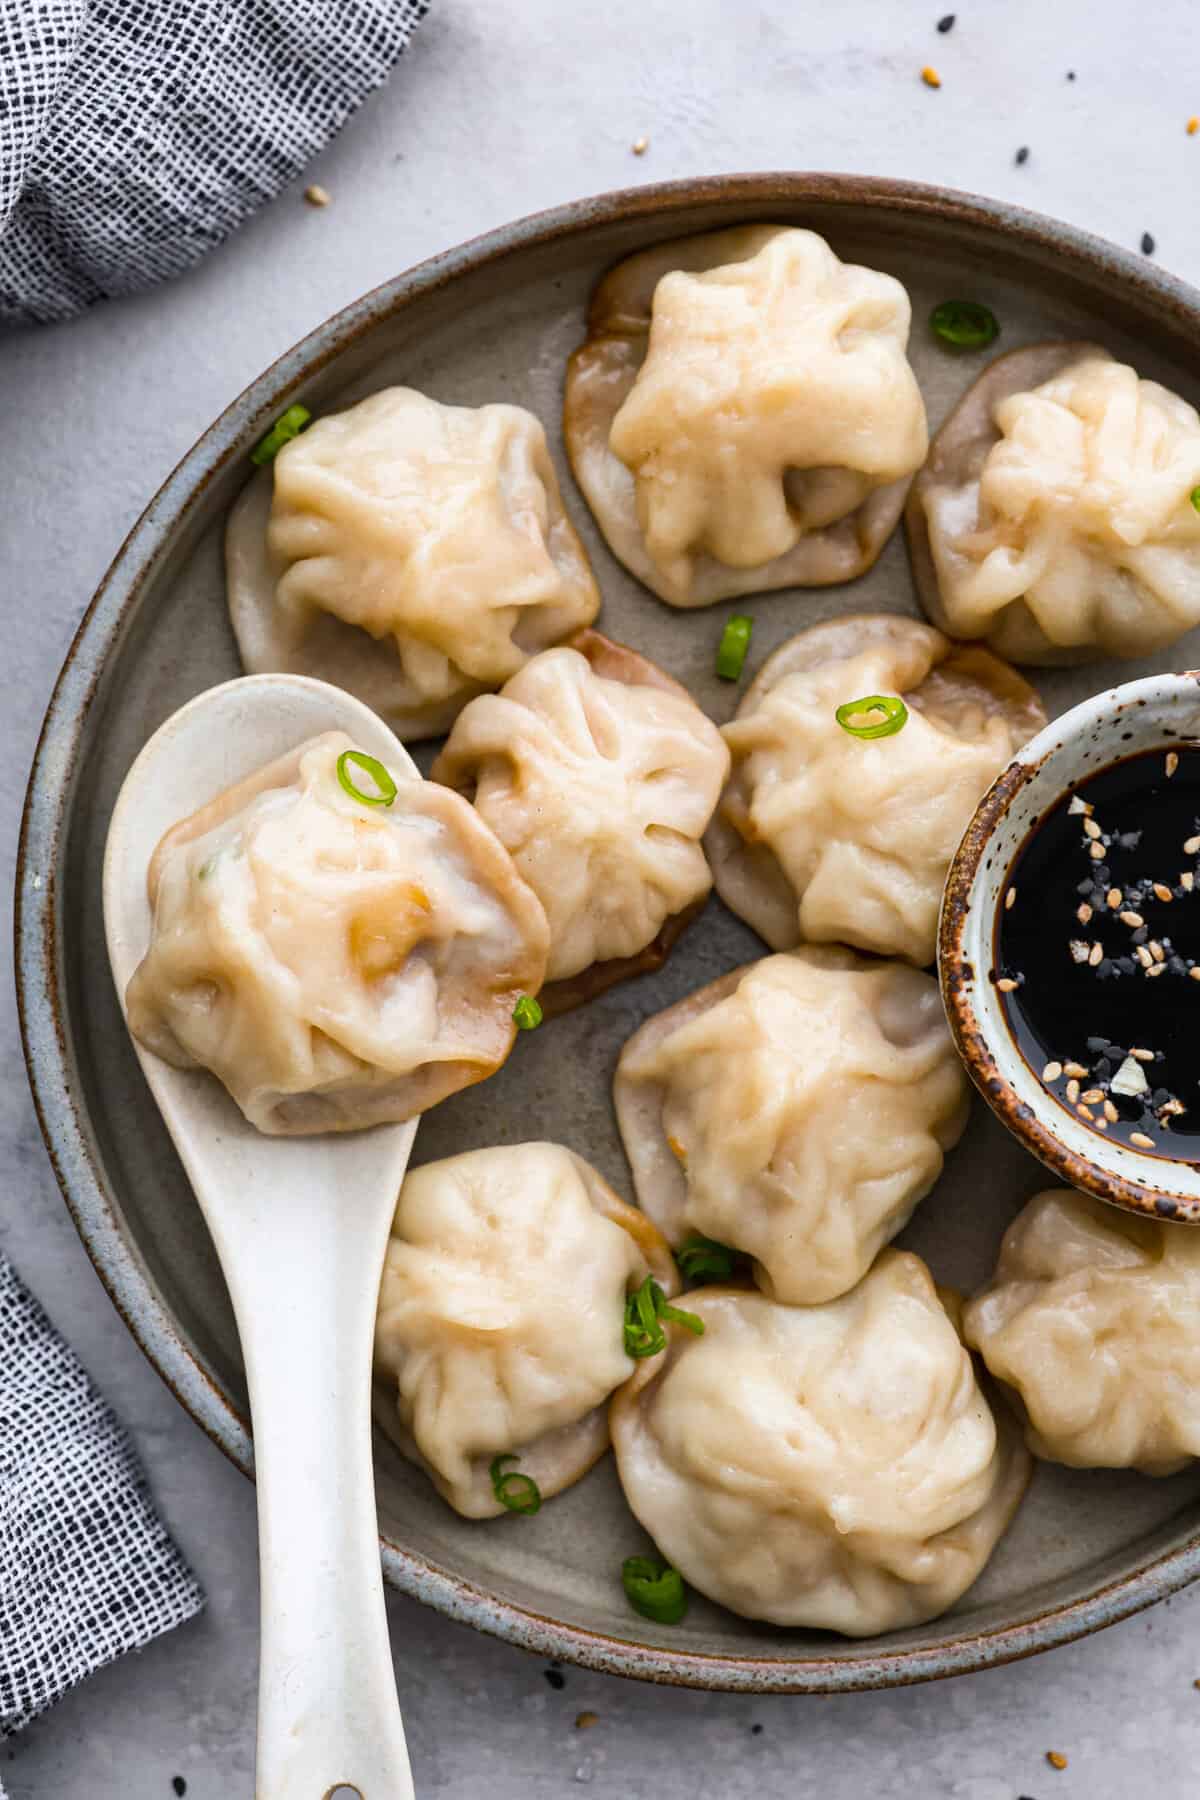
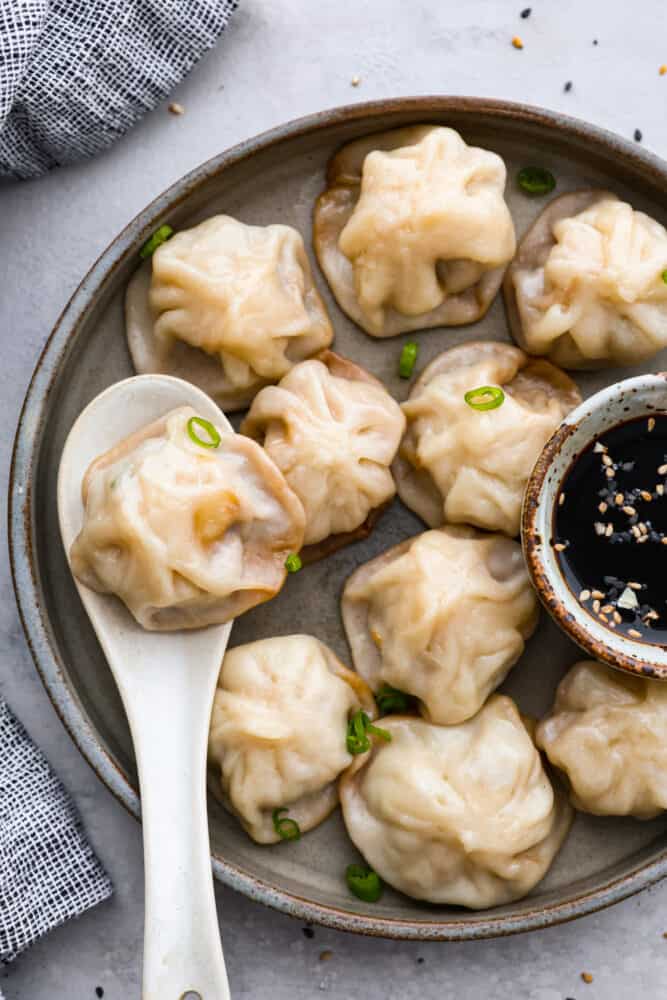
Soup dumplings on a plate with a spoon.

Soup Dumpling

If you have never had a Chinese soup dumpling, you are going to fall in love with this recipe! If you don’t know what a soup dumpling is, I think you are going to love the idea. It is a dumpling with a pork and broth filling. That’s right, there is soup INSIDE the dumpling! You bite into this delicious and soft wrapper and out pours this flavor packed chicken stock and soy sauce broth.

This soup dumpling, also called a Xiao Long Bao, is absolutely one of the best dishes I’ve eaten in my entire life! It’s full of Asian flavors that are so easy to keep eating and eating. This recipe keeps things simple by cooking them in a steamer just like chicken potstickers. These dumplings can also be cooked in a bamboo steamer or cooked in a wok. I love eating these with garlic edamame and dipping them in Chinese black vinegar. They are also delicious with white rice to make it a more filling meal!

Ingredients

The ingredients in these soup dumplings are actually so simple! Straightforward and easy to make, these dumplings are now at the top of my list of fun and creative meals. My whole family looks forward to these dumplings so much. You can find the measurements below in the recipe card.

Soup Gelatin

  • Hot Water: To balance out the strong flavors in the broth.
  • Hot Chicken Stock: You could also use pork broth or beef broth, or even vegetable stock.
  • Soy Sauce: This adds a lot of flavor to the gelatin.
  • Gelatin Powder: This helps the soup set up firm so that you can add it to the filling.

Soup Dumpling Wrapper

  • All-Purpose Flour: Easy to work with and a simple dough.
  • Warm Water: This helps the dough come together.
  • Salt: To add a little extra flavor.

Filling

  • Ground Pork: This is the traditional protein, but you could use ground chicken or ground beef if you want to.
  • Sesame Oil: Sesame oil is really nutty and earthy and goes perfectly with Asian flavors and pork.
  • Soy Sauce: I love adding soy sauce to the filling too
  • Ginger: Fresh ginger is full of zingy flavor.
  • Sugar: A little sugar helps to balance out the salty flavors.
  • Salt and Pepper: For seasoning the meat. I often use white pepper instead of black.
  • Rice Vinegar: Is made from fermented rice and has a mild and slightly sweet flavor. You could use rice wine vinegar too.
  • Green Onion: This brightens up the filling and adds extra flavor.
  • Chinese Black Vinegar: This is for dipping your dumpling in, it’s amazing!
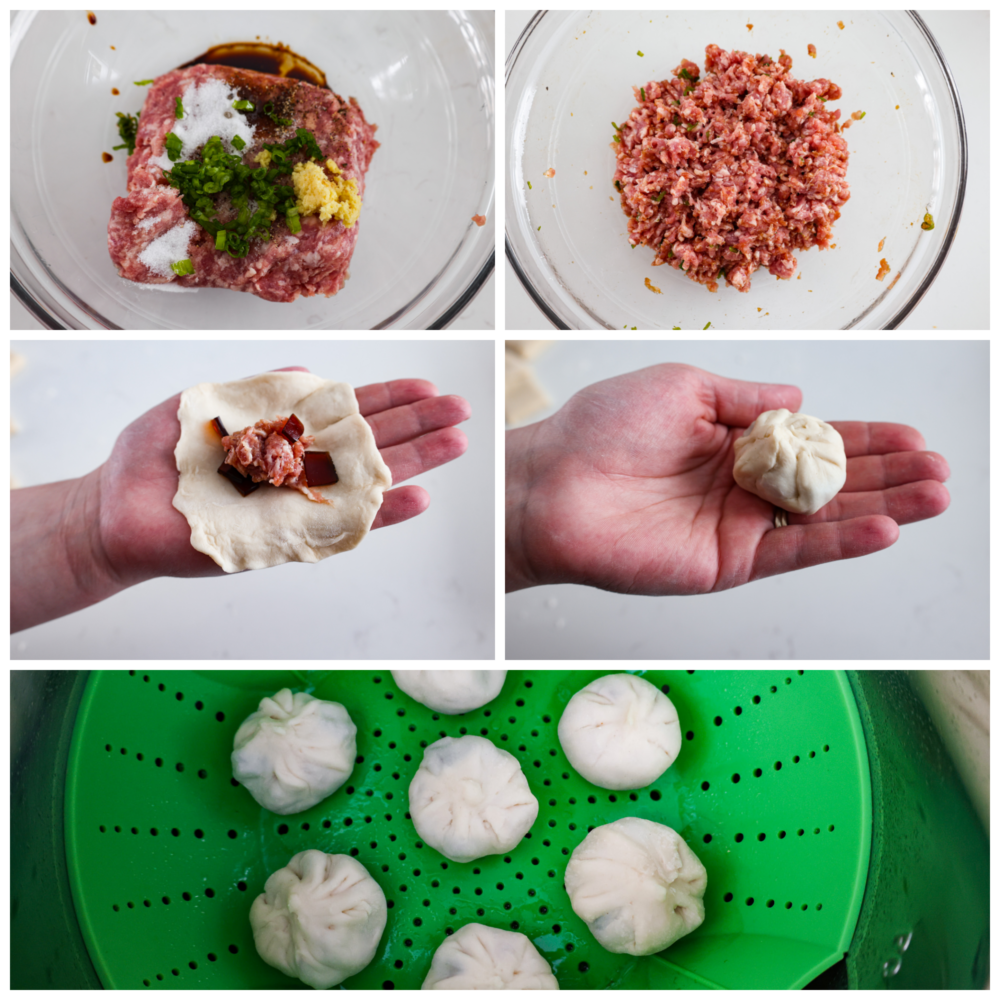
Process photos showing how to mix the filling, add them to the dough, and steam them.

Soup Dumplings Recipe

I really love this soup dumplings recipe because of how straightforward it is! I steam my buns in an instant pot because of how easy it is, but you can absolutely use a traditional pot and boil some water and do it the old-fashioned way! If you love dumplings from the freezer section at the grocery store, then you are going to fall in love with these fresh and delicious flavors.

Make Soup Gelatin

  1. Mix Stock and Gelatin: In a medium bowl, add your water and chicken stock and then heat in the microwave for about 1 minute. Then add in your soy sauce and gelatin and then mix until all the gelatin has dissolved.
  2. Cool: Pour your gelatin mixture into a shallow tray, about an 8X8 baking sheet, and then cool in the fridge until the gelatin has set, about an hour.
  3. Fluff: When the gelatin has set, remove it from the fridge and then fluff/ break it up with a fork. Then set aside.

Soup Dumpling Wrapper

  1. Make Dough: In a medium bowl, add your flour, water and salt. Mix well using a spoon. Once dough has begun to come together, then knead it with your hands until it is a smooth dough. Cover and then allow the dough to rest for 30 minutes.

Soup Dumpling Filling

  1. Mix Filling: In a large bowl, add in your ground pork, sesame oil, soy sauce, ginger, sugar, salt, pepper, rice vinegar, and green onion. Then mix until well combined.

Put It All Together

  1. Roll Out Dough: On a lightly floured surface, roll your dough into a log and then cut into 30 even pieces. Then roll each piece of dough out into a thin round disk.
  2. Add Filling: Take a prepared rolled-out disk and then fill it with about a tablespoon of your pork filling and 1 teaspoon of soup gelatin.
  3. Fold Closed: To fold the dumpling, place it in the palm of your hand and fold the edges of the dumpling wrapper in on itself into pleats until it is all joined at the top of the dumpling. Then pinch tightly to secure the wrapper closed, you don’t want any of your soup to leak out while they are cooking.
  4. Steam: In an instant pot with a steamer basket sprayed with nonstick cooking spray, set the instant pot to steam for 8 minutes. Allow the steaming time to finish and then do a quick steam release to take the dumplings out.
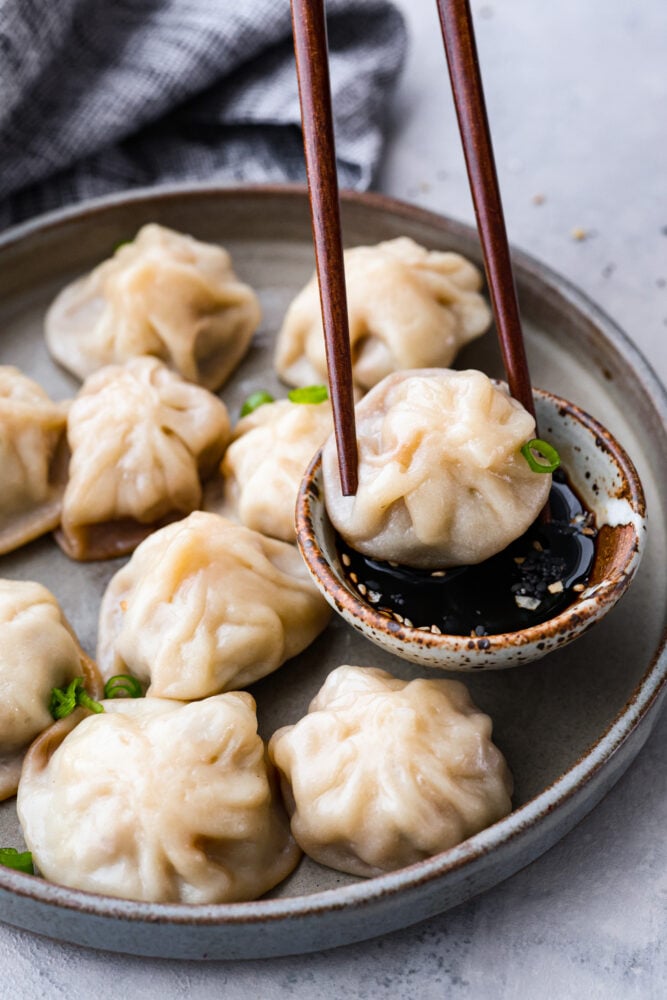
  5. Dip and Enjoy: Enjoy fresh with Chinese black vinegar!
Soup dumplings being dipped in sauce with chop sticks.

Tips for Making Soup Dumplings

Soup dumplings are amazingly simple to make, and these tips are going to make your life even easier. I walk you through how to use a bamboo steamer to get the best results in this recipe, and how to freeze them for a quick and easy meal.

  • Different Ways to Steam Dumplings: The traditional way to steam soup dumplings is in a bamboo steamer. This one is cheap and can be found at your local Target. I personally love steaming things in my instant pot. Using a bamboo steamer is really pretty simple, the first time you do it it can seem a little intimidating. Just fill a wok or skillet with water and bring to a boil. Line your bamboo steamer with liners, and lay your dumplings on top. Make sure they aren’t touching and have plenty of room. Set the steamer in the wok or pot and steam for 8 minutes.
  • Make Freezer Dumplings: I absolutely love the pre-cooked frozen dumplings from Costco. You can make your own at home with this recipe! Follow these instructions to make the soup dumplings. Let them completely cool, and then freeze them on a baking sheet lined with parchment. Make sure they aren’t touching each other. When they have frozen for a few hours, then you can place them in an airtight bag and store for two months. Now you have dumplings that you can steam or boil until they are heated through and you’ve got the perfect quick and easy meal.

Storing Leftovers

Check out the tip box above for how to turn this soup dumpling recipe into a freezer meal! You can also store your dumplings in the fridge after you have cooked them. I recommend eating them fresh because they are hard to reheat. If you really want to cut down on prep time the day of, you can make the gelatin broth and fill ahead of time, then make the dough and assemble them when you are ready to cook them.

  • In the Refrigerator: You can store your leftovers in an airtight container in the refrigerator for up to two days.
Print

Soup Dumplings

Chinese soup dumplings are delicious homemade wrappers filled with perfectly seasoned pork and soup. Yes, these dumplings are FILLED with soup! How do you get soup inside of a dumpling? It's like magic! This recipe is simple, delicious, and something everyone will enjoy.
Course Dinner
Cuisine Asian, Chinese
Keyword chinese dumplings, pork dumplings, soup dumplings
Prep Time 1 hour 30 minutes
Cook Time 20 minutes
Total Time 1 hour 50 minutes
Servings 30 dumplings
Calories 55kcal
Author Alyssa Rivers

Ingredients

Soup gelatin

  • ¼ cup hot water
  • ¼ cup hot chicken stock
  • 2 tablespoons soy sauce
  • 2 teaspoons unflavored gelatin powder

Wrapper

  • 2 cups all purpose flour
  • ¾ cup warm water
  • 1 teaspoon salt

Filling

  • ½ pound ground pork
  • 1 teaspoon sesame oil
  • 1 teaspoons soy sauce
  • 1 teaspoon ginger freshly grated
  • 1 teaspoon sugar
  • ½ teaspoon salt
  • ½ teaspoon pepper
  • 2 teaspoons rice vinegar
  • 1 tablespoon green onion finely chopped
  • Chinese black vinegar for serving

Instructions

Soup Gelatin

  • In a medium bowl, add your water and chicken stock and heat in the microwave for about 1 minute. Add in your soy sauce and gelatin and mix until all the gelatin has dissolved.
  • Pour your gelatin mixture into a shallow tray, about an 8X8 baking sheet, and cool in the fridge until the gelatin has set, about an hour.
  • When the gelatin has set, remove it from the fridge and fluff/ break it up with a fork. Set aside.

Wrapper

  • In a medium bowl, add your flour, water and salt. Mix well using a spoon. Once dough has begun to come together, knead it with your hands until it is a smooth dough. Cover and allow the dough to rest for 30 minutes.

Filling

  • In a large bowl, add in your ground pork, sesame oil, soy sauce, ginger, sugar, salt, pepper, rice vinegar, and green onion. Mix until well combined.

Assembly

  • On a lightly floured surface, roll your dough into a log and cut into 30 even pieces. Roll each piece of dough out into a thin round disk.
  • Take a prepared rolled out disk and fill it with about a tablespoon of your pork filling and 1 teaspoon of soup gelatin.
  • To fold the dumpling, place it in the palm of your hand and fold the edges of the dumpling wrapper in on itself into pleats until it is all joined at the top of the dumpling. Pinch tightly to secure the wrapper closed, you don’t want any of your soup to leak out while they are cooking.
  • In an instant pot with a steamer basket sprayed with nonstick cooking spray, set the instant pot to steam for 8 minutes. Allow the steaming time to finish and do a quick steam release to take the dumplings out.
  • Enjoy fresh with Chinese black vinegar!

Nutrition

Calories: 55kcal | Carbohydrates: 7g | Protein: 3g | Fat: 2g | Saturated Fat: 1g | Polyunsaturated Fat: 0.2g | Monounsaturated Fat: 1g | Cholesterol: 6mg | Sodium: 203mg | Potassium: 37mg | Fiber: 0.3g | Sugar: 0.2g | Vitamin A: 3IU | Vitamin C: 0.1mg | Calcium: 3mg | Iron: 1mg


source https://therecipecritic.com/soup-dumplings/
Share:

Popular

Archive

Slider Tag

Facebook

Header Ads

Recent in Food

Blog Archive

Recent Posts

Unordered List

  • Lorem ipsum dolor sit amet, consectetuer adipiscing elit.
  • Aliquam tincidunt mauris eu risus.
  • Vestibulum auctor dapibus neque.

Pages

Theme Support

Need our help to upload or customize this blogger template? Contact me with details about the theme customization you need.