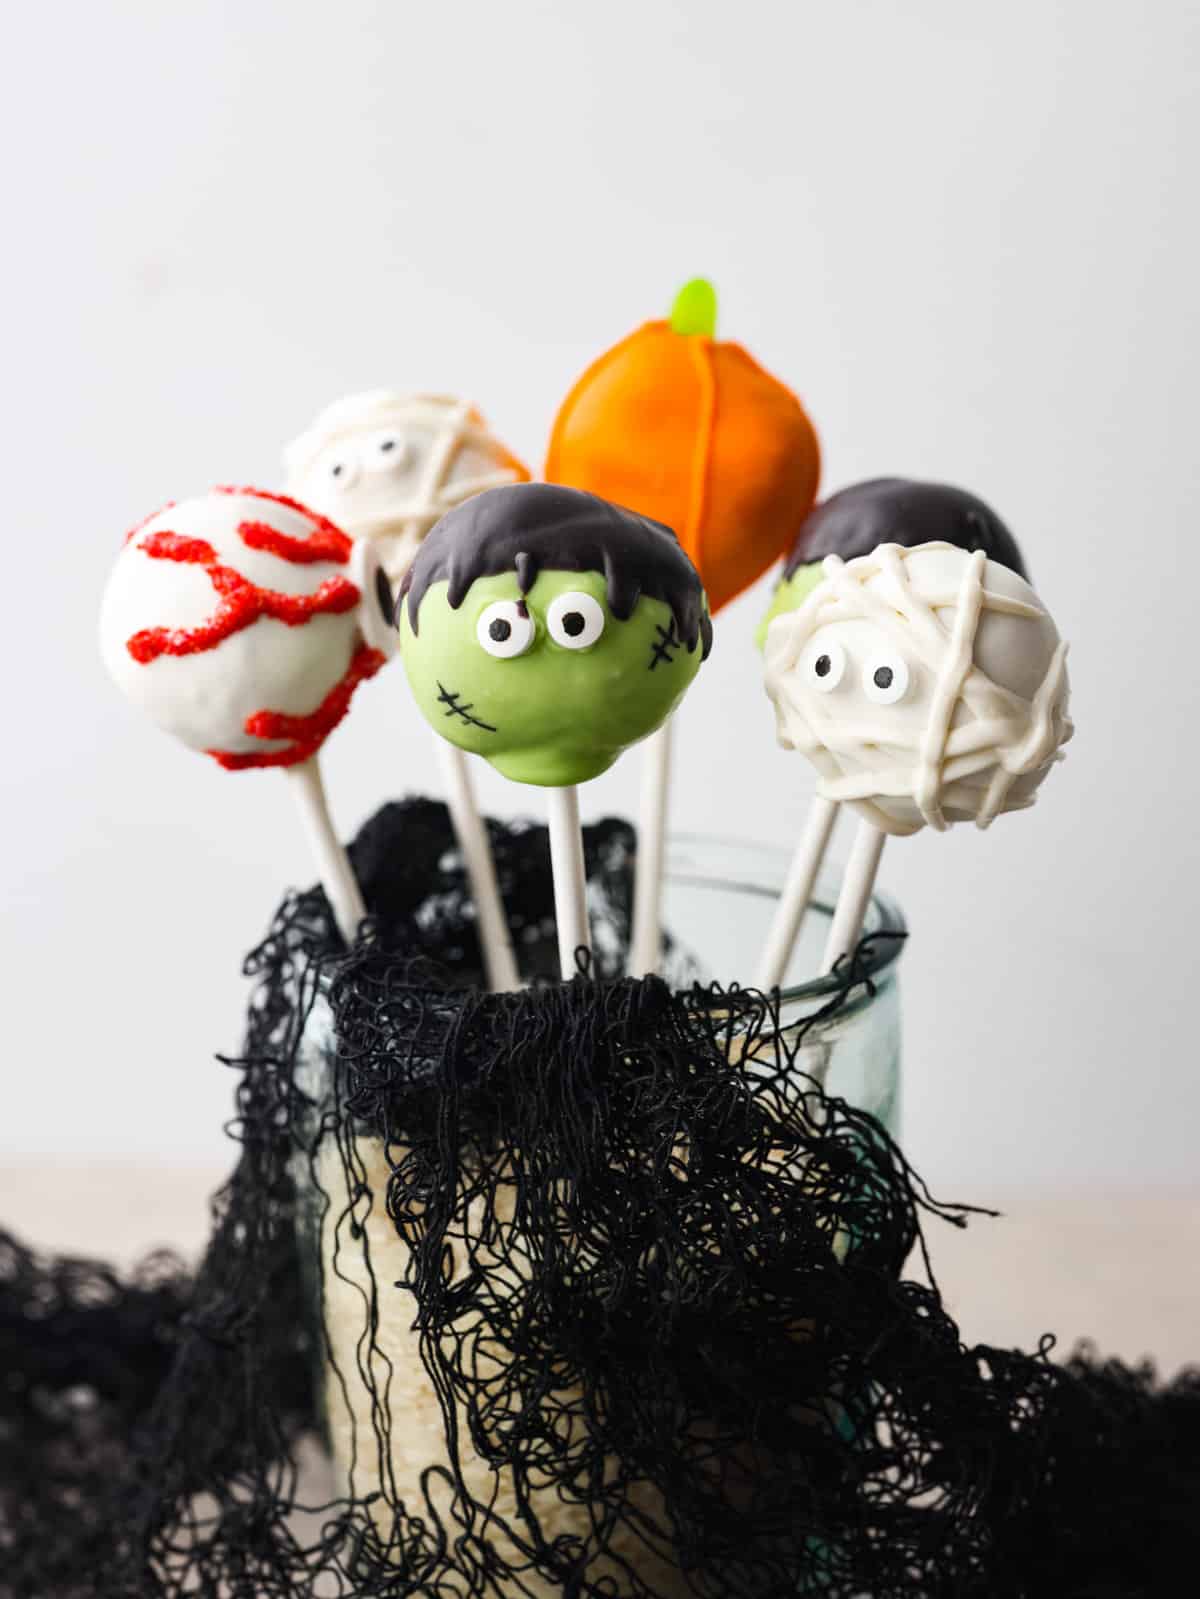
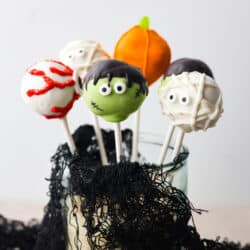
These easy, festive, and adorable Halloween donut hole pops will thrill your guests! Believe me when I say people can’t stop talking about how adorable, and how delicious these pops are. You’ll be so glad you served these at your Halloween party this year.
It’s no secret I’m a fan of Halloween. Give me all things fall! I can’t get enough of fun Halloween recipes either, and if you love them as much as I do, you absolutely have to try this epic Hocus Pocus Charcuterie Board, or keep it a more general Halloween theme with this Halloween Charcuterie Board! These Mummy Hot Dogs are something I make every year and people can’t get enough of them.
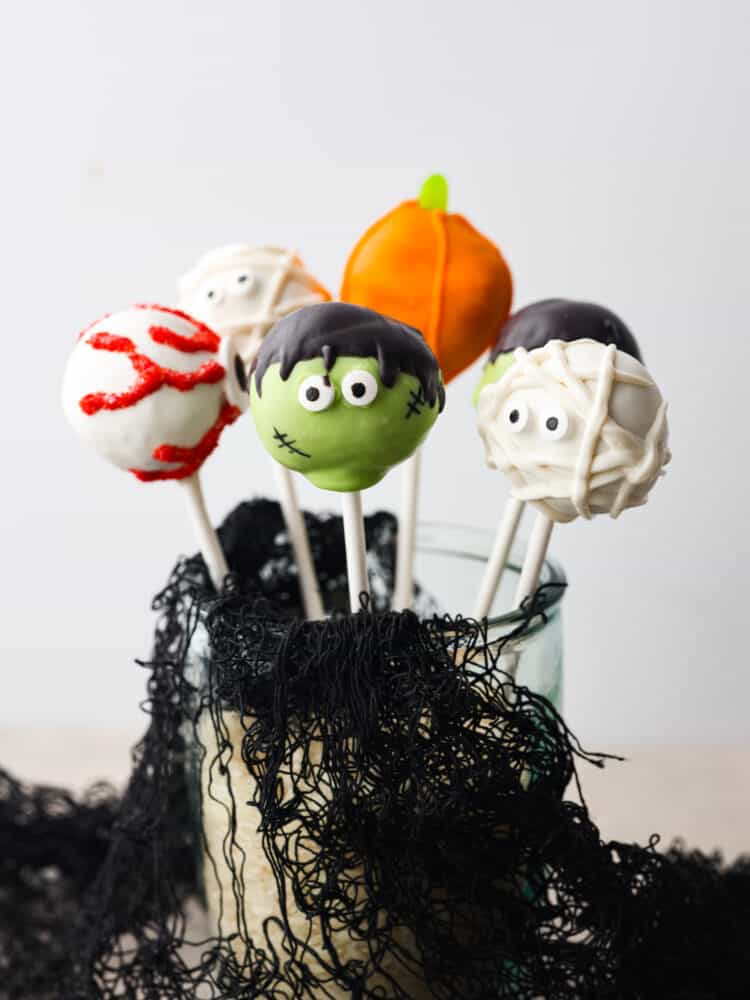
Halloween Donut Hole Pops
Trust me when I say this was one of the easiest and most enjoyable holiday treats I’ve made in a long time! They are so simple, yet blew everyone away with their look and taste! I have some pretty great Halloween recipes up my sleeve, but this one may take the cake… pop (corny, I know). I love making things from scratch, and you could make the donut holes or the cake for these pops if you wanted to. But it was nice to just get right to decorating and to have a lot less to clean up.
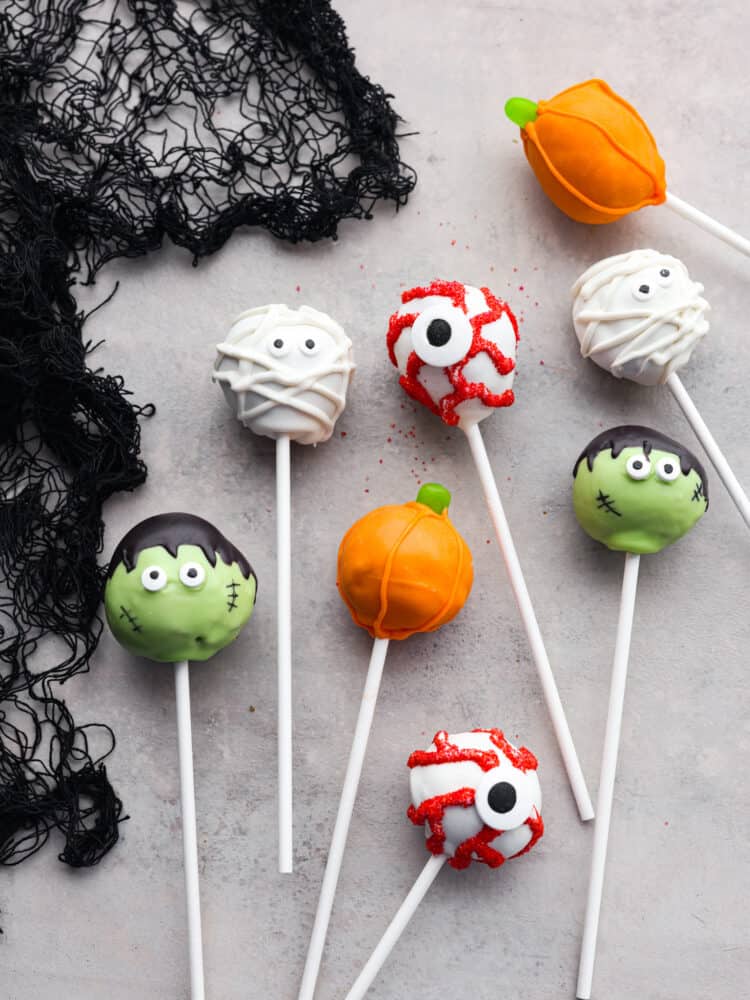
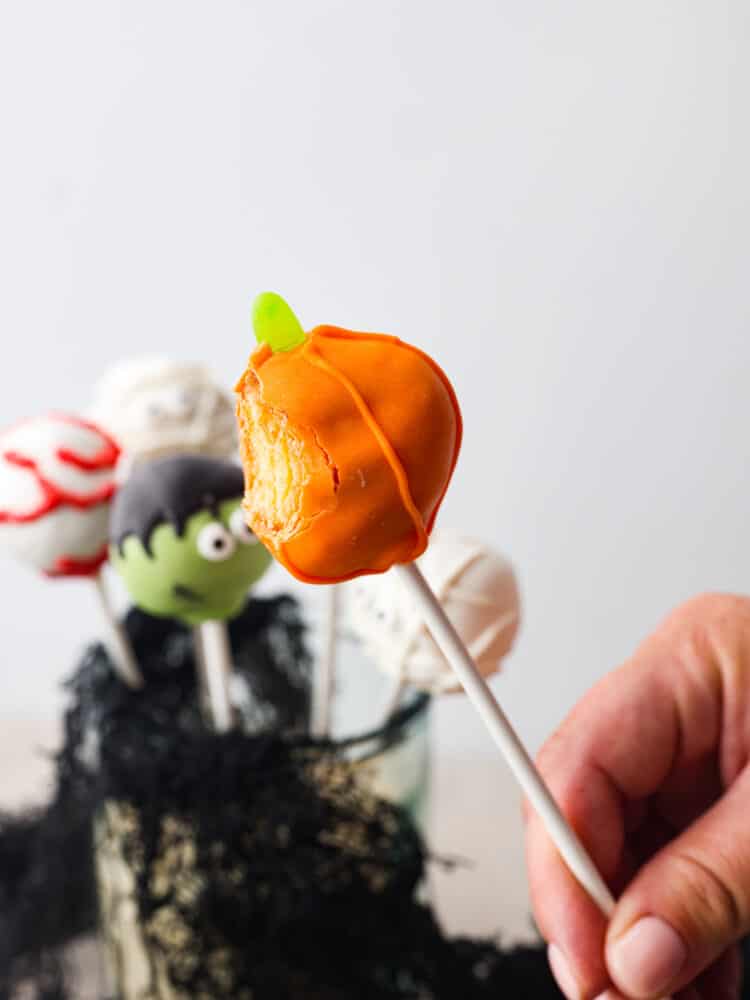
I decided to make some of my favorite Halloween characters. Frankenstein is probably my favorite, he’s just so loveable! The mummy and eyeball were so simple and really wowed everyone. You could also get a few more characters by drawing a face on the pumpkin to turn them into Jack-O-Lanterns. There are so many possibilities with these fun Halloween Donut Hole Pops!
Halloween Donut Hole Pops Ingredients
This recipe is so fun to put together, and would be a great activity to do with guests too! It’s so simple, and all that is required is the decorating tools and lots of creativity. If you are going to grab all the ingredients listed here, you’ll want to make quite a few pops. These Halloween cake pops come together so quickly, you won’t be able to stop making them! Check out the recipe card below for the full recipe.
- Donut Holes: I bought 20, and found that plain donut holes worked the best.
- Candy Melts: I bought White for the mummy, Green for Frankenstein, Black for Frankensteins’ hair, and Orange for the pumpkin. You can buy whatever colors you like, or stick to this recipe!
- Green Mike and Ikes: These are for the stems of the pumpkin.
- Small Eyeball Sprinkles: I used small eyes for my Frankenstein and mummy.
- Large Eyeball Sprinkles: The large sprinkles were the perfect size for the eyeball pop.
- Edible Black Marker: This is great to have on hand for lots of projects, so you’ll want to get one! I used it to make the small details on Frankenstein which totally bring him to life.
- Red Sanding Sugar: I used sanding sugar to get the veins of the eyeball to really pop (see what I did there?). It turned out great!
- Lollipop Sticks: You can find these cake pop sticks in the baking aisle, you may be able to find other colors than just white which would add to the theme!
How to Assemble Halloween Donut Hole Pops
Now the fun part! Assembling these donut hole cake pops was way too much fun. Using my imagination to create Halloween creatures makes the holiday feel as exciting as it did when I was a kid. Get creative with your designs, or if you want to make them the same way I did, here is how to do it.
Let’s Get Started!
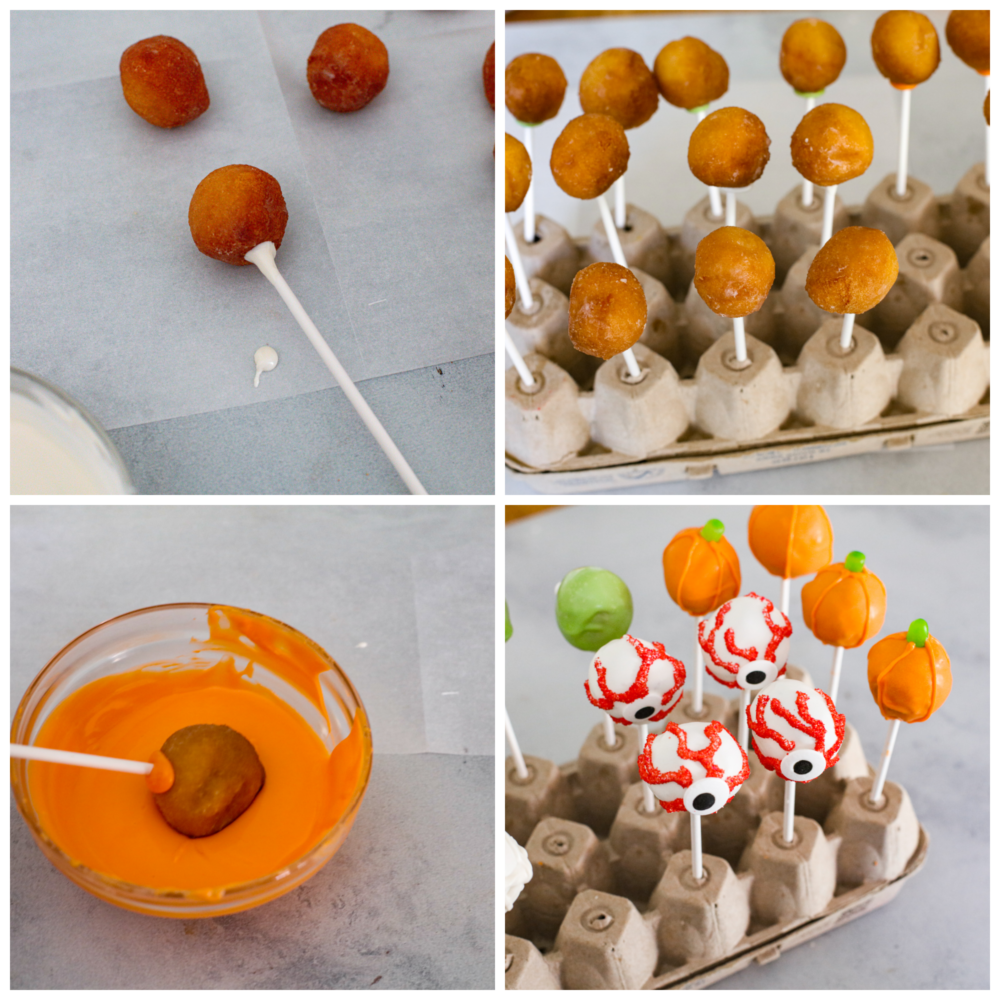
- Prep: Prep your work area by laying down parchment paper. Poke holes in either an upside-down egg carton, a large Styrofoam block, or a small cardboard box. This will act as a stand for the pops as they set up.
- Melt: In four small bowls add the candy melts, one color to each bowl. Melt in the microwave one bowl at a time with the power on 50% for 1 minute. Stir and microwave again for 30 seconds as needed.
- Dip: Dip the end of a lollipop stick in the melted candy melts and then insert into the bottom of a doughnut hole. Let the candy melts fully set up before proceeding with decorating. Five with green, five with orange and ten with white.
Pumpkin Design
- Dip: One at a time, dip five donut holes (the ones with orange candy melts holding the stick in them) in the melted orange candy melts until fully covered. Tap off the excess and place a green Mike and Ike (cut in half) right on top to act as the pumpkin stem. Let set up completely.
- Decorate: Once the orange is set, remelt the remaining orange candy melts and add to a piping bag. Snip off a very small bit of the end of the bag and pipe 5 lines up and down the pumpkin to give it definition.
- Let Them Set Up: Let set up completely before serving.
Eyeball Design
- Dip: One at a time, dip five donut holes (ones with white candy melts holding the stick in them) in the melted white candy melts until fully covered. Tap off the excess and stick a large eyeball sprinkle to the front. Let set up completely.
- Decorate: Remelt some of the white candy melts and add to a piping bag. Snip off the very end of the bag and pipe vein-like strands all around the eyeball. White the candy melts are still wet, dust generously with red sanding sugar.
- Let Them Set Up: Let set up completely before serving.
Mummy Design
- Dip: One at a time, dip five donut holes (ones with white candy melts holding the stick in them) in the melted white candy melts until fully covered. Tap off the excess and stick two small eyeball sprinkles to the front of the donut hole, about ⅓ of the way down from the top.
- Decorate: Remelt some of the white candy melts and add to a piping bag. Snip off the very end of the bag and pipe stripes of white all around the front and eyes.
- Let Them Set Up: Let set up completely before serving.
Frankenstein Design
- Dip: One at a time, dip five donut holes (ones with green candy melts holding the stick in them) in the melted green candy melts until fully covered. Tap off the excess and stick two small eyeball sprinkles to the front of the donut hole, about ⅓ of the way down from the top.
- Dip Top: Once the green has set up, dip the top ⅓ of the donut hole into the melted black candy melts and use a toothpick to carefully make the hairline pointed or rough all around the head.
- Decorate: Once the black has set up, use an edible black marker to draw a couple stitches on Frankenstein’s face.
- Let Them Set Up: Let set completely before serving.
Switch It Up!
I chose the candies I like the most for the features of my little creatures. You can totally customize these designs to make the most out of this recipe!
- Get Creative: Are you a chocolate lover? Use Sixlets or Green M&M’s instead of Mike and Ikes to make the pumpkin stem.
- Make a New Creature: Get clever with the Halloween characters you love and create something new! Use the natural colors of your favorite candies and flavors to inspire your next cake pop design.
- Use Different Donut Flavors: Keep your guests guessing by using different donut hole flavors! There are so many fun flavors you can create.
- Use Melting Chocolates: You can easily use melting chocolates instead of melting candies. White chocolate, dark chocolate, and milk chocolate will still give you a range of fun colors to create with, and some may like the flavor better!
How to Store Leftovers
I doubt you will have any of these left over, but if you do make extra, or make them ahead of time, here is how you can keep them fresh.
- On the Counter: You can leave these out at room temperature in an airtight container or covered with plastic wrap. You can store them for up to 3 days, but I recommend eating them within 24 hours.
Note: Do not store your donut cake pops in the fridge or freezer. This will cause them to sweat and crack, and they could also develop mold.
Halloween Donut Hole Pops
Ingredients
- 20 Donut Holes Plain work best
- White Candy Melts
- Green Candy Melts
- Black Candy Melts
- Orange Candy Melts
- Green Mike and Ikes
- Small Eyeball Sprinkles
- Large Eyeball Sprinkles
- Edible Black Marker
- Red Sanding Sugar
- 20 Lollipop Sticks
Instructions
-
Prep your work area by laying down parchment paper. Poke holes in either an upside-down egg carton, a large Styrofoam block, or a small cardboard box. This will act as a stand for the pops as they set up.
-
In four small bowls add the candy melts, one color to each bowl. Melt in the microwave one bowl at a time with the power on 50% for 1 minute. Stir and microwave again for 30 seconds as needed.
-
Dip the end of a lollipop stick in the candy melts and then insert into the bottom of a donut hole. Let the candy melts fully set up before proceeding with decorating. Five with green, five with orange and ten with white.
Pumpkin Design
-
One at a time, dip five donut holes (the ones with orange candy melts holding the stick in them) in the melted orange candy melts until fully covered. Tap off the excess and place a green Mike and Ike (cut in half) right on top to act as the pumpkin stem. Let set up completely.
-
Once the orange is set, remelt the remaining orange candy melts and add to a piping bag. Snip off a very small bit of the end of the bag and pipe 5 lines up and down the pumpkin to give it definition.
-
Let set up completely before serving.
Eyeball Design
-
One at a time, dip five donut holes (ones with white candy melts holding the stick in them) in the melted white candy melts until fully covered. Tap off the excess and stick a large eyeball sprinkle to the front. Let set up completely.
-
Remelt some of the white candy melts and add to a piping bag. Snip off the very end of the bag and pipe vein-like strands all around the eyeball. White the candy melts are still wet, dust generously with red sanding sugar.
-
Let set up completely before serving.
Mummy Design
-
One at a time, dip five donut holes (ones with white candy melts holding the stick in them) in the melted white candy melts until fully covered. Tap off the excess and stick two small eyeball sprinkles to the front of the donut hole, about ⅓ of the way down from the top.
-
Remelt some of the white candy melts and add to a piping bag. Snip off the very end of the bag and pipe stripes of white all around the front and eyes.
-
Let set up completely before serving.
Frankenstein Design
-
One at a time, dip five donut holes (ones with green candy melts holding the stick in them) in the melted green candy melts until fully covered. Tap off the excess and stick two small eyeball sprinkles to the front of the donut hole, about ⅓ of the way down from the top.
-
Once the green has set up, dip the top ⅓ of the donut hole into the melted black candy melts and use a toothpick to carefully make the hairline pointed or rough all around the head.
-
Once the black has set up, use an edible black marker to draw a couple stitches on Frankenstein’s face.
-
Let set completely before serving.
Nutrition
source https://therecipecritic.com/halloween-donut-hole-pops/


No comments:
Post a Comment