Halloween Donut Hole Pops

These easy, festive, and adorable Halloween donut hole pops will thrill your guests! Believe me when I say people can’t stop talking about how adorable, and how delicious these pops are. You’ll be so glad you served these at your Halloween party this year.

It’s no secret I’m a fan of Halloween. Give me all things fall! I can’t get enough of fun Halloween recipes either, and if you love them as much as I do, you absolutely have to try this epic Hocus Pocus Charcuterie Board, or keep it a more general Halloween theme with this Halloween Charcuterie Board! These Mummy Hot Dogs are something I make every year and people can’t get enough of them.
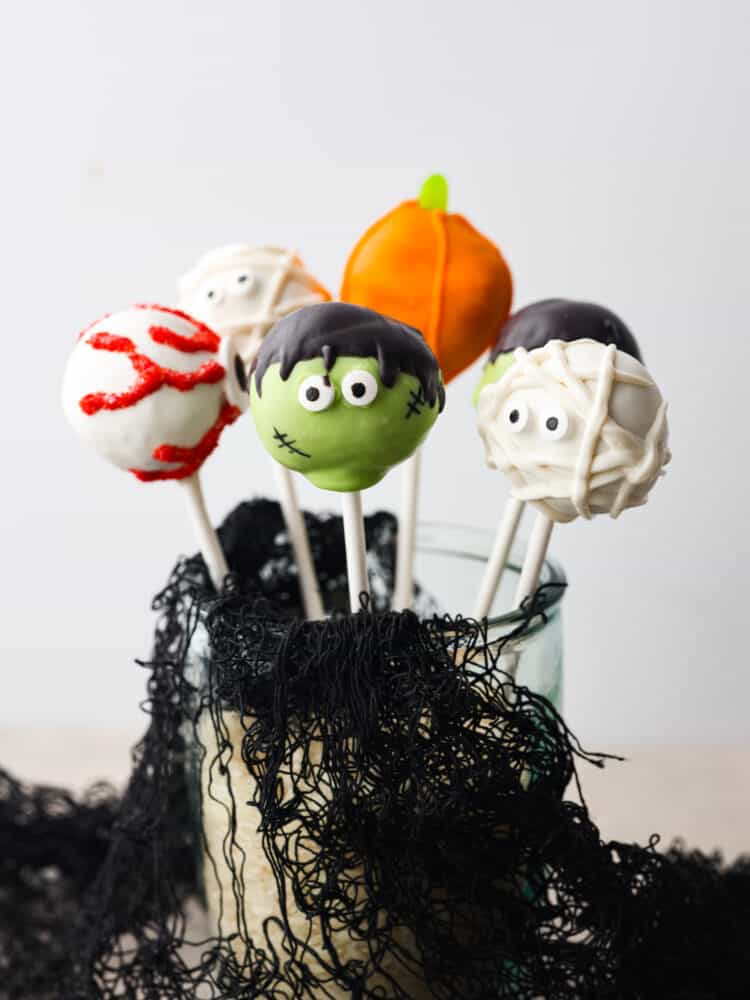
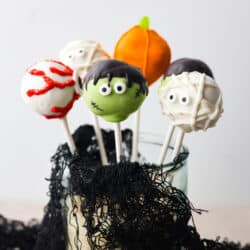
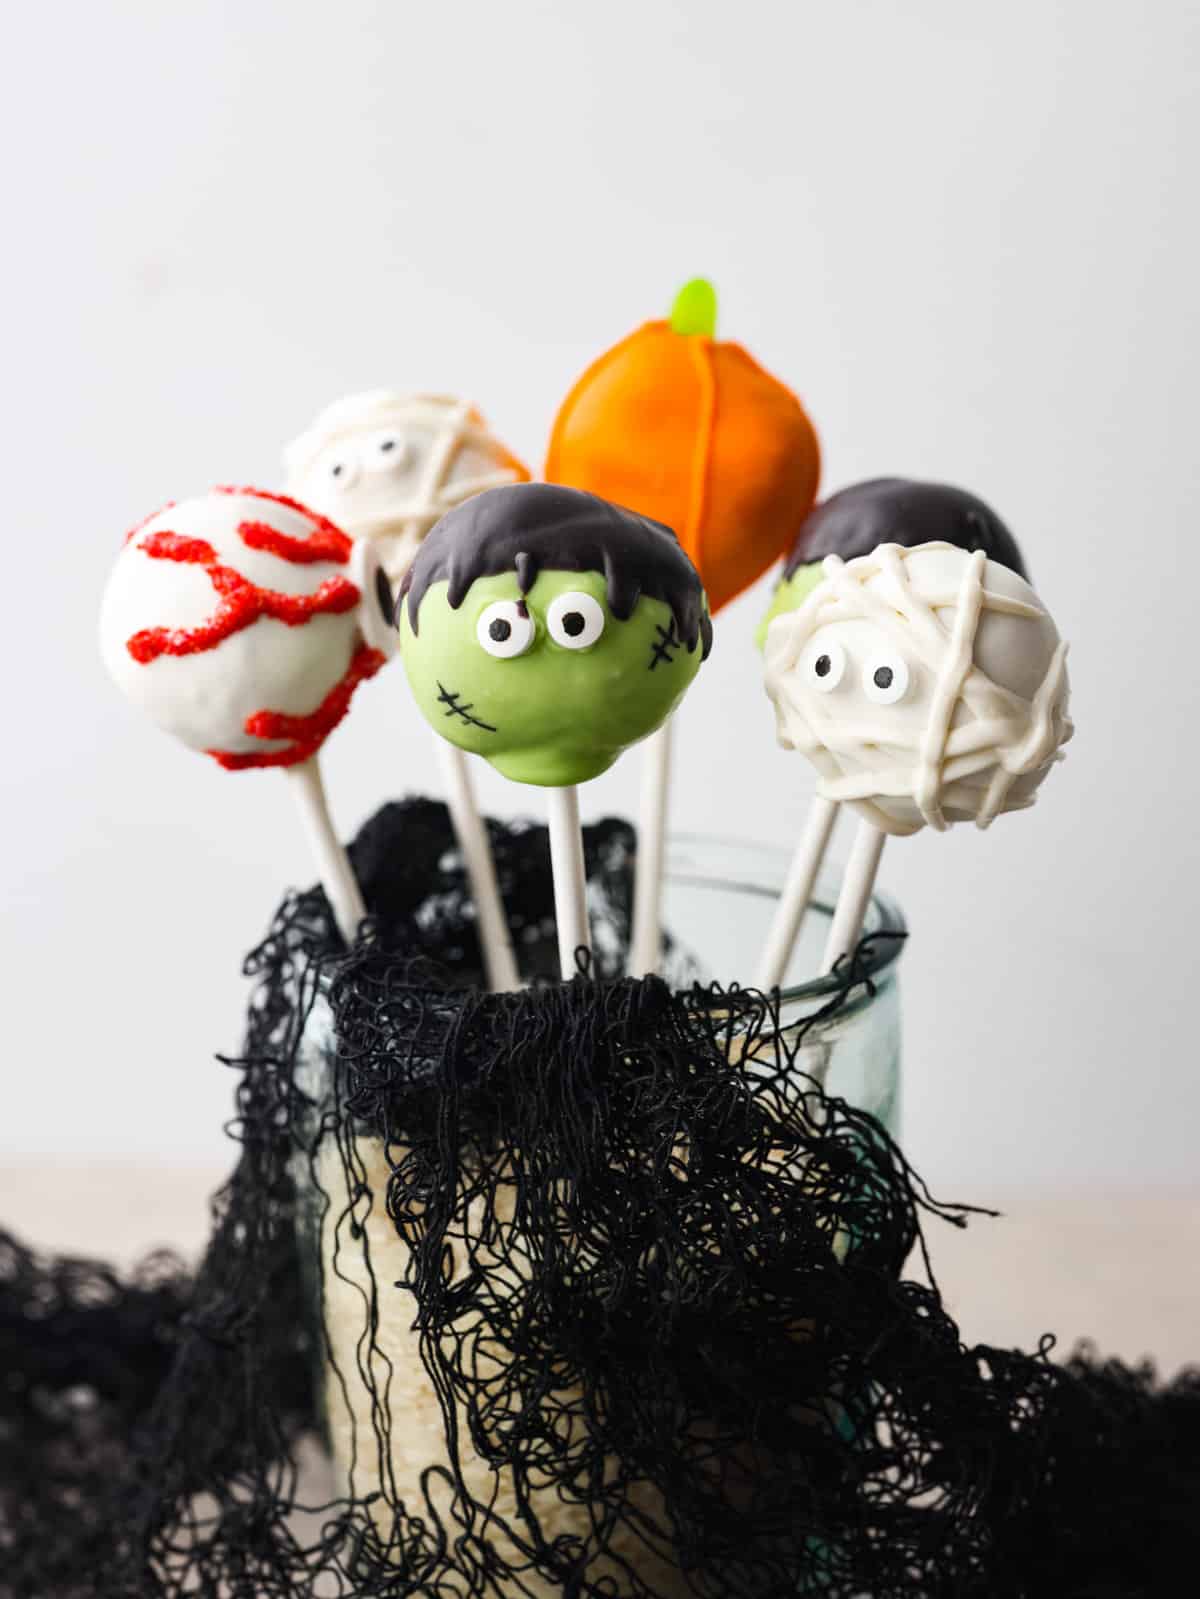
5 donut hole pops decorated like Halloween characters in a glass jar.

Halloween Donut Hole Pops

Trust me when I say this was one of the easiest and most enjoyable holiday treats I’ve made in a long time! They are so simple, yet blew everyone away with their look and taste! I have some pretty great Halloween recipes up my sleeve, but this one may take the cake… pop (corny, I know). I love making things from scratch, and you could make the donut holes or the cake for these pops if you wanted to. But it was nice to just get right to decorating and to have a lot less to clean up.

I decided to make some of my favorite Halloween characters. Frankenstein is probably my favorite, he’s just so loveable! The mummy and eyeball were so simple and really wowed everyone. You could also get a few more characters by drawing a face on the pumpkin to turn them into Jack-O-Lanterns. There are so many possibilities with these fun Halloween Donut Hole Pops!

Halloween Donut Hole Pops Ingredients

This recipe is so fun to put together, and would be a great activity to do with guests too! It’s so simple, and all that is required is the decorating tools and lots of creativity. If you are going to grab all the ingredients listed here, you’ll want to make quite a few pops. These Halloween cake pops come together so quickly, you won’t be able to stop making them! Check out the recipe card below for the full recipe.

  • Donut Holes: I bought 20, and found that plain donut holes worked the best.
  • Candy Melts: I bought White for the mummy, Green for Frankenstein, Black for Frankensteins’ hair, and Orange for the pumpkin. You can buy whatever colors you like, or stick to this recipe!
  • Green Mike and Ikes: These are for the stems of the pumpkin.
  • Small Eyeball Sprinkles: I used small eyes for my Frankenstein and mummy.
  • Large Eyeball Sprinkles: The large sprinkles were the perfect size for the eyeball pop.
  • Edible Black Marker: This is great to have on hand for lots of projects, so you’ll want to get one! I used it to make the small details on Frankenstein which totally bring him to life.
  • Red Sanding Sugar: I used sanding sugar to get the veins of the eyeball to really pop (see what I did there?). It turned out great!
  • Lollipop Sticks: You can find these cake pop sticks in the baking aisle, you may be able to find other colors than just white which would add to the theme!
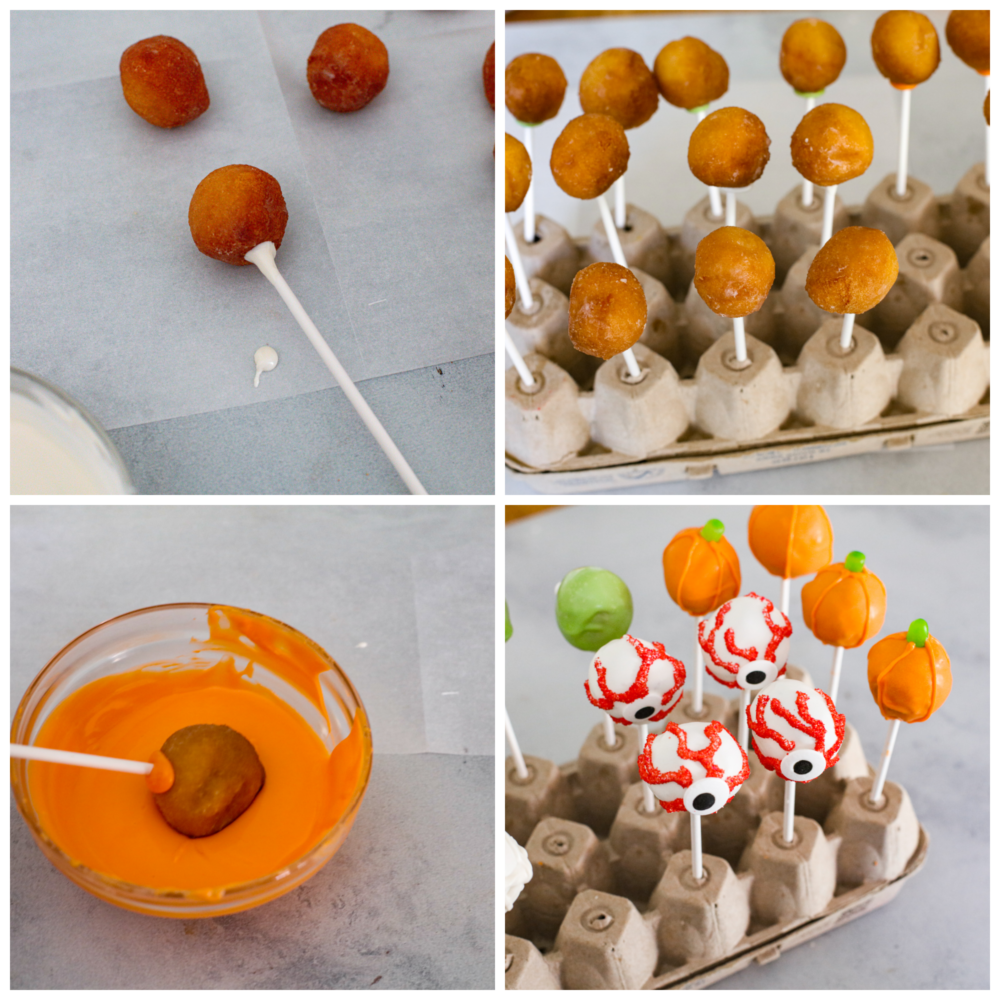
4-photo collage of donut holes being assembled, dipped in candy melts, and decorated.

How to Assemble Halloween Donut Hole Pops

Now the fun part! Assembling these donut hole cake pops was way too much fun. Using my imagination to create Halloween creatures makes the holiday feel as exciting as it did when I was a kid. Get creative with your designs, or if you want to make them the same way I did, here is how to do it.

Let’s Get Started!

  1. Prep: Prep your work area by laying down parchment paper. Poke holes in either an upside-down egg carton, a large Styrofoam block, or a small cardboard box. This will act as a stand for the pops as they set up.
  2. Melt: In four small bowls add the candy melts, one color to each bowl. Melt in the microwave one bowl at a time with the power on 50% for 1 minute. Stir and microwave again for 30 seconds as needed.
  3. Dip: Dip the end of a lollipop stick in the melted candy melts and then insert into the bottom of a doughnut hole. Let the candy melts fully set up before proceeding with decorating. Five with green, five with orange and ten with white.

Pumpkin Design

  1. Dip: One at a time, dip five donut holes (the ones with orange candy melts holding the stick in them) in the melted orange candy melts until fully covered. Tap off the excess and place a green Mike and Ike (cut in half) right on top to act as the pumpkin stem. Let set up completely.
  2. Decorate: Once the orange is set, remelt the remaining orange candy melts and add to a piping bag. Snip off a very small bit of the end of the bag and pipe 5 lines up and down the pumpkin to give it definition.
  3. Let Them Set Up: Let set up completely before serving.

Eyeball Design

  1. Dip: One at a time, dip five donut holes (ones with white candy melts holding the stick in them) in the melted white candy melts until fully covered. Tap off the excess and stick a large eyeball sprinkle to the front. Let set up completely.
  2. Decorate: Remelt some of the white candy melts and add to a piping bag. Snip off the very end of the bag and pipe vein-like strands all around the eyeball. White the candy melts are still wet, dust generously with red sanding sugar.
  3. Let Them Set Up: Let set up completely before serving.

Mummy Design

  1. Dip: One at a time, dip five donut holes (ones with white candy melts holding the stick in them) in the melted white candy melts until fully covered. Tap off the excess and stick two small eyeball sprinkles to the front of the donut hole, about ⅓ of the way down from the top.
  2. Decorate: Remelt some of the white candy melts and add to a piping bag. Snip off the very end of the bag and pipe stripes of white all around the front and eyes.
  3. Let Them Set Up: Let set up completely before serving.

Frankenstein Design

  1. Dip: One at a time, dip five donut holes (ones with green candy melts holding the stick in them) in the melted green candy melts until fully covered. Tap off the excess and stick two small eyeball sprinkles to the front of the donut hole, about ⅓ of the way down from the top.
  2. Dip Top: Once the green has set up, dip the top ⅓ of the donut hole into the melted black candy melts and use a toothpick to carefully make the hairline pointed or rough all around the head.
  3. Decorate: Once the black has set up, use an edible black marker to draw a couple stitches on Frankenstein’s face.
  4. Let Them Set Up: Let set completely before serving.
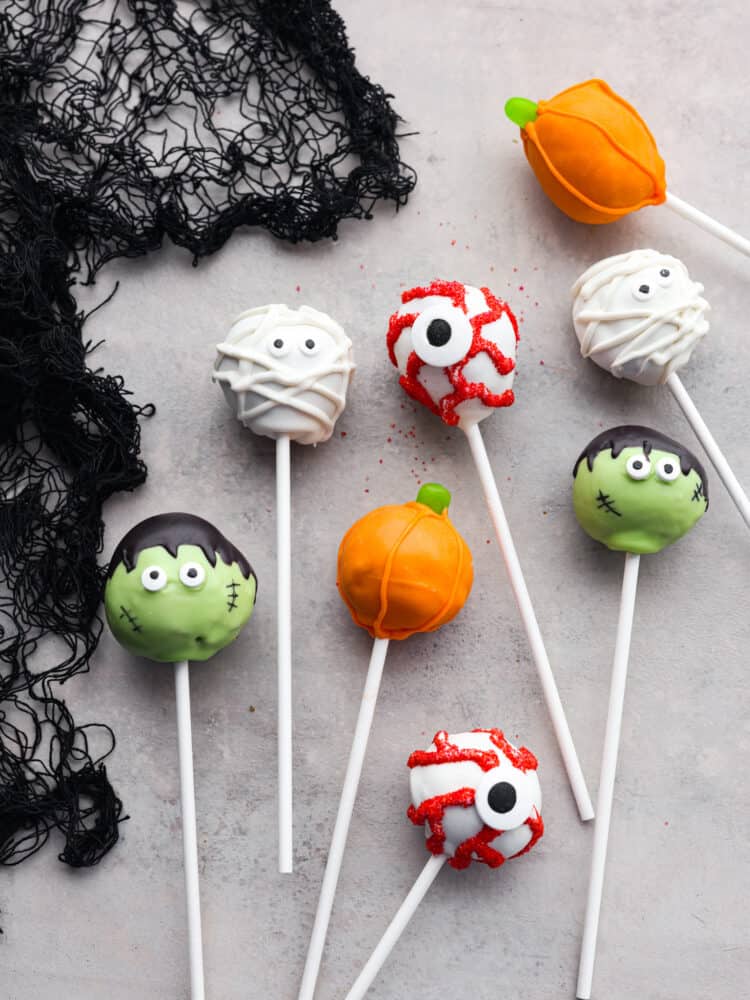
Top-down view of donut hole pops decorated like various Halloween characters.

Switch It Up!

I chose the candies I like the most for the features of my little creatures. You can totally customize these designs to make the most out of this recipe!

  • Get Creative: Are you a chocolate lover? Use Sixlets or Green M&M’s instead of Mike and Ikes to make the pumpkin stem.
  • Make a New Creature: Get clever with the Halloween characters you love and create something new! Use the natural colors of your favorite candies and flavors to inspire your next cake pop design.
  • Use Different Donut Flavors: Keep your guests guessing by using different donut hole flavors! There are so many fun flavors you can create.
  • Use Melting Chocolates: You can easily use melting chocolates instead of melting candies. White chocolate, dark chocolate, and milk chocolate will still give you a range of fun colors to create with, and some may like the flavor better!
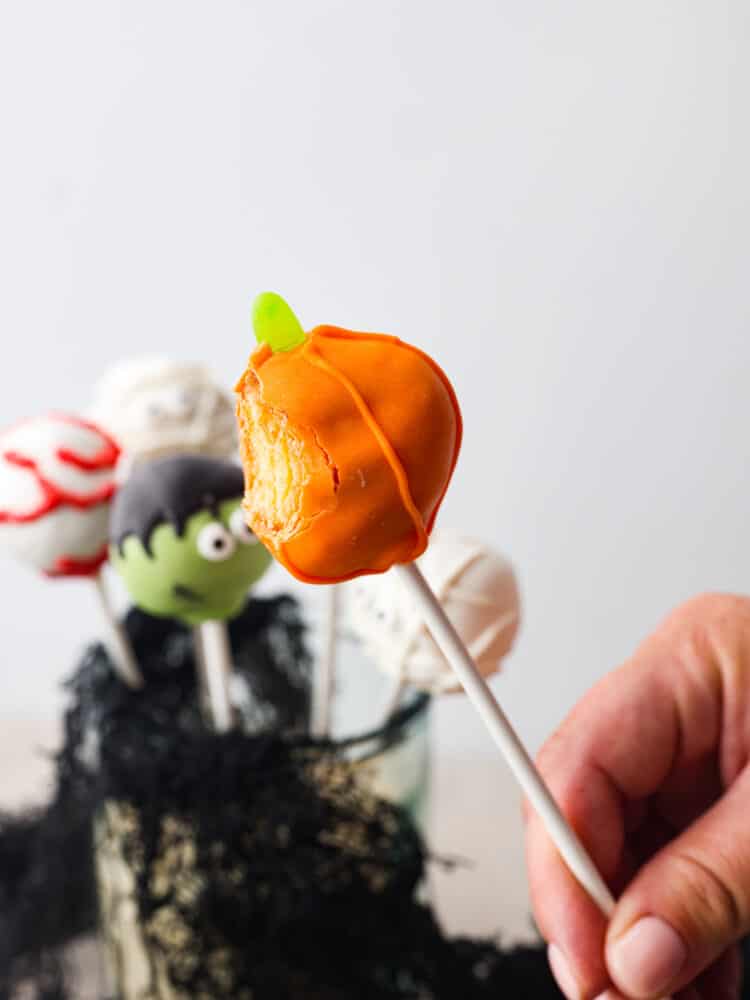
A pumpkin-shaped donut hole pop with a bite taken out of it.

How to Store Leftovers

I doubt you will have any of these left over, but if you do make extra, or make them ahead of time, here is how you can keep them fresh.

  • On the Counter: You can leave these out at room temperature in an airtight container or covered with plastic wrap. You can store them for up to 3 days, but I recommend eating them within 24 hours.

Note: Do not store your donut cake pops in the fridge or freezer. This will cause them to sweat and crack, and they could also develop mold.

Print

Halloween Donut Hole Pops

These easy, festive, and adorable Halloween donut hole pops will thrill your guests! Believe me when I say people can't stop talking about how adorable, and how delicious these pops are. You'll be so glad you served these at your Halloween party this year.
Course Dessert
Cuisine American
Keyword halloween dessert recipe, halloween donut hole pops recipe
Prep Time 45 minutes
Total Time 45 minutes
Servings 20 Donut Hole Pops
Calories 230kcal
Author Alyssa Rivers

Ingredients

  • 20 Donut Holes Plain work best
  • White Candy Melts
  • Green Candy Melts
  • Black Candy Melts
  • Orange Candy Melts
  • Green Mike and Ikes
  • Small Eyeball Sprinkles
  • Large Eyeball Sprinkles
  • Edible Black Marker
  • Red Sanding Sugar
  • 20 Lollipop Sticks

Instructions

  • Prep your work area by laying down parchment paper. Poke holes in either an upside-down egg carton, a large Styrofoam block, or a small cardboard box. This will act as a stand for the pops as they set up.
  • In four small bowls add the candy melts, one color to each bowl. Melt in the microwave one bowl at a time with the power on 50% for 1 minute. Stir and microwave again for 30 seconds as needed.
  • Dip the end of a lollipop stick in the candy melts and then insert into the bottom of a donut hole. Let the candy melts fully set up before proceeding with decorating. Five with green, five with orange and ten with white.

Pumpkin Design

  • One at a time, dip five donut holes (the ones with orange candy melts holding the stick in them) in the melted orange candy melts until fully covered. Tap off the excess and place a green Mike and Ike (cut in half) right on top to act as the pumpkin stem. Let set up completely.
  • Once the orange is set, remelt the remaining orange candy melts and add to a piping bag. Snip off a very small bit of the end of the bag and pipe 5 lines up and down the pumpkin to give it definition.
  • Let set up completely before serving.

Eyeball Design

  • One at a time, dip five donut holes (ones with white candy melts holding the stick in them) in the melted white candy melts until fully covered. Tap off the excess and stick a large eyeball sprinkle to the front. Let set up completely.
  • Remelt some of the white candy melts and add to a piping bag. Snip off the very end of the bag and pipe vein-like strands all around the eyeball. White the candy melts are still wet, dust generously with red sanding sugar.
  • Let set up completely before serving.

Mummy Design

  • One at a time, dip five donut holes (ones with white candy melts holding the stick in them) in the melted white candy melts until fully covered. Tap off the excess and stick two small eyeball sprinkles to the front of the donut hole, about ⅓ of the way down from the top.
  • Remelt some of the white candy melts and add to a piping bag. Snip off the very end of the bag and pipe stripes of white all around the front and eyes.
  • Let set up completely before serving.

Frankenstein Design

  • One at a time, dip five donut holes (ones with green candy melts holding the stick in them) in the melted green candy melts until fully covered. Tap off the excess and stick two small eyeball sprinkles to the front of the donut hole, about ⅓ of the way down from the top.
  • Once the green has set up, dip the top ⅓ of the donut hole into the melted black candy melts and use a toothpick to carefully make the hairline pointed or rough all around the head.
  • Once the black has set up, use an edible black marker to draw a couple stitches on Frankenstein’s face.
  • Let set completely before serving.

Nutrition

Calories: 230kcal | Carbohydrates: 32g | Protein: 3g | Fat: 10g | Saturated Fat: 4.5g | Cholesterol: 20mg | Sodium: 260mg | Sugar: 19g


source https://therecipecritic.com/halloween-donut-hole-pops/
Share:

Air Fryer Quesadilla

This air fryer quesadilla recipe is the BEST and ONLY way to make a quesadilla. A perfectly crisp tortilla on the outside bursting with cheesy goodness on the inside, you will love how easy you can make a quesadilla in just minutes!

Making quesadillas in the air fryer is literally life-changing! They cook evenly, the melty cheese is delicious, and the tortilla has a crispy golden texture that results in a restaurant-status quesadilla. This is an easy weeknight meal idea that can be made complete with salsa, rice, and beans.

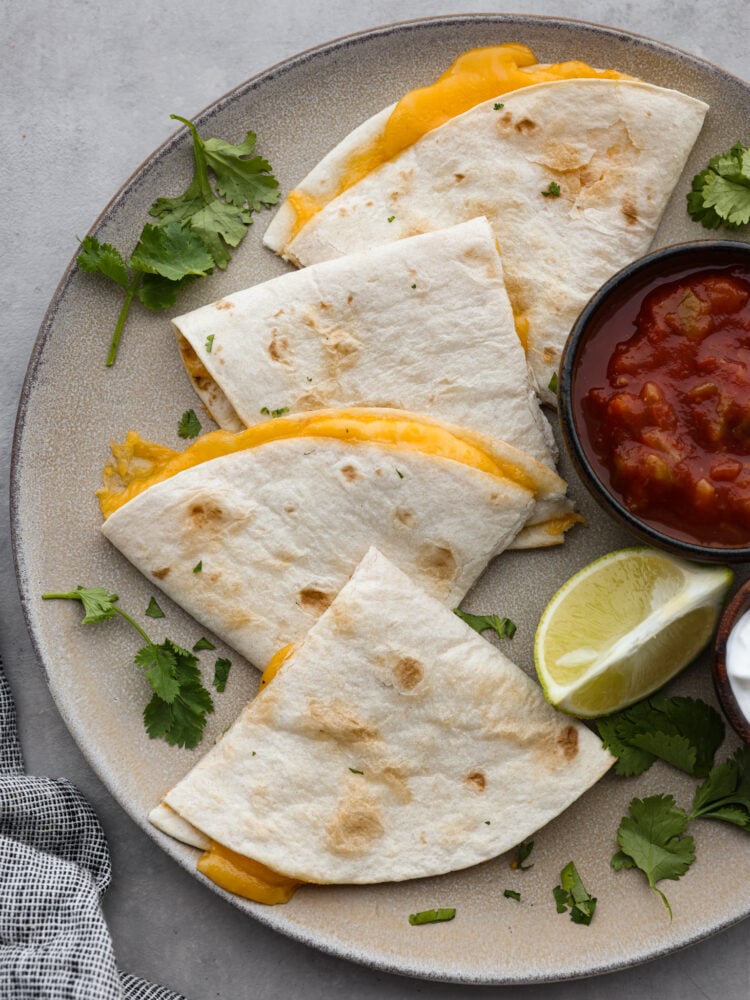
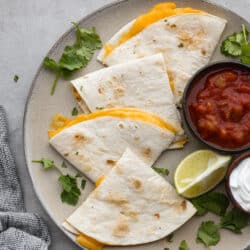
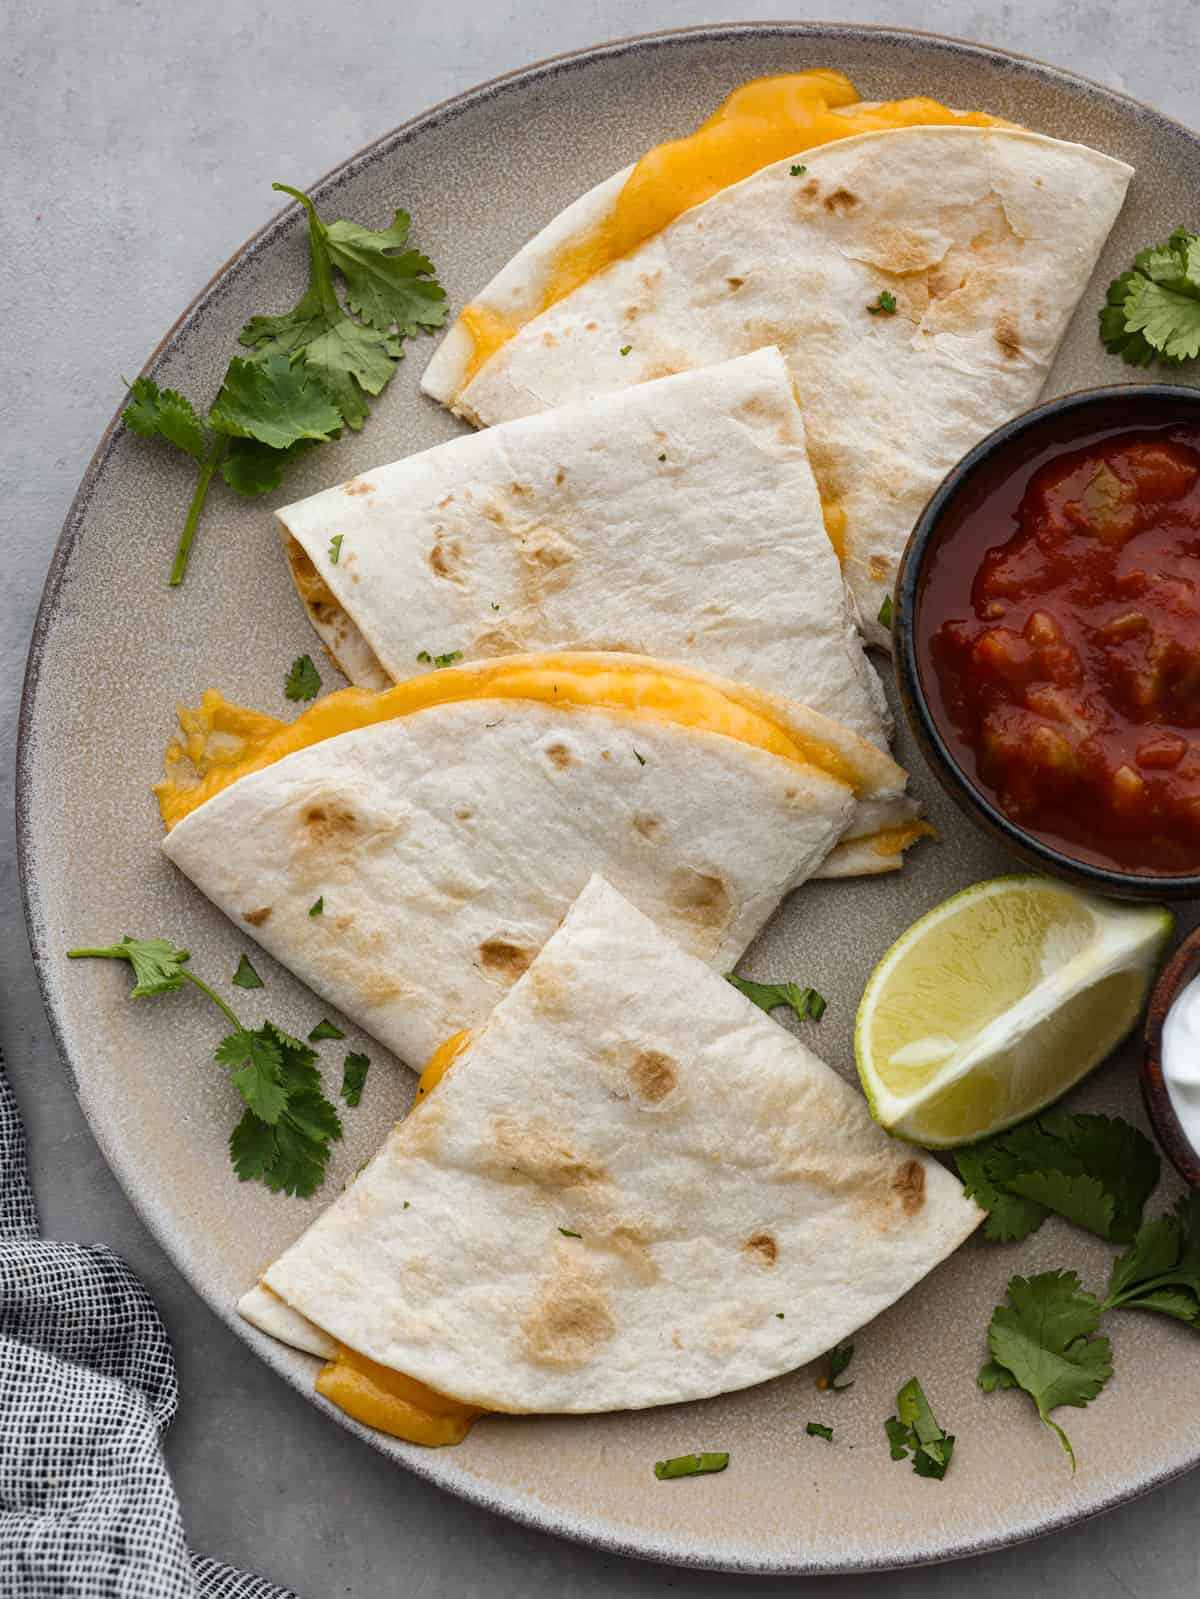
Top view of an air fryer quesadilla cut into triangles on a large gray plate. A small bowl of salsa, cilantro leaves, and a lime wedge are also on the plate next to the quesadilla.

What is an Air Fryer Quesadilla?

Two simple ingredients create a classic Mexican quesadilla. All you need is cheese and tortillas, and the air fryer does all the work! Everyone loves a cheesy, crispy, and warm quesadilla to enjoy as a snack, lunch, or any time of day. Follow my tips below for ideas on how to make this a heartier meal by adding meat, veggies, or beans.

Quesadillas can also be served as an appetizer or side dish to any meal. They are a great after-school snack idea, but they also go along with dinner. My kids LOVE when I serve quesadillas with this easy taco soup or our favorite tortilla soup. I also love to serve them as a side dish with this incredible avocado chicken!

Quesadilla Ingredients

A recipe doesn’t get any easier than 2 ingredients. And you most likely already have them on hand! This recipe is my go-to air fryer recipe when I’m in a time crunch. You’ll always want to have tortillas in your pantry and cheese in your fridge so you can make them! Whip these up on those busy weeknights when you don’t have a lot of time to make dinner.

  • Flour Tortillas: Flour tortillas are my favorite because they are crispy on the outside and soft on the inside! But corn tortillas are also delicious if you’re gluten-free.
  • Colby-Jack Cheese: I love using freshly grated Colby-jack cheese, but feel free to use any cheese you like.

Let’s Make Air Fryer Quesadillas

This air fryer quesadilla recipe is so easy to follow and the results are perfect every time! I love that I just throw the folded tortilla and cheese into the air fryer basket, then the air fryer does the rest. Wrap your quesadillas with foil to keep them warm if you need. It is easily my FAVORITE air fryer recipe and I can’t wait for you to see why I love it so much!

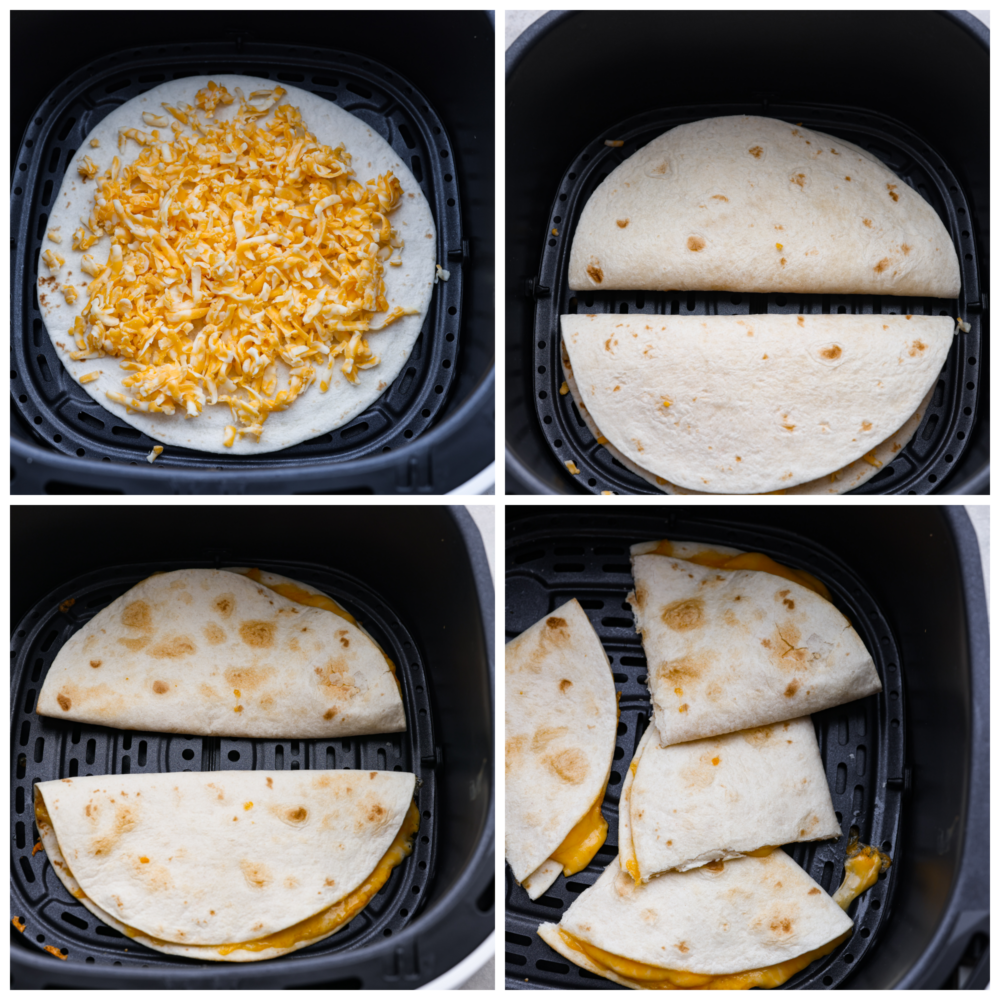
  1. Add Cheese on Tortillas: Sprinkle the shredded cheese on top of each tortilla, then fold the tortilla in half.  Divide the cheese between each tortilla using more or less to your liking.   
  2. Fold and Cook: Carefully place the folded tortillas in the air fryer basket and cook at 350° Fahrenheit for 3 minutes. Flip the quesadillas and continue to cook for an additional 3 minutes or cook longer to the desired doneness. 
  3. Serve: Serve immediately and enjoy with toppings and salsa!
First photo is a tortilla with shredded cheese on top in an air fryer basket. Second photo is to folded tortillas next to each other in the basket. Third photo is two cooked quesadillas in the air fryer basket. Fourth photo is the air fryer quesadilla cut into triangles and placed in the air fryer basket.

Variations

Air fryer quesadillas are so versatile because you can create them to fit your taste buds and your cravings. Quesadillas can be more than just cheese. Switch up the seasonings and flavors, or add veggies or meat to make it a full meal. Any way you choose to make them will be AMAZING!

  • Cheese: You can use any cheese or any combination of cheeses. I prefer Colby jack, but for a kick use pepper jack! 
  • Meat: These are vegetarian, but you can easily add in chicken or beef for a heartier meal.
  • Add Some Heat: I also love adding jalapenos or red pepper flakes to make it spicy!
  • Add-ins: To mix it up you can add in rice or beans. Black beans or refried beans are the best!
  • Veggies: Sneak in some nutrients by adding veggies like corn, bell peppers or onions.
  • Dipping Options: Serve with salsa verde, sour cream, or guacamole on the side for dipping!
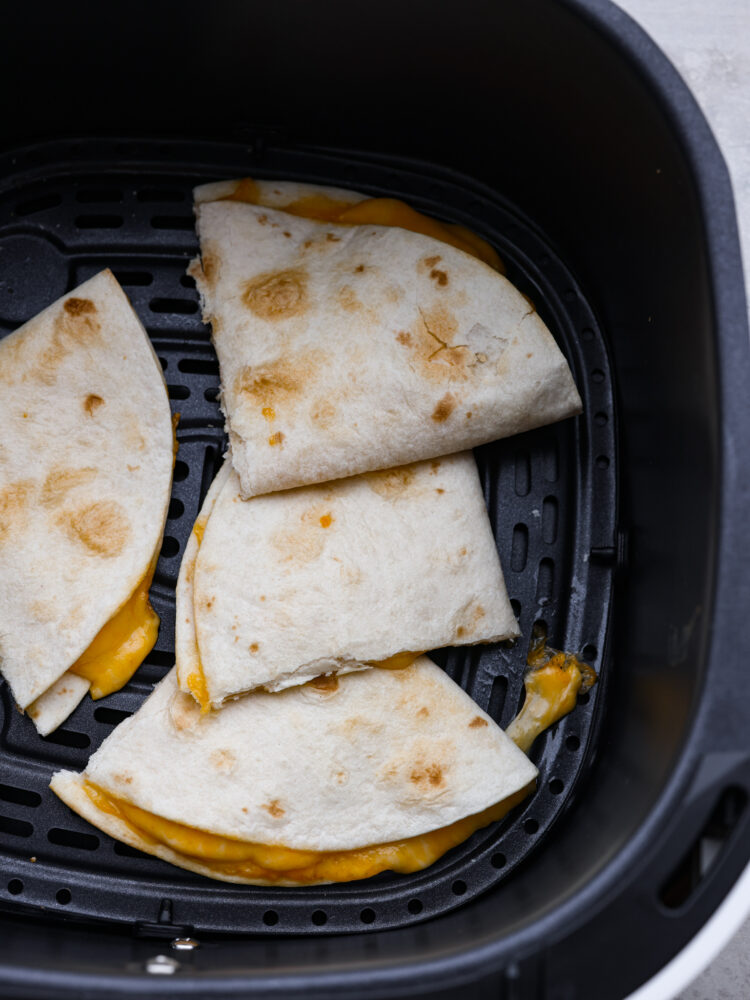
Top view of air fryer quesadilla in a black air fryer basket. The quesadilla is cut into triangles with melted cheese oozing out.

Storing Leftovers

Leftover air fryer quesadillas are great for quick snacks or meals! Rewarming them in the air fryer doesn’t take long at all. You can make a fresh quesadilla in the time it takes you to rewarm the leftovers, but if you do have leftover quesadillas just follow the directions below to enjoy them later.

  • In the Refrigerator: Place leftovers in an airtight container or sealable bag. Store in the fridge for up to 3 days. I like to separate them with paper towels to help them not get soggy.
  • In the Freezer: Wrap the quesadillas individually in parchment paper then place them in a freezer-safe Ziploc bag or sealable container. Make sure to lay them flat in the freezer. Store in the freezer for up to 3 months.
  • To Reheat: You can reheat them in the microwave but the tortilla will become soft. To keep the crisp outside, reheat the quesadilla in the air fryer. Cook at 350° Fahrenheit for about 3 minutes or until warmed through.
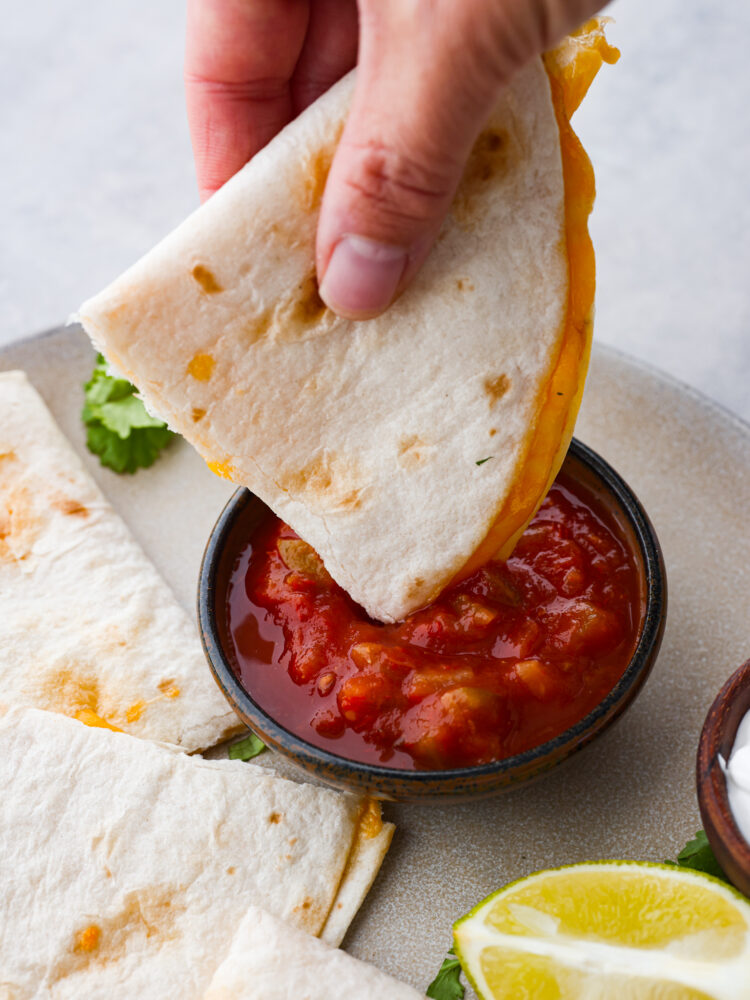
Close up photo of a piece of quesadilla being dipped into a small bowl of salsa. The quesadilla and salsa are on a large gray plate. Cilantro and a lime wedge are garnished on the plate.
Print

Air Fryer Quesadilla

This air fryer quesadilla is the BEST and ONLY way to make a quesadilla. A perfectly crisp tortilla on the outside bursting with cheesy goodness on the inside, you will love how fast and easy you can make a quesadilla in just minutes!
Course Appetizer, Dinner, lunch
Cuisine Mexican
Keyword 10 minute air fryer quesadilla, 2 ingredient dinner, air fryer quesadilla, easy, meatless, vegetarian
Prep Time 2 minutes
Cook Time 6 minutes
Total Time 8 minutes
Servings 2
Calories 416kcal
Author Alyssa Rivers

Ingredients

  • 2 8-inch flour tortillas
  • 1 cup Colby-jack cheese, shredded

Instructions

  • Sprinkle the cheese on top of each tortilla, then fold the tortilla in half.  Divide the cheese between each tortilla using more or less to your liking.   
  • Carefully place the folded tortillas in the air fryer basket and cook at 350° Fahrenheit for 3 minutes. Flip the quesadillas and continue to cook for an additional 3 minutes or cook longer to the desired doneness.
  • Serve immediately and enjoy with toppings on the side!

Notes

Block cheese that you shred by hand always creates the best melty cheese results!

Nutrition

Serving: 1quesadilla | Calories: 416kcal | Carbohydrates: 27g | Protein: 20g | Fat: 25g | Saturated Fat: 15g | Polyunsaturated Fat: 2g | Monounsaturated Fat: 7g | Cholesterol: 63mg | Sodium: 774mg | Potassium: 148mg | Fiber: 2g | Sugar: 2g | Vitamin A: 656IU | Calcium: 527mg | Iron: 2mg


source https://therecipecritic.com/air-fryer-quesadilla/
Share:

Mini Pumpkin Cheesecakes

These mini pumpkin cheesecakes are the perfect dessert for any fall gathering! Individual-sized and full of pumpkin flavor, they are everything you love about pumpkin pie and cheesecake all in one. These mini desserts are sure to be your new holiday tradition.

Single-serving desserts are so convenient for gatherings! A little more prep beforehand makes things so easy when it comes time for eating. And mini things are just so cute! Everyone always comments on how great the desserts look when I serve miniatures. If you love mini desserts, you’ll want to try these Mini Cherry Pies, these perfect-for-fall Mini Peach Cobblers, and these traditional Mini Cheesecakes!

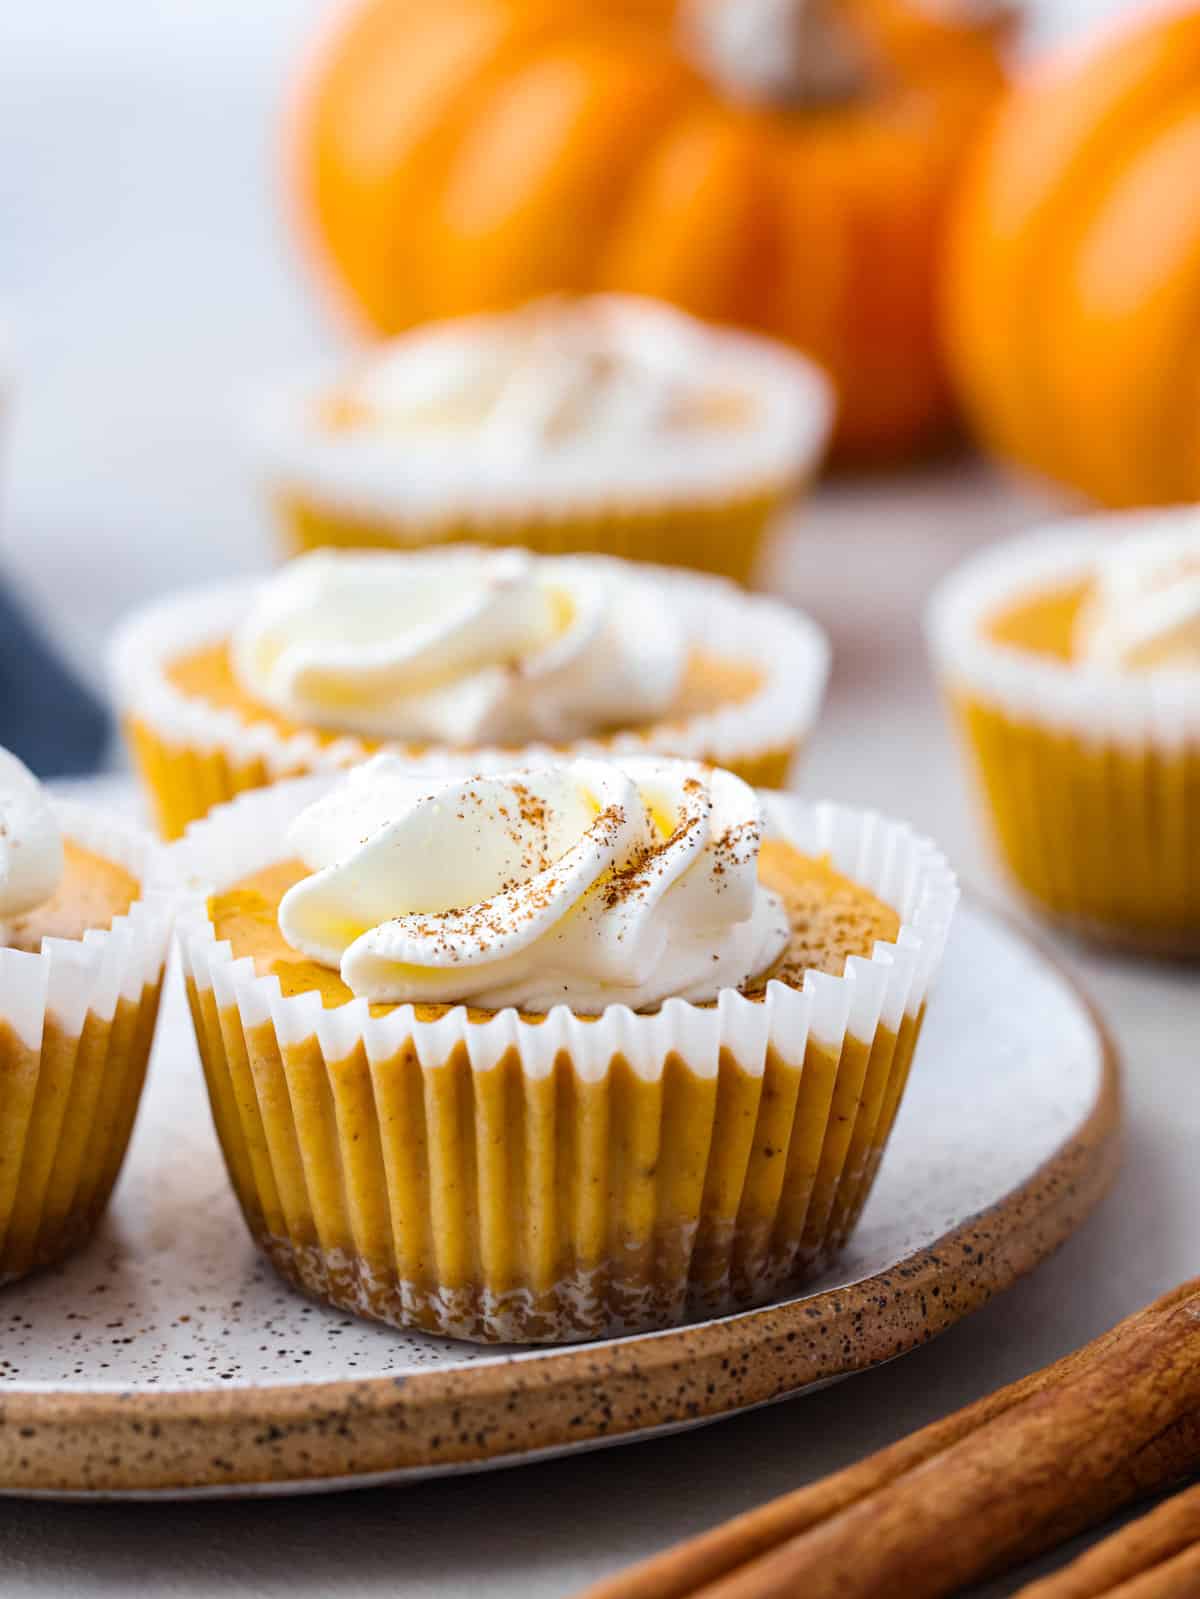
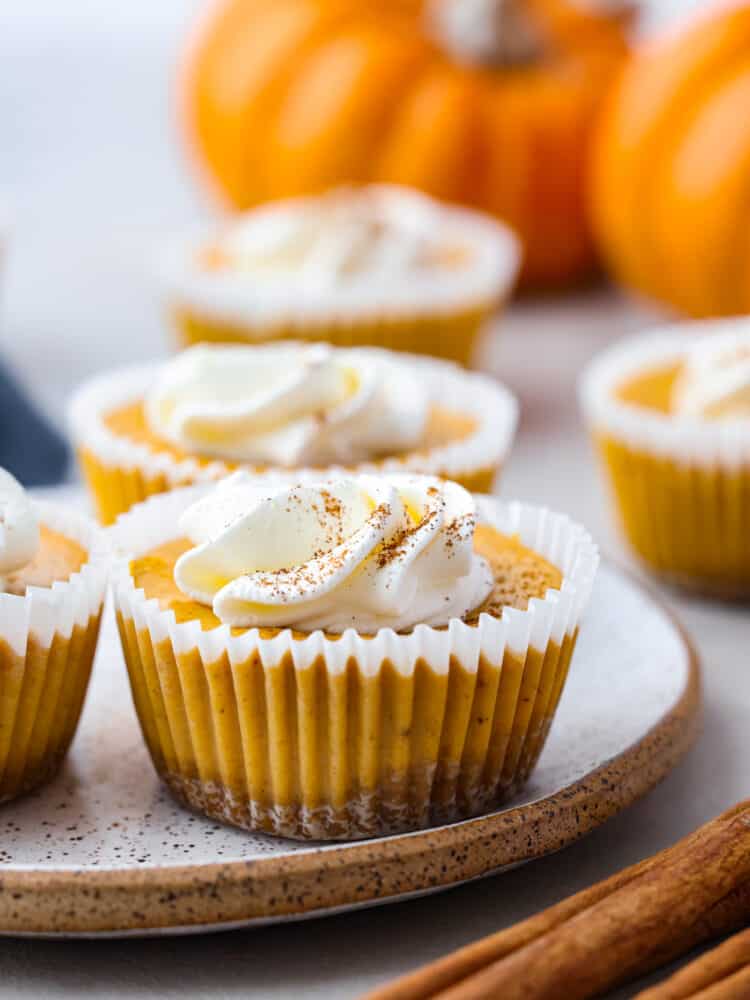
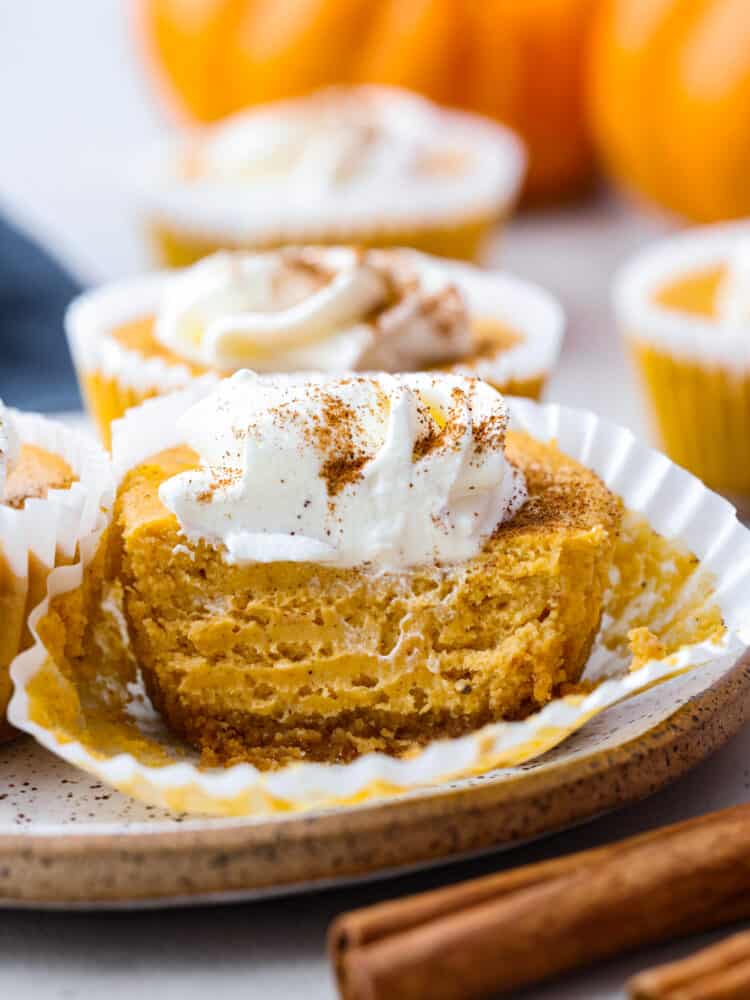
Closeup of a mini pumpkin cheesecake served on a stoneware plate.

Mini Pumpkin Cheesecakes

I have found the perfect fall gathering dessert! These mini pumpkin cheesecakes have the taste of a pumpkin pie with the tangy flavor of a cheesecake. The graham cracker crust is sweet and adds the crunchy texture you want in a creamy dessert. If you love pumpkin pie and cheesecake, this is the fall treat for you. I was amazed at how quickly they came together, and they turned out great!

This cheesecake is so easy to bake and you don’t need a water bath! Because they are mini, they don’t have to bake as long either. They really are easier than a large cheesecake and taste just as good. Instead of serving slices of cheesecake on a plate, guests can grab their own dessert and throw away the liner, making it such an easy holiday dessert.

Ingredients in Mini Pumpkin Cheesecakes

This recipe is so simple and one of my absolute favorites to serve at parties because they are easily portioned and no plates are necessary. You can make the crust in minutes, and the cheesecake filling is simple and full of warm holiday flavor! You’ll have a hard time finding a better party treat than this for the holiday season. Check out the recipe card at the bottom of the post for exact measurements.

Crust

  • Graham Cracker Crumbs: You can buy a box of graham crackers and pulse them in a food processor to get a perfect crumb. Or you can buy the crumbs at the store.
  • Butter: I used salted butter to balance out the sweetness of the graham crackers and sugar, and you’ll want to leave the butter out for a few hours to soften.
  • Sugar: Makes the crust a little more sweet. You can leave this ingredient out to cut down on sugar.

Cheesecake Filling

  • Cream Cheese: You will want softened cream cheese for this recipe, so make sure to leave it out for a few hours before making these mini pumpkin cheesecakes.
  • Pumpkin Puree: You can use a canned puree, or pumpkin pie filling that already has spices, but I prefer the homemade puree.
  • Vanilla Extract: Vanilla and pumpkin go great together!
  • Granulated Sugar: I use my regular pantry sugar for this recipe.
  • Pumpkin Pie Spice: I love the warm flavors of pumpkin pie spices, and I prefer my homemade blend! Homemade spice blends are fresher, and pack more flavor. I also like knowing there are less preservatives in them.
  • Eggs: I always use large Grade A eggs in my recipes.
  • Whipped Cream: This is for the topping. You could whip up your own whipped cream using heavy cream, or buy store-bought.
  • Ground Cinnamon: This is an added optional seasoning that I used to decorate the top of the whipped cream. It also adds an additional warmth and holiday feeling.
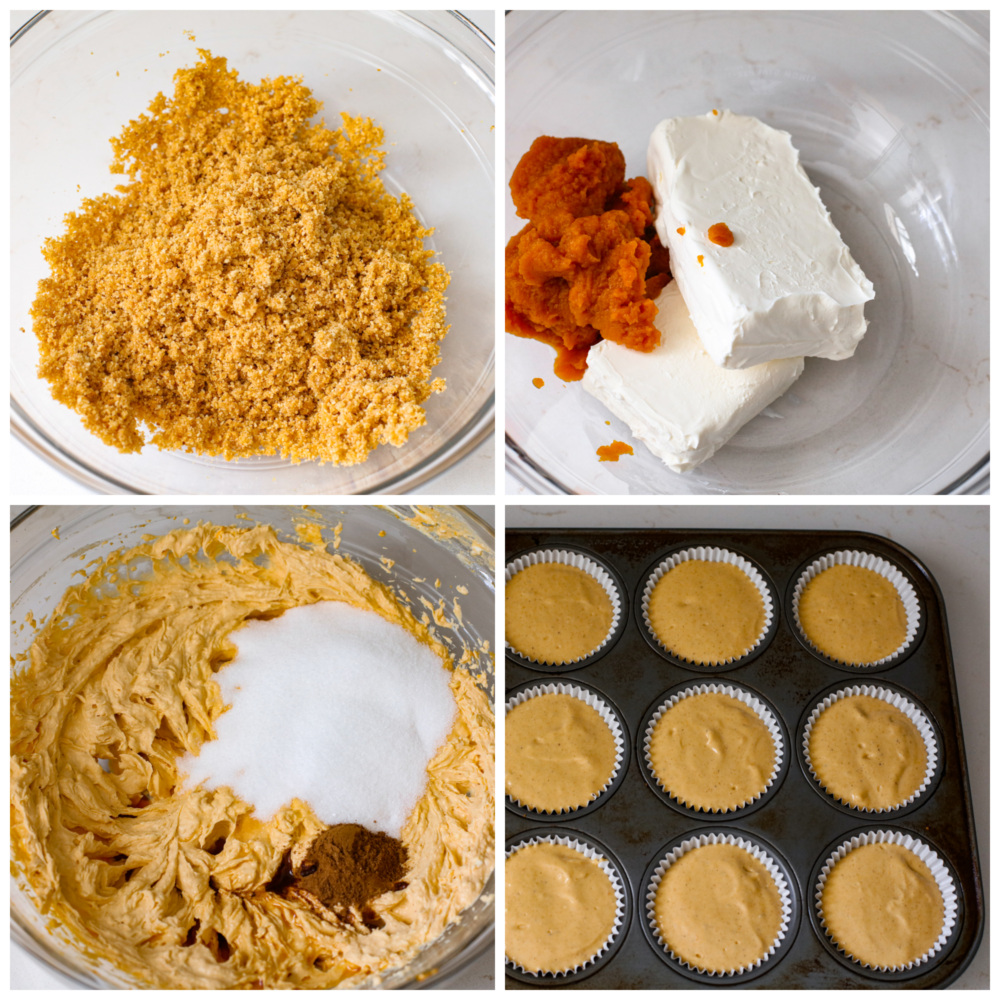
4-photo collage of cheesecake ingredients being mixed together and added to a muffin tin.

How to Make Mini Pumpkin Cheesecakes

If you have been intimidated by cheesecakes in the past, get ready to gain all the confidence you need! This mini pumpkin cheesecake recipe is so simple, you’ll be able to prep these in just 10 minutes. The first thing you need to do is preheat the oven to 325°F. Then, line a muffin tin with cupcake liners and set aside.

Crust

  1. Prepare Crust: In a small bowl, combine the graham cracker crumbs, melted butter, and sugar. Add about a tablespoon of the mixture to each cupcake liner and press down firmly, I placed a cupcake liner on top of the crumbs to get a nice, even layer. Then discard the extra cupcake liner after all 12 crusts have been pressed down. Bake in a muffin pan for 5 minutes.

Cheesecake Filling

  1. Beat: In a large bowl, beat together the cream cheese and pumpkin puree until smooth. Then add the vanilla, sugar, and pumpkin pie spice and mix again until smooth. Next, add the eggs one at a time, mixing thoroughly after each addition.
  2. Fill: Use a large scoop to fill each cupcake liner until they are just about full.
  3. Bake: Bake for 16-20 minutes, just until the cheesecakes are set in the middle. Then cool to room temperature. Cover the cheesecakes and refrigerate for at least 3 hours or overnight.
  4. Top: Top the chilled mini pumpkin cheesecakes with whipped cream and dust with ground cinnamon.
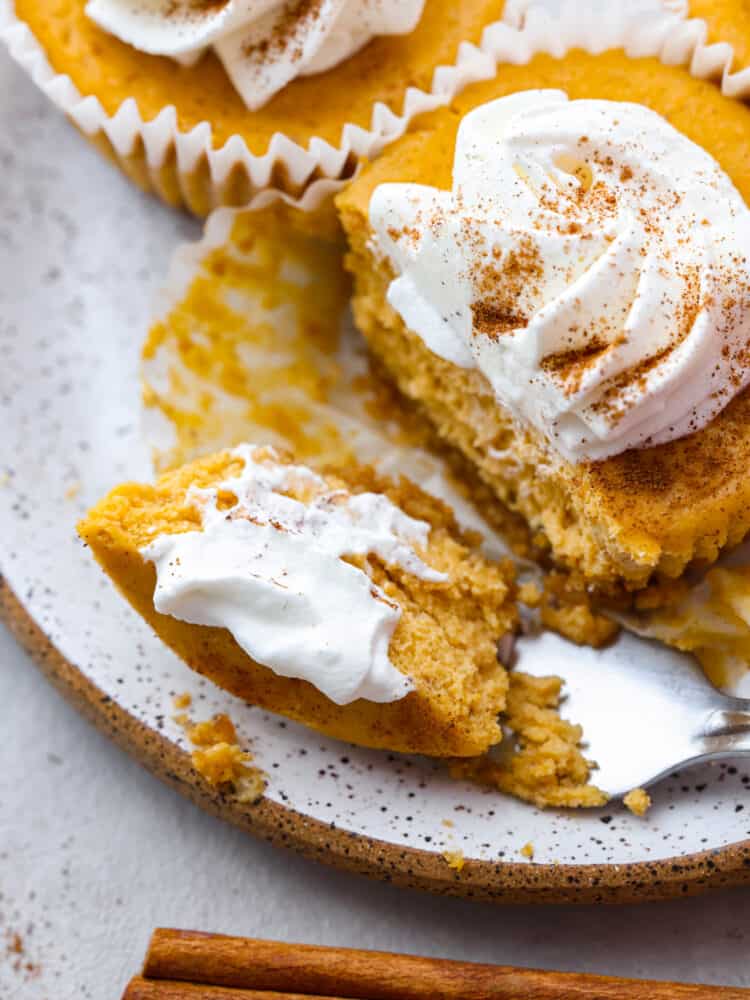
Closeup of a mini pumpkin cheesecake, cut so the inside can be seen.

Tips for Making Mini Cheesecakes

These mini cheesecakes are so delicious and easy to make. You’ll find yourself coming back to this recipe again and again. Here are a few tips to make the most of this recipe.

  • Using Pumpkin Pie Puree: If you buy pumpkin pie filling, remember that it already has spices in it so you’ll want to reduce the added spices in this recipe to balance that out.
  • Making the Graham Cracker Crust: You can buy graham cracker crumbs at the store, but you can also make them at home if you already have graham crackers. Just pulse them in a food processor until they are a fine crumb. If you don’t have a food processor, you can put them in a Ziploc bag and crush them with a rolling pin, which is really fun!
  • Alternative Crusts: There are so many great flavors that go with pumpkin. Get creative with the crust by trying gingersnaps, lady fingers, or even Vanilla Wafers for the crust!
Closeup of cheesecake topped with whipped cream and dusted with cinnamon. There is a piece cut out by a metal fork.

How to Store Leftovers

These mini pumpkin cheesecakes are so yummy I doubt you’ll have any leftovers! But if you do need to store them, here are a few tips to follow.

  • In the Refrigerator: You can put this dessert in an airtight container in the fridge, and your mini pumpkin cheesecakes will stay fresh for up to 3 days.
  • In the Freezer: Freezing your cheesecakes can be the best way to enjoy them for up to a month! Store them in an airtight container or wrapped in plastic wrap for up to a month. You don’t have to worry about defrosting your cheesecake, just leave it on the counter for an hour or two until it has thawed and enjoy!
Print

Mini Pumpkin Cheesecakes

These mini pumpkin cheesecakes are the perfect dessert for any fall gathering! Individual-sized and full of pumpkin flavor, they are everything you love about pumpkin pie and cheesecake all in one. These mini desserts are sure to be your new holiday tradition.
Course Dessert
Cuisine American
Keyword mini pumpkin cheesecakes, mini pumpkin cheesecakes recipe
Prep Time 10 minutes
Cook Time 25 minutes
Chill Time 3 hours
Total Time 3 hours 35 minutes
Servings 12 Cheesecakes
Calories 223kcal
Author Alyssa Rivers

Ingredients

Crust

  • 1 Cup Graham Cracker Crumbs
  • 4 Tablespoons Salted Butter Melted
  • 3 Tablespoons Sugar

Cheesecake Filling

  • 12 Ounces Cream Cheese Softened
  • ¾ Cup Pumpkin Puree
  • 1 Teaspoon Vanilla Extract
  • ½ Cup Granulated Sugar
  • 1 Teaspoon Pumpkin Pie Spice
  • 2 Large Eggs
  • Whipped Cream for Topping
  • Ground Cinnamon for topping

Instructions

  • Preheat the oven to 325°F. Line a muffin tin with cupcake liners and set aside.

Crust

  • In a small bowl, combine the graham cracker crumbs, melted butter and sugar. Add about a tablespoon of the mixture to each cupcake liner and press down firmly, I placed a cupcake liner on top of the crumbs to get a nice, even layer. Discard the extra cupcake liner after all 12 crusts have been pressed down. Bake for 5 minutes.

Cheesecake Filling

  • In a large bowl, beat together the cream cheese and pumpkin puree until smooth. Add the vanilla, sugar, and pumpkin pie spice and mix again until smooth. Add the eggs one at a time, mixing thoroughly after each addition.
  • Use a large scoop to fill each cupcake liner until they are just about full.
  • Bake for 16-20 minutes, just until the cheesecakes are set in the middle. Cool to room temperature. Cover the cheesecakes and refrigerate for at least 3 hours, or overnight.
  • Top the chilled cheesecakes with whipped cream and dust with ground cinnamon.

Nutrition

Calories: 223kcal | Carbohydrates: 20g | Protein: 3g | Fat: 15g | Saturated Fat: 8g | Polyunsaturated Fat: 1g | Monounsaturated Fat: 4g | Trans Fat: 0.2g | Cholesterol: 66mg | Sodium: 177mg | Potassium: 94mg | Fiber: 1g | Sugar: 15g | Vitamin A: 2920IU | Vitamin C: 1mg | Calcium: 44mg | Iron: 1mg


source https://therecipecritic.com/mini-pumpkin-cheesecakes/
Share:

Popular

Archive

Slider Tag

Facebook

Header Ads

Recent in Food

Blog Archive

Recent Posts

Unordered List

  • Lorem ipsum dolor sit amet, consectetuer adipiscing elit.
  • Aliquam tincidunt mauris eu risus.
  • Vestibulum auctor dapibus neque.

Pages

Theme Support

Need our help to upload or customize this blogger template? Contact me with details about the theme customization you need.